Cove of Transition
Cove of Transition is a Level in Tri Force Heroes.[1] It is the third Level of the Riverside Area, preceded by Abyss of Agony and followed by Water Temple.
In Stage 1, the Links enter a wide cliff side next to rushing Waterfalls, and are initially separated from each other on narrow walkways. A Gripshot is provided for each of them, which can be used on the Stakes across the gaps to pull the Links forward and reunite them on the next walkway. A broken bridge can be crossed by gripping onto the three Stakes on the other side. Another gap prevents them from going forward, however the Links can form a Totem and throw the top Link onto a nearby wooden platform with Rupees that drops down to the other side. The other Links then simply have to grip onto him with their Gripshots to cross over the gap. Once reunited, the Links can continue east until they reach another gap, which can be crossed by throwing two Links over and having the third Link grip onto them with the Gripshot. On the other side, the Links must form another Totem so that the top Link can grip onto a Stake on top of a wooden platform on the other side. Once he is on the other side, the other Links must then use the Gripshot on that Link again, and finally reach the Stage's Triforce Gateway.
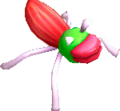
In Stage 2, the Links reappear on a stone platform in the middle of a small lake. Immediately the dams of a stone wall open as water pours in, and Tektites and Water Tektites spawn. The rushing water will alternate between flooding the lake and draining it, changing the water's depth periodically. This causes the stone platform to go under as the Links are forced to swim, but also makes the Stage's Triforce Gateway on an overhead platform reachable, as well as small ledges on the west and south sides, and one in the northeast corner. The Links must defeat all of the Enemies by swimming onto land and attacking the Tektites as they approach. The Triforce Gateway will then open, and the water's level permanently rises, after all Enemies have been defeated.
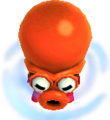
Stage 3 places the Links in another lake, where they immediately notice a Floor Switch on top of a tall dam. A Raft nearby can be moved by having the Links stand on it and use the Gripshots on a Stake. By moving the Raft, the Links end up facing a square platform where one Link must stand, so as to use the Gripshot on him to continue moving the Raft. After moving the Raft to the dam's wall, the Links can then form a Totem to have the top Link reach its Switch. Pressing it opens the wall's dam as the entire Stage floods. The Links can then swim over to a platform where the Triforce Gateway awaits, with a Squiddy next to it.
In Stage 4, the Links enter the courtyard of a temple with shallow water and uneven terrain. In the center is a Gyorm that must be defeated by using the Gripshot to pull it out of its shell, then quickly using the Gripshot again to stun it, or by having another Link slash at it. Three more Gyorms will emerge once the first is defeated. Hearts and Rupees can be found on top of some platforms, reachable by forming a Totem, and some Red Rupees. can be found along the southern edge of the Stage. Once all the Enemies are defeated, the Triforce Gateway will open.
Drablands Challenges
Once the Boss of the Riverside has been defeated, Cove of Transition can be replayed with the following Drablands Challenges: "Halved attack and defense!", "Evade the Wallmaster!", and "Clear within the time limit!".
In "Clear within the time limit!", the Links are given a timer of 30 seconds in Multiplayer, or one minute and 30 seconds in single-player. This timer can be increased by collecting Hourglasses or wearing Linebeck's Uniform.
Materials
At the end of the Level, three Treasure Chests can be opened. Two contain the same Material, and one contains another, more valuable Material.
| Drablands Challenge | — |
|---|---|
| Magical Materials | |
| Drablands Challenge | |
| Magical Materials | |
| Drablands Challenge | |
| Magical Materials | |
| Drablands Challenge | |
| Magical Materials |
| Drablands Challenge | Magical Materials |
|---|---|
— | |
Enemies and Traps
Trivia
As alluded to in Vol. 2 of the Drablands Diary, a "Turtle Rock"—a rock resembling a turtle shell—is hidden in each Level of the Riverside. One can be found in Stage 3 of Cove of Transition, by forming a Totem and shifting the camera toward the west end of the Stage's upper section, before the Water level is raised.
Nomenclature
| Language | Names | Meanings |
|---|---|---|
| うつろいの入り江 (Utsuroi no Irie)[3] | Relaxing Cove | |
| Crique capricieuse | ||
| Crique capricieuse[5] | ||
| Bleiche Bucht[4] | ||
| Cala di transito[2] | ||
| Cueva cambiante[6] | ||
| Cueva Cambiante[7] | ||
| This table was generated using translation pages. To request an addition, please contact a staff member with a reference. | ||
References
- ↑ Encyclopedia, Dark Horse Books, pg. 159
- ↑ "Cala di transito" — Level Selection (Tri Force Heroes)
- ↑ "うつろいの入り江" — Level Selection (Tri Force Heroes)
- ↑ "Bleiche Bucht" — Level Selection (Tri Force Heroes)
- ↑ "Crique capricieuse" — Level Selection (Tri Force Heroes)
- ↑ "Cueva cambiante" — Level Selection (Tri Force Heroes)
- ↑ "Cueva Cambiante" — Level Selection (Tri Force Heroes)


![Wallmaster ×1[a]](http://cdn.wikimg.net/en/zeldawiki/images/thumb/b/b2/TFH_Wallmaster_Model.png/101px-TFH_Wallmaster_Model.png)