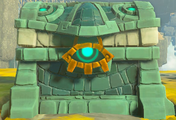
Sinakawak Shrine
The Sinakawak Shrine,[1] designated by the trial name An Uplifting Device,[1] is a Shrine of Light in Tears of the Kingdom.
Entrance to the Shrine
The Sinakawak Shrine is located directly northwest of New Serenne Stable in Hyrule Field. It corresponds to the Kawakanis Lightroot in the Depths.

The entrance chamber to Sinakawak Shrine is a spacious room with four levels. The first level consists of a foyer with a stairway in its center leading to the second level, where a number of Zonai Devices can be found. This staircase is separated from the second level by a gap, which is bridged by a wooden Board. If this Board is destroyed or Fused to a piece of Equipment, it will reappear in its place moments later.

The second level features three Candles placed along the back wall. On the right-hand side there is a Balloon floating above a Candle to demonstrate the Balloon's properties. This Balloon is blocked by a ledge placed above it, forcing it to rise and fall in continuous cycles. Beside these Objects, there is a single Torch. To the left, there is a platform with three Boards placed as ramps onto it and two more Balloons placed on top of it. Like the Board near the stairway, these Boards will reappear if they are destroyed or Fused. By using Ultrahand, Link is able to assemble a Board, a Balloon, and a Candle into a makeshift Hot-Air Balloon and ascend toward the third level.
The third level features a wide floor with two more Candles and Balloons, and a single Torch. Along the back wall there is a portcullis blocking the way further into the Shrine. Above this floor, there is the fourth level, which consists of a lattice floor. A Pressure Plate is placed on the ceiling between the third level and the lattice above. Link is able to activate this Pressure Plate by sending a Balloon upward to press it. In doing so, the portcullis will lift and Link will be able to enter the next chamber.
This second chamber consists of three levels, beginning with a lattice floor overlooking the other two levels beneath it. To the left-hand side entrance of this chamber, there is a tall ladder which leads to the bottom third floor below. There are several Objects on this bottom third level. Four Candles, three Balloons, two Torches and a single Board are placed throughout this floor. Four active Flame Emitters can be found behind a divider wall to the right, and an alcove in the back wall is provided to allow Link to build contraptions without them flying away into the air.
-
A contraption to carry the smaller Ancient Orb
-
A contraption to carry the larger Ancient Orb
There are also two Ancient Orbs of different sizes placed in this floor. The smallest is located on a pedestal surrounded by Candles, while the largest is found among the Flame Emitters. In order to advance to the end of the Shrine, Link must carry these Ancient Orbs to the middle level above. The lattice floor above is useful to catch any Balloon contraptions that Link sends into the air while he stands on the middle level.
This middle level consists of two Concave Slots. Like the Ancient Orbs, these Slots are of different sizes and correspond to the Ancient Orbs of the same size. The largest Concave Slot corresponds to a portcullis in the back wall hiding a Stone Chest. The smallest Concave Slot controls the portcullis blocking the end of the Shrine. The effects of both of these Concave Slots remain even when their corresponding Ancient Orbs are later removed.
A Statue of Rauru and Sonia can be found at the end of the Sinakawak Shrine. By interacting with the Terminal in front of the Statue, Link can receive a Light of Blessing to cleanse the corruption of Darkness from within him.[2][3]
Equipment
Zonai Devices
Treasure Chests
| Treasure Chest | |
|---|---|
| Contents | |
| Notes | Behind the right-hand side portcullis on the second chamber's middle level |
| Treasure Chest | Contents | Notes |
|---|---|---|
Behind the right-hand side portcullis on the second chamber's middle level |
Nomenclature
| Language | Names | |
|---|---|---|
| This table was generated using translation pages. To request an addition, please contact a staff member with a reference. | ||
Gallery
-
The interior of the Shrine
-
The Sinakawak Shrine before being activated
-
The Sinakawak Shrine after being completed
See Also
References
- ↑ 1.0 1.1 "Sinakawak Shrine
An Uplifting Device" — Map (Tears of the Kingdom) - ↑ "You have done well to reach this place... We offer this light that will cleanse you of evil." — Statue (Tears of the Kingdom)
- ↑ "May the Light of Blessing grant you the strength you seek." — Statue (Tears of the Kingdom)


