Den of Trials
The Den of Trials is a location in Tri Force Heroes,[name references needed] added through the Ver. 2.0.0 update.[1] It is designated as the ninth Area of the Drablands as well as the sole Level within the Area, and contains 40 Floors based on the prior eight Areas. At the bottom of the Den of Trials rests the Fierce Deity Armor.
To access the Den of Trials, Link must complete nine Levels and/or Drablands Challenges, then return to Hytopia, where The Great Tripini tells the young hero about the newly-discovered Area and the powerful Outfit said to be found within.[2][3] Though the Den of Trials cannot be unlocked or selected through Download Play, the Links can still access the Den if the "host" Link selects it. However, the other Links will not be able to obtain the Fierce Deity Armor in this mode.
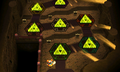
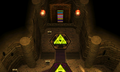
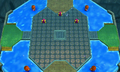
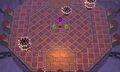
The Den of Trials is divided into portions called Zones, with each portioned Zone being based on the Woodlands, Riverside, Volcano, Ice Cavern, Fortress, The Dunes, The Ruins and the Sky Realm respectively. Each Zone contains five Floors and is accessible from a central hub area with eight Triforce Gateways. The Floors contain Enemies that must all be defeated in order to activate the Triforce Gateway to advance to the next Floor.[4] According to The Great Tripini, all of the Fairies that accompany the Links flee in fear of the Den of Trials, leaving them with only one to start with.[5] However, by reaching the "safe room" on the fifth Floor of a Zone, the Links can obtain another Fairy trapped in a Treasure Chest after collecting the Materials from that Zone and Saving their progress. Each safe room also contains a Squiddy from which supplementary Hearts and Rupees can be retrieved before descending further. When a Zone is completed, its corresponding Triforce Gateway in the hub area becomes activated. If the entire Den of Trials is completed in a single session, beginning from the first Floor, then the final safe room will contain eight Chests with more valuable Materials than the usual three.
A party cannot warp to any Zones that have not been reached by all the participating Links, forcing them to begin from the highest common Zone available, or earlier.[6] The Den of Trials features several "dark" variants of common Enemies, which have increased attack power and defense, attacks which tend to Curse the Links, and much faster recovery from being stunned. In addition there are new Enemies that were not present in the other Areas of the Drablands, including Slaroks, Gimos, and land-based Octoroks. The final Floor features a triumvirate of Shadow Links, equipped with powered up versions of the weapons available.
Forest Zone
| Items | Materials |
|---|---|
| 2× | |
| 1× | |
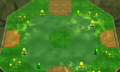
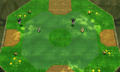
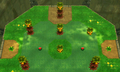
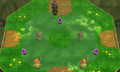
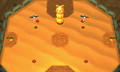
The Forest Zone consists of grassy surfaces without any special features. The Totem Dekus emerge at random heights of one to three Links, and periodically change their height.
| Floor | Enemies | |
|---|---|---|
| B1 | 4× | Blobs |
| 4× | Buzz Blobs | |
| B2 | 2× | Rats |
| 2× | Crows | |
| 4× | Skullropes | |
| B3 | 2× | Life Likes (Posing as Hearts) |
| 7× | Totem Dekus | |
| B4 | 2× | Gimos |
| 3× | Dark Blobs | |
| 2× | Spear Throwing Moblins (Riding a Totem Armos) | |
| 1× | Dark Spear Throwing Moblin (Riding two Dark Totem Armos) | |
| B5 | 1× | Squiddy |
Flooded Zone
| Items | Materials |
|---|---|
| 2× | |
| 1× | |
Each floor in the Flooded Zone has pools of Water along their edges, except for the second floor, which is almost entirely submerged. The Keeleon on the second floor will spew silver Spikes, which can accumulate over a large area and explode on contact. The third floor has a large Guruguru Bar that spans the entire central platform.
| Floor | Enemies | |
|---|---|---|
| B6 | 3× | Slaroks |
| 4× | Water Octoroks | |
| B7 | 3× | Buzz Blobs |
| 3× | Water Tektites | |
| 2× | Tektites | |
| 1× | Keeleon (Spews silver Spikes) | |
| B8 | 2× | White Poes |
| 2× | Ice Wizzrobes | |
| 2× | Water Octoroks | |
| B9 | 1× | Octorok |
| 1× | Slarok | |
| 2× | Dark Octoroks | |
| 1× | Slarok (Riding a Totem Armos) | |
| 1× | Octorok (Riding a Totem Armos) | |
| 1× | Dark Octorok (Riding two Dark Totem Armos) | |
| B10 | 1× | Squiddy |
Scorching Zone
| Items | Materials |
|---|---|
| 2× | |
| 1× | |
Each floor in the Scorching Zone features a grated metal floor above a pool of Lava, except for the second floor, which instead features rocky platforms that sink into the Lava if the Links stand on them for several seconds. These grated platforms leave several strips of exposed Lava along the floors' edges, which the Links can fall into if not careful. On the third floor, Volcanic Rocks will fall continuously, while on the fourth floor, Lava Geysers shoot upward through parts of the grated floor.
| Floor | Enemies | |
|---|---|---|
| B11 | 3× | Red Hardhat Beetles |
| 3× | Fire Keese | |
| B12 | 3× | Hardhat Beetles |
| 2× | Fire Keeleons | |
| 1× | Beamos | |
| B13 | 2× | Helmasaurs |
| 2× | Kodongos | |
| 1× | Deadrock | |
| 3× | Terrorpins (In a Totem formation) | |
| B14 | 1× | Dark Spear Throwing Moblin |
| 3× | Dark Hardhat Beetles | |
| 2× | Dark Hinoxes | |
| 1× | Dark Sky Spear Soldier (Riding a Dark Totem Armos) | |
| B15 | 1× | Squiddy |
Frozen Zone
| Items | Materials |
|---|---|
| 2× | |
| 1× | |
Each floor in the Frozen Zone features patches of slippery Ice and several thin Ice platforms that gradually crack and break away under the Links' weight, but eventually grow over again. The third and fourth floors also have several permanent holes. In the center of the second floor, two Switch Moles appear from a circle of six Mole Holes; when both are defeated, the Fire Keeleon and Hardhat Beetles appear.
| Floor | Enemies | |
|---|---|---|
| B16 | 4× | Ice Gimos |
| 2× | Freezards | |
| B17 | 2× | Ice Keese |
| 2× | Switch Moles | |
| 1× | Fire Keeleon | |
| 2× | Hardhat Beetles | |
| B18 | 2× | Blue Sword Soldiers |
| 2× | Prankster Poes | |
| B19 | 2× | Ice Wizzrobes |
| 1× | Dark Wizzrobe | |
| 1× | Dark Sky Spear Soldier (Riding two Dark Totem Armos) | |
| 1× | Bomb Soldier (Riding a Totem Armos) | |
| B20 | 1× | Squiddy |
Fortified Zone
| Items | Materials |
|---|---|
| 2× | |
| 1× | |
The first floor of the Fortified Zone has four Arrow Traps along the outside edges, which automatically start firing Arrows after the Links select their Items, and a set of four unlit Torches sitting in the Arrows' paths. Two of the Arrow Traps also have lit Torches directly in front of them, which quickly causes a chain reaction leading to a flurry of Fire Arrows across the stage. This trap can be avoided if the Link wielding the Gust Jar extinguishes the two lit Torches before all Links select their Items, though the Torches will reignite after one minute.
On the second floor, two stacks of two Mini-Margos travel clockwise around the floor's perimeter, while the last Mini-Margo travels counter-clockwise in a smaller radius. A patch of Bomb Flowers awaits in the center. Once all five Mini-Margos or the solo Mini-Margo or the single Dark Keeleon are defeated, a second Dark Keeleon appears. On the third floor, the four Dark Hinoxes are initially standing on ledges along the floor's perimeter, and can be easily defeated by knocking them off with a single hit. However, if the Beamos and Gimos are defeated first, the Dark Hinoxes will drop to the floor and begin giving chase to the Links.
| Floor | Enemies | |
|---|---|---|
| B21 | 1× | Spear Soldier (Riding a Totem Armos) |
| 1× | Green Poe | |
| 1× | Red Poe | |
| 1× | Blue Poe | |
| B22 | 2× | Dark Keeleon |
| 5× | Mini-Margos (Two stacks of two; one solo) | |
| B23 | 1× | Beamos |
| 1× | Fire Gimos | |
| 1× | Ice Gimos | |
| 1× | Spear Soldier (Riding three Totem Armos) | |
| 4× | Dark Hinoxes | |
| B24 | 1× | Dark Sky Sword Soldier |
| 1× | Dark Sky Shield Soldier | |
| 1× | Dark Sky Spear Soldier | |
| 1× | Dark Sky Spear Soldier (Riding a Dark Totem Armos) | |
| 1× | Dark Sky Ball and Chain Soldier | |
| 1× | Dark Sky Sword Soldier (Riding a Dark Totem Armos) | |
| 2× | Dark Sky Spear Soldiers (Riding two Dark Totem Armos each) | |
| B25 | 1× | Squiddy |
Desert Zone
| Items | Materials |
|---|---|
| 2× | |
| 1× | |
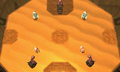
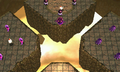
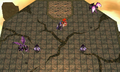
All four floors of the Desert Zone are covered in Quicksand, save for a small patch of solid ground in each of the four cardinal directions, and one in the center. The second floor features walls around the floor's edges, and two Bomb Flowers that must be watered with the Water Rod before they can be plucked. On the third floor, the Morths will continually regenerate shortly after they are defeated, but will permanently disappear once all other Enemies are defeated.
| Floor | Enemies | |
|---|---|---|
| B26 | 2× | Karat Crabs (Inside Sand Mounds) |
| 4× | Leevers | |
| B27 | 1× | Hokkubokku |
| 2× | Vultures | |
| 4× | Life Likes (Posing as Hearts) | |
| B28 | 3× | Skullropes |
| 2× | Gyorms | |
| 4× | Morths | |
| B29 | 2× | Red Stalfos |
| 2× | Gibdos | |
| 2× | Dark Stalfos (Riding a Dark Totem Armos each) | |
| 1× | Dark Stalfos (Riding two Dark Totem Armos) | |
| B30 | 1× | Squiddy |
Shadow Zone
| Items | Materials |
|---|---|
| 2× | |
| 1× | |
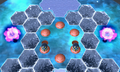
Each floor in the Shadow Zone has a large pit and features a different type of platform trap. The first floor has three grey platforms that periodically vanish and reappear. The second floor has six colored platforms that cycle around the stage, plus two static ones in the center; only the Link matching a platform's color can safely walk on it without falling through. The third floor appears to be mostly groundless, but features a number of invisible platforms that briefly appear when touched by a Fireball or a Dark Wizzrobe's blast. On the fourth floor, the Dark Stalfos throw their bones at the Links from small sections of ground separated from the rest of the floor; hitting a Shock Switch makes platforms briefly appear that allow the Links to cross into these sections.
| Floor | Enemies | |
|---|---|---|
| B31 | 1× | Keese |
| 1× | Chasupa | |
| 2× | Fire Keese | |
| 2× | Ice Keese | |
| B32 | 2× | White Poes |
| 1× | Prankster Poe | |
| 1× | Green Poe | |
| 1× | Red Poe | |
| 1× | Blue Poe | |
| B33 | 3× | Hardhat Beetles |
| 3× | Dark Wizzrobes | |
| B34 | 2× | Gibdos |
| 2× | Dark Stalfos | |
| 2× | ReDeads | |
| B35 | 1× | Squiddy |
Baneful Zone
| Items | |
|---|---|
| Materials | |
| 2× | |
| 1× | |
| Materials | |
The first floor of the Baneful Zone consists of four separate diamond-shaped islands; one where the Links appear and can select from any of the eight Items, and three others with a trio of Dark Enemies on each. The Links must pick up any of the six Cuccos wandering around the floor and use them to glide across the gaps. The second floor has a strong gust of wind coming from the north end, which can be temporarily blocked by a wall that rises up when a Shock Switch is struck.
The Squiddy and the Treasure Chest containing a Fairy appear on the third floor of the Baneful Zone after all Enemies are defeated, as opposed to the fifth floor, like in all other Zones. This allows the Links to restore their Heart ahead of the next floor's Boss battle.
| Floor | Enemies | |
|---|---|---|
| B36 | 3× | Dark Blobs |
| 3× | Dark Hardhat Beetles | |
| 3× | Dark Octoroks | |
| 1× | Dark Keeleon | |
| 6× | Cuccos | |
| B37 | 1× | Dark Stalfos (Riding a Dark Totem Armos) |
| 1× | Dark Spear Moblin (Riding two Dark Totem Armos) | |
| 2× | Dark Hinoxes | |
| B38 | 2× | Dark Wizzrobes |
| 1× | Dark Sky Fire Chain Soldier | |
| 2x | Dark Super Aeralfos | |
| 1× | Squiddy | |
| B39 | 3× | Shadow Links |
| B40 | ||
Trivia
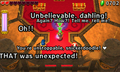
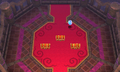
- For each consecutive safe room that the Links reach, a new congratulatory Status Report will scroll across the screen. These Status Reports will accumulate and reappear at each safe room thereafter, eventually covering most of the screen. The messages for each consecutive safe room are as follows:
- No message
- "Well THAT was unexpected!"
- "You're unstoppable, snickerdoodle! ♥"
- "Oh!!"
- "Again? How?! Tell me, tell me!"
- "Unbelievable, dahling!"
- "My awe has been inspired!"
- "You're legendary, chum! Really!"
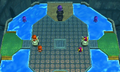
- If the Links reach all eight safe rooms consecutively, they will also be greeted by a loud round of applause, followed by an audible cheer from Sir Combsly and the Status Report message "Good work, soldier!"
Nomenclature
| Language | Names | |
|---|---|---|
Japanese |
| |
FrenchCA | Crypte | |
FrenchEU | Crypte[13] | |
German | Monsterhort[9] | |
Italian | Covo ostile[7] | |
Korean | ||
SpanishLA | Gruta del desafío | |
SpanishEU |
| |
| This table was generated using translation pages. To request an addition, please contact a staff member with a reference. | ||
Gallery
-
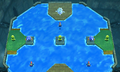
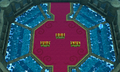
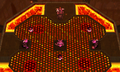
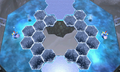
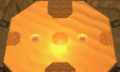
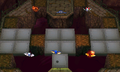
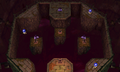
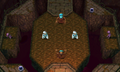
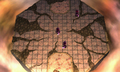
The central hub area
-
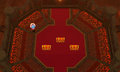
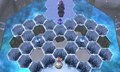
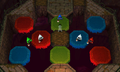
Bottom of the central hub
-
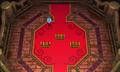
Congratulatory Status Reports


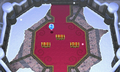
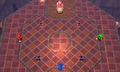
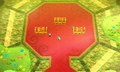
Forest Zone
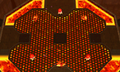
-
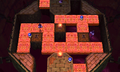
First floor
-
Second floor
-
Third floor
-
Fourth floor
-
Fifth floor


Flooded Zone
-
First floor
-
Second floor
-
Third floor
-
Fourth floor
-
Fifth floor


Scorching Zone
-
First floor
-
Second floor
-
Third floor
-
Fourth floor
-
Fifth floor


Frozen Zone
-
First floor
-
Second floor
-
Third floor
-
Fourth floor
-
Fifth floor


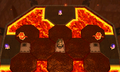
Fortified Zone
-
First floor
-
Second floor
-
Third floor
-
Fourth floor
-
Fifth floor


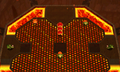
Desert Zone
-
First floor (enemies are underground)
-
Second floor
-

Third floor
-
Fourth floor
-
Fifth floor


Shadow Zone
-
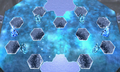
First floor
-
Second floor
-
Third floor
-
Third floor, invisible platforms shown
-
Fourth floor
-
Fifth floor


Baneful Zone
-
First floor
-

Second floor
-
Third floor
-
Fourth floor
-
Fifth floor


References
- ↑ "Ver. 2.0.0 (Released December 2, 2015)
Den of Trials will be added." — How to Update The Legend of Zelda: Tri Force Heroes , Nintendo Support. - ↑ "Oh, uh, hi there, little hero dude! Hey, have you heard? They've finished surveying a new, uh, Drablands area. You can, ah, go on a trip there, too. I hear it's called, the, ah... Yeah. The Den of Trials." — The Great Tripini (Tri Force Heroes)
- ↑ "Ol' Trip hears, uh, stuff. Like about a one-of-a-kind outfit at the, um, bottom floor of the Den of Trials... That's mighty...ah...awesome, right?" — The Great Tripini (Tri Force Heroes)
- ↑ " Hey, it's the little hero! Hey. Yeah. Looks like this is the Den of Trials we've been, ah, hearing about... And, uh, it looks like there's some special rules in this place that, um, set it apart from other places.
[…]
They say the Den of Trials has, ah, 40 underground floors. Like...whoa. Yeah. You grab the treasure in each of the zones, and that, um, that completes it. And then you get to go deeper down. From the topmost Forest Zone to the, uh, Baneful Zone at the bottom... Sounds like a long way to, ah, go. Oh, but, ah! If you can complete a zone, then you'll be able to restart from there. So don't, uh, stress, OK?" — The Great Tripini (Tri Force Heroes) - ↑ "I hear all the, uh, fairies ran away in fear. Yeah. So you only start with, ah, just one! They say there are more, um, hidden away in...uh...oh yeah. In treasure chests in safe rooms." — The Great Tripini (Tri Force Heroes)
- ↑ "Where you can go depends on, ah, the allies you’ve brought with you, it seems. You can only take a trip to the zone just after the deepest one that all fellow heroes have completed. Oh Yeah. It looks like you haven’t completed any yet... That’s OK, dude. Everyone has to start, ah, somewhere. You’ll just have to start at the start. Yeah! That’ll be the, uh, Forest Zone. The Den of Trials is a confusing place. Is there, ah, anything else you wanna know about it?" — The Great Tripini (Tri Force Heroes)
- ↑ "Covo ostile" — Level Selection (Tri Force Heroes)
- ↑ "エリア 魔窟エリア
コース 魔窟" — Pick an Outfit (Tri Force Heroes) - ↑ "Monsterhort" — Level Selection (Tri Force Heroes)
- ↑ "시련의 동굴" — Level Selection (Tri Force Heroes)
- ↑ "시련의 동굴 지역" — Level Selection (Tri Force Heroes)
- ↑ "Gruta del desafío" — Level Selection (Tri Force Heroes)
- ↑ "Crypte" — Level Selection (Tri Force Heroes)
- ↑ "Región Grutas
Recorrido Grutas Sombrías" — Pick an Outfit (Tri Force Heroes)