Gallery:Midna: Difference between revisions
(→Imp Form: Adding more concept art) |
m (removing unnessicary screenshots) |
||
| (41 intermediate revisions by 15 users not shown) | |||
| Line 3: | Line 3: | ||
==Imp Form== | ==Imp Form== | ||
<gallery> | <gallery> | ||
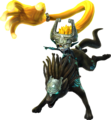
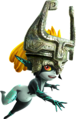
File: | File:TP Midna Render.png|A render of Midna | ||
File: | File:TP Midna Render 2.png | ||
File: | File:TP Midna Render 3.png | ||
File: | File:TP Midna Render 4.png | ||
File: | File:TP Midna Render 5.png | ||
File:Midna | File:TP Midna Render 6.png | ||
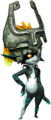
File:Midna | File:TP Midna Animated Render.png|Animated render of {{Term|TP|Midna}} hovering | ||
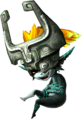
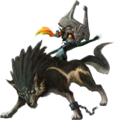
File:TP Wolf | File:TP Midna and Wolf Link Model.png|Midna atop Wolf Link | ||
File:TP Midna and Wolf Link Artwork.png|Artwork of Midna atop [[Wolf Link]] | |||
File:TP Midna Icon.png|Midna's in-game icon | File:TP Midna Icon.png|Midna's in-game icon | ||
File:Midna Monster.jpg|Closeup of Midna | File:Midna Monster.jpg|Closeup of Midna | ||
| Line 17: | Line 18: | ||
File:Zant'sWhisper.jpg|Zant whispering to Midna | File:Zant'sWhisper.jpg|Zant whispering to Midna | ||
File:MidnaInjured01.png|Midna having been Injured by [[Lanayru (Spirit)|Lanaryu]] | File:MidnaInjured01.png|Midna having been Injured by [[Lanayru (Spirit)|Lanaryu]] | ||
File:MidnaHealing.jpg|Midna being healed by [[Princess Zelda|Zelda's]] power | File:MidnaHealing.jpg|Midna being healed by [[Princess Zelda|Zelda's]] power | ||
File:Image190.jpg|Midna after Zelda sacrifices herself to save her | File:Image190.jpg|Midna after Zelda sacrifices herself to save her | ||
File:MidnaAndTheShadowCrystal.jpg|Midna holding the [[Shadow Crystal]] | File:MidnaAndTheShadowCrystal.jpg|Midna holding the [[Shadow Crystal]] | ||
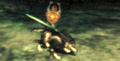
File:Link and Monster Midna.jpg|[[Link]] and Midna in the [[Sacred Grove]] | File:Link and Monster Midna.jpg|[[Link]] and Midna in the [[Sacred Grove]] | ||
File:Midna Fused Shadow.jpg|Midna using the Fused Shadow to kill Zant | File:Midna Fused Shadow.jpg|Midna using the Fused Shadow to kill Zant | ||
File:MidnaGasp.jpg|Midna in fear of the Fused Shadow's power | File:MidnaGasp.jpg|Midna in fear of the Fused Shadow's power | ||
File:Midna Summon Portal.jpg|Midna summoning a portal to leave the [[Palace of Twilight]] | File:Midna Summon Portal.jpg|Midna summoning a portal to leave the [[Palace of Twilight]] | ||
File:MidnaLink.jpg|Midna and Link preparing to fight [[ | File:MidnaLink.jpg|Midna and Link preparing to fight [[Ganondorf]] | ||
File:Midna's Transformation.png|Midna unleashing the full power of the Fused Shadow | File:Midna's Transformation.png|Midna unleashing the full power of the Fused Shadow | ||
File:Midna's Transformation 2.png|Midna trying to use a Trident to kill Ganon | File:Midna's Transformation 2.png|Midna trying to use a Trident to kill Ganon | ||
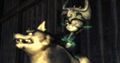
File:Zelda and Monster Midna.jpg|Midna frustrated at Ganondorf for possessing Zelda | File:Zelda and Monster Midna.jpg|Midna frustrated at Ganondorf for possessing Zelda | ||
File: | File:TP Midna Riding Wolf Link.jpg|Early screenshot of Wolf Link and Midna outside [[Hyrule Castle]] covered in [[Twilight]] | ||
File:Monster TP website.jpg|Midna on the official ''Zelda'' website | File:Monster TP website.jpg|Midna on the official ''Zelda'' website | ||
File:Midna Concept.png|Concept art | File:TP Midna Concept Art.png|Concept art | ||
File:TP Midna Concept Art 1.jpg|Concept art | File:TP Midna Concept Art 1.jpg|Concept art | ||
File:TP Midna Concept Art 2.jpg|Concept art | File:TP Midna Concept Art 2.jpg|Concept art | ||
File:TP Midna Concept Art 3.jpg|Concept art | File:TP Midna Concept Art 3.jpg|Concept art | ||
File:TP Midna Concept Art 4.jpg|Concept art | File:TP Midna Concept Art 4.jpg|Concept art | ||
File:TP Midna Concept Artwork 5.png|Concept art | |||
File:TP Midna Concept Artwork 6.png|Concept art | |||
File:TP Midna and Wolf Link Concept Art.jpg|Concept art of Midna atop Wolf Link | File:TP Midna and Wolf Link Concept Art.jpg|Concept art of Midna atop Wolf Link | ||
</gallery> | </gallery> | ||
=== | ==={{TPHD|-}}=== | ||
<gallery> | <gallery> | ||
File:TPHD Midna Artwork.png|Midna artwork | File:TPHD Midna Artwork.png|Midna artwork | ||
File:TPHD Wolf Link and Midna Artwork.png|Artwork of Midna atop Wolf Link | File:TPHD Wolf Link and Midna Artwork.png|Artwork of Midna atop Wolf Link | ||
File:TPHD Midna Icon.png|Midna's in-game icon | |||
File:TPHD Malo Promotional Artwork.jpg|Artwork of Midna, Link and Malo | |||
File:TPHD JP Release Promo.jpg|Promotional artwork depicting Midna, Link, Zelda, Ganondorf and Zant | |||
File:TPHD Midna Floor Portal.png|Midna summoning a portal | File:TPHD Midna Floor Portal.png|Midna summoning a portal | ||
File:TPHD Midna Model 2.png|{{Term|TPHD|Midna}} as she appears in the {{Term|TPHD|Light World}} | |||
File:TPHD Midna Shadowed Form Model.png|Midna cloaked in shadows | File:TPHD Midna Shadowed Form Model.png|Midna cloaked in shadows | ||
File:TPHD Surprised Midna Stamp.png|Midna Stamp | |||
File:TPHD Sad Midna Stamp.png|Midna Stamp | |||
File:TPHD Angry Midna Stamp.png|Midna Stamp | |||
File:TPHD Happy Midna Stamp.png|Midna Stamp | |||
</gallery> | </gallery> | ||
==True Form== | ==True Form== | ||
<gallery> | <gallery> | ||
File: | File:TP Twili Midna Concept Art.png|Concept art of Midna's true form | ||
File:Midna's Revival.jpg|Midna being revived by the [[Light Spirits]] | File:Midna's Revival.jpg|Midna being revived by the [[Light Spirits]] | ||
File:Midna's True Form.jpg|Midna after she is revived by the Light Spirits | File:Midna's True Form.jpg|Midna after she is revived by the Light Spirits | ||
| Line 68: | Line 72: | ||
File:Midna's Farewell 8.jpg|Midna leaving through the Mirror of Twilight | File:Midna's Farewell 8.jpg|Midna leaving through the Mirror of Twilight | ||
File:Midna's Farewell 7.jpg|Midna returning to the Palace of Twilight | File:Midna's Farewell 7.jpg|Midna returning to the Palace of Twilight | ||
File:TPHD Twili Midna Stamp.png|Twili Midna Stamp | |||
</gallery> | </gallery> | ||
== | ==Other Appearances== | ||
==={{ | ==={{HW|-}}=== | ||
<gallery> | <gallery> | ||
File: | File:HW Midna Render.png|Render of Midna | ||
File:HW Midna Cursed Shackle.png|Midna wielding the Cursed Shackle | |||
File:HW Midna Standard Outfit (Master Quest) Model.png|Midna's Standard Outfit (Master Quest) | |||
File:HW Midna Standard Outfit (Twilight) Model.png|Midna's Standard Outfit (Twilight) | |||
File:HW Midna Ordon Shield Model.png|Midna's [[Ordon Shield]] Costume from the Termina Map | |||
File:HWDE Midna Icon.png|Midna portrait | |||
File:HWDE Midna Portrait 2.png|Midna portrait | |||
File:HWDE Midna Portrait 3.png|Midna portrait | |||
File:HWDE Midna Portrait 4.png|Midna portrait | |||
File:HWDE Midna Portrait 5.png|Midna portrait | |||
File:HWDE Dark Midna Icon.png|Dark Midna portrait | |||
File:HW Midna Adventure Mode Icon.png|Midna Adventure Mode icon | |||
File:HW Midna Head Adventure Mode Icon.png|Midna Adventure Mode head icon | |||
File:HW Midna Transformation.png|Midna's Fused Shadow transformation | |||
</gallery> | </gallery> | ||
==={{HW}} | ===={{HW|L|-}}==== | ||
<gallery> | <gallery> | ||
File:HWL Midna Cover Artwork.png|Cover artwork of Midna | File:HWL Midna Cover Artwork.png|Cover artwork of Midna | ||
File: | File:HWL Midna Master Wind Waker Standard Outfit Model.png|Midna's Standard Outfit (Wind Waker) | ||
File:HWL Midna Lorule Standard Outfit Model.png|Midna's Standard Outfit (Lorule) | |||
File: | </gallery> | ||
File: | ===={{HW|DE|-}}==== | ||
File: | <gallery> | ||
File: | File:HWDE Midna Standard Outfit (Great Sea) Model.png|Midna's Standard Outfit (Great Sea) | ||
File: | File:HWDE Midna Mini Map Icon.png|Midna Mini Map icon | ||
File: | File:HWDE Dark Midna Mini Map Icon.png|Dark Midna Mini Map icon | ||
File: | File:HWDE Midna 8-Bit Red Ring.png|Midna wielding the 8-Bit Red Ring | ||
File: | File:HWDE Midna Thunderhead Shackle.png|Midna wielding the Thunderhead Shackle | ||
File: | </gallery> | ||
File: | |||
File: | ==={{SSB4|-}}=== | ||
File: | <gallery> | ||
File: | File:SSBfN3DS Midna Trophy Model.png|Midna Trophy from {{SSB4|3DS|-}} | ||
File: | File:SSBfWU Midna Trophy Model.png|Midna Trophy from {{SSB4|Wii U|-}} | ||
File:SSB4 Midna.jpg|Midna's Assist Trophy in {{SSB4|Wii U|-}} | |||
</gallery> | |||
==={{MNPTP|-}}=== | |||
<gallery> | |||
File:MNPTP Midna Sprite.png|Puzzle solution depicting Midna | |||
File:MNPTP Midna Tutorial.png|Midna teaching how to play ''Picross'' | |||
</gallery> | |||
==={{SSBU|-}}=== | |||
<gallery> | |||
File:SSBU Midna Render.png|Render of Midna's Assist Trophy | |||
File:SSBU Midna Model.png|Model of Midna's Assist Trophy | |||
File:SSBU Midna Spirit Artwork.png|Midna's Spirit | |||
</gallery> | </gallery> | ||
=== | ===''Super Mario Maker''=== | ||
<gallery> | <gallery> | ||
File: | File:SMM Wolf Link Costume Sprite.png|Midna on the Wolf Link Costume | ||
</gallery> | </gallery> | ||
=== | ===''WarioWare Gold''=== | ||
<gallery> | |||
File:WarioWare Gold Wolf Link & Midna Art.png|Wolf Link and Midna in ''WarioWare Gold'' | |||
</gallery> | |||
=== | ===''amiibo''=== | ||
<gallery> | <gallery> | ||
File: | File:TP Series Wolf Link amiibo.png|Midna on ''The Legend of Zelda'' series Wolf Link amiibo | ||
File:TLoZ Wolf Link amiibo.jpg|Promotion for the {{Term|Series|Wolf Link}} {{Term|Series|Amiibo}} | |||
</gallery> | </gallery> | ||
==Video Gallery== | |||
{{Youtube|Jtvgfh-m_40|200|Shackles gameplay from {{HW|-}}}} | |||
{{clear}} | |||
{{Categories | |||
|Galleries | |||
}} | |||
Revision as of 13:46, 2 April 2024
This page is a gallery page, featuring character art of Midna.
Imp Form
-
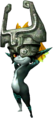
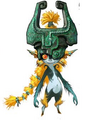
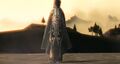
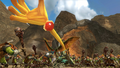
A render of Midna
-
-
-
-

-

-

Animated render of Midna hovering
-

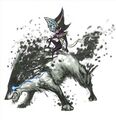
Midna atop Wolf Link
-
Artwork of Midna atop Wolf Link
-

Midna's in-game icon
-
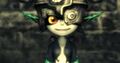
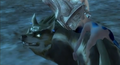
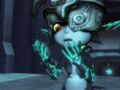
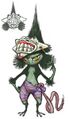
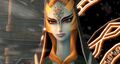
Closeup of Midna
-
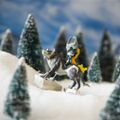
Midna atop Wolf Link
-
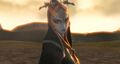
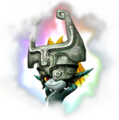
Midna wearing the Ordon Shield as a Mask
-
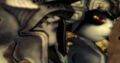
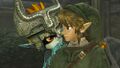
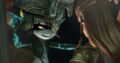
Zant whispering to Midna
-
Midna having been Injured by Lanaryu
-
Midna being healed by Zelda's power
-

Midna after Zelda sacrifices herself to save her
-

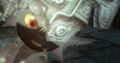
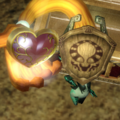
Midna holding the Shadow Crystal
-
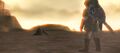
Link and Midna in the Sacred Grove
-
Midna using the Fused Shadow to kill Zant
-
Midna in fear of the Fused Shadow's power
-
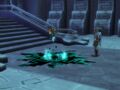
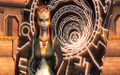
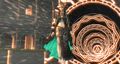
Midna summoning a portal to leave the Palace of Twilight
-
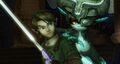
Midna and Link preparing to fight Ganondorf
-
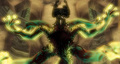
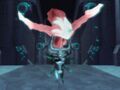
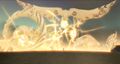
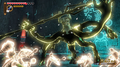
Midna unleashing the full power of the Fused Shadow
-
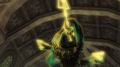
Midna trying to use a Trident to kill Ganon
-
Midna frustrated at Ganondorf for possessing Zelda
-
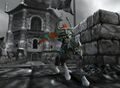
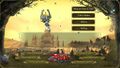
Early screenshot of Wolf Link and Midna outside Hyrule Castle covered in Twilight
-
Midna on the official Zelda website
-
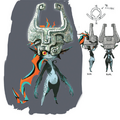
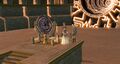
Concept art
-
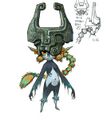
Concept art
-
Concept art
-
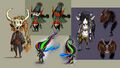
Concept art
-
Concept art
-
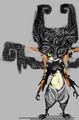
Concept art
-
Concept art
-
Concept art of Midna atop Wolf Link


Twilight Princess HD
-

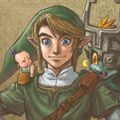
Midna artwork
-

Artwork of Midna atop Wolf Link
-

Midna's in-game icon
-
Artwork of Midna, Link and Malo
-

Promotional artwork depicting Midna, Link, Zelda, Ganondorf and Zant
-
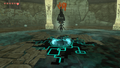
Midna summoning a portal
-
Midna as she appears in the Light World
-

Midna cloaked in shadows
-

Midna Stamp
-

Midna Stamp
-

Midna Stamp
-

Midna Stamp


True Form
-

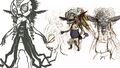
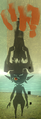
Concept art of Midna's true form
-
Midna being revived by the Light Spirits
-
Midna after she is revived by the Light Spirits
-
Link meeting with Midna after her true form has been restored
-
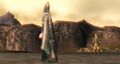
Front view of Midna's restored form
-
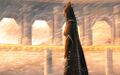
The back of Midna's robe after she reveals her true form
-
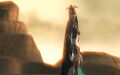
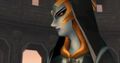
Closeup of Midna's true form
-
Midna alongside Link and Zelda at the Mirror of Twilight
-
Midna in front of the Mirror of Twilight
-
Closeup of Midna at the Mirror of Twilight
-
Midna bidding farewell to Link
-
Midna leaving through the Mirror of Twilight
-
Midna returning to the Palace of Twilight
-

Twili Midna Stamp


Other Appearances
Hyrule Warriors
-

Render of Midna
-
Midna wielding the Cursed Shackle
-

Midna's Standard Outfit (Master Quest)
-

Midna's Standard Outfit (Twilight)
-
Midna's Ordon Shield Costume from the Termina Map
-

Midna portrait
-

Midna portrait
-

Midna portrait
-

Midna portrait
-

Midna portrait
-

Dark Midna portrait
-

Midna Adventure Mode icon
-

Midna Adventure Mode head icon
-
Midna's Fused Shadow transformation


_Model.png)
_Model.png)


Hyrule Warriors Legends
-
Cover artwork of Midna
-

Midna's Standard Outfit (Wind Waker)
-

Midna's Standard Outfit (Lorule)


Hyrule Warriors: Definitive Edition
-

Midna's Standard Outfit (Great Sea)
-

Midna Mini Map icon
-

Dark Midna Mini Map icon
-
Midna wielding the 8-Bit Red Ring
-

Midna wielding the Thunderhead Shackle
_Model.png)


Super Smash Bros. for Nintendo 3DS / Wii U
-

Midna Trophy from Super Smash Bros. for Nintendo 3DS
-

Midna Trophy from Super Smash Bros. for Wii U
-

Midna's Assist Trophy in Super Smash Bros. for Wii U


My Nintendo Picross: Twilight Princess
-

Puzzle solution depicting Midna
-

Midna teaching how to play Picross

Super Smash Bros. Ultimate
-

Render of Midna's Assist Trophy
-

Model of Midna's Assist Trophy
-
Midna's Spirit


Super Mario Maker
-

Midna on the Wolf Link Costume
WarioWare Gold
-

Wolf Link and Midna in WarioWare Gold

amiibo
-
Midna on The Legend of Zelda series Wolf Link amiibo
-
Promotion for the Wolf Link amiibo
