Classic Mode: Difference between revisions
JumbledLimes (talk | contribs) No edit summary Tag: 2017 source edit |
m (Mass Formatting <br> to <br/>) |
||
| Line 5: | Line 5: | ||
|image= File:SSBU Classic Mode Artwork.png | |image= File:SSBU Classic Mode Artwork.png | ||
|caption= Artwork of Classic Mode from {{SSBU|-}} | |caption= Artwork of Classic Mode from {{SSBU|-}} | ||
|game= {{SSBM}}<br>{{SSBB}}<br>{{SSB4}}<br>{{SSBU}} | |game= {{SSBM}}<br/>{{SSBB}}<br/>{{SSB4}}<br/>{{SSBU}} | ||
|other= | |other= | ||
|players= | |players= | ||
| Line 13: | Line 13: | ||
|theme= | |theme= | ||
}} | }} | ||
{{Term/Store|Classic Mode||Series, SSBU}} is a recurring [[Mode]] in {{TLoZ|Series}}.<ref>{{Cite web|quote= Classic Mode<br>Choose your fighter and smash your way through increasingly difficult enemies for great rewards. |author= Nintendo |published= n.d. |retrieved= November 9, 2018 |url= https://www.smashbros.com/en_US/howtoplay/mode.html |title= More features {{!}} Super Smash Bros. Ultimate for the Nintendo Switch system |site= Super Smash Bros. Ultimate Official Site |type= }}</ref> | {{Term/Store|Classic Mode||Series, SSBU}} is a recurring [[Mode]] in {{TLoZ|Series}}.<ref>{{Cite web|quote= Classic Mode<br/>Choose your fighter and smash your way through increasingly difficult enemies for great rewards. |author= Nintendo |published= n.d. |retrieved= November 9, 2018 |url= https://www.smashbros.com/en_US/howtoplay/mode.html |title= More features {{!}} Super Smash Bros. Ultimate for the Nintendo Switch system |site= Super Smash Bros. Ultimate Official Site |type= }}</ref> | ||
==Overview== | ==Overview== | ||
| Line 28: | Line 28: | ||
Each [[Fighter]] is given their own route in Classic Mode in {{SSBU}}. These routes are named and thematically based on various factors, such as the Fighters themselves as well as the Stages, opponents, and special conditions they face. | Each [[Fighter]] is given their own route in Classic Mode in {{SSBU}}. These routes are named and thematically based on various factors, such as the Fighters themselves as well as the Stages, opponents, and special conditions they face. | ||
{{Caption|image= [[File:SSBU Link Icon.png|215px|link=A Quest to Seal the Darkness]] |text= Link Route<br>'''[[A Quest to Seal the Darkness|{{Color|#7db2ac|A Quest to Seal the Darkness}}]]'''}} | {{Caption|image= [[File:SSBU Link Icon.png|215px|link=A Quest to Seal the Darkness]] |text= Link Route<br/>'''[[A Quest to Seal the Darkness|{{Color|#7db2ac|A Quest to Seal the Darkness}}]]'''}} | ||
{{Caption|image= [[File:SSBU Ganondorf Icon.png|215px|link=Encroaching Darkness]] |text= Ganondorf Route<br>'''[[Encroaching Darkness|{{Color|#7db2ac|Encroaching Darkness}}]]'''}} | {{Caption|image= [[File:SSBU Ganondorf Icon.png|215px|link=Encroaching Darkness]] |text= Ganondorf Route<br/>'''[[Encroaching Darkness|{{Color|#7db2ac|Encroaching Darkness}}]]'''}} | ||
{{Caption|image= [[File:SSBU Young Link Icon.png|215px|link=Hyrule Smash!]] |text= Young Link Route<br>'''[[Hyrule Smash!|{{Color|#7db2ac|Hyrule Smash!}}]]'''}} | {{Caption|image= [[File:SSBU Young Link Icon.png|215px|link=Hyrule Smash!]] |text= Young Link Route<br/>'''[[Hyrule Smash!|{{Color|#7db2ac|Hyrule Smash!}}]]'''}} | ||
{{Caption|image= [[File:SSBU Sheik Icon.png|215px|link=Masquerade]] |text= Sheik Route<br>'''[[Masquerade|{{Color|#7db2ac|Masquerade}}]]'''}} | {{Caption|image= [[File:SSBU Sheik Icon.png|215px|link=Masquerade]] |text= Sheik Route<br/>'''[[Masquerade|{{Color|#7db2ac|Masquerade}}]]'''}} | ||
{{Caption|image= [[File:SSBU Toon Link Icon.png|215px|link=The Teamwork of Courage]] |text= Toon Link Route<br>'''[[The Teamwork of Courage|{{Color|#7db2ac|The Teamwork of Courage}}]]'''}} | {{Caption|image= [[File:SSBU Toon Link Icon.png|215px|link=The Teamwork of Courage]] |text= Toon Link Route<br/>'''[[The Teamwork of Courage|{{Color|#7db2ac|The Teamwork of Courage}}]]'''}} | ||
{{Caption|image= [[File:SSBU Zelda Icon.png|215px|link=Wisdom Prevails]] |text= Zelda Route<br>'''[[Wisdom Prevails|{{Color|#7db2ac|Wisdom Prevails}}]]'''}} | {{Caption|image= [[File:SSBU Zelda Icon.png|215px|link=Wisdom Prevails]] |text= Zelda Route<br/>'''[[Wisdom Prevails|{{Color|#7db2ac|Wisdom Prevails}}]]'''}} | ||
{{Clear}} | {{Clear}} | ||
====Classic Mode Routes with {{TLoZ|-}} Content==== | ====Classic Mode Routes with {{TLoZ|-}} Content==== | ||
| Line 46: | Line 46: | ||
!style="width:30%"| Notes | !style="width:30%"| Notes | ||
|- | |- | ||
| Bayonetta Route<br>{{Color|#7db2ac|The Requiem of Fallen Wings}} | | Bayonetta Route<br/>{{Color|#7db2ac|The Requiem of Fallen Wings}} | ||
| Round 4 | | Round 4 | ||
| {{Stock|SSBU|Bayonetta|1}} | | {{Stock|SSBU|Bayonetta|1}} | ||
| Line 54: | Line 54: | ||
|style="text-align:left"| | |style="text-align:left"| | ||
|- | |- | ||
| Bowser Jr. Route<br>{{Color|#7db2ac|Mama Peach, Where Are You?}} | | Bowser Jr. Route<br/>{{Color|#7db2ac|Mama Peach, Where Are You?}} | ||
| Round 4 | | Round 4 | ||
| {{Stock|SSBU|Bowser Jr.|1}} | | {{Stock|SSBU|Bowser Jr.|1}} | ||
| Line 62: | Line 62: | ||
|style="text-align:left"| | |style="text-align:left"| | ||
|- | |- | ||
| Captain Falcon Route<br>{{Color|#7db2ac|Up Close and Personal}} | | Captain Falcon Route<br/>{{Color|#7db2ac|Up Close and Personal}} | ||
| Round 2 | | Round 2 | ||
| {{Stock|SSBU|Captain Falcon|1}} | | {{Stock|SSBU|Captain Falcon|1}} | ||
| Line 70: | Line 70: | ||
|style="text-align:left"| The title of Captain Falcon's Route alludes to the fact that all of the opponents that he faces are close-range Fighters. | |style="text-align:left"| The title of Captain Falcon's Route alludes to the fact that all of the opponents that he faces are close-range Fighters. | ||
|- | |- | ||
|rowspan="2"| Daisy Route<br>{{Color|#7db2ac|Sarasaland Represent!}} | |rowspan="2"| Daisy Route<br/>{{Color|#7db2ac|Sarasaland Represent!}} | ||
| Round 1 | | Round 1 | ||
| {{Stock|SSBU|Daisy|1}} | | {{Stock|SSBU|Daisy|1}} | ||
| Line 80: | Line 80: | ||
| Round 5 | | Round 5 | ||
| {{Stock|SSBU|Daisy|1}} | | {{Stock|SSBU|Daisy|1}} | ||
| {{Small|Horde Battle}}<br>{{Stock|SSBU|Mii Brawler|1}} {{Small|([[Princess Zelda Wig]] and Nia Outfit)}}<br>{{Stock|SSBU|Mii Gunner|1}} {{Small|(Peach's Crown and Steampunk Getup)}}<br>{{Stock|SSBU|Mii Swordfighter|1}} {{Small|(Peach's Crown and Viridi Outfit)}}<br>{{Stock|SSBU|Mii Brawler|1}} {{Small|(Daisy's Crown and Vampire Garb)}}<br>{{Stock|SSBU|Mii Gunner|1}} {{Small|(Princess's Crown and Isabelle Outfit)}}<br>{{Stock|SSBU|Mii Swordfighter|1}} {{Small|(Daisy's Crown and Ashley Outfit)}} | | {{Small|Horde Battle}}<br/>{{Stock|SSBU|Mii Brawler|1}} {{Small|([[Princess Zelda Wig]] and Nia Outfit)}}<br/>{{Stock|SSBU|Mii Gunner|1}} {{Small|(Peach's Crown and Steampunk Getup)}}<br/>{{Stock|SSBU|Mii Swordfighter|1}} {{Small|(Peach's Crown and Viridi Outfit)}}<br/>{{Stock|SSBU|Mii Brawler|1}} {{Small|(Daisy's Crown and Vampire Garb)}}<br/>{{Stock|SSBU|Mii Gunner|1}} {{Small|(Princess's Crown and Isabelle Outfit)}}<br/>{{Stock|SSBU|Mii Swordfighter|1}} {{Small|(Daisy's Crown and Ashley Outfit)}} | ||
| {{Ssb|Peach's Castle}} | | {{Ssb|Peach's Castle}} | ||
|style="text-align:left"| "Underwater Theme - Super Mario Bros." | |style="text-align:left"| "Underwater Theme - Super Mario Bros." | ||
|- style="background:#17456e" | |- style="background:#17456e" | ||
| Dark Samus Route<br>{{Color|#7db2ac|The Great Posison Given Form}} | | Dark Samus Route<br/>{{Color|#7db2ac|The Great Posison Given Form}} | ||
| Round 1 | | Round 1 | ||
| {{Stock|SSBU|Dark Samus|1}}<br>{{Stock|SSBU|Zelda|6}} | | {{Stock|SSBU|Dark Samus|1}}<br/>{{Stock|SSBU|Zelda|6}} | ||
| {{Stock|SSBU|Link|1}} | | {{Stock|SSBU|Link|1}} | ||
| [[Hyrule Castle#Super Smash Bros. Ultimate|Hyrule Castle]] | | [[Hyrule Castle#Super Smash Bros. Ultimate|Hyrule Castle]] | ||
| Line 92: | Line 92: | ||
|style="text-align:left"| | |style="text-align:left"| | ||
|- style="background:#163d5f" | |- style="background:#163d5f" | ||
| Dark Pit Route<br>{{Color|#7db2ac|Created Warriors}} | | Dark Pit Route<br/>{{Color|#7db2ac|Created Warriors}} | ||
| Round 3 | | Round 3 | ||
| {{Stock|SSBU|Dark Pit|1}} | | {{Stock|SSBU|Dark Pit|1}} | ||
| {{Stock|SSBU|Link|8}}<br>{{Stock|SSBU|Link|8}}<br>{{Stock|SSBU|Link|8}} | | {{Stock|SSBU|Link|8}}<br/>{{Stock|SSBU|Link|8}}<br/>{{Stock|SSBU|Link|8}} | ||
| [[Temple#Super Smash Bros. Ultimate|Temple]] | | [[Temple#Super Smash Bros. Ultimate|Temple]] | ||
|style="text-align:left"| "{{Remix|SSBB|Great Temple / Temple|SSBU}}" | |style="text-align:left"| "{{Remix|SSBB|Great Temple / Temple|SSBU}}" | ||
|style="text-align:left"| | |style="text-align:left"| | ||
|- style="background:#17456e" | |- style="background:#17456e" | ||
| Diddy Kong Route<br>{{Color|#7db2ac|Hey, Little Buddy!}} | | Diddy Kong Route<br/>{{Color|#7db2ac|Hey, Little Buddy!}} | ||
| Round 3 | | Round 3 | ||
| {{Stock|SSBU|Diddy Kong|1}}<br>{{Stock|SSBU|Zelda|1}} | | {{Stock|SSBU|Diddy Kong|1}}<br/>{{Stock|SSBU|Zelda|1}} | ||
| {{Stock|SSBU|Ganondorf|1}} | | {{Stock|SSBU|Ganondorf|1}} | ||
| {{Ssb|Unova Pokémon League}} | | {{Ssb|Unova Pokémon League}} | ||
| Line 108: | Line 108: | ||
|style="text-align:left"| | |style="text-align:left"| | ||
|- style="background:#163d5f" | |- style="background:#163d5f" | ||
| Falco Route<br>{{Color|#7db2ac|Soar above the Darkness}} | | Falco Route<br/>{{Color|#7db2ac|Soar above the Darkness}} | ||
| Round 3 | | Round 3 | ||
| {{Stock|SSBU|Falco|1}} | | {{Stock|SSBU|Falco|1}} | ||
| {{Stock|SSBU|Link|8}}<br>{{Stock|SSBU|Toon Link|6}} | | {{Stock|SSBU|Link|8}}<br/>{{Stock|SSBU|Toon Link|6}} | ||
| [[Bridge of Eldin#Super Smash Bros. Ultimate|Bridge of Eldin]] | | [[Bridge of Eldin#Super Smash Bros. Ultimate|Bridge of Eldin]] | ||
|style="text-align:left"| "{{Remix|SSB4|Dark World (for 3DS / Wii U)|SSBU}}" | |style="text-align:left"| "{{Remix|SSB4|Dark World (for 3DS / Wii U)|SSBU}}" | ||
|style="text-align:left"| | |style="text-align:left"| | ||
|- style="background:#17456e" | |- style="background:#17456e" | ||
| Ice Climbers Route<br>{{Color|#7db2ac|Duos for Days}} | | Ice Climbers Route<br/>{{Color|#7db2ac|Duos for Days}} | ||
| Round 1 | | Round 1 | ||
| {{Stock|SSBU|Ice Climbers|1}} | | {{Stock|SSBU|Ice Climbers|1}} | ||
| {{Stock|SSBU|Link|1}}<br>{{Stock|SSBU|Zelda|1}} | | {{Stock|SSBU|Link|1}}<br/>{{Stock|SSBU|Zelda|1}} | ||
| [[Great Plateau Tower#Super Smash Bros. Ultimate|Great Plateau Tower]] | | [[Great Plateau Tower#Super Smash Bros. Ultimate|Great Plateau Tower]] | ||
|style="text-align:left"| "{{Remix|SSBU|Main Theme - The Legend of Zelda: Breath of the Wild|SSBU}}" | |style="text-align:left"| "{{Remix|SSBU|Main Theme - The Legend of Zelda: Breath of the Wild|SSBU}}" | ||
|style="text-align:left"| | |style="text-align:left"| | ||
|- style="background:#163d5f" | |- style="background:#163d5f" | ||
| Ike Route<br>{{Color|#7db2ac|The Blac-Clad Warriors}} | | Ike Route<br/>{{Color|#7db2ac|The Blac-Clad Warriors}} | ||
| Round 6 | | Round 6 | ||
| {{Stock|SSBU|Ike|1}} | | {{Stock|SSBU|Ike|1}} | ||
| {{Stock|SSBU|Link|8}}<br>{{Stock|SSBU|Toon Link|6}} | | {{Stock|SSBU|Link|8}}<br/>{{Stock|SSBU|Toon Link|6}} | ||
| [[Bridge of Eldin#Super Smash Bros. Ultimate|Bridge of Eldin]] | | [[Bridge of Eldin#Super Smash Bros. Ultimate|Bridge of Eldin]] | ||
|style="text-align:left"| "{{Remix|Original|Hyrule Castle (Outside)|SSBU}}" | |style="text-align:left"| "{{Remix|Original|Hyrule Castle (Outside)|SSBU}}" | ||
|style="text-align:left"| | |style="text-align:left"| | ||
|- style="background:#17456e" | |- style="background:#17456e" | ||
| Incineroar Route<br>{{Color|#7db2ac|Burning Pro Wrestling Spirit!}} | | Incineroar Route<br/>{{Color|#7db2ac|Burning Pro Wrestling Spirit!}} | ||
| Round 2 | | Round 2 | ||
| {{Stock|SSBU|Incineroar|1}} | | {{Stock|SSBU|Incineroar|1}} | ||
| Line 140: | Line 140: | ||
|style="text-align:left"| | |style="text-align:left"| | ||
|- style="background:#163d5f" | |- style="background:#163d5f" | ||
| Inkling Route<br>{{Color|#7db2ac|An Inkredible Journey}} | | Inkling Route<br/>{{Color|#7db2ac|An Inkredible Journey}} | ||
| Round 1 | | Round 1 | ||
| {{Stock|SSBU|Inkling|1}} | | {{Stock|SSBU|Inkling|1}} | ||
| {{Stock|SSBU|Lucario|7}}<br>{{Stock|SSBU|Sheik|5}} | | {{Stock|SSBU|Lucario|7}}<br/>{{Stock|SSBU|Sheik|5}} | ||
| {{Ssb|Yoshi's Island (SSBM)|Yoshi's Island (Melee)}} | | {{Ssb|Yoshi's Island (SSBM)|Yoshi's Island (Melee)}} | ||
|style="text-align:left"| "Splattack!" | |style="text-align:left"| "Splattack!" | ||
|style="text-align:left"| | |style="text-align:left"| | ||
|- style="background:#17456e" | |- style="background:#17456e" | ||
|rowspan="2"| Isabelle Route<br>{{Color|#7db2ac|Best In Show}} | |rowspan="2"| Isabelle Route<br/>{{Color|#7db2ac|Best In Show}} | ||
| Round 3 | | Round 3 | ||
| {{Stock|SSBU|Isabelle|1}} | | {{Stock|SSBU|Isabelle|1}} | ||
| {{Small|Free-for-all}}<br>{{Stock|SSBU|Palutena|1}}<br>{{Stock|SSBU|Lucina|1}}<br>{{Stock|SSBU|Zelda|1}}<br>{{Stock|SSBU|Corrin|2}}<br>{{Stock|SSBU|Robin|2}} | | {{Small|Free-for-all}}<br/>{{Stock|SSBU|Palutena|1}}<br/>{{Stock|SSBU|Lucina|1}}<br/>{{Stock|SSBU|Zelda|1}}<br/>{{Stock|SSBU|Corrin|2}}<br/>{{Stock|SSBU|Robin|2}} | ||
| [[Temple#Super Smash Bros. Ultimate|Temple]] {{Small|(Battlefield)}} | | [[Temple#Super Smash Bros. Ultimate|Temple]] {{Small|(Battlefield)}} | ||
|style="text-align:left"| "Title Theme - Animal Crossing: Happy Home Designer" | |style="text-align:left"| "Title Theme - Animal Crossing: Happy Home Designer" | ||
| Line 162: | Line 162: | ||
|style="text-align:left"| "{{Remix|SSBB|Ocarina of Time Medley|SSBU}}" | |style="text-align:left"| "{{Remix|SSBB|Ocarina of Time Medley|SSBU}}" | ||
|- | |- | ||
| Jigglypuff Route<br>{{Color|#7db2ac|All Original, All 64}} | | Jigglypuff Route<br/>{{Color|#7db2ac|All Original, All 64}} | ||
| Round 1 | | Round 1 | ||
| {{Stock|SSBU|Jigglypuff|1}} | | {{Stock|SSBU|Jigglypuff|1}} | ||
| Line 170: | Line 170: | ||
|style="text-align:left"| | |style="text-align:left"| | ||
|- | |- | ||
| Ken Route<br>{{Color|#7db2ac|Red-Hot Rivalry}} | | Ken Route<br/>{{Color|#7db2ac|Red-Hot Rivalry}} | ||
| Round 4 | | Round 4 | ||
| {{Stock|SSBU|Ken|1}} | | {{Stock|SSBU|Ken|1}} | ||
| Line 178: | Line 178: | ||
|style="text-align:left"| | |style="text-align:left"| | ||
|- | |- | ||
|rowspan="3"| King Dedede Route<br>{{Color|#7db2ac|Royal Rumble}} | |rowspan="3"| King Dedede Route<br/>{{Color|#7db2ac|Royal Rumble}} | ||
| Round 1 | | Round 1 | ||
| {{Stock|SSBU|King Dedede|1}} | | {{Stock|SSBU|King Dedede|1}} | ||
| Line 198: | Line 198: | ||
|style="text-align:left"| "{{Remix|Original|Calamity Ganon Battle - Second Form|SSBU}}" | |style="text-align:left"| "{{Remix|Original|Calamity Ganon Battle - Second Form|SSBU}}" | ||
|- | |- | ||
| King K. Rool Route<br>{{Color|#7db2ac|Super Heavyweight Class}} | | King K. Rool Route<br/>{{Color|#7db2ac|Super Heavyweight Class}} | ||
| Round 5 | | Round 5 | ||
| {{Stock|SSBU|King K. Rool|1}} | | {{Stock|SSBU|King K. Rool|1}} | ||
| Line 206: | Line 206: | ||
|style="text-align:left"| | |style="text-align:left"| | ||
|- | |- | ||
| Lucario Route<br>{{Color|#7db2ac|Counter Encouters}} | | Lucario Route<br/>{{Color|#7db2ac|Counter Encouters}} | ||
| Round 4 | | Round 4 | ||
| {{Stock|SSBU|Lucario|1}} | | {{Stock|SSBU|Lucario|1}} | ||
| {{Small|Horde Battle}}<br>{{Stock|SSBU|Mii Swordfighter|1}} {{Small|(Isaac Wig and Isaac's Outfit)}}<br>{{Stock|SSBU|Mii Swordfighter|1}} {{Small|([[Yiga Clan Mask]] and [[Yiga Clan Outfit]])}}<br>{{Stock|SSBU|Mii Swordfighter|1}} {{Small|(Takamaru Wig and Takamaru Outfit)}}<br>{{Stock|SSBU|Mii Swordfighter|1}} {{Small|(Dunban Wig and Dunban Outfit)}}<br>{{Stock|SSBU|Mii Swordfighter|1}} {{Small|(Black Knight Helm and Black Knight Armor)}}<br>{{Stock|SSBU|Mii Swordfighter|1}} {{Small|(Vince's Hat and Vince's Outfit)}} | | {{Small|Horde Battle}}<br/>{{Stock|SSBU|Mii Swordfighter|1}} {{Small|(Isaac Wig and Isaac's Outfit)}}<br/>{{Stock|SSBU|Mii Swordfighter|1}} {{Small|([[Yiga Clan Mask]] and [[Yiga Clan Outfit]])}}<br/>{{Stock|SSBU|Mii Swordfighter|1}} {{Small|(Takamaru Wig and Takamaru Outfit)}}<br/>{{Stock|SSBU|Mii Swordfighter|1}} {{Small|(Dunban Wig and Dunban Outfit)}}<br/>{{Stock|SSBU|Mii Swordfighter|1}} {{Small|(Black Knight Helm and Black Knight Armor)}}<br/>{{Stock|SSBU|Mii Swordfighter|1}} {{Small|(Vince's Hat and Vince's Outfit)}} | ||
| {{Ssb|Spear Pillar | | {{Ssb|Spear Pillar | ||
|style="text-align:left"| "{{Remix|Original|Calamity Ganon Battle - Second Form|SSBU}}" | |style="text-align:left"| "{{Remix|Original|Calamity Ganon Battle - Second Form|SSBU}}" | ||
|style="text-align:left"| | |style="text-align:left"| | ||
|- | |- | ||
|rowspan="3"| Luigi Route<br>{{Color|#7db2ac|Luigi's Nightmares}} | |rowspan="3"| Luigi Route<br/>{{Color|#7db2ac|Luigi's Nightmares}} | ||
| Round 1 | | Round 1 | ||
| {{Stock|SSBU|Luigi|1}} | | {{Stock|SSBU|Luigi|1}} | ||
| {{Stock|SSBU|Toon Link|6}}<br>{{Stock|SSBU|Toon Link|6}}<br>{{Stock|SSBU|Toon Link|6}}<br>{{Stock|SSBU|Toon Link|6}} | | {{Stock|SSBU|Toon Link|6}}<br/>{{Stock|SSBU|Toon Link|6}}<br/>{{Stock|SSBU|Toon Link|6}}<br/>{{Stock|SSBU|Toon Link|6}} | ||
| {{Ssb|Luigi's Mansion}} | | {{Ssb|Luigi's Mansion}} | ||
|style="text-align:left"| "Main Theme - Luigi's Mansion {{Small|(Brawl)}}" | |style="text-align:left"| "Main Theme - Luigi's Mansion {{Small|(Brawl)}}" | ||
| Line 224: | Line 224: | ||
| Round 4 | | Round 4 | ||
| {{Stock|SSBU|Luigi|1}} | | {{Stock|SSBU|Luigi|1}} | ||
| {{Small|Horde Battle}}<br>{{Stock|SSBU|Mii Brawler|1}} {{Small|(Hockey Mask and SSB T-Shirt)}}<br>{{Stock|SSBU|Mii Swordfighter|1}} {{Small|(Magic Hat and Ashley Outfit)}}<br>{{Stock|SSBU|Mii Brawler|1}} {{Small|(Devil Horns and Vampire Garb)}}<br>{{Stock|SSBU|Mii Gunner|1}} {{Small|(Bear Hat and Bear Suit)}}<br>{{Stock|SSBU|Mii Brawler|1}} {{Small|(King K. Rool Hat and King K. Rool Outfit)}}<br>{{Stock|SSBU|Mii Swordfighter|1}} {{Small|([[Majora's Mask (Item)|Majora's Mask]] and Standard Outfit)}} | | {{Small|Horde Battle}}<br/>{{Stock|SSBU|Mii Brawler|1}} {{Small|(Hockey Mask and SSB T-Shirt)}}<br/>{{Stock|SSBU|Mii Swordfighter|1}} {{Small|(Magic Hat and Ashley Outfit)}}<br/>{{Stock|SSBU|Mii Brawler|1}} {{Small|(Devil Horns and Vampire Garb)}}<br/>{{Stock|SSBU|Mii Gunner|1}} {{Small|(Bear Hat and Bear Suit)}}<br/>{{Stock|SSBU|Mii Brawler|1}} {{Small|(King K. Rool Hat and King K. Rool Outfit)}}<br/>{{Stock|SSBU|Mii Swordfighter|1}} {{Small|([[Majora's Mask (Item)|Majora's Mask]] and Standard Outfit)}} | ||
| {{Ssb|Luigi's Mansion}} {{Small|(Battlefield)}} | | {{Ssb|Luigi's Mansion}} {{Small|(Battlefield)}} | ||
|style="text-align:left"| "Main Theme - Luigi's Mansion {{Small|(Brawl)}}" | |style="text-align:left"| "Main Theme - Luigi's Mansion {{Small|(Brawl)}}" | ||
| Line 234: | Line 234: | ||
|style="text-align:left"| "{{Remix|SSBU|Death Mountain|SSBU}}" | |style="text-align:left"| "{{Remix|SSBU|Death Mountain|SSBU}}" | ||
|- | |- | ||
| Mario Route<br>{{Color|#7db2ac|Let's-a Go!}} | | Mario Route<br/>{{Color|#7db2ac|Let's-a Go!}} | ||
| Round 1 | | Round 1 | ||
| {{Stock|SSBU|Mario|1}} | | {{Stock|SSBU|Mario|1}} | ||
| {{Stock|SSBU|Link|1}}<br>{{Stock|SSBU|Zelda|1}} | | {{Stock|SSBU|Link|1}}<br/>{{Stock|SSBU|Zelda|1}} | ||
| [[Great Plateau Tower#Super Smash Bros. Ultimate|Great Plateau Tower]] | | [[Great Plateau Tower#Super Smash Bros. Ultimate|Great Plateau Tower]] | ||
|style="text-align:left"| "{{Remix|SSBB|Overworld Theme - The Legend of Zelda (Brawl)|SSBU}}" | |style="text-align:left"| "{{Remix|SSBB|Overworld Theme - The Legend of Zelda (Brawl)|SSBU}}" | ||
|style="text-align:left"| The choice of Link and Zelda as Mario's first pair of opponents, the Great Plateau Tower Stage (which is known as the {{Romanize|始まりの塔|Hajimari no Tō|Tower of the Beginning|2}} in Japanese), and the music being from the first {{TLoZ}} may be a nod toward the shared origins of the {{Smw|Super Mario (series)|''Super Mario''}} and {{TLoZ|Series}}. | |style="text-align:left"| The choice of Link and Zelda as Mario's first pair of opponents, the Great Plateau Tower Stage (which is known as the {{Romanize|始まりの塔|Hajimari no Tō|Tower of the Beginning|2}} in Japanese), and the music being from the first {{TLoZ}} may be a nod toward the shared origins of the {{Smw|Super Mario (series)|''Super Mario''}} and {{TLoZ|Series}}. | ||
|- | |- | ||
|rowspan="2"| Marth Route<br>{{Color|#7db2ac|A Kingdom of Dragons}} | |rowspan="2"| Marth Route<br/>{{Color|#7db2ac|A Kingdom of Dragons}} | ||
| Round 3 | | Round 3 | ||
| {{Stock|SSBU|Marth|1}} | | {{Stock|SSBU|Marth|1}} | ||
| Line 256: | Line 256: | ||
|style="text-align:left"| "Lords-Showdown" | |style="text-align:left"| "Lords-Showdown" | ||
|- style="background:#163d5f" | |- style="background:#163d5f" | ||
| Meta Knight Route<br>{{Color|#7db2ac|Two Sides of the Same Coin}} | | Meta Knight Route<br/>{{Color|#7db2ac|Two Sides of the Same Coin}} | ||
| Round 1 | | Round 1 | ||
| {{Stock|SSBU|Meta Knight|1}} | | {{Stock|SSBU|Meta Knight|1}} | ||
| {{Small|Free-for-all}}<br>{{Stock|SSBU|Link|1}}<br>{{Stock|SSBU|Link|8}} | | {{Small|Free-for-all}}<br/>{{Stock|SSBU|Link|1}}<br/>{{Stock|SSBU|Link|8}} | ||
| [[Bridge of Eldin#Super Smash Bros. Ultimate|Bridge of Eldin]] | | [[Bridge of Eldin#Super Smash Bros. Ultimate|Bridge of Eldin]] | ||
|style="text-align:left"| "{{Remix|SSBB|Hidden Mountain & Forest|SSBU}}" | |style="text-align:left"| "{{Remix|SSBB|Hidden Mountain & Forest|SSBU}}" | ||
|style="text-align:left"| | |style="text-align:left"| | ||
|- style="background:#17456e" | |- style="background:#17456e" | ||
|rowspan="2"| Ness Route<br>{{Color|#7db2ac|Home to Onett}} | |rowspan="2"| Ness Route<br/>{{Color|#7db2ac|Home to Onett}} | ||
| Round 4 | | Round 4 | ||
| {{Stock|SSBU|Ness|1}} | | {{Stock|SSBU|Ness|1}} | ||
| Line 274: | Line 274: | ||
| Round 5 | | Round 5 | ||
| {{Stock|SSBU|Ness|1}} | | {{Stock|SSBU|Ness|1}} | ||
| {{Stock|SSBU|Toon Link|6}}<br>{{Stock|SSBU|Toon Link|6}} | | {{Stock|SSBU|Toon Link|6}}<br/>{{Stock|SSBU|Toon Link|6}} | ||
| {{Ssb|Luigi's Mansion}} | | {{Ssb|Luigi's Mansion}} | ||
|style="text-align:left"| "Unfounded Revenge / Smashing Song of Praise" | |style="text-align:left"| "Unfounded Revenge / Smashing Song of Praise" | ||
|- | |- | ||
| PAC-MAN Route<br>{{Color|#7db2ac|Ageless Classic}} | | PAC-MAN Route<br/>{{Color|#7db2ac|Ageless Classic}} | ||
| Round 4 | | Round 4 | ||
| {{Stock|SSBU|PAC-MAN|1}} | | {{Stock|SSBU|PAC-MAN|1}} | ||
| {{Stock|SSBU|Young Link|1}}<br>{{Stock|SSBU|Samus|1}}<br>{{Stock|SSBU|Simon|1}}<br>{{Stock|SSBU|Pit|1}} | | {{Stock|SSBU|Young Link|1}}<br/>{{Stock|SSBU|Samus|1}}<br/>{{Stock|SSBU|Simon|1}}<br/>{{Stock|SSBU|Pit|1}} | ||
| [[Hyrule Castle#Super Smash Bros. Ultimate|Hyrule Castle]] | | [[Hyrule Castle#Super Smash Bros. Ultimate|Hyrule Castle]] | ||
|style="text-align:left"| "{{Remix|Original|Overworld Theme - The Legend of Zelda|SSBU}}" | |style="text-align:left"| "{{Remix|Original|Overworld Theme - The Legend of Zelda|SSBU}}" | ||
|style="text-align:left"| | |style="text-align:left"| | ||
|- | |- | ||
| Palutena Route<br>{{Color|#7db2ac|A Little Divine Intervention}} | | Palutena Route<br/>{{Color|#7db2ac|A Little Divine Intervention}} | ||
| Round 1 | | Round 1 | ||
| {{Stock|SSBU|Palutena|1}} | | {{Stock|SSBU|Palutena|1}} | ||
| {{Stock|SSBU|Link|1}}<br>{{Stock|SSBU|Zelda|1}} | | {{Stock|SSBU|Link|1}}<br/>{{Stock|SSBU|Zelda|1}} | ||
| [[Great Plateau Tower#Super Smash Bros. Ultimate|Great Plateau Tower]] | | [[Great Plateau Tower#Super Smash Bros. Ultimate|Great Plateau Tower]] | ||
|style="text-align:left"| "Overworld" | |style="text-align:left"| "Overworld" | ||
|style="text-align:left"| | |style="text-align:left"| | ||
|- | |- | ||
| Peach Route<br>{{Color|#7db2ac|No Damsel in Distress}} | | Peach Route<br/>{{Color|#7db2ac|No Damsel in Distress}} | ||
| Round 2 | | Round 2 | ||
| {{Stock|SSBU|Peach|1}} | | {{Stock|SSBU|Peach|1}} | ||
| Line 302: | Line 302: | ||
|style="text-align:left"| | |style="text-align:left"| | ||
|- | |- | ||
| Pichu Route<br>{{Color|#7db2ac|Lightweight Fracas}} | | Pichu Route<br/>{{Color|#7db2ac|Lightweight Fracas}} | ||
| Round 5 | | Round 5 | ||
| {{Stock|SSBU|Pichu|1}} | | {{Stock|SSBU|Pichu|1}} | ||
| {{Small|Free-for-all}}<br>{{Stock|SSBU|Kirby|1}}<br>{{Stock|SSBU|Meta Knight|1}} | | {{Small|Free-for-all}}<br/>{{Stock|SSBU|Kirby|1}}<br/>{{Stock|SSBU|Meta Knight|1}} | ||
| [[Skyloft#Super Smash Bros. Ultimate|Skyloft]] | | [[Skyloft#Super Smash Bros. Ultimate|Skyloft]] | ||
|style="text-align:left"| "Butter Building {{Small|(for 3DS / Wii U)}}" | |style="text-align:left"| "Butter Building {{Small|(for 3DS / Wii U)}}" | ||
|style="text-align:left"| | |style="text-align:left"| | ||
|- | |- | ||
| Pit Route<br>{{Color|#7db2ac|Fighting for the Goddess!}} | | Pit Route<br/>{{Color|#7db2ac|Fighting for the Goddess!}} | ||
| Round 3 | | Round 3 | ||
| {{Stock|SSBU|Pit|1}} | | {{Stock|SSBU|Pit|1}} | ||
| Line 318: | Line 318: | ||
|style="text-align:left"| | |style="text-align:left"| | ||
|- | |- | ||
| Roy Route<br>{{Color|#7db2ac|A Journey of Swords}} | | Roy Route<br/>{{Color|#7db2ac|A Journey of Swords}} | ||
| Round 3 | | Round 3 | ||
| {{Stock|SSBU|Roy|1}} | | {{Stock|SSBU|Roy|1}} | ||
| Line 326: | Line 326: | ||
|style="text-align:left"| | |style="text-align:left"| | ||
|- | |- | ||
| Simon Route<br>{{Color|#7db2ac|Smash-vania}} | | Simon Route<br/>{{Color|#7db2ac|Smash-vania}} | ||
| Round 5 | | Round 5 | ||
| {{Stock|SSBU|Simon|1}} | | {{Stock|SSBU|Simon|1}} | ||
| {{Stock|SSBU|Bowser|1}}<br>{{Stock|SSBU|Ganondorf|1}}<br>{{Stock|SSBU|Mewtwo|1}} | | {{Stock|SSBU|Bowser|1}}<br/>{{Stock|SSBU|Ganondorf|1}}<br/>{{Stock|SSBU|Mewtwo|1}} | ||
| {{Ssb|Reset Bomb Forest}} | | {{Ssb|Reset Bomb Forest}} | ||
|style="text-align:left"| "Simon Belmont Theme (The Arcade)" | |style="text-align:left"| "Simon Belmont Theme (The Arcade)" | ||
|style="text-align:left"| | |style="text-align:left"| | ||
|- | |- | ||
| Sonic Route<br>{{Color|#7db2ac|At the Speed of Sound}} | | Sonic Route<br/>{{Color|#7db2ac|At the Speed of Sound}} | ||
| Round 5 | | Round 5 | ||
| {{Stock|SSBU|Sonic|1}} | | {{Stock|SSBU|Sonic|1}} | ||
| Line 342: | Line 342: | ||
|style="text-align:left"| | |style="text-align:left"| | ||
|- | |- | ||
| Snake Route<br>{{Color|#7db2ac|Weapons and Equipment OSP}} | | Snake Route<br/>{{Color|#7db2ac|Weapons and Equipment OSP}} | ||
| Round 4 | | Round 4 | ||
| {{Stock|SSBU|Snake|1}} | | {{Stock|SSBU|Snake|1}} | ||
| Line 350: | Line 350: | ||
|style="text-align:left"| | |style="text-align:left"| | ||
|- | |- | ||
| Wario Route<br>{{Color|#7db2ac|I'm-a Gonna Win!}} | | Wario Route<br/>{{Color|#7db2ac|I'm-a Gonna Win!}} | ||
| Round 1 | | Round 1 | ||
| {{Stock|SSBU|Wario|1}} | | {{Stock|SSBU|Wario|1}} | ||
| Line 358: | Line 358: | ||
|style="text-align:left"| | |style="text-align:left"| | ||
|- | |- | ||
| Wolf Route<br>{{Color|#7db2ac|Reunited Roster}} | | Wolf Route<br/>{{Color|#7db2ac|Reunited Roster}} | ||
| Round 2 | | Round 2 | ||
| {{Stock|SSBU|Wolf|1}} | | {{Stock|SSBU|Wolf|1}} | ||
| Line 366: | Line 366: | ||
|style="text-align:left"| All of Wolf's opponents are Fighters who appeared in {{SSB|-}} titles prior to {{SSBU}} but did not return in at least one subsequent title. Young Link appeared in {{SSBM}} and was not present in {{SSBB}} nor {{SSB4}}. | |style="text-align:left"| All of Wolf's opponents are Fighters who appeared in {{SSB|-}} titles prior to {{SSBU}} but did not return in at least one subsequent title. Young Link appeared in {{SSBM}} and was not present in {{SSBB}} nor {{SSB4}}. | ||
|- | |- | ||
| Zero Suit Samus Route<br>{{Color|#7db2ac|Grapplers! Whips! Claws!}} | | Zero Suit Samus Route<br/>{{Color|#7db2ac|Grapplers! Whips! Claws!}} | ||
| Round 1 | | Round 1 | ||
| {{Stock|SSBU|Zero Suit Samus|1}} | | {{Stock|SSBU|Zero Suit Samus|1}} | ||
| {{Stock|SSBU|Young Link|1}}<br>{{Stock|SSBU|Toon Link|1}} | | {{Stock|SSBU|Young Link|1}}<br/>{{Stock|SSBU|Toon Link|1}} | ||
| [[Skyloft#Super Smash Bros. Ultimate|Skyloft]] | | [[Skyloft#Super Smash Bros. Ultimate|Skyloft]] | ||
|style="text-align:left"| "{{Remix|SSB4|Dark World (for 3DS / Wii U)|SSBU}}" | |style="text-align:left"| "{{Remix|SSB4|Dark World (for 3DS / Wii U)|SSBU}}" | ||
Revision as of 06:35, 30 January 2022
- See SmashWiki's article on Classic Mode for more information.
Template:Mode Classic Mode is a recurring Mode in The Legend of Zelda series.[1]
Overview
Super Smash Bros.
The original Super Smash Bros.'s classic mode is simply called 1P Game. All fighters go through the same predetermined set of battles. Link always appears as the first opponent on the Hyrule Castle stage and is the easiest to defeat.
Super Smash Bros. Melee
Super Smash Bros. Brawl
Super Smash Bros. for Nintendo 3DS / Wii U
Super Smash Bros. Ultimate
Each Fighter is given their own route in Classic Mode in Super Smash Bros. Ultimate. These routes are named and thematically based on various factors, such as the Fighters themselves as well as the Stages, opponents, and special conditions they face.
Link Route
[[A Quest to Seal the Darkness|A Quest to Seal the Darkness]]
Ganondorf Route
[[Encroaching Darkness|Encroaching Darkness]]
Young Link Route
[[Hyrule Smash!|Hyrule Smash!]]
Sheik Route
[[Masquerade|Masquerade]]
Toon Link Route
[[The Teamwork of Courage|The Teamwork of Courage]]
Zelda Route
[[Wisdom Prevails|Wisdom Prevails]]
Classic Mode Routes with The Legend of Zelda Content
| Route | Round | Party | Opponent(s) | Stage | Theme | Notes |
|---|---|---|---|---|---|---|
| Bayonetta Route The Requiem of Fallen Wings |
Round 4 | Skyloft | "Time For The Climax!" | |||
| Bowser Jr. Route Mama Peach, Where Are You? |
Round 4 | Hyrule Castle | "Saria's Theme" | |||
| Captain Falcon Route Up Close and Personal |
Round 2 | Gerudo Valley | "Gerudo Valley" | The title of Captain Falcon's Route alludes to the fact that all of the opponents that he faces are close-range Fighters. | ||
| Daisy Route Sarasaland Represent! |
Round 1 | Temple | "Ocarina of Time Medley" | |||
| Round 5 | Horde Battle |
Peach's Castle | "Underwater Theme - Super Mario Bros." | |||
| Dark Samus Route The Great Posison Given Form |
Round 1 | Hyrule Castle | "Hyrule Castle (Outside)" | |||
| Dark Pit Route Created Warriors |
Round 3 | Temple | "Great Temple / Temple" | |||
| Diddy Kong Route Hey, Little Buddy! |
Round 3 | Unova Pokémon League | "Death Mountain" | |||
| Falco Route Soar above the Darkness |
Round 3 | Bridge of Eldin | "Dark World (for 3DS / Wii U)" | |||
| Ice Climbers Route Duos for Days |
Round 1 | Great Plateau Tower | "Main Theme - The Legend of Zelda: Breath of the Wild" | |||
| Ike Route The Blac-Clad Warriors |
Round 6 | Bridge of Eldin | "Hyrule Castle (Outside)" | |||
| Incineroar Route Burning Pro Wrestling Spirit! |
Round 2 | Boxing Ring | "Molgera" | |||
| Inkling Route An Inkredible Journey |
Round 1 | Yoshi's Island (Melee) | "Splattack!" | |||
| Isabelle Route Best In Show |
Round 3 | Free-for-all |
Temple (Battlefield) | "Title Theme - Animal Crossing: Happy Home Designer" | ||
| Round 6 | Gerudo Valley | "Ocarina of Time Medley" | ||||
| Jigglypuff Route All Original, All 64 |
Round 1 | Hyrule Castle | "Overworld Theme - The Legend of Zelda (64)" | |||
| Ken Route Red-Hot Rivalry |
Round 4 | Temple | "Great Temple / Temple" | |||
| King Dedede Route Royal Rumble |
Round 1 | Pirate Ship | "Gang-Plank Galleon" | |||
| Round 3 | Hyrule Castle | "Overworld Theme - The Legend of Zelda (64)" | ||||
| Round 6 | Bridge of Eldin | "Calamity Ganon Battle - Second Form" | ||||
| King K. Rool Route Super Heavyweight Class |
Round 5 | Bridge of Eldin | "Calamity Ganon Battle - Second Form" | |||
| Lucario Route Counter Encouters |
Round 4 | Horde Battle |
Spear Pillar | "Calamity Ganon Battle - Second Form" | ||
| Luigi Route Luigi's Nightmares |
Round 1 | Luigi's Mansion | "Main Theme - Luigi's Mansion (Brawl)" | |||
| Round 4 | Horde Battle |
Luigi's Mansion (Battlefield) | "Main Theme - Luigi's Mansion (Brawl)" | |||
| Round 5 | Midgar | "Death Mountain" | ||||
| Mario Route Let's-a Go! |
Round 1 | Great Plateau Tower | "Overworld Theme - The Legend of Zelda (Brawl)" | The choice of Link and Zelda as Mario's first pair of opponents, the Great Plateau Tower Stage (which is known as the 始まりの塔 (Tower of the Beginning) in Japanese), and the music being from the first The Legend of Zelda may be a nod toward the shared origins of the Super Mario and The Legend of Zelda series. | ||
| Marth Route A Kingdom of Dragons |
Round 3 | Bridge of Eldin | "Fire Emblem: Mystery of the Emblem Medley" | |||
| Round 5 | Gerudo Valley | "Lords-Showdown" | ||||
| Meta Knight Route Two Sides of the Same Coin |
Round 1 | Free-for-all |
Bridge of Eldin | "Hidden Mountain & Forest" | ||
| Ness Route Home to Onett |
Round 4 | Gerudo Valley | "Bein' Friend" | |||
| Round 5 | Luigi's Mansion | "Unfounded Revenge / Smashing Song of Praise" | ||||
| PAC-MAN Route Ageless Classic |
Round 4 | Hyrule Castle | "Overworld Theme - The Legend of Zelda" | |||
| Palutena Route A Little Divine Intervention |
Round 1 | Great Plateau Tower | "Overworld" | |||
| Peach Route No Damsel in Distress |
Round 2 | Mushroomy Kingdom | "Dark World (for 3DS / Wii U)" | |||
| Pichu Route Lightweight Fracas |
Round 5 | Free-for-all |
Skyloft | "Butter Building (for 3DS / Wii U)" | ||
| Pit Route Fighting for the Goddess! |
Round 3 | Gerudo Valley | "Magnus's Theme" | |||
| Roy Route A Journey of Swords |
Round 3 | Skyloft | "Ballad of the Goddess" | |||
| Simon Route Smash-vania |
Round 5 | Reset Bomb Forest | "Simon Belmont Theme (The Arcade)" | |||
| Sonic Route At the Speed of Sound |
Round 5 | Mushroomy Kingdom | "Seven Rings in Hand" | |||
| Snake Route Weapons and Equipment OSP |
Round 4 | Jungle Japes | "Snake Eater" | |||
| Wario Route I'm-a Gonna Win! |
Round 1 | Coliseum | "Death Mountain" | |||
| Wolf Route Reunited Roster |
Round 2 | Great Bay | "Overworld Theme - The Legend of Zelda (Melee)" | All of Wolf's opponents are Fighters who appeared in Super Smash Bros. titles prior to Super Smash Bros. Ultimate but did not return in at least one subsequent title. Young Link appeared in Super Smash Bros. Melee and was not present in Super Smash Bros. Brawl nor Super Smash Bros. for Nintendo 3DS / Wii U. | ||
| Zero Suit Samus Route Grapplers! Whips! Claws! |
Round 1 | Skyloft | "Dark World (for 3DS / Wii U)" |
Nomenclature
| Language | Name | Meaning | |
|---|---|---|---|
| Japanese | 勝ちあがり乱闘 (Kachi Agari Rantō) (SSBU) | Winning Brawl | |
Gallery
-
The icon for Classic Mode from Super Smash Bros. Ultimate
-
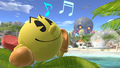
PAC-MAN's completion image, featuring Great Bay
-
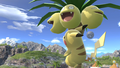
Pikachu's completion image, featuring Great Bay
-
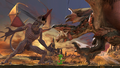
Ridley's completion image, featuring the Bridge of Eldin
-
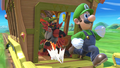
Luigi's completion image, featuring the Spirit Train
-
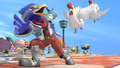
Falco's completion image, featuring Cuccos
-
Captain Falcon's completion image, featuring Zelda
-
King Dedede's completion image, featuring Ganondorf
-
Greninja's completion image, featuring the Pirate Ship from Super Smash Bros. Ultimate


