Weather: Difference between revisions
No edit summary |
IcyLeoDragon (talk | contribs) (TotK exists now) Tags: Mobile edit Mobile web edit |
||
| (7 intermediate revisions by 5 users not shown) | |||
| Line 1: | Line 1: | ||
{{Infobox Mechanic | {{Infobox Mechanic | ||
|image= File:BotW | |image= File:BotW Rain.png | ||
|caption= | |caption= {{Term|BotW|Rain}} in {{BotW|-}} | ||
|pronunciation= | |pronunciation= | ||
|game= TWW, BotW | |game= TWW, BotW, TotK | ||
|other= | |other= | ||
|purpose= | |purpose= | ||
|related= | |related= | ||
}} | }} | ||
{{Term/Store|Weather||Series, BotW}} is a recurring mechanic in {{TLoZ|Series}}.<ref>{{Cite Book|quote= |book= E |publisher= |page= 260}}</ref><ref>{{Cite Guide|quote= |game= BotW |publisher= Piggyback |page= 12}}</ref> | {{Term/Store|Weather||Series, TWW, TWWHD, BotW, TotK}} is a recurring mechanic in {{TLoZ|Series}}.<ref>{{Cite Book|quote= |book= E |publisher= |page= 260 {{Exp Game|TWW, TWWHD}}}}</ref><ref>{{Cite Guide|quote= |game= BotW |publisher= Piggyback |page= 12}}</ref><ref>{{Cite Guide|quote= |game= TotK |publisher= Piggyback |page= 12}}</ref> | ||
==Overview== | ==Overview== | ||
| Line 16: | Line 16: | ||
==={{BotW|-}}=== | ==={{BotW|-}}=== | ||
[[File:BotW Field Map Area.png|left|400px|thumb|Map used for climates. Check "Field Map Areas" on the [https://objmap.zeldamods.org/#/map/z2,0,8 object map] for more details]] | [[File:BotW Field Map Area.png|left|400px|thumb|Map used for climates. Check "Field Map Areas" on the [https://objmap.zeldamods.org/#/map/z2,0,8 object map] for more details]] | ||
In {{BotW}}, several different types of {{Term|BotW|Weather}} can be encountered throughout {{Term|BotW|Hyrule|link}}. The | In {{BotW}}, several different types of {{Term|BotW|Weather}} can be encountered throughout {{Term|BotW|Hyrule|link}}. The {{Term|BotW|Weather}} changes dynamically, with most locations subject to clear or overcast {{Term|BotW|Weather}} as well as {{Term|BotW|Rain|link}} and {{Plural|BotW|Thunderstorm|link}}. At lower temperatures (especially at higher elevations), {{Term|BotW|Rain|link}} will turn into {{Term|BotW|Snow|link}}. | ||
The current {{Term|BotW|Weather}} is indicated by a forecast to the left of the {{Term|BotW|Minimap|link}}. The {{Term|BotW|Sheikah Slate|link}}'s {{Term|BotW|Map|link}} also displays the current {{Term|BotW|Weather}}. Every four in-game hours, the {{Term|BotW|Weather}} of a given area will change. | |||
While not part of the dynamic weather system, certain areas may have {{Plural|BotW|Wind|link}} or {{Plural|BotW|Raging Wind|link}}. Similarly, colder areas are known as {{Plural|BotW|Freezing Climate|link}}, where {{Term|BotW|Snow|link}} and {{Term|BotW|Cold Water|link}} is common. {{Term|BotW|Eldin (Region)|link}} and the {{Term|BotW|Gerudo Desert|link}} both suffer from excessive {{Term|BotW|Heat|link}}, which is caused by their {{Term|BotW|Scorching Climate|link}} and {{Plural|BotW|Extremely Hot Zone|link}}, respectively. Portions of the {{Term|BotW|Gerudo Desert}} also feature {{Plural|BotW|Sandstorm|link}}. | |||
{{Term|BotW|Hyrule}} is divided into 94 small "map areas" that are linked to one of the twenty predefined "climates." The name of {{Term|BotW|Link}}'s current map area can be seen in the {{Term|BotW|System|link}} menu while {{Term|BotW|Saving|link}}. Climates have different appearance rates for each {{Term|BotW|Weather}} type and may be shared across different map areas. The following table links the unique identifier of each map area to its associated climate.<ref>{{Cite Internal|quote= AreaData.sbyml |game= BotW |system= Nintendo Switch |version= 1.0.0|country= }}</ref> | |||
{| class="wikitable mw-collapsible mw-collapsed" data-expandtext="Show Area-Climate linking" data-collapsetext="Hide Area-Climate linking" style="width: 100%; text-align: center" | {| class="wikitable mw-collapsible mw-collapsed" data-expandtext="Show Area-Climate linking" data-collapsetext="Hide Area-Climate linking" style="width: 100%; text-align: center" | ||
|+ | |+ | ||
! Map Area ID || Map Area Name (Internal) || Climate Name (Internal) || Climate ID | |||
|- | |||
| 0 || GerudoHighlands || GerudoFrostClimate || 17 | | 0 || GerudoHighlands || GerudoFrostClimate || 17 | ||
|- | |- | ||
| Line 213: | Line 217: | ||
|- | |- | ||
|} | |} | ||
Each of the twenty climates multiple parameters, the most important ones defining the odds for each weather to appear, and the temperatures to set for each height in the map area. Here's the list of the most important parameters : | |||
* <code>WeatherBlueskyeRate</code> : odds, in %, to get the blue sky weather. | |||
* <code>WeatherCloudyRate</code> : odds, in %, to get the cloudy weather. | |||
* <code>WeatherRainRate</code> : odds, in %, to get either {{Term|BotW|Rain|link}} or {{Term|BotW|Snow|link}} for colder temperatures. | |||
* <code>WeatherHeavyRainRate</code> : odds, in %, to get either intense rain or intense snow for colder temperatures. | |||
* <code>WeatherStormRate</code> : odds, in %, to get a {{Term|BotW|Thunderstorm|link}}. | |||
* <code>ClimateTemperatureDay_1000</code> : air {{Term|BotW|Temperature|link}} during the day at more than 1000 meters high (in °C) | |||
* <code>ClimateTemperatureDay_0900</code> air temperature during the day between 900 and 1000 meters high (in °C) | |||
* [...] | |||
* <code>ClimateTemperatureDay_0000</code> air temperature during the day between 0 and 100 meters high (in °C) | |||
* <code>ClimateTemperatureNight_1000</code> : air {{Term|BotW|Temperature|link}} during the night at more than 1000 meters high (in °C) | |||
* [...] | |||
* <code>ClimateTemperatureNight_0000</code> : air temperature during the night between 0 and 100 meters high (in °C) | |||
* <code>IgnitedLevel</code> : <code>1</code> if the air is burning hot, <code>2</code> if the air is even hotter. <code>0</code> otherwise. | |||
* <code>PaletteSetSelect</code> : the sky color theme to apply. | |||
==={{TotK|-}}=== | |||
{{Stub|TotK}} | |||
Several {{Term|TotK|Weather}} conditions reappear in {{TotK}}. | |||
==Nomenclature== | ==Nomenclature== | ||
| Line 220: | Line 245: | ||
<gallery> | <gallery> | ||
File:BotW Weather Forecast Icon.png|The {{Term|BotW|Sheikah Slate}}'s {{Term|BotW|Weather}} forecast from {{BotW|-}} | File:BotW Weather Forecast Icon.png|The {{Term|BotW|Sheikah Slate}}'s {{Term|BotW|Weather}} forecast from {{BotW|-}} | ||
File:BotW Sunny Weather Icon.png|Icon for sunny {{Term|BotW|Weather}} from {{BotW|-}} | |||
File:BotW Cloudy Weather Icon.png|Icon for cloudy {{Term|BotW|Weather}} from {{BotW|-}} | File:BotW Cloudy Weather Icon.png|Icon for cloudy {{Term|BotW|Weather}} from {{BotW|-}} | ||
File:BotW | File:BotW Thunderstorm.png|A {{Term|BotW|Thunderstorm}} from {{BotW|-}} | ||
File:BotW | File:BotW Sandstorm.png|A {{Term|BotW|Sandstorm}} from {{BotW|-}} | ||
File: | File:TotK Weather Icon.png|The {{Term|TotK|Weather}} gauge from {{TotK|-}} | ||
</gallery> | </gallery> | ||
| Line 230: | Line 256: | ||
{{Categories | {{Categories | ||
|Weather | |Weather | ||
|mechanics= TWW, TWWHD, BotW | |mechanics= TWW, TWWHD, BotW, TotK | ||
}} | }} | ||
Latest revision as of 16:10, 3 November 2023
Weather is a recurring mechanic in The Legend of Zelda series.[1][2][3]
Overview
The Wind Waker
Breath of the Wild

In Breath of the Wild, several different types of Weather can be encountered throughout Hyrule Kingdom. The Weather changes dynamically, with most locations subject to clear or overcast Weather as well as Rain and Thunderstorms. At lower temperatures (especially at higher elevations), Rain will turn into Snow.
The current Weather is indicated by a forecast to the left of the Mini-Map. The Sheikah Slate's Map also displays the current Weather. Every four in-game hours, the Weather of a given area will change.
While not part of the dynamic weather system, certain areas may have Winds or Raging Winds. Similarly, colder areas are known as Freezing Climates, where Snow and Cold Water is common. Eldin and the Gerudo Desert both suffer from excessive Heat, which is caused by their Scorching Climate and Extremely Hot Zones, respectively. Portions of the Gerudo Desert also feature Sandstorm.
Hyrule Kingdom is divided into 94 small "map areas" that are linked to one of the twenty predefined "climates." The name of Link's current map area can be seen in the System menu while Saving. Climates have different appearance rates for each Weather type and may be shared across different map areas. The following table links the unique identifier of each map area to its associated climate.[4]
| Map Area ID | Map Area Name (Internal) | Climate Name (Internal) | Climate ID |
|---|---|---|---|
| 0 | GerudoHighlands | GerudoFrostClimate | 17 |
| 1 | WestHateru | HateruPlainClimate | 10 |
| 2 | TamulPlateau | TamourPlainClimate | 8 |
| 3 | HeburaMountains | HebraFrostClimate | 2 |
| 4 | GerudoHighlands | GerudoPlateauClimate | 6 |
| 5 | HeburaMountains | HebraFrostClimate | 2 |
| 6 | CentralHyrule | HyrulePlainClimate | 0 |
| 7 | EldinCanyon | EldinClimateLv0 | 7 |
| 8 | HyruleForest | LostWoodClimate | 16 |
| 9 | HeburaMountains | HebraFrostClimate | 2 |
| 10 | HyliaLake | HyrulePlainClimate | 0 |
| 11 | LanayruWaterSources | HateruPlainClimate | 10 |
| 12 | CentralHyrule | HyrulePlainClimate | 0 |
| 13 | EastHateru | HateruPlainClimate | 10 |
| 14 | HyruleForest | KorogForest | 18 |
| 15 | EldinMountains | NorthHyrulePlainClimate | 1 |
| 16 | HyruleForest | NorthHyrulePlainClimate | 1 |
| 17 | EldinCanyon | HyrulePlainClimate | 0 |
| 18 | TabantaFrontier | TabantaAridClimate | 3 |
| 19 | WestHateru | HateruPlainClimate | 10 |
| 20 | TamulOutback | TamourPlainClimate | 8 |
| 21 | GerudoDesert | GerudoDesertClimateLv2 | 19 |
| 22 | TamulOutback | TamourPlainClimate | 8 |
| 23 | TabantaFrontier | TabantaAridClimate | 3 |
| 24 | FironeGrassland | HateruPlainClimate | 10 |
| 25 | FironeGrassland | HyrulePlainClimate | 0 |
| 26 | CentralHyrule | NorthHyrulePlainClimate | 1 |
| 27 | TabantaFrontier | HyrulePlainClimate | 0 |
| 28 | HateruSea | SouthHateruHumidTemperateClimate | 12 |
| 29 | FironeGrassland | FiloneSubtropicalClimate | 11 |
| 30 | TamulSea | TamourPlainClimate | 8 |
| 31 | TabantaFrontier | HebraFrostClimate | 2 |
| 32 | CentralHyrule | HyrulePlainClimate | 0 |
| 33 | TamulPlateau | TamourPlainClimate | 8 |
| 34 | LanayruWaterSources | ZoraTemperateClimate | 9 |
| 35 | CentralHyrule | HyrulePlainClimate | 0 |
| 36 | FironeGrassland | HateruPlainClimate | 10 |
| 37 | HeburaMountains | TabantaAridClimate | 3 |
| 38 | LiveMountain | FrostClimate | 4 |
| 39 | HeburaMountains | HebraFrostClimate | 2 |
| 40 | GerudoDesert | GerudoDesertClimateLv2 | 19 |
| 41 | CentralHyrule | HyrulePlainClimate | 0 |
| 42 | TabantaFrontier | TabantaAridClimate | 3 |
| 43 | HateruSea | HateruPlainClimate | 10 |
| 44 | DeathMountain | EldinClimateLv2 | 14 |
| 45 | GerudoHighlands | GerudoFrostClimate | 17 |
| 46 | CentralHyrule | HyrulePlainClimate | 0 |
| 47 | CentralHyrule | HyrulePlainClimate | 0 |
| 48 | TabantaFrontier | HebraFrostClimate | 2 |
| 49 | WestHateru | HateruPlainClimate | 10 |
| 50 | CentralHyrule | HyrulePlainClimate | 0 |
| 51 | EldinMountains | EldinClimateLv0 | 7 |
| 52 | EldinMountains | NorthHyrulePlainClimate | 1 |
| 53 | EldinMountains | EldinClimateLv0 | 7 |
| 54 | TamulSea | TamourPlainClimate | 8 |
| 55 | FironeSea | HateruPlainClimate | 10 |
| 56 | TamulPlateau | ZoraTemperateClimate | 9 |
| 57 | LanayruSea | HateruPlainClimate | 10 |
| 58 | HateruSea | SouthHateruHumidTemperateClimate | 12 |
| 59 | WestHateru | FiloneSubtropicalClimate | 11 |
| 60 | HyruleForest | NorthHyrulePlainClimate | 1 |
| 61 | EastHateru | SouthHateruHumidTemperateClimate | 12 |
| 62 | EastHateru | SouthHateruHumidTemperateClimate | 12 |
| 63 | HyruleHill | HyrulePlainClimate | 0 |
| 64 | HyruleHill | HyrulePlainClimate | 0 |
| 65 | LanayruWetlands | HyrulePlainClimate | 0 |
| 66 | EldinCanyon | EldinClimateLv1 | 13 |
| 67 | EldinCanyon | EldinClimateLv2 | 14 |
| 68 | LanayruWaterSources | ZoraTemperateClimate | 9 |
| 69 | LanayruWetlands | HyrulePlainClimate | 0 |
| 70 | CentralHyrule | HyrulePlainClimate | 0 |
| 71 | TamulPlateau | TamourPlainClimate | 8 |
| 72 | GerudoDesert | GerudoDesertClimate | 5 |
| 73 | GerudoHighlands | GerudoPlateauClimate | 6 |
| 74 | FironeGrassland | HateruPlainClimate | 10 |
| 75 | TamulPlateau | TamourPlainClimate | 8 |
| 76 | CentralHyrule | HyrulePlainClimate | 0 |
| 77 | HyruleHill | HyrulePlainClimate | 0 |
| 78 | EastHateru | HateruPlainClimate | 10 |
| 79 | CentralHyrule | HyrulePlainClimate | 0 |
| 80 | TabantaFrontier | HyrulePlainClimate | 0 |
| 81 | HyruleHill | HyrulePlainClimate | 0 |
| 82 | CentralHyrule | HyrulePlainClimate | 0 |
| 83 | TabantaFrontier | TabantaAridClimate | 3 |
| 84 | LanayruWaterSources | ZoraTemperateClimate | 9 |
| 85 | LanayruWaterSources | ZoraTemperateClimate | 9 |
| 86 | EastHateru | HateruPlainClimate | 10 |
| 87 | GerudoDesert | GerudoDesertClimate | 5 |
| 88 | HyruleForest | DarkWoodsClimat | 15 |
| 89 | EldinMountains | EldinClimateLv0 | 7 |
| 90 | FironeGrassland | HateruPlainClimate | 10 |
| 91 | EldinCanyon | EldinClimateLv0 | 7 |
| 92 | EldinCanyon | EldinClimateLv0 | 7 |
| 93 | WestHateru | HateruPlainClimate | 10 |
Each of the twenty climates multiple parameters, the most important ones defining the odds for each weather to appear, and the temperatures to set for each height in the map area. Here's the list of the most important parameters :
WeatherBlueskyeRate: odds, in %, to get the blue sky weather.WeatherCloudyRate: odds, in %, to get the cloudy weather.WeatherRainRate: odds, in %, to get either Rain or Snow for colder temperatures.WeatherHeavyRainRate: odds, in %, to get either intense rain or intense snow for colder temperatures.WeatherStormRate: odds, in %, to get a Thunderstorm.ClimateTemperatureDay_1000: air Temperature during the day at more than 1000 meters high (in °C)ClimateTemperatureDay_0900air temperature during the day between 900 and 1000 meters high (in °C)- [...]
ClimateTemperatureDay_0000air temperature during the day between 0 and 100 meters high (in °C)ClimateTemperatureNight_1000: air Temperature during the night at more than 1000 meters high (in °C)- [...]
ClimateTemperatureNight_0000: air temperature during the night between 0 and 100 meters high (in °C)IgnitedLevel:1if the air is burning hot,2if the air is even hotter.0otherwise.PaletteSetSelect: the sky color theme to apply.
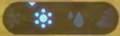
Tears of the Kingdom
Several Weather conditions reappear in Tears of the Kingdom.
Nomenclature
| Language | Names | |
|---|---|---|
| This table was generated using translation pages. To request an addition, please contact a staff member with a reference. | ||
Gallery
-
The Sheikah Slate's Weather forecast from Breath of the Wild
-

Icon for sunny Weather from Breath of the Wild
-

Icon for cloudy Weather from Breath of the Wild
-
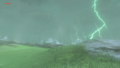
A Thunderstorm from Breath of the Wild
-

A Sandstorm from Breath of the Wild
-

The Weather gauge from Tears of the Kingdom


References
- ↑ Encyclopedia, Dark Horse Books, pg. 260 (TWW | TWWHD)
- ↑ The Legend of Zelda: Breath of the Wild—The Complete Official Guide, Piggyback Interactive Limited, pg. 12
- ↑ The Legend of Zelda: Tears of the Kingdom—The Complete Official Guide, Piggyback Interactive Limited, pg. 12
- ↑ "AreaData.sbyml" (Breath of the Wild v1.0.0, Nintendo Switch)