Bosses in Skyward Sword: Difference between revisions
Jump to navigation
Jump to search

mNo edit summary |
m (→{{Plural|SS|Sub-Boss}}: fixes Stalfos images) |
||
| (44 intermediate revisions by 9 users not shown) | |||
| Line 1: | Line 1: | ||
== | <noinclude>{{DISPLAYTITLE: Bosses in {{SS|-}}}} | ||
<center | The following is a list of all {{Plural|SS|Boss|link}} in {{SS}}. | ||
File:Stalfos | {{OTOC}}</noinclude> | ||
File:Lizalfos | =={{Plural|SS|Sub-Boss}}== | ||
File:Stalfos | <gallery class="center"> | ||
File: | File:SS Stalfos Render.png|{{Term|SS|Stalfos|link}}<br/>''({{Term|SS|Skyview Temple|link}})'' {{Exp|(First Visit)}} | ||
File:SS | File:SS Lizalfos Model.png|{{Term|SS|Lizalfos|link}}<br/>''({{Term|SS|Earth Temple|link}})'' | ||
File:Scervo.png| | File:SS Stalfos Render.png|Three {{Plural|SS|Stalfos|link}}<br/>''({{Term|SS|Skyview Temple|link}})'' {{Exp|(Second Visit)}} | ||
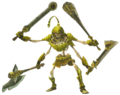
File: | File:SS Stalmaster Render.png|{{Term|SS|Stalmaster|link}}<br/>''({{Term|SS|Ancient Cistern|link}})''<br/>''({{Term|SS|Sky Keep|link}})'' | ||
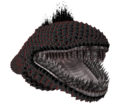
File:Magmanos.png| | File:SS Moldarach Model.png|{{Term|SS|Moldarach|link}}<br/>''({{Term|SS|Lanayru Shipyard|link}})'' | ||
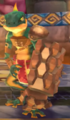
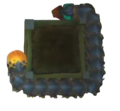
File:Moldorm | File:SS LD-002G Scervo Model.png|{{Term|SS|LD-002G Scervo|link}}<br/>''({{Term|SS|Sandship|link}})'' | ||
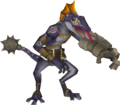
File:LD- | File:SS Dark Lizalfos Model.png|{{Term|SS|Dark Lizalfos|link}}<br/>''({{Term|SS|Fire Sanctuary (Dungeon)|link}})'' | ||
File:Metal Shield Moblin | File:SS Magmanos Model.png|{{Term|SS|Magmanos|link}}<br/>''({{Term|SS|Fire Sanctuary (Dungeon)|link}})'' | ||
</gallery | File:SS Moldorm Model.png|{{Term|SS|Moldorm|link}}<br/>''({{Term|SS|Fire Sanctuary (Dungeon)|link}})''<br/>''({{Term|SS|Sky Keep|link}})'' | ||
File:SS LD-003D Dreadfuse Model.png|{{Term|SS|Dreadfuse|link}}<br/>''({{Term|SS|Sky Keep|link}})'' | |||
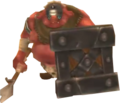
File:SS Metal Shield Moblin Model.png|{{Term|SS|Metal Shield Moblin|link}}<br/>''({{Term|SS|Sky Keep|link}})'' | |||
</gallery> | |||
== | =={{Plural|SS|Boss}}== | ||
<center | <gallery class="center"> | ||
File: | File:SS Ghirahim Render.png|Demon Lord: {{Term|SS|Ghirahim|link}} (''First Battle'')<br/>''({{Term|SS|Skyview Temple|link}})''{{exp|First Visit}} | ||
File:Scaldera.png|Pyroclastic Fiend: | File:SS Scaldera Render.png|Pyroclastic Fiend: {{Term|SS|Scaldera|link}}<br/>''({{Term|SS|Earth Temple|link}})'' | ||
File:SS | File:SS Moldarach Model.png|Thousand-Year Arachnid: {{Term|SS|Moldarach|link}}<br/>''({{Term|SS|Lanayru Mining Facility|link}})'' | ||
File:SS | File:SS The Imprisoned Model.png|{{Term|SS|The Imprisoned|link}}<br/>(''First Battle'')<br/>''({{Term|SS|Sealed Grounds|link}})'' | ||
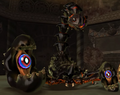
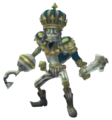
File: | File:SS Koloktos Model.png|Ancient Automaton: {{Term|SS|Koloktos|link}}<br/>''({{Term|SS|Ancient Cistern|link}})'' | ||
File: | File:SS Tentalus Render.png|Abyssal Leviathan: {{Term|SS|Tentalus|link}}<br/>''({{Term|SS|Sandship|link}})'' | ||
File:Ghirahim | File:SS Ghirahim Render 2.png|Demon Lord: {{Term|SS|Ghirahim|link}} (''Second Battle'')<br/>''({{Term|SS|Fire Sanctuary (Dungeon)|link}})'' | ||
File:The Imprisoned | File:SS The Imprisoned Model 2.png|{{Term|SS|The Imprisoned|link}}<br/>(''Second Battle'')<br/>''({{Term|SS|Sealed Grounds|link}})'' | ||
File: | File:SS Levias Possessed Render.png|Great Spirit of the Skies: {{Term|SS|Levias|link}}<br/>''({{Term|SS|Thunderhead|link}})'' | ||
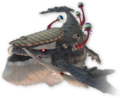
File:Bilocyte.png|Ocular Parasite: | File:SS Bilocyte Model.png|Ocular Parasite: {{Term|SS|Bilocyte|link}}<br/>''({{Term|SS|Thunderhead|link}})'' | ||
File:The Imprisoned | File:SS The Imprisoned Model 4.png|{{Term|SS|The Imprisoned|link}}<br/>(''Third Battle'')<br/>''({{Term|SS|Sealed Grounds|link}})'' | ||
</gallery> | |||
<gallery class="center"> | |||
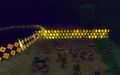
File:SS Horde Battle.png|{{Term|SS|Horde Battle|link}}<br/>''({{Term|SS|Hylia's Realm|link}})'' | |||
File:SS Ghirahim Render 3.png|Demon Lord: {{Term|SS|Ghirahim|link}}<br/>(''Third Battle'')<br/>''({{Term|SS|Hylia's Realm|link}})'' | |||
File:SS Demise Model.png|{{Term|SS|Demise|link}}<br/>''({{Term|SS|Demise's Realm|link}})'' | |||
</gallery> | </gallery> | ||
<noinclude>{{BossNav}} | <noinclude>{{BossNav}} | ||
{{Categories | |||
|Boss Galleries | |||
}}</noinclude> | |||
Latest revision as of 22:06, 4 May 2023
The following is a list of all Bosses in Skyward Sword.
Sub-Bosses
-

-
-
Three Stalfos
(Skyview Temple)
-
-
-

-
-

-
-
-


Bosses
-

Demon Lord: Ghirahim (First Battle)
(Skyview Temple)
-

Pyroclastic Fiend: Scaldera
(Earth Temple) -
Thousand-Year Arachnid: Moldarach
(Lanayru Mining Facility) -
The Imprisoned
(First Battle)
(Sealed Grounds) -
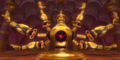
Ancient Automaton: Koloktos
(Ancient Cistern) -

-

Demon Lord: Ghirahim (Second Battle)
(Fire Sanctuary) -

The Imprisoned
(Second Battle)
(Sealed Grounds) -
Great Spirit of the Skies: Levias
(Thunderhead) -

Ocular Parasite: Bilocyte
(Thunderhead) -

The Imprisoned
(Third Battle)
(Sealed Grounds)


-
-

Demon Lord: Ghirahim
(Third Battle)
(Hylia's Realm) -