NES Remix: Difference between revisions
Htwretched (talk | contribs) m (→Remix II) |
Htwretched (talk | contribs) m (→Bonus) |
||
| (6 intermediate revisions by the same user not shown) | |||
| Line 1: | Line 1: | ||
{{Italic Title}} | {{Italic Title}} | ||
{{Infobox Game | {{Infobox Game | ||
|image= File:NES Remix Logo.png | |image= File:NES Remix Logo.png | ||
| Line 22: | Line 21: | ||
|strategy= | |strategy= | ||
}} | }} | ||
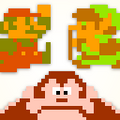
'''''NES Remix''''' is a video game compilation for the [[Wii U]], released in 2013 as a download-only title. It features | '''''NES Remix''''' is a video game compilation for the [[Wii U]], released in 2013 as a download-only title.<ref>{{Cite Web|quote= Release date: 18/12/2013|title= NES™ Remix {{!}} Wii U download software|url= https://www.nintendo.com/en-gb/Games/Wii-U-download-software/NES-Remix-842880.html|retrieved= June 8, 2024|site= Nintendo}}</ref><ref>{{Cite Web|quote= Best over 200 stages based on much-loved Nintendo classics in NES™ Remix, only on Nintendo eShop on Wii U!|title= NES™ Remix {{!}} Wii U download software|url= https://www.nintendo.com/en-gb/Games/Wii-U-download-software/NES-Remix-842880.html|retrieved= June 8, 2024|site= Nintendo}}</ref> It features 16 classic [[NES]] games, including {{TLoZ}}, which are played as a series of miniature challenges. A sequel, {{NESR2}} was released in 2014, followed by a 2-in-1 retail release, {{NESRP}}, and a [[Nintendo 3DS]] version containing the "best of" both games, {{UNESR}}. | ||
==Overview== | ==Overview== | ||
In {{NESR|-}}, players can choose from a variety of classic games for the [[Nintendo Entertainment System]]. Rather than playing them in their entirety, these games are given a curated set of Stages that can be selected from a main menu. Stages consist of one or more challenges that must be completed consecutively; these challenges are short excerpts of gameplay that can last from several seconds to several minutes, giving players a sampling of various moments and types of gameplay. Of the 16 games included in {{NESR|-}}, 12 become available to be played in this manner as they are unlocked. In addition, there are two sets of "Remix" Stages that present unique challenges, such as combining elements of two different games, adding new graphical effects, or creating scenarios that are not otherwise possible in the original games. A set of "Bonus" Stages features even more challenges, some of which include the four additional NES games that do not have their own sets of Stages. | |||
After a single, introductory Remix Stage, | After playing a single, introductory Remix Stage based on ''{{Smw|Super Mario Bros.}}'', six NES games become unlocked and available to play. Every Stage is given a time limit and/or a "Life" counter, which is the number of times a challenge can be failed before the player must restart or use a "continue". Upon completing a Stage, the player is graded from one Star to three Stars, or the best possible grade of three Stars with rainbow-colored outlines, based on the speed of completion and whether or not any continues were used. New games, as well as extra Remix or Bonus Stages, are unlocked by accumulating these Stars. {{TLoZ}} is the first game to unlock after the initial six, once 100 Stars have been collected. | ||
The player can also collect Bits, which are another type of score-keeping. Unlike Stars, they can be earned even when a Stage is cleared repeatedly. Each Stage has a base number of Bits awarded, which is multiplied by the number of Stars earned (rainbow Stars count as four), as well as bonus amounts of Bits for first-time clears and "perfect" clears (no Life is lost). Setting a new completion-time record also nets 15 Bits. When certain milestone numbers of Bits are collected, a new [[Miiverse]] Stamp is unlocked. | |||
{{Clear}} | {{Clear}} | ||
===Stages=== | ===Stages=== | ||
The following Stages feature content from {{TLoZ}}. Note that "Life" refers to the number of chances given to complete the Stage, rather than {{Term|Series|Link|link}}'s actual {{Term|Series|Life Gauge|link}}. | The following Stages feature content from {{TLoZ|-}}. Note that "Life" refers to the number of chances given to complete the Stage, rather than {{Term|Series|Link|link}}'s actual {{Term|Series|Life Gauge|link}}. | ||
There is no ''Zelda'' content in the "Remix I" Stages. | There is no ''Zelda'' content in the "Remix I" Stages. | ||
| Line 40: | Line 39: | ||
{{TLoZ}} and its first Stage are unlocked by collecting 100 Stars. There are 17 Stages for this game, with 53 challenges in total. Each subsequent Stage is unlocked by simply playing the Stage before it. | {{TLoZ}} and its first Stage are unlocked by collecting 100 Stars. There are 17 Stages for this game, with 53 challenges in total. Each subsequent Stage is unlocked by simply playing the Stage before it. | ||
{| class="wikitable" | {| class="wikitable" style="text-align:left" | ||
! Stage # | ! Stage # | ||
! colspan="3"| Details | ! colspan="3"| Details | ||
|- | |- | ||
| style="text-align:center; background-color:#25527b" rowspan="5"| '''1''' | | style="text-align:center; background-color:#25527b" rowspan="5"| '''1''' | ||
| style=" | | style="width:5.5em"| Challenges: | ||
| style=" | | style="background-color:#163d5f; width:4em"| '''5''' | ||
| style="text-align:center; width:29em" rowspan="4"| | | style="text-align:center; width:29em" rowspan="4"| | ||
{|align="center" style="text-align:center" | {|align="center" style="text-align:center" | ||
| Line 60: | Line 59: | ||
|tab3= 3 | |tab3= 3 | ||
|tooltip3= Stage 1-3 | |tooltip3= Stage 1-3 | ||
|content3= [[File:UNESR TLoZ Stage 1-3.png|300px]]<br/>'''3. | |content3= [[File:UNESR TLoZ Stage 1-3.png|300px]]<br/>'''3. Restore your life gauge!''' | ||
|tab4= 4 | |tab4= 4 | ||
|tooltip4= Stage 1-4 | |tooltip4= Stage 1-4 | ||
|content4= [[File:UNESR TLoZ Stage 1-4.png|300px]]<br/>'''4. Buy | |content4= [[File:UNESR TLoZ Stage 1-4.png|300px]]<br/>'''4. Buy somethin' will ya!''' | ||
|tab5= 5 | |tab5= 5 | ||
|tooltip5= Stage 1-5 | |tooltip5= Stage 1-5 | ||
|content5= [[File:UNESR TLoZ Stage 1-5.png|300px]]<br/>'''5. Enter the dungeon!''' | |content5= [[File:UNESR TLoZ Stage 1-5.png|300px]]<br/>'''5. Enter the dungeon!''' | ||
}} | }} | ||
|} | |} | ||
|- | |- | ||
| Time: | |||
| style=" | | style="background-color:#163d5f"| '''100''' | ||
|- | |- | ||
| Life: | |||
| style=" | | style="background-color:#163d5f"| '''—''' | ||
|- | |- | ||
| Bits: | |||
| style=" | | style="background-color:#163d5f"| '''15''' {{Exp|Stage Clear (multiplied by number of Stars)}}<br/>'''80''' {{Exp|1st-Time Clear bonus}}<br/>'''10''' {{Exp|Perfect bonus}} | ||
|- | |- | ||
| Notes: | |||
| style=" | | style="background-color:#163d5f; width:33em" colspan="2"| '''—''' | ||
|- | |- | ||
| Line 87: | Line 86: | ||
|- | |- | ||
| style="text-align:center; background-color:#25527b" rowspan="5"| '''2''' | | style="text-align:center; background-color:#25527b" rowspan="5"| '''2''' | ||
| Challenges: | |||
| style=" | | style="background-color:#163d5f"| '''3''' | ||
| style="text-align:center" rowspan="4"| | | style="text-align:center" rowspan="4"| | ||
{|align="center" style="text-align:center" | {|align="center" style="text-align:center" | ||
| Line 99: | Line 98: | ||
|tab2= 2 | |tab2= 2 | ||
|tooltip2= Stage 2-2 | |tooltip2= Stage 2-2 | ||
|content2= [[File:UNESR TLoZ Stage 2-2.png|300px]]<br/>'''2. | |content2= [[File:UNESR TLoZ Stage 2-2.png|300px]]<br/>'''2. Collect the key without taking damage!''' | ||
|tab3= 3 | |tab3= 3 | ||
|tooltip3= Stage 2-3 | |tooltip3= Stage 2-3 | ||
|content3= [[File:UNESR TLoZ Stage 2-3.png|300px]]<br/>'''3. | |content3= [[File:UNESR TLoZ Stage 2-3.png|300px]]<br/>'''3. Collect the key without taking damage!''' | ||
}} | }} | ||
|} | |} | ||
|- | |- | ||
| Time: | |||
| style=" | | style="background-color:#163d5f"| '''—''' | ||
|- | |- | ||
| Life: | |||
| style=" | | style="background-color:#163d5f"| '''3''' | ||
|- | |- | ||
| Bits: | |||
| style=" | | style="background-color:#163d5f"| '''15''' {{Exp|Stage Clear (multiplied by number of Stars)}}<br/>'''80''' {{Exp|1st-Time Clear bonus}}<br/>'''10''' {{Exp|Perfect bonus}} | ||
|- | |- | ||
| Notes: | |||
| style=" | | style="background-color:#163d5f" colspan="2"| '''—''' | ||
|- | |- | ||
| Line 123: | Line 122: | ||
|- | |- | ||
| style="text-align:center; background-color:#25527b" rowspan="5"| '''3''' | | style="text-align:center; background-color:#25527b" rowspan="5"| '''3''' | ||
| Challenges: | |||
| style=" | | style="background-color:#163d5f"| '''1''' | ||
| style="text-align:center" rowspan="4"| | | style="text-align:center" rowspan="4"| | ||
{|align="center" style="text-align:center" | {|align="center" style="text-align:center" | ||
| [[File:UNESR TLoZ Stage 3.png| | | [[File:UNESR TLoZ Stage 3.png|350px]]<br/>'''Collect Rupees, and then buy an item!''' | ||
|} | |} | ||
|- | |- | ||
| Time: | |||
| style=" | | style="background-color:#163d5f"| '''300''' | ||
|- | |- | ||
| Life: | |||
| style=" | | style="background-color:#163d5f"| '''3''' | ||
|- | |- | ||
| Bits: | |||
| style=" | | style="background-color:#163d5f"| '''22.5''' {{Exp|Stage Clear (multiplied by number of Stars; rounded up)}}<br/>'''120''' {{Exp|1st-Time Clear bonus}}<br/>'''15''' {{Exp|Perfect bonus}} | ||
|- | |- | ||
| Notes: | |||
| style=" | | style="background-color:#163d5f" colspan="2"| It may be quicker to enter the {{Term|TLoZ|Shop|link}} two screens west and two north, and purchase {{Plural|TLoZ|Bomb|link}} for 20 {{Plural|TLoZ|Rupee|link}}. | ||
|- | |- | ||
| Line 147: | Line 146: | ||
|- | |- | ||
| style="text-align:center; background-color:#25527b" rowspan="5"| '''4''' | | style="text-align:center; background-color:#25527b" rowspan="5"| '''4''' | ||
| Challenges: | |||
| style=" | | style="background-color:#163d5f"| '''3''' | ||
| style="text-align:center" rowspan="4"| | | style="text-align:center" rowspan="4"| | ||
{|align="center" style="text-align:center" | {|align="center" style="text-align:center" | ||
| Line 159: | Line 158: | ||
|tab2= 2 | |tab2= 2 | ||
|tooltip2= Stage 4-2 | |tooltip2= Stage 4-2 | ||
|content2= [[File:UNESR TLoZ Stage 4-2.png|300px]]<br/>'''2. Use a bomb to blow a hole, then go through!''' | |content2= [[File:UNESR TLoZ Stage 4-2.png|300px]]<br/>'''2. Use a bomb to blow a hole, and then go through!''' | ||
|tab3= 3 | |tab3= 3 | ||
|tooltip3= Stage 4-3 | |tooltip3= Stage 4-3 | ||
| Line 166: | Line 165: | ||
|} | |} | ||
|- | |- | ||
| Time: | |||
| style=" | | style="background-color:#163d5f"| '''—''' | ||
|- | |- | ||
| Life: | |||
| style=" | | style="background-color:#163d5f"| '''3''' | ||
|- | |- | ||
| Bits: | |||
| style=" | | style="background-color:#163d5f"| '''15''' {{Exp|Stage Clear (multiplied by number of Stars)}}<br/>'''80''' {{Exp|1st-Time Clear bonus}}<br/>'''10''' {{Exp|Perfect bonus}} | ||
|- | |- | ||
| Notes: | |||
| style=" | | style="background-color:#163d5f" colspan="2"| Stage 4-1: Push the {{Term|TLoZ|Block|link}} in any direction.<br/>Stage 4-3: Push the leftmost {{Term|TLoZ|Block}} up or down. | ||
|- | |- | ||
| Line 183: | Line 182: | ||
|- | |- | ||
| style="text-align:center; background-color:#25527b" rowspan="5"| '''5''' | | style="text-align:center; background-color:#25527b" rowspan="5"| '''5''' | ||
| Challenges: | |||
| style=" | | style="background-color:#163d5f"| '''1''' | ||
| style="text-align:center" rowspan="4"| | | style="text-align:center" rowspan="4"| | ||
{|align="center" style="text-align:center" | {|align="center" style="text-align:center" | ||
| [[File:UNESR TLoZ Stage 5.png| | | [[File:UNESR TLoZ Stage 5.png|350px]]<br/>'''Get the Triforce fragment without taking damage!''' | ||
|} | |} | ||
|- | |- | ||
| Time: | |||
| style=" | | style="background-color:#163d5f"| '''—''' | ||
|- | |- | ||
| Life: | |||
| style=" | | style="background-color:#163d5f"| '''3''' | ||
|- | |- | ||
| Bits: | |||
| style=" | | style="background-color:#163d5f"| '''15''' {{Exp|Stage Clear (multiplied by number of Stars)}}<br/>'''80''' {{Exp|1st-Time Clear bonus}}<br/>'''10''' {{Exp|Perfect bonus}} | ||
|- | |- | ||
| Notes: | |||
| style=" | | style="background-color:#163d5f" colspan="2"| '''—''' | ||
|- | |- | ||
| Line 207: | Line 206: | ||
|- | |- | ||
| style="text-align:center; background-color:#25527b" rowspan="5"| '''6''' | | style="text-align:center; background-color:#25527b" rowspan="5"| '''6''' | ||
| Challenges: | |||
| style=" | | style="background-color:#163d5f"| '''3''' | ||
| style="text-align:center" rowspan="4"| | | style="text-align:center" rowspan="4"| | ||
{|align="center" style="text-align:center" | {|align="center" style="text-align:center" | ||
| Line 226: | Line 225: | ||
|} | |} | ||
|- | |- | ||
| Time: | |||
| style=" | | style="background-color:#163d5f"| '''—''' | ||
|- | |- | ||
| Life: | |||
| style=" | | style="background-color:#163d5f"| '''3''' | ||
|- | |- | ||
| Bits: | |||
| style=" | | style="background-color:#163d5f"| '''22.5''' {{Exp|Stage Clear (multiplied by number of Stars; rounded up)}}<br/>'''120''' {{Exp|1st-Time Clear bonus}}<br/>'''15''' {{Exp|Perfect bonus}} | ||
|- | |- | ||
| Notes: | |||
| style=" | | style="background-color:#163d5f" colspan="2"| {{Term|TLoZ|Link}} has no {{Term|TLoZ|Sword|link}} in this Stage. | ||
|- | |- | ||
| Line 243: | Line 242: | ||
|- | |- | ||
| style="text-align:center; background-color:#25527b" rowspan="5"| '''7''' | | style="text-align:center; background-color:#25527b" rowspan="5"| '''7''' | ||
| Challenges: | |||
| style=" | | style="background-color:#163d5f"| '''5''' | ||
| style="text-align:center" rowspan="4"| | | style="text-align:center" rowspan="4"| | ||
{|align="center" style="text-align:center" | {|align="center" style="text-align:center" | ||
| Line 268: | Line 267: | ||
|} | |} | ||
|- | |- | ||
| Time: | |||
| style=" | | style="background-color:#163d5f"| '''240''' | ||
|- | |- | ||
| Life: | |||
| style=" | | style="background-color:#163d5f"| '''—''' | ||
|- | |- | ||
| Bits: | |||
| style=" | | style="background-color:#163d5f"| '''22.5''' {{Exp|Stage Clear (multiplied by number of Stars; rounded up)}}<br/>'''120''' {{Exp|1st-Time Clear bonus}}<br/>'''15''' {{Exp|Perfect bonus}} | ||
|- | |- | ||
| Notes: | |||
| style=" | | style="background-color:#163d5f" colspan="2"| Stage 7-2: {{Term|TLoZ|Bomb}} the north wall, just left of center.<br/>Stage 7-4: [[Red Candle|Burn]] the lower-right of the group of four bushes.<br/>Stage 7-5: Burn the lower-right green bush. | ||
|- | |- | ||
| Line 285: | Line 284: | ||
|- | |- | ||
| style="text-align:center; background-color:#25527b" rowspan="5"| '''8''' | | style="text-align:center; background-color:#25527b" rowspan="5"| '''8''' | ||
| Challenges: | |||
| style=" | | style="background-color:#163d5f"| '''1''' | ||
| style="text-align:center" rowspan="4"| | | style="text-align:center" rowspan="4"| | ||
{|align="center" style="text-align:center" | {|align="center" style="text-align:center" | ||
| [[File:UNESR TLoZ Stage 8.png| | | [[File:UNESR TLoZ Stage 8.png|350px]]<br/>'''Defeat Dodongo!''' | ||
|} | |} | ||
|- | |- | ||
| Time: | |||
| style=" | | style="background-color:#163d5f"| '''—''' | ||
|- | |- | ||
| Life: | |||
| style=" | | style="background-color:#163d5f"| '''3''' | ||
|- | |- | ||
| Bits: | |||
| style=" | | style="background-color:#163d5f"| '''22.5''' {{Exp|Stage Clear (multiplied by number of Stars; rounded up)}}<br/>'''120''' {{Exp|1st-Time Clear bonus}}<br/>'''15''' {{Exp|Perfect bonus}} | ||
|- | |- | ||
| Notes: | |||
| style=" | | style="background-color:#163d5f" colspan="2"| '''—''' | ||
|- | |- | ||
| Line 309: | Line 308: | ||
|- | |- | ||
| style="text-align:center; background-color:#25527b" rowspan="5"| '''9''' | | style="text-align:center; background-color:#25527b" rowspan="5"| '''9''' | ||
| Challenges: | |||
| style=" | | style="background-color:#163d5f"| '''3''' | ||
| style="text-align:center" rowspan="4"| | | style="text-align:center" rowspan="4"| | ||
{|align="center" style="text-align:center" | {|align="center" style="text-align:center" | ||
| Line 324: | Line 323: | ||
|tab3= 3 | |tab3= 3 | ||
|tooltip3= Stage 9-3 | |tooltip3= Stage 9-3 | ||
|content3= [[File:UNESR TLoZ Stage 9-3.png|300px]]<br/>'''3. Find the real one | |content3= [[File:UNESR TLoZ Stage 9-3.png|300px]]<br/>'''3. Find and defeat the real one!''' | ||
}} | }} | ||
|} | |} | ||
|- | |- | ||
| Time: | |||
| style=" | | style="background-color:#163d5f"| '''—''' | ||
|- | |- | ||
| Life: | |||
| style=" | | style="background-color:#163d5f"| '''3''' | ||
|- | |- | ||
| Bits: | |||
| style=" | | style="background-color:#163d5f"| '''22.5''' {{Exp|Stage Clear (multiplied by number of Stars; rounded up)}}<br/>'''120''' {{Exp|1st-Time Clear bonus}}<br/>'''15''' {{Exp|Perfect bonus}} | ||
|- | |- | ||
| Notes: | |||
| style=" | | style="background-color:#163d5f" colspan="2"| Stage 9-3: The "real" {{Term|TLoZ|Ghini|link}} starts in the lower-right corner. | ||
|- | |- | ||
| Line 345: | Line 344: | ||
|- | |- | ||
| style="text-align:center; background-color:#25527b" rowspan="5"| '''10''' | | style="text-align:center; background-color:#25527b" rowspan="5"| '''10''' | ||
| Challenges: | |||
| style=" | | style="background-color:#163d5f"| '''6''' | ||
| style="text-align:center" rowspan="4"| | | style="text-align:center" rowspan="4"| | ||
{|align="center" style="text-align:center" | {|align="center" style="text-align:center" | ||
| Line 354: | Line 353: | ||
|tab1= 1 | |tab1= 1 | ||
|tooltip1= Stage 10-1 | |tooltip1= Stage 10-1 | ||
|content1= [[File:UNESR TLoZ Stage 10-1.png|300px]]<br/>'''1. | |content1= [[File:UNESR TLoZ Stage 10-1.png|300px]]<br/>'''1. Collect the second Triforce fragment!''' | ||
|tab2= 2 | |tab2= 2 | ||
|tooltip2= Stage 10-2 | |tooltip2= Stage 10-2 | ||
| Line 363: | Line 362: | ||
|tab4= 4 | |tab4= 4 | ||
|tooltip4= Stage 10-4 | |tooltip4= Stage 10-4 | ||
|content4= [[File:UNESR TLoZ Stage 10-4.png|300px]]<br/>'''4. | |content4= [[File:UNESR TLoZ Stage 10-4.png|300px]]<br/>'''4. Collect the third Triforce fragment!''' | ||
|tab5= 5 | |tab5= 5 | ||
|tooltip5= Stage 10-5 | |tooltip5= Stage 10-5 | ||
| Line 369: | Line 368: | ||
|tab6= 6 | |tab6= 6 | ||
|tooltip6= Stage 10-6 | |tooltip6= Stage 10-6 | ||
|content6= [[File:UNESR TLoZ Stage 10-6.png|300px]]<br/>'''5. | |content6= [[File:UNESR TLoZ Stage 10-6.png|300px]]<br/>'''5. Collect the fourth Triforce fragment!''' | ||
}} | }} | ||
|} | |} | ||
|- | |- | ||
| Time: | |||
| style=" | | style="background-color:#163d5f"| '''—''' | ||
|- | |- | ||
| Life: | |||
| style=" | | style="background-color:#163d5f"| '''3''' | ||
|- | |- | ||
| Bits: | |||
| style=" | | style="background-color:#163d5f"| '''22.5''' {{Exp|Stage Clear (multiplied by number of Stars; rounded up)}}<br/>'''120''' {{Exp|1st-Time Clear bonus}}<br/>'''15''' {{Exp|Perfect bonus}} | ||
|- | |- | ||
| Notes: | |||
| style=" | | style="background-color:#163d5f" colspan="2"| '''—''' | ||
|- | |- | ||
| Line 390: | Line 389: | ||
|- | |- | ||
| style="text-align:center; background-color:#25527b" rowspan="5"| '''11''' | | style="text-align:center; background-color:#25527b" rowspan="5"| '''11''' | ||
| Challenges: | |||
| style=" | | style="background-color:#163d5f"| '''3''' | ||
| style="text-align:center" rowspan="4"| | | style="text-align:center" rowspan="4"| | ||
{|align="center" style="text-align:center" | {|align="center" style="text-align:center" | ||
| Line 409: | Line 408: | ||
|} | |} | ||
|- | |- | ||
| Time: | |||
| style=" | | style="background-color:#163d5f"| '''—''' | ||
|- | |- | ||
| Life: | |||
| style=" | | style="background-color:#163d5f"| '''3''' | ||
|- | |- | ||
| Bits: | |||
| style=" | | style="background-color:#163d5f"| '''22.5''' {{Exp|Stage Clear (multiplied by number of Stars; rounded up)}}<br/>'''120''' {{Exp|1st-Time Clear bonus}}<br/>'''15''' {{Exp|Perfect bonus}} | ||
|- | |- | ||
| Notes: | |||
| style=" | | style="background-color:#163d5f" colspan="2"| Stage 11-1: {{Term|TLoZ|Link}} can walk the left, upper, and right edges of this room; the rest is blocked by a body of water.<br/>Stage 11-2: This room has narrow bodies of water that {{Term|TLoZ|Link}} can cross using the {{Term|TLoZ|Stepladder|link}}.<br/>Stage 11-3: This room has several diagonal rows of {{Plural|TLoZ|Block}}. | ||
|- | |- | ||
| Line 426: | Line 425: | ||
|- | |- | ||
| style="text-align:center; background-color:#25527b" rowspan="5"| '''12''' | | style="text-align:center; background-color:#25527b" rowspan="5"| '''12''' | ||
| Challenges: | |||
| style=" | | style="background-color:#163d5f"| '''1''' | ||
| style="text-align:center" rowspan="4"| | | style="text-align:center" rowspan="4"| | ||
{|align="center" style="text-align:center" | {|align="center" style="text-align:center" | ||
| [[File:UNESR TLoZ Stage 12.png| | | [[File:UNESR TLoZ Stage 12.png|350px]]<br/>'''Fully restore your life gauge without taking damage!''' | ||
|} | |} | ||
|- | |- | ||
| Time: | |||
| style=" | | style="background-color:#163d5f"| '''300''' | ||
|- | |- | ||
| Life: | |||
| style=" | | style="background-color:#163d5f"| '''3''' | ||
|- | |- | ||
| Bits: | |||
| style=" | | style="background-color:#163d5f"| '''22.5''' {{Exp|Stage Clear (multiplied by number of Stars; rounded up)}}<br/>'''120''' {{Exp|1st-Time Clear bonus}}<br/>'''15''' {{Exp|Perfect bonus}} | ||
|- | |- | ||
| Notes: | |||
| style=" | | style="background-color:#163d5f" colspan="2"| '''—''' | ||
|- | |- | ||
| Line 450: | Line 449: | ||
|- | |- | ||
| style="text-align:center; background-color:#25527b" rowspan="5"| '''13''' | | style="text-align:center; background-color:#25527b" rowspan="5"| '''13''' | ||
| Challenges: | |||
| style=" | | style="background-color:#163d5f"| '''2''' | ||
| style="text-align:center" rowspan="4"| | | style="text-align:center" rowspan="4"| | ||
{|align="center" style="text-align:center" | {|align="center" style="text-align:center" | ||
| Line 466: | Line 465: | ||
|} | |} | ||
|- | |- | ||
| Time: | |||
| style=" | | style="background-color:#163d5f"| '''—''' | ||
|- | |- | ||
| Life: | |||
| style=" | | style="background-color:#163d5f"| '''3''' | ||
|- | |- | ||
| Bits: | |||
| style=" | | style="background-color:#163d5f"| '''22.5''' {{Exp|Stage Clear (multiplied by number of Stars; rounded up)}}<br/>'''120''' {{Exp|1st-Time Clear bonus}}<br/>'''15''' {{Exp|Perfect bonus}} | ||
|- | |- | ||
| Notes: | |||
| style=" | | style="background-color:#163d5f" colspan="2"| Stage 13-1: Push the top-center {{Term|TLoZ|Armos|link}}.<br/>Stage 13-2: Defeat the {{Plural|TLoZ|Wizzrobe|link}}, then push the leftmost {{Term|TLoZ|Block}} up or down. | ||
|- | |- | ||
| Line 483: | Line 482: | ||
|- | |- | ||
| style="text-align:center; background-color:#25527b" rowspan="5"| '''14''' | | style="text-align:center; background-color:#25527b" rowspan="5"| '''14''' | ||
| Challenges: | |||
| style=" | | style="background-color:#163d5f"| '''3''' | ||
| style="text-align:center" rowspan="4"| | | style="text-align:center" rowspan="4"| | ||
{|align="center" style="text-align:center" | {|align="center" style="text-align:center" | ||
| Line 502: | Line 501: | ||
|} | |} | ||
|- | |- | ||
| Time: | |||
| style=" | | style="background-color:#163d5f"| '''—''' | ||
|- | |- | ||
| Life: | |||
| style=" | | style="background-color:#163d5f"| '''3''' | ||
|- | |- | ||
| Bits: | |||
| style=" | | style="background-color:#163d5f"| '''22.5''' {{Exp|Stage Clear (multiplied by number of Stars; rounded up)}}<br/>'''120''' {{Exp|1st-Time Clear bonus}}<br/>'''15''' {{Exp|Perfect bonus}} | ||
|- | |- | ||
| Notes: | |||
| style=" | | style="background-color:#163d5f" colspan="2"| '''—''' | ||
|- | |- | ||
| Line 519: | Line 518: | ||
|- | |- | ||
| style="text-align:center; background-color:#25527b" rowspan="5"| '''15''' | | style="text-align:center; background-color:#25527b" rowspan="5"| '''15''' | ||
| Challenges: | |||
| style=" | | style="background-color:#163d5f"| '''6''' | ||
| style="text-align:center" rowspan="4"| | | style="text-align:center" rowspan="4"| | ||
{|align="center" style="text-align:center" | {|align="center" style="text-align:center" | ||
| Line 540: | Line 539: | ||
|tab5= 5 | |tab5= 5 | ||
|tooltip5= Stage 15-5 | |tooltip5= Stage 15-5 | ||
|content5= [[File:UNESR TLoZ Stage 15-5.png|300px]]<br/>'''5. | |content5= [[File:UNESR TLoZ Stage 15-5.png|300px]]<br/>'''5. Collect the fifth Triforce fragment!''' | ||
|tab6= 6 | |tab6= 6 | ||
|tooltip6= Stage 15-6 | |tooltip6= Stage 15-6 | ||
|content6= [[File:UNESR TLoZ Stage 15-6.png|300px]]<br/>'''6. | |content6= [[File:UNESR TLoZ Stage 15-6.png|300px]]<br/>'''6. Collect the sixth Triforce fragment!''' | ||
}} | }} | ||
|} | |} | ||
|- | |- | ||
| Time: | |||
| style=" | | style="background-color:#163d5f"| '''—''' | ||
|- | |- | ||
| Life: | |||
| style=" | | style="background-color:#163d5f"| '''3''' | ||
|- | |- | ||
| Bits: | |||
| style=" | | style="background-color:#163d5f"| '''22.5''' {{Exp|Stage Clear (multiplied by number of Stars; rounded up)}}<br/>'''120''' {{Exp|1st-Time Clear bonus}}<br/>'''15''' {{Exp|Perfect bonus}} | ||
|- | |- | ||
| Notes: | |||
| style=" | | style="background-color:#163d5f" colspan="2"| Stage 15-2: Pay the {{Term|TLoZ|Old Woman|link}} 20 {{Plural|TLoZ|Rupee}}.<br/>Stage 15-3: Go east, then north four times.<br/>Stage 15-4: Defeat the {{Plural|TLoZ|Darknut|link}}, then push the {{Term|TLoZ|Block}} in any direction.<br/>Stage 15-5: Use the {{Term|TLoZ|Recorder|link|display=Recorder}} first. | ||
|- | |- | ||
| Line 564: | Line 563: | ||
|- | |- | ||
| style="text-align:center; background-color:#25527b" rowspan="5"| '''16''' | | style="text-align:center; background-color:#25527b" rowspan="5"| '''16''' | ||
| Challenges: | |||
| style=" | | style="background-color:#163d5f"| '''1''' | ||
| style="text-align:center" rowspan="4"| | | style="text-align:center" rowspan="4"| | ||
{|align="center" style="text-align:center" | {|align="center" style="text-align:center" | ||
| [[File:UNESR TLoZ Stage 16.png| | | [[File:UNESR TLoZ Stage 16.png|350px]]<br/>'''Make your way to the boss's lair!''' | ||
|} | |} | ||
|- | |- | ||
| Time: | |||
| style=" | | style="background-color:#163d5f"| '''300''' | ||
|- | |- | ||
| Life: | |||
| style=" | | style="background-color:#163d5f"| '''3''' | ||
|- | |- | ||
| Bits: | |||
| style=" | | style="background-color:#163d5f"| '''22.5''' {{Exp|Stage Clear (multiplied by number of Stars; rounded up)}}<br/>'''120''' {{Exp|1st-Time Clear bonus}}<br/>'''15''' {{Exp|Perfect bonus}} | ||
|- | |- | ||
| Notes: | |||
| style=" | | style="background-color:#163d5f" colspan="2"| '''—''' | ||
|- | |- | ||
| Line 588: | Line 587: | ||
|- | |- | ||
| style="text-align:center; background-color:#25527b" rowspan="5"| '''17''' | | style="text-align:center; background-color:#25527b" rowspan="5"| '''17''' | ||
| Challenges: | |||
| style=" | | style="background-color:#163d5f"| '''6''' | ||
| style="text-align:center" rowspan="4"| | | style="text-align:center" rowspan="4"| | ||
{|align="center" style="text-align:center" | {|align="center" style="text-align:center" | ||
| Line 597: | Line 596: | ||
|tab1= 1 | |tab1= 1 | ||
|tooltip1= Stage 17-1 | |tooltip1= Stage 17-1 | ||
|content1= [[File:UNESR TLoZ Stage 17-1.png|300px]]<br/>'''1. | |content1= [[File:UNESR TLoZ Stage 17-1.png|300px]]<br/>'''1. Collect the seventh Triforce fragment!''' | ||
|tab2= 2 | |tab2= 2 | ||
|tooltip2= Stage 17-2 | |tooltip2= Stage 17-2 | ||
| Line 603: | Line 602: | ||
|tab3= 3 | |tab3= 3 | ||
|tooltip3= Stage 17-3 | |tooltip3= Stage 17-3 | ||
|content3= [[File:UNESR TLoZ Stage 17-3.png|300px]]<br/>'''3. | |content3= [[File:UNESR TLoZ Stage 17-3.png|300px]]<br/>'''3. Collect the eighth Triforce fragment!''' | ||
|tab4= 4 | |tab4= 4 | ||
|tooltip4= Stage 17-4 | |tooltip4= Stage 17-4 | ||
| Line 616: | Line 615: | ||
|} | |} | ||
|- | |- | ||
| Time: | |||
| style=" | | style="background-color:#163d5f"| '''—''' | ||
|- | |- | ||
| Life: | |||
| style=" | | style="background-color:#163d5f"| '''3''' | ||
|- | |- | ||
| Bits: | |||
| style=" | | style="background-color:#163d5f"| '''30''' {{Exp|Stage Clear (multiplied by number of Stars)}}<br/>'''160''' {{Exp|1st-Time Clear bonus}}<br/>'''20''' {{Exp|Perfect bonus}} | ||
|- | |- | ||
| Notes: | |||
| style=" | | style="background-color:#163d5f" colspan="2"| Stage 17-2: Burn the bush in the narrow path.<br/>Stage 17-4: {{Term|TLoZ|Bomb}} the bottom of the left mountain peak. | ||
|} | |} | ||
====Remix II==== | ====Remix II==== | ||
"Remix II" and its first three Stages are unlocked by collecting 155 Stars; another three Stages are unlocked for every 15 or 20 Stars thereafter. Only two of its 25 Stages contain {{TLoZ|-}} content. | "Remix II" and its first three Stages are unlocked by collecting 155 Stars; another three Stages are unlocked for every 15 or 20 Stars thereafter. Only two of its 25 Stages contain {{TLoZ|-}} content. | ||
{| class="wikitable" | {| class="wikitable" style="text-align:left" | ||
! Stage # | ! Stage # | ||
! colspan="3"| Details | ! colspan="3"| Details | ||
|- | |- | ||
| style="text-align:center; background-color:#25527b" rowspan="6"| '''1''' | | style="text-align:center; background-color:#25527b" rowspan="6"| '''1''' | ||
| style=" | | style="width:5.5em"| Stars required: | ||
| style=" | | style="background-color:#163d5f; width:4em"| '''155''' | ||
| style="text-align:center; width:29em" rowspan="5"| | | style="text-align:center; width:29em" rowspan="5"| | ||
{|align="center" style="text-align:center" | {|align="center" style="text-align:center" | ||
| Line 652: | Line 651: | ||
|} | |} | ||
|- | |- | ||
| Challenges: | |||
| style=" | | style="background-color:#163d5f"| '''2''' | ||
|- | |- | ||
| Time: | |||
| style=" | | style="background-color:#163d5f"| '''—''' | ||
|- | |- | ||
| Life: | |||
| style=" | | style="background-color:#163d5f"| '''6''' | ||
|- | |- | ||
| Bits: | |||
| style=" | | style="background-color:#163d5f"| '''30''' {{Exp|Stage Clear (multiplied by number of Stars)}}<br/>'''200''' {{Exp|1st-Time Clear bonus}}<br/>'''20''' {{Exp|Perfect bonus}} | ||
|- | |- | ||
| Notes: | |||
| style=" | | style="background-color:#163d5f; width:33em" colspan="2"| Stage 1-1: The screen gradually pixelates.<br/>Stage 1-2: {{Term|TLoZ|Link|link}} must complete the {{Smw|25m|first level}} from ''{{Smw|Donkey Kong (game)|Donkey Kong}}''. He is unable to jump. | ||
|- | |- | ||
| Line 672: | Line 671: | ||
|- | |- | ||
| style="text-align:center; background-color:#25527b" rowspan="6"| '''20''' | | style="text-align:center; background-color:#25527b" rowspan="6"| '''20''' | ||
| Stars required: | |||
| style=" | | style="background-color:#163d5f"| '''265''' | ||
| style="text-align:center" rowspan="5"| | | style="text-align:center" rowspan="5"| | ||
{|align="center" style="text-align:center" | {|align="center" style="text-align:center" | ||
| Line 688: | Line 687: | ||
|} | |} | ||
|- | |- | ||
| Challenges: | |||
| style=" | | style="background-color:#163d5f"| '''2''' | ||
|- | |- | ||
| Time: | |||
| style=" | | style="background-color:#163d5f"| '''—''' | ||
|- | |- | ||
| Life: | |||
| style=" | | style="background-color:#163d5f"| '''3''' | ||
|- | |- | ||
| Bits: | |||
| style=" | | style="background-color:#163d5f"| '''30''' {{Exp|Stage Clear (multiplied by number of Stars)}}<br/>'''200''' {{Exp|1st-Time Clear bonus}}<br/>'''20''' {{Exp|Perfect bonus}} | ||
|- | |- | ||
| Notes: | |||
| style=" | | style="background-color:#163d5f" colspan="2"| Stage 20-1: The screen gradually pixelates.<br/>Stage 20-2: {{Term|TLoZ|Link}} must complete the {{Smw|100m|final level}} from ''Donkey Kong''. He is again unable to jump. | ||
|} | |} | ||
====Bonus==== | ====Bonus==== | ||
"Bonus" and its first Stage are unlocked by collecting 310 Stars; another Stage is unlocked for every 10 Stars thereafter. Three of its 25 Stages contain {{TLoZ|-}} content. | "Bonus" and its first Stage are unlocked by collecting 310 Stars; another Stage is unlocked for every 10 Stars thereafter. Three of its 25 Stages contain {{TLoZ|-}} content. | ||
{| class="wikitable" | {| class="wikitable" style="text-align:left" | ||
! Stage # | ! Stage # | ||
! colspan="3"| Details | ! colspan="3"| Details | ||
|- | |- | ||
| style="text-align:center; background-color:#25527b" rowspan="6"| '''2''' | | style="text-align:center; background-color:#25527b" rowspan="6"| '''2''' | ||
| style=" | | style="width:5.5em"| Stars required: | ||
| style=" | | style="background-color:#163d5f; width:4em"| '''320''' | ||
| style="text-align:center; width:29em" rowspan="5"| | | style="text-align:center; width:29em" rowspan="5"| | ||
{|align="center" style="text-align:center" | {|align="center" style="text-align:center" | ||
| Line 720: | Line 719: | ||
|tab1= 1 | |tab1= 1 | ||
|tooltip1= Stage 2-1 | |tooltip1= Stage 2-1 | ||
|content1= [[File: | |content1= [[File:NESR Bonus Stage 2-1.png|350px]]<br/>'''1. (Second Quest) Enter the dungeon!''' | ||
|tab2= 2 | |tab2= 2 | ||
|tooltip2= Stage 2-2 | |tooltip2= Stage 2-2 | ||
|content2= [[File: | |content2= [[File:NESR Bonus Stage 2-2.png|350px]]<br/>'''2. (Second Quest) Enter the next room!''' | ||
|tab3= 3 | |tab3= 3 | ||
|tooltip3= Stage 2-3 | |tooltip3= Stage 2-3 | ||
|content3= [[File: | |content3= [[File:NESR Bonus Stage 2-3.png|350px]]<br/>'''3. (Second Quest) Leave a heart and go!''' | ||
|tab4= 4 | |tab4= 4 | ||
|tooltip4= Stage 2-4 | |tooltip4= Stage 2-4 | ||
|content4= [[File: | |content4= [[File:NESR Bonus Stage 2-4.png|350px]]<br/>'''4. (Second Quest) Defeat all the enemies!''' | ||
}} | }} | ||
|} | |} | ||
|- | |- | ||
| Challenges: | |||
| style=" | | style="background-color:#163d5f"| '''4''' | ||
|- | |- | ||
| Time: | |||
| style=" | | style="background-color:#163d5f"| '''—''' | ||
|- | |- | ||
| Life: | |||
| style=" | | style="background-color:#163d5f"| '''3''' | ||
|- | |- | ||
| Bits: | |||
| style=" | | style="background-color:#163d5f"| '''30''' {{Exp|Stage Clear (multiplied by number of Stars)}}<br/>'''160''' {{Exp|1st-Time Clear bonus}}<br/>'''20''' {{Exp|Perfect bonus}} | ||
|- | |- | ||
| Notes: | |||
| style=" | | style="background-color:#163d5f; width:33em" colspan="2"| Stage 2-1: Push the top-center Armos.<br/>Stage 2-2: Walk through the south wall. | ||
|- | |- | ||
| Line 753: | Line 752: | ||
|- | |- | ||
| style="text-align:center; background-color:#25527b" rowspan="6"| '''17''' | | style="text-align:center; background-color:#25527b" rowspan="6"| '''17''' | ||
| Stars required: | |||
| style=" | | style="background-color:#163d5f"| '''470''' | ||
| style="text-align:center" rowspan="5"| | | style="text-align:center" rowspan="5"| | ||
{|align="center" style="text-align:center" | {|align="center" style="text-align:center" | ||
| [[File: | | [[File:NESR Bonus Stage 17-1.png|400px]]<br/>'''1. Defeat Gohma with your very last arrow!''' | ||
|} | |} | ||
|- | |- | ||
| Challenges: | |||
| style=" | | style="background-color:#163d5f"| '''1''' of 4 {{Exp|This Stage has four Challenges, but only one of them contains The Legend of Zelda content.}} | ||
|- | |- | ||
| Time: | |||
| style=" | | style="background-color:#163d5f"| '''—''' | ||
|- | |- | ||
| Life: | |||
| style=" | | style="background-color:#163d5f"| '''6''' | ||
|- | |- | ||
| Bits: | |||
| style=" | | style="background-color:#163d5f"| '''37.5''' {{Exp|Stage Clear (multiplied by number of Stars; rounded up)}}<br/>'''200''' {{Exp|1st-Time Clear bonus}}<br/>'''25''' {{Exp|Perfect bonus}} | ||
|- | |- | ||
| Notes: | |||
| style=" | | style="background-color:#163d5f" colspan="2"| '''—''' | ||
|- | |- | ||
| Line 780: | Line 779: | ||
|- | |- | ||
| style="text-align:center; background-color:#25527b" rowspan="6"| '''18''' | | style="text-align:center; background-color:#25527b" rowspan="6"| '''18''' | ||
| Stars required: | |||
| style=" | | style="background-color:#163d5f"| '''480''' | ||
| style="text-align:center" rowspan="5"| | | style="text-align:center" rowspan="5"| | ||
{|align="center" style="text-align:center" | {|align="center" style="text-align:center" | ||
| [[File:NESR Bonus Stage 18.png| | | [[File:NESR Bonus Stage 18.png|400px]]<br/>'''Defeat Manhandla with a bomb!''' | ||
|} | |} | ||
|- | |- | ||
| Challenges: | |||
| style=" | | style="background-color:#163d5f"| '''1''' | ||
|- | |- | ||
| Time: | |||
| style=" | | style="background-color:#163d5f"| '''—''' | ||
|- | |- | ||
| Life: | |||
| style=" | | style="background-color:#163d5f"| '''3''' | ||
|- | |- | ||
| Bits: | |||
| style=" | | style="background-color:#163d5f"| '''37.5''' {{Exp|Stage Clear (multiplied by number of Stars; rounded up)}}<br/>'''200''' {{Exp|1st-Time Clear bonus}}<br/>'''25''' {{Exp|Perfect bonus}} | ||
|- | |- | ||
| Notes: | |||
| style=" | | style="background-color:#163d5f" colspan="2"| '''—''' | ||
|} | |} | ||
===Miiverse Integration=== | ===Miiverse Integration=== | ||
{{ | [[File:NESR Menu.png|300px|right|thumb|The game's menu, displaying a Miiverse post for {{TLoZ|-}} Stages.]] | ||
Miiverse | Prior to the closure of [[Miiverse]] in November 2017, {{NESR|-}} featured optional integration with the service. When selecting a Stage on the game's menu, a post about that Stage from another Miiverse user (either text, or a black-and-white drawing) would be displayed on the right-hand side of the screen, along with that user's best completion time for the Stage, when applicable. By pressing the Right Control Stick, different posts could be shown. Tapping an icon in the upper-right corner of the post added a "Yeah!" (like), while a green speech-balloon icon in the menu's bottom-right corner allowed the player to write their own Miiverse post about that Stage. | ||
{{NESR|-}} contains 100 Miiverse Stamps which can be used while making posts. Ten of them are available by default, while the other 90 are unlocked by reaching certain amounts of the total Bits collected by the player. Collected Stamps can be viewed by pressing the Y button on the game's menu. | |||
{{Collapsible | {{Collapsible | ||
|header= List of Stamps | |header= List of ''Zelda'' Stamps | ||
|frame= true | |frame= true | ||
|content= | |content= | ||
| Line 885: | Line 886: | ||
|align= left | |align= left | ||
|ja= {{Romanize|ファミコンリミックス|Famikon Rimikksu}} | |ja= {{Romanize|ファミコンリミックス|Famikon Rimikksu}} | ||
|jaM= Famicom Remix | |jaM= ''Famicom Remix'' | ||
}} | }} | ||
==Gallery== | |||
<gallery> | |||
File:NES Remix Wii U Icon.png|The game's HOME Menu icon, featuring {{Term|TLoZ|Link}} | |||
File:NES Remix Wii U Banner.png|The game's Wii U banner | |||
File:NES Remix Japanese Logo.png|The Japanese game logo | |||
</gallery> | |||
{{Ref}} | {{Ref}} | ||
Latest revision as of 20:59, 10 June 2024
NES Remix is a video game compilation for the Wii U, released in 2013 as a download-only title.[1][2] It features 16 classic NES games, including The Legend of Zelda, which are played as a series of miniature challenges. A sequel, NES Remix 2 was released in 2014, followed by a 2-in-1 retail release, NES Remix Pack, and a Nintendo 3DS version containing the "best of" both games, Ultimate NES Remix.
Overview
In NES Remix, players can choose from a variety of classic games for the Nintendo Entertainment System. Rather than playing them in their entirety, these games are given a curated set of Stages that can be selected from a main menu. Stages consist of one or more challenges that must be completed consecutively; these challenges are short excerpts of gameplay that can last from several seconds to several minutes, giving players a sampling of various moments and types of gameplay. Of the 16 games included in NES Remix, 12 become available to be played in this manner as they are unlocked. In addition, there are two sets of "Remix" Stages that present unique challenges, such as combining elements of two different games, adding new graphical effects, or creating scenarios that are not otherwise possible in the original games. A set of "Bonus" Stages features even more challenges, some of which include the four additional NES games that do not have their own sets of Stages.
After playing a single, introductory Remix Stage based on Super Mario Bros., six NES games become unlocked and available to play. Every Stage is given a time limit and/or a "Life" counter, which is the number of times a challenge can be failed before the player must restart or use a "continue". Upon completing a Stage, the player is graded from one Star to three Stars, or the best possible grade of three Stars with rainbow-colored outlines, based on the speed of completion and whether or not any continues were used. New games, as well as extra Remix or Bonus Stages, are unlocked by accumulating these Stars. The Legend of Zelda is the first game to unlock after the initial six, once 100 Stars have been collected.
The player can also collect Bits, which are another type of score-keeping. Unlike Stars, they can be earned even when a Stage is cleared repeatedly. Each Stage has a base number of Bits awarded, which is multiplied by the number of Stars earned (rainbow Stars count as four), as well as bonus amounts of Bits for first-time clears and "perfect" clears (no Life is lost). Setting a new completion-time record also nets 15 Bits. When certain milestone numbers of Bits are collected, a new Miiverse Stamp is unlocked.
Stages
The following Stages feature content from The Legend of Zelda. Note that "Life" refers to the number of chances given to complete the Stage, rather than Link's actual Life Gauge.
There is no Zelda content in the "Remix I" Stages.
The Legend of Zelda
The Legend of Zelda and its first Stage are unlocked by collecting 100 Stars. There are 17 Stages for this game, with 53 challenges in total. Each subsequent Stage is unlocked by simply playing the Stage before it.
| Stage # | Details | |||
|---|---|---|---|---|
| 1 | Challenges: | 5 |
| |
| Time: | 100 | |||
| Life: | — | |||
| Bits: | 15 80 10 | |||
| Notes: | — | |||
| Stage # | Details | |||
| 2 | Challenges: | 3 |
| |
| Time: | — | |||
| Life: | 3 | |||
| Bits: | 15 80 10 | |||
| Notes: | — | |||
| Stage # | Details | |||
| 3 | Challenges: | 1 |
| |
| Time: | 300 | |||
| Life: | 3 | |||
| Bits: | 22.5 120 15 | |||
| Notes: | It may be quicker to enter the Shop two screens west and two north, and purchase Bombs for 20 Rupees. | |||
| Stage # | Details | |||
| 4 | Challenges: | 3 |
| |
| Time: | — | |||
| Life: | 3 | |||
| Bits: | 15 80 10 | |||
| Notes: | Stage 4-1: Push the Block in any direction. Stage 4-3: Push the leftmost Block up or down. | |||
| Stage # | Details | |||
| 5 | Challenges: | 1 |
| |
| Time: | — | |||
| Life: | 3 | |||
| Bits: | 15 80 10 | |||
| Notes: | — | |||
| Stage # | Details | |||
| 6 | Challenges: | 3 |
| |
| Time: | — | |||
| Life: | 3 | |||
| Bits: | 22.5 120 15 | |||
| Notes: | Link has no Sword in this Stage. | |||
| Stage # | Details | |||
| 7 | Challenges: | 5 |
| |
| Time: | 240 | |||
| Life: | — | |||
| Bits: | 22.5 120 15 | |||
| Notes: | Stage 7-2: Bomb the north wall, just left of center. Stage 7-4: Burn the lower-right of the group of four bushes. Stage 7-5: Burn the lower-right green bush. | |||
| Stage # | Details | |||
| 8 | Challenges: | 1 |
| |
| Time: | — | |||
| Life: | 3 | |||
| Bits: | 22.5 120 15 | |||
| Notes: | — | |||
| Stage # | Details | |||
| 9 | Challenges: | 3 |
| |
| Time: | — | |||
| Life: | 3 | |||
| Bits: | 22.5 120 15 | |||
| Notes: | Stage 9-3: The "real" Ghini starts in the lower-right corner. | |||
| Stage # | Details | |||
| 10 | Challenges: | 6 |
| |
| Time: | — | |||
| Life: | 3 | |||
| Bits: | 22.5 120 15 | |||
| Notes: | — | |||
| Stage # | Details | |||
| 11 | Challenges: | 3 |
| |
| Time: | — | |||
| Life: | 3 | |||
| Bits: | 22.5 120 15 | |||
| Notes: | Stage 11-1: Link can walk the left, upper, and right edges of this room; the rest is blocked by a body of water. Stage 11-2: This room has narrow bodies of water that Link can cross using the Stepladder. Stage 11-3: This room has several diagonal rows of Blocks. | |||
| Stage # | Details | |||
| 12 | Challenges: | 1 |
| |
| Time: | 300 | |||
| Life: | 3 | |||
| Bits: | 22.5 120 15 | |||
| Notes: | — | |||
| Stage # | Details | |||
| 13 | Challenges: | 2 |
| |
| Time: | — | |||
| Life: | 3 | |||
| Bits: | 22.5 120 15 | |||
| Notes: | Stage 13-1: Push the top-center Armos. Stage 13-2: Defeat the Wizzrobes, then push the leftmost Block up or down. | |||
| Stage # | Details | |||
| 14 | Challenges: | 3 |
| |
| Time: | — | |||
| Life: | 3 | |||
| Bits: | 22.5 120 15 | |||
| Notes: | — | |||
| Stage # | Details | |||
| 15 | Challenges: | 6 |
| |
| Time: | — | |||
| Life: | 3 | |||
| Bits: | 22.5 120 15 | |||
| Notes: | Stage 15-2: Pay the Old Woman 20 Rupees. Stage 15-3: Go east, then north four times. Stage 15-4: Defeat the Darknuts, then push the Block in any direction. Stage 15-5: Use the Recorder first. | |||
| Stage # | Details | |||
| 16 | Challenges: | 1 |
| |
| Time: | 300 | |||
| Life: | 3 | |||
| Bits: | 22.5 120 15 | |||
| Notes: | — | |||
| Stage # | Details | |||
| 17 | Challenges: | 6 |
| |
| Time: | — | |||
| Life: | 3 | |||
| Bits: | 30 160 20 | |||
| Notes: | Stage 17-2: Burn the bush in the narrow path. Stage 17-4: Bomb the bottom of the left mountain peak. | |||


Remix II
"Remix II" and its first three Stages are unlocked by collecting 155 Stars; another three Stages are unlocked for every 15 or 20 Stars thereafter. Only two of its 25 Stages contain The Legend of Zelda content.
| Stage # | Details | |||
|---|---|---|---|---|
| 1 | Stars required: | 155 |
| |
| Challenges: | 2 | |||
| Time: | — | |||
| Life: | 6 | |||
| Bits: | 30 200 20 | |||
| Notes: | Stage 1-1: The screen gradually pixelates. Stage 1-2: Link must complete the first level from Donkey Kong. He is unable to jump. | |||
| Stage # | Details | |||
| 20 | Stars required: | 265 |
| |
| Challenges: | 2 | |||
| Time: | — | |||
| Life: | 3 | |||
| Bits: | 30 200 20 | |||
| Notes: | Stage 20-1: The screen gradually pixelates. Stage 20-2: Link must complete the final level from Donkey Kong. He is again unable to jump. | |||


Bonus
"Bonus" and its first Stage are unlocked by collecting 310 Stars; another Stage is unlocked for every 10 Stars thereafter. Three of its 25 Stages contain The Legend of Zelda content.
| Stage # | Details | |||
|---|---|---|---|---|
| 2 | Stars required: | 320 |
| |
| Challenges: | 4 | |||
| Time: | — | |||
| Life: | 3 | |||
| Bits: | 30 160 20 | |||
| Notes: | Stage 2-1: Push the top-center Armos. Stage 2-2: Walk through the south wall. | |||
| Stage # | Details | |||
| 17 | Stars required: | 470 |
| |
| Challenges: | 1 of 4 | |||
| Time: | — | |||
| Life: | 6 | |||
| Bits: | 37.5 200 25 | |||
| Notes: | — | |||
| Stage # | Details | |||
| 18 | Stars required: | 480 |
| |
| Challenges: | 1 | |||
| Time: | — | |||
| Life: | 3 | |||
| Bits: | 37.5 200 25 | |||
| Notes: | — | |||


Miiverse Integration

Prior to the closure of Miiverse in November 2017, NES Remix featured optional integration with the service. When selecting a Stage on the game's menu, a post about that Stage from another Miiverse user (either text, or a black-and-white drawing) would be displayed on the right-hand side of the screen, along with that user's best completion time for the Stage, when applicable. By pressing the Right Control Stick, different posts could be shown. Tapping an icon in the upper-right corner of the post added a "Yeah!" (like), while a green speech-balloon icon in the menu's bottom-right corner allowed the player to write their own Miiverse post about that Stage.
NES Remix contains 100 Miiverse Stamps which can be used while making posts. Ten of them are available by default, while the other 90 are unlocked by reaching certain amounts of the total Bits collected by the player. Collected Stamps can be viewed by pressing the Y button on the game's menu.
| Stamp | |
|---|---|
| Subject Depicted | Link |
| Bits Required | 6,000 |
| Stamp | |
| Subject Depicted | Moblin |
| Bits Required | 7,000 |
| Stamp | |
| Subject Depicted | Link |
| Bits Required | 15,000 |
| Stamp | |
| Subject Depicted | Hearts |
| Bits Required | 15,500 |
| Stamp | |
| Subject Depicted | Merchant |
| Bits Required | 16,000 |
| Stamp | |
| Subject Depicted | Staircase |
| Bits Required | 16,500 |
| Stamp | |
| Subject Depicted | Old Man |
| Bits Required | 17,000 |
| Stamp | |
| Subject Depicted | Block |
| Bits Required | 17,500 |
| Stamp | |
| Subject Depicted | Fairy |
| Bits Required | 18,500 |
| Stamp | |
| Subject Depicted | Zelda |
| Bits Required | 19,000 |
| Stamp | |
| Subject Depicted | Link |
| Bits Required | 19,500 |
| Stamp | |
| Subject Depicted | Rupee |
| Bits Required | 20,000 |
| Stamp | |
| Subject Depicted | Ganon |
| Bits Required | 24,800 |
| Stamp | |
| Subject Depicted | Zora |
| Bits Required | 49.000 |
| Stamp | |
| Subject Depicted | Dodongo |
| Bits Required | 52,500 |
| Stamp | |
| Subject Depicted | Gohma |
| Bits Required | 60,000 |
| Stamp | Subject Depicted | Bits Required |
|---|---|---|
Link | 6,000 | |
Moblin | 7,000 | |
Link | 15,000 | |
Hearts | 15,500 | |
Merchant | 16,000 | |
Staircase | 16,500 | |
Old Man | 17,000 | |
Block | 17,500 | |
Fairy | 18,500 | |
Zelda | 19,000 | |
Link | 19,500 | |
Rupee | 20,000 | |
Ganon | 24,800 | |
Zora | 49.000 | |
Dodongo | 52,500 | |
Gohma | 60,000 |
Note: Obtained in between the Block and Fairy Stamps at 18,000 Bits is a Bomb Stamp; however, it is based on the sprite from Wrecking Crew. Obtained at 21,000 Bits is a Stamp of an Ingot from Clu Clu Land, which appears as a horizontal-facing Rupee.
Nomenclature
| Language | Name | Meaning | |
|---|---|---|---|
| Japanese | ファミコンリミックス (Famikon Rimikksu) | Famicom Remix | |
Gallery
-
The game's HOME Menu icon, featuring Link
-
The game's Wii U banner
-

The Japanese game logo

References
- ↑ "Release date: 18/12/2013" — NES™ Remix | Wii U download software , Nintendo, retrieved June 8, 2024.
- ↑ "Best over 200 stages based on much-loved Nintendo classics in NES™ Remix, only on Nintendo eShop on Wii U!" — NES™ Remix | Wii U download software , Nintendo, retrieved June 8, 2024.