Bosses in Ocarina of Time: Difference between revisions
TriforceTony (talk | contribs) No edit summary |
TriforceTony (talk | contribs) No edit summary |
||
| Line 54: | Line 54: | ||
;{{Plural|OoT3D|Sub-Boss}} | ;{{Plural|OoT3D|Sub-Boss}} | ||
{{Hatnote|There are two {{Term|OoT3D|Sub-Boss}} fights in this location.}} | {{Hatnote|There are two {{Term|OoT3D|Sub-Boss}} fights in this location.}} | ||
{{Listing Container| | |||
{{Listing Item|header= {{Term|OoT3D|Sub-Boss}} Battle|content= | |||
{{Gallery List|Enemies | {{Gallery List|Enemies | ||
|OoT= Lizalfos [Qty:2] | |OoT= Lizalfos [Qty:2] | ||
|OoT3D= Lizalfos [Qty:2] | |OoT3D= Lizalfos [Qty:2] | ||
}} | |||
}} | }} | ||
{{Listing Item|header= {{Term|OoT3D|Sub-Boss}} Battle|content= | |||
{{Gallery List|Enemies | {{Gallery List|Enemies | ||
|OoT= Lizalfos [Qty:2] | |OoT= Lizalfos [Qty:2] | ||
|OoT3D= Lizalfos [Qty:2] | |OoT3D= Lizalfos [Qty:2] | ||
}} | |||
}} | |||
}} | }} | ||
| Line 86: | Line 92: | ||
;{{Plural|OoT3D|Sub-Boss}} | ;{{Plural|OoT3D|Sub-Boss}} | ||
{{Hatnote|There are six {{Term|OoT3D|Sub-Boss}} fights in this location.}} | {{Hatnote|There are six {{Term|OoT3D|Sub-Boss}} fights in this location.}} | ||
{{Listing Container| | |||
{{Listing Item|header= {{Term|OoT3D|Sub-Boss}} Battle|content= | |||
{{Gallery List|Enemies | {{Gallery List|Enemies | ||
|OoT= Stalfos [Qty:2] | |OoT= Stalfos [Qty:2] | ||
|OoT3D= Stalfos [Qty:2] | |OoT3D= Stalfos [Qty:2] | ||
}} | |||
}} | }} | ||
{{Listing Item|header= {{Term|OoT3D|Sub-Boss}} Battle|content= | |||
{{Gallery List|Enemies | {{Gallery List|Enemies | ||
|OoT= Stalfos [Qty:3] | |OoT= Stalfos [Qty:3] | ||
|OoT3D= Stalfos [Qty:3] | |OoT3D= Stalfos [Qty:3] | ||
}} | |||
}} | }} | ||
{{Listing Item|header= {{Term|OoT3D|Sub-Boss}} Battle|content= | |||
{{Gallery List|Enemies | {{Gallery List|Enemies | ||
|OoT= Beth (Poe) [Qty:1] | |OoT= Beth (Poe) [Qty:1] | ||
|OoT3D= Beth (Poe) [Qty:1] | |OoT3D= Beth (Poe) [Qty:1] | ||
}} | |||
}} | }} | ||
{{Listing Item|header= {{Term|OoT3D|Sub-Boss}} Battle|content= | |||
{{Gallery List|Enemies | {{Gallery List|Enemies | ||
|OoT= Joelle [Qty:1] | |OoT= Joelle [Qty:1] | ||
|OoT3D= Joelle [Qty:1] | |OoT3D= Joelle [Qty:1] | ||
}} | |||
}} | }} | ||
{{Listing Item|header= {{Term|OoT3D|Sub-Boss}} Battle|content= | |||
{{Gallery List|Enemies | {{Gallery List|Enemies | ||
|OoT= Amy [Qty:1] | |OoT= Amy [Qty:1] | ||
|OoT3D= Amy [Qty:1] | |OoT3D= Amy [Qty:1] | ||
}} | |||
}} | }} | ||
{{Listing Item|header= {{Term|OoT3D|Sub-Boss}} Battle|content= | |||
{{Gallery List|Enemies | {{Gallery List|Enemies | ||
|OoT= Meg [Qty:1] | |OoT= Meg [Qty:1] | ||
|OoT3D= Meg [Qty:1] | |OoT3D= Meg [Qty:1] | ||
}} | |||
}} | |||
}} | }} | ||
| Line 125: | Line 145: | ||
;{{Plural|OoT3D|Sub-Boss}} | ;{{Plural|OoT3D|Sub-Boss}} | ||
{{Hatnote|There are two {{Term|OoT3D|Sub-Boss}} fights in this location.}} | {{Hatnote|There are two {{Term|OoT3D|Sub-Boss}} fights in this location.}} | ||
{{Listing Container| | |||
{{Listing Item|header= {{Term|OoT3D|Sub-Boss}} Battle|content= | |||
{{Gallery List|Enemies | {{Gallery List|Enemies | ||
|OoT= Flare Dancer [Qty:1] | |OoT= Flare Dancer [Qty:1] | ||
|OoT3D= Flare Dancer [Qty:1] | |OoT3D= Flare Dancer [Qty:1] | ||
}} | |||
}} | }} | ||
{{Listing Item|header= {{Term|OoT3D|Sub-Boss}} Battle|content= | |||
{{Gallery List|Enemies | {{Gallery List|Enemies | ||
|OoT= Flare Dancer [Qty:1] | |OoT= Flare Dancer [Qty:1] | ||
|OoT3D= Flare Dancer [Qty:1] | |OoT3D= Flare Dancer [Qty:1] | ||
}} | |||
}} | |||
}} | }} | ||
| Line 184: | Line 210: | ||
;{{Plural|OoT3D|Sub-Boss}} | ;{{Plural|OoT3D|Sub-Boss}} | ||
{{Hatnote|There are two {{Term|OoT3D|Sub-Boss}} fights in this location.}} | {{Hatnote|There are two {{Term|OoT3D|Sub-Boss}} fights in this location.}} | ||
{{Listing Container| | |||
{{Listing Item|header= {{Term|OoT3D|Sub-Boss}} Battle|content= | |||
{{Gallery List|Enemies | {{Gallery List|Enemies | ||
|OoT= Iron Knuckle [Qty:1] | |OoT= Iron Knuckle [Qty:1] | ||
|OoT3D= Iron Knuckle [Qty:1] | |OoT3D= Iron Knuckle [Qty:1] | ||
}} | |||
}} | }} | ||
{{Listing Item|header= {{Term|OoT3D|Sub-Boss}} Battle|content= | |||
{{Gallery List|Enemies | {{Gallery List|Enemies | ||
|OoT= Iron Knuckle [2][Qty:1] | |OoT= Iron Knuckle [2][Qty:1] | ||
|OoT3D= Iron Knuckle [2][Qty:1] | |OoT3D= Iron Knuckle [2][Qty:1] | ||
}} | |||
}} | |||
}} | }} | ||
| Line 258: | Line 290: | ||
;{{Plural|OoT3D|Sub-Boss}} | ;{{Plural|OoT3D|Sub-Boss}} | ||
{{Hatnote|There are six {{Term|OoT3D|Sub-Boss}} fights in this location.}} | {{Hatnote|There are six {{Term|OoT3D|Sub-Boss}} fights in this location.}} | ||
{{Listing Container| | |||
{{Listing Item|header= {{Term|OoT3D|Sub-Boss}} Battle|content= | |||
{{Gallery List|Enemies | {{Gallery List|Enemies | ||
|OoT= Stalfos [Qty:1] | |OoT= Stalfos [Qty:1] | ||
|OoT3D= Stalfos [Qty:1] | |OoT3D= Stalfos [Qty:1] | ||
}} | |||
}} | }} | ||
{{Listing Item|header= {{Term|OoT3D|Sub-Boss}} Battle|content= | |||
{{Gallery List|Enemies | {{Gallery List|Enemies | ||
|OoT= Stalfos [Qty:3] | |OoT= Stalfos [Qty:3] | ||
|OoT3D= Stalfos [Qty:3] | |OoT3D= Stalfos [Qty:3] | ||
}} | |||
}} | }} | ||
{{Listing Item|header= {{Term|OoT3D|Sub-Boss}} Battle|content= | |||
{{Gallery List|Enemies | {{Gallery List|Enemies | ||
|OoT= Beth (Poe) [Qty:1] | |OoT= Beth (Poe) [Qty:1] | ||
|OoT3D= Beth (Poe) [Qty:1] | |OoT3D= Beth (Poe) [Qty:1] | ||
}} | |||
}} | }} | ||
{{Listing Item|header= {{Term|OoT3D|Sub-Boss}} Battle|content= | |||
{{Gallery List|Enemies | {{Gallery List|Enemies | ||
|OoT= Joelle [Qty:1] | |OoT= Joelle [Qty:1] | ||
|OoT3D= Joelle [Qty:1] | |OoT3D= Joelle [Qty:1] | ||
}} | |||
}} | }} | ||
{{Listing Item|header= {{Term|OoT3D|Sub-Boss}} Battle|content= | |||
{{Gallery List|Enemies | {{Gallery List|Enemies | ||
|OoT= Amy [Qty:1] | |OoT= Amy [Qty:1] | ||
|OoT3D= Amy [Qty:1] | |OoT3D= Amy [Qty:1] | ||
}} | |||
}} | }} | ||
{{Listing Item|header= {{Term|OoT3D|Sub-Boss}} Battle|content= | |||
{{Gallery List|Enemies | {{Gallery List|Enemies | ||
|OoT= Meg [Qty:1] | |OoT= Meg [Qty:1] | ||
|OoT3D= Meg [Qty:1] | |OoT3D= Meg [Qty:1] | ||
}} | |||
}} | |||
}} | }} | ||
| Line 304: | Line 350: | ||
;{{Plural|OoT3D|Sub-Boss}} | ;{{Plural|OoT3D|Sub-Boss}} | ||
{{Hatnote|There are four {{Term|OoT3D|Sub-Boss}} fights in this location.}} | {{Hatnote|There are four {{Term|OoT3D|Sub-Boss}} fights in this location.}} | ||
{{Listing Container| | |||
{{Listing Item|header= {{Term|OoT3D|Sub-Boss}} Battle|content= | |||
{{Gallery List|Enemies | {{Gallery List|Enemies | ||
|OoT= Stalfos [Qty:3] | |OoT= Stalfos [Qty:3] | ||
|OoT3D= Stalfos [Qty:3] | |OoT3D= Stalfos [Qty:3] | ||
}} | |||
}} | }} | ||
{{Listing Item|header= {{Term|OoT3D|Sub-Boss}} Battle|content= | |||
{{Gallery List|Enemies | {{Gallery List|Enemies | ||
|OoT= Stalfos [Qty:3] | |OoT= Stalfos [Qty:3] | ||
|OoT3D= Stalfos [Qty:3] | |OoT3D= Stalfos [Qty:3] | ||
}} | |||
}} | }} | ||
{{Listing Item|header= {{Term|OoT3D|Sub-Boss}} Battle|content= | |||
{{Gallery List|Enemies | {{Gallery List|Enemies | ||
|OoT= Dark Link [Qty:1] | |OoT= Dark Link [Qty:1] | ||
|OoT3D= Dark Link [Qty:1] | |OoT3D= Dark Link [Qty:1] | ||
}} | |||
}} | }} | ||
{{Listing Item|header= {{Term|OoT3D|Sub-Boss}} Battle|content= | |||
{{Gallery List|Enemies | {{Gallery List|Enemies | ||
|OoT= Stalfos [Qty:1] | |OoT= Stalfos [Qty:1] | ||
|OoT3D= Stalfos [Qty:1] | |OoT3D= Stalfos [Qty:1] | ||
}} | |||
}} | |||
}} | }} | ||
| Line 333: | Line 389: | ||
;{{Plural|OoT3D|Sub-Boss}} | ;{{Plural|OoT3D|Sub-Boss}} | ||
{{Hatnote|There are five {{Term|OoT3D|Sub-Boss}} fights in this location.}} | {{Hatnote|There are five {{Term|OoT3D|Sub-Boss}} fights in this location.}} | ||
{{Listing Container| | |||
{{Listing Item|header= {{Term|OoT3D|Sub-Boss}} Battle|content= | |||
{{Gallery List|Enemies | {{Gallery List|Enemies | ||
|OoT= Stalfos [Qty:2] | |OoT= Stalfos [Qty:2] | ||
|OoT3D= Stalfos [Qty:2] | |OoT3D= Stalfos [Qty:2] | ||
}} | |||
}} | }} | ||
{{Listing Item|header= {{Term|OoT3D|Sub-Boss}} Battle|content= | |||
{{Gallery List|Enemies | {{Gallery List|Enemies | ||
|OoT= Iron Knuckle [Qty:1] | |OoT= Iron Knuckle [Qty:1] | ||
|OoT3D= Iron Knuckle [Qty:1] | |OoT3D= Iron Knuckle [Qty:1] | ||
}} | |||
}} | }} | ||
{{Listing Item|header= {{Term|OoT3D|Sub-Boss}} Battle|content= | |||
{{Gallery List|Enemies | {{Gallery List|Enemies | ||
|OoT= Flare Dancer [Qty:1] | |OoT= Flare Dancer [Qty:1] | ||
|OoT3D= Flare Dancer [Qty:1] | |OoT3D= Flare Dancer [Qty:1] | ||
}} | |||
}} | }} | ||
{{Listing Item|header= {{Term|OoT3D|Sub-Boss}} Battle|content= | |||
{{Gallery List|Enemies | {{Gallery List|Enemies | ||
|OoT= Flare Dancer [Qty:1] | |OoT= Flare Dancer [Qty:1] | ||
|OoT3D= Flare Dancer [Qty:1] | |OoT3D= Flare Dancer [Qty:1] | ||
}} | |||
}} | }} | ||
{{Listing Item|header= {{Term|OoT3D|Sub-Boss}} Battle|content= | |||
{{Gallery List|Enemies | {{Gallery List|Enemies | ||
|OoT= Stalfos [Qty:2] | |OoT= Stalfos [Qty:2] | ||
|OoT3D= Stalfos [Qty:2] | |OoT3D= Stalfos [Qty:2] | ||
}} | |||
}} | |||
}} | }} | ||
| Line 367: | Line 435: | ||
;{{Plural|OoT3D|Sub-Boss}} | ;{{Plural|OoT3D|Sub-Boss}} | ||
{{Hatnote|There are two {{Term|OoT3D|Sub-Boss}} fights in this location.}} | {{Hatnote|There are two {{Term|OoT3D|Sub-Boss}} fights in this location.}} | ||
{{Listing Container| | |||
{{Listing Item|header= {{Term|OoT3D|Sub-Boss}} Battle|content= | |||
{{Gallery List|Enemies | {{Gallery List|Enemies | ||
|OoT= Dead Hand [Qty:1], Dead Hand's Hand [Qty:6] | |OoT= Dead Hand [Qty:1], Dead Hand's Hand [Qty:6] | ||
|OoT3D= Dead Hand [Qty:1], Dead Hand's Hand [Qty:6] | |OoT3D= Dead Hand [Qty:1], Dead Hand's Hand [Qty:6] | ||
}} | |||
}} | }} | ||
{{Listing Item|header= {{Term|OoT3D|Sub-Boss}} Battle|content= | |||
{{Gallery List|Enemies | {{Gallery List|Enemies | ||
|OoT= Dead Hand [Qty:1] | |OoT= Dead Hand [Qty:1] | ||
|OoT3D= Dead Hand [Qty:1] | |OoT3D= Dead Hand [Qty:1] | ||
}} | |||
}} | |||
}} | }} | ||
| Line 386: | Line 460: | ||
;{{Plural|OoT3D|Sub-Boss}} | ;{{Plural|OoT3D|Sub-Boss}} | ||
{{Hatnote|There are four {{Term|OoT3D|Sub-Boss}} fights in this location.}} | {{Hatnote|There are four {{Term|OoT3D|Sub-Boss}} fights in this location.}} | ||
{{Listing Container| | |||
{{Listing Item|header= {{Term|OoT3D|Sub-Boss}} Battle|content= | |||
{{Gallery List|Enemies | {{Gallery List|Enemies | ||
|OoT= Iron Knuckle [Qty:1] | |OoT= Iron Knuckle [Qty:1] | ||
|OoT3D= Iron Knuckle [Qty:1] | |OoT3D= Iron Knuckle [Qty:1] | ||
}} | |||
}} | }} | ||
{{Listing Item|header= {{Term|OoT3D|Sub-Boss}} Battle|content= | |||
{{Gallery List|Enemies | {{Gallery List|Enemies | ||
|OoT= Iron Knuckle [Qty:1] | |OoT= Iron Knuckle [Qty:1] | ||
|OoT3D= Iron Knuckle [Qty:1] | |OoT3D= Iron Knuckle [Qty:1] | ||
}} | |||
}} | }} | ||
{{Listing Item|header= {{Term|OoT3D|Sub-Boss}} Battle|content= | |||
{{Gallery List|Enemies | {{Gallery List|Enemies | ||
|OoT= Iron Knuckle [3][Qty:1] | |OoT= Iron Knuckle [3][Qty:1] | ||
|OoT3D= Iron Knuckle [3][Qty:1] | |OoT3D= Iron Knuckle [3][Qty:1] | ||
}} | |||
}} | }} | ||
{{Listing Item|header= {{Term|OoT3D|Sub-Boss}} Battle|content= | |||
{{Gallery List|Enemies | {{Gallery List|Enemies | ||
|OoT= Iron Knuckle [2][Qty:1] | |OoT= Iron Knuckle [2][Qty:1] | ||
|OoT3D= Iron Knuckle [2][Qty:1] | |OoT3D= Iron Knuckle [2][Qty:1] | ||
}} | |||
}} | |||
}} | }} | ||
| Line 421: | Line 505: | ||
==={{Term|OoT3D|Gerudo Training Ground}}=== | ==={{Term|OoT3D|Gerudo Training Ground}}=== | ||
;{{Term|OoT3D|Sub-Boss}} | ;{{Term|OoT3D|Sub-Boss}} | ||
{{Hatnote|There are | {{Hatnote|There are two {{Term|OoT3D|Sub-Boss}} fights in this location.}} | ||
{{Listing Container| | |||
{{Listing Item|header= {{Term|OoT3D|Sub-Boss}} Battle|content= | |||
{{Gallery List|Enemies | {{Gallery List|Enemies | ||
|OoT= Iron Knuckle [Qty:1] | |OoT= Iron Knuckle [Qty:1] | ||
|OoT3D= Iron Knuckle [Qty:1] | |OoT3D= Iron Knuckle [Qty:1] | ||
}} | |||
}} | }} | ||
{{Listing Item|header= {{Term|OoT3D|Sub-Boss}} Battle|content= | |||
{{Gallery List|Enemies | {{Gallery List|Enemies | ||
|OoT= Iron Knuckle [3][Qty:1] | |OoT= Iron Knuckle [3][Qty:1] | ||
|OoT3D= Iron Knuckle [3][Qty:1] | |OoT3D= Iron Knuckle [3][Qty:1] | ||
}} | |||
}} | |||
}} | }} | ||
| Line 435: | Line 525: | ||
;{{Term|OoT3D|Sub-Boss}} | ;{{Term|OoT3D|Sub-Boss}} | ||
{{Hatnote|There are two {{Term|OoT3D|Sub-Boss}} fights in this location.}} | {{Hatnote|There are two {{Term|OoT3D|Sub-Boss}} fights in this location.}} | ||
{{Listing Container| | |||
{{Listing Item|header= {{Term|OoT3D|Sub-Boss}} Battle|content= | |||
{{Gallery List|Enemies | {{Gallery List|Enemies | ||
|OoT= Iron Knuckle [Qty:1] | |OoT= Iron Knuckle [Qty:1] | ||
|OoT3D= Iron Knuckle [Qty:1] | |OoT3D= Iron Knuckle [Qty:1] | ||
}} | |||
}} | }} | ||
{{Listing Item|header= {{Term|OoT3D|Sub-Boss}} Battle|content= | |||
{{Gallery List|Enemies | {{Gallery List|Enemies | ||
|OoT= Stalfos [Qty:2] | |OoT= Stalfos [Qty:2] | ||
|OoT3D= Stalfos [Qty:2] | |OoT3D= Stalfos [Qty:2] | ||
}} | |||
}} | |||
}} | }} | ||
Latest revision as of 20:24, 16 October 2023
The following is a list of Sub-Bosses and Bosses that appear in Ocarina of Time and Ocarina of Time 3D. The information is presented here in two ways: first with a generalized listing placed by chronological encounter order, and then a detailed breakdown of every fight ordered by location. The Master Quest mode of Ocarina of Time is displayed separately from the normal mode in every listing.
Sub-Bosses
- Ocarina of Time


- Master Quest


Bosses
-
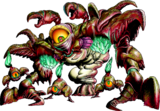
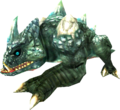
Gohma
Parasitic Armored Arachnid
• Inside the Deku Tree -
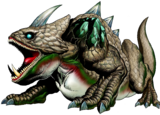
King Dodongo
Infernal Dinosaur
• Dodongo's Cavern -
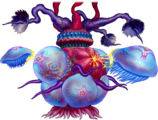
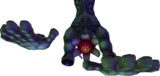
Barinade
Bio-Electric Anemone
• Inside Jabu-Jabu's Belly -
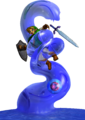
Phantom Ganon
Evil Spirit from Beyond
• Forest Temple -
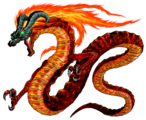
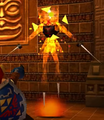
Volvagia
Subterranean Lava Dragon
• Fire Temple -
Morpha
Giant Aquatic Amoeba
• Water Temple -
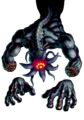
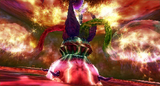
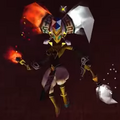
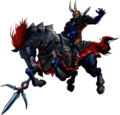
Bongo Bongo
Phantom Shadow Beast
• Shadow Temple -
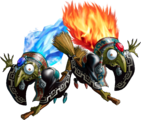
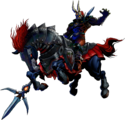
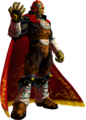
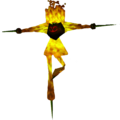
Twinrova
Sorceress Sisters
• Spirit Temple -
Ganondorf
Great King of Evil
• Inside Ganon's Castle -


-
Gohma
Parasitic Armored Arachnid
• Inside the Deku Tree -
King Dodongo
Infernal Dinosaur
• Dodongo's Cavern -
Barinade
Bio-Electric Anemone
• Inside Jabu-Jabu's Belly -
Phantom Ganon
Evil Spirit from Beyond
• Forest Temple -
Volvagia
Subterranean Lava Dragon
• Fire Temple -

Morpha
Giant Aquatic Amoeba
• Water Temple -
Bongo Bongo
Phantom Shadow Beast
• Shadow Temple -
Twinrova
Sorceress Sisters
• Spirit Temple -
Ganondorf
Great King of Evil
• Inside Ganon's Castle -


Ocarina of Time
Inside the Deku Tree
Dodongo's Cavern
- Sub-Bosses
- Boss
-
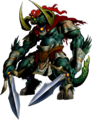
King Dodongo ×1
Infernal Dinosaur
-
King Dodongo ×1
Infernal Dinosaur
Inside Jabu-Jabu's Belly
- Sub-Boss
- Boss
Forest Temple
- Sub-Bosses
- Boss
-
Phantom Ganon ×1
Evil Spirit from Beyond
-
Phantom Ganon ×1
Evil Spirit from Beyond
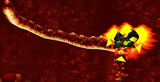
Fire Temple
- Sub-Bosses
Sub-Boss Battle
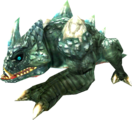
-
Flare Dancer ×1
-
Flare Dancer ×1
Sub-Boss Battle
-
Flare Dancer ×1
-
Flare Dancer ×1
- Boss
Ice Cavern
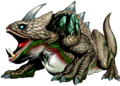
- Sub-Boss
-
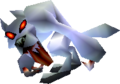
White Wolfos ×1
-
White Wolfos ×1
Water Temple
- Sub-Boss
- Boss
Bottom of the Well
- Sub-Bosses
Shadow Temple
- Sub-Bosses
- Boss
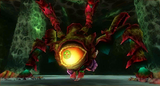
-
Bongo Bongo ×1
Phantom Shadow Beast
-
Bongo Bongo ×1
Phantom Shadow Beast
Spirit Temple
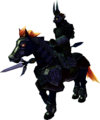
- Sub-Bosses
Sub-Boss Battle
-
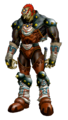
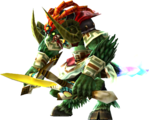
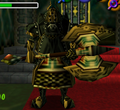
Iron Knuckle ×1
-
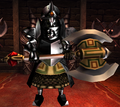
Iron Knuckle ×1
Sub-Boss Battle
-
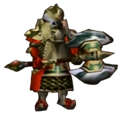
Iron Knuckle ×1
-
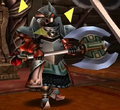
Iron Knuckle ×1
- Boss
- Phase 1
- Phase 2

Inside Ganon's Castle
- Boss
Ganon's Castle
- Boss
Master Quest
Inside the Deku Tree
- Boss
Dodongo's Cavern
- Sub-Bosses
- Boss
-
King Dodongo ×1
Infernal Dinosaur
-
King Dodongo ×1
Infernal Dinosaur
Inside Jabu-Jabu's Belly
- Sub-Boss
- Boss
Forest Temple
- Sub-Bosses
- Boss
Ice Cavern
- Sub-Boss
Water Temple
- Sub-Bosses
- Boss
Fire Temple
- Sub-Bosses
Sub-Boss Battle
-
Iron Knuckle ×1
-
Iron Knuckle ×1
Sub-Boss Battle
-
Flare Dancer ×1
-
Flare Dancer ×1
Sub-Boss Battle
-
Flare Dancer ×1
-
Flare Dancer ×1
- Boss
Shadow Temple
- Sub-Bosses
- Boss
-
Bongo Bongo ×1
-
Bongo Bongo ×1
Spirit Temple
- Sub-Bosses
Sub-Boss Battle
-
Iron Knuckle ×1
-
Iron Knuckle ×1
Sub-Boss Battle
-
Iron Knuckle ×1
-
Iron Knuckle ×1
Sub-Boss Battle
-
Iron Knuckle ×1
-

Iron Knuckle ×1
Sub-Boss Battle
-
Iron Knuckle ×1
-
Iron Knuckle ×1
- Boss
- Phase 1
- Phase 2
Gerudo Training Ground
- Sub-Boss
Sub-Boss Battle
-
Iron Knuckle ×1
-
Iron Knuckle ×1
Sub-Boss Battle
-
Iron Knuckle ×1
-
Iron Knuckle ×1
Inside Ganon's Castle
- Sub-Boss
Sub-Boss Battle
-
Iron Knuckle ×1
-
Iron Knuckle ×1
- Boss
References
