Gerudo Training Ground
The Gerudo Training Ground is an optional mini-dungeon in Ocarina of Time.(OoT | OoT3D)[1] It consists of various difficult obstacles that Link must overcome in order to prove his abilities as a hero. If he manages to complete the training ground, he will be rewarded with the Ice Arrow as proof of his skill.[2]
Entrance to the Training Ground
The Gerudo Training Ground can be found within the Gerudo's Fortress. In order to enter, Link must speak to a Gerudo standing guard outside of the Dungeon. The cost for entry is proof of membership with the Gerudo Token and a fee of 10 Rupees.[3][4] If Link leaves the Dungeon at any point after paying, the gate blocking its entrance will return and he will have to pay another fee to enter. The gate will also close if Link travels too far away from it while at the Gerudo's Fortress. Link will still be charged a fee to enter even if he completes the Dungeon.
The Gerudo Training Ground consists of a labyrinth wherein each room serves as a trial. The room containing the Dungeon's treasure, the Ice Arrow, is accessible from the entrance, though the treasure can only be obtained by completing the trials and collecting Small Keys throughout the Dungeon. A total of nine Locked Doors are present in the Training Ground, though only seven are required to reach the treasure. A handful of these trials feature time limits which will void Link out if they are not completed in time, dealing a quarter of a Heart of damage and resetting their challenges. Silver Rupees are also used as components for these trials, requiring Link to collect all of the Rupees in a room in order to complete their trials. Each Silver Rupee grants five Rupees. If Link leaves a room or a room is reset, any Silver Rupees that were collected and any Enemies that were defeated will return, though Link will be able to retain any money he obtained from collecting them. When a trial is completed, its puzzles will permanently remain completed and any Enemies that must be defeated to advance will no longer appear as well.
To fully navigate the Gerudo Training Ground, Link needs the Fairy Bow from the Forest Temple, the Megaton Hammer from the Fire Temple, the Hookshot from Kakariko Village's Graveyard, and the Iron Boots from the Ice Cavern. The Silver Gauntlets from the Spirit Temple, the Lens of Truth from the Bottom of the Well, and the Hover Boots from the Shadow Temple are optional but useful tools to navigate the Dungeon. However, none of these three Items are strictly necessary to reach the Dungeon's treasure as though the Lens of Truth helps to see through various illusory walls and floors and to locate a single Invisible Chest, Link can navigate through the illusory segments and open the Invisible Chest without them. The Silver Gauntlets are used to obtain an optional Small Key and though they help with crossing the Lava Room, the Hover Boots are made unnecessary if Link summons Time Blocks instead.
The entrance to the Training Ground opens into a cavern lit by two Torches. Four pillars surround these Torches in a semicircular formation. Beyond these pillars, there are three doorways, decorated with Lion carvings. To the north is the Treasure Room housing the Ice Arrow. To the west is the stone garden room, and to the south is the Dinolfos room.
An Eye Switch sits on the wall above the entrance. By striking the Eye Switch with an Arrow, Link can cause two Treasure Chests to appear. One is found between the northwestern pillars, while the other is between the northeastern pillars. Link can play the "Song of Storms" between the northern pillars to find a Big Fairy. This Big Fairy can be summoned at any point that Link reenters the entrance room. As Link approaches one of the Doors that lead further into the Dungeon, he will be given instructions to complete the trials ahead.[5]
In Master Quest mode, the east and west Doors are blocked by portcullises and the two Torches at the center of the room have been replaced by another variety which are unlit by default. By igniting these Torches, Link can unlock the rooms to each side and advance. There is no longer an Eye Switch in this room and no Big Fairy that can be summoned.
Treasure Chests in Normal Quest mode
| Treasure Chest | |
|---|---|
| Contents | |
| Notes | Between the northeastern pillars in the entrance room |
| Treasure Chest | |
| Contents | |
| Notes | Between the northwestern pillars in the entrance room |
| Treasure Chest | Contents | Notes |
|---|---|---|
Between the northeastern pillars in the entrance room | ||
Between the northwestern pillars in the entrance room |
Treasure Chests in Master Quest mode
| Treasure Chest | |
|---|---|
| Contents | |
| Notes | Between the northwestern pillars in the entrance room |
| Treasure Chest | |
| Contents | |
| Notes | Between the northeastern pillars in the entrance room |
| Treasure Chest | Contents | Notes |
|---|---|---|
Between the northwestern pillars in the entrance room | ||
Between the northeastern pillars in the entrance room |
Dinolfos room
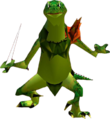
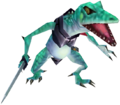
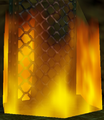
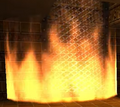
The Dinolfos room is a chamber that is connected to the entrance room and the Lava Room. The sides of the room are accented with ledges that Link can climb onto. However, these ledges are guarded from the front by Flame Walls. Two Recovery Hearts sit along the longest ledge. When Link enters the room, the Door to the Lava Room will be blocked by a portcullis and he will be instructed to defeat the Enemies inside within a time limit of one minute and thirty seconds.[6] When this trial is completed, the portcullis over the Door to the Lava Room will raise and a Treasure Chest will appear.
In Master Quest mode, the composition of Enemies has been changed. In addition to the removal of the Beamos at the center of the room, there are now two Dodongos and a Lizalfos will descend from the ceiling when Link walks in. The Recovery Hearts are also absent, and the time limit has been reduced by thirty seconds, resulting in the trial lasting for one minute. Finally, the Flame Walls are now absent as a lone Armos sits atop the longest ledge. As before, the Door to the Lava Room is blocked by a portcullis until the Enemies have been defeated. A Treasure Chest will also appear at this time.
Enemies in Normal Quest mode
-
Flame Wall ×8
-
Flame Wall ×8
Treasure Chests in Normal Quest mode
| Treasure Chest | |
|---|---|
| Contents | |
| Notes |
| Treasure Chest | Contents | Notes |
|---|---|---|
Treasure Chests in Master Quest mode
| Treasure Chest | |
|---|---|
| Contents | |
| Notes |
| Treasure Chest | Contents | Notes |
|---|---|---|
Lava Room

The Lava Room is a Lava-filled chamber with four exits.[7] To the south, it is connected to the Dinolfos room. To the west it is connected to the dead-end portion of the Treasure Room. Its eastern exit is the only means of entering the underwater gem room, and its northern exit leads to the Megaton Hammer room. There are five stone platforms spread unevenly throughout the Lava. To safely travel between these platforms, Link must use the Hover Boots that are found in the Shadow Temple. However, there are also Torches spread throughout the northern, eastern, and southern exits to the room which Link can instead grapple to with the Water Temple's Longshot. Near the center of the room, Link can play the "Song of Time" to summon a couple Time Blocks that act as stairs to the western exit, which is on a higher level than the rest of the room. A Small Key can be found on the ground of the level leading to the Treasure Room.
When Link enters the room, he is instructed to "cross the sea of fire" as five Silver Rupees are spread throughout the room. The Door to the underwater gem room will also be blocked by a portcullis, preventing entry. Three of these Silver Rupees sit in the open on the stone platforms, while one floats in the air near a Hookshot Target by the Door to the Megaton Hammer room. The fifth Rupee is found on a stone platform between the Megaton Hammer room and the Treasure Room. However, it is protected by a Flame Wall, which can only be temporarily disabled by pressing the Floor Switch on the ledge south of the entrance to the Treasure Room. This disables the Flame Wall for roughly 20 seconds, allowing Link time to reach it and escape. When Link has obtained all five Silver Rupees, the portcullis blocking the underwater gem room will raise, granting him entry. If Link falls into the Lava, he will void out and the room will also reset if the Silver Rupees have not been collected.
In Master Quest mode, there are now six Silver Rupees which have been relocated to sit atop each of the stone platforms and below the entrance to the Treasure Room. Flame Walls now guard each of the Silver Rupees and the Time Blocks and Floor Switch are now absent. There is no longer a Small Key sitting in the open within this room and the Torch by the underwater gem room has changed to a type of Torch that only temporarily stays lit. It is unlit by default, and igniting it will temporarily cause the Flame Walls to disappear. As before, the Door to the underwater gem room is blocked by a portcullis that will only raise when the Silver Rupees have been collected. When the Door is opened, Hookshot Target towers will raise from the Lava between the stone platforms, giving Link an alternate method of navigating the room to account for the Flame Walls reappearing. The ledge leading to the Megaton Hammer room features a Rusty Switch that summons a Hookshot Target tower atop the ledge leading to a segment of the Treasure Room.
Enemies in Normal Quest mode
-
Flame Wall ×1
-
Red Bubble ×2
-
Flame Wall ×1
-
Red Bubble ×2
Enemies in Master Quest mode
-
Flame Wall ×5
-
Red Bubble ×3
-
Flame Wall ×5
-
Red Bubble ×3
Underwater gem room
The underwater gem room features a large stonework pool. The entrance to this pool is obstructed by four Time Blocks which can be removed by playing the "Song of Time". Each wall of the pool's interior has four apertures and a single Hookshot Target. Inside the pool, there are a number of Silver Rupees that Link must collect in order to pass its trial.[8] However, the pool moves in a counter-clockwise direction in tandem with a Blade Trap at its bottom. When all of the Rupees have been collected, a Treasure Chest will appear above the pool.
In Master Quest mode, the Time Blocks obstructing the pool are absent and have been replaced by a Web. The number of Silver Rupees has been reduced to three and the composition of Enemies within the room has been altered. Because of the mirroring effect that is present in Ocarina of Time 3D's Master Quest mode, the Water inside the pool now moves in a clockwise direction.
Enemies in Normal Quest mode
-
Razor ×1
-
Shell Blade ×4
-
Blade Trap ×1
-
Shell Blade ×4
Enemies in Master Quest mode
-
Bari ×1
-
Shell Blade ×1
-
Stinger ×2
-
Bari ×1
-
Shell Blade ×1
-
Stinger ×2
Treasure Chests in Normal Quest mode
| Treasure Chest | |
|---|---|
| Contents | |
| Notes | Appears in the underwater gem room once the Silver Rupees have been collected |
| Treasure Chest | Contents | Notes |
|---|---|---|
Appears in the underwater gem room once the Silver Rupees have been collected |
Treasure Chests in Master Quest mode
| Treasure Chest | |
|---|---|
| Contents | |
| Notes | Appears in the underwater gem room once the Silver Rupees have been collected |
| Treasure Chest | Contents | Notes |
|---|---|---|
Appears in the underwater gem room once the Silver Rupees have been collected |
Megaton Hammer room
The Megaton Hammer room is connected to the Statue room and the Lava Room. A stone pathway leading from the center of the room to the Statue room helps to distinguish the exits. Likewise, a Crest of the Gerudo sits above the entrance to the Lava Room. When Link enters the Megaton Hammer room, portcullises will cover the Doors leading from it, trapping him inside. Stacked stone Totems are spread along the walls of this room. These Totems can be destroyed with the Megaton Hammer to reveal things hiding beneath them. A circular Flame Wall guards a Treasure Chest at the center of the room and several Enemies inhabit the room. By defeating these Enemies, Link can release the portcullises and cause a Treasure Chest to appear along one of the walls in the room. However, the Flame Wall will remain until its corresponding Floor Switch is pressed. This Floor Switch is hidden under a single Totem on the wall opposite the Statue room entrance, distinguished by the aforementioned stone pathway.
In Master Quest mode, Link is instead required to defeat all of the Enemies in the room, excluding the Flame Wall at the center, within one minute.[6] As before, portcullises will block the exits to the room until the Enemies have been defeated and a Treasure Chest will then appear. The Totem blocks are no longer present, leaving the Floor Switch exposed. The Floor Switch will cause the Flame Wall to disappear, though the Treasure Chest that is normally found here is hidden by another puzzle. In order to reveal the Treasure Chest, Link must strike the Crest of the Gerudo along the wall above the Door leading to the Lava Room.
Enemies in Normal Quest mode
-
Fire Keese ×2
-
Flame Wall ×1
-
Torch Slug ×2
-
Fire Keese ×2
-
Flame Wall ×1
-
Torch Slug ×2
Enemies in Master Quest mode
-
Iron Knuckle ×1
-
Flame Wall ×1
-
Torch Slug ×2
-
Iron Knuckle ×1
-
Flame Wall ×1
-
Torch Slug ×2
Treasure Chests in Normal Quest mode
| Treasure Chest | |
|---|---|
| Contents | |
| Notes | Appears in the Megaton Hammer room once the Fire Keese and Torch Slugs have been defeated |
| Treasure Chest | |
| Contents | |
| Notes | In the center of the Megaton Hammer room |
| Treasure Chest | Contents | Notes |
|---|---|---|
Appears in the Megaton Hammer room once the Fire Keese and Torch Slugs have been defeated | ||
In the center of the Megaton Hammer room |
Treasure Chests in Master Quest mode
| Treasure Chest | |
|---|---|
| Contents | |
| Notes | Appears in the Megaton Hammer room once the Iron Knuckle and Torch Slugs have been defeated |
| Treasure Chest | |
| Contents | |
| Notes | Appears in the Megaton Hammer room once the Crest of the Gerudo above the Door has been struck |
| Treasure Chest | Contents | Notes |
|---|---|---|
Appears in the Megaton Hammer room once the Iron Knuckle and Torch Slugs have been defeated | ||
Appears in the Megaton Hammer room once the Crest of the Gerudo above the Door has been struck |
Statue room
The Statue room is divided into two levels, the top level consists of a floor along the wall connected to the Silver Gauntlets room and an isolated section of the Treasure Room. The Door to the Treasure Room is obstructed by a portcullis, however. The bottom level features a circular floor along the wall with a pit of Lava in its center. When Link sets foot onto the circular floor, it will begin revolving around the room. A Door to the Megaton Hammer room can also be found on this level. Above this Door, there is a Hookshot Target.
Inside the Lava pit, there is a Statue with four faces. Each face has a single Eye which Link is prompted to strike with either the Bow or Hookshot.[9] By doing so, Link can release the portcullis over the Door to the Treasure Room and cause a Treasure Chest to appear at the center of the room. However, Link has a limited amount of time to strike all of the Eyes. If he takes longer than 20.24 seconds, the Eyes will reset, forcing him to restart.[note 1] By playing the "Scarecrow's Song", Link can summon Pierre at the top level, providing an easy way to travel between the room's levels via Hookshot.
In Master Quest mode, the Statue at the center of the room is surrounded by Flame Walls and both Pierre's spot and the Hookshot Target are absent. Instead, Hookshot Target towers can be seen at the top level and above the Statue. Striking the Eyes of the Statue now causes a Treasure Chest to appear along the circular floor instead, and it no longer raises the portcullis over the Door to the Treasure Room. To release this portcullis, Link can instead strike a Crystal Switch hidden in one of the Flame Walls opposite the top floor.
Enemies in Master Quest mode
-
Flame Wall ×8
-
Flame Wall ×8
Treasure Chests in Normal Quest mode
| Treasure Chest | |
|---|---|
| Contents | |
| Notes | Appears in the Statue room after all of the eyes have been struck |
| Treasure Chest | Contents | Notes |
|---|---|---|
Appears in the Statue room after all of the eyes have been struck |
Treasure Chests in Master Quest mode
| Treasure Chest | |
|---|---|
| Contents | |
| Notes | Appears in the Statue room after all of the eyes have been struck |
| Treasure Chest | Contents | Notes |
|---|---|---|
Appears in the Statue room after all of the eyes have been struck |
Silver Gauntlets room
The Silver Gauntlets room is located between the obstacle course room and the Statue room. It is also the only room that connects to the sand pit room. This room is divided into two levels. AT the base level, there is an arena where Link must fight against Wolfos. Along the far wall opposite the obstacle course room's Door, there is a large Block that can only be moved with the strength of the Silver Gauntlets. This Block guards the Door to the sand pit room, which is obstructed by a portcullis. Along the wall to the right of the Block there is a trick wall. Link can use the Lens of Truth to see through this trick wall to either reveal the second level, or see the first level below. There is a Hookshot Target on the ceiling behind this trick wall, which grants Link the ability to ascend to the second level. This second level leads to the Statue room. In front of the Door to this room there is a Floor Switch, which lifts the portcullis over the Door to the sand pit room when pressed. Once all of the Wolfos have been defeated, a Treasure Chest will appear on the floor near the Block.
In Master Quest mode, this arena contains a different set of Enemies which Link must defeat within the span of a minute.[6] Additionally, there is a Blue Fire pedestal on the base level of the room. As before, both the trick wall and the heavy Block are present, though the door to the Statue room is now obstructed by both a portcullis and a wall of Red Ice. Once all of the Enemies have been defeated, a Treasure Chest will appear on the floor opposite the Blue Fire pedestal. As the Hookshot Target on the second level is now absent, Link must instead play the "Song of Time" near the trick wall to summon a Time Block to ascend up toward it.
Treasure Chests in Normal Quest mode
| Treasure Chest | |
|---|---|
| Contents | |
| Notes | Appears in the Silver Gauntlets room once all of the Wolfos have been defeated |
| Treasure Chest | Contents | Notes |
|---|---|---|
Appears in the Silver Gauntlets room once all of the Wolfos have been defeated |
Treasure Chests in Master Quest mode
| Treasure Chest | |
|---|---|
| Contents | |
| Notes | Appears in the Silver Gauntlets room once all of the Enemies have been defeated |
| Treasure Chest | Contents | Notes |
|---|---|---|
Appears in the Silver Gauntlets room once all of the Enemies have been defeated |
Sand pit room
The sand pit room is a dead-end chamber that features three sand pits and an altar at its end. Like Likes occupy each of these sand pits, which all house Treasure Chests. A Tricky Chest sits atop the altar as a trap, while an Invisible Chest can be found in the third sand pit. Two Treasure Chests will appear in the first and second pits when all of the Like Likes have been defeated.
In Master Quest mode, the Like Likes have been replaced with Spikes and the Tricky Chest is now absent. A Treasure Chest will appear on the altar once all of the Enemies in this room have been defeated.
Enemies in Normal Quest mode
-
Like Like ×3
-
Tricky Chest ×1
-
Like Like ×3
-
Tricky Chest ×1
Treasure Chests in Normal Quest mode
| Treasure Chest | |
|---|---|
| Contents | |
| Notes | In the third pit in the sand pit room |
| Treasure Chest | |
| Contents | |
| Notes | Appears in the first pit in the sand pit room once all of the Enemies have been defeated |
| Treasure Chest | |
| Contents | |
| Notes | In the second pit in the sand pit room once all of the Enemies have been defeated |
| Treasure Chest | Contents | Notes |
|---|---|---|
In the third pit in the sand pit room | ||
Appears in the first pit in the sand pit room once all of the Enemies have been defeated | ||
In the second pit in the sand pit room once all of the Enemies have been defeated |
Treasure Chests in Master Quest mode
| Treasure Chest | |
|---|---|
| Contents | |
| Notes | Appears in the sand pit room once all of the Enemies have been defeated |
| Treasure Chest | Contents | Notes |
|---|---|---|
Appears in the sand pit room once all of the Enemies have been defeated |
Obstacle course room
The obstacle course room is situated between the stone garden room and the Silver Gauntlets room. It is composed of three corridors that rise in elevation with three hallways on each side of the central corridor connecting them. The flanking corridors have Boulders rolling through them periodically as they appear from chutes at the beginnings of each corridor and fall into pits at their respective ends. Instead of containing walkable ramps like its flanking corridors, the final third of the central corridor is separated by a tall ledge. Within the central corridor, there are three Hookshot Targets spread along the ceiling. The first sits in the middle of the corridor while another sits above the ledge to allow quick access to its upper level. The Door to the Silver Gauntlets room is found at the end of the central corridor. However, it is blocked by a portcullis and a Flame Wall that divides it from the rest of the corridor. The third Hookshot Target is found beyond this Flame Wall, giving Link a method of bypassing it. Additionally, the first hallway to the right and third hallway to the left of the central corridor are blocked by Flame Walls.
When Link enters the room, he is instructed to gather the five Silver Rupees hidden throughout it within the time limit of one minute and thirty seconds.[10] The locations of these Rupees are as follows:
-
Floating off the ledge in the central corridor
-
On the right side of the first hallway connecting the central and right-side corridors
-
Floating beneath the Hookshot Target in the middle of the central corridor
-
At the end of the left-side corridor
-
At the start of the left-side corridor
After this trial is completed, the portcullis over the Door to the Silver Gauntlets room will raise. However, the Boulders will continue to appear and roll through the flanking corridors.
In Master Quest mode, the Boulders are no longer present as a number of Ice-related obstacles now occupy the room's flanking hallways. As before, the Door to the Silver Gauntlets room will be blocked by a portcullis until the trial is completed by collecting the Silver Rupees. However, there is no longer a time limit and there are only four Rupees to collect. The Hookshot Targets and Flame Walls have also been relocated.
- Beneath the ledge in the central corridor
- Beneath the Hookshot Target on the ceiling near the beginning of the central corridor
- At the start of the left-side corridor
- Inside the pit of the left-side corridor
When the trial is completed, a Hookshot Target tower will appear near the Door to the Silver Gauntlets room, allowing an easy way to bypass the Flame Wall blocking it.
Enemies in Normal Quest mode
-
Boulder ×2
-
Flame Wall ×3
-
Boulder ×2
-
Flame Wall ×3
Enemies in Master Quest mode
-
Flame Wall ×3
-
Freezard ×1
-
Icicle ×8
-
Wallmaster ×1
-
Flame Wall ×3
-
Freezard ×1
-
Icicle ×8
-
Wallmaster ×1
Stone garden room
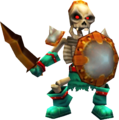
The stone garden room is connected to the entrance chamber to the east and the obstacle course room to the north. It is a spacious chamber with a sandy arena at its center. Four rocks decorate the interior of the arena. As Link enters the room, a portcullis will close over the Door to the obstacle course room and a pair of Stalfos will appear to challenge him. In order to complete the trial, Link must defeat both Stalfos within one minute.[6] However, the sandy arena will draw Link down into it, slowing his movement if he stands still and making the trial more difficult. Once both Stalfos have been defeated, a Treasure Chest will appear and the portcullis blocking the Door to the obstacle course room will raise.
In Master Quest mode, Link is instead tasked with defeating a single Iron Knuckle. As before, Link only has one minute's worth of time to complete the trial and a Treasure Chest will appear once it is completed. The Blade Trap near the Door to the entrance chamber is no longer present.
Enemies in Normal Quest mode
Enemies in Master Quest mode
Treasure Chests in Normal Quest mode
| Treasure Chest | |
|---|---|
| Contents | |
| Notes | Appears in the stone garden room after the Stalfos have been defeated |
| Treasure Chest | Contents | Notes |
|---|---|---|
Appears in the stone garden room after the Stalfos have been defeated |
Treasure Chests in Master Quest mode
| Treasure Chest | |
|---|---|
| Contents | |
| Notes | Appears in the stone garden room once the Iron Knuckle has been defeated |
| Treasure Chest | Contents | Notes |
|---|---|---|
Appears in the stone garden room once the Iron Knuckle has been defeated |
Treasure Room
The Treasure Room is connected to the entrance room, the upper level of the Lava Room, and the upper level of the Statue room.[11] It is a spacious chamber separated by fencing which creates cells. These fences can be climbed, although this is only useful to do in one specific cell. Most of these cells are locked off from each other, requiring Small Keys to traverse between them. From the entrance room's Door, the cells branch in two directions. The path to the left leads to the cell containing the Dungeon's treasure, the Ice Arrow. The path to the right leads to a dead-end and connects to the Lava Room. A disconnected chamber in this room is accessible only by entering from the upper level of the Statue room. From this chamber, Link can see another seemingly disconnected chamber with a Treasure Chest. He is also able to view the cell housing the Treasure Chest containing the Ice Arrow from above.
When Link enters the room, he is prompted to retrieve the Small Keys spread throughout the Dungeon.[12] In order to reach the Ice Arrow, Link must have a total of seven Small Keys, starting from the entrance room's Door. Two additional Small Keys may be used to fully unlock this room through its dead-end route. The aforementioned disconnected chamber with a Treasure Chest is accessible from the first cell to the left of the entrance Door. This cell has an illusory ceiling which can be passed through to reach it. Several of the cells have their own Treasure Chests, which only provide rewards like Rupees.
In Master Quest mode, only the three Doors leading to the central cell are locked. The Treasure Chest containing the Ice Arrow is also no longer located in the central cell. Instead, there is now a Wooden Box concealing a Rusty Switch that summons the Treasure Chest when activated. This Treasure Chest appears in the isolated segment of the room connected to the Statue room. This side chamber is now decorated with fuchsia flames where two Torches once stood which help to draw attention to it from below and from the adjacent chamber with the illusory floor.
Treasure Chests in Normal Quest mode
| Treasure Chest | |
|---|---|
| Contents | |
| Notes | In the segment of the Treasure Room connected to the upper floor of the Statue room |
| Treasure Chest | |
| Contents |
|
| Notes | In the segment of the Treasure Room connected to the Lava Room |
| Treasure Chest | |
| Contents | |
| Notes | In the segment of the Treasure Room connected to the Lava Room |
| Treasure Chest | |
| Contents | |
| Notes | On a floor above the first room to the left in the Treasure Room |
| Treasure Chest | |
| Contents | |
| Notes | Inside the second room to the left in the Treasure Room |
| Treasure Chest | |
| Contents | |
| Notes | Inside the fourth room to the left in the Treasure Room |
| Treasure Chest | |
| Contents | |
| Notes | Inside the fifth room to the left in the Treasure Room |
| Treasure Chest | |
| Contents | |
| Notes | In the center of the Treasure Room |
| Treasure Chest | Contents | Notes |
|---|---|---|
In the segment of the Treasure Room connected to the upper floor of the Statue room | ||
| In the segment of the Treasure Room connected to the Lava Room | |
In the segment of the Treasure Room connected to the Lava Room | ||
On a floor above the first room to the left in the Treasure Room | ||
Inside the second room to the left in the Treasure Room | ||
Inside the fourth room to the left in the Treasure Room | ||
Inside the fifth room to the left in the Treasure Room | ||
In the center of the Treasure Room |
Treasure Chests in Master Quest mode
| Treasure Chest | |
|---|---|
| Contents | |
| Notes | In the segment of the Treasure Room connected to the Lava Room |
| Treasure Chest | |
| Contents | |
| Notes | In the segment of the Treasure Room connected to the Lava Room |
| Treasure Chest | |
| Contents | |
| Notes | On a floor above the first room to the right in the Treasure Room |
| Treasure Chest | |
| Contents | |
| Notes | Inside the second room to the right in the Treasure Room |
| Treasure Chest | |
| Contents | |
| Notes | Inside the fourth room to the right in the Treasure Room |
| Treasure Chest | |
| Contents | |
| Notes | Inside the fifth room to the right in the Treasure Room |
| Treasure Chest | |
| Contents | |
| Notes | Appears in the segment of the Treasure Room connected to the upper floor of the Statue room once the Rusty Switch at the center of the room has been pressed |
| Treasure Chest | Contents | Notes |
|---|---|---|
In the segment of the Treasure Room connected to the Lava Room | ||
In the segment of the Treasure Room connected to the Lava Room | ||
On a floor above the first room to the right in the Treasure Room | ||
Inside the second room to the right in the Treasure Room | ||
Inside the fourth room to the right in the Treasure Room | ||
Inside the fifth room to the right in the Treasure Room | ||
Appears in the segment of the Treasure Room connected to the upper floor of the Statue room once the Rusty Switch at the center of the room has been pressed |
Animals
Enemies
Normal Quest mode
-
Beamos ×1
-
Boulder ×2
-
Dinolfos ×2
-
Fire Keese ×2
-
Flame Wall ×3
-
Flame Wall ×2
-
Like Like ×3
-
Razor ×2
-
Red Bubble ×2
-
Shell Blade ×4
-
Stalfos ×2
-
Torch Slug ×2
-
Tricky Chest ×1
-
Wallmaster ×1
-
White Wolfos ×2
-
Wolfos ×2
-
Beamos ×1
-
Blade Trap ×2
-
Boulder ×2
-
Dinolfos ×2
-
Fire Keese ×2
-
Flame Wall ×3
-
Flame Wall ×2
-
Like Like ×3
-
Red Bubble ×2
-
Shell Blade ×4
-
Stalfos ×2
-
Torch Slug ×2
-
Trap Door ×1
-
Tricky Chest ×1
-
Wallmaster ×1
-
White Wolfos ×2
-
Wolfos ×2
Master Quest mode
-
Armos ×1
-
Bari ×1
-
Dinolfos ×2
-
Dodongo ×2
-
Flame Wall ×3
-
Flame Wall ×14
-
Freezard ×3
-
Icicle ×8
-
Iron Knuckle ×1
-
Iron Knuckle ×1
-
Lizalfos ×1
-
Red Bubble ×3
-
Shell Blade ×1
-
Spike ×3
-
Stalfos ×2
-
Stinger ×2
-
Torch Slug ×2
-
Wallmaster ×1
-
Armos ×1
-
Bari ×1
-
Dinolfos ×2
-
Dodongo ×2
-
Flame Wall ×3
-
Flame Wall ×14
-
Freezard ×3
-
Icicle ×8
-
Iron Knuckle ×1
-
Iron Knuckle ×1
-
Lizalfos ×1
-
Red Bubble ×3
-
Shell Blade ×1
-
Spike ×3
-
Stalfos ×2
-
Stinger ×2
-
Torch Slug ×2
-
Wallmaster ×1
Treasure Chests
Normal Quest mode
| Treasure Chest | |
|---|---|
| Contents | |
| Notes | Between the northeastern pillars in the entrance room |
| Treasure Chest | |
| Contents | |
| Notes | Between the northwestern pillars in the entrance room |
| Treasure Chest | |
| Contents | |
| Notes | Appears in the stone garden room after the Stalfos have been defeated |
| Treasure Chest | |
| Contents | |
| Notes | Appears in the Silver Gauntlets room once all of the Wolfos have been defeated |
| Treasure Chest | |
| Contents | |
| Notes | In the third pit in the sand pit room |
| Treasure Chest | |
| Contents | |
| Notes | Appears in the first pit in the sand pit room once all of the Enemies have been defeated |
| Treasure Chest | |
| Contents | |
| Notes | In the second pit in the sand pit room once all of the Enemies have been defeated |
| Treasure Chest | |
| Contents | |
| Notes | Appears in the Statue room after all of the eyes have been struck |
| Treasure Chest | |
| Contents | |
| Notes | In the segment of the Treasure Room connected to the upper floor of the Statue room |
| Treasure Chest | |
| Contents | |
| Notes | Appears in the Megaton Hammer room once the Fire Keese and Torch Slugs have been defeated |
| Treasure Chest | |
| Contents | |
| Notes | In the center of the Megaton Hammer room |
| Treasure Chest | |
| Contents |
|
| Notes | In the segment of the Treasure Room connected to the Lava Room |
| Treasure Chest | |
| Contents | |
| Notes | In the segment of the Treasure Room connected to the Lava Room |
| Treasure Chest | |
| Contents | |
| Notes | Appears in the underwater gem room once the Silver Rupees have been collected |
| Treasure Chest | |
| Contents | |
| Notes | |
| Treasure Chest | |
| Contents | |
| Notes | On a floor above the first room to the left in the Treasure Room |
| Treasure Chest | |
| Contents | |
| Notes | Inside the second room to the left in the Treasure Room |
| Treasure Chest | |
| Contents | |
| Notes | Inside the fourth room to the left in the Treasure Room |
| Treasure Chest | |
| Contents | |
| Notes | Inside the fifth room to the left in the Treasure Room |
| Treasure Chest | |
| Contents | |
| Notes | In the center of the Treasure Room |
| Treasure Chest | Contents | Notes |
|---|---|---|
Between the northeastern pillars in the entrance room | ||
Between the northwestern pillars in the entrance room | ||
Appears in the stone garden room after the Stalfos have been defeated | ||
Appears in the Silver Gauntlets room once all of the Wolfos have been defeated | ||
In the third pit in the sand pit room | ||
Appears in the first pit in the sand pit room once all of the Enemies have been defeated | ||
In the second pit in the sand pit room once all of the Enemies have been defeated | ||
Appears in the Statue room after all of the eyes have been struck | ||
In the segment of the Treasure Room connected to the upper floor of the Statue room | ||
Appears in the Megaton Hammer room once the Fire Keese and Torch Slugs have been defeated | ||
In the center of the Megaton Hammer room | ||
| In the segment of the Treasure Room connected to the Lava Room | |
In the segment of the Treasure Room connected to the Lava Room | ||
Appears in the underwater gem room once the Silver Rupees have been collected | ||
On a floor above the first room to the left in the Treasure Room | ||
Inside the second room to the left in the Treasure Room | ||
Inside the fourth room to the left in the Treasure Room | ||
Inside the fifth room to the left in the Treasure Room | ||
In the center of the Treasure Room |
Master Quest mode
| Treasure Chest | |
|---|---|
| Contents | |
| Notes | Between the northwestern pillars in the entrance room |
| Treasure Chest | |
| Contents | |
| Notes | Between the northeastern pillars in the entrance room |
| Treasure Chest | |
| Contents | |
| Notes | |
| Treasure Chest | |
| Contents | |
| Notes | Appears in the underwater gem room once the Silver Rupees have been collected |
| Treasure Chest | |
| Contents | |
| Notes | Appears in the stone garden room once the Iron Knuckle has been defeated |
| Treasure Chest | |
| Contents | |
| Notes | Appears in the Silver Gauntlets room once all of the Enemies have been defeated |
| Treasure Chest | |
| Contents | |
| Notes | Appears in the sand pit room once all of the Enemies have been defeated |
| Treasure Chest | |
| Contents | |
| Notes | Appears in the Statue room after all of the eyes have been struck |
| Treasure Chest | |
| Contents | |
| Notes | Appears in the Megaton Hammer room once the Iron Knuckle and Torch Slugs have been defeated |
| Treasure Chest | |
| Contents | |
| Notes | Appears in the Megaton Hammer room once the Crest of the Gerudo above the Door has been struck |
| Treasure Chest | |
| Contents | |
| Notes | In the segment of the Treasure Room connected to the Lava Room |
| Treasure Chest | |
| Contents | |
| Notes | In the segment of the Treasure Room connected to the Lava Room |
| Treasure Chest | |
| Contents | |
| Notes | On a floor above the first room to the right in the Treasure Room |
| Treasure Chest | |
| Contents | |
| Notes | Inside the second room to the right in the Treasure Room |
| Treasure Chest | |
| Contents | |
| Notes | Inside the fourth room to the right in the Treasure Room |
| Treasure Chest | |
| Contents | |
| Notes | Inside the fifth room to the right in the Treasure Room |
| Treasure Chest | |
| Contents | |
| Notes | Appears in the segment of the Treasure Room connected to the upper floor of the Statue room once the Rusty Switch at the center of the room has been pressed |
| Treasure Chest | Contents | Notes |
|---|---|---|
Between the northwestern pillars in the entrance room | ||
Between the northeastern pillars in the entrance room | ||
Appears in the underwater gem room once the Silver Rupees have been collected | ||
Appears in the stone garden room once the Iron Knuckle has been defeated | ||
Appears in the Silver Gauntlets room once all of the Enemies have been defeated | ||
Appears in the sand pit room once all of the Enemies have been defeated | ||
Appears in the Statue room after all of the eyes have been struck | ||
Appears in the Megaton Hammer room once the Iron Knuckle and Torch Slugs have been defeated | ||
Appears in the Megaton Hammer room once the Crest of the Gerudo above the Door has been struck | ||
In the segment of the Treasure Room connected to the Lava Room | ||
In the segment of the Treasure Room connected to the Lava Room | ||
On a floor above the first room to the right in the Treasure Room | ||
Inside the second room to the right in the Treasure Room | ||
Inside the fourth room to the right in the Treasure Room | ||
Inside the fifth room to the right in the Treasure Room | ||
Appears in the segment of the Treasure Room connected to the upper floor of the Statue room once the Rusty Switch at the center of the room has been pressed |
Nomenclature
| Language | Names | Meanings |
|---|---|---|
| ゲルドの修練場 (Gerudo no Shūrenjō) (OoT)[14] | Same as English. | |
| Zona di addestramento Gerudo (OoT3D)[13] | Gerudo training zone | |
| This table was generated using translation pages. To request an addition, please contact a staff member with a reference. | ||
Other Names
| Name | Gerudo's Training Ground[15] |
|---|---|
| Applies to | |
| Source | |
| Superseded by |
| Name | Applies to | Source | Superseded by |
|---|---|---|---|
Gerudo's Training Ground[15] |
Gallery
-
Entrance to the training ground from Ocarina of Time
-
Dungeon Map of the Gerudo Training Ground from Ocarina of Time
Notes
- ↑ In Ocarina of Time 3D, the Eyes are set to reset after 624 frames. At 30 frames per second, this results in a time limit of 20.24 seconds. In prior versions of Ocarina of Time, the Eyes are programmed to reset after 416 frames instead, which equals to 20.16 seconds at 20 frames per second. As a result, Ocarina of Time 3D provides an additional .08 seconds to complete the puzzle.
References
- ↑ "Gerudo Training Ground" — N/A (Ocarina of Time 3D)
- ↑ "You got the Ice Arrow! Set it to
 and your arrows will be powered up! If you hit your target, it will freeze. This arrow magic is granted only to those who complete the difficult training of the Gerudos, so use it with pride!" — N/A (Ocarina of Time)
- ↑ "This is the Gerudo's Training Ground. Nobody is allowed to enter without a membership card." — Gerudo (Ocarina of Time)
- ↑ "This is the Gerudo Training Ground. Gerudo Token verified. One try for 10 Rupees!" — Gerudo (Ocarina of Time 3D)
- ↑ "If you can overcome the trials in the chambers ahead, then and only then will you be qualified to hold our secret treasure!" — N/A (Ocarina of Time 3D)
- ↑ 6.0 6.1 6.2 6.3 "Defeat all the enemies in a limited time!" — N/A (Ocarina of Time 3D)
- ↑ "Gerudo Training Grounds" (The Legend of Zelda: Ocarina of Time 3D—Prima Official Game Guide by Prima Games, § Master Quest § Spirit Temple)
- ↑ "Collect the underwater gems!" — N/A (Ocarina of Time 3D)
- ↑ "Blind the eyes of the statue!" — N/A (Ocarina of Time 3D)
- ↑ "Gather the jewels of white while avoiding traps and danger!" — N/A (Ocarina of Time 3D)
- ↑ The Legend of Zelda: Ocarina of Time—Perfect Guide, Versus Books, pg. 121
- ↑ "If you desire to acquire our hidden treasure, you must strive to obtain the keys hidden in each chamber!" — N/A (Ocarina of Time 3D)
- ↑ "Zona di addestramento Gerudo - Ingresso riservato ai soci" — Sign (Ocarina of Time 3D, Italian localization)
- ↑ Nintendo Official Guidebook—The Legend of Zelda: Ocarina of Time, Shogakukan, pg. 155
- ↑ "This is the Gerudo's Training Ground. Membership card verified. One try for 10 Rupees!" — Gerudo (Ocarina of Time)


![Beamos ×1[a]](http://cdn.wikimg.net/en/zeldawiki/images/thumb/9/9d/OoT_Beamos_Model.png/61px-OoT_Beamos_Model.png)
![Dinolfos ×2[b]](http://cdn.wikimg.net/en/zeldawiki/images/thumb/4/4b/OoT_Dinolfos_Model.png/71px-OoT_Dinolfos_Model.png)

![Beamos ×1[a]](http://cdn.wikimg.net/en/zeldawiki/images/thumb/0/03/OoT3D_Beamos_Model.png/66px-OoT3D_Beamos_Model.png)
![Dinolfos ×2[b]](http://cdn.wikimg.net/en/zeldawiki/images/thumb/0/04/OoT3D_Dinolfos_Model.png/116px-OoT3D_Dinolfos_Model.png)










![Door that Falls Down ×1[a]](http://cdn.wikimg.net/en/zeldawiki/images/thumb/4/4e/OoT_Door_that_Falls_Down_Model.png/62px-OoT_Door_that_Falls_Down_Model.png)
![White Wolfos ×2[b]](http://cdn.wikimg.net/en/zeldawiki/images/thumb/f/fe/OoT_White_Wolfos_Model.png/120px-OoT_White_Wolfos_Model.png)
![Wolfos ×2[b]](http://cdn.wikimg.net/en/zeldawiki/images/thumb/d/d1/OoT_Wolfos_Model.png/120px-OoT_Wolfos_Model.png)
![Trap Door ×1[a]](http://cdn.wikimg.net/en/zeldawiki/images/thumb/8/81/OoT3D_Trap_Door_Model.png/75px-OoT3D_Trap_Door_Model.png)
![White Wolfos ×2[b]](http://cdn.wikimg.net/en/zeldawiki/images/thumb/a/aa/OoT3D_White_Wolfos_Model.png/120px-OoT3D_White_Wolfos_Model.png)
![Wolfos ×2[b]](http://cdn.wikimg.net/en/zeldawiki/images/thumb/8/89/OoT3D_Wolfos_Model.png/90px-OoT3D_Wolfos_Model.png)






![Wallmaster ×1[a]](http://cdn.wikimg.net/en/zeldawiki/images/thumb/5/51/OoT_Wallmaster_Model.png/120px-OoT_Wallmaster_Model.png)
![Wallmaster ×1[a]](http://cdn.wikimg.net/en/zeldawiki/images/thumb/a/a1/OoT3D_Wallmaster_Model.png/108px-OoT3D_Wallmaster_Model.png)
![Iron Knuckle ×1[a]](http://cdn.wikimg.net/en/zeldawiki/images/thumb/f/fe/OoT_Iron_Knuckle_Model.png/120px-OoT_Iron_Knuckle_Model.png)
![Iron Knuckle ×1[a]](http://cdn.wikimg.net/en/zeldawiki/images/thumb/b/b5/OoT3D_Iron_Knuckle_Model.png/120px-OoT3D_Iron_Knuckle_Model.png)


