
Jochi-iu Shrine
The Jochi-iu Shrine,[1] designated by the trial name Courage to Pluck,[1] is a Shrine of Light in Tears of the Kingdom.
Entrance to the Shrine
The Jochi-iu Shrine is situated on the North Akkala Foothill in Deep Akkala, between East Akkala Stable and the Akkala Ancient Tech Lab.[2] It corresponds to the Ui-ihcoj Lightroot in the Depths.
Nomenclature
 Names in Other Regions Names in Other Regions  | ||
|---|---|---|
| Language | Names | |
| This table was generated using translation pages. To request an addition, please contact a staff member with a reference. | ||
Gallery
-
The interior of the Jochi-iu Shrine
-
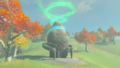
The Jochi-iu Shrine before being activated
-
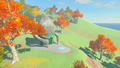
The Jochi-iu Shrine after being completed


See Also
References
- ↑ 1.0 1.1 "Jochi-iu Shrine
Courage to Pluck" — Map (Tears of the Kingdom) - ↑ "Jochi-iu Shrine
Deep Akkala" — Game Screen (Tears of the Kingdom)


Dungeons in The Legend of Zelda
Level 1 • Level 2 • Level 3 • Level 4 • Level 5 • Level 6 • Level 7 • Level 8 • Level 9
Dungeons in The Adventure of Link
Parapa Palace • Midoro Palace • Island Palace • Maze Island Palace • Palace on the Sea • Three-Eye Rock Palace • Great Palace
Dungeons in A Link to the Past
Hyrule Castle • Castle Dungeon • Eastern Palace • Desert Palace • Tower of Hera
Palace of Darkness • Swamp Palace • Skull Woods • Thieves' Town • Ice Palace • Misery Mire • Turtle Rock • Ganon's Tower • Palace of the Four Sword
Tail Cave • Bottle Grotto • Key Cavern • Angler's Tunnel • Catfish's Maw • Face Shrine • Eagle's Tower • Turtle Rock • Wind Fish's Egg
Color Dungeon (LADX | LANS) • Chamber Dungeon (LANS)
Inside the Deku Tree • Dodongo's Cavern • Inside Jabu-Jabu's Belly
Forest Temple • Fire Temple • Water Temple • Shadow Temple • Spirit Temple • Ganon's Castle
Woodfall Temple • Snowhead Temple • Great Bay Temple • Stone Tower Temple
Swamp Spider House • Pirates' Fortress • Oceanside Spider House • Beneath the Well • Ancient Castle of Ikana • Moon Dungeons
Gnarled Root Dungeon • Snake's Remains • Poison Moth's Lair • Dancing Dragon Dungeon • Unicorn's Cave • Ancient Ruins • Explorer's Crypt • Sword & Shield Maze • Onox's Castle • Room of Rites
Spirit's Grave • Wing Dungeon • Moonlit Grotto • Skull Dungeon • Crown Dungeon • Mermaid's Cave • Jabu-Jabu's Belly • Ancient Tomb • Black Tower • Room of Rites
Maku Road • Great Moblin's Keep • Ambi's Palace • Hero's Cave
Chambers of Insight • Sea of Trees • Talus Cave • Death Mountain • Vaati's Palace
Dragon Roost Cavern • Forbidden Woods • Tower of the Gods • Forsaken Fortress • Earth Temple • Wind Temple • Ganon's Castle
Fire Mountain • Ice Ring Isle • Ghost Ship • Savage Labyrinth
Stages in Four Swords Adventures
Whereabouts of the Wind
Lake Hylia • Cave of No Return • Hyrule Castle
Eastern Hyrule
The Coast • Village of the Blue Maiden • Eastern Temple
Death Mountain
Death Mountain Foothills • The Mountain Path • Tower of Flames
Near the Fields
The Field • The Swamp • Infiltration of Hyrule Castle
The Dark World
Lost Woods (Four Swords Adventures) • Kakariko Village (Four Swords Adventures) • Temple of Darkness
The Desert of Doubt
Desert of Doubt • Desert Temple • Pyramid
Frozen Hyrule
Frozen Hyrule • Temple of Ice • Tower of Winds
Realm of the Heavens • The Dark Cloud • Palace of Winds
Deepwood Shrine • Cave of Flames • Fortress of Winds • Temple of Droplets • Palace of Winds • Dark Hyrule Castle
Forest Temple • Goron Mines • Lakebed Temple • Arbiter's Grounds • Snowpeak Ruins • Temple of Time • City in the Sky • Palace of Twilight • Hyrule Castle
Lantern Caverns • Cave of Ordeals • Cave of Shadows (TPHD)
Temple of the Ocean King • Temple of Fire • Temple of Wind • Temple of Courage • Ghost Ship • Goron Temple • Temple of Ice • Mutoh's Temple
Tower of Spirits • Forest Temple • Snow Temple • Ocean Temple • Fire Temple • Sand Temple
Skyview Temple • Earth Temple • Lanayru Mining Facility • Ancient Cistern • Sandship • Fire Sanctuary • Sky Keep
Dungeons in A Link Between Worlds
Eastern Palace • Tower of Hera • House of Gales • Inside Hyrule Castle • Desert Palace
Ice Ruins • Swamp Palace • Thieves' Hideout • Dark Palace • Skull Woods • Turtle Rock • Lorule Castle
Woodlands
Deku Forest • Buzz Blob Cave • Moblin Base • Forest Temple
Riverside
Secret Fortress • Abyss of Agony • Cove of Transition • Water Temple
Volcano
Blazing Trail • Hinox Mine • Den of Flames • Fire Temple
Ice Cavern
Frozen Plateau • Snowball Ravine • Silver Shrine • Ice Temple
Fortress
Sealed Gateway • Bomb Storage • Training Ground • The Lady's Lair
The Dunes
Infinity Dunes • Stone Corridors • Gibdo Mausoleum • Desert Temple
The Ruins
Illusory Mansion • Palace Noir • Lone Labyrinth • Grim Temple
Sky Realm
Floating Garden • Deception Castle • Dragon Citadel • Sky Temple
Forest Zone • Flooded Zone • Scorching Zone • Frozen Zone • Fortified Zone • Desert Zone • Shadow Zone • Baneful Zone
Dungeons in Breath of the Wild
Divine Beast Vah Ruta • Divine Beast Vah Rudania • Divine Beast Vah Medoh • Divine Beast Vah Naboris • Hyrule Castle
Sword Monk's Shrine (TMT) • Final Trial (TCB)
Akh Va'quot • Bareeda Naag • Bosh Kala • Chaas Qeta • Daag Chokah • Dagah Keek • Dah Kaso • Dah Hesho • Daka Tuss • Dako Tah • Daqa Koh • Daqo Chisay • Dila Maag • Dow Na'eh • Dunba Taag • Gee Ha'rah • Goma Asaagh • Gorae Torr • Ha Dahamar • Hawa Koth • Hia Miu • Hila Rao • Ishto Soh • Ja Baij • Jee Noh • Jitan Sa'mi • Joloo Nah • Ka'o Makagh • Kaam Ya'tak • Kah Mael Shrine • Kah Okeo Shrine • Kah Yah Shrine • Kam Urog Shrine • Katah Chuki • Katosa Aug • Kay Noh • Kaya Wan • Kayra Mah • Ke'nai Shakah • Keeha Yoog • Keh Namut • Kema Kosassa • Kema Zoos • Keo Ruug • Ketoh Wawai • Korgu Chideh • Korsh O'hu • Kuh Takkar • Kuhn Sidajj • Lakna Rokee • Lanno Kooh • Maag Halan • Maag No'rah • Maka Rah • Mezza Lo • Mijah Rokee • Mirro Shaz • Misae Suma • Mo'a Keet • Mogg Latan • Monya Toma • Mozo Shenno • Muwo Jeem • Myahm Agana • Namika Ozz • Ne'ez Yohma • Noya Neha • Oman Au • Owa Daim • Pumaag Nitae • Qua Raym • Qaza Tokki • Qukah Nata • Raqa Zunzo • Ree Dahee • Rin Oyaa • Ritaag Zumo • Rok Uwog • Rona Kachta • Rota Ooh • Rucco Maag • Saas Ko'sah • Sah Dahaj • Sasa Kai • Sha Gehma • Sha Warvo • Shada Naw • Shae Katha • Shae Loya • Shae Mo'sah • Shai Utoh • Shai Yota • Shee Vaneer • Shee Venath • Sheem Dagoze • Sheh Rata • Sho Dantu • Shoda Sah • Shoqa Tatone • Shora Hah • Soh Kofi • Suma Sahma • Ta'loh Naeg • Tah Muhl • Tahno O'ah • Tawa Jinn • Tena Ko'sah • Tho Kayu • To Quomo • Toh Yahsa • Toto Sah • Tu Ka'loh • Tutsuwa Nima • Voo Lota • Wahgo Katta • Ya Naga • Yah Rin • Zalta Wa • Ze Kasho • Zuna Kai
Etsu Korima • Kamia Omuna • Kee Dafunia • Keive Tala • Kiah Toza • Kihiro Moh • Mah Eliya • Noe Rajee • Rinu Honika • Rohta Chigah • Ruvo Korbah • Sato Koda • Sharo Lun • Shira Gomar • Takama Shiri • Yowaka Ita
Dungeons in Tears of the Kingdom
Wind Temple • Fire Temple • Water Temple • Lightning Temple • Hyrule Castle • Spirit Temple • Beneath Hyrule Castle
Anedamimik • Apogek • Bamitok • Chichim • Domizuin • Ekochiu • En-oma • Eshos • Eutoum • Ga-ahisas • Ganos • Gasas • Gatakis • Gatanisis • Gemimik • Gikaku • Gutanbac • Igashuk • Igoshon • Ihen-a • Ijo-o • Ikatak • In-isa • Irasak • Ishodag • Ishokin • Isisim • Iun-orok • Jikais • Jinodok • Jiosin • Jiotak • Jirutagumac • Jiukoum • Jochi-ihiga • Jochi-iu • Jochisiu • Jogou • Jojon • Joju-u-u • Joku-u • Joku-usin • Joniu • Jonsau • Josiu • Kadaunar • Kahatanaum • Kamatukis • Kamizun • Karahatag • Kikakin • Kimayat • Kisinona • Kitawak • Kiuyoyou • Kudanisar • Kumamayn • Kurakat • Kyokugon • Kyononis • Makasura • Makurukis • Maoikes • Marakuguc • Marari-in • Mayachideg • Mayachin • Mayahisik • Mayak • Mayam • Mayamats • Mayanas • Mayaotaki • Mayasiar • Mayatat • Mayaumekis • Mayausiy • Minetak • Miryotanog • Mogawak • Mogisari • Momosik • Morok • Moshapin • Motsusis • Musanokir • Nachoyah • Natak • Ninjis • Nouda • O-ogim • Orochium • Oromuwak • Oshozan-u • Otak • Otutsum • Pupunke • Rakakudaj • Rakashog • Rasitakiwak • Rasiwak • Ren-iz • Riogok • Rotsumamu • Runakit • Rutafu-um • Sahirow • Sakunbomar • Sepapa • Serutabomac • Sibajitak • Sifumim • Sihajog • Sikukuu • Simosiwak • Sinakawak • Sinatanika • Sisuran • Sitsum • Siwakama • Sonapan • Soryotanog • Suariwak • Susub • Susuyai • Tadarok • Tajikats • Taki-ihaban • Taninoud • Taunhiy • Tauyosipun • Tenbez • Teniten • Tenmaten • Timawak • Tokiy • Tsutsu-um • Tukarok • Turakamik • Turakawak • Ukoojisi • Ukouh • Usazum • Utojis • Utsushok • Wao-os • Yamiyo • Yansamin • Yomizuk • Zakusu • Zanmik
Dungeons in Freshly-Picked Tingle's Rosy Rupeeland
Hero's Shrine • Pirate Hideaway • Deku Temple • Insect Cavern • Desma's Labyrinth
Stages in Link's Crossbow Training
Level 1
Ordon Target Practice • Gerudo Stalfos: Defender • Arbiter's Grounds: Ranger
Level 2
Goron Target Practice • Zora River: Defender • Skull Shooting
Level 3
Kakariko Target Practice • Fruit Balloons • The Great Bridge: Defender
Level 4
Zora River Target Practice • Hyrule Castle: Defender • Skulltula Forest: Ranger
Level 5
Oocca Target Practice • Gerudo Moldorm: Defender • The Shootout
Level 6
Ordon Target Practice 2 • Bridge of Eldin: Defender • Snowpeak Ruins: Ranger
Level 7
Underground Target Practice • City in the Sky: Defender • Temple of Time: Ranger
Level 8
Horseback Target Practice • Snowpeak Ruins: Defender • Darknut Battle
Ranch Target Practice • Sacred Grove: Defender • Fossil Stallord Battle
Hyrule Field • Eldin Caves • Faron Woods • Valley of Seers • Death Mountain • Lake Hylia • Twilight Field • Palace of Twilight • Skyloft • Sealed Grounds • Temple of the Sacred Sword • Temple of Souls • Gerudo Desert • Ganon's Tower • Forsaken Fortress • Wind and Earth Temples
Frozen Grotto • Gerudo Ruins • Lost Swamp • Temple of Storms • Hyrule Castle • Future World