Hyrule Castle (Dungeon)
Hyrule Castle,(ALttP | FSA | TP | TPHD | BotW | TotK | CoH)[1][2][3][4][name references needed][5] also known as the Castle of Hyrule,(ALttP)[6] is a recurring Dungeon in the The Legend of Zelda series.
Overview
A Link to the Past
Hyrule Castle is visited twice by Link throughout his adventure: first to rescue Princess Zelda from her cell, and later to battle Agahnim before being transported to the Dark World. The main Item obtained is the Boomerang.
Entrance to the Castle
After Link is telepathically contacted by Princess Zelda to rescue her from Agahnim's clutches in Hyrule Castle,[7] the young hero uncovers a hidden hole beneath a bush northeast of the Castle that leads him into a secret passage.[8] He then finds his Uncle has been mortally wounded and receives his Fighter's Sword and shield before passing away.[9]

Hyrule Castle is overrun by corrupted soldiers who attack Link on sight. The first time Link visits the Dungeon, he must traverse the maze-like Castle to find Princess Zelda's cell. On his way, he finds the Boomerang, which can be used to stun the Castle Soldiers. Guarding Princess Zelda's cell is the Ball and Chain Trooper, whom Link must defeat in order to free Zelda from her prison. Together, they head towards the King's chamber to reveal a path that takes them to the Secret Passage, which eventually leads them into the Sanctuary.
At this point, Agahnim makes the upper levels of the Castle inaccessible by creating an electrical barrier that cannot be bypassed. It can only be destroyed once Link retrieves the Master Sword from the Lost Woods. With the Sword in hand, he can access the upper area of the Castle and destroy the barrier with a single slash from the Blade of Evil's Bane. This area of the Castle requires Link to defeat various enemy Soldiers in order to reach the top of the Castle. Although he can evade some of the foes, some of the rooms will require that Link defeat all the enemies before proceeding. After reaching the top of the Castle, Link witnesses Agahnim as he sends Princess Zelda to the Dark World. The young hero must then burn the middle curtain with the use of his Lamp to enter another room and battle against the evil wizard who, upon his defeat, sends Link to the Dark World.
Minor Enemies
Treasure Chests
| Treasure Chest | |
|---|---|
| Contents | |
| Notes | In the second room of the Castle sewers |
| Treasure Chest | |
| Contents | |
| Notes | In the second room of the Castle sewers |
| Treasure Chest | |
| Contents | |
| Notes | In the northernmost chamber in B1 |
| Treasure Chest | |
| Contents | |
| Notes | In the statue-filled north-northwestern chamber in B1 |
| Treasure Chest | |
| Contents | |
| Notes | In Princess Zelda's cell in B3 |
| Treasure Chest | |
| Contents | |
| Notes | In Princess Zelda's cell in B3 |
| Treasure Chest | Contents | Notes |
|---|---|---|
In the second room of the Castle sewers | ||
In the second room of the Castle sewers | ||
In the northernmost chamber in B1 | ||
In the statue-filled north-northwestern chamber in B1 | ||
In Princess Zelda's cell in B3 | ||
In Princess Zelda's cell in B3 |
Four Swords Adventures
Hyrule Castle is the third and last stage in the Whereabouts of the Wind level.
After making their way through Lake Hylia and the Cave of No Return, the Links finally make their way back to Hyrule Castle. As they approach the castle grounds, Kaepora Gaebora arrives and warns them that a terrible fiend inside the castle is leeching power from the captured Maidens. He cautions them that in order to rescue the Maidens, they must first face this incredibly dangerous foe. The Links also find a signpost left by Tingle, which informs them that an adorable female Fairy Tingle met had gone inside the castle and has not been seen since. Tingle signs off that he suspects she was captured, and implores that someone save her.
The castle's interior and exterior, for the most part, greatly resembles the one from A Link to the Past, although it is considerably larger and contains even more rooms than its predecessor. Soldiers heavily patrol the castle grounds at every corner and attack intruders on sight. Two Bomb Soldiers also patrol the entrance from the castle walls high above, and throw Bombs at anyone who comes near. The Links must find an underground entrance to the castle to activate a switch that opens the gate to the castle. At the castle's courtyard, the young heroes encounter a Chief Soldier as well as a legion of Hyrulean Soldiers that will try to stop them from gaining access inside the castle.
Once inside the castle, the Links explore its various chambers as well as the roof in order to open the main door situated at the center of the castle, where they come upon a large arena that forces them to fight and defeat a Ball and Chain Soldier as well as numerous Hyrulean Soldiers. After their defeat, the Links find that the rest of the castle is bordered off by a magical barrier, preventing their approach. Through searching the area, they eventually find a Zora imprisoned in a chamber. The frustrated Zora explains that she had heard the cries of the Maidens and came to investigate, only to find the castle ridden with Soldiers. They had captured and split her in two, resulting in her current shape. She asks the Links to help her find her other half in order to return to her former shape.[10] Once the Links find the second half, the two Zora request to be escorted to the barrier that blocks the Links' way. There, they merge together and are revealed to actually be the Fairy Queen.[11] She immediately assists the young heroes by smiting all on-screen Soldiers and dispels the magical barrier, allowing the Links to continue.[12][13] The Fairy Queen then thanks them and promises to tell the other Great Fairies to help them whenever needed.[14]
The Links continue to search the castle and its chambers while running into many more enemies along the way. At the throne room, the Links push aside the throne to access a hidden passageway that leads to the rooftop, where the Links ultimately face against Phantom Ganon as the evil fiend leeching power from the Maidens. Once it is defeated, a stairway reveals itself to a hidden chamber where the Links find four dark barriers imprisoning the Blue Maiden. The freed Maiden explains to them that the dark shadow that captured her and the other Maidens was a being that looks just like the Links. She implores that they save Princess Zelda and the remaining Maidens. Sensing that the next Maiden is imprisoned at the Eastern Temple, the Blue Maiden tells them to travel by sea under her protection and transforms herself into a Fairy to guide them. The Links are then warped to the next area, The Coast.
| Items Obtained in this Area | |
|---|---|
|
|
Minor Enemies
Twilight Princess
Hyrule Castle is the final Dungeon in Twilight Princess.
Entrance to the Castle
In order to enter the Castle, Link and Midna need the power of the three Fused Shadows. After recovering them from Zant, Midna uses them to destroy the crystal surrounding the Castle, granting them access to the castle's courtyard.
In the west area of the courtyard, Link fights one last time with King Bulblin who, after his defeat, gives Link the Small Key that opens the main door to the interior of the castle. The east area houses various Enemies and puzzles, leading to another Small Key. This area also leads to the Castle's graveyard, which houses an extra Small Key. This Small Key can be used to access a room filled with Treasure Chests containing every consumable Item in the game, as well as every type of Rupee.

The main hall of Hyrule Castle consists of a large room with various chandeliers that Link must Clawshot to in order to access the rest of the Castle's chambers. Once he enters one of the rooms of the main hall, Link will encounter a Darknut. After its defeat, Link will have the option of either taking the left or right path of the Castle. Both paths lead back out to the balcony of Hyrule Castle, wherein the east side Link battles an Aeralfos to retrieve a Small Key. Just as Link walks over to the west side of the Castle, a group of Enemies spring an ambush against him. However, the members of Resistance come in and save the young hero, defeating the Enemies and making the Big Key accessible to him.
In the middle of the balcony is another door that leads to the final area of the Dungeon, making way to the third and fourth floors. As Link progresses through these last two floors, he must use his abilities as Wolf Link to make it safely across various traps; moreover, since the stairs leading to the upper floors have been destroyed, Link must use the Double Clawshots and the Spinner to successfully reach the fourth floor. The door on the fourth floor, which leads to the outside of Hyrule Castle and eventually to the throne room, is blocked off by another Darknut.
At the throne room, Link and Midna come face-to-face with Ganondorf, who uses Princess Zelda as his puppet in an attempt to defeat Link. After defeating Princess Zelda, Midna uses her powers to extract Ganondorf's evil influence from her. It is here that Ganondorf transforms into Ganon. After defeating Ganondorf's beast form, Midna attempts to finish him off, warping Link and Princess Zelda to Hyrule Field. The resulting battle destroys the Castle, and Ganondorf emerges victorious. After Princess Zelda summons the Spirits of Light to aid them with Light Arrows, she and Link fight Ganondorf while riding Epona before Link battles him in a Sword fight to finish him off once and for all.
Minor Enemies and Traps
Breath of the Wild
Hyrule Castle is the final Dungeon of Breath of the Wild. Prior to the second Great Calamity, it was the government seat of Hyrule Kingdom,[15] ruled under King Rhoam.[16] It has since served as the location where Zelda has kept Calamity Ganon sealed while Link was dormant under the Slumber of Restoration.[17][18]
Entrance to the Castle

Hyrule Castle is surrounded on all sides by the Hyrule Castle Moat. The only way that Link can approach it by land is by crossing through the Hyrule Castle Gate from the Hyrule Castle Town Ruins to its south. This Gate hides a winding path that surrounds Hyrule Castle and ultimately ends at the Sanctum, where Calamity Ganon lies. It is possible for Link to approach Hyrule Castle by air with the Paraglider or by Swimming through the Moat. As Link nears Hyrule Castle, Calamity Ganon will manifest himself and swirl through the air above the Castle, before he is contained in a radiant burst of light from Zelda in the Sanctum.
There are several entrances to the interior of Hyrule Castle, such as the Docks in the northern side of the castle grounds, as well as tunnels built into the earth supporting it. A break in the walls of the Lockup allow Link direct access to the Castle's prison and the Hyrule Castle Underground. Similarly, recesses in the structures of the Castle itself allow Link passage to various parts of its key areas, such as with the broken roof atop the Library.
Despite the accessibility of Hyrule Castle, the landscape is littered with various kinds of Guardians under Calamity Ganon's control. Decayed Guardians and Guardian Turrets can be found stationed along the ground and walls of the Hyrule Castle, and Guardian Skywatchers patrol the air around it. Positioned in formation along the ground just outside of the Hyrule Castle Moat are five Giant Columns, atop of which Link can find broken Guardians that can be searched for Ancient Materials. These Columns were used to store the legion of Guardians prior to the second Great Calamity.[19] Upon Calamity Ganon's return, the Giant Columns arose around the Castle, and he seized control of the Guardians inside.[20]
Due to the presence of Calamity Ganon's Malice, the Master Sword is perpetually empowered while Link is at Hyrule Castle. Pools of Malice can be found scattered throughout most of the Castle grounds, as well as within the Castle itself. The main entrance to Hyrule Castle itself is overflowing with Malice, forcing Link to ascend the grounds by other means. While in the vicinity of Hyrule Castle, the Sheikah Slate's Map displays a three-dimensional model of Hyrule Castle and its entrances, as well as the positions of Link and Calamity Ganon. A primary, winding road from the Hyrule Castle Gate leads to the Sanctum, where Calamity Ganon waits. The Bridge between Princess Zelda's Room and Princess Zelda's Study is the location of the 12th Recovered Memory, " Father and Daughter."
In a chamber connected to the southern end of the Library, Link can find a Great Frostblade embedded in a mound of rubble. This chamber leads into Hyrule Castle Corridors, eventually connecting to the Square Spiral Staircase. The upper floor of the Staircase leads back into the Hyrule Castle Corridors, which consists of a series of hallways that converge near the Dining Hall.
From the pathway between Lockup and the West Passage, Link can enter the Water Pump Room, which leads him out of the Hyrule Castle Underground. This Updraft in the Water Pump Room brings Link to a hallway. The right path of leads outside to the grounds of Hyrule Castle near Princess Zelda's Room, while the left path leads back into the Hyrule Castle Corridors and the Guards' Chamber. The hallway leading to the Guards' Chamber ends in two doorways, one of which is blocked by Malice controlled by a Glowing Eyeball, which can summon Cursed Lizalfos to attack Link. Destroying the Glowing Eyeball will open the path forward, allowing Link to continue further into the Hyrule Castle Corridors, where he finds a Cooking Pot.
Here, Link will find two accessible doors, the first of which leads down into the Guards' Chamber, while the latter leads to the entrance along the road nearest the Hyrule Castle Gate. Another doorway is blocked by an immovable wall of Malice, prohibiting direct access to the Reception Room and Observation Room.
The other doorway in the initial path to the Guards' Chamber leads to the Round Spiral Staircase, which is blocked by another Glowing Eyeball. If destroyed, the Malice covering the Staircase will disappear, allowing Link access to the colonnade along the road near the First Gatehouse. This area once functioned as a garden.[21] A single Guardian Turret can be found inside the colonnade.
Path to the Sanctum
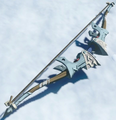
To the right of the Hyrule Castle Gate stands a tower which holds a stone Treasure Chest containing five Bomb Arrows. The roof of this tower also bears a stone Treasure Chest containing five Ice Arrows. The main road to the Sanctum continues to the west of this tower, beyond a Decayed Guardian on the roadside. The path along the road is interrupted by a strip of Malice covering the ground along the road, and there are steep cliffs on either side. A nearby doorway offers a detour into the Castle's interior, near the Guards' Chamber. From there, Link can return to the Hyrule Castle Courtyard just beyond the strip of Malice. Link can remove this Malice by striking the Glowing Eyeball on its far side, clearing the roadway. A Natural Hiding Spot can be found nearby, and if Link lifts this Rock, a Korok will appear and give him a Korok Seed.[22]
The aforementioned courtyard sits beneath a second tower, guarded by a Guardian Turret. On the floor inside the tower sits a Rusty Shield, and a Royal Bow can be found on the end of the wall north of the tower. The main road continues along a curved slope in front of the tower into the First Gatehouse. The main road continuing from the First Gatehouse is obstructed by a massive cluster of Malice. However, a side road branching from the main road across a small Bridge and underneath a colonnade. The side road continues along the path until it is obstructed by the remains of a landslide, where a Decayed Guardian watches from an angle. An unmarked branch of this road continues left, down a flight of stairs into the northern entrance of the Library. However, it is possible for Link to simply walk around the rubble and continue along the side road. Beyond the landslide sits a pool of Water beside the road. A metallic Treasure Chest containing five Bomb Arrows is hidden underwater. A Guardian Skywatcher patrols the road near the pool.
Beyond the pool of Water, the side road continues to another landslide. When Link approaches the landslide, an inactive Guardian will fall from above. Link can walk along the narrow strip of land around the landslide to continue along the side road which passes the Dining Hall. The road continuing from the Bridge beyond the Dining Hall meets back with the main road, on the other side of the massive collection of Malice. An Glowing Eyeball can be found on this side of the Malice, and destroying it will clear the main road for Link to travel between his position and the First Gatehouse. From here, the main road continues along to the Second Gatehouse nearby.
The main road beyond the Second Gatehouse curves around a series of stone walls. Along the wall on the inward curve of the road is a tower that holds a stone Treasure Chest with five Bomb Arrows stored inside. A second stone Treasure Chest on the roof of this tower holds five Shock Arrows. After the main road curves around the tower and its corresponding wall, it is once again obstructed by a thin strip of Malice connected to an Glowing Eyeball between two thin, short towers. Beyond this strip of Malice, the main road curves once more before turning straight for the entrance of the Sanctum. A ledge beneath the final curve hosts a cracked boulder, which can be bombed to unveil a Natural Hiding Spot. When Link lifts it, another Korok will appear and give him a Korok Seed.[22]
Unmarked Paths
Beyond the Bridge crossing between Princess Zelda's Room and Princess Zelda's Study, Link can find a small tower to the left-hand side of the side road. The roof of this tower holds a stone Treasure Chest with five Ice Arrows. At the bottom of this tower is a small, unmarked path trailing down the side of the Hyrule Castle Courtyard's grounds. At the end of this path stands a pool of Water, from which a metallic Treasure Chest can be retrieved with Magnesis to yield 10 Ice Arrows. A stone wall along the ledge of this path bears two towers. Two stone Treasure Chests can be found the roofs of both towers, both containing bundles of five Bomb Arrows. A larger pool of Water near the second tower hides a Treasure Chest containing five Ice Arrows. A break in the road along the stone wall leads to the entrance to Lockup and the Docks.
Across the dried remains of a Waterfall at the top of the slope near where the unmarked road begins sits a cracked rock, which hides a stone Treasure Chest containing five Bomb Arrows. A tower stands beneath a series of ledges from this Chest, and atop this tower's roof, Link can find a stone Treasure Chest that holds five Fire Arrows. Another cracked boulder sits along the ground closest to the cliff on the interior portion of the stone wall connected to this tower. Beneath the cracked boulder is a stone Treasure Chest that holds five Shock Arrows. A third cracked boulder sits on the ledge southeast of the stone wall. The stone Treasure Chest underneath holds Dinraal's Scale.
Following the path around the grounds of Hyrule Castle, Link can find the entrance to the East Passage. The ledge beneath the entrance to the East Passage holds a fourth cracked boulder, under which Link can find a Silver Rupee in a stone Treasure Chest. A stone wall sits on the ledge above the entrance to the East Passage, where a stone Treasure Chest can be found atop the roof of the wall's corresponding tower. This Treasure Chest contains three Ancient Arrows. The stone wall encompasses the exterior of the Library, where Link can find a fifth cracked boulder that hides Treasure Chest with a Ruby. The Water north of the cracked boulder features a Circle of Lily Pads, which Link can jump into to reveal a Korok.[22] Also in these waters is a metallic Treasure Chest that holds five Ice Arrows.
A land Bridge from the nearby tower continues to an empty ledge overlooking another tower. The stone Treasure Chest atop the roof of this tower holds five Shock Arrows. The wall north of this tower holds a giant stone slab which can be moved by using Stasis in conjunction with a Weapon. Underneath this slab is a stone Treasure Chest containing a Silver Rupee. In the vacant space created by this wall sits a sixth cracked boulder, which holds a stone Treasure Chest with a Gold Rupee. The southern extension of the tower's wall leads into a cliff, where another walled tower stands at the top. The stone Chest on this tower's roof contains five Fire Arrows. The wall from this tower leads up a rock ledge, the path of which meets with the road near the Dining Hall.
Areas
Tears of the Kingdom
Areas
Ground-level
Dungeon-level
Enemies
Monster Outpost south of Serutabomac Shrine
-
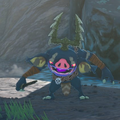
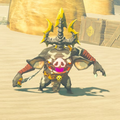
Black Moblin ×3
Sub-Bosses
During the "Crisis at Hyrule Castle" Main Quest
First Sub-Boss Battle
Scourge of Hyrule Castle
Monster Forces
Second Sub-Boss Battle
Scourge of Hyrule Castle
Monster Forces
Third Sub-Boss Battle
Scourge of Hyrule Castle
Monster Forces[a]
-
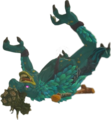
Gibdo ×3
-
Moth Gibdo ×1
Fourth Sub-Boss Battle
Scourge of Hyrule Castle
Monster Forces
Fifth Sub-Boss Battle
Scourge of Hyrule Castle
Monster Forces
Sixth Sub-Boss Battle
Scourge of Hyrule Castle
Monster Forces[a]
-
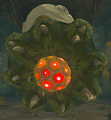
Shock Like ×3
- ↑ East of the Round Spiral Staircase
Bosses
During the "Crisis at Hyrule Castle" Main Quest
Boss Battle — Phase 1
The Demon King's Phantom Saboteur
Phantom Ganon
Boss Battle — Phase 2
The Demon King's Phantom Saboteur
Phantom Ganon
Equipment
Treasure Chests
| Treasure Chest | |
|---|---|
| Contents | |
| Coordinates | -0159, 0879, 0325 |
| Notes | Inside the roof of the Second Gatehouse |
| Treasure Chest | |
| Contents | |
| Coordinates | -0095, 0932, 0296 |
| Notes | In the tower to the northeast of the Second Gatehouse |
| Treasure Chest | |
| Contents | |
| Coordinates | -0098, 0931, 0326 |
| Notes | Atop tower to the northeast of the Second Gatehouse |
| Treasure Chest | |
| Contents | |
| Coordinates | -0226, 0961, 0301 |
| Notes | |
| Treasure Chest | |
| Contents | |
| Coordinates | -0202, 0983, 0301 |
| Notes | |
| Treasure Chest | |
| Contents | |
| Coordinates | -0288, 0967, 0301 |
| Notes | |
| Treasure Chest | |
| Contents | |
| Coordinates | -0284, 0994, 0330 |
| Notes | |
| Treasure Chest | |
| Contents | |
| Coordinates | -0384, 0993, 0315 |
| Notes | On the south side of Princess Zelda's Study |
| Treasure Chest | |
| Contents | |
| Coordinates | -0272, 1034, 0357 |
| Notes | Behind the staircase leading to the Champions' Hall |
| Treasure Chest | |
| Contents | |
| Coordinates | -0254, 1091, 0351 |
| Notes | Beneath the statue behind the throne in the Throne Room |
| Treasure Chest | |
| Contents | |
| Coordinates | -0254, 1068, 0422 |
| Notes | On the north side of the Sanctum Observation Room |
| Treasure Chest | |
| Contents | |
| Coordinates | -0235, 1052, 0380 |
| Notes | In the southeastern stairway of the Champions' Hall |
| Treasure Chest | |
| Contents | |
| Coordinates | -0259, 1064, 0466 |
| Notes | On the northwest side of the Bell Tower |
| Treasure Chest | |
| Contents | |
| Coordinates | -0248, 1065, 0466 |
| Notes | On the northeast side of the Bell Tower |
| Treasure Chest | |
| Contents | |
| Coordinates | -0153, 0895, 0284 |
| Notes | Along the northern wall of the Second Gatehouse |
| Treasure Chest | |
| Contents | |
| Coordinates | -0331, 1005, 0302 |
| Notes | Behind the privacy barrier in Princess Zelda's Room |
| Treasure Chest | |
| Contents | |
| Coordinates | -0342, 1093, 0261 |
| Notes | Atop the northwestern tower on Hyrule Castle B2 |
| Treasure Chest | |
| Contents | |
| Coordinates | -0179, 1055, 0273 |
| Notes | In the Water beside the Monster Outpost south of Serutabomac Shrine on Hyrule Castle B2 |
| Treasure Chest | |
| Contents | |
| Coordinates | -0165, 1052, 0272 |
| Notes | In the Water beside the Monster Outpost south of Serutabomac Shrine on Hyrule Castle B2 |
| Treasure Chest | |
| Contents | |
| Coordinates | -0387, 0999, 0241 |
| Notes | Atop a ledge around the side of the water pump in the Water Pump Room |
| Treasure Chest | |
| Contents | |
| Coordinates | -0189, 1083, 0221 |
| Notes | |
| Treasure Chest | |
| Contents | |
| Coordinates | -0174, 1122, 0216 |
| Notes | At the back wall of the King's Study |
| Treasure Chest | |
| Contents | |
| Coordinates | -0326, 1001, 0186 |
| Notes | Located in a small chamber positioned beneath Princess Zelda's Room on the underside of the portion of Hyrule Castle that has risen into the Sky |
| Treasure Chest | Contents | Coordinates | Notes |
|---|---|---|---|
-0159, 0879, 0325 | Inside the roof of the Second Gatehouse | ||
-0095, 0932, 0296 | In the tower to the northeast of the Second Gatehouse | ||
-0098, 0931, 0326 | Atop tower to the northeast of the Second Gatehouse | ||
-0226, 0961, 0301 | |||
-0202, 0983, 0301 | |||
-0288, 0967, 0301 | |||
-0284, 0994, 0330 | |||
-0384, 0993, 0315 | On the south side of Princess Zelda's Study | ||
-0272, 1034, 0357 | Behind the staircase leading to the Champions' Hall | ||
-0254, 1091, 0351 | Beneath the statue behind the throne in the Throne Room | ||
-0254, 1068, 0422 | On the north side of the Sanctum Observation Room | ||
-0235, 1052, 0380 | In the southeastern stairway of the Champions' Hall | ||
-0259, 1064, 0466 | On the northwest side of the Bell Tower | ||
-0248, 1065, 0466 | On the northeast side of the Bell Tower | ||
-0153, 0895, 0284 | Along the northern wall of the Second Gatehouse | ||
-0331, 1005, 0302 | Behind the privacy barrier in Princess Zelda's Room | ||
-0342, 1093, 0261 | Atop the northwestern tower on Hyrule Castle B2 | ||
-0179, 1055, 0273 | In the Water beside the Monster Outpost south of Serutabomac Shrine on Hyrule Castle B2 | ||
-0165, 1052, 0272 | In the Water beside the Monster Outpost south of Serutabomac Shrine on Hyrule Castle B2 | ||
-0387, 0999, 0241 | Atop a ledge around the side of the water pump in the Water Pump Room | ||
-0189, 1083, 0221 | |||
-0174, 1122, 0216 | At the back wall of the King's Study | ||
-0326, 1001, 0186 | Located in a small chamber positioned beneath Princess Zelda's Room on the underside of the portion of Hyrule Castle that has risen into the Sky |
Korok Seeds
| Korok | |
|---|---|
| Type | |
| Coordinates | -0083, 0906, 0319 |
| Notes | Beside the flagpole northeast of the Second Gatehouse |
| Korok | |
| Type | |
| Coordinates | -0254, 0944, 0306 |
| Notes | Beneath the rock bridge leading to the Sanctum |
| Korok | |
| Type | |
| Coordinates | -0394, 0997, 0319 |
| Notes | Outside the window of Princess Zelda's Study |
| Korok | |
| Type | |
| Coordinates | -0383, 0995, 0391 |
| Notes | Atop the spire of Princess Zelda's Study |
| Korok | |
| Type | |
| Coordinates | -0251, 1060, 0472 |
| Notes | Inside the Bell Tower |
| Korok | |
| Type | |
| Coordinates | -0254, 1061, 0561 |
| Notes | At the top of the Bell Tower's spire |
| Korok | |
| Type | |
| Coordinates | -0359, 0886, 0276 |
| Notes | At the bottom of the broken stairs directly south of the Hyrule Castle Gazebo |
| Korok | |
| Type | |
| Coordinates | -0052, 0970, 0277 |
| Notes | At the end of the road south of Serutabomac Shrine |
| Korok | Type | Coordinates | Notes |
|---|---|---|---|
-0083, 0906, 0319 | Beside the flagpole northeast of the Second Gatehouse | ||
-0254, 0944, 0306 | Beneath the rock bridge leading to the Sanctum | ||
-0394, 0997, 0319 | Outside the window of Princess Zelda's Study | ||
-0383, 0995, 0391 | Atop the spire of Princess Zelda's Study | ||
-0251, 1060, 0472 | Inside the Bell Tower | ||
-0254, 1061, 0561 | At the top of the Bell Tower's spire | ||
-0359, 0886, 0276 | At the bottom of the broken stairs directly south of the Hyrule Castle Gazebo | ||
-0052, 0970, 0277 | At the end of the road south of Serutabomac Shrine |
Other Appearances
Cadence of Hyrule
Entrance to the Castle
Hyrule Castle is where Zelda can be found if Cadence chooses to enter Zelda's Portal. After Zelda is awakened by the power of the Triforce by Cadence, Impa informs Zelda that Octavo kidnapped the King of Hyrule and sealed the Castle with his Golden Lute.[23] After gifting Zelda the Telescope, she instructs the Princess to take the nearby Dagger and flee the Castle.[24] After pushing a Rock upon leaving the Castle's walls, this section of the Castle can be revisited at any time. However, the remaining portions of the Castle cannot be entered until Octavo's Four Champions have been defeated.[25]
Four Sheikah Stones can be found at Hyrule Castle. One is situated just outside the section of the Castle where Impa took refuge. A second can be found just outside the main entrance to the Castle.
Treasure Chests containing Purple Rupees and Orange Rupees can be found in Hyrule Castle.
Minor Enemies
Trivia
- In A Link to the Past, Hyrule Castle has a Dungeon Map and a Big Key (necessary to unlock Zelda's cell), but no Compass. It is the only dungeon in the game without one. The game treats the portion of the castle after Agahnim's magical barrier as a separate area from the rest of the castle, and so the latter has no boss, while the former has no dungeon items whatsoever. As the Compass's only purpose in A Link to the Past is to show the location of bosses, there is no use for a Compass in the lower part of Hyrule Castle.
- In Twilight Princess, if Link shoots the triangle at the top of the statue in the Castle's courtyard with a Bomb Arrow, a bell noise will sound and 40 Rupees will fall to the ground. This can be repeatedly done any time the area is re-entered.
- In Cadence of Hyrule, various cutouts of enemies from Crypt of the NecroDancer can be found inside Hyrule Castle, including a cutout of the NecroDancer.
Nomenclature
| Language | Names | |
|---|---|---|
| This table was generated using translation pages. To request an addition, please contact a staff member with a reference. | ||
Other Names
| Name | Hyrule Palace[26] |
|---|---|
| Applies to | |
| Source | |
| Superseded by |
| Name | Applies to | Source | Superseded by |
|---|---|---|---|
Hyrule Palace[26] |
Gallery
-
Hyrule Castle, as seen from the overworld map from Four Swords Adventures
-
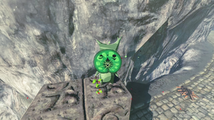
One of the Koroks found at Hyrule Castle from Breath of the Wild
-
The exterior of Hyrule Castle from Cadence of Hyrule
See Also
- Hyrule Castle
- Secret Passage
- East Hyrule Castle
- Hyrule Castle
- Hyrule Castle Town Ruins
- Hyrule Castle West
- Future World
- Hyrule Castle
References
- ↑ Encyclopedia, Dark Horse Books, pg. 146
- ↑ Encyclopedia, Dark Horse Books, pg. 267
- ↑ "Hyrule Castle" — N/A (Twilight Princess HD)
- ↑ "From Hyrule Castle, off in the distance, you hear the woman's voice speaking to you again..." — Adventure Log (Breath of the Wild)
- ↑ "Hyrule Castle" — N/A (Cadence of Hyrule)
- ↑ "CASTLE OF HYRULE" — Quest History (A Link to the Past)
- ↑ "Help me... Please help me... I am a prisoner in the dungeon of the castle. My name is Zelda. The wizard, Agahnim, has done... something to the other missing girls. Now only I remain..." — Princess Zelda (A Link to the Past)
- ↑ "I know there is a hidden path from outside of the castle to the garden inside." — Princess Zelda (Ocarina of Time)
- ↑ "Unnh... Link, I didn't want you involved in this... I told you not to leave the house... Take my sword and shield and listen." — Link's Uncle (A Link to the Past)
- ↑ "I heard the maidens' cries and came running to find the castle a nest of fiends. They captured me and split me in two. That's why I look so horrible right now. Please, I beg of you. Reunite my two halves! Make me whole again!" — Zora (Four Swords Adventures)
- ↑ "I didn't think I would ever be allowed to reclaim my true form as a Great Fairy again! Thank you so much, brave ones!" — Fairy Queen (Four Swords Adventures)
- ↑ "Uh-oh! It looks like those soldiers have noticed us. I'll take care of this!" — Fairy Queen (Four Swords Adventures)
- ↑ "So this is the magical barrier that barred your way? Allow me to take care of this." — Fairy Queen (Four Swords Adventures)
- ↑ "I'll let all of my friends throughout Hyrule know... "If you run into four travelers with one face, tend to their weariness and ease the burden of their travels!"" — Fairy Queen (Four Swords Adventures)
- ↑ "Hyrule Castle was the governing center of Hyrule, home to the king and the beautiful princess. Brave souls from nearby villages would all set their sights there, do great deeds, and return home draped in glory. Hyrule Castle, once strong and proud, was corrupted by the Calamity...and it's still in that state today." — Uma (Breath of the Wild)
- ↑ "I was King Rhoam Bosphoramus Hyrule. I was...the last leader of Hyrule. A kingdom which no longer exists." — Old Man (Breath of the Wild)
- ↑ "Remember... Try... Try to remember... You have been asleep for the past 100 years. The beast... When the beast regains its true power, this world will face its end. Now then... You must hurry, Link. Before it's too late..." — Zelda (Breath of the Wild)
- ↑ "The words of guidance you have been hearing since your awakening are from Princess Zelda herself. Even now, as she works to restrain Ganon from within Hyrule Castle, she calls out for your help." — King Rhoam (Breath of the Wild)
- ↑ "Robbie has restored mobility to many of the Guardians we've excavated. ...But we have still yet to find all of the Guardians. Records mention a greater number of them—and even other types. They are said to be stored in five giant columns that rest beneath Hyrule Castle. The thing is... No matter how I search beneath the castle, I can't seem to locate these columns. They must be buried deep. Were they perhaps designed to sense the appearance of Calamity Ganon and to only activate upon his return?" — Zelda's Research Notes (Breath of the Wild)
- ↑ "Ganon was cunning, and he responded with a plan beyond our imagining. He appeared from deep below Hyrule Castle, seized control of the Guardians and the Divine Beasts, and turned them against us." — King Rhoam (Breath of the Wild)
- ↑ Creating a Champion, Dark Horse Books, pg. 240
- ↑ 22.0 22.1 22.2 "Yahaha! You found me!" — Korok (Breath of the Wild)
- ↑ "Thank goodness you're awake! We need to get you out of the castle. Your father has been taken, and most of the guards no longer obey our command. The heart of the castle has been sealed by Octavo's Golden Lute. You'll need to find something capable of breaking the seal to save the king! Take this telescope. It should help your search!" — Impa (Cadence of Hyrule)
- ↑ "You must hurry, Princess. Take the dagger by those crates. You can break the pots over there with it and head down the stairs." — Impa (Cadence of Hyrule)
- ↑ "You did it! You defeated all four of Octavo's champions! Now we can go to Hyrule Castle and put an end to this!" — Trill (Dungeon) (Cadence of Hyrule)
- ↑ The Legend of Zelda: A Link to the Past—Nintendo Player's Guide, Nintendo of America, pg. 46
- Dungeons
- Castles
- Hyrule Castle
- Hyrule Field
- Lanayru Province
- Locations
- Dungeons in A Link to the Past
- Locations in A Link to the Past
- Dungeons in Four Swords Adventures
- Locations in Four Swords Adventures
- Dungeons in Twilight Princess
- Locations in Twilight Princess
- Dungeons in Twilight Princess HD
- Locations in Twilight Princess HD
- Dungeons in Breath of the Wild
- Locations in Breath of the Wild
- Dungeons in Tears of the Kingdom
- Locations in Tears of the Kingdom
- Dungeons in Cadence of Hyrule

