Temple of Time (Dungeon)
The Temple of Time is the sixth Dungeon in Twilight Princess.[1]
Entrance to the Temple
Link must first travel to the Sacred Grove and return the Master Sword to it's pedestal, thus revealing the door to the past. Entering the door brings Link to the past where he can again drive the Master Sword into its pedestal, creating stairs leading to the Dungeon.
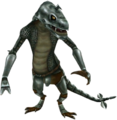
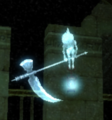
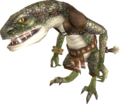
The Dungeon has eight floors, which lead upward like a tower, and also contains many large, mosaic windows on its upper floors, allowing the light from the outside to shine through. However, despite seemingly being a peaceful setting, the Temple of Time is inhabited by a large number of enemies, including Lizalfos and Beamos. Many of the statue enemies, like the Beamos and Pathblades, are designed in a more sleek and elegant appearance, similar to the look of the Temple of Time. Upon reaching the eighth floor of the Dungeon, Link enters combat with the Middle Boss of the dungeon, a Darknut. After defeating the armored foe, he is rewarded with a sacred rod known as the Dominion Rod. The Dominion Rod holds the power to animate and move certain objects, such as statues. Link uses the item to control a large statue, equipped with a Hammer, which he uses to solve many of the puzzles throughout the Dungeon and obtain the Big Key. Making his way back to the entrance to the Temple of Time, Link places the statue in its original position opposite of its counterpart, which reveals a pathway to the Boss chamber.[2][3]
The Boss of the Dungeon is known as Armogohma, and is defeated with the use of the Dominion Rod and the large statues surrounding the chamber. Upon defeating it, Link is rewarded with the third shard of the Mirror of Twilight and a Heart Container.
Areas
Enemies
-
Baby Gohma ×63[b]
-
Blade Trap ×7
-
Pendulum ×1
-
Spiketrap ×2
- ↑ Three do not reappear until the entire area is reloaded.
- ↑ Twelve do not reappear. Fifty-one do not reappear until the entire area is reloaded.
- ↑ One does not reappear until the entire area is reloaded.
- ↑ Two do not reappear until the entire area is reloaded.
- ↑ Two do not reappear.
- ↑ Four do not reappear until the entire area is reloaded.
- ↑ Ten do not reappear until the entire area is reloaded.
- ↑ Two do not reappear until the entire area is reloaded.
- ↑ Five do not reappear until the entire area is reloaded.
| After Link obtains the Dominion Rod |
-
Baby Gohma ×66[b]
-
Blade Trap ×9
-
Pendulum ×4
-
Spiketrap ×3
-
Young Gohma ×17[j]
- ↑ Four do not reappear until the entire area is reloaded.
- ↑ Sixty-six do not reappear until the entire area is reloaded.
- ↑ Three will not reappear at all if they are smashed by a Statue. If they are destroyed otherwise, these three and the remaining three will not reappear until the entire area is reloaded. If the Beamos on 3F is smashed, it will cause 15 Baby Gohmas to appear from its spot.
- ↑ Two do not reappear until the entire area is reloaded.
- ↑ Two do not reappear.
- ↑ Four do not reappear until the entire area is reloaded.
- ↑ Twelve do not reappear until the entire area is reloaded.
- ↑ One does not reappear until the entire area is reloaded.
- ↑ Seventeen do not reappear until the entire area is reloaded.
Bosses
Treasure Chests
| Treasure Chest | |
|---|---|
| Contents | |
| Notes | Appears atop the ledge in 1F's entrance once both Torches have been lit |
| Treasure Chest | |
| Contents | |
| Notes | In the southern chamber in 2F's room one down from the center |
| Treasure Chest | |
| Contents | |
| Notes | In the southern chamber of 3F's eastern room |
| Treasure Chest | |
| Contents | |
| Notes | Appears in the southeastern chamber of 3F's eastern room once the Armos has been defeated |
| Treasure Chest | |
| Contents | |
| Notes | At the southern end of 5F's southernmost room |
| Treasure Chest | |
| Contents | |
| Notes | Appears in the western chamber of 5F's southernmost room once the Armos have been defeated |
| Treasure Chest | |
| Contents | |
| Notes | In the chamber due west of the Crystal Switch in 5F's northernmost room |
| Treasure Chest | |
| Contents | |
| Notes | Appears in 6F's eastern room once all 28 of the Baby Gohmas have been defeated |
| Treasure Chest | |
| Contents | |
| Notes | In the southeastern part of 7F's southernmost room |
| Treasure Chest | |
| Contents | |
| Notes | Appears on the northern ledge of 8F's eastern room once all 12 of the Baby Gohmas have been defeated |
| Treasure Chest | |
| Contents | |
| Notes | Inside the fenced chamber of 8F's western room |
| Treasure Chest | |
| Contents | |
| Notes | Atop the southeastern ledge in 7F's northwestern room |
| Treasure Chest | |
| Contents | |
| Notes | Atop the ledge in 7F's northeastern room |
| Treasure Chest | |
| Contents | |
| Notes | Behind the fence in 7F's northeastern room |
| Treasure Chest | |
| Contents | |
| Notes | Behind the northern fence in 5F's northern room |
| Treasure Chest | |
| Contents | |
| Notes | Appears in the eastern chamber of 5F's southernmost room once both Floor Switches have been pressed |
| Treasure Chest | Contents | Notes |
|---|---|---|
Appears atop the ledge in 1F's entrance once both Torches have been lit | ||
In the southern chamber in 2F's room one down from the center | ||
In the southern chamber of 3F's eastern room | ||
Appears in the southeastern chamber of 3F's eastern room once the Armos has been defeated | ||
At the southern end of 5F's southernmost room | ||
Appears in the western chamber of 5F's southernmost room once the Armos have been defeated | ||
In the chamber due west of the Crystal Switch in 5F's northernmost room | ||
Appears in 6F's eastern room once all 28 of the Baby Gohmas have been defeated | ||
In the southeastern part of 7F's southernmost room | ||
Appears on the northern ledge of 8F's eastern room once all 12 of the Baby Gohmas have been defeated | ||
Inside the fenced chamber of 8F's western room | ||
Atop the southeastern ledge in 7F's northwestern room | ||
Atop the ledge in 7F's northeastern room | ||
Behind the fence in 7F's northeastern room | ||
Behind the northern fence in 5F's northern room | ||
Appears in the eastern chamber of 5F's southernmost room once both Floor Switches have been pressed |
Trivia
- Several Objects and Items in the Temple of Time bear the symbol of the Light Medallion from Ocarina of Time, such as the Scales of Time, the floor tiles, Floor Switches, the bell-like structure in the first chamber, and the Dungeon Map. The Light Medallion originally belongs to Rauru, who built the Temple of Time.[4]
- The Tower of the Gods from The Wind Waker has many similarities to this Dungeon, such as both being towers, similar music, statues which can be controlled, numerous Beamos and Armos, a Darknut Sub-Boss and a room in each temple with a balance scale that requires the weight of statues to manipulate.
- The music in the Dungeon is a remix of the Dig Cavern/Inside the Deku Tree music from Ocarina of Time.[verification needed]
- The Dominion Rod is not required to obtain the Big Key for this dungeon if Link uses the two available statues, as well as both Helmasaur helmets.
Nomenclature
| Language | Names |
|---|---|
| This table was generated from Zelda Wiki's translation data. | |
Gallery
-
Twilight Princess
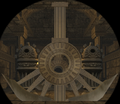
The Chamber of Stone inside the Temple of Time -
Twilight Princess
The Scales of Time found in the Dungeon -
Twilight Princess HD
Stone statue in the Boss room
See Also
References
- ↑ Encyclopedia, Dark Horse Books, pg. 155
- ↑
Link... Don't you think there's something odd about that statue? In the grove and in the temple entry, there were always matching ones on each side, but there's only one here... Why don't you use your senses to take a look around? I knew it... There was one more here originally.
— Midna (Twilight Princess) - ↑
We need to find the other statue in this temple that matches that one.
— Midna (Twilight Princess) - ↑ Hyrule Historia, Dark Horse Books, pg. 77