Forest Temple
The Forest Temple is a recurring Dungeon and location in The Legend of Zelda series.[1][2][3][4][5] The Forest Temple goes unnamed in Ocarina of Time 4-koma Manga Kingdom, Ocarina of Time 4-koma Gag Battle Adventure Compilation, and Twilight Princess (Himekawa).
Overview
Ocarina of Time


The Forest Temple is the first Dungeon that Link is directed to as an adult in Ocarina of Time. He must journey here to save his childhood friend, the Kokiri named Saria, only to awaken her to her role as the Sage of Forest.[6] The primary item of the Temple is the Fairy Bow, and its boss is Phantom Ganon.
Areas


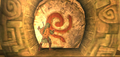
Entrance to the Temple
Deep within the Sacred Forest Meadow in the Lost Woods lies the mansion-like Forest Temple,[7] inhabited by many fierce foes. Since the stairway leading to the Temple is now broken, the only way to gain access to the Temple is by obtaining the Hookshot from the Kakariko Village Graveyard and using it to grab onto a Tree branch hanging off of the entrance platform.[8]

The Forest Temple is an eerie, complex Temple filled with strange puzzles and other features designed to confuse its explorers, such as an array of Switches which have the ability to twist entire hallways in an unnatural manner, rearranging the very Dungeon, making walls become floors. It one of the few Dungeons in The Legend of Zelda series whose structure can be altered in this manner. Another similar mechanism involves a room with a black-and-white checkered floor and a falling ceiling. The ceiling has a few openings allowing for safe passage, but it is colored like the floor, making the traversal confusing and perilous.
Despite its name, the Forest Temple of Ocarina of Time has few Forest elements compared to other Forest Temples in the series. Instead, its theme primarily revolves around color, art, illusion, and the undead.
The Dungeon's interior design is more reminiscent of a mansion or castle than a Temple, with portraits hanging in certain rooms and quaint red carpets decorating the floor. This is also one of the few Dungeons that has open-air elements, walled gardens are found on the east and west sides of the Dungeon, connected by two wells. Most of its rooms and corridors are covered with moss and Vines, and many hold enemies. However, most of the threats Link will encounter in this Dungeon are undead.
The Temple is also where the four Poe Sisters appear by stealing the flames from four multicolored Torches in the center of the main room of the Dungeon. This becomes the primary puzzle that the Dungeon is centered around: Link must hunt down and destroy them to restore the flames and complete the Temple. The first two Sisters can be found on the upper levels of the Temple, in passageways with staircases; the third Sister appears in the eastern end of the upper levels after Link solves a jigsaw-like puzzle, and the final Sister returns to the Dungeon's main chamber after her allies are defeated, directly engaging Link in battle using illusory doppelgangers.
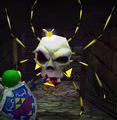
Some of the most challenging miniboss battles in the game are fought in the Forest Temple, representing an unexpected jump in difficulty for some players. One fight invovles three Stalfos that can reassemble themselves if they are not defeated quickly enough; the first half of the fight is complicated by a large hole in the arena, which the Stalfos can traverse as if walking on an invisible platform. Phantom Ganon, the boss of the Temple, also employs the use of illusory doppelgangers similar to Meg while travelling in and out of a series of identical paintings; he can only be defeated by the Bow and, later, a game of Dead Man's Volley.[9]
In Master Quest, the locations of Small Keys and Locked Doors have changed. The two Wolfos are no longer at the entrance of the Temple, but rather at the room where the first Stalfos was fought. The Stalfos now appears in a small connecting room and rewards Link with the Dungeon Map. More Skulltulas and Skullwalltulas appear throughout the Dungeon. The room with the Floormaster has been altered to host a single ReDead whereas the Floormaster has been moved elsewhere. There are two extra blocks in the jigsaw puzzle room, but they serve no purpose other than to obfuscate the puzzle further. The first twisted room is straightened when it is first found, and is twisted by activating a Crystal Switch instead of an Eye Switch. Puzzles involving Time Blocks have been added throughout the Dungeon as well. The wells are now emptied by shooting an Eye Switch with an Arrow.
Enemies
-

-

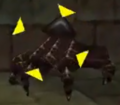
Blue Bubble ×7
-

Deku Baba ×1
-
Floormaster ×1
-
-

Green Bubble ×2
-

Octorok ×2
-
Toxic Water ×1
-

Skulltula ×7
-

-
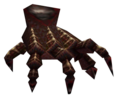
Wallmaster ×2
-

Wolfos ×2


-
-

Blue Bubble ×7
-

Deku Baba ×1
-
Floormaster ×1
-

-

Green Bubble ×2
-

Octorok ×2
-
Poison Pool ×1
-

Skulltula ×7
-

-
Wallmaster ×2
-

Wolfos ×2


- Master Quest
-
-

-
Blue Bubble ×2
-
Deku Baba ×1
-
-
Green Bubble ×2
-
Octorok ×3
-
Toxic Water ×1
-

ReDead ×1
-
Skulltula ×13
-
-
Wallmaster ×2
-

-
-
-
Blue Bubble ×2
-
Deku Baba ×1
-
-
Green Bubble ×2
-
Octorok ×3
-
Poison Pool ×1
-
ReDead ×1
-
Skulltula ×13
-
-
Wallmaster ×2
-

Sub-Bosses


Sub-Boss Battle


- Master Quest
Sub-Boss Battle
Bosses
-

Phantom Ganon
Evil Spirit from Beyond

-
Phantom Ganon
Evil Spirit from Beyond

Treasure Chests
| Treasure Chest | |
|---|---|
| Contents | |
| Coordinates |  |
| Notes | Atop the western Tree in the entrance room |
| Treasure Chest | |
| Contents | |
| Coordinates |  |
| Notes | Appears in the center of 1F's northern room once the Stalfos have been defeated |
| Treasure Chest | |
| Contents | |
| Coordinates |  |
| Notes | Appears in the center of 2F's central hallway once the Blue Bubble has been defeated |
| Treasure Chest | |
| Contents | |
| Coordinates |  |
| Notes | Atop the raised ground above the Water in the East Courtyard |
| Treasure Chest | |
| Contents | |
| Coordinates |  |
| Notes | On the western side of the sewer tunnel connecting the East and West Courtyards |
| Treasure Chest | |
| Contents | |
| Coordinates |  |
| Notes | Appears in the center of 2F's north-central room once the Stalfos have been defeated |
| Treasure Chest | |
| Contents | |
| Coordinates |  |
| Notes | Appears beside the golden Torch in the room east of the Twisted Hallway once Joelle has been defeated |
| Treasure Chest | |
| Contents | |
| Coordinates |  |
| Notes | Appears atop a ledge in the Stone Tower's third level once the golden Eye Switch has been activated |
| Treasure Chest | |
| Contents | |
| Coordinates |  |
| Notes | Along the eastern wall of the Twisted Hallway's northern chamber |
| Treasure Chest | |
| Contents | |
| Coordinates |  |
| Notes | |
| Treasure Chest | |
| Contents | |
| Coordinates |  |
| Notes | Appears beside the wall in 1F's western room once the Floormaster has been defeated |
| Treasure Chest | |
| Contents | |
| Coordinates |  |
| Notes | In a gap near the southern Door beneath the falling ceiling in 1F's northeastern room |
| Treasure Chest | |
| Contents | |
| Coordinates |  |
| Notes | In the Basement's southwestern chamber |


| Treasure Chest | Contents | Coordinates | Notes |
|---|---|---|---|
| Atop the western Tree in the entrance room | ||
| Appears in the center of 1F's northern room once the Stalfos have been defeated | ||
| Appears in the center of 2F's central hallway once the Blue Bubble has been defeated | ||
| Atop the raised ground above the Water in the East Courtyard | ||
| On the western side of the sewer tunnel connecting the East and West Courtyards | ||
| Appears in the center of 2F's north-central room once the Stalfos have been defeated | ||
| Appears beside the golden Torch in the room east of the Twisted Hallway once Joelle has been defeated | ||
| Appears atop a ledge in the Stone Tower's third level once the golden Eye Switch has been activated | ||
| Along the eastern wall of the Twisted Hallway's northern chamber | ||
| |||
| Appears beside the wall in 1F's western room once the Floormaster has been defeated | ||
| In a gap near the southern Door beneath the falling ceiling in 1F's northeastern room | ||
| In the Basement's southwestern chamber |
- Master Quest
| Treasure Chest | |
|---|---|
| Contents | |
| Coordinates |  |
| Notes | Appears atop the western Tree when the Floor Switch on the eastern tree has been pressed |
| Treasure Chest | |
| Contents | |
| Coordinates |  |
| Notes | Appears in 1F's northern room once the Wolfos have been defeated |
| Treasure Chest | |
| Contents | |
| Coordinates |  |
| Notes | In the northwest corner of the Twisted Hallway's northern chamber |
| Treasure Chest | |
| Contents | |
| Coordinates |  |
| Notes | Appears in 1F's eastern room once the ReDead has been defeated |
| Treasure Chest | |
| Contents | |
| Coordinates |  |
| Notes | Appears in 2F's northern-central room once the Stalfos have been defeated |
| Treasure Chest | |
| Contents | |
| Coordinates |  |
| Notes | Appears in the room west of the Twisted Hallway once Joelle is defeated |
| Treasure Chest | |
| Contents | |
| Coordinates |  |
| Notes | Appears in the room where Beth is fought once she is defeated |
| Treasure Chest | |
| Contents | |
| Coordinates |  |
| Notes | Atop the northern balcony in the East Courtyard |
| Treasure Chest | |
| Contents | |
| Coordinates |  |
| Notes | On the west side of the sewer tunnel connecting the East and West Courtyards |
| Treasure Chest | |
| Contents | |
| Coordinates |  |
| Notes | Appears in the room with the falling ceiling after the eastern Floor Switch is pressed |
| Treasure Chest | |
| Contents | |
| Coordinates |  |
| Notes | Atop the raised ground across the stream of Water in the East Courtyard |
| Treasure Chest | |
| Contents | |
| Coordinates |  |
| Notes | In the northeastern chamber of the Basement |
| Treasure Chest | Contents | Coordinates | Notes |
|---|---|---|---|
| Appears atop the western Tree when the Floor Switch on the eastern tree has been pressed | ||
| Appears in 1F's northern room once the Wolfos have been defeated | ||
| In the northwest corner of the Twisted Hallway's northern chamber | ||
| Appears in 1F's eastern room once the ReDead has been defeated | ||
| Appears in 2F's northern-central room once the Stalfos have been defeated | ||
| Appears in the room west of the Twisted Hallway once Joelle is defeated | ||
| Appears in the room where Beth is fought once she is defeated | ||
| Atop the northern balcony in the East Courtyard | ||
| On the west side of the sewer tunnel connecting the East and West Courtyards | ||
| Appears in the room with the falling ceiling after the eastern Floor Switch is pressed | ||
| Atop the raised ground across the stream of Water in the East Courtyard | ||
| In the northeastern chamber of the Basement |
Golden Skull Tokens
| Gold Skulltula |  |
|---|---|
| Location | |
| Gold Skulltula |  |
| Location | |
| Gold Skulltula |  |
| Location | On the wall above the raised ground across the Water in the East Courtyard |
| Gold Skulltula |  |
| Location | High on the wall north of the arches in the West Courtyard |
| Gold Skulltula |  |
| Location | On the wall inside the southwestern chamber of the Basement |
| Gold Skulltula | Location |
|---|---|
| |
| |
| On the wall above the raised ground across the Water in the East Courtyard |
| High on the wall north of the arches in the West Courtyard |
| On the wall inside the southwestern chamber of the Basement |
- Master Quest
| Gold Skulltula |  |
|---|---|
| Location | |
| Gold Skulltula |  |
| Location | Behind the southern wall near the entrance of the Stone Tower |
| Gold Skulltula |  |
| Location | Atop the ledge above the Well with Vines in the West Courtyard |
| Gold Skulltula |  |
| Location | On the Hookshot Target over the entrance of the East Courtyard |
| Gold Skulltula |  |
| Location | On the bars on the east side of the sewer tunnel connecting the East and West Courtyards |
| Gold Skulltula | Location |
|---|---|
| |
| Behind the southern wall near the entrance of the Stone Tower |
| Atop the ledge above the Well with Vines in the West Courtyard |
| On the Hookshot Target over the entrance of the East Courtyard |
| On the bars on the east side of the sewer tunnel connecting the East and West Courtyards |
Twilight Princess
Areas


Entrance to the Temple
The Forest Temple is housed within a massive Tree in Faron Woods. If Link revisits the Temple after clearing it, the Clawshot will be needed in order to make it any further than the Dungeon's main room, as well as to reach the Boss chamber. This is because the Monkeys that initially helped him traverse the Temple disappear from inside it once the Boss is defeated.
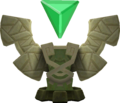
The Forest Temple is infested with Enemies. The Gale Boomerang, which is obtained after defeating the Temple's Middle Boss, Ook, is used to manipulate wind powered Switches and bridges, allowing Link to access rooms deeper within the Temple. Bomblings must also be used in place of Bombs in order to destroy several Boulders inside the Temple, as well as to defeat the Temple's Boss. Eight Monkeys, which have been imprisoned in various locations throughout the Temple by Ook, must be freed in order to help Link progress. There are two Pieces of Heart that Link can obtain in the Dungeon. Upon defeating the Temple's Boss, Diababa, Link will obtain the first of the Fused Shadows.
Minor Enemies


Spirit Tracks
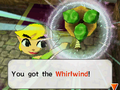
The Forest Temple is the first Dungeon that Link must explore in order to restore its energy to the fragmented Tower of Spirits in Spirit Tracks. The main item obtained is the Whirlwind, and the Temple's boss is Stagnox.
Areas
Entrance to the Temple
The Forest Temple is located in the northwest of the Forest Realm of New Hyrule, and is accessible after Link and Gage perform a Song of Restoration in the Forest Sanctuary, which in turn is found after the young hero crosses a maze in the Lost Woods. Left of the Temple's inner entrance is a statue that teaches Link the "Song of Healing".

The Forest Temple has the appearance of a Mesoamerican pyramid with a giant Tree growing atop it. Gossip Stones throughout the Temple will reveal the locations of Treasure Chests on each floor for a fee of Rupees. Items such as Demon Fossils and Wood Hearts are found here, as well as the Whirlwind, the main treasure of the Temple that is also critical to defeat the boss of the Temple. Mothula serves as the dungeon's Sub-Boss, while the boss is a large stag beetle-like creature called Stagnox, who has stolen the Temple's Force Gem from its beacon atop the Temple and thus is responsible for the deactivation of the Temple's energy beacon.
Link must defeat the creature atop the Temple by using the Whirlwind to turn its weaknesses and attacks on itself, therefore exposing it to his own attacks. Following Stagnox's defeat, the Temple's Force Gem is restored to its energy beacon, restoring the Temple's energy flow to the Tower of Spirits and causing a segment of the Tower to reconnect to the base, completing the hero's first task to restore the Tower to its original state.
Minor Enemies


Skyward Sword
The Forest Temple is the area surrounding the Skyview Temple situated in the Deep Woods. Before Link can enter the Skyview Temple, he must find the Shock Switch within the Forest Temple area. The location of this Shock Switch is revealed by a Stone Tablet that is hidden in a patch of Grass.[10] A Tree Stump that Link can Sit on to restore his Hearts can be found to the side of the entrance to the Skyview Temple. The door to the Skyview Temple has two crystals, located at the head and the tail. By shooting these crystals with the Slingshot, Link can receive a Blue Rupee and a Green Rupee, respectively. A single Bird Statue can be found at the Forest Temple.
After Link receives the Ruby Tablet at the Skyview Spring, he is greeted by Machi in the Forest Temple area. Machi asks Link if he found Zelda.[11] Upon hearing that she is still missing, Machi offers that Link at least knows where to go next.[12] Machi then thanks Link for helping to reunite him with his friends and then bids farewell.[13][14]
Animals


Enemies


Goddess Cubes
| Goddess Cube | |
|---|---|
| Location | Near the chasm separating the Forest Temple from the rest of the Deep Woods |
| Destination | |
| Reward | |
| Goddess Cube | |
| Location | On top of the Skyview Temple |
| Destination | |
| Reward |
| Goddess Cube | Location | Destination | Reward |
|---|---|---|---|
Near the chasm separating the Forest Temple from the rest of the Deep Woods | |||
On top of the Skyview Temple |
Tri Force Heroes
The Forest Temple is a Level in Tri Force Heroes. It is the fourth and last Level of the Woodlands Area, preceded by Moblin Base.
The Level consists of an ancient Temple situated within a dense forest. It features numerous types of traps and obstacles that the Links must overcome.

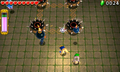
In Stage 1, the Links enter a Torch room where a pair of Bombs and a Bow can be found. A gate blocks the rest of the passage, and must be opened by lighting the unlit Torches in the room. The Torches can be lit by having one Link fire an Arrow towards it from one of the lit Torches, which will carry the flame over and light it. The second Torch near the gate is too high for one Link to reach, thus requiring that the Links form a Totem and have the top Link light it with an Arrow. Lighting both Torches opens the gate to a room with four spinning Mini-Margos that follow a set path. These traps must be destroyed by having the Links throw Bombs into their openings. This room also has several Jars and a Squiddy, from which the Links can collect some Hearts and Rupees. When the last Mini-Margo is defeated, it will drop a Key that opens the gate to the Triforce Gateway.

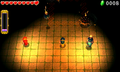
Stage 2 is a large, seemingly empty chamber with a Big Switch in the center, that can only be pressed down with all three Links. Pressing it makes pillars raise from the floor, and summons Mini-Margos and Tektites that the Links must defeat. The Mini-Margos will move along several set paths around the room, while the Tektites will hop along the pillars. The Tektites can be attacked either by forming a Totem, by firing Arrows at them from one of the ledges, or by throwing well-timed Bombs at them. The Tektites can be attacked from the floor once they are knocked off, but they will soon hop back onto the pillars. Defeating all the Enemies opens the gate to the next Triforce Gateway.

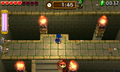
Stage 3 places the Links in a large chasm with narrow paths over a pit. The Links must carefully follow this path, while dodging Arrow Traps that constantly shoot Arrows from the walls. One of the trap Arrows will fly into the path of a Torch and carry its flame, but is blocked by small Cracked Blocks preventing it from flying any further. The Links must destroy both Cracked Blocks, allowing the trap Arrows to light a Torch at the far end of the path. Once this Torch is lit, the Links can use it to light the other Torches and raise a staircase. The Links walk along more narrow paths while dodging trap Arrows, eventually reaching the end where a heavy, steel Large Block sits atop a ledge. The Links must use their combined effort to push this block into the path of oncoming Arrows, protecting them while they move towards the Triforce Gateway. In a single-player game, this Large Block is replaced by a wooden version that a single Link can push on his own. Finally, a Mini-Margo freely moving around the Triforce Gateway platform must be defeated to activate the Gateway.

Stage 4 is where Margoma is fought in a courtyard outside the Temple. The Links begin on a high-up ledge with slopes that drop them into the courtyard, thus beginning the battle. On the left side of the area is some Grass that produces Hearts when sliced, and on the right side is a ledge that the Links can use as a vantage point. Several small Cracked Blocks are on the ground, which can be strategically used to block the path of the charging Margoma, though they will be destroyed in the process. Once Margoma is defeated, a large doorway opens to the north that leads to the Triforce Gateway.
Drablands Challenges
Once the Boss of the Woodlands has been defeated, the Forest Temple can be replayed with the following Drablands Challenges: "Adventure in the dark!", "Clear within the time limit!", and "Fewer Heart Containers!".
In "Clear within the time limit!", the Links are given a timer of one minute in Multiplayer, or two minutes in single-player. This timer can be increased by collecting Hourglasses or wearing Linebeck's Uniform.
Materials
At the end of the Level, three Treasure Chests can be opened. Two contain the same Materials, and one contains a more valuable Material.
| Drablands Challenge | — |
|---|---|
| Magical Materials | |
| Drablands Challenge | Adventure in the dark! |
| Magical Materials | |
| Drablands Challenge | Clear within the time limit! |
| Magical Materials | |
| Drablands Challenge | Fewer Heart Containers! |
| Magical Materials |
| Drablands Challenge | Magical Materials |
|---|---|
— | |
Adventure in the dark! | |
Clear within the time limit! | |
Fewer Heart Containers! |
The first time Link completes the Forest Temple, he will also find the Lady's Glasses in the bottom of the Chest.[15][16]
Enemies and Traps
In this Level, each Drablands Challenge features the same configuration of Enemies.
- Stage 1


- Stage 2
-
Mini-Margo ×4
-

Tektite ×4

- Stage 3
-
![Arrow Trap ×10[a]](//cdn.wikimg.net/en/zeldawiki/images/thumb/a/a5/TFH_Arrow_Trap_Model.png/89px-TFH_Arrow_Trap_Model.png)
Arrow Trap ×10[a]
-
Mini-Margo ×1
- ↑ Arranged in two groups of three, and two groups of two.
- Stage 4

Other Appearances
Ocarina of Time 4-koma Manga Kingdom
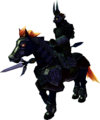
Within the Forest Temple, Link battle Phantom Ganon with the Bow. However, he accidentally knocks the Painting that Phantom Ganon is emerging from off the wall with a stray Arrow, killing Phantom Ganon and his Horse in the process.[17] In another version of events, Link beats back Phantom Ganon within the Forest Temple with only an Empty Bottle.[18] In yet another version, Link is fighting Phantom Ganon in the Temple when his Bow catches fire.[19]
Ocarina of Time 4-koma Gag Battle Adventure Compilation
While exploring the Forest Temple, Link stumbles across a picture frame containing Joelle. Not understanding her to be a foe, Link is unimpressed by the quality of what he thinks is merely a painting, and offers to fix it with a pack of drawing materials. Joelle, slighted, grows angry and attacks him.[20]
Ocarina of Time Pathways to Adventure
After obtaining the Hookshot from ? and the "Song of Storms" from the Phonogram Man,[21] Link travels through the Sacred Forest Meadow and reaches the entrance to the Forest Temple. While fighting through Blue Bubbles, Deku Babas, Wallmasters, and Stalfos, Link collects several Small Keys and locates the Bow. He obtains the Dungeon Map and Compass, and, after shooting an Eyeball Switch, the Nightmare Key.[22] After completing a Block Puzzle, Link fights Amy, and later Meg. He then opens the Dungeon's Big Door and uses the Master Sword to best Phantom Ganon.[23] He then is transported to the Chamber of Sages, and awakens Saria as the Sage of Forest.[24]
Ocarina of Time (Himekawa)
After returning to what remains of Kokiri Forest, Link makes his way to the Forest Temple.[25] Along the way, he reunites with his old rival Mido, whom he saves from an attacking Deku Baba.[26] The pair are attacked again by a pair of Wolfos, before they enter the Forest Temple together.[27] As they walk through the Temple, Link and Mido discuss what has come of Saria and the Great Deku Tree. All the while, a magical painting of Ganondorf eyes the two intruders.[28] Without warning, Phantom Ganon suddenly springs from one of the picture frames and attacks. Link soon finds that the Master Sword does not work on the spirit.[29] Luckily, Mido soon stumbles across the Bow, which Link uses to slay Phantom Ganon and free Saria from his clutches.[30] Saria thanks Link for his hard work, before departing from him for good.[31]
Twilight Princess (Himekawa)

After being attacked and knocked unconscious by Ook wielding the Gale Boomerang, Wolf Link is brought to his base of operations—the Forest Temple. Ook attaches a rope around Wolf Link's neck as a collar and drags him around, still unconscious. Midna, having followed them to the Temple, wakes Wolf Link up and informs him of his power of Sense. Awakening his Eye of Twilight, Wolf Link is suddenly able to see several Shadow Insects crawling around. He attacks and kills every one, and, upon doing so, is transported to the Faron Spring and returned to his Hylian form.
With his original form returned to him, Link returns to the Forest Temple and retrieves the Gale Boomerang from Ook. He then slays Diababa using the Ordon Sword, obtaining the Fused Shadow hidden in the Temple's depths.
Trivia
- As described in Vol. 1 of the Drablands Diary, a bright green Butterfly is hidden in each Level of the Woodlands in Tri Force Heroes. Two can be found on a fern in Stage 4 of the Forest Temple, by forming a Totem and throwing one of the Links onto the southwest of the ledges surrounding the battle area.
- Some of the earliest developmental concepts for Ocarina of Time place the entirety of the game within Ganon's Castle, in a similar vein to Mario 64; one particular boss was envisioned as emerging from one of the castle's paintings—vestiges of this are seen within the Forest Temple in the final game.[32][33] Despite beta evidence that the Forest Temple would have originally been the Wind Temple, all wind-related assets are instead used in Kakariko Village and the Shadow Temple in the final game.
Nomenclature
| Language | Names | Meanings |
|---|---|---|
EnglishBR | Wooded Temple (ST)[48] | |
Japanese |
| |
ChineseTR | 森林神殿前 (Sēnlín shéndiàn qián) (SSHD) | |
ChineseSI |
| |
FrenchEU |
| |
FrenchCA | Temple de la forêt (ST | TFH)[49][50] | Forest temple |
German |
| |
Italian |
| |
SpanishLA |
| |
SpanishEU |
|
|
| This table was generated using translation pages. To request an addition, please contact a staff member with a reference. | ||
Other Names
| Name | The Temple[52] |
|---|---|
| Applies to | |
| Source | Tri Force Heroes E3 2015 demo |
| Superseded by |
| Name | Applies to | Source | Superseded by |
|---|---|---|---|
The Temple[52] | Tri Force Heroes E3 2015 demo |
Gallery
-
A Dungeon Map of the Forest Temple from Ocarina of Time
-
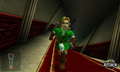
Link running through a twisted corridor from Ocarina of Time 3D
-
Link opening a door inside the Temple from Twilight Princess
-
Link obtaining the Whirlwind in the Forest Temple from Spirit Tracks
-
The Forest Temple's Force Gem from Spirit Tracks
-

The true height of the Forest Temple from Spirit Tracks, shown with empty space to represent the spacing of the two Nintendo DS screens
-
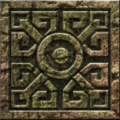
A design from the Forest Temple from Twilight Princess HD
-
A design from the Forest Temple from Twilight Princess HD
-
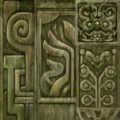
A design from the Forest Temple from Twilight Princess HD, used throughout the Dungeon
-
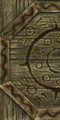
A design from the Forest Temple from Twilight Princess HD, used in the opening hub room
-
A design from the Forest Temple from Twilight Princess HD, used in center of Middle Boss room
-
A floor design found in the Forest Temple from Twilight Princess HD, used in the room with Tile Worm enemies. The left half is used for the underside of the tile and the right half is used for the top side
-
The Links battling Mini-Margos in Stage 1 from Tri Force Heroes
-
The Links battling Mini-Margos in the "Adventure in the dark!" Drablands Challenge from Tri Force Heroes
-

Using Fire Arrows in Stage 3 from Tri Force Heroes
-
Avoiding more Arrow Traps in Stage 3 from Tri Force Heroes
-
Using the Large Block as a shield against Arrow Traps in Stage 3 from Tri Force Heroes
-

Battling Margoma in the "Adventure in the dark!" Drablands Challenge from Tri Force Heroes


See Also
References
- ↑ Encyclopedia, Dark Horse Books, pg. 159, (TFH) 240, (OoT | OoT3D) 278, (TP | TPHD) & 290 (ST)
- ↑ "Forest Temple" — Map (Skyward Sword)
- ↑ "Forest Temple" — Map (Skyward Sword HD)
- ↑ Ocarina of Time Pathways to Adventure, Sybex Inc., pg. 40
- ↑ Ocarina of Time manga, VIZ Media, pg. 138
- ↑ "Thank you... Because of you, I could awaken as a Sage... I am Saria. The Sage of the Forest Temple..." — Saria (Ocarina of Time)
- ↑ "The Forest Temple is located in the Sacred Forest Meadow in the far side of the Lost Woods." — N/A (Ocarina of Time)
- ↑ "Unfortunately, equipped as you currently are, you cannot even enter the temple... But, if you believe what I'm saying, you should head to Kakariko Village..." — Sheik (Ocarina of Time)
- ↑ "Phantom Ganon It's an evil ghost of the Forest Temple! He comes out of one of the pictures. Answer his magic attack with an attack of your own!" — Navi (Ocarina of Time)
- ↑ "He who descended from above: look to the star that the bird rising heavenward gazes upon, and aim your shot there." — Sign (Skyward Sword)
- ↑ "Hey! It's me, kwee! Did you find the girl?" — Machi (Skyward Sword)
- ↑ "[Not yet...] Oh. That's too bad. But it sounds like you at least know where you need to search next to find her, kwee. That's...something, right?" — Machi (Skyward Sword)
- ↑ "I'm so glad I've finally been reunited with all my Kikwi friends. It's all thanks to you, koo-weep!" — Machi (Skyward Sword)
- ↑ "With any luck, hopefully you'll find that girl you've been searching for real soon, koro-koo! Take care, OK?" — Machi (Skyward Sword)
- ↑ "Hm? There's something else here!" — N/A (Tri Force Heroes)
- ↑ "You got The Lady's Glasses!" — N/A (Tri Force Heroes)
- ↑ Ocarina of Time 4-koma Manga Kingdom, Futabasha, pg. 59
- ↑ Ocarina of Time 4-koma Manga Kingdom, Futabasha, pg. 92
- ↑ Ocarina of Time 4-koma Manga Kingdom, Futabasha, pg. 109
- ↑ Ocarina of Time 4-koma Gag Battle Adventure Compilation, Koubunsha, pg. 87
- ↑ Ocarina of Time Pathways to Adventure, Sybex Inc., pg. 44
- ↑ Ocarina of Time Pathways to Adventure, Sybex Inc., pg. 46
- ↑ Ocarina of Time Pathways to Adventure, Sybex Inc., pg. 47
- ↑ Ocarina of Time Pathways to Adventure, Sybex Inc., pg. 48
- ↑ Ocarina of Time manga, VIZ Media, pg. 139
- ↑ Ocarina of Time manga, VIZ Media, pg. 140
- ↑ Ocarina of Time manga, VIZ Media, pg. 143
- ↑ Ocarina of Time manga, VIZ Media, pg. 144
- ↑ Ocarina of Time manga, VIZ Media, pg. 146
- ↑ Ocarina of Time manga, VIZ Media, pg. 148
- ↑ Ocarina of Time manga, VIZ Media, pg. 149
- ↑ The Legend of Zelda: Ocarina of Time 3D Mr. Shigeru Miyamoto/Ganon's Castle as the Only Setting? , Nintendo.com, retrieved June 23, 2024.
- ↑ The Legend of Zelda: Ocarina of Time 3D Mr. Shigeru Miyamoto/Many Characters, Many Roles , Nintendo.com, retrieved June 23, 2024.
- ↑ "Tempio delle Fronde" — Rail Map (Spirit Tracks)
- ↑ "Tempio delle fronde" — Level Selection (Tri Force Heroes)
- ↑ Enciclopedia di Hyrule, Magazzini Salani, pg. 149
- ↑ "Uno dei Saggi che devi incontrare si trova nel Santuario della Foresta" — Sheik (Ocarina of Time 3D, Italian localization)
- ↑ Nintendo Official Guidebook—The Legend of Zelda: Ocarina of Time, Shogakukan, pg. 155
- ↑ "森の神殿" — Level Selection (Tri Force Heroes)
- ↑ "Temple de la Forêt" — Level Selection (Tri Force Heroes)
- ↑ "Temple sylvestre" — Rail Map (Spirit Tracks)
- ↑ "森林神殿前" — Bird Statue (Skyward Sword HD, Simplified Chinese localization)
- ↑ 塞尔达传说:百科全书, New Star Press, pg. 290
- ↑ "Templo de los Bosques" — Rail Map (Spirit Tracks)
- ↑ "Templo del bosque" — Level Selection (Tri Force Heroes)
- ↑ "Waldtempel" — Rail Map (Spirit Tracks)
- ↑ "Waldtempel" — Level Selection (Tri Force Heroes)
- ↑ "Wooded Temple" — Rail Map (Spirit Tracks)
- ↑ "Temple de la forêt" — Rail Map (Spirit Tracks)
- ↑ "Temple de la forêt" — Level Selection (Tri Force Heroes)
- ↑ "Templo del Bosque" — Level Selection (Tri Force Heroes)
- ↑ The Legend of Zelda: Tri Force Heroes - The Forest (Direct Gampelay), @GameXplain on YouTube, Uploaded August 2, 2015 (Archive)
Dungeons in The Legend of Zelda
Level 1 • Level 2 • Level 3 • Level 4 • Level 5 • Level 6 • Level 7 • Level 8 • Level 9
Dungeons in The Adventure of Link
Parapa Palace • Midoro Palace • Island Palace • Maze Island Palace • Palace on the Sea • Three-Eye Rock Palace • Great Palace
Dungeons in A Link to the Past
Hyrule Castle • Castle Dungeon • Eastern Palace • Desert Palace • Tower of Hera
Palace of Darkness • Swamp Palace • Skull Woods • Thieves' Town • Ice Palace • Misery Mire • Turtle Rock • Ganon's Tower • Palace of the Four Sword![]()
Tail Cave • Bottle Grotto • Key Cavern • Angler's Tunnel • Catfish's Maw • Face Shrine • Eagle's Tower • Turtle Rock • Wind Fish's Egg
Color Dungeon (LADX | LANS) • Chamber Dungeon (LANS)
Inside the Deku Tree • Dodongo's Cavern • Inside Jabu-Jabu's Belly
Forest Temple • Fire Temple • Water Temple • Shadow Temple • Spirit Temple • Ganon's Castle
Woodfall Temple • Snowhead Temple • Great Bay Temple • Stone Tower Temple
Swamp Spider House • Pirates' Fortress • Oceanside Spider House • Beneath the Well • Ancient Castle of Ikana • Moon Dungeons
Gnarled Root Dungeon • Snake's Remains • Poison Moth's Lair • Dancing Dragon Dungeon • Unicorn's Cave • Ancient Ruins • Explorer's Crypt • Sword & Shield Maze • Onox's Castle • Room of Rites
Spirit's Grave • Wing Dungeon • Moonlit Grotto • Skull Dungeon • Crown Dungeon • Mermaid's Cave • Jabu-Jabu's Belly • Ancient Tomb • Black Tower • Room of Rites
Maku Road • Great Moblin's Keep • Ambi's Palace • Hero's Cave
Chambers of Insight • Sea of Trees • Talus Cave • Death Mountain • Vaati's Palace
Dragon Roost Cavern • Forbidden Woods • Tower of the Gods • Forsaken Fortress • Earth Temple • Wind Temple • Ganon's Castle
Fire Mountain • Ice Ring Isle • Ghost Ship • Savage Labyrinth
Stages in Four Swords Adventures
Whereabouts of the Wind
Lake Hylia • Cave of No Return • Hyrule Castle
Eastern Hyrule
The Coast • Village of the Blue Maiden • Eastern Temple
Death Mountain
Death Mountain Foothills • The Mountain Path • Tower of Flames
Near the Fields
The Field • The Swamp • Infiltration of Hyrule Castle
The Dark World
Lost Woods (Four Swords Adventures) • Kakariko Village (Four Swords Adventures) • Temple of Darkness
The Desert of Doubt
Desert of Doubt • Desert Temple • Pyramid
Frozen Hyrule
Frozen Hyrule • Temple of Ice • Tower of Winds
Realm of the Heavens • The Dark Cloud • Palace of Winds
Deepwood Shrine • Cave of Flames • Fortress of Winds • Temple of Droplets • Palace of Winds • Dark Hyrule Castle
Forest Temple • Goron Mines • Lakebed Temple • Arbiter's Grounds • Snowpeak Ruins • Temple of Time • City in the Sky • Palace of Twilight • Hyrule Castle
Lantern Caverns • Cave of Ordeals • Cave of Shadows (TPHD)
Temple of the Ocean King • Temple of Fire • Temple of Wind • Temple of Courage • Ghost Ship • Goron Temple • Temple of Ice • Mutoh's Temple
Tower of Spirits • Forest Temple • Snow Temple • Ocean Temple • Fire Temple • Sand Temple
Skyview Temple • Earth Temple • Lanayru Mining Facility • Ancient Cistern • Sandship • Fire Sanctuary • Sky Keep
Dungeons in A Link Between Worlds
Eastern Palace • Tower of Hera • House of Gales • Inside Hyrule Castle • Desert Palace
Ice Ruins • Swamp Palace • Thieves' Hideout • Dark Palace • Skull Woods • Turtle Rock • Lorule Castle
Woodlands
Deku Forest • Buzz Blob Cave • Moblin Base • Forest Temple
Riverside
Secret Fortress • Abyss of Agony • Cove of Transition • Water Temple
Volcano
Blazing Trail • Hinox Mine • Den of Flames • Fire Temple
Ice Cavern
Frozen Plateau • Snowball Ravine • Silver Shrine • Ice Temple
Fortress
Sealed Gateway • Bomb Storage • Training Ground • The Lady's Lair
The Dunes
Infinity Dunes • Stone Corridors • Gibdo Mausoleum • Desert Temple
The Ruins
Illusory Mansion • Palace Noir • Lone Labyrinth • Grim Temple
Sky Realm
Floating Garden • Deception Castle • Dragon Citadel • Sky Temple
Forest Zone • Flooded Zone • Scorching Zone • Frozen Zone • Fortified Zone • Desert Zone • Shadow Zone • Baneful Zone
Dungeons in Breath of the Wild
Divine Beast Vah Ruta • Divine Beast Vah Rudania • Divine Beast Vah Medoh • Divine Beast Vah Naboris • Hyrule Castle
Sword Monk's Shrine (TMT) • Final Trial (TCB)
Akh Va'quot • Bareeda Naag • Bosh Kala • Chaas Qeta • Daag Chokah • Dagah Keek • Dah Kaso • Dah Hesho • Daka Tuss • Dako Tah • Daqa Koh • Daqo Chisay • Dila Maag • Dow Na'eh • Dunba Taag • Gee Ha'rah • Goma Asaagh • Gorae Torr • Ha Dahamar • Hawa Koth • Hia Miu • Hila Rao • Ishto Soh • Ja Baij • Jee Noh • Jitan Sa'mi • Joloo Nah • Ka'o Makagh • Kaam Ya'tak • Kah Mael Shrine • Kah Okeo Shrine • Kah Yah Shrine • Kam Urog Shrine • Katah Chuki • Katosa Aug • Kay Noh • Kaya Wan • Kayra Mah • Ke'nai Shakah • Keeha Yoog • Keh Namut • Kema Kosassa • Kema Zoos • Keo Ruug • Ketoh Wawai • Korgu Chideh • Korsh O'hu • Kuh Takkar • Kuhn Sidajj • Lakna Rokee • Lanno Kooh • Maag Halan • Maag No'rah • Maka Rah • Mezza Lo • Mijah Rokee • Mirro Shaz • Misae Suma • Mo'a Keet • Mogg Latan • Monya Toma • Mozo Shenno • Muwo Jeem • Myahm Agana • Namika Ozz • Ne'ez Yohma • Noya Neha • Oman Au • Owa Daim • Pumaag Nitae • Qua Raym • Qaza Tokki • Qukah Nata • Raqa Zunzo • Ree Dahee • Rin Oyaa • Ritaag Zumo • Rok Uwog • Rona Kachta • Rota Ooh • Rucco Maag • Saas Ko'sah • Sah Dahaj • Sasa Kai • Sha Gehma • Sha Warvo • Shada Naw • Shae Katha • Shae Loya • Shae Mo'sah • Shai Utoh • Shai Yota • Shee Vaneer • Shee Venath • Sheem Dagoze • Sheh Rata • Sho Dantu • Shoda Sah • Shoqa Tatone • Shora Hah • Soh Kofi • Suma Sahma • Ta'loh Naeg • Tah Muhl • Tahno O'ah • Tawa Jinn • Tena Ko'sah • Tho Kayu • To Quomo • Toh Yahsa • Toto Sah • Tu Ka'loh • Tutsuwa Nima • Voo Lota • Wahgo Katta • Ya Naga • Yah Rin • Zalta Wa • Ze Kasho • Zuna Kai
Etsu Korima • Kamia Omuna • Kee Dafunia • Keive Tala • Kiah Toza • Kihiro Moh • Mah Eliya • Noe Rajee • Rinu Honika • Rohta Chigah • Ruvo Korbah • Sato Koda • Sharo Lun • Shira Gomar • Takama Shiri • Yowaka Ita
Dungeons in Tears of the Kingdom
Wind Temple • Fire Temple • Water Temple • Lightning Temple • Hyrule Castle • Spirit Temple • Beneath Hyrule Castle
Anedamimik • Apogek • Bamitok • Chichim • Domizuin • Ekochiu • En-oma • Eshos • Eutoum • Ga-ahisas • Ganos • Gasas • Gatakis • Gatanisis • Gemimik • Gikaku • Gutanbac • Igashuk • Igoshon • Ihen-a • Ijo-o • Ikatak • In-isa • Irasak • Ishodag • Ishokin • Isisim • Iun-orok • Jikais • Jinodok • Jiosin • Jiotak • Jirutagumac • Jiukoum • Jochi-ihiga • Jochi-iu • Jochisiu • Jogou • Jojon • Joju-u-u • Joku-u • Joku-usin • Joniu • Jonsau • Josiu • Kadaunar • Kahatanaum • Kamatukis • Kamizun • Karahatag • Kikakin • Kimayat • Kisinona • Kitawak • Kiuyoyou • Kudanisar • Kumamayn • Kurakat • Kyokugon • Kyononis • Makasura • Makurukis • Maoikes • Marakuguc • Marari-in • Mayachideg • Mayachin • Mayahisik • Mayak • Mayam • Mayamats • Mayanas • Mayaotaki • Mayasiar • Mayatat • Mayaumekis • Mayausiy • Minetak • Miryotanog • Mogawak • Mogisari • Momosik • Morok • Moshapin • Motsusis • Musanokir • Nachoyah • Natak • Ninjis • Nouda • O-ogim • Orochium • Oromuwak • Oshozan-u • Otak • Otutsum • Pupunke • Rakakudaj • Rakashog • Rasitakiwak • Rasiwak • Ren-iz • Riogok • Rotsumamu • Runakit • Rutafu-um • Sahirow • Sakunbomar • Sepapa • Serutabomac • Sibajitak • Sifumim • Sihajog • Sikukuu • Simosiwak • Sinakawak • Sinatanika • Sisuran • Sitsum • Siwakama • Sonapan • Soryotanog • Suariwak • Susub • Susuyai • Tadarok • Tajikats • Taki-ihaban • Taninoud • Taunhiy • Tauyosipun • Tenbez • Teniten • Tenmaten • Timawak • Tokiy • Tsutsu-um • Tukarok • Turakamik • Turakawak • Ukoojisi • Ukouh • Usazum • Utojis • Utsushok • Wao-os • Yamiyo • Yansamin • Yomizuk • Zakusu • Zanmik
Dungeons in Freshly-Picked Tingle's Rosy Rupeeland
Hero's Shrine • Pirate Hideaway • Deku Temple • Insect Cavern • Desma's Labyrinth
Stages in Link's Crossbow Training
Level 1
Ordon Target Practice • Gerudo Stalfos: Defender • Arbiter's Grounds: Ranger
Level 2
Goron Target Practice • Zora River: Defender • Skull Shooting
Level 3
Kakariko Target Practice • Fruit Balloons • The Great Bridge: Defender
Level 4
Zora River Target Practice • Hyrule Castle: Defender • Skulltula Forest: Ranger
Level 5
Oocca Target Practice • Gerudo Moldorm: Defender • The Shootout
Level 6
Ordon Target Practice 2 • Bridge of Eldin: Defender • Snowpeak Ruins: Ranger
Level 7
Underground Target Practice • City in the Sky: Defender • Temple of Time: Ranger
Level 8
Horseback Target Practice • Snowpeak: Defender • Darknut Battle
Ranch Target Practice • Sacred Grove: Defender • Fossil Stallord Battle
Hyrule Field • Eldin Caves • Faron Woods • Valley of Seers • Death Mountain • Lake Hylia • Twilight Field • Palace of Twilight • Skyloft • Sealed Grounds • Temple of the Sacred Sword • Temple of Souls • Gerudo Desert • Ganon's Tower • Forsaken Fortress • Wind and Earth Temples
Frozen Grotto • Gerudo Ruins • Lost Swamp • Temple of Storms • Hyrule Castle • Future World
- Dungeons
- Faron Province
- Faron Woods
- Forest Realm
- Forest Temple
- Temples
- Levels
- Locations
- Dungeons in Ocarina of Time
- Dungeons in Ocarina of Time 3D
- Dungeons in Twilight Princess
- Dungeons in Twilight Princess HD
- Dungeons in Spirit Tracks
- Locations in Skyward Sword
- Locations in Skyward Sword HD
- Levels in Tri Force Heroes
- Locations in Ocarina of Time 4-koma Manga Kingdom
- Locations in Ocarina of Time 4-koma Gag Battle Adventure Compilation
- Locations in Ocarina of Time Pathways to Adventure
- Locations in Ocarina of Time (Himekawa)
- Locations in Twilight Princess (Himekawa)