Locations in Ocarina of Time: Difference between revisions
Jump to navigation
Jump to search
MannedTooth (talk | contribs) m (Text replacement - "Zeldaganonscastle.jpg" to "OoT Ganon's Castle.png") |
MannedTooth (talk | contribs) m (Text replacement - "Btww.jpg" to "OoT Bottom of the Well.png") |
||
| Line 50: | Line 50: | ||
File:Kakarikovillageoot.jpg|[[Kakariko Village]] | File:Kakarikovillageoot.jpg|[[Kakariko Village]] | ||
File:Kakarikowindmill.jpg|[[Kakariko Windmill]] | File:Kakarikowindmill.jpg|[[Kakariko Windmill]] | ||
File: | File:OoT Bottom of the Well.png|[[Bottom of the Well]] | ||
File:Kakariko Bazaar.png|{{Term|OoT|Bazaar|link}} | File:Kakariko Bazaar.png|{{Term|OoT|Bazaar|link}} | ||
File:Potionshop2.jpg|[[Medicine Shop]] | File:Potionshop2.jpg|[[Medicine Shop]] | ||
Revision as of 22:46, 19 June 2020
| Regions in Ocarina of Time | |
|---|---|
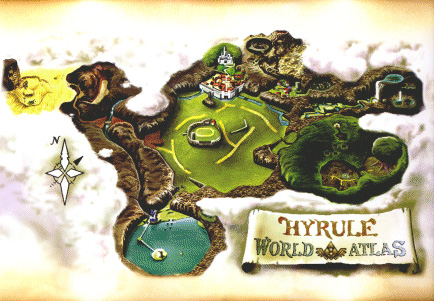 Click on a location | |


