Vision: Difference between revisions
JumbledLimes (talk | contribs) (Will probably add a list of Visions with links at some point) Tags: Mobile edit Mobile web edit |
No edit summary |
||
| (4 intermediate revisions by one other user not shown) | |||
| Line 13: | Line 13: | ||
|related= | |related= | ||
}} | }} | ||
{{Term/Store|Vision|Visions|Series, OoT3D, MM3D | {{Term/Store|Vision|Visions|Series, OoT3D, MM3D|plural}} are a recurring mechanic in {{TLoZ|Series}}.<ref>{{Cite|Vision|Game Over|OoT3D}}</ref><ref>{{Cite|'''Visions'''|Visions|MM3D}}</ref> {{Plural|Series|Vision}} go unnamed in {{SS}}. They are short gameplay clips that are presented on the {{Term|Series|Visions|link}} menu, viewable with the help of [[Sheikah Stone]]s that demonstrate how to advance in the game. This is in contrast to the "{{smw|Super Guide}}" variation of ''{{smw|New Super Mario Bros. Wii}}'', which actually completes the puzzle directly for the player.<ref>{{Cite Web|quote=These visions are actually pre-recorded snippets of gameplay, each consisting of 3-5 short clips that loosely demonstrate what to do next. They’re not meant to replace video walkthroughs (such as our own), but are instead intended to offer lost gamers at least some idea of what they should do next.|url=http://www.gamexplain.com/article-424-1305158680-the-legend-of-zelda-ocarina-of-time-3d-hands-on-boss-rush-water-temple-super-guide.html|title=The Legend of Zelda: Ocarina of Time 3D Hands-On (Boss Rush, Water Temple Super-Guide); retrieved May 12 2011|site=GameXplain}}</ref> | ||
==Appearances== | ==Appearances== | ||
| Line 20: | Line 20: | ||
Visions are not available in the ''Master Quest'' mode, and each Vision will only become available once a certain point in the game has been reached or once the player has attempted to solve the puzzle. Once a new Vision is unlocked, it will be labeled in red as "New" on the Visions screen, and it will be replaced with a green checkmark once the Vision has been watched. When the goal shown within the Vision is completed, a green "Clear" will appear next to it in the Vision selection screen. | Visions are not available in the ''Master Quest'' mode, and each Vision will only become available once a certain point in the game has been reached or once the player has attempted to solve the puzzle. Once a new Vision is unlocked, it will be labeled in red as "New" on the Visions screen, and it will be replaced with a green checkmark once the Vision has been watched. When the goal shown within the Vision is completed, a green "Clear" will appear next to it in the Vision selection screen. | ||
====List of {{Plural|OoT3D|Vision}}==== | |||
{{Data Table | |||
|game= OoT3D | |||
|storeAs= OoT3D Visions | |||
|columns= Location [Term] [Rowspan], Title | |||
|- | |||
| Inside the Deku Tree | |||
| [[File:OoT3D Through the Spider's Web.png]]<br/>"{{Term|OoT3D|Through the Spider's Web|link}}" | |||
|- | |||
| Inside the Deku Tree | |||
| [[File:OoT3D Clearing the Cobwebs.png]]<br/>"{{Term|OoT3D|Clearing the Cobwebs|link}}" | |||
|- | |||
| Inside the Deku Tree | |||
| [[File:OoT3D Waterlogged Limbo.png]]<br/>"{{Term|OoT3D|Waterlogged Limbo|link}}" | |||
|- | |||
| Inside the Deku Tree | |||
| [[File:OoT3D Webbed Feet.png]]<br/>"{{Term|OoT3D|Webbed Feet|link}}" | |||
|- | |||
| Inside the Deku Tree | |||
| [[File:OoT3D Twenty-Three Is Number One.png]]<br/>"{{Term|OoT3D|Twenty-Three Is Number One|link}}" | |||
|- | |||
| Inside the Deku Tree | |||
| [[File:OoT3D Gohma Battle.png]]<br/>"{{Term|OoT3D|Gohma Battle|link}}" | |||
|- | |||
| Dodongo's Cavern | |||
| [[File:OoT3D A Weighty Dilemma.png]]<br/>"{{Term|OoT3D|A Weighty Dilemma|link}}" | |||
|- | |||
| Dodongo's Cavern | |||
| [[File:OoT3D Carrying a Torch.png]]<br/>"{{Term|OoT3D|Carrying a Torch|link}}" | |||
|- | |||
| Dodongo's Cavern | |||
| [[File:OoT3D A Bumper Crop.png]]<br/>"{{Term|OoT3D|A Bumper Crop|link}}" | |||
|- | |||
| Dodongo's Cavern | |||
| [[File:OoT3D The Wall above the Ladder.png]]<br/>"{{Term|OoT3D|The Wall above the Ladder|link}}" | |||
|- | |||
| Dodongo's Cavern | |||
| [[File:OoT3D Something in Your Eye.png]]<br/>"{{Term|OoT3D|Something in Your Eye|link}}" | |||
|- | |||
| Dodongo's Cavern | |||
| [[File:OoT3D If the Block Fits....png]]<br/>"{{Term|OoT3D|If the Block Fits...|link}}" | |||
|- | |||
| Dodongo's Cavern | |||
| [[File:OoT3D Onward and Downward.png]]<br/>"{{Term|OoT3D|Onward and Downward|link}}" | |||
|- | |||
| Dodongo's Cavern | |||
| [[File:OoT3D King Dodongo Battle.png]]<br/>"{{Term|OoT3D|King Dodongo Battle|link}}" | |||
|- | |||
| Inside Jabu-Jabu's Belly | |||
| [[File:OoT3D Reaching the Far Shore.png]]<br/>"{{Term|OoT3D|Reaching the Far Shore|link}}" | |||
|- | |||
| Inside Jabu-Jabu's Belly | |||
| [[File:OoT3D Removing the Red Tentacle.png]]<br/>"{{Term|OoT3D|Removing the Red Tentacle|link}}" | |||
|- | |||
| Inside Jabu-Jabu's Belly | |||
| [[File:OoT3D Bigocto Battle.png]]<br/>"{{Term|OoT3D|Bigocto Battle|link}}" | |||
|- | |||
| Inside Jabu-Jabu's Belly | |||
| [[File:OoT3D Unstable Footing.png]]<br/>"{{Term|OoT3D|Unstable Footing|link}}" | |||
|- | |||
| Inside Jabu-Jabu's Belly | |||
| [[File:OoT3D Weighing it Down.png]]<br/>"{{Term|OoT3D|Weighing it Down|link}}" | |||
|- | |||
| Inside Jabu-Jabu's Belly | |||
| [[File:OoT3D Reaching Past Barriers.png]]<br/>"{{Term|OoT3D|Reaching Past Barriers|link}}" | |||
|- | |||
| Inside Jabu-Jabu's Belly | |||
| [[File:OoT3D Barinade Battle.png]]<br/>"{{Term|OoT3D|Barinade Battle|link}}" | |||
|- | |||
| Forest Temple | |||
| [[File:OoT3D Bird's-Eye View.png]]<br/>"{{Term|OoT3D|Bird's-Eye View|link}}" | |||
|- | |||
| Forest Temple | |||
| [[File:OoT3D Blue Block Blues.png]]<br/>"{{Term|OoT3D|Blue Block Blues|link}}" | |||
|- | |||
| Forest Temple | |||
| [[File:OoT3D All's Well....png]]<br/>"{{Term|OoT3D|All's Well...|link}}" | |||
|- | |||
| Forest Temple | |||
| [[File:OoT3D Building Blocks.png]]<br/>"{{Term|OoT3D|Building Blocks|link}}" | |||
|- | |||
| Forest Temple | |||
| [[File:OoT3D Undoing the Twist.png]]<br/>"{{Term|OoT3D|Undoing the Twist|link}}" | |||
|- | |||
| Forest Temple | |||
| [[File:OoT3D The Art of Exorcism.png]]<br/>"{{Term|OoT3D|The Art of Exorcism|link}}" | |||
|- | |||
| Forest Temple | |||
| [[File:OoT3D A Cold Look.png]]<br/>"{{Term|OoT3D|A Cold Look|link}}" | |||
|- | |||
| Forest Temple | |||
| [[File:OoT3D The Sky Is Falling.png]]<br/>"{{Term|OoT3D|The Sky Is Falling|link}}" | |||
|- | |||
| Forest Temple | |||
| [[File:OoT3D Paranormal Puzzle.png]]<br/>"{{Term|OoT3D|Paranormal Puzzle|link}}" | |||
|- | |||
| Forest Temple | |||
| [[File:OoT3D One Last Ghost.png]]<br/>"{{Term|OoT3D|One Last Ghost|link}}" | |||
|- | |||
| Forest Temple | |||
| [[File:OoT3D A Revolutionary Room.png]]<br/>"{{Term|OoT3D|A Revolutionary Room|link}}" | |||
|- | |||
| Forest Temple | |||
| [[File:OoT3D Phantom Ganon Battle.png]]<br/>"{{Term|OoT3D|Phantom Ganon Battle|link}}" | |||
|- | |||
| Fire Temple | |||
| [[File:OoT3D The First Goron.png]]<br/>"{{Term|OoT3D|The First Goron|link}}" | |||
|- | |||
| Fire Temple | |||
| [[File:OoT3D The Second Goron.png]]<br/>"{{Term|OoT3D|The Second Goron|link}}" | |||
|- | |||
| Fire Temple | |||
| [[File:OoT3D The Third Goron.png]]<br/>"{{Term|OoT3D|The Third Goron|link}}" | |||
|- | |||
| Fire Temple | |||
| [[File:OoT3D Rising Flames.png]]<br/>"{{Term|OoT3D|Rising Flames|link}}" | |||
|- | |||
| Fire Temple | |||
| [[File:OoT3D Bypassing the Flame Walls.png]]<br/>"{{Term|OoT3D|Bypassing the Flame Walls|link}}" | |||
|- | |||
| Fire Temple | |||
| [[File:OoT3D The Fourth Goron.png]]<br/>"{{Term|OoT3D|The Fourth Goron|link}}" | |||
|- | |||
| Fire Temple | |||
| [[File:OoT3D The Fifth Goron.png]]<br/>"{{Term|OoT3D|The Fifth Goron|link}}" | |||
|- | |||
| Fire Temple | |||
| [[File:OoT3D The Sixth Goron.png]]<br/>"{{Term|OoT3D|The Sixth Goron|link}}" | |||
|- | |||
| Fire Temple | |||
| [[File:OoT3D The Seventh Goron.png]]<br/>"{{Term|OoT3D|The Seventh Goron|link}}" | |||
|- | |||
| Fire Temple | |||
| [[File:OoT3D The Dancer in Flames.png]]<br/>"{{Term|OoT3D|The Dancer in Flames|link}}" | |||
|- | |||
| Fire Temple | |||
| [[File:OoT3D Spiraling toward Treasure.png]]<br/>"{{Term|OoT3D|Spiraling toward Treasure|link}}" | |||
|- | |||
| Fire Temple | |||
| [[File:OoT3D Totem Toppling.png]]<br/>"{{Term|OoT3D|Totem Toppling|link}}" | |||
|- | |||
| Fire Temple | |||
| [[File:OoT3D Hidden in the Hallway.png]]<br/>"{{Term|OoT3D|HIdden in the Hallway|link}}" | |||
|- | |||
| Fire Temple | |||
| [[File:OoT3D The Eighth Goron.png]]<br/>"{{Term|OoT3D|The Eighth Goron|link}}" | |||
|- | |||
| Fire Temple | |||
| [[File:OoT3D The Final Goron.png]]<br/>"{{Term|OoT3D|The Final Goron|link}}" | |||
|- | |||
| Fire Temple | |||
| [[File:OoT3D Volvagia Battle.png]]<br/>"{{Term|OoT3D|Volvagia Battle|link}}" | |||
|- | |||
| Ice Cavern | |||
| [[File:OoT3D Gathering the Silver Rupees.png]]<br/>"{{Term|OoT3D|Gathering the Silver Rupees|link}}" | |||
|- | |||
| Ice Cavern | |||
| [[File:OoT3D Blue Fire, Red Ice.png]]<br/>"{{Term|OoT3D|Blue Fire, Red Ice|link}}" | |||
|- | |||
| Ice Cavern | |||
| [[File:OoT3D Sliding Puzzle.png]]<br/>"{{Term|OoT3D|Sliding Puzzle|link}}" | |||
|- | |||
| Water Temple | |||
| [[File:OoT3D Low Tide.png]]<br/>"{{Term|OoT3D|Low Tide|link}}" | |||
|- | |||
| Water Temple | |||
| [[File:OoT3D Twin Flames.png]]<br/>"{{Term|OoT3D|Twin Flames|link}}" | |||
|- | |||
| Water Temple | |||
| [[File:OoT3D The Beached Block.png]]<br/>"{{Term|OoT3D|The Beached Block|link}}" | |||
|- | |||
| Water Temple | |||
| [[File:OoT3D Through Troubled Waters.png]]<br/>"{{Term|OoT3D|Through Troubled Waters|link}}" | |||
|- | |||
| Water Temple | |||
| [[File:OoT3D The Mark in the Tower.png]]<br/>"{{Term|OoT3D|The Mark in the Tower|link}}" | |||
|- | |||
| Water Temple | |||
| [[File:OoT3D Beyond the Wall.png]]<br/>"{{Term|OoT3D|Beyond the Wall|link}}" | |||
|- | |||
| Water Temple | |||
| [[File:OoT3D The Third Mark.png]]<br/>"{{Term|OoT3D|The Third Mark|link}}" | |||
|- | |||
| Water Temple | |||
| [[File:OoT3D Level Up...and Down.png]]<br/>"{{Term|OoT3D|Level Up...and Down|link}}" | |||
|- | |||
| Water Temple | |||
| [[File:OoT3D Your Own Worst Enemy.png]]<br/>"{{Term|OoT3D|Your Own Worst Enemy|link}}" | |||
|- | |||
| Water Temple | |||
| [[File:OoT3D Raging River.png]]<br/>"{{Term|OoT3D|Raging River|link}}" | |||
|- | |||
| Water Temple | |||
| [[File:OoT3D Underwater Sliding Puzzle.png]]<br/>"{{Term|OoT3D|Underwater Sliding Puzzle|link}}" | |||
|- | |||
| Water Temple | |||
| [[File:OoT3D Stonesetting.png]]<br/>"{{Term|OoT3D|Stonesetting|link}}" | |||
|- | |||
| Water Temple | |||
| [[File:OoT3D Entering Unfriendly Waters.png]]<br/>"{{Term|OoT3D|Entering Unfriendly Waters|link}}" | |||
|- | |||
| Water Temple | |||
| [[File:OoT3D Morpha Battle.png]]<br/>"{{Term|OoT3D|Morpha Battle|link}}" | |||
|- | |||
| Shadow Temple | |||
| [[File:OoT3D The Winged Boots.png]]<br/>"{{Term|OoT3D|The Winged Boots|link}}" | |||
|- | |||
| Shadow Temple | |||
| [[File:OoT3D Pointing toward Truth.png]]<br/>"{{Term|OoT3D|Pointing toward Truth|link}}" | |||
|- | |||
| Shadow Temple | |||
| [[File:OoT3D The Stone Umbrella.png]]<br/>"{{Term|OoT3D|The Stone Umbrella|link}}" | |||
|- | |||
| Shadow Temple | |||
| [[File:OoT3D Rupees out of Reach.png]]<br/>"{{Term|OoT3D|Rupees out of Reach|link}}" | |||
|- | |||
| Shadow Temple | |||
| [[File:OoT3D Fire, Fire Everywhere....png]]<br/>"{{Term|OoT3D|Fire, Fire Everywhere...|link}}" | |||
|- | |||
| Shadow Temple | |||
| [[File:OoT3D Against the Wind.png]]<br/>"{{Term|OoT3D|Against the Wind|link}}" | |||
|- | |||
| Shadow Temple | |||
| [[File:OoT3D Walking on Air.png]]<br/>"{{Term|OoT3D|Walking on Air|link}}" | |||
|- | |||
| Shadow Temple | |||
| [[File:OoT3D A Buried Key.png]]<br/>"{{Term|OoT3D|A Buried Key|link}}" | |||
|- | |||
| Shadow Temple | |||
| [[File:OoT3D Preparing to Set Sail.png]]<br/>"{{Term|OoT3D|Preparing to Set Sail|link}}" | |||
|- | |||
| Shadow Temple | |||
| [[File:OoT3D The Walls Close In!.png]]<br/>"{{Term|OoT3D|The Walls Close In!|link}}" | |||
|- | |||
| Shadow Temple | |||
| [[File:OoT3D A Bridge from an Arrow.png]]<br/>"{{Term|OoT3D|A Bridge from an Arrow|link}}" | |||
|- | |||
| Shadow Temple | |||
| [[File:OoT3D The Dark Path.png]]<br/>"{{Term|OoT3D|The Dark Path|link}}" | |||
|- | |||
| Shadow Temple | |||
| [[File:OoT3D Bongo Bongo Battle.png]]<br/>"{{Term|OoT3D|Bongo Bongo Battle|link}}" | |||
|- | |||
| Spirit Temple | |||
| [[File:OoT3D Return Another Time.png]]<br/>"{{Term|OoT3D|Return Another Time|link}}" | |||
|- | |||
| Spirit Temple | |||
| [[File:OoT3D Reaching around Corners.png]]<br/>"{{Term|OoT3D|Reaching around Corners|link}}" | |||
|- | |||
| Spirit Temple | |||
| [[File:OoT3D Anubis's Weakness.png]]<br/>"{{Term|OoT3D|Anubis's Weakness|link}}" | |||
|- | |||
| Spirit Temple | |||
| [[File:OoT3D Fenced In.png]]<br/>"{{Term|OoT3D|Fenced In|link}}" | |||
|- | |||
| Spirit Temple | |||
| [[File:OoT3D Lighting Up the Sun.png]]<br/>"{{Term|OoT3D|Lighting Up the Sun|link}}" | |||
|- | |||
| Spirit Temple | |||
| [[File:OoT3D Sun Block.png]]<br/>"{{Term|OoT3D|Sun Block (Vision)|link}}" | |||
|- | |||
| Spirit Temple | |||
| [[File:OoT3D SIlver and Fire.png]]<br/>"{{Term|OoT3D|Silver and Fire|link}}" | |||
|- | |||
| Spirit Temple | |||
| [[File:OoT3D The Fearsome Iron Knuckle.png]]<br/>"{{Term|OoT3D|The Fearsome Iron Knuckle|link}}" | |||
|- | |||
| Spirit Temple | |||
| [[File:OoT3D Spirit Temple Revisited.png]]<br/>"{{Term|OoT3D|Spirit Temple Revisited|link}}" | |||
|- | |||
| Spirit Temple | |||
| [[File:OoT3D Rising Above.png]]<br/>"{{Term|OoT3D|Rising Above|link}}" | |||
|- | |||
| Spirit Temple | |||
| [[File:OoT3D Lighting the Way.png]]<br/>"{{Term|OoT3D|Lighting the Way (Vision)|link}}" | |||
|- | |||
| Spirit Temple | |||
| [[File:OoT3D In Good Hands.png]]<br/>"{{Term|OoT3D|In Good Hands|link}}" | |||
|- | |||
| Spirit Temple | |||
| [[File:OoT3D Anubis Trio.png]]<br/>"{{Term|OoT3D|Anubis Trio|link}}" | |||
|- | |||
| Spirit Temple | |||
| [[File:OoT3D Baiting the Armos.png]]<br/>"{{Term|OoT3D|Baiting the Armos|link}}" | |||
|- | |||
| Spirit Temple | |||
| [[File:OoT3D Moment of Relection.png]]<br/>"{{Term|OoT3D|Moment of Reflection|link}}" | |||
|- | |||
| Spirit Temple | |||
| [[File:OoT3D Trap Doors.png]]<br/>"{{Term|OoT3D|Trap Doors|link}}" | |||
|- | |||
| Spirit Temple | |||
| [[File:OoT3D Let There Be....png]]<br/>"{{Term|OoT3D|Let There Be...|link}}" | |||
|- | |||
| Spirit Temple | |||
| [[File:OoT3D The Goddess's True Face.png]]<br/>"{{Term|OoT3D|The Goddess's True Face|link}}" | |||
|- | |||
| Spirit Temple | |||
| [[File:OoT3D Twinrova Battle.png]]<br/>"{{Term|OoT3D|Twinrova Battle|link}}" | |||
|- | |||
| Ganon's Castle | |||
| [[File:OoT3D Ganondorf Battle (Vision).png]]<br/>"{{Term|OoT3D|Ganondorf Battle (Vision)|link}}" | |||
|- | |||
| Ganon's Castle | |||
| [[File:OoT3D The Final Battle.png]]<br/>"{{Term|OoT3D|The Final Battle|link}}" | |||
|- | |||
| Bonus | |||
| [[File:OoT3D Finding Fairies.png]]<br/>"{{Term|OoT3D|Finding Fairies|link}}" | |||
|- | |||
| Bonus | |||
| [[File:OoT3D Four-Legged Friend.png]]<br/>"{{Term|OoT3D|Four-Legged Friend|link}}" | |||
|- | |||
| Bonus | |||
| [[File:OoT3D Din's Blessing.png]]<br/>"{{Term|OoT3D|Din's Blessing|link}}" | |||
|- | |||
| Bonus | |||
| [[File:OoT3D Farore's Blessing.png]]<br/>"{{Term|OoT3D|Farore's Blessing|link}}" | |||
|- | |||
| Bonus | |||
| [[File:OoT3D Nayru's Blessing.png]]<br/>"{{Term|OoT3D|Nayru's Blessing|link}}" | |||
|- | |||
| Bonus | |||
| [[File:OoT3D Sword Mastery.png]]<br/>"{{Term|OoT3D|Sword Mastery|link}}" | |||
|- | |||
| Bonus | |||
| [[File:OoT3D Magic Mastery.png]]<br/>"{{Term|OoT3D|Magic Mastery|link}}" | |||
|- | |||
| Bonus | |||
| [[File:OoT3D Defensive Mastery.png]]<br/>"{{Term|OoT3D|Defensive Mastery|link}}" | |||
|- | |||
| Bonus | |||
| [[File:OoT3D Riding Farore's Wind.png]]<br/>"{{Term|OoT3D|Riding Farore's Wind|link}}" | |||
|- | |||
| Hyrule | |||
| [[File:OoT3D Where the Sword Sleeps.png]]<br/>"{{Term|OoT3D|Where the Sword Sleeps|link}}" | |||
|- | |||
| Hyrule | |||
| [[File:OoT3D Breaking and Entering.png]]<br/>"{{Term|OoT3D|Breaking and Entering|link}}" | |||
|- | |||
| Hyrule | |||
| [[File:OoT3D Rise and Shine.png]]<br/>"{{Term|OoT3D|Rise and Shine|link}}" | |||
|- | |||
| Hyrule | |||
| [[File:OoT3D Up the Mountain Trail.png]]<br/>"{{Term|OoT3D|Up the Mountain Trail|link}}" | |||
|- | |||
| Hyrule | |||
| [[File:OoT3D Moving a Heart of Stone.png]]<br/>"{{Term|OoT3D|Moving a Heart of Stone|link}}" | |||
|- | |||
| Hyrule | |||
| [[File:OoT3D Blasting and Entering.png]]<br/>"{{Term|OoT3D|Blasting and Entering|link}}" | |||
|- | |||
| Hyrule | |||
| [[File:OoT3D Entering Zora's Domain.png]]<br/>"{{Term|OoT3D|Entering Zora's Domain|link}}" | |||
|- | |||
| Hyrule | |||
| [[File:OoT3D Taking a Dive.png]]<br/>"{{Term|OoT3D|Taking a Dive|link}}" | |||
|- | |||
| Hyrule | |||
| [[File:OoT3D Finding the Wayward Princess.png]]<br/>"{{Term|OoT3D|Finding the Wayward Princess|link}}" | |||
|- | |||
| Hyrule | |||
| [[File:OoT3D The Princess's Plea.png]]<br/>"{{Term|OoT3D|The Princess's Plea|link}}" | |||
|- | |||
| Hyrule | |||
| [[File:OoT3D A Grave Secret.png]]<br/>"{{Term|OoT3D|A Grave Secret|link}}" | |||
|- | |||
| Hyrule | |||
| [[File:OoT3D Reaching the Fire Temple.png]]<br/>"{{Term|OoT3D|Reaching the Fire Temple|link}}" | |||
|- | |||
| Hyrule | |||
| [[File:OoT3D A Frozen Cave.png]]<br/>"{{Term|OoT3D|A Frozen Cave|link}}" | |||
|- | |||
| Hyrule | |||
| [[File:OoT3D Reviving King Zora.png]]<br/>"{{Term|OoT3D|Reviving King Zora|link}}" | |||
|- | |||
| Hyrule | |||
| [[File:OoT3D To the Water Temple.png]]<br/>"{{Term|OoT3D|To the Water Temple|link}}" | |||
|- | |||
| Hyrule | |||
| [[File:OoT3D Shooting for the Morning Sun.png]]<br/>"{{Term|OoT3D|Shooting for the Morning Sun|link}}" | |||
|- | |||
| Hyrule | |||
| [[File:OoT3D Down the Well.png]]<br/>"{{Term|OoT3D|Down the Well|link}}" | |||
|- | |||
| Hyrule | |||
| [[File:OoT3D Earning the Eye of Truth.png]]<br/>"{{Term|OoT3D|Earning the Eye of Truth|link}}" | |||
|- | |||
| Hyrule | |||
| [[File:OoT3D Into the Shadow Temple.png]]<br/>"{{Term|OoT3D|Into the Shadow Temple|link}}" | |||
|- | |||
| Hyrule | |||
| [[File:OoT3D Canyon Crossing.png]]<br/>"{{Term|OoT3D|Canyon Crossing|link}}" | |||
|- | |||
| Hyrule | |||
| [[File:OoT3D Captive Carpenters:Part I.png]]<br/>"{{Term|OoT3D|Captive Carpenters: Part I|link}}" | |||
|- | |||
| Hyrule | |||
| [[File:OoT3D Captive Carpenters:Part II.png]]<br/>"{{Term|OoT3D|Captive Carpenters: Part II|link}}" | |||
|- | |||
| Hyrule | |||
| [[File:OoT3D Captive Carpenters:Part III.png]]<br/>"{{Term|OoT3D|Captive Carpenters: Part III|link}}" | |||
|- | |||
| Hyrule | |||
| [[File:OoT3D Captive Carpenters:Part IV.png]]<br/>"{{Term|OoT3D|Captive Carpenters: Part IV|link}}" | |||
|- | |||
| Hyrule | |||
| [[File:OoT3D Desert Journey.png]]<br/>"{{Term|OoT3D|Desert Journey|link}}" | |||
}} | |||
==={{MM3D|-}}=== | ==={{MM3D|-}}=== | ||
Visions in {{MM3D}} work just the same as they did in {{OoT3D|-}}. As previously, more Visions are unlocked as Link progresses through his adventure. A Sheikah Stone can be found inside the [[Clock Tower]] near the [[Happy Mask Salesman]], who points it out to Link at the beginning of his quest to retrieve the [[Ocarina of Time (Item)|Ocarina of Time]]. | {{Main|Hint Movie, Hint Photo}} | ||
Visions in {{MM3D}} work just the same as they did in {{OoT3D|-}}. As previously, more Visions are unlocked as Link progresses through his adventure. A Sheikah Stone can be found inside the [[Clock Tower]] near the [[Happy Mask Salesman]], who points it out to Link at the beginning of his quest to retrieve the [[Ocarina of Time (Item)|Ocarina of Time]]. {{Plural|MM3D|Vision}} are divided into {{Plural|MM3D|Hint Movie|link}}, which offer guidance pertaining to the game's main story, and {{Plural|MM3D|Hint Photo|link}}, which depict the locations of {{Plural|MM3D|Piece of Heart|link}} and {{Plural|MM3D|Stray Fairy|link}}. | |||
====List of {{Plural|MM3D|Hint Movie}}==== | |||
{{Data Table Copy | |||
|fromPage= Hint Movie | |||
|storedAs= MM3D Hint Movies | |||
}} | |||
====List of {{Plural|MM3D|Hint Photo}}==== | |||
{{Data Table Copy | |||
|fromPage= Hint Photo | |||
|storedAs= MM3D Hint Photos | |||
}} | |||
==={{SS|-}}=== | ==={{SS|-}}=== | ||
| Line 29: | Line 451: | ||
Along with {{Plural|SS|Sheikah Stone}}, {{Plural|SS|Vision}} were removed entirely in {{SSHD}}. | Along with {{Plural|SS|Sheikah Stone}}, {{Plural|SS|Vision}} were removed entirely in {{SSHD}}. | ||
====List of {{Plural|SS|Vision}}==== | |||
{{Data Table | |||
|game= SS | |||
|storeAs= SS Visions | |||
|columns= Location [Term] [Rowspan], Title | |||
|- | |||
| Skyloft - Sky | |||
| [[File:SS Saving Your Loftwing.png]]<br/>"{{Term|SS|Saving Your Loftwing|link}}" | |||
|- | |||
| Skyloft - Sky | |||
| [[File:SS Chasing the Mysterious Girl.png]]<br/>"{{Term|SS|Chasing the Mysterious Girl|link}}" | |||
|- | |||
| Skyloft - Sky | |||
| [[File:SS Getting into Beedle's Airshop.png]]<br/>"{{Term|SS|Getting into Beedle's Airshop|link}}" | |||
|- | |||
| Skyloft - Sky | |||
| [[File:SS Solving the Cemetery Mystery.png]]<br/>"{{Term|SS|Solving the Cemetery Mystery|link}}" | |||
|- | |||
| Skyloft - Sky | |||
| [[File:SS Two Whirling Sails:Part 1.png]]<br/>"{{Term|SS|Two Whirling Sails: Part 1|link}}" | |||
|- | |||
| Skyloft - Sky | |||
| [[File:SS Two Whirling Sails:Part 2.png]]<br/>"{{Term|SS|Two Whirling Sails: Part 2|link}}" | |||
|- | |||
| Skyloft - Sky | |||
| [[File:SS Moving the Isle of Songs Bridge.png]]<br/>"{{Term|SS|Moving the Isle of Songs Bridge|link}}" | |||
|- | |||
| Skyloft - Sky | |||
| [[File:SS Saving Levias.png]]<br/>"{{Term|SS|Saving Levias|link}}" | |||
|- | |||
| Skyloft - Sky | |||
| [[File:SS Inserting the Stone of Trials.png]]<br/>"{{Term|SS|Inserting the Stone of Trials|link}}" | |||
|- | |||
| Sealed Grounds | |||
| [[File:SS Defeating a Deku Baba.png]]<br/>"{{Term|SS|Defeating a Deku Baba|link}}" | |||
|- | |||
| Sealed Grounds | |||
| [[File:SS The Imprisoned Battle.png]]<br/>"{{Term|SS|The Imprisoned Battle|link}}" | |||
|- | |||
| Sealed Grounds | |||
| [[File:SS The Imprisoned Battle:Part 2.png]]<br/>"{{Term|SS|The Imprisoned Battle: Part 2|link}}" | |||
|- | |||
| Sealed Grounds | |||
| [[File:SS The Imprisoned Battle:Part 3.png]]<br/>"{{Term|SS|The Imprisoned Battle: Part 3|link}}" | |||
|- | |||
| Sealed Grounds | |||
| [[File:SS Battle the Horde.png]]<br/>"{{Term|SS|Battle the Horde|link}}" | |||
|- | |||
| Sealed Grounds | |||
| [[File:SS Ghirahim Final Battle:Part 1.png]]<br/>"{{Term|SS|Ghirahim Final Battle: Part 1|link}}" | |||
|- | |||
| Sealed Grounds | |||
| [[File:SS Ghirahim Final Battle:Part 2.png]]<br/>"{{Term|SS|Ghirahim Final Battle: Part 2|link}}" | |||
|- | |||
| Sealed Grounds | |||
| [[File:SS Demise Battle.png]]<br/>"{{Term|SS|Demise Battle|link}}" | |||
|- | |||
| Faron Woods Area | |||
| [[File:SS Finding the Kikwis:Part 1.png]]<br/>"{{Term|SS|Finding the Kikwis: Part 1|link}}" | |||
|- | |||
| Faron Woods Area | |||
| [[File:SS Finding the Kikwis:Part 2.png]]<br/>"{{Term|SS|Finding the Kikwis: Part 2|link}}" | |||
|- | |||
| Faron Woods Area | |||
| [[File:SS Finding the Kikwis:Part 3.png]]<br/>"{{Term|SS|Finding the Kikwis: Part 3|link}}" | |||
|- | |||
| Faron Woods Area | |||
| [[File:SS Defeating an Octorok.png]]<br/>"{{Term|SS|Defeating an Octorok|link}}" | |||
|- | |||
| Faron Woods Area | |||
| [[File:SS Dealing with Deku Hornets.png]]<br/>"{{Term|SS|Dealing with Deku Hornets|link}}" | |||
|- | |||
| Faron Woods Area | |||
| [[File:SS Traveling to the Temple.png]]<br/>"{{Term|SS|Traveling to the Temple|link}}" | |||
|- | |||
| Faron Woods Area | |||
| [[File:SS Entering the Temple.png]]<br/>"{{Term|SS|Entering the Temple|link}}" | |||
|- | |||
| Faron Woods Area | |||
| [[File:SS After Getting the Water Dragon's Scale.png]]<br/>"{{Term|SS|After Getting the Water Dragon's Scale|link}}" | |||
|- | |||
| Faron Woods Area | |||
| [[File:SS Crossing the Swinging Platform.png]]<br/>"{{Term|SS|Crossing the Swinging Platform|link}}" | |||
|- | |||
| Faron Woods Area | |||
| [[File:SS Heading to the Lake.png]]<br/>"{{Term|SS|Heading to the Lake|link}}" | |||
|- | |||
| Faron Woods Area | |||
| [[File:SS Catching Tadtones.png]]<br/>"{{Term|SS|Catching Tadtones|link}}" | |||
|- | |||
| Faron Woods Area | |||
| [[File:SS The Tadtone under the Lily Pad.png]]<br/>"{{Term|SS|The Tadtone under the Lilypad|link}}" | |||
|- | |||
| Faron Woods Area | |||
| [[File:SS The Tadtone behind the Rocks.png]]<br/>"{{Term|SS|The Tadtone behind the Rocks|link}}" | |||
|- | |||
| Eldin Volcano Area | |||
| [[File:SS Clearing the Plugged Lava Hole.png]]<br/>"{{Term|SS|Clearing the Plugged Lava Hole|link}}" | |||
|- | |||
| Eldin Volcano Area | |||
| [[File:SS Getting By a Tower.png]]<br/>"{{Term|SS|Getting By a Tower|link}}" | |||
|- | |||
| Eldin Volcano Area | |||
| [[File:SS Finding the Pieces of the Key:Part 1.png]]<br/>"{{Term|SS|Finding the Pieces of the Key: Part 1|link}}" | |||
|- | |||
| Eldin Volcano Area | |||
| [[File:SS Crossing the Bridgeless Gap.png]]<br/>"{{Term|SS|Crossing the Bridgeless Gap|link}}" | |||
|- | |||
| Eldin Volcano Area | |||
| [[File:SS Finding the Pieces of the Key:Part 2.png]]<br/>"{{Term|SS|Finding the Pieces of the Key: Part 2|link}}" | |||
|- | |||
| Eldin Volcano Area | |||
| [[File:SS Finding the Pieces of the Key:Part 3.png]]<br/>"{{Term|SS|Finding the Pieces of the Key: Part 3|link}}" | |||
|- | |||
| Eldin Volcano Area | |||
| [[File:SS Quench My Thirst:Part 1.png]]<br/>"{{Term|SS|Quench My Thirst: Part 1|link}}" | |||
|- | |||
| Eldin Volcano Area | |||
| [[File:SS Finding a Large Water Basin.png]]<br/>"{{Term|SS|Finding a Large Water Basin|link}}" | |||
|- | |||
| Eldin Volcano Area | |||
| [[File:SS Reclaiming Your Whip.png]]<br/>"{{Term|SS|Reclaiming Your Whip|link}}" | |||
|- | |||
| Eldin Volcano Area | |||
| [[File:SS Recaliming Your Slingshot.png]]<br/>"{{Term|SS|Reclaiming Your Slingshot|link}}" | |||
|- | |||
| Eldin Volcano Area | |||
| [[File:SS Reclaiming Your Bomb Bag.png]]<br/>"{{Term|SS|Reclaiming Your Bomb Bag|link}}" | |||
|- | |||
| Eldin Volcano Area | |||
| [[File:SS Reclaiming Your Other Items.png]]<br/>"{{Term|SS|Reclaiming Your Other Items|link}}" | |||
|- | |||
| Lanayru Desert Area | |||
| [[File:SS Lanayru Mine:Part 1.png]]<br/>"{{Term|SS|Lanayru Mine: Part 1|link}}" | |||
|- | |||
| Lanayru Desert Area | |||
| [[File:SS Lanayru Mine:Part 2.png]]<br/>"{{Term|SS|Lanayru Mine: Part 2|link}}" | |||
|- | |||
| Lanayru Desert Area | |||
| [[File:SS Lanayru Mine:Part 3.png]]<br/>"{{Term|SS|Lanayru Mine: Part 3|link}}" | |||
|- | |||
| Lanayru Desert Area | |||
| [[File:SS Rescuing the Robot.png]]<br/>"{{Term|SS|Rescuing the Robot|link}}" | |||
|- | |||
| Lanayru Desert Area | |||
| [[File:SS Lanayru Desert:Part 1.png]]<br/>"{{Term|SS|Lanayru Desert: Part 1|link}}" | |||
|- | |||
| Lanayru Desert Area | |||
| [[File:SS Lanayru Desert:Part 2.png]]<br/>"{{Term|SS|Lanayru Desert: Part 2|link}}" | |||
|- | |||
| Lanayru Desert Area | |||
| [[File:SS Reaching the Temple of Time.png]]<br/>"{{Term|SS|Reaching the Temple of Time|link}}" | |||
|- | |||
| Lanayru Desert Area | |||
| [[File:SS Reaching Lanayru Mining Facility.png]]<br/>"{{Term|SS|Reaching Lanayru Mining Facility|link}}" | |||
|- | |||
| Lanayru Desert Area | |||
| [[File:SS Walking over Sinksand.png]]<br/>"{{Term|SS|Walking over Sinksand|link}}" | |||
|- | |||
| Lanayru Desert Area | |||
| [[File:SS Finding the Remote Power Node:Part 1.png]]<br/>"{{Term|SS|Finding the Remote Power Node: Part 1|link}}" | |||
|- | |||
| Lanayru Desert Area | |||
| [[File:SS Finding the Remote Power Node:Part 2.png]]<br/>"{{Term|SS|Finding the Remote Power Node: Part 2|link}}" | |||
|- | |||
| Lanayru Desert Area | |||
| [[File:SS Finding the Remote Power Node:Part 3.png]]<br/>"{{Term|SS|Finding the Remote Power Node: Part 3|link}}" | |||
|- | |||
| Lanayru Desert Area | |||
| [[File:SS Exploring New Areas with the Clawshots.png]]<br/>"{{Term|SS|Exploring New Areas with the Clawshots|link}}" | |||
|- | |||
| Lanayru Desert Area | |||
| [[File:SS Defeating a Moblin.png]]<br/>"{{Term|SS|Defeating a Moblin|link}}" | |||
|- | |||
| Lanayru Desert Area | |||
| [[File:SS Pirate Stronghold:Part 1.png]]<br/>"{{Term|SS|Pirate Stronghold: Part 1|link}}" | |||
|- | |||
| Lanayru Desert Area | |||
| [[File:SS Pirate Stronghold:Part 2.png]]<br/>"{{Term|SS|Pirate Stronghold: Part 2|link}}" | |||
|- | |||
| Lanayru Desert Area | |||
| [[File:SS Searching for the Sandship.png]]<br/>"{{Term|SS|Searching for the Sandship|link}}" | |||
|- | |||
| Lanayru Desert Area | |||
| [[File:SS The Location of the Small Key.png]]<br/>"{{Term|SS|The Location of the Small Key|link}}" | |||
|- | |||
| Lanayru Desert Area | |||
| [[File:SS The Blocked Timestone Cart.png]]<br/>"{{Term|SS|The Blocked Timestone Cart|link}}" | |||
|- | |||
| Lanayru Desert Area | |||
| [[File:SS Planting the Seedling.png]]<br/>"{{Term|SS|Planting the Seedling|link}}" | |||
|- | |||
| Skyview Temple | |||
| [[File:SS The Eye Guardian.png]]<br/>"{{Term|SS|The Eye Guardian|link}}" | |||
|- | |||
| Skyview Temple | |||
| [[File:SS Finding the Portcullis Switch:Part 1.png]]<br/>"{{Term|SS|Finding the Portcullis Switch: Part 1|link}}" | |||
|- | |||
| Skyview Temple | |||
| [[File:SS Defeating a Skulltula.png]]<br/>"{{Term|SS|Defeating a Skulltula|link}}" | |||
|- | |||
| Skyview Temple | |||
| [[File:SS Finding the X on the Map.png]]<br/>"{{Term|SS|Finding the X on the Map|link}}" | |||
|- | |||
| Skyview Temple | |||
| [[File:SS Defeating a Stalfos.png]]<br/>"{{Term|SS|Defeating a Stalfos|link}}" | |||
|- | |||
| Skyview Temple | |||
| [[File:SS Finding the Portcullis Switch:Part 2.png]]<br/>"{{Term|SS|Finding the Portcullis Switch: Part 2|link}}" | |||
|- | |||
| Skyview Temple | |||
| [[File:SS Ghirahim Battle.png]]<br/>"{{Term|SS|Ghirahim Battle|link}}" | |||
|- | |||
| Skyview Temple | |||
| [[File:SS Finding the Mogma's Key.png]]<br/>"{{Term|SS|Finding the Mogma's Key|link}}" | |||
|- | |||
| Earth Temple | |||
| [[File:SS A Bridge across the Lava.png]]<br/>"{{Term|SS|A Bridge across the Lava|link}}" | |||
|- | |||
| Earth Temple | |||
| [[File:SS Crossing the Lava.png]]<br/>"{{Term|SS|Crossing the Lava|link}}" | |||
|- | |||
| Earth Temple | |||
| [[File:SS Finding the Bomb Bag.png]]<br/>"{{Term|SS|Finding the Bomb Bag|link}}" | |||
|- | |||
| Earth Temple | |||
| [[File:SS Defeating a Lizalfos.png]]<br/>"{{Term|SS|Defeating a Lizalfos|link}}" | |||
|- | |||
| Earth Temple | |||
| [[File:SS After You Obtain the Map.png]]<br/>"{{Term|SS|After You Obtain the Map|link}}" | |||
|- | |||
| Earth Temple | |||
| [[File:SS Opening the Lava Gate.png]]<br/>"{{Term|SS|Opening the Lava Gate|link}}" | |||
|- | |||
| Earth Temple | |||
| [[File:SS Climbing the Slope.png]]<br/>"{{Term|SS|Climbing the Slope|link}}" | |||
|- | |||
| Earth Temple | |||
| [[File:SS Scaldera Battle.png]]<br/>"{{Term|SS|Scaldera Battle|link}}" | |||
|- | |||
| Lanayru Mining Facility | |||
| [[File:SS Opening the First Portcullis.png]]<br/>"{{Term|SS|Opening the First Portcullis|link}}" | |||
|- | |||
| Lanayru Mining Facility | |||
| [[File:SS Breaking the Wooden Boxes.png]]<br/>"{{Term|SS|Breaking the Wooden Boxes|link}}" | |||
|- | |||
| Lanayru Mining Facility | |||
| [[File:SS The Timsehift Stone inside the Cage.png]]<br/>"{{Term|SS|The Timeshift Stone inside the Cage|link}}" | |||
|- | |||
| Lanayru Mining Facility | |||
| [[File:SS Getting Down the Conveyor Belt.png]]<br/>"{{Term|SS|Getting Down the Conveyor Belt|link}}" | |||
|- | |||
| Lanayru Mining Facility | |||
| [[File:SS The Treasure Chest inside the Jail.png]]<br/>"{{Term|SS|The Treasure Chest inside the Jail|link}}" | |||
|- | |||
| Lanayru Mining Facility | |||
| [[File:SS Crossing the Sinksand.png]]<br/>"{{Term|SS|Crossing the Sinksand|link}}" | |||
|- | |||
| Lanayru Mining Facility | |||
| [[File:SS Timeshift Stone Cart and Wind Switch.png]]<br/>"{{Term|SS|Timeshift Stone Cart and Wind Switch|link}}" | |||
|- | |||
| Lanayru Mining Facility | |||
| [[File:SS Mystery of the Three Linked Switches.png]]<br/>"{{Term|SS|Mystery of the Three Linked Switches|link}}" | |||
|- | |||
| Lanayru Mining Facility | |||
| [[File:SS Timeshift Stone Carts and Propeller Lifts.png]]<br/>"{{Term|SS|Timeshift Stone Carts and Propeller Lifts|link}}" | |||
|- | |||
| Lanayru Mining Facility | |||
| [[File:SS Defeating a Sentrobe.png]]<br/>"{{Term|SS|Defeating a Sentrobe|link}}" | |||
|- | |||
| Lanayru Mining Facility | |||
| [[File:SS Defeating a Beamos.png]]<br/>"{{Term|SS|Defeating a Beamos|link}}" | |||
|- | |||
| Lanayru Mining Facility | |||
| [[File:SS Defeating an Armos.png]]<br/>"{{Term|SS|Defeating an Armos|link}}" | |||
|- | |||
| Lanayru Mining Facility | |||
| [[File:SS Moldarach Battle.png]]<br/>"{{Term|SS|Moldarach Battle|link}}" | |||
|- | |||
| Ancient Cistern | |||
| [[File:SS The Correct Gemstone-Switch Order.png]]<br/>"{{Term|SS|The Correct Gemstone-Switch Order|link}}" | |||
|- | |||
| Ancient Cistern | |||
| [[File:SS Getting By the Lily Pads Blocking the Underwater Canal.png]]<br/>"{{Term|SS|Getting By the Lily Pads Blocking the Underwater Canal|link}}" | |||
|- | |||
| Ancient Cistern | |||
| [[File:SS Defeating a Stalmaster.png]]<br/>"{{Term|SS|Defeating a Stalmaster|link}}" | |||
|- | |||
| Ancient Cistern | |||
| [[File:SS The Switch beside the Waterfall.png]]<br/>"{{Term|SS|The Switch beside the Waterfall|link}}" | |||
|- | |||
| Ancient Cistern | |||
| [[File:SS Stealing the Bokoblin's Key.png]]<br/>"{{Term|SS|Stealing the Bokoblin's Key|link}}" | |||
|- | |||
| Ancient Cistern | |||
| [[File:SS A Spin Jump Refresher.png]]<br/>"{{Term|SS|A Spin Jump Refresher|link}}" | |||
|- | |||
| Ancient Cistern | |||
| [[File:SS Defeating a Furnix.png]]<br/>"{{Term|SS|Defeating a Furnix|link}}" | |||
|- | |||
| Ancient Cistern | |||
| [[File:SS Grabbing On to the Ivy.png]]<br/>"{{Term|SS|Grabbing On to the Ivy|link}}" | |||
|- | |||
| Ancient Cistern | |||
| [[File:SS Getting Through the Rolling Room.png]]<br/>"{{Term|SS|Getting Through the Rolling Room|link}}" | |||
|- | |||
| Ancient Cistern | |||
| [[File:SS Koloktos Battle.png]]<br/>"{{Term|SS|Koloktos Battle|link}}" | |||
|- | |||
| Sandship | |||
| [[File:SS The Order of the Four Gemstone Switches.png]]<br/>"{{Term|SS|The Order of the Four Gemstone Switches|link}}" | |||
|- | |||
| Sandship | |||
| [[File:SS Scervo Battle.png]]<br/>"{{Term|SS|Scervo Battle|link}}" | |||
|- | |||
| Sandship | |||
| [[File:SS Activating the Power Generator:Part 1.png]]<br/>"{{Term|SS|Activating the Power Generator: Part 1|link}}" | |||
|- | |||
| Sandship | |||
| [[File:SS Activating the Power Generator:Part 2.png]]<br/>"{{Term|SS|Activating the Power Generator: Part 2|link}}" | |||
|- | |||
| Sandship | |||
| [[File:SS Beating the Tentacles Back.png]]<br/>"{{Term|SS|Beating the Tentacles Back|link}}" | |||
|- | |||
| Sandship | |||
| [[File:SS Tentalus Battle:Part 1.png]]<br/>"{{Term|SS|Tentalus Battle: Part 1|link}}" | |||
|- | |||
| Sandship | |||
| [[File:SS Tentalus Battle:Part 2.png]]<br/>"{{Term|SS|Tentalus Battle: Part 2|link}}" | |||
|- | |||
| Fire Sanctuary | |||
| [[File:SS The Magmanos Room.png]]<br/>"{{Term|SS|The Magmanos Room|link}}" | |||
|- | |||
| Fire Sanctuary | |||
| [[File:SS Getting Through the Lava Room.png]]<br/>"{{Term|SS|Getting Through the Lava Room|link}}" | |||
|- | |||
| Fire Sanctuary | |||
| [[File:SS Quench My Thirst:Part 2.png]]<br/>"{{Term|SS|Quench My Thirst: Part 2|link}}" | |||
|- | |||
| Fire Sanctuary | |||
| [[File:SS Defeat a Magmanos.png]]<br/>"{{Term|SS|Defeat a Magmanos|link}}" | |||
|- | |||
| Fire Sanctuary | |||
| [[File:SS Finding the Hidden Passage.png]]<br/>"{{Term|SS|Finding the Hidden Passage|link}}" | |||
|- | |||
| Fire Sanctuary | |||
| [[File:SS Getting the Boss Key.png]]<br/>"{{Term|SS|Getting the Boss Key|link}}" | |||
|- | |||
| Fire Sanctuary | |||
| [[File:SS Ghirahim Battle:Part 2.png]]<br/>"{{Term|SS|Ghirahim Battle: Part 2|link}}" | |||
|- | |||
| Sky Keep | |||
| [[File:SS The Pyrups Hiding in the Cliff.png]]<br/>"{{Term|SS|The Pyrups Hiding in the Cliff|link}}" | |||
|- | |||
| Sky Keep | |||
| [[File:SS Crossing the Swinging Platforms.png]]<br/>"{{Term|SS|Crossing the Swinging Platforms|link}}" | |||
|- | |||
| Sky Keep | |||
| [[File:SS Crossing the River of Lava:Part 1.png]]<br/>"{{Term|SS|Crossing the River of Lava: Part 1|link}}" | |||
|- | |||
| Sky Keep | |||
| [[File:SS Crossing the River of Lava:Part 2.png]]<br/>"{{Term|SS|Crossing the River of Lava: Part 2|link}}" | |||
|- | |||
| Sky Keep | |||
| [[File:SS The Gemstone Switches behind the Statues.png]]<br/>"{{Term|SS|The Gemstone Switches behind the Statues|link}}" | |||
|- | |||
| Sky Keep | |||
| [[File:SS The Sinksand Room:Part 1.png]]<br/>"{{Term|SS|The Sinksand Room: Part 1|link}}" | |||
|- | |||
| Sky Keep | |||
| [[File:SS The Sinksand Room:Part 2.png]]<br/>"{{Term|SS|The Sinksand Room: Part 2|link}}" | |||
|- | |||
| Sky Keep | |||
| [[File:SS The Sinksand Room:Part 3.png]]<br/>"{{Term|SS|The Sinksand Room: Part 3|link}}" | |||
|- | |||
| Sky Keep | |||
| [[File:SS Dreadfuse Battle.png]]<br/>"{{Term|SS|Dreadfuse Battle|link}}" | |||
|- | |||
| Extras | |||
| [[File:SS Catching Bugs.png]]<br/>"{{Term|SS|Catching Bugs|link}}" | |||
|- | |||
| Extras | |||
| [[File:SS Delivering the Soup to Eagus.png]]<br/>"{{Term|SS|Delivering the Soup to Eagus|link}}" | |||
|- | |||
| Extras | |||
| [[File:SS Orielle Has Disappeared.png]]<br/>"{{Term|SS|Orielle Has Disappeared|link}}" | |||
|- | |||
| Extras | |||
| [[File:SS Getting Into the Shed with No Door.png]]<br/>"{{Term|SS|Getting Into the Shed with No Door|link}}" | |||
|- | |||
| Extras | |||
| [[File:SS Giving a Special Drink to Fledge.png]]<br/>"{{Term|SS|Giving a Special Drink to Fledge|link}}" | |||
|- | |||
| Extras | |||
| [[File:SS The Fortune-Teller's Problem.png]]<br/>"{{Term|SS|The Fortune-Teller's Problem|link}}" | |||
|- | |||
| Extras | |||
| [[File:SS Finding the Lost Rattle.png]]<br/>"{{Term|SS|Finding the Lost Rattle|link}}" | |||
|- | |||
| Extras | |||
| [[File:SS Finding the Lost Horned Colossus Beetle.png]]<br/>"{{Term|SS|Finding the Lost Horner Colossus Beetle|link}}" | |||
|- | |||
| Extras | |||
| [[File:SS Drawing on Goddess Walls.png]]<br/>"{{Term|SS|Drawing on Goddess Walls|link}}" | |||
|- | |||
| Extras | |||
| [[File:SS Finding Arrows.png]]<br/>"{{Term|SS|Finding Arrows|link}}" | |||
|- | |||
| Extras | |||
| [[File:SS A Good Skydiving Spot.png]]<br/>"{{Term|SS|A Good Skydiving Spot|link}}" | |||
}} | |||
{{Noncanon|End}} | {{Noncanon|End}} | ||
==Nomenclature== | |||
{{Nomenclature}} | |||
==Gallery== | ==Gallery== | ||
Revision as of 04:47, 22 February 2024
Visions are a recurring mechanic in The Legend of Zelda series.[1][2] Visions go unnamed in Skyward Sword. They are short gameplay clips that are presented on the Visions menu, viewable with the help of Sheikah Stones that demonstrate how to advance in the game. This is in contrast to the "Super Guide" variation of New Super Mario Bros. Wii, which actually completes the puzzle directly for the player.[3]
Appearances
Ocarina of Time 3D
In Ocarina of Time 3D, Visions can be accessed via Sheikah Stones, which are larger, more animated versions of the Gossip Stones from the original game. Link has the option to crawl inside these Sheikah Stones to bring up the Visions screen. From there, he can choose one of the Visions listed and get hints on how to complete a specified puzzle, find a secret, or defeat a boss - after reaching a point in the game close to accessing the subject, or having attempted it. There are two Sheikah Stones which can be found near Link's house in Kokiri Forest and the other one in the Temple of Time. The Visions screen can also be accessed from the Game Over screen.
Visions are not available in the Master Quest mode, and each Vision will only become available once a certain point in the game has been reached or once the player has attempted to solve the puzzle. Once a new Vision is unlocked, it will be labeled in red as "New" on the Visions screen, and it will be replaced with a green checkmark once the Vision has been watched. When the goal shown within the Vision is completed, a green "Clear" will appear next to it in the Vision selection screen.
List of Visions
| Location | Title |
|---|---|
Majora's Mask 3D
Visions in Majora's Mask 3D work just the same as they did in Ocarina of Time 3D. As previously, more Visions are unlocked as Link progresses through his adventure. A Sheikah Stone can be found inside the Clock Tower near the Happy Mask Salesman, who points it out to Link at the beginning of his quest to retrieve the Ocarina of Time. Visions are divided into Hint Movies, which offer guidance pertaining to the game's main story, and Hint Photos, which depict the locations of Pieces of Heart and Stray Fairies.
List of Hint Movies
| Category | Title |
|---|---|
The First Three Days | |
Swamp | |
Woodfall | |
Mountains | |
Snowhead | |
Ocean | |
Great Bay | |
Canyon | |
Stone Tower | |
Final Battle | |


List of Hint Photos
| Category | Pieces of Heart |
|---|---|
| Title | |
| Category | Pieces of Heart |
| Title | |
| Category | Pieces of Heart |
| Title | |
| Category | Pieces of Heart |
| Title | |
| Category | Pieces of Heart |
| Title | |
| Category | Pieces of Heart |
| Title | |
| Category | Pieces of Heart |
| Title | |
| Category | Pieces of Heart |
| Title | |
| Category | Pieces of Heart |
| Title | |
| Category | Pieces of Heart |
| Title | |
| Category | Pieces of Heart |
| Title | |
| Category | Pieces of Heart |
| Title | |
| Category | Pieces of Heart |
| Title | |
| Category | Pieces of Heart |
| Title | |
| Category | Pieces of Heart |
| Title | |
| Category | Pieces of Heart |
| Title | |
| Category | Pieces of Heart |
| Title | |
| Category | Pieces of Heart |
| Title | |
| Category | Pieces of Heart |
| Title | |
| Category | Pieces of Heart |
| Title | |
| Category | Pieces of Heart |
| Title | |
| Category | Pieces of Heart |
| Title | |
| Category | Pieces of Heart |
| Title | |
| Category | Stray Fairies |
| Title | |
| Category | Stray Fairies |
| Title | |
| Category | Stray Fairies |
| Title | |
| Category | Stray Fairies |
| Title | |
| Category | Stray Fairies |
| Title | |
| Category | Stray Fairies |
| Title | |
| Category | Stray Fairies |
| Title | |
| Category | Stray Fairies |
| Title | |
| Category | Stray Fairies |
| Title | |
| Category | Stray Fairies |
| Title | |
| Category | Stray Fairies |
| Title | |
| Category | Stray Fairies |
| Title | |
| Category | Stray Fairies |
| Title | |
| Category | Stray Fairies |
| Title | |
| Category | Stray Fairies |
| Title | |
| Category | Stray Fairies |
| Title | |
| Category | Stray Fairies |
| Title | |
| Category | Stray Fairies |
| Title | |
| Category | Stray Fairies |
| Title | |
| Category | Stray Fairies |
| Title | |
| Category | Stray Fairies |
| Title | |
| Category | Stray Fairies |
| Title | |
| Category | Stray Fairies |
| Title | |
| Category | Stray Fairies |
| Title | |
| Category | Stray Fairies |
| Title | |
| Category | Stray Fairies |
| Title | |
| Category | Stray Fairies |
| Title | |
| Category | Stray Fairies |
| Title | |
| Category | Stray Fairies |
| Title | |
| Category | Stray Fairies |
| Title | |
| Category | Stray Fairies |
| Title | |
| Category | Stray Fairies |
| Title | |
| Category | Stray Fairies |
| Title | |
| Category | Stray Fairies |
| Title | |
| Category | Stray Fairies |
| Title | |
| Category | Stray Fairies |
| Title | |
| Category | Stray Fairies |
| Title | |
| Category | Stray Fairies |
| Title | |
| Category | Stray Fairies |
| Title | |
| Category | Stray Fairies |
| Title | |
| Category | Stray Fairies |
| Title | |
| Category | Stray Fairies |
| Title | |
| Category | Stray Fairies |
| Title | |
| Category | Stray Fairies |
| Title | |
| Category | Stray Fairies |
| Title | |
| Category | Stray Fairies |
| Title | |
| Category | Stray Fairies |
| Title | |
| Category | Stray Fairies |
| Title | |
| Category | Stray Fairies |
| Title | |
| Category | Stray Fairies |
| Title | |
| Category | Stray Fairies |
| Title | |
| Category | Stray Fairies |
| Title | |
| Category | Stray Fairies |
| Title | |
| Category | Stray Fairies |
| Title | |
| Category | Stray Fairies |
| Title | |
| Category | Stray Fairies |
| Title | |
| Category | Stray Fairies |
| Title | |
| Category | Stray Fairies |
| Title | |
| Category | Stray Fairies |
| Title | |
| Category | Stray Fairies |
| Title |


| Category | Title |
|---|---|
Pieces of Heart | |
Stray Fairies | |
Skyward Sword
Visions return in Skyward Sword, where they can be viewed by talking to Sheikah Stones. They work essentially the same as they did in Ocarina of Time 3D. They are progressively unlocked in the normal quest, but they are all available from the start in Hero Mode. One Sheikah Stone is found outside the sword training room at the Knight Academy in Skyloft, and another appears at the base of Eldin Volcano when it erupts and Link is captured by Bokoblins.
Along with Sheikah Stones, Visions were removed entirely in Skyward Sword HD.
List of Visions
| Location | Title |
|---|---|
Nomenclature
| Language | Names | |
|---|---|---|
| This table was generated using translation pages. To request an addition, please contact a staff member with a reference. | ||
Gallery
-
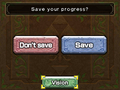
Accessing the Visions from the Game Over screen in Ocarina of Time 3D

.png)
References
- ↑ "Vision" — Game Over (Ocarina of Time 3D)
- ↑ "Visions" — Visions (Majora's Mask 3D)
- ↑ "These visions are actually pre-recorded snippets of gameplay, each consisting of 3-5 short clips that loosely demonstrate what to do next. They’re not meant to replace video walkthroughs (such as our own), but are instead intended to offer lost gamers at least some idea of what they should do next." — The Legend of Zelda: Ocarina of Time 3D Hands-On (Boss Rush, Water Temple Super-Guide); retrieved May 12 2011 , GameXplain.