Rock: Difference between revisions
(Ah, geez. Forgot all this worked for a minute there.) Tag: 2017 source edit |
(replaced brs w/List) |
||
| (39 intermediate revisions by 10 users not shown) | |||
| Line 1: | Line 1: | ||
{{Reorg}} | {{Reorg}} | ||
{{Images}} | {{Lacking Images}} | ||
{{Infobox Object | {{Infobox Object | ||
|image= | |image= | ||
{{Media | {{Media | ||
|Model LANS= File:LANS Rock Model.png | |Model LANS= File:LANS Rock Model.png | ||
|Model MM= File:MM Hammer Rock Model.png | |||
|Model MM= File:MM Rock Model.png | |||
|Model MM3D= File:MM3D Rock Model.png | |Model MM3D= File:MM3D Rock Model.png | ||
|Model TWW= File:TWW Rock Model.png | |Model TWW= File:TWW Rock Model.png | ||
| Line 16: | Line 14: | ||
|Model ST= File:ST Rock Model.png | |Model ST= File:ST Rock Model.png | ||
|Model SS= File:SS Rock Model.png | |Model SS= File:SS Rock Model.png | ||
|Model SSHD= File:SSHD Rock Model.png | |||
|Model ALBW= File:ALBW Rock Model.png | |||
|Model TFH= File:TFH Rock Model.png | |||
|Model BotW= File:BotW Rock Model.png | |Model BotW= File:BotW Rock Model.png | ||
|Model TotK= File:TotK Rock Model.png | |||
|Sprite TLoZ= File:TLoZ Rock Sprite.png | |Sprite TLoZ= File:TLoZ Rock Sprite.png | ||
|Sprite ALttP= File:ALttP Rock Sprite.png | |Sprite ALttP= File:ALttP Rock Sprite.png | ||
|Sprite OoS= File:OoS Rock Sprite.png | |||
|Sprite OoA= File:OoA Rock Sprite.png | |||
|Sprite TMC= File:TMC Rock Sprite.png | |Sprite TMC= File:TMC Rock Sprite.png | ||
}} | }} | ||
|caption= | |caption= | ||
|game= | |game= TLoZ, LANS, ALttP, MM, OoS, OoA, TWW, TMC, TP, SS, ALBW, BotW, TotK | ||
|other= | |other= HW | ||
|cost= | |cost= | ||
|uses= Obtain items | |uses= | ||
{{List| | |||
Obtain items, | |||
Damage enemies, | |||
}} | }} | ||
{{Term/Store|Rock|Rocks|Series, TWW, TWWHD, TMC, TP, TPHD|plural}},<ref>{{Cite Guide|quote= |game= TWW |publisher= Prima |page= 11}}</ref><ref>{{Cite|Rock Breaker|Tiger Scroll|TMC}}</ref><ref>{{Cite|{{Big|YAY!}} You did it! Well, my gal tells me there are still some {{Color|TP Red|rocks}} blocking the way along the river, so you should take care of those, too. Here's the boat... Hop in!|Iza|TP}}</ref>{{ | |comp= | ||
{{List| | |||
{{Term|Series|Barrel|link}}, | |||
{{Term|Series|Boulder|link}}, | |||
{{Term|Series|Grass|link}}, | |||
{{Term|Series|Item Bulb|link}}, | |||
{{Term|Series|Jar|link}}, | |||
{{Term|Series|Skull|link}}, | |||
{{Term|Series|Wooden Box|link}}, | |||
}} | |||
}} | |||
{{Term/Store|Rock|Rocks|Series, TLoZ, OoS, OoA, TWW, TWWHD, TMC, TP, TPHD, HW, HWL, HWDE|plural}}{{Exp Game|TLoZ, OoS, OoA, TWW, TMC, TP, HW}} are recurring {{Plural|Series|Object|link}} in {{TLoZ|Series}}.<ref>{{Cite Guide|quote= |game= CE|publisher= Nintendo|page= 7 {{Exp Game|TLoZ}}}}</ref><ref>{{Cite Guide|quote= |game= OoS |guide= Nintendo |page= 117 {{Exp Game|OoS}} & 119 {{Exp Game|OoA}}}}</ref><ref>{{Cite Guide|quote= |game= TWW |publisher= Prima |page= 11}}</ref><ref>{{Cite|Rock Breaker|Tiger Scroll|TMC}}</ref><ref>{{Cite|{{Big|YAY!}} You did it! Well, my gal tells me there are still some {{Color|TP Red|rocks}} blocking the way along the river, so you should take care of those, too. Here's the boat... Hop in!|Iza|TP}}</ref><ref>{{Cite|Rock|Game Screen|TotK}}</ref><ref>{{Cite|Rock|Apothecary|HWDE}}</ref>{{Name Ref|LANS, ALttP, MM3D, TWWHD, TPHD, SSHD, ALBW, BotW}} | |||
==Uses== | ==Location and Uses== | ||
[[File:Lifting Small Rock OoT3D.jpg|thumb|left|190px|Link lifting a small Rock from {{OoT3D|-}}]] | [[File:Lifting Small Rock OoT3D.jpg|thumb|left|190px|Link lifting a small Rock from {{OoT3D|-}}]] | ||
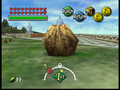
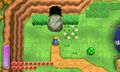
Rocks usually yield items when destroyed, such as [[Heart]]s, [[Rupee]]s, [[Arrow]]s, and [[Bomb]]s. They also serve as obstacles that must be lifted and thrown, or destroyed by the use of Bombs or a [[Hammer]]. When thrown, they can also damage some enemies. | Rocks usually yield items when destroyed, such as [[Heart]]s, [[Rupee]]s, [[Arrow]]s, and [[Bomb]]s. They also serve as obstacles that must be lifted and thrown, or destroyed by the use of Bombs or a [[Hammer]]. When thrown, they can also damage some enemies. | ||
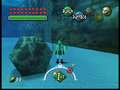
To move or lift some Rocks, [[Link]] must wear certain items in order to do so. In {{ALttP}}, Link must wear the [[Power Glove]]s to lift | To move or lift some Rocks, [[Link]] must wear certain items in order to do so. In {{ALttP}}, Link must wear the [[Power Glove]]s to lift silver Rocks, while the Titan's Mitt are required to lift brown ones. He can also use the [[Pegasus Boots#A Link to the Past|Pegasus Shoes]] to destroy piles of Rocks. In {{OoT}}, large, unbombable rocks can be lifted by Adult Link by using the Silver and Golden Gauntlets, although the bronze ones, using the same model with the coloring, can be destroyed by using the [[Megaton Hammer]]; both rocks for {{MM}}, the hammer stones can be smashed using [[Goron Link]]'s [[Goron_Link#Goron_Punch|punching]] technique, or detonated with a [[Powder Keg]], and the silver rocks, including but not limited to stones placed underwater, can only be lifted by his transformation. In {{TP}}, Link can also use [[Bomb Arrow]]s to destroy Rocks from afar. | ||
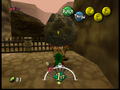
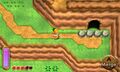
Rocks also appear as visual hints, mostly pointing out hidden areas or covering secrets. In {{ALttP|-}}, [[Magical Warp Tile]]s can sometimes be found under Rocks. | Rocks also appear as visual hints, mostly pointing out hidden areas or covering secrets. In {{ALttP|-}}, [[Magical Warp Tile]]s can sometimes be found under Rocks. Some large Rocks also hide beneath them [[Treasure Chest]]s. In {{ALBW}}, some Rocks hide beneath them lost [[Maiamai]]s. | ||
In the [[Dark World]] and [[Lorule]], Rocks are replaced with [[Skull]]s, which may occasionally turn out to be [[Stal]]s. | In the [[Dark World]] and [[Lorule]], Rocks are replaced with [[Skull]]s, which may occasionally turn out to be [[Stal]]s. | ||
== | ==={{TLoZ|-}}=== | ||
=== | {{Stub|TLoZ}} | ||
==={{LANS|-}}=== | |||
{{Stub|LANS}} | |||
==={{ALttP|-}}=== | |||
{{Stub|ALttP}} | |||
==={{MM|-}}=== | |||
{{Stub|MM3D}} | |||
==={{OoS|-}}=== | |||
{{Stub|OoS}} | |||
==={{OoA|-}}=== | |||
{{Stub|OoA}} | |||
==={{TWW|-}}=== | |||
{{Stub|TWWHD}} | |||
==={{TMC|-}}=== | |||
{{Stub|TMC}} | |||
==={{TP|-}}=== | |||
{{Stub|TPHD}} | |||
==={{SS|-}}=== | |||
{{Stub|SSHD}} | |||
==={{ALBW|-}}=== | |||
{{Stub|ALBW}} | |||
==={{BotW|-}}=== | |||
{{Stub|BotW}} | |||
==={{TotK|-}}=== | |||
{{Stub|TotK}} | |||
==Other Appearances== | |||
==={{HW|-}}=== | |||
{{Noncanon|Start}} | {{Noncanon|Start}} | ||
{{Stub|HW}} | {{Stub|HW}} | ||
{{Noncanon|End}} | {{Noncanon|End}} | ||
==Variations== | |||
===Stone Watchers=== | ===Stone Watchers=== | ||
{{Main|Stone Watcher}} | {{Main|Stone Watcher}} | ||
In {{TWW}}, Stone Watchers appear in various locations hiding [[Cave|secret cave]]s beneath them, or covering secret passages and entrances. They can only be lifted by wearing the [[Power Bracelet]]s found inside the [[Fire Mountain]], where the first Stone Watcher is found blocking the exit. | In {{TWW}}, Stone Watchers appear in various locations hiding [[Cave|secret cave]]s beneath them, or covering secret passages and entrances. They can only be lifted by wearing the [[Power Bracelet]]s found inside the [[Fire Mountain]], where the first Stone Watcher is found blocking the exit. | ||
=== | ==Nomenclature== | ||
{{Nomenclature}} | |||
==Gallery== | ==Gallery== | ||
<gallery> | <gallery> | ||
File:Cucco Revenge.jpg|Pile of Rocks from {{ALttP|-}} | File:Cucco Revenge.jpg|Pile of Rocks from {{ALttP|-}} | ||
File: | File:ALttP Pond of Happiness.png|A brown Rock from {{ALttP|-}} | ||
File: | File:MM rock.png|Large bomb rock from {{MM|-}} | ||
File:LiftRock. | File:MM LiftRock.png|A large liftable rock placed underwater from {{MM|-}} | ||
File:MM | File:Goron link lift.png|{{Term|MM|Goron Link}} lifting a silver rock, even though his lifting animations were unused on {{MM|-}} | ||
File:MM Goron Link Hammer Rock Punch.png|{{Term|MM|Goron Link}} punching a hammer-able rock from {{MM|-}} | |||
File:TMC Rock Sprite 2.png|A cracked {{Term|TMC|Rock}} from {{TMC|-}} | File:TMC Rock Sprite 2.png|A cracked {{Term|TMC|Rock}} from {{TMC|-}} | ||
File:TMC Rock Sprite 3.png|A movable {{Term|TMC|Rock}} from {{TMC|-}} | File:TMC Rock Sprite 3.png|A movable {{Term|TMC|Rock}} from {{TMC|-}} | ||
| Line 70: | Line 123: | ||
File:ALBW Rocks Blocking Cave.jpg|Small Rocks blocking Link from {{ALBW|-}} | File:ALBW Rocks Blocking Cave.jpg|Small Rocks blocking Link from {{ALBW|-}} | ||
File:RockOnHouse.jpg|A small Rock hidding a Maiamai from {{ALBW|-}} | File:RockOnHouse.jpg|A small Rock hidding a Maiamai from {{ALBW|-}} | ||
File: | File:ALBW Rock Big Model.png|A large Rock from {{ALBW|-}} | ||
File:ALBW Large Rock Blocking Cave.jpg|Large Rock blocking the entrance to a cave from {{ALBW|-}} | File:ALBW Large Rock Blocking Cave.jpg|Large Rock blocking the entrance to a cave from {{ALBW|-}} | ||
File:ALBW Cracked Rock.png|A Large Cracked Rock from {{ALBW|-}} | File:ALBW Cracked Rock.png|A Large Cracked Rock from {{ALBW|-}} | ||
File:Lorule Castle Big Bomb Flower.png|A Large Cracked Rock from {{ALBW|-}} | File:Lorule Castle Big Bomb Flower.png|A Large Cracked Rock from {{ALBW|-}} | ||
File:Hint Rock Door Before and After ALBW.png|Rocks hinting towards a hidden entrance from {{ALBW|-}} | File:Hint Rock Door Before and After ALBW.png|Rocks hinting towards a hidden entrance from {{ALBW|-}} | ||
File:TotK Rock Model 2.png|A {{Term|TotK|Rock}} thrown by an {{Term|TotK|Enemy}} from {{TotK|-}} | |||
File:HW Rock Icon.png|A {{Term|HW|Rock}} from {{HW|-}} | |||
File:HWDE Rock Icon.png|A {{Term|HWDE|Rock}} from {{HWDE|-}} | |||
</gallery> | </gallery> | ||
==See Also== | ==See Also== | ||
*{{Term|Series|Barrel|link}} | * {{Term|Series|Barrel|link}} | ||
*{{Term|Series|Boulder|link}} | * {{Term|Series|Bomb Rock|link}} | ||
*{{Term|Series|Grass|link}} | * {{Term|Series|Boulder|link}} | ||
*{{Term|Series|Item Bulb|link}} | * {{Term|Series|Grass|link}} | ||
*{{Term|Series|Jar|link}} | * {{Term|Series|Grey Rock|link}} | ||
*{{Term|Series|Rock|link}} | * {{Term|Series|Item Bulb|link}} | ||
*{{Term|Series|Skull|link}} | * {{Term|Series|Jar|link}} | ||
*{{Term|Series|Wooden Box|link}} | * {{Term|Series|Monolith|link}} | ||
* {{Term|Series|Rupee Rock|link}} | |||
* {{Term|Series|Skull|link}} | |||
* {{Term|Series|Wooden Box|link}} | |||
{{Ref}} | {{Ref}} | ||
{{Categories | {{Categories | ||
|Materials | |Materials, Rocks | ||
|enemies= TLoZ | |enemies= TLoZ | ||
|items= HW, HWL, HWDE | |items= HW, HWL, HWDE | ||
|objects= | |objects= OoS, OoA, LANS, MM, MM3D, TWW, TWWHD, TP, TPHD, TMC, PH, ST, SS, SSHD, ALBW, BotW, TotK | ||
}} | }} | ||
Revision as of 05:33, 11 March 2024


Rocks(TLoZ | OoS | OoA | TWW | TMC | TP | HW) are recurring Objects in The Legend of Zelda series.[1][2][3][4][5][6][7][name references needed]
Location and Uses

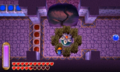
Rocks usually yield items when destroyed, such as Hearts, Rupees, Arrows, and Bombs. They also serve as obstacles that must be lifted and thrown, or destroyed by the use of Bombs or a Hammer. When thrown, they can also damage some enemies.
To move or lift some Rocks, Link must wear certain items in order to do so. In A Link to the Past, Link must wear the Power Gloves to lift silver Rocks, while the Titan's Mitt are required to lift brown ones. He can also use the Pegasus Shoes to destroy piles of Rocks. In Ocarina of Time, large, unbombable rocks can be lifted by Adult Link by using the Silver and Golden Gauntlets, although the bronze ones, using the same model with the coloring, can be destroyed by using the Megaton Hammer; both rocks for Majora's Mask, the hammer stones can be smashed using Goron Link's punching technique, or detonated with a Powder Keg, and the silver rocks, including but not limited to stones placed underwater, can only be lifted by his transformation. In Twilight Princess, Link can also use Bomb Arrows to destroy Rocks from afar.
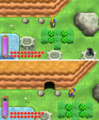
Rocks also appear as visual hints, mostly pointing out hidden areas or covering secrets. In A Link to the Past, Magical Warp Tiles can sometimes be found under Rocks. Some large Rocks also hide beneath them Treasure Chests. In A Link Between Worlds, some Rocks hide beneath them lost Maiamais.
In the Dark World and Lorule, Rocks are replaced with Skulls, which may occasionally turn out to be Stals.
The Legend of Zelda
Link's Awakening for Nintendo Switch
A Link to the Past
Majora's Mask
Oracle of Seasons
Oracle of Ages
The Wind Waker
The Minish Cap
Twilight Princess
Skyward Sword
A Link Between Worlds
Breath of the Wild
Tears of the Kingdom
Other Appearances
Hyrule Warriors
Variations
Stone Watchers
In The Wind Waker, Stone Watchers appear in various locations hiding secret caves beneath them, or covering secret passages and entrances. They can only be lifted by wearing the Power Bracelets found inside the Fire Mountain, where the first Stone Watcher is found blocking the exit.
Nomenclature
| Language | Names | Meanings |
|---|---|---|
German | Stein (HWDE)[8] | Stone |
| This table was generated using translation pages. To request an addition, please contact a staff member with a reference. | ||
Gallery
-

Pile of Rocks from A Link to the Past
-

A brown Rock from A Link to the Past
-
Large bomb rock from Majora's Mask
-
A large liftable rock placed underwater from Majora's Mask
-
Goron Link lifting a silver rock, even though his lifting animations were unused on Majora's Mask
-
Goron Link punching a hammer-able rock from Majora's Mask
-

A cracked Rock from The Minish Cap
-

A movable Rock from The Minish Cap
-
A large Rock at Funday School that requires three copies of Link from The Minish Cap
-
Small Rocks blocking Link from A Link Between Worlds
-

A small Rock hidding a Maiamai from A Link Between Worlds
-

A large Rock from A Link Between Worlds
-
Large Rock blocking the entrance to a cave from A Link Between Worlds
-
A Large Cracked Rock from A Link Between Worlds
-
A Large Cracked Rock from A Link Between Worlds
-
Rocks hinting towards a hidden entrance from A Link Between Worlds
-
A Rock thrown by an Enemy from Tears of the Kingdom
-

A Rock from Hyrule Warriors
-
A Rock from Hyrule Warriors: Definitive Edition


See Also
References
- ↑ The Legend of Zelda: Collector's Edition—The Official Nintendo Player's Guide, Nintendo of America, pg. 7 (TLoZ)
- ↑ The Legend of Zelda: Oracle of Seasons and Oracle of Ages—The Official Nintendo Player's Guide, Nintendo of America, pg. 117 (OoS) & 119 (OoA)
- ↑ The Legend of Zelda: The Wind Waker—Prima's Official Strategy Guide, Prima Games, pg. 11
- ↑ "Rock Breaker" — Tiger Scroll (The Minish Cap)
- ↑ "YAY! You did it! Well, my gal tells me there are still some rocks blocking the way along the river, so you should take care of those, too. Here's the boat... Hop in!" — Iza (Twilight Princess)
- ↑ "Rock" — Game Screen (Tears of the Kingdom)
- ↑ "Rock" — Apothecary (Hyrule Warriors: Definitive Edition)
- ↑ "Stein" — Apothecary (Hyrule Warriors: Definitive Edition)
- Materials
- Rocks
- Enemies
- Items
- Objects
- Enemies in The Legend of Zelda
- Objects in Link's Awakening (Nintendo Switch)
- Objects in Majora's Mask
- Objects in Majora's Mask 3D
- Objects in Oracle of Seasons
- Objects in Oracle of Ages
- Objects in The Wind Waker
- Objects in The Wind Waker HD
- Objects in The Minish Cap
- Objects in Twilight Princess
- Objects in Twilight Princess HD
- Objects in Phantom Hourglass
- Objects in Spirit Tracks
- Objects in Skyward Sword
- Objects in Skyward Sword HD
- Objects in A Link Between Worlds
- Objects in Breath of the Wild
- Objects in Tears of the Kingdom
- Items in Hyrule Warriors
- Items in Hyrule Warriors Legends
- Items in Hyrule Warriors: Definitive Edition