Beehive: Difference between revisions
TriforceTony (talk | contribs) No edit summary |
m (→{{SS|-}}) |
||
| (20 intermediate revisions by 12 users not shown) | |||
| Line 6: | Line 6: | ||
|Model OoT= File:OoT Beehive Model.png | |Model OoT= File:OoT Beehive Model.png | ||
|Model OoT3D= File:OoT3D Beehive Model.png | |Model OoT3D= File:OoT3D Beehive Model.png | ||
|Model MM= File:MM Beehive.png | |Model MM= File:MM Beehive Model.png | ||
|Model MM3D= File:MM3D Beehive.png | |Model MM3D= File:MM3D Beehive Model.png | ||
|Model TP= File:TP Beehive Model.png | |Model TP= File:TP Beehive Model.png | ||
|Model TPHD= File:TPHD Beehive Model.png | |Model TPHD= File:TPHD Beehive Model.png | ||
|Model PH= File:PH Beehive Model.png | |Model PH= File:PH Beehive Model.png | ||
|Model SS= File:SS Beehive Model.png | |Model SS= File:SS Beehive Model.png | ||
|Model SSHD= File:SSHD Beehive Model.png | |||
|Sprite LA= File:LA Honeycomb Sprite.png | |Sprite LA= File:LA Honeycomb Sprite.png | ||
|Sprite LADX= File:LADX Honeycomb Sprite.png | |Sprite LADX= File:LADX Honeycomb Sprite.png | ||
|Sprite LANS= File:LANS Honeycomb Icon.png | |||
}} | }} | ||
|caption= | |caption= | ||
| Line 19: | Line 21: | ||
|plural= | |plural= | ||
|type= | |type= | ||
|game= | |game= LA, OoT, MM, TP, PH, SS | ||
|other= | |other= FPTRR, CoH | ||
|cost= | |cost= | ||
|value= | |value= | ||
|location= | |location= | ||
|uses= Trading for the | {{Infobox Game Blocks | ||
|LA= {{Term|LANS|Ukuku Prairie|link}}<ref name="Encyclopedia">{{Cite Book|quote= |book= E |publisher= |page= 127 {{Exp Game|LA}}}}</ref> | |||
|FPTRR= {{Term|FPTRR|Steamy Marsh|link}} | |||
}} | |||
|uses= | |||
{{Infobox Game Blocks | |||
|LA= Trading for the {{Term|LANS|Pineapple|link}}<ref name="Encyclopedia"/> | |||
}} | |||
|strength= | |strength= | ||
|durability= | |durability= | ||
|comp= | |comp= {{List|{{Term|Series|Bee Larva|link}}, {{Term|Series|Courser Bee Honey|link}}, {{Term|Series|Hornet Larvae|link}}}} | ||
|sample= | |sample= | ||
|theme= | |theme= | ||
}} | }} | ||
{{Term/Store|Beehive|Beehives|Series, MM, MM3D|plural}},{{Exp Game| | {{Term/Store|Beehive|Beehives|Series, MM, MM3D, FPTRR|plural}},{{Exp Game|MM, FPTRR}}<ref>{{Cite Guide|quote= |game= MM |guide= Nintendo |page= 72}}</ref><ref>{{Cite|Field, #3: Beehive Hole|Vision|MM3D}}</ref><ref>{{Cite|Beehive|Map|FPTRR}}</ref> also known as {{Term/Store|Honeycomb|Honeycombs|LA, LADX, LANS|plural}},{{Exp Game|LA}}<ref name="Encyclopedia"/>{{Name Ref|LANS}} are recurring {{Plural|Series|Item|link}}, locations, and {{Plural|Series|Object|link}} in {{TLoZ|Series}}.{{Note|{{Plural|LA|Beehive}} were also referred to as '''Bee Hives''' in {{Guide|LA|Nintendo}}.<ref>{{Cite Guide|quote= |game= LA|publisher= Nintendo|page= 47}}</ref> However, as {{E}} takes precedence, this term is not considered [[Guidelines:Canon|Canon]].}} Beehives go unnamed in {{OoT}}, {{MM}}, {{TP}}, {{PH}}, and {{SS}}. | ||
==Location and Uses== | ==Location and Uses== | ||
==={{LA|-}}=== | ==={{LA|-}}=== | ||
The Honeycomb is the sixth | The {{Term|LANS|Honeycomb|link}} is the sixth {{Term|LANS|Item|link}} in the {{Term|LANS|Trading Quest|link}}.<ref>{{Cite|{{Icon|LADX Stick}} became the honeycomb {{Icon|LADX Honeycomb}}! You're not sure how it happened, but take it!|N/A|LADX}}</ref> It is obtained after giving {{Term|LANS|Tarin|link}} the {{Term|LANS|Stick|link}},<ref name="Encyclopedia"/> who can be found near a beehive in {{Term|LANS|Ukuku Prairie|link}} after {{Term|LANS|Link|link}} retrieves the {{Term|LANS|Sea Lily's Bell|link}} from the {{Term|LANS|Key Cavern|link}}. {{Term|LANS|Tarin}} uses the {{Term|LANS|Stick}} to knock down the beehive for its honey, but is chased away by the angry {{Plural|LANS|Bee|link}}, leaving behind the {{Term|LANS|Honeycomb}} that {{Term|LANS|Link}} instead takes. | ||
The Honeycomb is then traded to the | The {{Term|LANS|Honeycomb}} is then traded to the {{Term|LANS|Chef Bear|link}} in {{Term|LANS|Animal Village|link}}, who needs it for a dish she is preparing,<ref>{{Cite|Rik'm rak'm! I ran out of ingredients! If I had honey, I could make this fit for a king!|Chef Bear|LADX}}</ref> and gives {{Term|LANS|Link}} her {{Term|LANS|Pineapple|link}} in exchange.<ref name="Encyclopedia"/> The {{Term|LANS|Chef Bear}} also gives useful information after receiving the {{Term|LANS|Honeycomb}}, telling {{Term|LANS|Link}} that {{Term|LANS|Marin|link}}'s song can awake the sleeping {{Term|LANS|Walrus|link}} at the entrance to {{Term|LANS|Yarna Desert|link}}.<ref>{{Cite|Hi ho! Yeah, I know, that tub of goo is asleep right in the way to Yarna Desert! Once he's asleep he won't budge for a loooooonng time. But hey! Take Little Marin and wake him up with her song! That slob would wake up with a jump if he heard her sing, for sure! Heh heh heh!|Chef Bear|LADX}}</ref> This advice is essential to progress through the game, as {{Term|LANS|Marin}} will only accompany {{Term|LANS|Link}} to the {{Term|LANS|Animal Village}} after trading the Honeycomb (she will accompany Link regardless in the switch version). | ||
==={{OoT|-}}=== | ==={{OoT|-}}=== | ||
| Line 47: | Line 56: | ||
==={{TP|-}}=== | ==={{TP|-}}=== | ||
{{ | {{Plural|TPHD|Beehive}} containing {{Plural|TPHD|Hylian Hornet|link}} can be found in {{Term|TPHD|Ordon Village|link}}, {{Term|TPHD|Kakariko Village Graveyard|link}}, and the {{Term|TPHD|Fishing Hole|link}} in {{TP}}. {{Term|TPHD|Link}} first encounters a {{Term|TPHD|Beehive}} in {{Term|TPHD|Ordon Village}} in the {{Term|TPHD|Tree|link}} above {{Term|TPHD|Fado (Twilight Princess)|link}}'s house. {{Term|TPHD|Link}} can knock down the {{Term|TPHD|Beehive}} either by running into it, using the {{Term|TPHD|Slingshot|link}} or {{Term|TPHD|Hero's Bow|link}}, or by summoning the {{Term|TPHD|Hawk|link}}. If {{Term|TPHD|Link}} releases the {{Term|TPHD|Hawk}} to knock down the {{Term|TPHD|Beehive}}, the {{Term|TPHD|Hylian Hornet|display=Hornets}} will disperse. From the remains of the {{Term|TPHD|Beehive}}, {{Term|TPHD|Link}} can collect ten {{Plural|TPHD|Bee Larva|link}} in an {{Term|TPHD|Empty Bottle|link}}. {{Term|TPHD|Link}} can eat {{Plural|TPHD|Bee Larva}} to restore a oneq quarter of a {{Term|TPHD|Heart|link}} per {{Term|TPHD|Bee Larva|display=Larva}}, or he can use them as {{Term|TPHD|Bait|link}} for {{Term|TPHD|Fishing|link}}. | ||
==={{PH|-}}=== | ==={{PH|-}}=== | ||
| Line 54: | Line 63: | ||
==={{SS|-}}=== | ==={{SS|-}}=== | ||
{{Stub|SS}} | {{Stub|SS}} | ||
In {{SS}}, {{Plural|SSHD|Beehive}} are most common in {{Term|SSHD|Faron Woods|link}}. They can be hit with the {{Term|SSHD|Slingshot|link}} to make them fall down and break, producing {{Plural|SSHD|Bee Larva|link}}. Some {{Term|SSHD|Beehive}} may be located over a gap and cannot be broken to receive {{Term|SSHD|Bee Larva}}. In these cases, {{Term|SSHD|Link}} can use an upgraded {{Term|SSHD|Beetle|link}} to pick up the {{Term|SSHD|Beehive|display=Hive}} and drop it on solid ground to receive his reward. If a {{Term|SSHD|Beehive}} is shot, it will release a swarm of {{Plural|SSHD|Deku Hornet|link}} that will attack {{Term|SSHD|Link}}. They will also attack him if he gets too close to the {{Term|SSHD|Beehive|display=Hive}}. This can be circumvented by using the {{Term|SSHD|Net|link}} to scoop up the {{Term|SSHD|Deku Hornet|display=Hornets}}. | |||
==Other Appearances== | ==Other Appearances== | ||
==={{FPTRR|-}}=== | |||
{{Noncanon|Start}} | |||
The {{Term|FPTRR|Beehive}} is a location in {{Term|FPTRR|Steamy Marsh|link}}. It can be accessed after defeating two large swarms of {{Term|FPTRR|Bee|link}} guards, and contains the {{Term|FPTRR|Queen Bee|link}}. | |||
The {{Term|FPTRR|Beehive}} is one of the locations that {{Term|FPTRR|Tingle}} can mark on his {{Term|FPTRR|Steamy Marsh}} {{Term|FPTRR|Map|link}} for the {{Term|FPTRR|Map-Seller|link}}. She will reward {{Term|FPTRR|Tingle}} with 640 {{Plural|FPTRR|Rupee|link}} for {{Term|FPTRR|Mapping|link}} the {{Term|FPTRR|Beehive}}.<ref>{{Cite|It's a perfect map of Beehive!<br/><br/>Here are {{Color|FPTRR Green|640}} rupees!|Map-Seller|FPTRR}}</ref> | |||
{{Noncanon|End}} | |||
==={{CoH|-}}=== | ==={{CoH|-}}=== | ||
{{Ambig|Start}} | {{Ambig|Start}} | ||
{{Stub|CoH}} | {{Stub|CoH}} | ||
{{Ambig|End}} | {{Ambig|End}} | ||
==Gallery== | |||
<gallery> | |||
File:Honeycomb Screenshot.png|Link obtaining the Honeycomb from {{LA|DX|-}} | |||
File:LANS Honeycomb Text Icon.png|Textual icon of the {{Term|LANS|Honeycomb}} from {{LA|NS|-}} | |||
File:PH Beehive Tree Model.png|A Beehive in a Tree from {{PH|-}} | |||
File:FPTRR Beehive.png|The {{Term|FPTRR|Beehive}} in {{FPTRR|-}} | |||
File:CoH Beehive Sprite.png|A {{Term|CoH|Beehive}} from {{CoH|-}} | |||
</gallery> | |||
==Nomenclature== | ==Nomenclature== | ||
| Line 75: | Line 103: | ||
{{LA Trading Quest}} | {{LA Trading Quest}} | ||
{{Categories | {{Categories | ||
|objects= OoT, OoT3D, MM, MM3D, TP, TPHD, PH, SS | |Steamy Marsh, Trading Quest Items | ||
|items= LA, LADX, LANS | |||
|locations= FPTRR | |||
|objects= OoT, OoT3D, MM, MM3D, TP, TPHD, PH, SS, SSHD | |||
}} | }} | ||
Latest revision as of 11:13, 24 April 2024
Beehives,(MM | FPTRR)[2][3][4] also known as Honeycombs,(LA)[1][name references needed] are recurring Items, locations, and Objects in The Legend of Zelda series.[note 1] Beehives go unnamed in Ocarina of Time, Majora's Mask, Twilight Princess, Phantom Hourglass, and Skyward Sword.
Location and Uses
Link's Awakening
The Honeycomb is the sixth Item in the Trading Quest.[6] It is obtained after giving Tarin the Stick,[1] who can be found near a beehive in Ukuku Prairie after Link retrieves the Sea Lily's Bell from the Key Cavern. Tarin uses the Stick to knock down the beehive for its honey, but is chased away by the angry Bees, leaving behind the Honeycomb that Link instead takes.
The Honeycomb is then traded to the Chef Bear in Animal Village, who needs it for a dish she is preparing,[7] and gives Link her Pineapple in exchange.[1] The Chef Bear also gives useful information after receiving the Honeycomb, telling Link that Marin's song can awake the sleeping Walrus at the entrance to Yarna Desert.[8] This advice is essential to progress through the game, as Marin will only accompany Link to the Animal Village after trading the Honeycomb (she will accompany Link regardless in the switch version).
Ocarina of Time
Beehives are found in Secret Grottoes and in Zora's Domain in King Zora's Throne Room. When hit with the Hookshot, Fairy Bow, or Boomerang, they will drop a random value of Rupees. However, a Beehive will not break if it is hit with a Fairy Slingshot. Unlike many other games in The Legend of Zelda series, Beehives will not release Bees to attack Link when shot.
Majora's Mask
Twilight Princess
Beehives containing Hylian Hornets can be found in Ordon Village, Kakariko Village Graveyard, and the Fishing Hole in Twilight Princess. Link first encounters a Beehive in Ordon Village in the Tree above Fado's house. Link can knock down the Beehive either by running into it, using the Slingshot or Hero's Bow, or by summoning the Hawk. If Link releases the Hawk to knock down the Beehive, the Hornets will disperse. From the remains of the Beehive, Link can collect ten Bee Larva in an Empty Bottle. Link can eat Bee Larva to restore a oneq quarter of a Heart per Larva, or he can use them as Bait for Fishing.
Phantom Hourglass
Skyward Sword
In Skyward Sword, Beehives are most common in Faron Woods. They can be hit with the Slingshot to make them fall down and break, producing Hornet Larvae. Some Beehive may be located over a gap and cannot be broken to receive Hornet Larvae. In these cases, Link can use an upgraded Beetle to pick up the Hive and drop it on solid ground to receive his reward. If a Beehive is shot, it will release a swarm of Deku Hornets that will attack Link. They will also attack him if he gets too close to the Hive. This can be circumvented by using the Bug Net to scoop up the Hornets.
Other Appearances
Freshly-Picked Tingle's Rosy Rupeeland
The Beehive is a location in Steamy Marsh. It can be accessed after defeating two large swarms of Bee guards, and contains the Queen Bee.
The Beehive is one of the locations that Tingle can mark on his Steamy Marsh Map for the Map-Seller. She will reward Tingle with 640 Rupees for Mapping the Beehive.[9]
Cadence of Hyrule
Gallery
-
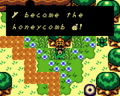
Link obtaining the Honeycomb from Link's Awakening DX
-

Textual icon of the Honeycomb from Link's Awakening for Nintendo Switch
-
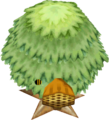
A Beehive in a Tree from Phantom Hourglass
-
The Beehive in Freshly-Picked Tingle's Rosy Rupeeland
-

A Beehive from Cadence of Hyrule


Nomenclature
| Language | Names | Meanings |
|---|---|---|
Japanese | ハチミツ (Hachimitsu) (LANS) | Honey |
German | Honigwabe (LANS) | Honeycomb |
Italian | Alveare (LA | LADX | LANS)[10] | Same as English. |
| This table was generated using translation pages. To request an addition, please contact a staff member with a reference. | ||
See Also
Notes
- ↑ Honeycombs were also referred to as Bee Hives in The Legend of Zelda: Link's Awakening—Nintendo Player's Guide by Nintendo of America.[5] However, as Encyclopedia takes precedence, this term is not considered Canon.
References
- ↑ 1.0 1.1 1.2 1.3 1.4 Encyclopedia, Dark Horse Books, pg. 127 (LA)
- ↑ The Legend of Zelda: Majora's Mask—Official Nintendo Player's Guide, Nintendo of America, pg. 72
- ↑ "Field, #3: Beehive Hole" — Vision (Majora's Mask 3D)
- ↑ "Beehive" — Map (Freshly-Picked Tingle's Rosy Rupeeland)
- ↑ The Legend of Zelda: Link's Awakening—Nintendo Player's Guide, Nintendo of America, pg. 47
- ↑ "
 became the honeycomb
  ! You're not sure how it happened, but take it!" — N/A (Link's Awakening DX)
- ↑ "Rik'm rak'm! I ran out of ingredients! If I had honey, I could make this fit for a king!" — Chef Bear (Link's Awakening DX)
- ↑ "Hi ho! Yeah, I know, that tub of goo is asleep right in the way to Yarna Desert! Once he's asleep he won't budge for a loooooonng time. But hey! Take Little Marin and wake him up with her song! That slob would wake up with a jump if he heard her sing, for sure! Heh heh heh!" — Chef Bear (Link's Awakening DX)
- ↑ "It's a perfect map of Beehive!
Here are 640 rupees!" — Map-Seller (Freshly-Picked Tingle's Rosy Rupeeland) - ↑ Enciclopedia di Hyrule, Magazzini Salani, pg. 127
- Items
- Steamy Marsh
- Trading Quest Items
- Locations
- Objects
- Items in Link's Awakening
- Items in Link's Awakening DX
- Items in Link's Awakening (Nintendo Switch)
- Objects in Ocarina of Time
- Objects in Ocarina of Time 3D
- Objects in Majora's Mask
- Objects in Majora's Mask 3D
- Objects in Twilight Princess
- Objects in Twilight Princess HD
- Objects in Phantom Hourglass
- Objects in Skyward Sword
- Objects in Skyward Sword HD
- Locations in Freshly-Picked Tingle's Rosy Rupeeland