Breach of Demise: Difference between revisions
No edit summary |
|||
| (13 intermediate revisions by 7 users not shown) | |||
| Line 1: | Line 1: | ||
{{Infobox | {{Infobox Location | ||
|image= | |image= | ||
{{Media | {{Media | ||
|Screenshot BotW= File:BotW Breach of Demise.png | |Screenshot BotW= File:BotW Breach of Demise.png | ||
|Screenshot | |Screenshot TotK= File:TotK Breach of Demise.png | ||
}} | }} | ||
|caption= | |caption= | ||
|pronunciation= | |pronunciation= | ||
|game= | |game= BotW, TotK | ||
|other= | |other= HWAoC | ||
|inhab= | |inhab= | ||
|items= | |items= | ||
|related= {{Term| | |related= {{Term|Series|Hilltop High Road|link}} | ||
|season= | |season= | ||
|theme= | |theme= | ||
}} | }} | ||
The {{Term/Store|Breach of Demise||Series, BotW, HWAoC}} is a recurring location in {{TLoZ|Series}}.<ref>{{Cite|'''Breach of Demise'''|Map|BotW}}</ref><ref>{{Cite|'''Breach of Demise'''|Map|HWAoC}}</ref> | The {{Term/Store|Breach of Demise||Series, BotW, TotK, HWAoC}} is a recurring location in {{TLoZ|Series}}.<ref>{{Cite|'''Breach of Demise'''|Map|BotW}}</ref><ref>{{Cite|'''Breach of Demise'''|Map|TotK}}</ref><ref>{{Cite|{{Color|HWAoC Map Blue|'''Breach of Demise'''}}|Map|HWAoC}}</ref> | ||
==Features and Overview== | ==Features and Overview== | ||
==={{BotW|-}}=== | ==={{BotW|-}}=== | ||
The {{Term|BotW|Breach of Demise}} is located in {{Term|BotW|Central Hyrule|link}}. A crossroad between the north, east, and west runs through it. The travelers {{Term|BotW|Baddek|link}}, {{Term|BotW|Nazbi|link}}, and {{Term|BotW|Savelle|link}} ride their {{Plural|BotW|Horse|link}} through the {{Term|BotW|Hilltop High Road|link}}, which runs to the north and west. To the far reaches of the eastern road is a monster camp, consisting of an outdoor encampment with a {{Term|BotW|Cooking Pot|link}} and a couple of watchtowers, along with three skull structures where more {{Plural|BotW|Enemy|link}} are taking shelter. | The {{Term|BotW|Breach of Demise}} is located in {{Term|BotW|Central Hyrule|link}}. A crossroad between the north, east, and west runs through it. The travelers {{Term|BotW|Baddek|link}}, {{Term|BotW|Nazbi|link}}, and {{Term|BotW|Savelle|link}} ride their {{Plural|BotW|Horse|link}} through the {{Term|BotW|Hilltop High Road|link}}, which runs to the north and west. To the far reaches of the eastern road is a monster camp, consisting of an outdoor encampment with a {{Term|BotW|Cooking Pot|link}} and a couple of watchtowers, along with three skull structures where more {{Plural|BotW|Enemy|link}} are taking shelter. | ||
| Line 27: | Line 25: | ||
A {{Term|BotW|Korok|link}} can be found by standing on a {{Term|BotW|Tree|link}} stump atop the southernmost spire and racing to the ring that appears atop a spire further north before it disappears. | A {{Term|BotW|Korok|link}} can be found by standing on a {{Term|BotW|Tree|link}} stump atop the southernmost spire and racing to the ring that appears atop a spire further north before it disappears. | ||
==== | ===={{Plural|BotW|Creature}}==== | ||
{{Gallery List|Creatures | |||
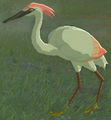
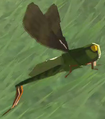
|BotW= Blue-Winged Heron, Fairy, Hightail Lizard, Islander Hawk, Pink Heron, Restless Cricket, Rugged Rhino Beetle, Warm Darner | |||
}} | |||
====Minor | ====Minor {{Plural|BotW|Enemy}}==== | ||
{{ | {{Tabs | ||
|align= | |align= | ||
|default= 1 | |default= 1 | ||
|tab1= Normal Mode | |tab1= Normal Mode | ||
|content1= | |content1= | ||
{{Gallery List|Enemies | |||
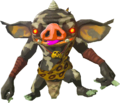
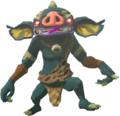
|BotW= Black Bokoblin, | |||
Blue Bokoblin, | |||
Chuchu [3], | |||
Keese, | |||
Keese Swarm, | |||
Stalkoblin, | |||
Stalkoblin {{Equipment|BotW|Spiked Boko Bow}}{{Equipment|BotW|Arrow}}, | |||
Stone Pebblit, | |||
Yiga Footsoldier {{Equipment|BotW|Duplex Bow}}{{Equipment|BotW|Arrow}} | |||
}} | |||
|tab2= Master Mode | |tab2= Master Mode | ||
|content2= | |content2= | ||
{{Gallery List|Enemies | |||
|BotW= Black Bokoblin, | |||
Blue Bokoblin, | |||
Chuchu [3], | |||
Keese, | |||
Keese Swarm, | |||
Silver Bokoblin, | |||
Stalkoblin, | |||
Stalkoblin {{Equipment|BotW|Spiked Boko Bow}}{{Equipment|BotW|Arrow}}, | |||
Stone Pebblit, | |||
Yiga Footsoldier {{Equipment|BotW|Duplex Bow}}{{Equipment|BotW|Arrow}} | |||
}} | |||
}} | |||
===={{Plural|BotW|Material}}==== | |||
{{Gallery List|Materials | |||
|BotW= Rushroom | |||
}} | }} | ||
=== | ==={{TotK|-}}=== | ||
{{Stub|TotK}} | |||
==Other Appearances== | ==Other Appearances== | ||
==={{HWAoC|-}}=== | ==={{HWAoC|-}}=== | ||
{{Noncanon|Start}} | |||
{{Stub|HWAoC}} | {{Stub|HWAoC}} | ||
The {{Term|HWAoC|Breach of Demise}} is the main setting of the "{{Term|HWAoC|Road to the Ancient Lab|link}}" {{Term|HWAoC|Scenario|link}}. {{Term|HWAoC|Link|link}}, {{Term|HWAoC|Zelda|link}}, and {{Term|HWAoC|Impa|link}} make their way through the {{Term|HWAoC|Breach of Demise}} to reach the {{Term|HWAoC| | The {{Term|HWAoC|Breach of Demise}} is the main setting of the "{{Term|HWAoC|Road to the Ancient Lab|link}}" {{Term|HWAoC|Scenario|link}}. {{Term|HWAoC|Link|link}}, {{Term|HWAoC|Zelda|link}}, and {{Term|HWAoC|Impa|link}} make their way through the {{Term|HWAoC|Breach of Demise}} to reach the {{Term|HWAoC|Ancient Research Institute|link}}. | ||
{{Noncanon|End}} | |||
==Nomenclature== | ==Nomenclature== | ||
| Line 92: | Line 90: | ||
{{Categories | {{Categories | ||
|Hyrule Field, Rock Formations, Valleys | |Hyrule Field, Rock Formations, Valleys | ||
| | |locations= BotW, TotK, HWAoC | ||
}} | }} | ||
Revision as of 04:24, 2 February 2024
The Breach of Demise is a recurring location in The Legend of Zelda series.[1][2][3]
Features and Overview
Breath of the Wild
The Breach of Demise is located in Central Hyrule. A crossroad between the north, east, and west runs through it. The travelers Baddek, Nazbi, and Savelle ride their Horses through the Hilltop High Road, which runs to the north and west. To the far reaches of the eastern road is a monster camp, consisting of an outdoor encampment with a Cooking Pot and a couple of watchtowers, along with three skull structures where more Enemies are taking shelter.
Inside the westernmost skull structure, Link can find a metallic Treasure Chest containing a Silver Rupee embedded in the ground.
A Korok can be found by standing on a Tree stump atop the southernmost spire and racing to the ring that appears atop a spire further north before it disappears.
Creatures
Minor Enemies
Materials
Tears of the Kingdom
Other Appearances
Hyrule Warriors: Age of Calamity
The Breach of Demise is the main setting of the "Road to the Ancient Lab" Scenario. Link, Zelda, and Impa make their way through the Breach of Demise to reach the Royal Ancient Lab.
Nomenclature
The Breach of Demise is named for Demise.
| Language | Names | Meanings |
|---|---|---|
| しゅうえん終焉のたに谷 (TotK) | ||
| 終焉之谷 (Zhōngyān zhī gǔ) (TotK) | ||
| 终焉之谷 (Zhōngyān zhī gǔ) (TotK) | ||
| Kloof van de ondergang (HWAoC)[5] | Chasm of Demise | |
| Crevasse du Néant (TotK) | ||
| Vallée du Néant (TotK) | ||
| Todbringer-Schlucht (TotK | HWAoC)[4] | ||
| Crepaccio di Mortipher (TotK) | ||
| 종언의 계곡 (TotK) | ||
| Desfiladero del heraldo (TotK) | ||
| This table was generated using translation pages. To request an addition, please contact a staff member with a reference. | ||
See Also
References
- ↑ "Breach of Demise" — Map (Breath of the Wild)
- ↑ "Breach of Demise" — Map (Tears of the Kingdom)
- ↑ "Breach of Demise" — Map (Hyrule Warriors: Age of Calamity)
- ↑ "Todbringer-Schlucht" — Map (Hyrule Warriors: Age of Calamity)
- ↑ "Kloof van de ondergang" — Map (Hyrule Warriors: Age of Calamity)


