Hylian Sword: Difference between revisions
MannedTooth (talk | contribs) No edit summary |
mNo edit summary |
||
| (28 intermediate revisions by 9 users not shown) | |||
| Line 1: | Line 1: | ||
{{Noncanon}} | {{Noncanon}} | ||
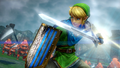
{{Item | {{Infobox Item | ||
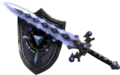
|image= File:HW Link Sword.png | |image= File:HW Link Hylian Sword Artwork.png | ||
|caption= Link wielding the Knight's Sword | |caption= Link wielding the Knight's Sword | ||
| | |pronunciation= | ||
|game= | |plural= | ||
|game= HW | |||
|other= | |other= | ||
|cost= | |cost= | ||
|location= {{Small|Knight's Sword:}}<br>Available from start< | |value= | ||
|location= | |||
<p>{{Small|Knight's Sword:}}<br/>Available from start</p> | |||
<p>{{Small|White Sword:}}<br/>[[Sealed Ambition]] {{Small|(East Cannon Keep)}}</p> | |||
<p>{{Small|Magical Sword:}}<br/>{{List|[[Adventure Map/Valley of Seers (Hyrule Warriors)#Battle B3|B3]] - [[Adventure Map]] {{Small|("A" rank)}} {{Exp Game|HW}}|[[Master Quest Map/Faron Woods (Hyrule Warriors:Definitive Edition)#Battle H6|H6]] - [[Master Quest Map]] {{Small|("A" rank)}} {{Exp Game|HWL, HWDE}}}}</p> | |||
<p>{{Small|8-Bit Wooden Sword:}}<br/>[[Shining Beacon]] {{Small|(complete)}} {{Exp Game|HW}}</p> | |||
<p>{{Small|Magical Sword +:}}<br/>{{List| | |||
[[Twilight Map/Temple of Souls (Hyrule Warriors Legends)#Battle C2|C2]] - [[Twilight Map]] {{Small|("A" rank)}} {{Exp Game|HWL}}, | |||
[[Twilight Map/Temple of Souls (Hyrule Warriors: Definitive Edition)#Battle C3|C3]] - Twilight Map {{Small|("A" rank)}} {{Exp Game|HWDE}}}}</p> | |||
<p>{{Small|Darkmagic Sword:}}<br/>[[Lorule Map/Temple of the Sacred Sword (Hyrule Warriors:Definitive Edition)#Battle A11|A11]] - [[Lorule Map]] {{Small|("A" rank)}} {{Exp Game|HWL, HWDE}}</p> | |||
|uses= | |uses= | ||
|strength= | |||
|durability= | |||
|comp= | |comp= | ||
|sample= | |sample= | ||
|theme= | |theme= | ||
}} | }} | ||
The {{Term/Store|Hylian Sword||Series, HW}} is a class of Weapon used by | The {{Term/Store|Hylian Sword||Series, HW, HWL, HWDE}} is a class of {{Term|HWDE|Weapon|link}} used by {{Term|HWDE|Link|link}} in {{HW}}.<ref>{{Cite|Hylian Sword|Smithy|HWDE}}</ref> It is the first class of {{Term|HWDE|Weapon}} unlocked at the start of the game alongside unlocking {{Term|HWDE|Link}}. The {{Term|HWDE|Hylian Sword}} is associated with {{Term|HWDE|Element|link|display=Light}}. | ||
==Variations== | ==Variations== | ||
===Knight's Sword=== | ===Knight's Sword=== | ||
The Knight's Sword is the first | {{Main|Knight's Sword}} | ||
The {{Term|HWDE|Knight's Sword|link}} is the first level of the {{Term|HWDE|Hylian Sword}} and is the first type of {{Term|HWDE|Weapon}} unlocked in the game. {{Plural|HWDE|Knight's Sword}} are used by the {{Plural|HWDE|Soldier|link}} of {{Term|HWDE|Hyrule|link}}. During the {{Term|HWDE|Scenario|link}}, "{{Term|HWDE|The Armies of Ruin|link}}," {{Term|HWDE|Link}}, a {{Term|HWDE|Trainee|link}}, disobeys the orders to stay inside and takes a {{Term|HWDE|Knight's Sword}} to join the battle.<ref>{{Cite|Hey, Link! What d'you think you're doing with that sword?!|Trainee|HWDE}}</ref> As a Lv.1 {{Term|HWDE|Weapon}}, the {{Term|HWDE|Knight's Sword}} can be obtained with an attack strength ranging from 80 to 120, in increments of eight per star rating.<ref name="Prima Star Rating">{{Cite Guide|quote= Each added star adds an additional 10 percent attack damage to a weapon.|game= HWL|publisher= Prima|page= 8}}</ref> | |||
===White Sword=== | ===White Sword=== | ||
The White Sword is the second | {{Main|White Sword}} | ||
The {{Term|HWDE|White Sword|link}} is the second level of the {{Term|HWDE|Hylian Sword}}. The {{Term|HWDE|White Sword}} is unlocked within {{Term|HWDE|Legend Mode|link}} during the "{{Term|HWDE|Sealed Ambition|link}}" {{Term|HWDE|Scenario}}. A {{Term|HWDE|Chest|link}} containing the corresponding {{Term|HWDE|Sealed Weapon|link}} appears within the East Cannon {{Term|HWDE|Keep|link}} after it is captured. Like other Lv.2 {{Plural|HWDE|Weapon}}, the {{Term|HWDE|White Sword}} is found in six variants with different attack strengths based on a given {{Term|HWDE|Weapon}}'s star rating. The {{Term|HWDE|White Sword}} has a base attack strength of 150 and each star adds 15 to the attack strength, so a five-star {{Term|HWDE|White Sword}} possesses an attack strength of 225.<ref name="Prima Star Rating"/> | |||
Like other Lv.2 | |||
===Magical Sword=== | ===Magical Sword=== | ||
The Magical Sword is the Lv.3 form of the Hylian Sword. | {{Main|Magical Sword}} | ||
The {{Term|HWDE|Magical Sword|link}} is the Lv.3 form of the {{Term|HWDE|Hylian Sword}}. The {{Term|HWDE|Magical Sword}} is the only version of the {{Term|HWDE|Hylian Sword}} that is unlocked in {{Term|HWDE|Adventure Mode|link}} in {{HW|-}}. In {{HW|-}}, it can be obtained as a Reward for clearing [[Adventure Map/Valley of Seers (Hyrule Warriors)#Battle B3|Battle B3]] in the {{Term|HWDE|Adventure Map|link}} with an A-Rank. In {{HW|L}} and {{HW|DE}}, it can be obtained as a Reward for clearing [[Master Quest Map/Faron Woods (Hyrule Warriors:Definitive Edition)#Battle H6|Battle H6]] in the {{Term|HWDE|Master Quest Map|link}} with an A-Rank. Lv.3 {{Plural|HWDE|Weapon}} such as the {{Term|HWDE|Magical Sword}} have the highest attack strength values in {{HW|-}}, ranging from 280 to 420, in increments of 28, depending on the Star Rating of a specific weapon.<ref name="Prima Star Rating"/> | |||
Lv.3 | |||
===8-Bit Wooden Sword=== | ===8-Bit Wooden Sword=== | ||
The 8-Bit Wooden Sword is the Lv.★ form of the Hylian Sword, which is available in {{HW|-}} and {{ | {{Main|8-Bit Wooden Sword}} | ||
The {{Term|HWDE|8-Bit Wooden Sword|link}} is the Lv.★ form of the {{Term|HWDE|Hylian Sword}}, which is available in {{HW|-}} and {{HWDE|-}}. It is an exact replica of the Sword from {{TLoZ|-}}, rendered in three dimensions, while the Shield is a 3D render of {{Term|TLoZ|Wooden Shield|link}} from {{TLoZ|-}}, albeit with a somewhat altered emblem. | |||
The 8-Bit Wooden Sword is the only 8-bit Weapon skin available in {{HW|-}} without any of the [[ | The {{Term|HWDE|8-Bit Wooden Sword}} is the only 8-bit {{Term|HWDE|Weapon}} skin available in {{HW|-}} without any of the [[Downloadable Content]] packs, being unlocked automatically upon completion of the "{{Term|HWDE|Shining Beacon|link}}" {{Term|HWDE|Scenario}} in {{Term|HWDE|Legend Mode}} after installing [[Hyrule Warriors#Updates|Version 1.2.0]] update in {{HW|-}}. If the {{Term|HWDE|Scenario}} had already been completed before installing the update, this {{Term|HWDE|Weapon}} will be unlocked the first time the game is loaded after updating. After unlocking, {{Plural|HWDE|8-Bit Wooden Sword}} can be collected just as any other {{Term|HWDE|Weapon}}. In {{HW|DE|-}}, instead of appearing as a separate Weapon, the {{Term|HWDE|8-Bit Wooden Sword}} replaces the {{Term|HWDE|Darkmagic Sword|link}} when the "8-Bit Weapons" Setting is turned on in {{Term|HWDE|Game Settings|link}} within the {{Term|HWDE|Settings|link}} menu. | ||
As a Lv.★ weapon, the 8-Bit Wooden Sword effectively shares all properties except aesthetic ones with its Lv.3 counterpart, in this case the Magical Sword. It is found with | As a Lv.★ weapon, the {{Term|HWDE|8-Bit Wooden Sword}} effectively shares all properties except aesthetic ones with its Lv.3 counterpart, in this case the {{Term|HWDE|Magical Sword}}. It is found with attack strength values ranging from 280 to 420, in increments of 28. | ||
===Magical Sword +=== | ===Magical Sword +=== | ||
The Magical Sword + is the Lv.4 form of the Hylian Sword, which is available in {{ | {{Main|Magical Sword +}} | ||
The {{Term|HWDE|Magical Sword +|link}} is the Lv.4 form of the {{Term|HWDE|Hylian Sword}}, which is available in {{HWL|-}} and {{HWDE|-}}. The Sword and Shield are aesthetically identical to the {{Term|HWDE|Magical Sword}}. | |||
The Magical Sword + can be obtained as a | The {{Term|HWDE|Magical Sword +}} can be obtained as a reward for clearing [[Twilight Map/Temple of Souls (Hyrule Warriors Legends)#Battle C2|Battle C2]] in {{HW|L|-}}, which is [[Twilight Map/Temple of Souls (Hyrule Warriors: Definitive Edition)#Battle C3|Battle C3]] in {{HWDE|-}}, in the {{Term|HWDE|Twilight Map|link}} with an A-Rank. | ||
Although they are aesthetically identical to the Lv.3 form, Lv.4 Weapons such as the Magical Sword + are much stronger with | Although they are aesthetically identical to the Lv.3 form, Lv.4 Weapons such as the {{Term|HWDE|Magical Sword +}} are much stronger with attack strength values ranging from 500 to 750, in increments of 50 per each star in its star rating.<ref name="Prima Star Rating"/> | ||
===Darkmagic Sword=== | ===Darkmagic Sword=== | ||
The Darkmagic Sword is the Lv.4+ or Multi-Element form of the Hylian Sword, which was added to {{ | {{Main|Darkmagic Sword}} | ||
The {{Term|HWDE|Darkmagic Sword|link}} is the Lv.4+ or Multi-Element form of the {{Term|HWDE|Hylian Sword}}, which was added to {{HWL|-}} with the {{ALBWP}} [[Downloadable Content]] and is available in {{HWDE|-}}. The Sword and Shield are aesthetically similar to the {{Term|ALBW|Magical Sword}} but with a color scheme of purple, gray and black, representing its extra element of {{Term|HWDE|Element|link|display=Darkness}}. | |||
The Darkmagic Sword is obtained as a | The {{Term|HWDE|Darkmagic Sword}} is obtained as a reward for clearing [[Lorule Map/Temple of the Sacred Sword (Hyrule Warriors:Definitive Edition)#Battle A11|Battle A11]] in the {{Term|HWDE|Lorule Map|link}} with an A-Rank. Multi-Element {{Plural|HWDE|Weapon}} such as the {{Term|HWDE|Darkmagic Sword}} have the same range of attack strength values as their Lv.4 counterpart. | ||
{| class="wikitable" style="text-align:center; width:100%; max-width:40em" | |||
{| class=" | |||
!colspan="3"|Weapon | !colspan="3"|Weapon | ||
!colspan="6"| | !colspan="6"|Damage per Star Rating | ||
|- | |- | ||
! width="5%"| Tier | ! width="5%"| Tier | ||
| Line 76: | Line 77: | ||
|- | |- | ||
! Lv.1 | ! Lv.1 | ||
| [[File:HW Knight's Sword.png|link=]]<br>'''Knight's Sword''' | | [[File:HW Knight's Sword Icon.png|link=]]<br/>'''Knight's Sword''' | ||
| | | {{HW Element|Light}} | ||
| 80 | | 80 | ||
| 88 | | 88 | ||
| Line 86: | Line 87: | ||
|- | |- | ||
! Lv.2 | ! Lv.2 | ||
| [[File:HW White Sword.png|link=]]<br>'''White Sword''' | | [[File:HW White Sword Icon.png|link=]]<br/>'''White Sword''' | ||
| | | {{HW Element|Light}} | ||
| 150 | | 150 | ||
| 165 | | 165 | ||
| Line 96: | Line 97: | ||
|- | |- | ||
! Lv.3 | ! Lv.3 | ||
| [[File:HW Magical Sword.png|link=]]<br>'''Magical Sword''' | | [[File:HW Magical Sword Icon.png|link=]]<br/>'''Magical Sword''' | ||
| | | {{HW Element|Light}} | ||
| 280 | | 280 | ||
| 308 | | 308 | ||
| Line 105: | Line 106: | ||
| 420 | | 420 | ||
|- | |- | ||
! Lv.★ {{Exp Game|HW | ! Lv.★ {{Exp Game|HW, HWDE}} | ||
| [[File:HW 8-Bit Wooden Sword.png|link=]]<br>'''8-Bit Wooden Sword''' | | [[File:HW 8-Bit Wooden Sword Icon.png|link=]]<br/>'''8-Bit Wooden Sword''' | ||
| | | {{HW Element|Light}} | ||
| 280 | | 280 | ||
| 308 | | 308 | ||
| Line 115: | Line 116: | ||
| 420 | | 420 | ||
|- | |- | ||
! Lv.4 {{Exp Game|HWL | ! Lv.4 {{Exp Game|HWL, HWDE}} | ||
| [[File:HW Magical Sword.png|link=]]<br>'''Magical Sword +''' | | [[File:HW Magical Sword Icon.png|link=]]<br/>'''Magical Sword +''' | ||
| | | {{HW Element|Light}} | ||
| 500 | | 500 | ||
| 550 | | 550 | ||
| Line 125: | Line 126: | ||
| 750 | | 750 | ||
|- | |- | ||
! Lv.4+ {{Exp Game|HWL | ! Lv.4+ {{Exp Game|HWL, HWDE}} | ||
| [[File: | |[[File:HWL Darkmagic Sword Render.png|179x179px]]<br/>'''Darkmagic Sword''' | ||
| | | {{HW Element|Light}}<br/>{{HW Element|Darkness}} | ||
| 500 | | 500 | ||
| 550 | | 550 | ||
| Line 136: | Line 137: | ||
|} | |} | ||
== | ==Attack Combinations== | ||
===Regular Attack | {{Tabs | ||
|tab1= Warriors Mode | |||
|content1= | |||
{{Data Table | |||
|game= HWDE | |||
|storeAs= Warriors Mode Combos | |||
|sortable= false | |||
|stretch= | |||
|columns= Combination, Attack, Badge Required [Term], Cost [Amounts] | |||
|- | |||
|[[File:HWDE X Button Icon.png|26px|link=]] | |||
|{{Term|HWDE|Strong Attack|link}}: {{Term|HWDE|Spin Attack|link}}<br/>{{Small|Tapping X performs a quick {{Term|HWDE|Spin Attack}}, holding for at least one second before releasing increases both damage and radius.}} | |||
|N/A | |||
|N/A | |||
|- | |||
|[[File:HWDE Y Button Icon.png|26px|link=]] | |||
|{{Term|HWDE|Regular Attack|link}}: Diagonal slash | |||
|N/A | |||
|N/A | |||
|- | |||
|[[File:HWDE Y Button Icon.png|26px|link=]] [[File:HWDE X Button Icon.png|26px|link=]] | |||
|{{Term|HWDE|Combo Attack|link}}: {{Term|HWDE|Jump Thrust|link}} | |||
|N/A | |||
|N/A | |||
|- | |||
|[[File:HWDE Y Button Icon.png|26px|link=]] [[File:HWDE X Button Icon.png|26px|link=]] [[File:HWDE Y Button Icon.png|26px|link=]] [[File:HWDE Y Button Icon.png|26px|link=]] [[File:HWDE Y Button Icon.png|26px|link=]] | |||
|{{Term|HWDE|Combo Attack}}: Mid-air horizontal slashes<br/>{{Small|{{Term|HWDE|Link}} can perform up to three slashes before falling back to the ground.<ref name="Prima 9">{{Cite Guide|quote= |game= HWL|publisher= Prima|page= 9}}</ref>}} | |||
|N/A | |||
|N/A | |||
|- | |||
|[[File:HWDE Y Button Icon.png|26px|link=]] [[File:HWDE X Button Icon.png|26px|link=]] [[File:HWDE Y Button Icon.png|26px|link=]] [[File:HWDE Y Button Icon.png|26px|link=]] [[File:HWDE Y Button Icon.png|26px|link=]] [[File:HWDE X Button Icon.png|26px|link=]] | |||
|{{Term|HWDE|Combo Attack}}: {{Term|HWDE|Down Thrust|link}}<br/>{{Small|At any point {{Term|HWDE|Link}} is still in the air, the three mid-air slashes can be skipped and moved straight into the {{Term|HWDE|Down Thrust}}.<ref name="Prima 9"/>}} | |||
|N/A | |||
|N/A | |||
|- | |||
|[[File:HWDE Y Button Icon.png|26px|link=]] [[File:HWDE Y Button Icon.png|26px|link=]] | |||
|{{Term|HWDE|Regular Attack}}: Horizontal slash | |||
|N/A | |||
|N/A | |||
|- | |||
|[[File:HWDE Y Button Icon.png|26px|link=]] [[File:HWDE Y Button Icon.png|26px|link=]] [[File:HWDE X Button Icon.png|26px|link=]] | |||
|{{Term|HWDE|Combo Attack}}: {{Term|HWDE|Sword Beam|link}}<br/>{{Small|{{Term|HWDE|Link}} will jump backwards and then shoot a circular {{Term|HWDE|Sword Beam}} that travels straight ahead for about one second before disappearing.}} | |||
|N/A | |||
|N/A | |||
|- | |||
|[[File:HWDE Y Button Icon.png|26px|link=]] [[File:HWDE Y Button Icon.png|26px|link=]] [[File:HWDE Y Button Icon.png|26px|link=]] | |||
|{{Term|HWDE|Regular Attack}}: Diagonal slash | |||
|N/A | |||
|N/A | |||
|- | |||
|[[File:HWDE Y Button Icon.png|26px|link=]] [[File:HWDE Y Button Icon.png|26px|link=]] [[File:HWDE Y Button Icon.png|26px|link=]] [[File:HWDE X Button Icon.png|26px|link=]] | |||
|{{Term|HWDE|Combo Attack}}: Rising {{Term|HWDE|Spin Attack}} | |||
|N/A | |||
|N/A | |||
|- | |||
|[[File:HWDE Y Button Icon.png|26px|link=]] [[File:HWDE Y Button Icon.png|26px|link=]] [[File:HWDE Y Button Icon.png|26px|link=]] [[File:HWDE X Button Icon.png|26px|link=]] [[File:HWDE Y Button Icon.png|26px|link=]] [[File:HWDE Y Button Icon.png|26px|link=]] [[File:HWDE Y Button Icon.png|26px|link=]] | |||
|{{Term|HWDE|Combo Attack}}: Mid-air horizontal slashes<br/>{{Small|{{Term|HWDE|Link}} can perform up to three slashes before falling back to the ground.<ref name="Prima 9"/>}} | |||
|N/A | |||
|N/A | |||
|- | |||
|[[File:HWDE Y Button Icon.png|26px|link=]] [[File:HWDE Y Button Icon.png|26px|link=]] [[File:HWDE Y Button Icon.png|26px|link=]] [[File:HWDE X Button Icon.png|26px|link=]] [[File:HWDE Y Button Icon.png|26px|link=]] [[File:HWDE Y Button Icon.png|26px|link=]] [[File:HWDE Y Button Icon.png|26px|link=]] [[File:HWDE X Button Icon.png|26px|link=]] | |||
|{{Term|HWDE|Combo Attack}}: {{Term|HWDE|Down Thrust}}<br/>{{Small|At any point {{Term|HWDE|Link}} is still in the air, the three mid-air slashes can be skipped and moved straight into the {{Term|HWDE|Down Thrust}}.<ref name="Prima 9"/>}} | |||
|N/A | |||
|N/A | |||
|- | |||
|[[File:HWDE Y Button Icon.png|26px|link=]] [[File:HWDE Y Button Icon.png|26px|link=]] [[File:HWDE Y Button Icon.png|26px|link=]] [[File:HWDE Y Button Icon.png|26px|link=]] | |||
|{{Term|HWDE|Regular Attack}}: Diagonal slash | |||
|N/A | |||
|N/A | |||
|- | |||
|[[File:HWDE Y Button Icon.png|26px|link=]] [[File:HWDE Y Button Icon.png|26px|link=]] [[File:HWDE Y Button Icon.png|26px|link=]] [[File:HWDE Y Button Icon.png|26px|link=]] [[File:HWDE Y Button Icon.png|26px|link=]] | |||
|{{Term|HWDE|Regular Attack}}: Horizontal right slash<br/>{{Small|If {{Term|HWDE|Kokiri Sword I}} has not been purchased, this will instead perform a vertical {{Term|HWDE|Spin Attack}} and end the combination chain.}} | |||
|Kokiri Sword I | |||
|1 Monster Tooth, 100 Rupee | |||
|- | |||
|[[File:HWDE Y Button Icon.png|26px|link=]] [[File:HWDE Y Button Icon.png|26px|link=]] [[File:HWDE Y Button Icon.png|26px|link=]] [[File:HWDE Y Button Icon.png|26px|link=]] [[File:HWDE Y Button Icon.png|26px|link=]] [[File:HWDE Y Button Icon.png|26px|link=]] | |||
|{{Term|HWDE|Regular Attack}}: Horizontal left slash | |||
|Kokiri Sword I | |||
|1 Monster Tooth, 100 Rupee | |||
|- | |||
|[[File:HWDE Y Button Icon.png|26px|link=]] [[File:HWDE Y Button Icon.png|26px|link=]] [[File:HWDE Y Button Icon.png|26px|link=]] [[File:HWDE Y Button Icon.png|26px|link=]] [[File:HWDE Y Button Icon.png|26px|link=]] [[File:HWDE Y Button Icon.png|26px|link=]] [[File:HWDE Y Button Icon.png|26px|link=]] | |||
|{{Term|HWDE|Regular Attack}}: Horizontal right slash | |||
|Kokiri Sword I | |||
|1 Monster Tooth, 100 Rupee | |||
|- | |||
|Hold [[File:HWDE X Button Icon.png|26px|link=]] after any {{Term|HWDE|Combo Attack}} | |||
|{{Term|HWDE|Combo Attack}}: {{Term|HWDE|Spin Attack}}<br/>{{Small|After any {{Term|HWDE|Combo Attack}}, continuing to hold {{Icon|HWDE X}} will charge a small {{Term|HWDE|Spin Attack}} that will launch {{Term|HWDE|Link}} forwards while he attacks.}} | |||
|Kokiri Sword II | |||
|1 Piece of Darknut Armor, 1 Monster Tooth, 500 Rupee | |||
|- | |||
|[[File:HWDE Y Button Icon.png|26px|link=]] [[File:HWDE Y Button Icon.png|26px|link=]] [[File:HWDE Y Button Icon.png|26px|link=]] [[File:HWDE Y Button Icon.png|26px|link=]] [[File:HWDE Y Button Icon.png|26px|link=]] [[File:HWDE Y Button Icon.png|26px|link=]] [[File:HWDE Y Button Icon.png|26px|link=]] [[File:HWDE Y Button Icon.png|26px|link=]] | |||
|{{Term|HWDE|Regular Attack}}: Horizontal left slash<br/>{{Small|If {{Term|HWDE|Kokiri Sword III}} has not been purchased, this will instead perform a vertical {{Term|HWDE|Spin Attack}} and end the combination chain.}} | |||
|Kokiri Sword I | |||
|1 Monster Tooth, 100 Rupee | |||
|- | |||
|[[File:HWDE Y Button Icon.png|26px|link=]] [[File:HWDE Y Button Icon.png|26px|link=]] [[File:HWDE Y Button Icon.png|26px|link=]] [[File:HWDE Y Button Icon.png|26px|link=]] [[File:HWDE Y Button Icon.png|26px|link=]] [[File:HWDE Y Button Icon.png|26px|link=]] [[File:HWDE Y Button Icon.png|26px|link=]] [[File:HWDE Y Button Icon.png|26px|link=]] [[File:HWDE Y Button Icon.png|26px|link=]] | |||
|{{Term|HWDE|Regular Attack}}: Vertical {{Term|HWDE|Spin Attack}} | |||
|Kokiri Sword III | |||
|1 Monster Tooth, 1 Moblin Flank, 1000 Rupee | |||
|- | |||
|[[File:HWDE Y Button Icon.png|26px|link=]] [[File:HWDE Y Button Icon.png|26px|link=]] [[File:HWDE Y Button Icon.png|26px|link=]] [[File:HWDE Y Button Icon.png|26px|link=]] [[File:HWDE X Button Icon.png|26px|link=]]<br/>or<br/>[[File:HWDE Y Button Icon.png|26px|link=]] [[File:HWDE Y Button Icon.png|26px|link=]] [[File:HWDE Y Button Icon.png|26px|link=]] [[File:HWDE Y Button Icon.png|26px|link=]] [[File:HWDE Y Button Icon.png|26px|link=]] [[File:HWDE X Button Icon.png|26px|link=]]<br/>or<br/>[[File:HWDE Y Button Icon.png|26px|link=]] [[File:HWDE Y Button Icon.png|26px|link=]] [[File:HWDE Y Button Icon.png|26px|link=]] [[File:HWDE Y Button Icon.png|26px|link=]] [[File:HWDE Y Button Icon.png|26px|link=]] [[File:HWDE Y Button Icon.png|26px|link=]] [[File:HWDE X Button Icon.png|26px|link=]]<br/>or<br/>[[File:HWDE Y Button Icon.png|26px|link=]] [[File:HWDE Y Button Icon.png|26px|link=]] [[File:HWDE Y Button Icon.png|26px|link=]] [[File:HWDE Y Button Icon.png|26px|link=]] [[File:HWDE Y Button Icon.png|26px|link=]] [[File:HWDE Y Button Icon.png|26px|link=]] [[File:HWDE Y Button Icon.png|26px|link=]] [[File:HWDE X Button Icon.png|26px|link=]]<br/>or<br/>[[File:HWDE Y Button Icon.png|26px|link=]] [[File:HWDE Y Button Icon.png|26px|link=]] [[File:HWDE Y Button Icon.png|26px|link=]] [[File:HWDE Y Button Icon.png|26px|link=]] [[File:HWDE Y Button Icon.png|26px|link=]] [[File:HWDE Y Button Icon.png|26px|link=]] [[File:HWDE Y Button Icon.png|26px|link=]] [[File:HWDE Y Button Icon.png|26px|link=]] [[File:HWDE X Button Icon.png|26px|link=]] | |||
|{{Term|HWDE|Combo Attack}}: {{Term|HWDE|Dash Attack|link}}<br/>{{Small|Pressing {{Icon|HWDE X}} after four or more consecutive slashes will trigger the {{Term|HWDE|Dash Attack}} combo. {{Term|HWDE|Link}} runs forwards with his {{Term|HWDE|Hylian Sword}} extended and carries {{Plural|HWDE|Enemy}} backwards, then makes one last lunge with his {{Term|HWDE|Hylian Sword}} to deal the most damage.}} | |||
|Kokiri Sword IV | |||
|1 Stalmaster Wrist Bone, 1 Monster Tooth, 3000 Rupee | |||
}} | |||
|tab2= Zelda Mode | |||
|content2= | |||
{{Data Table | |||
|game= HWDE | |||
|storeAs= Zelda Mode Combos | |||
|sortable= false | |||
|stretch= | |||
|columns= Combination, Attack, Badge Required [Term], Cost [Amounts] | |||
|- | |||
|[[File:HWDE Y Button Icon.png|26px|link=]] | |||
|{{Term|HWDE|Strong Attack|link}}: {{Term|HWDE|Spin Attack|link}}<br/>{{Small|Tapping X performs a quick {{Term|HWDE|Spin Attack}}, holding for at least one second before releasing increases both damage and radius.}} | |||
|N/A | |||
|N/A | |||
|- | |||
|[[File:HWDE B Button Icon.png|26px|link=]] | |||
|{{Term|HWDE|Regular Attack|link}}: Diagonal slash | |||
|N/A | |||
|N/A | |||
|- | |||
|[[File:HWDE B Button Icon.png|26px|link=]] [[File:HWDE Y Button Icon.png|26px|link=]] | |||
|{{Term|HWDE|Combo Attack|link}}: {{Term|HWDE|Jump Thrust|link}} | |||
|N/A | |||
|N/A | |||
|- | |||
|[[File:HWDE B Button Icon.png|26px|link=]] [[File:HWDE Y Button Icon.png|26px|link=]] [[File:HWDE B Button Icon.png|26px|link=]] [[File:HWDE B Button Icon.png|26px|link=]] [[File:HWDE B Button Icon.png|26px|link=]] | |||
|{{Term|HWDE|Combo Attack}}: Mid-air horizontal slashes<br/>{{Small|{{Term|HWDE|Link}} can perform up to three slashes before falling back to the ground.<ref name="Prima 9"/>}} | |||
|N/A | |||
|N/A | |||
|- | |||
|[[File:HWDE B Button Icon.png|26px|link=]] [[File:HWDE Y Button Icon.png|26px|link=]] [[File:HWDE B Button Icon.png|26px|link=]] [[File:HWDE B Button Icon.png|26px|link=]] [[File:HWDE B Button Icon.png|26px|link=]] [[File:HWDE Y Button Icon.png|26px|link=]] | |||
|{{Term|HWDE|Combo Attack}}: {{Term|HWDE|Down Thrust|link}}<br/>{{Small|At any point {{Term|HWDE|Link}} is still in the air, the three mid-air slashes can be skipped and moved straight into the {{Term|HWDE|Down Thrust}}.<ref name="Prima 9"/>}} | |||
|N/A | |||
|N/A | |||
|- | |||
|[[File:HWDE B Button Icon.png|26px|link=]] [[File:HWDE B Button Icon.png|26px|link=]] | |||
|{{Term|HWDE|Regular Attack}}: Horizontal slash | |||
|N/A | |||
|N/A | |||
|- | |||
|[[File:HWDE B Button Icon.png|26px|link=]] [[File:HWDE B Button Icon.png|26px|link=]] [[File:HWDE Y Button Icon.png|26px|link=]] | |||
|{{Term|HWDE|Combo Attack}}: {{Term|HWDE|Sword Beam|link}}<br/>{{Small|{{Term|HWDE|Link}} will jump backwards and then shoot a circular {{Term|HWDE|Sword Beam}} that travels straight ahead for about one second before disappearing.}} | |||
|N/A | |||
|N/A | |||
|- | |||
|[[File:HWDE B Button Icon.png|26px|link=]] [[File:HWDE B Button Icon.png|26px|link=]] [[File:HWDE B Button Icon.png|26px|link=]] | |||
|{{Term|HWDE|Regular Attack}}: Diagonal slash | |||
|N/A | |||
|N/A | |||
|- | |||
|[[File:HWDE B Button Icon.png|26px|link=]] [[File:HWDE B Button Icon.png|26px|link=]] [[File:HWDE B Button Icon.png|26px|link=]] [[File:HWDE Y Button Icon.png|26px|link=]] | |||
|{{Term|HWDE|Combo Attack}}: Rising {{Term|HWDE|Spin Attack}} | |||
|N/A | |||
|N/A | |||
|- | |||
|[[File:HWDE B Button Icon.png|26px|link=]] [[File:HWDE B Button Icon.png|26px|link=]] [[File:HWDE B Button Icon.png|26px|link=]] [[File:HWDE Y Button Icon.png|26px|link=]] [[File:HWDE B Button Icon.png|26px|link=]] [[File:HWDE B Button Icon.png|26px|link=]] [[File:HWDE B Button Icon.png|26px|link=]] | |||
|{{Term|HWDE|Combo Attack}}: Mid-air horizontal slashes | |||
|N/A | |||
|N/A | |||
|- | |||
|[[File:HWDE B Button Icon.png|26px|link=]] [[File:HWDE B Button Icon.png|26px|link=]] [[File:HWDE B Button Icon.png|26px|link=]] [[File:HWDE Y Button Icon.png|26px|link=]] [[File:HWDE B Button Icon.png|26px|link=]] [[File:HWDE B Button Icon.png|26px|link=]] [[File:HWDE B Button Icon.png|26px|link=]] [[File:HWDE Y Button Icon.png|26px|link=]] | |||
|{{Term|HWDE|Combo Attack}}: {{Term|HWDE|Down Thrust}}<br/>{{Small|At any point {{Term|HWDE|Link}} is still in the air, the three mid-air slashes can be skipped and moved straight into the {{Term|HWDE|Down Thrust}}.}} | |||
|N/A | |||
|N/A | |||
|- | |||
|[[File:HWDE B Button Icon.png|26px|link=]] [[File:HWDE B Button Icon.png|26px|link=]] [[File:HWDE B Button Icon.png|26px|link=]] [[File:HWDE B Button Icon.png|26px|link=]] | |||
|{{Term|HWDE|Regular Attack}}: Diagonal slash | |||
|N/A | |||
|N/A | |||
|- | |||
|[[File:HWDE B Button Icon.png|26px|link=]] [[File:HWDE B Button Icon.png|26px|link=]] [[File:HWDE B Button Icon.png|26px|link=]] [[File:HWDE B Button Icon.png|26px|link=]] [[File:HWDE B Button Icon.png|26px|link=]] | |||
|{{Term|HWDE|Regular Attack}}: Horizontal right slash<br/>{{Small|If {{Term|HWDE|Kokiri Sword I}} has not been purchased, this will instead perform a vertical {{Term|HWDE|Spin Attack}} and end the combination chain.}} | |||
|Kokiri Sword I | |||
|1 Monster Tooth, 100 Rupee | |||
|- | |||
|[[File:HWDE B Button Icon.png|26px|link=]] [[File:HWDE B Button Icon.png|26px|link=]] [[File:HWDE B Button Icon.png|26px|link=]] [[File:HWDE B Button Icon.png|26px|link=]] [[File:HWDE B Button Icon.png|26px|link=]] [[File:HWDE B Button Icon.png|26px|link=]] | |||
|{{Term|HWDE|Regular Attack}}: Horizontal left slash | |||
|Kokiri Sword I | |||
|1 Monster Tooth, 100 Rupee | |||
|- | |||
|[[File:HWDE B Button Icon.png|26px|link=]] [[File:HWDE B Button Icon.png|26px|link=]] [[File:HWDE B Button Icon.png|26px|link=]] [[File:HWDE B Button Icon.png|26px|link=]] [[File:HWDE B Button Icon.png|26px|link=]] [[File:HWDE B Button Icon.png|26px|link=]] [[File:HWDE B Button Icon.png|26px|link=]] | |||
|{{Term|HWDE|Regular Attack}}: Horizontal right slash | |||
|Kokiri Sword I | |||
|1 Monster Tooth, 100 Rupee | |||
|- | |||
|Hold [[File:HWDE Y Button Icon.png|26px|link=]] after any {{Term|HWDE|Combo Attack}} | |||
|{{Term|HWDE|Combo Attack}}: {{Term|HWDE|Spin Attack}}<br/>{{Small|After any {{Term|HWDE|Combo Attack}}, continuing to hold {{Icon|HWDE Y}} will charge a small {{Term|HWDE|Spin Attack}} that will launch {{Term|HWDE|Link}} forwards while he attacks.<ref name="Prima 9"/>}} | |||
|Kokiri Sword II | |||
|1 Piece of Darknut Armor, 1 Monster Tooth, 500 Rupee | |||
|- | |||
|[[File:HWDE B Button Icon.png|26px|link=]] [[File:HWDE B Button Icon.png|26px|link=]] [[File:HWDE B Button Icon.png|26px|link=]] [[File:HWDE B Button Icon.png|26px|link=]] [[File:HWDE B Button Icon.png|26px|link=]] [[File:HWDE B Button Icon.png|26px|link=]] [[File:HWDE B Button Icon.png|26px|link=]] [[File:HWDE B Button Icon.png|26px|link=]] | |||
|{{Term|HWDE|Regular Attack}}: Horizontal left slash<br/>{{Small|If {{Term|HWDE|Kokiri Sword III}} has not been purchased, this will instead perform a vertical {{Term|HWDE|Spin Attack}} and end the combination chain.}} | |||
|Kokiri Sword I | |||
|1 Monster Tooth, 100 Rupee | |||
|- | |||
|[[File:HWDE B Button Icon.png|26px|link=]] [[File:HWDE B Button Icon.png|26px|link=]] [[File:HWDE B Button Icon.png|26px|link=]] [[File:HWDE B Button Icon.png|26px|link=]] [[File:HWDE B Button Icon.png|26px|link=]] [[File:HWDE B Button Icon.png|26px|link=]] [[File:HWDE B Button Icon.png|26px|link=]] [[File:HWDE B Button Icon.png|26px|link=]] [[File:HWDE B Button Icon.png|26px|link=]] | |||
|{{Term|HWDE|Regular Attack}}: Vertical {{Term|HWDE|Spin Attack}} | |||
|Kokiri Sword III | |||
|1 Monster Tooth, 1 Moblin Flank, 1000 Rupee | |||
|- | |||
|[[File:HWDE B Button Icon.png|26px|link=]] [[File:HWDE B Button Icon.png|26px|link=]] [[File:HWDE B Button Icon.png|26px|link=]] [[File:HWDE B Button Icon.png|26px|link=]] [[File:HWDE Y Button Icon.png|26px|link=]]<br/>or<br/>[[File:HWDE B Button Icon.png|26px|link=]] [[File:HWDE B Button Icon.png|26px|link=]] [[File:HWDE B Button Icon.png|26px|link=]] [[File:HWDE B Button Icon.png|26px|link=]] [[File:HWDE B Button Icon.png|26px|link=]] [[File:HWDE Y Button Icon.png|26px|link=]]<br/>or<br/>[[File:HWDE B Button Icon.png|26px|link=]] [[File:HWDE B Button Icon.png|26px|link=]] [[File:HWDE B Button Icon.png|26px|link=]] [[File:HWDE B Button Icon.png|26px|link=]] [[File:HWDE B Button Icon.png|26px|link=]] [[File:HWDE B Button Icon.png|26px|link=]] [[File:HWDE Y Button Icon.png|26px|link=]]<br/>or<br/>[[File:HWDE B Button Icon.png|26px|link=]] [[File:HWDE B Button Icon.png|26px|link=]] [[File:HWDE B Button Icon.png|26px|link=]] [[File:HWDE B Button Icon.png|26px|link=]] [[File:HWDE B Button Icon.png|26px|link=]] [[File:HWDE B Button Icon.png|26px|link=]] [[File:HWDE B Button Icon.png|26px|link=]] [[File:HWDE Y Button Icon.png|26px|link=]]<br/>or<br/>[[File:HWDE B Button Icon.png|26px|link=]] [[File:HWDE B Button Icon.png|26px|link=]] [[File:HWDE B Button Icon.png|26px|link=]] [[File:HWDE B Button Icon.png|26px|link=]] [[File:HWDE B Button Icon.png|26px|link=]] [[File:HWDE B Button Icon.png|26px|link=]] [[File:HWDE B Button Icon.png|26px|link=]] [[File:HWDE B Button Icon.png|26px|link=]] [[File:HWDE Y Button Icon.png|26px|link=]] | |||
|{{Term|HWDE|Combo Attack}}: {{Term|HWDE|Dash Attack|link}}<br/>{{Small|Pressing {{Icon|HWDE Y}} after four or more consecutive slashes will trigger the {{Term|HWDE|Dash Attack}} combo. {{Term|HWDE|Link}} runs forwards with his {{Term|HWDE|Hylian Sword}} extended and carries {{Plural|HWDE|Enemy}} backwards, then makes one last lunge with his {{Term|HWDE|Hylian Sword}} to deal the most damage.}} | |||
|Kokiri Sword IV | |||
|1 Stalmaster Wrist Bone, 1 Monster Tooth, 3000 Rupee | |||
}} | |||
}} | |||
===Special Attack=== | ===Special Attack=== | ||
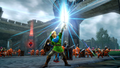
{{Main|Special Attack}} | <section begin="Special Attack"/>{{Main|Special Attack}} | ||
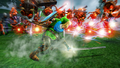
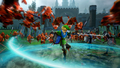
The Hylian Sword's Special Attack is a | The {{Term|HWDE|Hylian Sword}}'s {{Term|HWDE|Special Attack|link}} is a powerful version of the {{Term|HWDE|Spin Attack|link}}. The wielder raises the {{Term|HWDE|Hylian Sword}} {{Term|HWDE|Skyward Strike|link|display=skyward}} and charges the sword with some form of power, and then launches into a very large horizontal {{Term|HWDE|Spin Attack}} while dashing forward. This attack is highly effective against a crowd of enemy soldiers in front of {{Term|HWDE|Link}}, given its wide radius and extensive forward range.<section end="Special Attack"/> | ||
This attack is highly effective | |||
===Weak Point Smash=== | ===Weak Point Smash=== | ||
{{Main|Critical Point#Hyrule Warriors}} | <section begin="Weak Point Smash"/>{{Main|Critical Point#Hyrule Warriors}} | ||
Like all | Like all {{Term|HWDE|Weapon}} categories in {{HW|-}}, the {{Term|HWDE|Hylian Sword}} has two different {{Term|HWDE|Weak Point Smash}} attacks, the one used depending on whether the target is a {{Term|HWDE|Giant Boss|link}} or not. The attack used against {{Plural|HWDE|Captain (Hyrule Warriors)|link}} and {{Plural|HWDE|Warrior|link}} consists of a series of wide slices in varying directions, followed by an ultra-powerful forward thrust. The {{Term|HWDE|Weak Point Smash}} used against {{Plural|HWDE|Giant Boss}} is a massive leap into the air, followed by a to-the-hilt downward thrust into the {{Term|HWDE|Boss}}'s core.<section end="Weak Point Smash"/> | ||
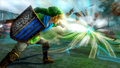
===Focus Spirit=== | ===Focus Spirit=== | ||
{{Main|Focus Spirit}} | <section begin="Focus Spirit"/>{{Main|Focus Spirit}} | ||
The Hylian Sword's Focus Spirit Attack is a single forward thrust that has a relatively high attack range. Like with all Focus Spirit | The {{Term|HWDE|Hylian Sword}}'s {{Term|HWDE|Focus Spirit Attack|link}} is a single forward thrust that has a relatively high attack range. Like with all {{Plural|HWDE|Focus Spirit Attack}}, hitting a {{Term|HWDE|Captain (Hyrule Warriors)}}, {{Term|HWDE|Warrior}}, or {{Term|HWDE|Giant Boss}} with this thrust will instantly expose that target's {{Term|HWDE|Weak Point Gauge|link}} for an extended period of time. | ||
If Link's Focus Spirit | If {{Term|HWDE|Link}}'s {{Term|HWDE|Focus Spirit Gauge|link}} is allowed to run dry on its own (without unleashing the {{Term|HWDE|Focus Spirit Attack}}), {{Term|HWDE|Link}} will thrust his {{Term|HWDE|Hylian Sword}} upward and release an explosion of light with him at the center.<section end="Focus Spirit"/> | ||
==Trivia== | ==Trivia== | ||
*The emblem on the shield of the 8-Bit Wooden Sword skin has been changed from the original on the | *The emblem on the shield of the 8-Bit Wooden Sword skin has been changed from the original on the {{Term|TLoZ|Wooden Shield|link}}. The original was a [[Symbols#The Cross and Christianity|Latin cross]]; this may have been seen by the {{HW|-}} developers as too religious for today's general gaming audience, so the emblem was changed to a "plus" sign (+) with a pixel missing in the center. | ||
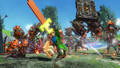
*Other Warriors make use of the Hylian Swords in certain [[Adventure Mode]] battles: | *Other Warriors make use of the Hylian Swords in certain [[Adventure Mode]] battles: | ||
| Line 176: | Line 375: | ||
|- | |- | ||
| | | | ||
{| class=" | {| class="wikitable" style="text-align:center; width:99%; max-width:30em" | ||
|- | |- | ||
!style="width:30%"| Warrior | !style="width:30%"| Warrior | ||
| Line 182: | Line 381: | ||
!style="width:30%"| Tile | !style="width:30%"| Tile | ||
|- | |- | ||
| [[File:HWDE Sheik Mini Map Icon.png|link=]]<br>'''[[Sheik]]''' | | [[File:HWDE Sheik Mini Map Icon.png|link=]]<br/>'''[[Sheik]]''' | ||
| [[Master Quest Map]] | | [[Master Quest Map]] | ||
| '''D10''' | | '''D10''' | ||
|- | |- | ||
| rowspan="3"| [[File:HWDE Impa Mini Map Icon.png|link=]]<br>'''[[Impa]]''' | | rowspan="3"| [[File:HWDE Impa Mini Map Icon.png|link=]]<br/>'''[[Impa]]''' | ||
| rowspan="3"| [[Master Quest Map]] | | rowspan="3"| [[Master Quest Map]] | ||
| '''C7''' | | '''C7''' | ||
| Line 194: | Line 393: | ||
| '''F10''' | | '''F10''' | ||
|- | |- | ||
|rowspan="2"| [[File:HWDE Zelda Mini Map Icon.png|link=]]<br>'''[[Princess Zelda|Zelda]]''' | |rowspan="2"| [[File:HWDE Zelda Mini Map Icon.png|link=]]<br/>'''[[Princess Zelda|Zelda]]''' | ||
| [[Master Quest Map]] | | [[Master Quest Map]] | ||
| '''B11''' | | '''B11''' | ||
| Line 201: | Line 400: | ||
|{{#var:Light}}| '''F8''' | |{{#var:Light}}| '''F8''' | ||
|- | |- | ||
|{{#var:Dark}} rowspan="4"| [[File:HWDE Midna Mini Map Icon.png|link=]]<br>'''[[Midna]]''' | |{{#var:Dark}} rowspan="4"| [[File:HWDE Midna Mini Map Icon.png|link=]]<br/>'''[[Midna]]''' | ||
|{{#var:Dark}} rowspan="2"| [[Twilight Map]] | |{{#var:Dark}} rowspan="2"| [[Twilight Map]] | ||
|{{#var:Dark}}| '''F8''' | |{{#var:Dark}}| '''F8''' | ||
| Line 213: | Line 412: | ||
|} | |} | ||
|} | |} | ||
==Nomenclature== | |||
{{Nomenclature}} | |||
==Gallery== | ==Gallery== | ||
| Line 218: | Line 420: | ||
File:HW White Sword Render.png|Render of the White Sword from {{HW|-}} | File:HW White Sword Render.png|Render of the White Sword from {{HW|-}} | ||
File:HW Magical Sword Render.png|Render of the Magical Sword from {{HW|-}} | File:HW Magical Sword Render.png|Render of the Magical Sword from {{HW|-}} | ||
File:HW Link Fierce Deity Link Model.png | File:HW Link Fierce Deity Link Model.png|Fierce Deity Link wielding the Magical Sword from {{HW|-}} | ||
File:HW Knight's Sword Model.png|The Knight's Sword from {{HW|-}} | File:HW Knight's Sword Model.png|The Knight's Sword from {{HW|-}} | ||
File:HW White Sword Model.png|The White Sword from {{HW|-}} | File:HW White Sword Model.png|The White Sword from {{HW|-}} | ||
File:HW Magical Sword Model.png|The Magical Sword from {{HW|-}} | File:HW Magical Sword Model.png|The Magical Sword from {{HW|-}} | ||
File:HW Magical Shield | File:HW Knight's Sword Shield Model.png|The Knight's Sword's accompanying shield from {{HW|-}} | ||
File:HW White Sword Shield Model.png|The White Sword's accompanying shield from {{HW|-}} | |||
File:HW Magical Shield Model.png|The Magical Sword's accompanying shield from {{HW|-}} | |||
File:HW Hylian Sword Adventure Mode Icon.png|Hylian Sword Adventure Mode icon from {{HW|-}} | File:HW Hylian Sword Adventure Mode Icon.png|Hylian Sword Adventure Mode icon from {{HW|-}} | ||
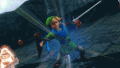
File:HW Link Slash 2.png|Link cutting down [[Bokoblin]]s with the Knight's Sword from {{HW|-}} | File:HW Link Slash 2.png|Link cutting down [[Bokoblin]]s with the Knight's Sword from {{HW|-}} | ||
| Line 230: | Line 434: | ||
File:HW Hylian Sword Focus Spirit Attack 2.png|The culmination of Link's Hylian Sword Focus Spirit Attack from {{HW|-}} | File:HW Hylian Sword Focus Spirit Attack 2.png|The culmination of Link's Hylian Sword Focus Spirit Attack from {{HW|-}} | ||
File:Hyrule Warriors Spin Attack Video.gif|The Hylian Sword's Special Attack from {{HW|-}} | File:Hyrule Warriors Spin Attack Video.gif|The Hylian Sword's Special Attack from {{HW|-}} | ||
File:HWL Darkmagic Sword | File:HWL Darkmagic Sword Render.png|Render of the Darkmagic Sword from {{HW|L|-}} | ||
File:HWDE Link 8-Bit Wooden Sword.png|Link wielding the 8-Bit Wooden Sword in {{HW|DE|-}} | File:HWDE Link 8-Bit Wooden Sword.png|Link wielding the 8-Bit Wooden Sword in {{HW|DE|-}} | ||
File:HWDE Link Darkmagic Sword.png|Link wielding the Darkmagic Sword in {{HW|DE|-}} | File:HWDE Link Darkmagic Sword.png|Link wielding the Darkmagic Sword in {{HW|DE|-}} | ||
</gallery> | </gallery> | ||
===Video Gallery=== | ===Video Gallery=== | ||
{{Youtube|xm7u4TGao_U|200|Link | {{Youtube|xm7u4TGao_U|200|Trailer for {{HW|-}} showcasing {{Term|HWDE|Link}} with a {{Term|HWDE|Knight's Sword}}}} | ||
==See Also== | ==See Also== | ||
* | * {{Term|HWDE|Master Sword|link}} | ||
{{Ref}} | |||
{{Categories | |||
|Hylian Swords, Swords | |||
|items= HW, HWL, HWDE | |||
}} | |||
Latest revision as of 13:07, 9 December 2023
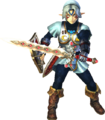
The Hylian Sword is a class of Weapon used by Link in Hyrule Warriors.[1] It is the first class of Weapon unlocked at the start of the game alongside unlocking Link. The Hylian Sword is associated with Light.
Variations
Knight's Sword
The Knight's Sword is the first level of the Hylian Sword and is the first type of Weapon unlocked in the game. Knight's Swords are used by the Soldiers of Hyrule. During the Scenario, "The Armies of Ruin," Link, a Trainee, disobeys the orders to stay inside and takes a Knight's Sword to join the battle.[2] As a Lv.1 Weapon, the Knight's Sword can be obtained with an attack strength ranging from 80 to 120, in increments of eight per star rating.[3]
White Sword
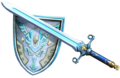
The White Sword is the second level of the Hylian Sword. The White Sword is unlocked within Legend Mode during the "Sealed Ambition" Scenario. A Chest containing the corresponding Sealed Weapon appears within the East Cannon Keep after it is captured. Like other Lv.2 Weapons, the White Sword is found in six variants with different attack strengths based on a given Weapon's star rating. The White Sword has a base attack strength of 150 and each star adds 15 to the attack strength, so a five-star White Sword possesses an attack strength of 225.[3]
Magical Sword
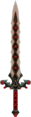
The Magical Sword is the Lv.3 form of the Hylian Sword. The Magical Sword is the only version of the Hylian Sword that is unlocked in Adventure Mode in Hyrule Warriors. In Hyrule Warriors, it can be obtained as a Reward for clearing Battle B3 in the Adventure Map with an A-Rank. In Hyrule Warriors Legends and Hyrule Warriors: Definitive Edition, it can be obtained as a Reward for clearing Battle H6 in the Master Quest Map with an A-Rank. Lv.3 Weapons such as the Magical Sword have the highest attack strength values in Hyrule Warriors, ranging from 280 to 420, in increments of 28, depending on the Star Rating of a specific weapon.[3]
8-Bit Wooden Sword
The 8-Bit Wooden Sword is the Lv.★ form of the Hylian Sword, which is available in Hyrule Warriors and Hyrule Warriors: Definitive Edition. It is an exact replica of the Sword from The Legend of Zelda, rendered in three dimensions, while the Shield is a 3D render of Wooden Shield from The Legend of Zelda, albeit with a somewhat altered emblem.
The 8-Bit Wooden Sword is the only 8-bit Weapon skin available in Hyrule Warriors without any of the Downloadable Content packs, being unlocked automatically upon completion of the "Shining Beacon" Scenario in Legend Mode after installing Version 1.2.0 update in Hyrule Warriors. If the Scenario had already been completed before installing the update, this Weapon will be unlocked the first time the game is loaded after updating. After unlocking, 8-Bit Wooden Swords can be collected just as any other Weapon. In Hyrule Warriors: Definitive Edition, instead of appearing as a separate Weapon, the 8-Bit Wooden Sword replaces the Darkmagic Sword when the "8-Bit Weapons" Setting is turned on in Game Settings within the Settings menu.
As a Lv.★ weapon, the 8-Bit Wooden Sword effectively shares all properties except aesthetic ones with its Lv.3 counterpart, in this case the Magical Sword. It is found with attack strength values ranging from 280 to 420, in increments of 28.
Magical Sword +
The Magical Sword + is the Lv.4 form of the Hylian Sword, which is available in Hyrule Warriors Legends and Hyrule Warriors: Definitive Edition. The Sword and Shield are aesthetically identical to the Magical Sword.
The Magical Sword + can be obtained as a reward for clearing Battle C2 in Hyrule Warriors Legends, which is Battle C3 in Hyrule Warriors: Definitive Edition, in the Twilight Map with an A-Rank.
Although they are aesthetically identical to the Lv.3 form, Lv.4 Weapons such as the Magical Sword + are much stronger with attack strength values ranging from 500 to 750, in increments of 50 per each star in its star rating.[3]
Darkmagic Sword
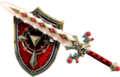
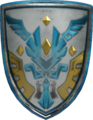
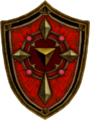
The Darkmagic Sword is the Lv.4+ or Multi-Element form of the Hylian Sword, which was added to Hyrule Warriors Legends with the A Link Between Worlds Pack Downloadable Content and is available in Hyrule Warriors: Definitive Edition. The Sword and Shield are aesthetically similar to the Magical Sword but with a color scheme of purple, gray and black, representing its extra element of Darkness.
The Darkmagic Sword is obtained as a reward for clearing Battle A11 in the Lorule Map with an A-Rank. Multi-Element Weapons such as the Darkmagic Sword have the same range of attack strength values as their Lv.4 counterpart.
| Weapon | Damage per Star Rating | |||||||
|---|---|---|---|---|---|---|---|---|
| Tier | Icon | Element(s) | 0 | 1 | 2 | 3 | 4 | 5 |
| Lv.1 | Knight's Sword |
80 | 88 | 96 | 104 | 112 | 120 | |
| Lv.2 | White Sword |
150 | 165 | 180 | 195 | 210 | 225 | |
| Lv.3 | Magical Sword |
280 | 308 | 336 | 364 | 392 | 420 | |
| Lv.★ (HW | HWDE) | 8-Bit Wooden Sword |
280 | 308 | 336 | 364 | 392 | 420 | |
| Lv.4 (HWL | HWDE) | Magical Sword + |
500 | 550 | 600 | 650 | 700 | 750 | |
| Lv.4+ (HWL | HWDE) |  Darkmagic Sword |
500 | 550 | 600 | 650 | 700 | 750 | |
Attack Combinations
| Combination | |
|---|---|
| Attack | Strong Attack: Spin Attack Tapping X performs a quick Spin Attack, holding for at least one second before releasing increases both damage and radius. |
| Badge Required | — |
| Cost | — |
| Combination | |
| Attack | Regular Attack: Diagonal slash |
| Badge Required | — |
| Cost | — |
| Combination | |
| Attack | |
| Badge Required | — |
| Cost | — |
| Combination | |
| Attack | Combo Attack: Mid-air horizontal slashes Link can perform up to three slashes before falling back to the ground.[4] |
| Badge Required | — |
| Cost | — |
| Combination | |
| Attack | Combo Attack: Down Thrust At any point Link is still in the air, the three mid-air slashes can be skipped and moved straight into the Down Thrust.[4] |
| Badge Required | — |
| Cost | — |
| Combination | |
| Attack | Regular Attack: Horizontal slash |
| Badge Required | — |
| Cost | — |
| Combination | |
| Attack | Combo Attack: Sword Beam Link will jump backwards and then shoot a circular Sword Beam that travels straight ahead for about one second before disappearing. |
| Badge Required | — |
| Cost | — |
| Combination | |
| Attack | Regular Attack: Diagonal slash |
| Badge Required | — |
| Cost | — |
| Combination | |
| Attack | Combo Attack: Rising Spin Attack |
| Badge Required | — |
| Cost | — |
| Combination | |
| Attack | Combo Attack: Mid-air horizontal slashes Link can perform up to three slashes before falling back to the ground.[4] |
| Badge Required | — |
| Cost | — |
| Combination | |
| Attack | Combo Attack: Down Thrust At any point Link is still in the air, the three mid-air slashes can be skipped and moved straight into the Down Thrust.[4] |
| Badge Required | — |
| Cost | — |
| Combination | |
| Attack | Regular Attack: Diagonal slash |
| Badge Required | — |
| Cost | — |
| Combination | |
| Attack | Regular Attack: Horizontal right slash If Kokiri Sword I has not been purchased, this will instead perform a vertical Spin Attack and end the combination chain. |
| Badge Required | |
| Cost | |
| Combination | |
| Attack | Regular Attack: Horizontal left slash |
| Badge Required | |
| Cost | |
| Combination | |
| Attack | Regular Attack: Horizontal right slash |
| Badge Required | |
| Cost | |
| Combination | Hold |
| Attack | Combo Attack: Spin Attack After any Combo Attack, continuing to hold |
| Badge Required | |
| Cost | |
| Combination | |
| Attack | Regular Attack: Horizontal left slash If Kokiri Sword III has not been purchased, this will instead perform a vertical Spin Attack and end the combination chain. |
| Badge Required | |
| Cost | |
| Combination | |
| Attack | Regular Attack: Vertical Spin Attack |
| Badge Required | |
| Cost | |
| Combination | or or or or |
| Attack | Combo Attack: Dash Attack Pressing |
| Badge Required | |
| Cost |
| Combination | Attack | Badge Required | Cost |
|---|---|---|---|
Strong Attack: Spin Attack Tapping X performs a quick Spin Attack, holding for at least one second before releasing increases both damage and radius. | — | — | |
Regular Attack: Diagonal slash | — | — | |
— | — | ||
Combo Attack: Mid-air horizontal slashes Link can perform up to three slashes before falling back to the ground.[4] | — | — | |
Combo Attack: Down Thrust At any point Link is still in the air, the three mid-air slashes can be skipped and moved straight into the Down Thrust.[4] | — | — | |
Regular Attack: Horizontal slash | — | — | |
Combo Attack: Sword Beam Link will jump backwards and then shoot a circular Sword Beam that travels straight ahead for about one second before disappearing. | — | — | |
Regular Attack: Diagonal slash | — | — | |
Combo Attack: Rising Spin Attack | — | — | |
Combo Attack: Mid-air horizontal slashes Link can perform up to three slashes before falling back to the ground.[4] | — | — | |
Combo Attack: Down Thrust At any point Link is still in the air, the three mid-air slashes can be skipped and moved straight into the Down Thrust.[4] | — | — | |
Regular Attack: Diagonal slash | — | — | |
Regular Attack: Horizontal right slash If Kokiri Sword I has not been purchased, this will instead perform a vertical Spin Attack and end the combination chain. | |||
Regular Attack: Horizontal left slash | |||
Regular Attack: Horizontal right slash | |||
Hold | Combo Attack: Spin Attack After any Combo Attack, continuing to hold | ||
Regular Attack: Horizontal left slash If Kokiri Sword III has not been purchased, this will instead perform a vertical Spin Attack and end the combination chain. | |||
Regular Attack: Vertical Spin Attack | |||
or or or or | Combo Attack: Dash Attack Pressing |
| Combination | |
|---|---|
| Attack | Strong Attack: Spin Attack Tapping X performs a quick Spin Attack, holding for at least one second before releasing increases both damage and radius. |
| Badge Required | — |
| Cost | — |
| Combination | |
| Attack | Regular Attack: Diagonal slash |
| Badge Required | — |
| Cost | — |
| Combination | |
| Attack | |
| Badge Required | — |
| Cost | — |
| Combination | |
| Attack | Combo Attack: Mid-air horizontal slashes Link can perform up to three slashes before falling back to the ground.[4] |
| Badge Required | — |
| Cost | — |
| Combination | |
| Attack | Combo Attack: Down Thrust At any point Link is still in the air, the three mid-air slashes can be skipped and moved straight into the Down Thrust.[4] |
| Badge Required | — |
| Cost | — |
| Combination | |
| Attack | Regular Attack: Horizontal slash |
| Badge Required | — |
| Cost | — |
| Combination | |
| Attack | Combo Attack: Sword Beam Link will jump backwards and then shoot a circular Sword Beam that travels straight ahead for about one second before disappearing. |
| Badge Required | — |
| Cost | — |
| Combination | |
| Attack | Regular Attack: Diagonal slash |
| Badge Required | — |
| Cost | — |
| Combination | |
| Attack | Combo Attack: Rising Spin Attack |
| Badge Required | — |
| Cost | — |
| Combination | |
| Attack | Combo Attack: Mid-air horizontal slashes |
| Badge Required | — |
| Cost | — |
| Combination | |
| Attack | Combo Attack: Down Thrust At any point Link is still in the air, the three mid-air slashes can be skipped and moved straight into the Down Thrust. |
| Badge Required | — |
| Cost | — |
| Combination | |
| Attack | Regular Attack: Diagonal slash |
| Badge Required | — |
| Cost | — |
| Combination | |
| Attack | Regular Attack: Horizontal right slash If Kokiri Sword I has not been purchased, this will instead perform a vertical Spin Attack and end the combination chain. |
| Badge Required | |
| Cost | |
| Combination | |
| Attack | Regular Attack: Horizontal left slash |
| Badge Required | |
| Cost | |
| Combination | |
| Attack | Regular Attack: Horizontal right slash |
| Badge Required | |
| Cost | |
| Combination | Hold |
| Attack | Combo Attack: Spin Attack After any Combo Attack, continuing to hold |
| Badge Required | |
| Cost | |
| Combination | |
| Attack | Regular Attack: Horizontal left slash If Kokiri Sword III has not been purchased, this will instead perform a vertical Spin Attack and end the combination chain. |
| Badge Required | |
| Cost | |
| Combination | |
| Attack | Regular Attack: Vertical Spin Attack |
| Badge Required | |
| Cost | |
| Combination | or or or or |
| Attack | Combo Attack: Dash Attack Pressing |
| Badge Required | |
| Cost |
| Combination | Attack | Badge Required | Cost |
|---|---|---|---|
Strong Attack: Spin Attack Tapping X performs a quick Spin Attack, holding for at least one second before releasing increases both damage and radius. | — | — | |
Regular Attack: Diagonal slash | — | — | |
— | — | ||
Combo Attack: Mid-air horizontal slashes Link can perform up to three slashes before falling back to the ground.[4] | — | — | |
Combo Attack: Down Thrust At any point Link is still in the air, the three mid-air slashes can be skipped and moved straight into the Down Thrust.[4] | — | — | |
Regular Attack: Horizontal slash | — | — | |
Combo Attack: Sword Beam Link will jump backwards and then shoot a circular Sword Beam that travels straight ahead for about one second before disappearing. | — | — | |
Regular Attack: Diagonal slash | — | — | |
Combo Attack: Rising Spin Attack | — | — | |
Combo Attack: Mid-air horizontal slashes | — | — | |
Combo Attack: Down Thrust At any point Link is still in the air, the three mid-air slashes can be skipped and moved straight into the Down Thrust. | — | — | |
Regular Attack: Diagonal slash | — | — | |
Regular Attack: Horizontal right slash If Kokiri Sword I has not been purchased, this will instead perform a vertical Spin Attack and end the combination chain. | |||
Regular Attack: Horizontal left slash | |||
Regular Attack: Horizontal right slash | |||
Hold | Combo Attack: Spin Attack After any Combo Attack, continuing to hold | ||
Regular Attack: Horizontal left slash If Kokiri Sword III has not been purchased, this will instead perform a vertical Spin Attack and end the combination chain. | |||
Regular Attack: Vertical Spin Attack | |||
or or or or | Combo Attack: Dash Attack Pressing |
Special Attack
The Hylian Sword's Special Attack is a powerful version of the Spin Attack. The wielder raises the Hylian Sword skyward and charges the sword with some form of power, and then launches into a very large horizontal Spin Attack while dashing forward. This attack is highly effective against a crowd of enemy soldiers in front of Link, given its wide radius and extensive forward range.
Weak Point Smash
Like all Weapon categories in Hyrule Warriors, the Hylian Sword has two different Weak Point Smash attacks, the one used depending on whether the target is a Giant Boss or not. The attack used against Captains and Warriors consists of a series of wide slices in varying directions, followed by an ultra-powerful forward thrust. The Weak Point Smash used against Giant Bosses is a massive leap into the air, followed by a to-the-hilt downward thrust into the Boss's core.
Focus Spirit
The Hylian Sword's Focus Spirit Attack is a single forward thrust that has a relatively high attack range. Like with all Focus Spirit Attack, hitting a Captain, Warrior, or Giant Boss with this thrust will instantly expose that target's Weak Point Gauge for an extended period of time.
If Link's Focus Spirit Gauge is allowed to run dry on its own (without unleashing the Focus Spirit Attack), Link will thrust his Hylian Sword upward and release an explosion of light with him at the center.
Trivia
- The emblem on the shield of the 8-Bit Wooden Sword skin has been changed from the original on the Wooden Shield. The original was a Latin cross; this may have been seen by the Hyrule Warriors developers as too religious for today's general gaming audience, so the emblem was changed to a "plus" sign (+) with a pixel missing in the center.
- Other Warriors make use of the Hylian Swords in certain Adventure Mode battles:
| Other users of the Hylian Swords | |||||||||||||||||||||||
|---|---|---|---|---|---|---|---|---|---|---|---|---|---|---|---|---|---|---|---|---|---|---|---|
|
Nomenclature
| Language | Names | |
|---|---|---|
| This table was generated using translation pages. To request an addition, please contact a staff member with a reference. | ||
Gallery
-
Render of the White Sword from Hyrule Warriors
-
Render of the Magical Sword from Hyrule Warriors
-
Fierce Deity Link wielding the Magical Sword from Hyrule Warriors
-

The Knight's Sword from Hyrule Warriors
-

The White Sword from Hyrule Warriors
-
The Magical Sword from Hyrule Warriors
-

The Knight's Sword's accompanying shield from Hyrule Warriors
-
The White Sword's accompanying shield from Hyrule Warriors
-
The Magical Sword's accompanying shield from Hyrule Warriors
-

Hylian Sword Adventure Mode icon from Hyrule Warriors
-
Link cutting down Bokoblins with the Knight's Sword from Hyrule Warriors
-
The Hylian Sword's third Combo Attack from Hyrule Warriors
-
Link preparing to unleash the Hylian Sword's Special Attack from Hyrule Warriors
-
Link preparing to unleash the Hylian Sword's Focus Spirit Attack from Hyrule Warriors
-
The culmination of Link's Hylian Sword Focus Spirit Attack from Hyrule Warriors
-
The Hylian Sword's Special Attack from Hyrule Warriors
-
Render of the Darkmagic Sword from Hyrule Warriors Legends
-
Link wielding the 8-Bit Wooden Sword in Hyrule Warriors: Definitive Edition
-
Link wielding the Darkmagic Sword in Hyrule Warriors: Definitive Edition


Video Gallery
See Also
References
- ↑ "Hylian Sword" — Smithy (Hyrule Warriors: Definitive Edition)
- ↑ "Hey, Link! What d'you think you're doing with that sword?!" — Trainee (Hyrule Warriors: Definitive Edition)
- ↑ 3.0 3.1 3.2 3.3 "Each added star adds an additional 10 percent attack damage to a weapon." (Hyrule Warriors Legends—Collector's Edition Guide, Prima Games, pg. 8)
- ↑ 4.0 4.1 4.2 4.3 4.4 4.5 4.6 Hyrule Warriors Legends—Collector's Edition Guide, Prima Games, pg. 9