Eldin Canyon: Difference between revisions
No edit summary |
TriforceTony (talk | contribs) |
||
| (45 intermediate revisions by 11 users not shown) | |||
| Line 1: | Line 1: | ||
{{ | {{Infobox Location | ||
| | |image= | ||
| | {{Media | ||
|Screenshot BotW= File:BotW Eldin Canyon.png | |||
|Screenshot TotK= File:TotK Eldin Canyon.png | |||
|Map BotW= File:BotW Eldin Canyon Map Area.png | |||
}} | |||
|caption= | |caption= | ||
|game= | |pronunciation= | ||
|other= | |game= BotW, TotK | ||
|inhab= | |other= HWAoC | ||
|inhab= {{Plural|Series|Goron|link}} | |||
|items= | |items= | ||
| | |services= | ||
|season= | |season= | ||
| | |temperature= | ||
|counter= | |||
{{List| | |||
{{Term|Series|Eldin Canyon Depths|link}} {{Small|({{Term|TotK|Depths|link}})}}, | |||
{{Term|Series|Eldin Canyon Sky|link}} {{Small|({{Term|TotK|Sky|link}})}} | |||
}} | }} | ||
'''Eldin Canyon''' | |theme= | ||
|related= {{List|{{Term|Series|Death Mountain|link}}, {{Term|Series|Eldin Mountains|link}}}} | |||
{{ | |strategy= | ||
{{ | |zu= | ||
}} | |||
{{Term/Store|Eldin Canyon||Series, BotW, TotK, HWAoC}} is a recurring location in {{TLoZ|Series}}.{{Exp Game|BotW, TotK, HWAoC}}<ref>{{Cite|{{Big|'''Eldin Canyon'''}}|Map|BotW}}</ref><ref>{{Cite|{{Big|'''Eldin Canyon'''}}|Map|TotK}}</ref><ref>{{Cite|{{Big|{{Color|HWAoC Map|'''Eldin Canyon'''}}}}|Map|HWAoC}}</ref> | |||
==Features and Overview== | ==Features and Overview== | ||
==={{BotW|-}}=== | |||
Eldin Canyon is a vast area within [[Eldin (Region)|Eldin]], comprising of almost the entirety of the Region. The Canyon primarily covers southern and central Eldin, and stretches to the far northeast along the ends of [[Hyrule]]. The southern portion of the Canyon is a valley with rolling foothills that borders along [[Great Hyrule Forest]], [[Hyrule Field]], and northern [[Lanayru (Region)|Lanayru]]. A road paves through this section before forking between Eldin proper and Lanayru. This winding road then leads to the [[Foothill Stable]] before continuing into central Eldin. The valley is initially even and partially wooded, especially toward the west, however, further north it increasingly turns more rugged and mountainous closer to central Eldin. | Eldin Canyon is a vast area within [[Eldin (Region)|Eldin]], comprising of almost the entirety of the Region. The Canyon primarily covers southern and central Eldin, and stretches to the far northeast along the ends of [[Hyrule]]. The southern portion of the Canyon is a valley with rolling foothills that borders along [[Great Hyrule Forest]], [[Hyrule Field]], and northern [[Lanayru (Region)|Lanayru]]. A road paves through this section before forking between Eldin proper and Lanayru. This winding road then leads to the [[Foothill Stable]] before continuing into central Eldin. The valley is initially even and partially wooded, especially toward the west, however, further north it increasingly turns more rugged and mountainous closer to central Eldin. | ||
| Line 25: | Line 37: | ||
Throughout Eldin Canyon, a number of bodies of water close to Death Mountain are [[Hot Spring]]s, and will gradually recover Link's health as he stands or swims in them. | Throughout Eldin Canyon, a number of bodies of water close to Death Mountain are [[Hot Spring]]s, and will gradually recover Link's health as he stands or swims in them. | ||
=== | ====Climates==== | ||
{{ | {{Collapsible | ||
|header= Eldin Level 0 Climate | |||
|frame= false | |||
|collapse= true | |||
|content= | |||
{{(!}} class="wikitable" | |||
{{!}}+ | |||
!colspan=2{{!}} Climate Data | |||
{{!-}} | |||
{{!}} | |||
[[File:BotW Eldin Canyon Eldin Level 0 Climate Area.png|thumb|center|Map boundaries of the "Eldin level 0" climate within {{Term|BotW|Eldin Canyon}}]] | |||
=== | {{!}}style="padding: 0px 50px 0px 50px;"{{!}} | ||
{{ | {{(!}} class="wikitable" style="margin: auto auto" | ||
{{!}}+ Weather | |||
{{!-}} | |||
! Weather Type !! Chance | |||
{{!-}} | |||
{{!}} Clear {{!!}} 100% | |||
{{!-}} | |||
{{!}} Cloudy {{!!}} 0% | |||
{{!-}} | |||
{{!}} Rain/Snow {{!!}} 0% | |||
{{!-}} | |||
{{!}} Heavy Rain/Snow {{!!}} 0% | |||
{{!-}} | |||
{{!}} Storm {{!!}} 0% | |||
{{!)}} | |||
=== | {{!-}} | ||
{{ | {{!}}style="padding: 25px 50px 25px 50px;" colspan=2{{!}} | ||
{{(!}} class="wikitable" style="margin: auto auto" | |||
{{!}}+ Temperature vs. Altitude | |||
{{!-}} | |||
! Altitude !! Temperature (Day) !! Temperature (Night) | |||
{{!-}} | |||
{{!}} 0m+ {{!!}} 77.0 °F{{Exp|25.0 °C}} {{!!}} 73.4 °F{{Exp|23.0 °C}} | |||
{{!-}} | |||
{{!}} 100m+ {{!!}} 77.0 °F{{Exp|25.0 °C}} {{!!}} 73.4 °F{{Exp|23.0 °C}} | |||
{{!-}} | |||
{{!}} 200m+ {{!!}} 77.0 °F{{Exp|25.0 °C}} {{!!}} 73.4 °F{{Exp|23.0 °C}} | |||
{{!-}} | |||
{{!}} 300m+ {{!!}} 77.0 °F{{Exp|25.0 °C}} {{!!}} 73.4 °F{{Exp|23.0 °C}} | |||
{{!-}} | |||
{{!}} 400m+ {{!!}} 102.2 °F{{Exp|39.0 °C}} {{!!}} 98.6 °F{{Exp|37.0 °C}} | |||
{{!-}} | |||
{{!}} 500m+ {{!!}} 102.2 °F{{Exp|39.0 °C}} {{!!}} 98.6 °F{{Exp|37.0 °C}} | |||
{{!-}} | |||
{{!}} 600m+ {{!!}} 102.2 °F{{Exp|39.0 °C}} {{!!}} 98.6 °F{{Exp|37.0 °C}} | |||
{{!-}} | |||
{{!}} 700m+ {{!!}} 77.0 °F{{Exp|25.0 °C}} {{!!}} 77.0 °F{{Exp|25.0 °C}} | |||
{{!-}} | |||
{{!}} 800m+ {{!!}} 73.4 °F{{Exp|23.0 °C}} {{!!}} 73.4 °F{{Exp|23.0 °C}} | |||
{{!-}} | |||
{{!}} 900m+ {{!!}} 68.0 °F{{Exp|20.0 °C}} {{!!}} 64.4 °F{{Exp|18.0 °C}} | |||
{{!-}} | |||
{{!}} 1000m+ {{!!}} 64.4 °F{{Exp|18.0 °C}} {{!!}} 62.6 °F{{Exp|17.0 °C}} | |||
{{!)}} | |||
{{!)}} | |||
{{ | }} | ||
=== | {{Collapsible | ||
{{ | |header= Eldin Level 1 Climate | ||
|frame= false | |||
|collapse= true | |||
|content= | |||
{{(!}} class="wikitable" | |||
{{!}}+ | |||
!colspan=2{{!}} Climate Data | |||
{{!-}} | |||
{{!}} | |||
[[File:BotW Eldin Canyon Eldin Level 1 Climate Area.png|thumb|center|Map boundaries of the "Eldin level 1" climate within {{Term|BotW|Eldin Canyon}}]] | |||
=== | {{!}}style="padding: 0px 50px 0px 50px;"{{!}} | ||
{{ | {{(!}} class="wikitable" style="margin: auto auto" | ||
{{!}}+ Weather | |||
{{!-}} | |||
! Weather Type !! Chance | |||
{{!-}} | |||
{{!}} Clear {{!!}} 100% | |||
{{!-}} | |||
{{!}} Cloudy {{!!}} 0% | |||
{{!-}} | |||
{{!}} Rain/Snow {{!!}} 0% | |||
{{!-}} | |||
{{!}} Heavy Rain/Snow {{!!}} 0% | |||
{{!-}} | |||
{{!}} Storm {{!!}} 0% | |||
{{!)}} | |||
=== | {{!-}} | ||
{{ | {{!}}style="padding: 25px 50px 25px 50px;" colspan=2{{!}} | ||
{{(!}} class="wikitable" style="margin: auto auto" | |||
{{!}}+ Temperature vs. Altitude | |||
{{!-}} | |||
! Altitude !! Temperature (Day) !! Temperature (Night) | |||
{{!-}} | |||
{{!}} 0m+ {{!!}} 102.2 °F{{Exp|39.0 °C}} {{!!}} 102.2 °F{{Exp|39.0 °C}} | |||
{{!-}} | |||
{{!}} 100m+ {{!!}} 102.2 °F{{Exp|39.0 °C}} {{!!}} 102.2 °F{{Exp|39.0 °C}} | |||
{{!-}} | |||
{{!}} 200m+ {{!!}} 102.2 °F{{Exp|39.0 °C}} {{!!}} 102.2 °F{{Exp|39.0 °C}} | |||
{{!-}} | |||
{{!}} 300m+ {{!!}} 102.2 °F{{Exp|39.0 °C}} {{!!}} 102.2 °F{{Exp|39.0 °C}} | |||
{{!-}} | |||
{{!}} 400m+ {{!!}} 102.2 °F{{Exp|39.0 °C}} {{!!}} 102.2 °F{{Exp|39.0 °C}} | |||
{{!-}} | |||
{{!}} 500m+ {{!!}} 102.2 °F{{Exp|39.0 °C}} {{!!}} 102.2 °F{{Exp|39.0 °C}} | |||
{{!-}} | |||
{{!}} 600m+ {{!!}} 102.2 °F{{Exp|39.0 °C}} {{!!}} 102.2 °F{{Exp|39.0 °C}} | |||
{{!-}} | |||
{{!}} 700m+ {{!!}} 82.4 °F{{Exp|28.0 °C}} {{!!}} 78.8 °F{{Exp|26.0 °C}} | |||
{{!-}} | |||
{{!}} 800m+ {{!!}} 77.0 °F{{Exp|25.0 °C}} {{!!}} 75.2 °F{{Exp|24.0 °C}} | |||
{{!-}} | |||
{{!}} 900m+ {{!!}} 68.0 °F{{Exp|20.0 °C}} {{!!}} 64.4 °F{{Exp|18.0 °C}} | |||
{{!-}} | |||
{{!}} 1000m+ {{!!}} 64.4 °F{{Exp|18.0 °C}} {{!!}} 62.6 °F{{Exp|17.0 °C}} | |||
{{!)}} | |||
{{!)}} | |||
{{ | }} | ||
=== | {{Collapsible | ||
{{ | |header= Eldin Level 2 Climate | ||
|frame= false | |||
|collapse= true | |||
|content= | |||
{{(!}} class="wikitable" | |||
{{!}}+ | |||
!colspan=2{{!}} Climate Data | |||
{{!-}} | |||
{{!}} | |||
[[File:BotW Eldin Canyon Eldin Level 2 Climate Area.png|thumb|center|Map boundaries of the "Eldin level 2" climate within {{Term|BotW|Eldin Canyon}}]] | |||
=== | {{!}}style="padding: 0px 50px 0px 50px;"{{!}} | ||
{{ | {{(!}} class="wikitable" style="margin: auto auto" | ||
{{!}}+ Weather | |||
{{!-}} | |||
! Weather Type !! Chance | |||
{{!-}} | |||
{{!}} Clear {{!!}} 100% | |||
{{!-}} | |||
{{!}} Cloudy {{!!}} 0% | |||
{{!-}} | |||
{{!}} Rain/Snow {{!!}} 0% | |||
{{!-}} | |||
{{!}} Heavy Rain/Snow {{!!}} 0% | |||
{{!-}} | |||
{{!}} Storm {{!!}} 0% | |||
{{!)}} | |||
{{!-}} | |||
{{!}}style="padding: 25px 50px 25px 50px;" colspan=2{{!}} | |||
{{(!}} class="wikitable" style="margin: auto auto" | |||
{{!}}+ Temperature vs. Altitude | |||
{{!-}} | |||
! Altitude !! Temperature (Day) !! Temperature (Night) | |||
{{!-}} | |||
{{!}} 0m+ {{!!}} 102.2 °F{{Exp|39.0 °C}} {{!!}} 102.2 °F{{Exp|39.0 °C}} | |||
{{!-}} | |||
{{!}} 100m+ {{!!}} 102.2 °F{{Exp|39.0 °C}} {{!!}} 102.2 °F{{Exp|39.0 °C}} | |||
{{!-}} | |||
{{!}} 200m+ {{!!}} 102.2 °F{{Exp|39.0 °C}} {{!!}} 102.2 °F{{Exp|39.0 °C}} | |||
{{!-}} | |||
{{!}} 300m+ {{!!}} 102.2 °F{{Exp|39.0 °C}} {{!!}} 102.2 °F{{Exp|39.0 °C}} | |||
{{!-}} | |||
{{!}} 400m+ {{!!}} 102.2 °F{{Exp|39.0 °C}} {{!!}} 102.2 °F{{Exp|39.0 °C}} | |||
{{!-}} | |||
{{!}} 500m+ {{!!}} 102.2 °F{{Exp|39.0 °C}} {{!!}} 102.2 °F{{Exp|39.0 °C}} | |||
{{!-}} | |||
{{!}} 600m+ {{!!}} 102.2 °F{{Exp|39.0 °C}} {{!!}} 102.2 °F{{Exp|39.0 °C}} | |||
{{!-}} | |||
{{!}} 700m+ {{!!}} 82.4 °F{{Exp|28.0 °C}} {{!!}} 78.8 °F{{Exp|26.0 °C}} | |||
{{!-}} | |||
{{!}} 800m+ {{!!}} 77.0 °F{{Exp|25.0 °C}} {{!!}} 75.2 °F{{Exp|24.0 °C}} | |||
{{!-}} | |||
{{!}} 900m+ {{!!}} 68.0 °F{{Exp|20.0 °C}} {{!!}} 64.4 °F{{Exp|18.0 °C}} | |||
{{!-}} | |||
{{!}} 1000m+ {{!!}} 64.4 °F{{Exp|18.0 °C}} {{!!}} 62.6 °F{{Exp|17.0 °C}} | |||
{{!)}} | |||
{{!)}} | |||
{{ | }} | ||
=== | {{Collapsible | ||
{{ | |header= North Hyrule Plain Climate | ||
|frame= false | |||
|collapse= true | |||
|content= | |||
{{(!}} class="wikitable" | |||
{{!}}+ | |||
!colspan=2{{!}} Climate Data | |||
{{!-}} | |||
{{!}} | |||
[[File:BotW Eldin Canyon Hyrule Plain Climate Area.png|thumb|center|Map boundaries of the "Hyrule north plain" climate within {{Term|BotW|Eldin Canyon}}]] | |||
=== | {{!}}style="padding: 0px 50px 0px 50px;"{{!}} | ||
{{ | {{(!}} class="wikitable" style="margin: auto auto" | ||
{{!}}+ Weather | |||
{{!-}} | |||
! Weather Type !! Chance | |||
{{!-}} | |||
{{!}} Clear {{!!}} 40% | |||
{{!-}} | |||
{{!}} Cloudy {{!!}} 30% | |||
{{!-}} | |||
{{!}} Rain/Snow {{!!}} 15% | |||
{{!-}} | |||
{{!}} Heavy Rain/Snow {{!!}} 5% | |||
{{!-}} | |||
{{!}} Storm {{!!}} 10% | |||
{{!)}} | |||
=== | {{!-}} | ||
{{ | {{!}}style="padding: 25px 50px 25px 50px;" colspan=2{{!}} | ||
{{(!}} class="wikitable" style="margin: auto auto" | |||
{{!}}+ Temperature vs. Altitude | |||
{{!-}} | |||
! Altitude !! Temperature (Day) !! Temperature (Night) | |||
{{!-}} | |||
{{!}} 0m+ {{!!}} 77.0 °F{{Exp|25.0 °C}} {{!!}} 73.4 °F{{Exp|23.0 °C}} | |||
{{!-}} | |||
{{!}} 100m+ {{!!}} 73.4 °F{{Exp|23.0 °C}} {{!!}} 68.0 °F{{Exp|20.0 °C}} | |||
{{!-}} | |||
{{!}} 200m+ {{!!}} 68.0 °F{{Exp|20.0 °C}} {{!!}} 62.6 °F{{Exp|17.0 °C}} | |||
{{!-}} | |||
{{!}} 300m+ {{!!}} 53.6 °F{{Exp|12.0 °C}} {{!!}} 44.6 °F{{Exp|7.0 °C}} | |||
{{!-}} | |||
{{!}} 400m+ {{!!}} 37.4 °F{{Exp|3.0 °C}} {{!!}} 30.2 °F{{Exp|-1.0 °C}} | |||
{{!-}} | |||
{{!}} 500m+ {{!!}} 19.4 °F{{Exp|-7.0 °C}} {{!!}} 15.8 °F{{Exp|-9.0 °C}} | |||
{{!-}} | |||
{{!}} 600m+ {{!!}} 8.6 °F{{Exp|-13.0 °C}} {{!!}} 5.0 °F{{Exp|-15.0 °C}} | |||
{{!-}} | |||
{{!}} 700m+ {{!!}} -18.4 °F{{Exp|-28.0 °C}} {{!!}} -18.4 °F{{Exp|-28.0 °C}} | |||
{{!-}} | |||
{{!}} 800m+ {{!!}} -18.4 °F{{Exp|-28.0 °C}} {{!!}} -18.4 °F{{Exp|-28.0 °C}} | |||
{{!-}} | |||
{{!}} 900m+ {{!!}} -18.4 °F{{Exp|-28.0 °C}} {{!!}} -19.1 °F{{Exp|-28.4 °C}} | |||
{{!-}} | |||
{{!}} 1000m+ {{!!}} -18.4 °F{{Exp|-28.0 °C}} {{!!}} -19.1 °F{{Exp|-28.4 °C}} | |||
{{!)}} | |||
{{!)}} | |||
{{ | }} | ||
=== | ====Areas==== | ||
{{ | {{Gallery List|Locations | ||
' | |BotW= Abandoned North Mine, Bridge of Eldin, Broca Island, Cephla Lake, Darb Pond, Daqa Koh Shrine, Darunia Lake, Death Caldera, East Gut Check Rock, Eldin Eastern Highlands, Eldin Tower, Eldin's Flank, Foothill Stable, Gero Pond, Golow River, Gorae Torr Shrine, Gorko Lake, Gorko Tunnel, Goro Cove, Goron City, Goron Hot Springs, Goronbi Lake, Goronbi Lake North, Goronbi River, Goronbi River West, Gortram Cliff, Gut Check Rock, Isle of Rabac, Kamia Omuna Shrine, Kayra Mah Shrine, Lake Darman, Lake Ferona, Lake Intenoch, Maw of Death Mountain, Medingo Pool, Mirro Shaz Shrine, Mo'a Keet Shrine, Mountain Road, Pico Pond, Qua Raym Shrine, Rinu Honika Shrine, Sah Dahaj Shrine, Shadow Hamlet Ruins, Sharo Lun Shrine, Shora Hah Shrine, Southern Mine, Stolock Bridge, Tah Muhl Shrine, Ternio Trail, Trilby Plain, Trilby Valley, Vault, Woodland Stable, Zelo Pond | ||
}} | |||
=== | ==={{TotK|-}}=== | ||
{{ | {{TotK Quest/Container|width= 46rem| | ||
{{TotK Quest | |||
|name= Bring Peace to Akkala! | |||
|type= Side Adventure | |||
|giver= [[Toren]] | |||
|location= Eldin Canyon | |||
}} | |||
{{TotK Quest | |||
|name= Bring Peace to Eldin! | |||
|type= Side Adventure | |||
|giver= [[Toren]] | |||
|location= Eldin Canyon | |||
}} | |||
{{TotK Quest | |||
|name= Cash In on Ripened Flint | |||
|type= Side Quest | |||
|giver= [[Gomo]] | |||
|location= [[Bedrock Bistro]] | |||
}} | |||
{{TotK Quest | |||
|name= For Our Princess! | |||
|type= Side Adventure | |||
|giver= [[Penn]] | |||
|location= [[Foothill Stable]] | |||
}} | |||
{{TotK Quest | |||
|name= Meat for Meat | |||
|type= Side Quest | |||
|giver= [[Mezer]] | |||
|location= [[Bedrock Bistro]] | |||
}} | |||
{{TotK Quest | |||
|name= Misko's Cave of Chests | |||
|type= Side Quest | |||
|giver= [[Domidak]] | |||
|location= [[Cephla Lake Cave]] | |||
}} | |||
{{TotK Quest | |||
|name= Misko's Treasure of Awakening I | |||
|type= Side Quest | |||
|giver= [[Misko's Letter]] | |||
|location= [[Goronbi River Cave]] | |||
}} | |||
{{TotK Quest | |||
|name= Misko's Treasure: Heroines Manuscript | |||
|type= Side Quest | |||
|giver= [[Domidak]] | |||
|location= [[Cephla Lake Cave]] | |||
}} | |||
{{TotK Quest | |||
|name= Misko's Treasure: Pirate Manuscript | |||
|type= Side Quest | |||
|giver= [[Domidak]] | |||
|location= [[Cephla Lake Cave]] | |||
}} | |||
{{TotK Quest | |||
|name= Misko's Treasure: The Fierce Deity | |||
|type= Side Quest | |||
|giver= [[Misko's Letter]] | |||
|location= [[Cephla Lake Cave]] | |||
}} | |||
{{TotK Quest | |||
|name= Misko's Treasure: Twins Manuscript | |||
|type= Side Quest | |||
|giver= [[Domidak]] | |||
|location= [[Cephla Lake Cave]] | |||
}} | |||
{{TotK Quest | |||
|name= Regional Phenomena | |||
|type= Main Quest | |||
|giver= [[Purah]] | |||
|location= [[Lookout Landing]] | |||
}} | |||
{{TotK Quest | |||
|name= Rock Roast or Dust | |||
|type= Side Quest | |||
|giver= [[Cooke]] | |||
|location= [[Bedrock Bistro]] | |||
}} | |||
{{TotK Quest | |||
|name= Teach Me a Lesson II | |||
|type= Side Quest | |||
|giver= [[Symin]] | |||
|location= [[Hateno Village]] | |||
}} | |||
{{TotK Quest | |||
|name= The Death Caldera Crystal | |||
|type= Shrine Quest | |||
|giver= [[Mysterious Voice]] | |||
|location= [[Death Caldera]] | |||
}} | |||
{{TotK Quest | |||
|name= The Hunt for Bubbul Gems! | |||
|type= Side Adventure | |||
|giver= [[Koltin]] | |||
|location= Eldin Canyon | |||
}} | |||
{{TotK Quest | |||
|name= The Lake Intenoch Cave Crystal | |||
|type= Shrine Quest | |||
|giver= [[Mysterious Voice]] | |||
|location= [[Lake Intenoch Cave]] | |||
}} | |||
{{TotK Quest | |||
|name= The Search for Koltin | |||
|type= Side Adventure | |||
|giver= [[Koltin]] | |||
|location= Eldin Canyon | |||
}} | |||
{{TotK Quest | |||
|name= Yunobo of Goron City | |||
|type= Main Quest | |||
|giver= [[Yunobo]] | |||
|location= [[Goron City]] | |||
}} | |||
}} | |||
{{Stub|TotK}} | |||
Following the dormancy of Death Mountain, the lava flows formerly present throughout Eldin Canyon have solidified into igneous rock and the majority of the canyon is now safe to travel through. Only the caves are hot enough to require Flame Resistance. | |||
=== | ====Areas==== | ||
{{ | {{Gallery List|Locations | ||
|TotK= Bedrock Bistro, Bridge of Eldin, Broca Island, Cephla Lake, Cephla Lake Cave, Darb Pond, Darunia Lake, Death Mountain Foothill Cave, East Gut Check Rock, East Restaurant Cave, Eldin Canyon Skyview Tower, Eldin Eastern Highlands, Eldin's Flank, Foothill Monster Den, Foothill Stable, Foothill Stable Well, Gero Pond, Golow River, Gorko Lake, Gorko Tunnel, Goro Cove, Goron City, Goron Hot Springs, Goronbi Lake, Goronbi Lake North, Goronbi River, Goronbi River Cave, Goronbi River West, Gortram Cliff, Gut Check Rock, Isisim Shrine, Isle of Rabac, Isle of Rabac Gallery, Jiotak Shrine, Kimayat Shrine, Lake Darman, Lake Darman Monster Den, Lake Ferona, Lake Ferona Cave, Lake Intenoch, Lake Intenoch Cave, Lizard Lakes, Lizard's Burrow, Maw of Death Mountain, Medingo Pool, Moshapin Shrine, Mountain Road, New Road, North Mine, Pico Pond, Pico Pond Cave, Shadow Hamlet Ruins, Shadow Hamlet Ruins Well, Sibajitak Shrine, Simmerstone Springs, Southern Mine, Stolock Bridge, Ternio Trail, Timawak Shrine, Trilby Plain, Trilby Valley, West Restaurant Cave, Woodland Stable, Woodland Stable Well, YunoboCo HQ, YunoboCo HQ East Cave, YunoboCo HQ South Cave, YunoboCo Mineral Market, YunoboCo Storage, Zelo Pond | |||
}} | |||
=== | ===={{Plural|TotK|Material}}==== | ||
{{ | {{Gallery List|Materials | ||
|TotK= Sundelion | |||
}} | |||
=== | ===={{Plural|TotK|Treasure Chest}}==== | ||
{{ | {{Treasure Chests|game= TotK | ||
|- | |||
| Stone Chest | |||
| Large Zonai Charge | |||
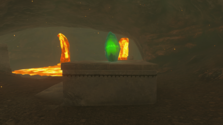
{{ | | 1253, 1248, 0386 | ||
| On the {{Term|TotK|Sky Island|link}} above the road north of {{Term|TotK|Pico Pond|link}} | |||
}} | |||
{{ | |||
{{ | |||
=== | ==Other Appearances== | ||
{{ | ==={{HWAoC|-}}=== | ||
{{Noncanon|Start}} | |||
{{Stub|HWAoC}} | |||
{{Noncanon|End}} | |||
== | ==Nomenclature== | ||
{{ | {{Nomenclature}} | ||
== | ==See Also== | ||
{{ | * {{Term|Series|Death Mountain|link}} | ||
* {{Term|Series|Eldin (Region)|link}} | |||
* {{Term|Series|Eldin Canyon Depths|link}} | |||
* {{Term|Series|Eldin Canyon Sky|link}} | |||
{{ | * {{Term|Series|Eldin Mountains|link}} | ||
{{ | |||
{{Ref}} | {{Ref}} | ||
{{Categories | |||
|Eldin, Eldin Canyon, Canyons | |||
|locations= BotW, TotK, HWAoC | |||
}} | |||
Latest revision as of 18:43, 19 March 2024
Eldin Canyon is a recurring location in The Legend of Zelda series.(BotW | TotK | HWAoC)[1][2][3]
Features and Overview
Breath of the Wild
Eldin Canyon is a vast area within Eldin, comprising of almost the entirety of the Region. The Canyon primarily covers southern and central Eldin, and stretches to the far northeast along the ends of Hyrule. The southern portion of the Canyon is a valley with rolling foothills that borders along Great Hyrule Forest, Hyrule Field, and northern Lanayru. A road paves through this section before forking between Eldin proper and Lanayru. This winding road then leads to the Foothill Stable before continuing into central Eldin. The valley is initially even and partially wooded, especially toward the west, however, further north it increasingly turns more rugged and mountainous closer to central Eldin.
The central portion of Eldin Canyon has harder terrain with steep cliffs and deep gorges. Further to the north and closer to Death Mountain, the landscape turns more perilous due to the area's high volcanic activity. Eruptions caused by Death Mountain have formed multiple bodies and rivers of lava around the area, as such as Darunia Lake and the moat that surrounds Death Mountain. Due to the intense climate, the Temperature grows exceedingly hot here, and puts Link in danger of catching fire along with any wooden Gear that is equipped. The high Temperature can be remedied either by consuming Food or an Elixir that grants fire resistance, or by wearing any one of the Flamebreaker Set. The road that paves through central Eldin Canyon eventually leads to Goron City, the home of the Gorons, before continuing to the Abandoned North Mine and finally Death Mountain.
The northernmost portion gives way to a mountainous, barren wasteland that has little to no substance. This area borders along the very edge of Hyrule as a steep, bottomless cliff known as Eldin's Flank. Eldin Canyon shares much of this landscape with the Eldin Mountains to the west.
Throughout Eldin Canyon, a number of bodies of water close to Death Mountain are Hot Springs, and will gradually recover Link's health as he stands or swims in them.
Climates
| Climate Data | |||||||||||||||||||||||||||||||||||||
|---|---|---|---|---|---|---|---|---|---|---|---|---|---|---|---|---|---|---|---|---|---|---|---|---|---|---|---|---|---|---|---|---|---|---|---|---|---|
 |
| ||||||||||||||||||||||||||||||||||||
| |||||||||||||||||||||||||||||||||||||
| Climate Data | |||||||||||||||||||||||||||||||||||||
|---|---|---|---|---|---|---|---|---|---|---|---|---|---|---|---|---|---|---|---|---|---|---|---|---|---|---|---|---|---|---|---|---|---|---|---|---|---|
 |
| ||||||||||||||||||||||||||||||||||||
| |||||||||||||||||||||||||||||||||||||
| Climate Data | |||||||||||||||||||||||||||||||||||||
|---|---|---|---|---|---|---|---|---|---|---|---|---|---|---|---|---|---|---|---|---|---|---|---|---|---|---|---|---|---|---|---|---|---|---|---|---|---|
 |
| ||||||||||||||||||||||||||||||||||||
| |||||||||||||||||||||||||||||||||||||
| Climate Data | |||||||||||||||||||||||||||||||||||||
|---|---|---|---|---|---|---|---|---|---|---|---|---|---|---|---|---|---|---|---|---|---|---|---|---|---|---|---|---|---|---|---|---|---|---|---|---|---|
 |
| ||||||||||||||||||||||||||||||||||||
| |||||||||||||||||||||||||||||||||||||
Areas


Tears of the Kingdom
- Related Quests

|
Bring Peace to Akkala! | |||
| Side Adventure | ||||
Bring Peace to Akkala! | |
|
|
Bring Peace to Eldin! | |||
| Side Adventure | ||||
Bring Peace to Eldin! | |
|
Cash In on Ripened Flint | |||
| Side Quest | ||||
Cash In on Ripened Flint | |
|
For Our Princess! | |||
| Side Adventure | ||||
For Our Princess! | |
|
Meat for Meat | |||
| Side Quest | ||||
Meat for Meat | |
|
Misko's Cave of Chests | |||
| Side Quest | ||||
Misko's Cave of Chests | |
|
Regional Phenomena | |||
| Main Quest | ||||
Regional Phenomena | |

|
Rock Roast or Dust | |||
| Side Quest | ||||
Rock Roast or Dust | |

|
Teach Me a Lesson II | |||
| Side Quest | ||||
Teach Me a Lesson II | |
|
The Death Caldera Crystal | |||
| Shrine Quest | ||||
The Death Caldera Crystal | |
|
The Hunt for Bubbul Gems! | |||
| Side Adventure | ||||
The Hunt for Bubbul Gems! | |
|
|
The Search for Koltin | |||
| Side Adventure | ||||
The Search for Koltin | |
|
Yunobo of Goron City | |||
| Main Quest | ||||
Yunobo of Goron City | |
|
|
Bring Peace to Akkala! | |||
| Side Adventure | ||||
Bring Peace to Akkala! | |
|
|
Bring Peace to Eldin! | |||
| Side Adventure | ||||
Bring Peace to Eldin! | |
|
|
Cash In on Ripened Flint | |||
| Side Quest | ||||
Cash In on Ripened Flint | |
|
|
For Our Princess! | |||
| Side Adventure | ||||
For Our Princess! | |
|
|
Meat for Meat | |||
| Side Quest | ||||
Meat for Meat | |
|
|
Misko's Cave of Chests | |||
| Side Quest | ||||
Misko's Cave of Chests | |
|
|
Regional Phenomena | |||
| Main Quest | ||||
Regional Phenomena | |
|
|
Rock Roast or Dust | |||
| Side Quest | ||||
Rock Roast or Dust | |
|
|
Teach Me a Lesson II | |||
| Side Quest | ||||
Teach Me a Lesson II | |
|
|
The Death Caldera Crystal | |||
| Shrine Quest | ||||
The Death Caldera Crystal | |
|
|
The Hunt for Bubbul Gems! | |||
| Side Adventure | ||||
The Hunt for Bubbul Gems! | |
|
|
The Search for Koltin | |||
| Side Adventure | ||||
The Search for Koltin | |
|
|
Yunobo of Goron City | |||
| Main Quest | ||||
Yunobo of Goron City | |
Following the dormancy of Death Mountain, the lava flows formerly present throughout Eldin Canyon have solidified into igneous rock and the majority of the canyon is now safe to travel through. Only the caves are hot enough to require Flame Resistance.
Areas


Materials

Treasure Chests
| Treasure Chest | |
|---|---|
| Contents | |
| Coordinates | 1253, 1248, 0386 |
| Notes | On the Sky Island above the road north of Pico Pond |

| Treasure Chest | Contents | Coordinates | Notes |
|---|---|---|---|
1253, 1248, 0386 | On the Sky Island above the road north of Pico Pond |
Other Appearances
Hyrule Warriors: Age of Calamity
Nomenclature
| Language | Names | Meanings |
|---|---|---|
Japanese | オルディンきょうこく峡谷 (TotK) | |
ChineseTR | 奧爾汀峽谷 (Àoěrtīng xiágǔ) (TotK) | |
ChineseSI | 奥尔汀峡谷 (Àoěrtīng xiágǔ) (TotK) | |
Dutch | Eldin-kloof (HWAoC)[5] | Same as English. |
FrenchCA | Ravin d'Ordinn (TotK) | |
FrenchEU | Ravin d'Ordinn (TotK) | |
German | Schlucht von Eldin (TotK | HWAoC)[4] | |
Italian | Valle di Oldin (TotK) | |
Korean | 올딘 협곡 (Oldin hyeopgok) (TotK) | Same as English. |
SpanishEU | Valle de Eldin (TotK) | |
| This table was generated using translation pages. To request an addition, please contact a staff member with a reference. | ||
See Also
References
- ↑ "Eldin Canyon" — Map (Breath of the Wild)
- ↑ "Eldin Canyon" — Map (Tears of the Kingdom)
- ↑ "Eldin Canyon" — Map (Hyrule Warriors: Age of Calamity)
- ↑ "Schlucht von Eldin" — Map (Hyrule Warriors: Age of Calamity)
- ↑ "Eldin-kloof" — Map (Hyrule Warriors: Age of Calamity)