Locations in Ocarina of Time: Difference between revisions
Jump to navigation
Jump to search
TriforceTony (talk | contribs) |
TriforceTony (talk | contribs) No edit summary |
||
| Line 13: | Line 13: | ||
<gallery widths="150px" heights"150px"> | <gallery widths="150px" heights"150px"> | ||
File:OoT Death Mountain.png|{{Term|OoT|Death Mountain|link}} | File:OoT Death Mountain.png|{{Term|OoT|Death Mountain|link}} | ||
File:Gerudo Valley. | File:OoT Gerudo Valley.png|{{Term|OoT|Gerudo Valley|link}} | ||
File:OoT Hyrule Castle.png|{{Term|OoT|Hyrule Castle|link}} | File:OoT Hyrule Castle.png|{{Term|OoT|Hyrule Castle|link}} | ||
File:OoT Hyrule Castle Town.png|{{Term|OoT|Hyrule Castle Town|link}} | File:OoT Hyrule Castle Town.png|{{Term|OoT|Hyrule Castle Town|link}} | ||
File:Hyrule | File:OoT Hyrule Field.png|{{Term|OoT|Hyrule Field|link}} | ||
File: | File:OoT Kakariko Village.png|{{Term|OoT|Kakariko Village|link}} | ||
File: | File:OoT Kokiri Forest.png|{{Term|OoT|Kokiri Forest|link}} | ||
File: | File:OoT Lake Hylia.png|{{Term|OoT|Lake Hylia|link}} | ||
File:OoT Lost Woods.png|{{Term|OoT|Lost Woods|link}} | File:OoT Lost Woods.png|{{Term|OoT|Lost Woods|link}} | ||
File: | File:OoT Zora's Domain.png|{{Term|OoT|Zora's Domain|link}} | ||
</gallery> | </gallery> | ||
| Line 27: | Line 27: | ||
;{{Term|OoT|Child Era}} | ;{{Term|OoT|Child Era}} | ||
<gallery widths="150px" heights="150px"> | <gallery widths="150px" heights="150px"> | ||
File: | File:OoT Lon Lon Ranch.png|{{Term|OoT|Lon Lon Ranch|link}} | ||
File:OoT Secret Grotto.png|{{Term|OoT|Secret Grotto|link}} | File:OoT Secret Grotto.png|{{Term|OoT|Secret Grotto|link}} | ||
</gallery> | </gallery> | ||
| Line 33: | Line 33: | ||
;{{Term|OoT|Adult Era}} | ;{{Term|OoT|Adult Era}} | ||
<gallery widths="150px" heights="150px"> | <gallery widths="150px" heights="150px"> | ||
File: | File:OoT Lon Lon Ranch.png|{{Term|OoT|Lon Lon Ranch|link}}<p>{{Small|{{Term|OoT|Ingo Ranch|link|display=Ingo Ranch}}}}</p> | ||
File:OoT Secret Grotto.png|{{Term|OoT|Secret Grotto|link}} | File:OoT Secret Grotto.png|{{Term|OoT|Secret Grotto|link}} | ||
</gallery> | </gallery> | ||
| Line 66: | Line 66: | ||
File:OoT Bazaar.png|{{Term|OoT|Bazaar|link}} | File:OoT Bazaar.png|{{Term|OoT|Bazaar|link}} | ||
File:OoT Bombchu Bowling Alley.png|{{Term|OoT|Bombchu Bowling Alley|link}} | File:OoT Bombchu Bowling Alley.png|{{Term|OoT|Bombchu Bowling Alley|link}} | ||
File: | File:OoT Bombchu Shop.png|{{Term|OoT|Bombchu Shop|link}} | ||
File:OoT Castle Gate.png|{{Term|OoT|Castle Gate|link}} | File:OoT Castle Gate.png|{{Term|OoT|Castle Gate|link}} | ||
File:Happy Mask Shop. | File:OoT Happy Mask Shop.png|{{Term|OoT|Happy Mask Shop|link}} | ||
File: | File:OoT Market.png|{{Term|OoT|Market|link}} | ||
File:OoT Medicine Shop.png|{{Term|OoT|Medicine Shop|link}} | File:OoT Medicine Shop.png|{{Term|OoT|Medicine Shop|link}} | ||
File:OoT Messy Guard Station.png|{{Term|OoT|Messy Guard Station|link}} | File:OoT Messy Guard Station.png|{{Term|OoT|Messy Guard Station|link}} | ||
File:OoT Pooch Lady's House.png|{{Term|OoT|Pooch Lady's House|link}} | File:OoT Pooch Lady's House.png|{{Term|OoT|Pooch Lady's House|link}} | ||
File:OoT Shooting Gallery.png|{{Term|OoT|Shooting Gallery|link}} | File:OoT Shooting Gallery.png|{{Term|OoT|Shooting Gallery|link}} | ||
File: | File:OoT Temple of Time.png|{{Term|OoT|Temple of Time|link}} | ||
File:OoT Treasure Chest Game.png|{{Term|OoT|Treasure Chest Shop|link}}<p>{{Small|({{Term|OoT|Treasure Chest Contest|link|display=Treasure Chest Contest}})}}</p><p>{{Small|({{Term|OoT|Treasure Box Shop|link|display=Treasure Box Shop}})}}</p> | File:OoT Treasure Chest Game.png|{{Term|OoT|Treasure Chest Shop|link}}<p>{{Small|({{Term|OoT|Treasure Chest Contest|link|display=Treasure Chest Contest}})}}</p><p>{{Small|({{Term|OoT|Treasure Box Shop|link|display=Treasure Box Shop}})}}</p> | ||
</gallery> | </gallery> | ||
| Line 88: | Line 88: | ||
==={{Term|OoT|Kokiri Forest}}=== | ==={{Term|OoT|Kokiri Forest}}=== | ||
<gallery widths="150px" heights="150px"> | <gallery widths="150px" heights="150px"> | ||
File: | File:OoT Forest Training Center.png|{{Term|OoT|Forest Training Center|link}} | ||
File:OoT Great Deku Tree's Meadow.png|{{Term|OoT|Great Deku Tree's Meadow|link}} | File:OoT Great Deku Tree's Meadow.png|{{Term|OoT|Great Deku Tree's Meadow|link}} | ||
File:OoT Hole of "Z".png|{{Term|OoT|Hole of "Z"|link}} | File:OoT Hole of "Z".png|{{Term|OoT|Hole of "Z"|link}} | ||
File:OoT House of the Know-It-All Bros. Interior.png|{{Term|OoT|House of the Know-It-All Bros.|link}} | File:OoT House of the Know-It-All Bros. Interior.png|{{Term|OoT|House of the Know-It-All Bros.|link}} | ||
File:OoT House of the Twins.png|{{Term|OoT|House of the Twins|link}} | File:OoT House of the Twins.png|{{Term|OoT|House of the Twins|link}} | ||
File:Inside the Deku Tree.png|{{Term|OoT|Inside the Deku Tree|link}} | File:OoT Inside the Deku Tree.png|{{Term|OoT|Inside the Deku Tree|link}} | ||
File: | File:OoT Kokiri Shop.png|{{Term|OoT|Kokiri Shop|link}} | ||
File:OoT Link's House.png|{{Term|OoT|Link's House|link}} | File:OoT Link's House.png|{{Term|OoT|Link's House|link}} | ||
File:OoT Mido's House Interior.png|{{Term|OoT|Mido's House|link}} | File:OoT Mido's House Interior.png|{{Term|OoT|Mido's House|link}} | ||
| Line 103: | Line 103: | ||
<gallery widths="150px" heights="150px"> | <gallery widths="150px" heights="150px"> | ||
File:OoT Fairy Fountain.png|{{Term|OoT|Fairy Fountain|link}} | File:OoT Fairy Fountain.png|{{Term|OoT|Fairy Fountain|link}} | ||
File: | File:OoT Forest Stage.png|{{Term|OoT|Forest Stage|link}} | ||
File:OoT Forest Temple.png|{{Term|OoT|Forest Temple|link}} | File:OoT Forest Temple.png|{{Term|OoT|Forest Temple|link}} | ||
File: | File:OoT Sacred Forest Meadow.png|{{Term|OoT|Sacred Forest Meadow|link}} | ||
</gallery> | </gallery> | ||
| Line 111: | Line 111: | ||
;{{Term|OoT|Child Era}} | ;{{Term|OoT|Child Era}} | ||
<gallery widths="150px" heights="150px"> | <gallery widths="150px" heights="150px"> | ||
File: | File:OoT Kakariko Windmill.png|{{Term|OoT|Kakariko Windmill|link}} | ||
File:OoT Bottom of the Well.png|{{Term|OoT|Bottom of the Well|link}} | File:OoT Bottom of the Well.png|{{Term|OoT|Bottom of the Well|link}} | ||
File:OoT Granny's Potion Shop.png|{{Term|OoT|Granny's Potion Shop|link}} | File:OoT Granny's Potion Shop.png|{{Term|OoT|Granny's Potion Shop|link}} | ||
File:OoT Gravekeeper's Hut.png|{{Term|OoT|Gravekeeper's Hut|link}} | File:OoT Gravekeeper's Hut.png|{{Term|OoT|Gravekeeper's Hut|link}} | ||
File:OoT Graveyard Boy's House.png|{{Term|OoT|Graveyard Boy's House|link}}<p>{{Small|({{Term|OoT|Graveyard Kid's House|link|display=Graveyard Kid's House}})}}</p><p>{{Small|({{Term|OoT|Little Boy's House|link|display=Little Boy's House}})}}</p> | File:OoT Graveyard Boy's House.png|{{Term|OoT|Graveyard Boy's House|link}}<p>{{Small|({{Term|OoT|Graveyard Kid's House|link|display=Graveyard Kid's House}})}}</p><p>{{Small|({{Term|OoT|Little Boy's House|link|display=Little Boy's House}})}}</p> | ||
File: | File:OoT House of Skulltula.png|{{Term|OoT|House of Skulltula|link}} | ||
File:OoT Impa's House.png|{{Term|OoT|Impa's House|link}} | File:OoT Impa's House.png|{{Term|OoT|Impa's House|link}} | ||
File: | File:OoT Kakariko Village Graveyard.png|{{Term|OoT|Kakariko Village Graveyard|link}} | ||
File:OoT Royal Family's Tomb.png|{{Term|OoT|Royal Family's Tomb|link}} | File:OoT Royal Family's Tomb.png|{{Term|OoT|Royal Family's Tomb|link}} | ||
File:Shadow. | File:OoT Shadow Temple.png|{{Term|OoT|Shadow Temple|link}} | ||
File:OoT Unfinished House.png|{{Term|OoT|Unfinished House|link}} | File:OoT Unfinished House.png|{{Term|OoT|Unfinished House|link}} | ||
File:OoT Well of Three Features.png|{{Term|OoT|Well of Three Features|link}} | File:OoT Well of Three Features.png|{{Term|OoT|Well of Three Features|link}} | ||
| Line 127: | Line 127: | ||
;{{Term|OoT|Adult Era}} | ;{{Term|OoT|Adult Era}} | ||
<gallery widths="150px" heights="150px"> | <gallery widths="150px" heights="150px"> | ||
File: | File:OoT Kakariko Windmill.png|{{Term|OoT|Kakariko Windmill|link}} | ||
File:OoT Bottom of the Well.png|{{Term|OoT|Bottom of the Well|link}} | File:OoT Bottom of the Well.png|{{Term|OoT|Bottom of the Well|link}} | ||
File:OoT Bazaar 2.png|{{Term|OoT|Bazaar|link}} | File:OoT Bazaar 2.png|{{Term|OoT|Bazaar|link}} | ||
File:OoT Gravekeeper's Hut.png|{{Term|OoT|Gravekeeper's Hut|link}} | File:OoT Gravekeeper's Hut.png|{{Term|OoT|Gravekeeper's Hut|link}} | ||
File:OoT Granny's Potion Shop.png|{{Term|OoT|Granny's Potion Shop|link}} | File:OoT Granny's Potion Shop.png|{{Term|OoT|Granny's Potion Shop|link}} | ||
File: | File:OoT House of Skulltula.png|{{Term|OoT|House of Skulltula|link}} | ||
File:OoT Impa's House.png|{{Term|OoT|Impa's House|link}} | File:OoT Impa's House.png|{{Term|OoT|Impa's House|link}} | ||
File: | File:OoT Kakariko Village Graveyard.png|{{Term|OoT|Kakariko Village Graveyard|link}} | ||
File:OoT Medicine Shop 2.png|{{Term|OoT|Medicine Shop|link}} | File:OoT Medicine Shop 2.png|{{Term|OoT|Medicine Shop|link}} | ||
File:OoT Royal Family's Tomb.png|{{Term|OoT|Royal Family's Tomb|link}} | File:OoT Royal Family's Tomb.png|{{Term|OoT|Royal Family's Tomb|link}} | ||
File:Shadow. | File:OoT Shadow Temple.png|{{Term|OoT|Shadow Temple|link}} | ||
File:OoT Shooting Gallery.png|{{Term|OoT|Shooting Gallery|link}} | File:OoT Shooting Gallery.png|{{Term|OoT|Shooting Gallery|link}} | ||
File:OoT Well of Three Features.png|{{Term|OoT|Well of Three Features|link}} | File:OoT Well of Three Features.png|{{Term|OoT|Well of Three Features|link}} | ||
File: | File:OoT ?.png|{{Term|OoT|?|link}} | ||
</gallery> | </gallery> | ||
==={{Term|OoT|Death Mountain}}=== | ==={{Term|OoT|Death Mountain}}=== | ||
<gallery widths="150px" heights="150px"> | <gallery widths="150px" heights="150px"> | ||
File:OoT Death Mountain | File:OoT Death Mountain Crater.png|{{Term|OoT|Death Mountain Crater|link}} | ||
File: | File:OoT Death Mountain Trail.png|{{Term|OoT|Death Mountain Trail|link}} | ||
File:OoT Dodongo's Cavern.png|{{Term|OoT|Dodongo's Cavern|link}} | File:OoT Dodongo's Cavern.png|{{Term|OoT|Dodongo's Cavern|link}} | ||
File:OoT Fire Temple.png|{{Term|OoT|Fire Temple|link}} | File:OoT Fire Temple.png|{{Term|OoT|Fire Temple|link}} | ||
File:OoT Goron City | File:OoT Goron City.png|{{Term|OoT|Goron City|link}} | ||
File:OoT Great Fairy's Fountain.png|{{Term|OoT|Great Fairy's Fountain|link}} | File:OoT Great Fairy's Fountain.png|{{Term|OoT|Great Fairy's Fountain|link}} | ||
File:OoT Death Mountain Summit.png|{{Term|OoT|Death Mountain Summit|link}} | File:OoT Death Mountain Summit.png|{{Term|OoT|Death Mountain Summit|link}} | ||
| Line 165: | Line 165: | ||
File:OoT Great Fairy's Fountain.png|{{Term|OoT|Great Fairy's Fountain|link}} | File:OoT Great Fairy's Fountain.png|{{Term|OoT|Great Fairy's Fountain|link}} | ||
File:OoT High-Dive Practice Spot.png|{{Term|OoT|High-Dive Practice Spot|link}} | File:OoT High-Dive Practice Spot.png|{{Term|OoT|High-Dive Practice Spot|link}} | ||
File:Ice Cavern. | File:OoT Ice Cavern.png|{{Term|OoT|Ice Cavern|link}} | ||
File:OoT Inside Jabu-Jabu's Belly.png|{{Term|OoT|Inside Jabu-Jabu's Belly|link}} | File:OoT Inside Jabu-Jabu's Belly.png|{{Term|OoT|Inside Jabu-Jabu's Belly|link}} | ||
File:OoT King Zora's Throne Room.png|{{Term|OoT|King Zora's Throne Room|link}}<p>{{Small|{{Term|OoT|King Zora's Chamber|link|display=King Zora's Chamber}}}}</p> | File:OoT King Zora's Throne Room.png|{{Term|OoT|King Zora's Throne Room|link}}<p>{{Small|{{Term|OoT|King Zora's Chamber|link|display=King Zora's Chamber}}}}</p> | ||
File: | File:OoT Sleepless Waterfall.png|{{Term|OoT|Sleepless Waterfall|link}} | ||
File: | File:OoT Zora Shop.png|{{Term|OoT|Zora Shop|link}} | ||
File: | File:OoT Zora's Fountain.png|{{Term|OoT|Zora's Fountain|link}} | ||
File: | File:OoT Zora's River.png|{{Term|OoT|Zora's River|link}} | ||
</gallery> | </gallery> | ||
==={{Term|OoT|Lake Hylia}}=== | ==={{Term|OoT|Lake Hylia}}=== | ||
<gallery widths="150px" heights="150px"> | <gallery widths="150px" heights="150px"> | ||
File: | File:OoT Fishing Pond.png|{{Term|OoT|Fishing Pond|link}} | ||
File: | File:OoT Lakeside Laboratory.png|{{Term|OoT|Lakeside Laboratory|link}} | ||
File:OoT Water Temple.png|{{Term|OoT|Water Temple|link}} | File:OoT Water Temple.png|{{Term|OoT|Water Temple|link}} | ||
</gallery> | </gallery> | ||
| Line 187: | Line 187: | ||
File:OoT Gerudo's Training Ground.png|{{Term|OoT|Gerudo's Training Ground|link}} | File:OoT Gerudo's Training Ground.png|{{Term|OoT|Gerudo's Training Ground|link}} | ||
File:OoT Great Fairy's Fountain.png|{{Term|OoT|Great Fairy's Fountain|link}} | File:OoT Great Fairy's Fountain.png|{{Term|OoT|Great Fairy's Fountain|link}} | ||
File:Range. | File:OoT Horseback Archery Range.png|{{Term|OoT|Horseback Archery Range|link}} | ||
File:OoT Haunted Wasteland. | File:OoT Haunted Wasteland.png|{{Term|OoT|Haunted Wasteland|link}} | ||
File: | File:OoT Desert Colossus.png|{{Term|OoT|Desert Colossus|link}} | ||
File:OoT Spirit Temple.png|{{Term|OoT|Spirit Temple|link}} | File:OoT Spirit Temple.png|{{Term|OoT|Spirit Temple|link}} | ||
</gallery> | </gallery> | ||
Revision as of 07:38, 3 December 2022
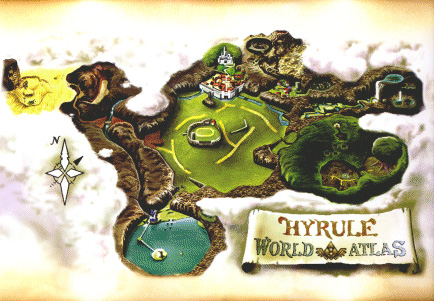
| Regions in Ocarina of Time | |
|---|---|
 Click on a location | |
Sacred Realm


Hyrule


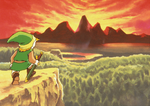
Hyrule Field
- Child Era

- Adult Era
Lon Lon Ranch
Hyrule Castle
- Child Era


- Adult Era


Hyrule Castle Town
- Child Era


- Adult Era


Kokiri Forest


Lost Woods


Kakariko Village
- Child Era


- Adult Era


Death Mountain


Goron City


Zora's Domain


Lake Hylia


Gerudo Valley


