|
|
| (33 intermediate revisions by 3 users not shown) |
| Line 1: |
Line 1: |
| {{DISPLAYTITLE: Items in {{OoT|-}}}} | | {{DISPLAYTITLE: Items in {{OoT|-}}}} |
| | The following is a list of {{Plural|OoT3D|Item|link}} from {{OoT}} and {{OoT3D}}. |
|
| |
|
| =={{Term|OoT|Select Item Subscreen}}== | | =={{Plural|OoT3D|Item}}== |
| {{Tabs
| | ==={{Term|OoT3D|Select Item Subscreen}}=== |
| |default= 1
| | {{Gallery List|Items |
| |tab1= {{OoT|-}}
| | |OoT= Bomb, Bombchu, Boomerang, Bottle {{Qty|4}}, Deku Nut, Deku Stick, Din's Fire, Fairy Bow, Fairy Ocarina, Fairy Slingshot, Farore's Wind, Fire Arrow, Hookshot, Ice Arrow, Lens of Truth <p>{{Small|'''AKA:''' {{Term|OoT|Eye of Truth|link|display=Eye of Truth}}}}</p>, Light Arrow <p>{{Small|'''AKA:''' {{Term|OoT|Arrow of Light|link|display=Arrow of Light}}}}</p>, Longshot, Magic Bean, Megaton Hammer, Nayru's Love, Ocarina of Time (Item) |
| |content1=
| | |OoT3D= Bomb, Bombchu, Boomerang, Bottle {{Qty|4}}, Deku Nut, Deku Stick, Din's Fire, Fairy Bow, Fairy Ocarina, Fairy Slingshot, Farore's Wind, Fire Arrow, Hookshot, Ice Arrow, Lens of Truth <p>{{Small|'''AKA:''' {{Term|OoT3D|Eye of Truth|link|display=Eye of Truth}}}}</p>, Light Arrow, Longshot, Magic Bean, Megaton Hammer, Nayru's Love, Ocarina of Time (Item) |
| Inventory Items
| | }} |
| <gallery perrow="6" widths="64px" heights="64px">
| | |
| File:OoT Deku Stick Icon.png|{{Term|OoT|Deku Stick|link}}
| | ;Bottled Items |
| File:OoT Deku Nut Icon.png|{{Term|OoT|Deku Nut|link}}
| | {{Gallery List|Items |
| File:OoT Bomb Icon.png|{{Term|OoT|Bomb|link}}
| | |OoT= Big Poe Soul, Blue Fire, Bottle Bug, Bottled Fairy <p>{{Small|'''AKA:''' {{Term|OoT|Fairy's Spirit|link|display=Fairy's Spirit}}}}</p>, Blue Potion, Fish, Green Potion, Lon Lon Milk, Lon Lon Milk (Half), Red Potion, Ruto's Letter |
| File:OoT Fairy Bow Icon.png|{{Term|OoT|Fairy Bow|link}}
| | |OoT3D= Big Poe Soul, Blue Fire, Bottled Bug, Bottled Fairy, Blue Potion, Fish, Green Potion, Lon Lon Milk, Lon Lon Milk (Half Bottle), Red Potion, Ruto's Letter |
| File:OoT Fire Arrow Icon.png|{{Term|OoT|Fire Arrow|link}}
| | }} |
| File:OoT Din's Fire Icon.png|{{Term|OoT|Din's Fire|link}}
| | |
| File:OoT Fairy Slingshot Icon.png|{{Term|OoT|Fairy Slingshot|link}}
| | ;Trading Quest Items |
| File:OoT Ocarina of Time Icon.png|{{Term|OoT|Ocarina of Time (Item)|link}}
| | {{Gallery List|Items |
| File:OoT Bombchu Icon.png|{{Term|OoT|Bombchu|link}}
| | |OoT= Weird Egg<br/><code>{{Term|OoT|Child Era}}</code>, Cucco<br/><code>{{Term|OoT|Child Era}}</code>, Zelda's Letter<br/><code>{{Term|OoT|Child Era}}</code>, Pocket Egg<br/><code>{{Term|OoT|Adult Era}}</code>, Pocket Cucco<br/><code>{{Term|OoT|Adult Era}}</code>, Cojiro<br/><code>{{Term|OoT|Adult Era}}</code>, Odd Mushroom<br/><code>{{Term|OoT|Adult Era}}</code>, Odd Potion<br/><code>{{Term|OoT|Adult Era}}</code>, Poacher's Saw<br/><code>{{Term|OoT|Adult Era}}</code>, Broken Goron's Sword<br/><code>{{Term|OoT|Adult Era}}</code>, Claim Check<br/><code>{{Term|OoT|Adult Era}}</code>, Prescription<br/><code>{{Term|OoT|Adult Era}}</code>, Eyeball Frog<br/><code>{{Term|OoT|Adult Era}}</code>, World's Finest Eye Drops <p>{{Small|'''AKA:''' {{Term|OoT|Biggoron's Eye Drops|link|display=Biggoron's Eye Drops}}}}</p><code>{{Term|OoT|Adult Era}}</code> |
| File:OoT Longshot Icon.png|{{Term|OoT|Longshot|link}}
| | |OoT3D= Weird Egg<br/><code>{{Term|OoT3D|Child Era}}</code>, Cucco<br/><code>{{Term|OoT3D|Child Era}}</code>, Zelda's Letter<br/><code>{{Term|OoT3D|Child Era}}</code>, Pocket Egg<br/><code>{{Term|OoT3D|Adult Era}}</code>, Pocket Cucco<br/><code>{{Term|OoT3D|Adult Era}}</code>, Cojiro<br/><code>{{Term|OoT3D|Adult Era}}</code>, Odd Mushroom<br/><code>{{Term|OoT3D|Adult Era}}</code>, Odd Poultice<br/><code>{{Term|OoT3D|Adult Era}}</code>, Poacher's Saw<br/><code>{{Term|OoT3D|Adult Era}}</code>, Broken Goron's Sword<br/><code>{{Term|OoT3D|Adult Era}}</code>, Claim Check<br/><code>{{Term|OoT3D|Adult Era}}</code>, Prescription<br/><code>{{Term|OoT3D|Adult Era}}</code>, Eyeball Frog<br/><code>{{Term|OoT3D|Adult Era}}</code>, World's Finest Eyedrops <p>{{Small|'''AKA:''' {{Term|OoT|Biggoron's Eyedrops|link|display=Biggoron's Eyedrops}}}}</p><code>{{Term|OoT3D|Adult Era}}</code> |
| File:OoT Ice Arrow Icon.png|{{Term|OoT|Ice Arrow|link}}
| | }} |
| File:OoT Farore's Wind Icon.png|{{Term|OoT|Farore's Wind|link}}
| | |
| File:OoT Boomerang Icon.png|{{Term|OoT|Boomerang|link}}
| | ;Masks |
| File:OoT Lens of Truth Icon.png|{{Term|OoT|Lens of Truth|link}}<br/>{{Small|{{Term|OoT|Eye of Truth|link|display=Eye of Truth}}}}
| | {{Gallery List|Items |
| File:OoT Magic Bean Icon.png|{{Term|OoT|Magic Bean|link}}
| | |OoT= Keaton Mask, Skull Mask, Spooky Mask, Bunny Hood, Mask of Truth, Goron Mask, Zora Mask, Gerudo Mask |
| File:OoT Megaton Hammer Icon.png|{{Term|OoT|Megaton Hammer|link}}
| | }} |
| File:OoT Light Arrow Icon.png|{{Term|OoT|Light Arrow|link}}<br/>{{Small|{{Term|OoT|Arrow of Light|link|display=Arrow of Light}}}}<!-- NOT IN 3D -->
| | |
| File:OoT Nayru's Love Icon.png|{{Term|OoT|Nayru's Love|link}}
| | ==={{Term|OoT|Equipment Subscreen}}=== |
| File:OoT Bottle Icon.png|{{Term|OoT|Bottle|link}} (x4)
| | ;{{Plural|OoT3D|Sword}} |
| </gallery> | | {{Gallery List|Items |
| <gallery perrow="6" widths="64px" heights="64px"> | | |OoT= Kokiri Sword, Master Sword, Broken Giant's Knife, Giant's Knife, Biggoron's Sword |
| File:OoT Fairy Ocarina Icon.png|{{Term|OoT|Fairy Ocarina|link}} (replaced with Ocarina of TIme)
| | }} |
| File:OoT Hookshot Icon.png|{{Term|OoT|Hookshot|link}} (replaced with Longshot)
| | |
| </gallery> | | ;{{Plural|OoT3D|Shield}} |
| Bottled Items
| | {{Gallery List|Items |
| <gallery perrow="6" widths="64px" heights="64px"> | | |OoT= Deku Shield, Hylian Shield, Mirror Shield |
| File:OoT Red Potion Icon.png|{{Term|OoT|Red Potion|link}}
| | }} |
| File:OoT Green Potion Icon.png|{{Term|OoT|Green Potion|link}}
| | |
| File:OoT Blue Potion Icon.png|{{Term|OoT|Blue Potion|link}}
| | ;{{Plural|OoT3D|Clothes}} |
| File:OoT Milk Icon.png|{{Term|OoT|Lon Lon Milk|link}}<br/>{{Small|{{Term|OoT|Milk|link|display=Lon Lon Milk}}}}
| | {{Gallery List|Items |
| File:OoT Milk (1/2) Icon.png|{{Term|OoT|Lon Lon Milk|link}}<br/>(Half Bottle)
| | |OoT= Kokiri Tunic, Goron Tunic <p>{{Small|'''AKA:''' {{Term|OoT|Heat-Resistant Tunic|link|display=Heat-Resistant Tunic}}}}</p>, Zora Tunic |
| File:OoT Fairy Icon.png|{{Term|OoT|Fairy|link}}<br/>{{Small|{{Term|OoT|Fairy's Spirit|link|display=Fairy's Spirit}}}}
| | |OoT3D= Kokiri Tunic, Goron Tunic <p>{{Small|'''AKA:''' {{Term|OoT3D|Heat-Resistant Tunic|link|display=Heat-Resistant Tunic}}}}</p>, Zora Tunic |
| File:OoT Fish Icon.png|{{Term|OoT|Fish|link}}
| | }} |
| File:OoT Bug Icon.png |{{Term|OoT|Bug|link}}<br/>{{Small|{{Term|OoT|Bottle Bug|link|display=Bottle Bug}}}}
| | |
| File:OoT Blue Fire Icon.png|{{Term|OoT|Blue Fire|link}}
| | ;{{Plural|OoT3D|Boot}} |
| File:OoT Poe Soul Icon.png|{{Term|OoT|Poe Soul|link}}
| | {{Gallery List|Items |
| File:OoT Big Poe Soul Icon.png|{{Term|OoT|Big Poe Soul|link}}
| | |OoT= Kokiri Boots, Iron Boots, Hover Boots <p>{{Small|'''AKA:''' {{Term|OoT|Sacred Feet|link|display=Sacred Feet}}}}</p> |
| File:OoT Letter Icon.png|{{Term|OoT|Letter|link}}<br/>{{Small|{{Term|OoT|Letter|link|display=Letter in a Bottle}}}}
| | |OoT3D= Kokiri Boots, Iron Boots, Hover Boots <p>{{Small|'''AKA:''' {{Term|OoT3D|Sacred Feet|link|display=Sacred Feet}}}}</p> |
| </gallery> | | }} |
| Quest Items
| |
| <gallery perrow="3" widths="64px" heights="64px"> | |
| File:OoT Weird Egg Icon.png|{{Term|OoT|Weird Egg|link}}
| |
| File:OoT Cucco Icon.png|{{Term|OoT|Cucco|link}}
| |
| File:OoT Zelda's Letter Icon.png|{{Term|OoT|Zelda's Letter|link}}
| |
| </gallery> | |
| Masks
| |
| <gallery perrow="4" widths="64px" heights="64px"> | |
| File:OoT Keaton Mask Icon.png|{{Term|OoT|Keaton Mask|link}}
| |
| File:OoT Skull Mask Icon.png|{{Term|OoT|Skull Mask|link}}
| |
| File:OoT Spooky Mask Icon.png|{{Term|OoT|Spooky Mask|link}}
| |
| File:OoT Bunny Hood Icon.png|{{Term|OoT|Bunny Hood|link}}
| |
| File:OoT Mask of Truth Icon.png|{{Term|OoT|Mask of Truth|link}}
| |
| File:OoT Goron Mask Icon.png|{{Term|OoT|Goron Mask|link}}
| |
| File:OoT Zora Mask Icon.png|{{Term|OoT|Zora Mask|link}}
| |
| File:OoT Gerudo Mask Icon.png|{{Term|OoT|Gerudo Mask|link}}
| |
| </gallery>
| |
| Biggoron Trading Sequence
| |
| <gallery perrow="6" widths="64px" heights="64px">
| |
| File:OoT Pocket Egg Icon.png|{{Term|OoT|Pocket Egg|link}}
| |
| File:OoT Pocket Cucco Icon.png|{{Term|OoT|Pocket Cucco|link}}
| |
| File:OoT Cojiro Icon.png|{{Term|OoT|Cojiro|link}}
| |
| File:OoT Odd Mushroom Icon.png|{{Term|OoT|Odd Mushroom|link}}
| |
| File:OoT Odd Potion Icon.png|{{Term|OoT|Odd Potion|link}}
| |
| File:OoT Poacher's Saw Icon.png|{{Term|OoT|Poacher's Saw|link}}
| |
| File:OoT Broken Goron's Sword Icon.png|{{Term|OoT|Broken Goron's Sword|link}}
| |
| File:OoT Prescription Icon.png|{{Term|OoT|Prescription|link}}
| |
| File:OoT Eyeball Frog Icon.png|{{Term|OoT|Eyeball Frog|link}}
| |
| File:OoT World's Finest Eye Drops Icon.png|{{Term|OoT|World's Finest Eyedrops|link}}<br/>{{Small|{{Term|OoT|Biggoron's Eye Drops|link|display=Biggoron's Eye Drops}}}}<!-- Eyedrops in 3D -->
| |
| File:OoT Claim Check Icon.png|{{Term|OoT|Claim Check|link}}
| |
| </gallery> | |
| |tab2= {{OoT3D|-}}
| |
| |content2=
| |
| {{#section:Items in Ocarina of Time 3D|Select Item Subscreen}}
| |
|
| |
|
| | ;{{Plural|OoT3D|Bullet Bag}} |
| | {{Gallery List|Items |
| | |OoT= Bullet Bag <p>{{Small|'''AKA:''' {{Term|OoT|Deku Seeds Bullet Bag|link|display=Deku Seeds Bullet Bag}}}}</p>, Bigger Bullet Bag <p>{{Small|'''AKA:''' {{Term|OoT|Big Bullet Bag|link|display=Big Bullet Bag}}}}</p>, Biggest Bullet Bag |
| | |OoT3D= Bullet Bag <p>{{Small|'''AKA:''' {{Term|OoT3D|Deku Seed Bullet Bag|link|display=Deku Seed Bullet Bag}}}}</p>, Bigger Bullet Bag <p>{{Small|'''AKA:''' {{Term|OoT3D|Big Bullet Bag|link|display=Big Bullet Bag}}, {{Term|OoT3D|Big Deku Seed Bullet Bag|link|display=Big Deku Seed Bullet Bag}}}}</p>, Biggest Bullet Bag <p>{{Small|'''AKA:''' {{Term|OoT3D|Biggest Deku Seed Bullet Bag|link|display=Biggest Deku Seed Bullet Bag}}}}</p> |
| }} | | }} |
|
| |
|
| =={{Term|OoT|Equipment Subscreen}}==
| | ;{{Plural|OoT3D|Quiver}} |
| {{Tabs | | {{Gallery List|Items |
| |default= 1 | | |OoT= Quiver, Big Quiver, Biggest Quiver |
| |tab1= {{OoT|-}}
| | }} |
| |content1=
| |
| Swords
| |
| <gallery perrow="3" widths="64px" heights="64px">
| |
| File:OoT Kokiri Sword Icon.png|{{Term|OoT|Kokiri Sword|link}}
| |
| File:OoT Master Sword Icon.png|{{Term|OoT|Master Sword|link}}
| |
| File:OoT Biggoron's Sword Icon.png|{{Term|OoT|Biggoron's Sword|link}}
| |
| File:OoT Giant's Knife Icon.png|{{Term|OoT|Giant's Knife|link}} (replaced with Biggoron's Sword)
| |
| File:OoT Broken Giant's Knife Icon.png|{{Term|OoT|Broken Giant's Knife|link}} (replaced with Biggoron's Sword)
| |
| </gallery>
| |
| Shields
| |
| <gallery widths="64px" heights="64px">
| |
| File:OoT Deku Shield Icon.png|{{Term|OoT|Deku Shield|link}}
| |
| File:OoT Hylian Shield Icon.png|{{Term|OoT|Hylian Shield|link}}
| |
| File:OoT Mirror Shield Icon.png|{{Term|OoT|Mirror Shield|link}}
| |
| </gallery>
| |
| Tunics
| |
| <gallery widths="64px" heights="64px">
| |
| File:OoT Kokiri Tunic Icon.png|{{Term|OoT|Kokiri Tunic|link}}
| |
| File:OoT Goron Tunic Icon.png|{{Term|OoT|Goron Tunic|link}}<br/>{{Small|{{Term|OoT|Heat-Resistant Tunic|link|display=Heat-Resistant Tunic}}}}
| |
| File:OoT Zora Tunic Icon.png|{{Term|OoT|Zora Tunic|link}}
| |
| </gallery>
| |
| Boots
| |
| <gallery widths="64px" heights="64px">
| |
| File:OoT Kokiri Boots Icon.png|{{Term|OoT|Kokiri Boots|link}}
| |
| File:OoT Iron Boots Icon.png|{{Term|OoT|Iron Boots|link}}
| |
| File:OoT Hover Boots Icon.png|{{Term|OoT|Hover Boots|link}}<br/>{{Small|{{Term|OoT|Sacred Feet|link|display=Sacred Feet}}}}
| |
| </gallery>
| |
| Bullet Bags
| |
| <gallery widths="64px" heights="64px">
| |
| File:OoT Bullet Bag Icon.png|{{Term|OoT|Bullet Bag|link}}<br/>{{Small|{{Term|OoT|Deku Seeds Bullet Bag|link|display=Deku Seeds Bullet Bag}}}}
| |
| File:OoT Bigger Bullet Bag Icon.png|{{Term|OoT|Bigger Bullet Bag|link}}
| |
| File:OoT Biggest Bullet Bag Icon.png|{{Term|OoT|Biggest Bullet Bag|link}}
| |
| </gallery>
| |
| Quivers
| |
| <gallery widths="64px" heights="64px">
| |
| File:OoT Quiver Icon.png|{{Term|OoT|Quiver|link}}
| |
| File:OoT Big Quiver Icon.png|{{Term|OoT|Big Quiver|link}}
| |
| File:OoT Biggest Quiver Icon.png|{{Term|OoT|Biggest Quiver|link}}
| |
| </gallery>
| |
| Bomb Bags
| |
| <gallery widths="64px" heights="64px">
| |
| File:OoT Bomb Bag Icon.png|{{Term|OoT|Bomb Bag|link}}
| |
| File:OoT Big Bomb Bag Icon.png|{{Term|OoT|Big Bomb Bag|link}}
| |
| File:OoT Biggest Bomb Bag Icon.png|{{Term|OoT|Biggest Bomb Bag|link}}
| |
| </gallery>
| |
| Wallets
| |
| <gallery widths="64px" heights="64px">
| |
| File:OoT Adult's Wallet Icon.png|{{Term|OoT|Adult's Wallet|link}}
| |
| File:OoT Giant's Wallet Icon.png|{{Term|OoT|Giant's Wallet|link}}
| |
| </gallery>
| |
| Strength Enhancements
| |
| <gallery widths="64px" heights="64px">
| |
| File:OoT Goron's Bracelet Icon.png|{{Term|OoT|Goron's Bracelet|link}}
| |
| File:OoT Silver Gauntlets Icon.png|{{Term|OoT|Silver Gauntlets|link}}<br/>{{Small|{{Term|OoT|Power of Silver|link|display=Power of Silver}}<br/>{{Term|OoT|Silver Hands|link|display=Silver Hands}}}}
| |
| File:OoT Golden Gauntlets Icon.png|{{Term|OoT|Golden Gauntlets|link}}
| |
| </gallery>
| |
| Diving Scales
| |
| <gallery widths="64px" heights="64px">
| |
| File:OoT Silver Scale Icon.png|{{Term|OoT|Silver Scale|link}}
| |
| File:OoT Golden Scale Icon.png|{{Term|OoT|Golden Scale|link}}
| |
| </gallery>
| |
| |tab2= {{OoT3D|-}}
| |
| |content2=
| |
| {{#section:Items in Ocarina of Time 3D|Equipment Subscreen}}
| |
|
| |
|
| | ;{{Plural|OoT3D|Bomb Bag}} |
| | {{Gallery List|Items |
| | |OoT= Bomb Bag, Big Bomb Bag, Biggest Bomb Bag |
| }} | | }} |
|
| |
|
| =={{Term|OoT|Quest Status Subscreen}}==
| | ;{{Plural|OoT3D|Wallet}} |
| {{Tabs | | {{Gallery List|Items |
| |default= 1 | | |OoT= Adult's Wallet, Giant's Wallet |
| |tab1= {{OoT|-}}
| | }} |
| |content1=
| |
| <gallery caption="" perrow="3" widths="64px" heights="64px">
| |
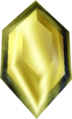
| File:OoT Spiritual Stone of the Forest Icon.png|{{Term|OoT|Spiritual Stone of the Forest|link}}<br/>{{Small|{{Term|OoT|Kokiri's Emerald|link|display=Kokiri's Emerald}}}}
| |
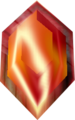
| File:OoT Spiritual Stone of Fire Icon.png|{{Term|OoT|Spiritual Stone of Fire|link}}<br/>{{Small|{{Term|OoT|Goron's Ruby|link|display=Goron's Ruby}}<br/>{{Term|OoT|Red Stone|link|display=Red Stone}}}}
| |
| File:OoT Spiritual Stone of Water Icon.png|{{Term|OoT|Spiritual Stone of Water|link}}<br/>{{Small|{{Term|OoT|Zora's Engagement Ring|link|display=Zora's Engagement Ring}}<br/>{{Term|OoT|Zora's Sapphire|link|display=Zora's Sapphire}}}}
| |
| </gallery>
| |
| <gallery caption="" perrow="6" widths="64px" heights="64px">
| |
| File:OoT Light Medallion Icon.png|{{Term|OoT|Light Medallion|link}}
| |
| File:OoT Forest Medallion Icon.png|{{Term|OoT|Forest Medallion|link}}
| |
| File:OoT Fire Medallion Icon.png|{{Term|OoT|Fire Medallion|link}}
| |
| File:OoT Water Medallion Icon.png|{{Term|OoT|Water Medallion|link}}
| |
| File:OoT Shadow Medallion Icon.png|{{Term|OoT|Shadow Medallion|link}}
| |
| File:OoT Spirit Medallion Icon.png|{{Term|OoT|Spirit Medallion|link}}
| |
| </gallery>
| |
| <gallery caption="" perrow="6" widths="64px" heights="64px">
| |
| File:OoT Gerudo Token Icon.png|{{Term|OoT|Gerudo Token|link}}<br/>{{Small|{{Term|OoT|Gerudo's Card|link|display=Gerudo's Card}}<br/>{{Term|OoT|Gerudo's Membership Card|link|display=Gerudo's Membership Card}}}}
| |
| File:OoT Stone of Agony Icon.png|{{Term|OoT|Stone of Agony|link}}<!-- Shard of Agony in 3D -->
| |
| File:OoT Piece of Heart Icon.png|{{Term|OoT|Piece of Heart|link}}
| |
| File:OoT Token Icon.png|{{Term|OoT|Token|link}}
| |
| </gallery>
| |
| |tab2= {{OoT3D|-}}
| |
| |content2=
| |
| {{#section:Items in Ocarina of Time 3D|Quest Status Subscreen}}
| |
|
| |
|
| | ;Strength Enhancements |
| | {{Gallery List|Items |
| | |OoT= Goron's Bracelet, Silver Gauntlets <p>{{Small|'''AKA:''' {{Term|OoT|Power of Silver|link|display=Power of Silver}}, {{Term|OoT|Silver Hands|link|display=Silver Hands}}}}</p>, Golden Gauntlets |
| | |OoT3D= Goron's Bracelet, Silver Gauntlets <p>{{Small|'''AKA:''' {{Term|OoT3D|Power of Silver|link|display=Power of Silver}}, {{Term|OoT3D|Silver Hands|link|display=Silver Hands}}}}</p>, Golden Gauntlets |
| }} | | }} |
|
| |
|
| =={{Term|OoT|Map Subscreen}}==
| | ;Diving Scales |
| {{Tabs | | {{Gallery List|Items |
| |default= 1 | | |OoT= Silver Scale, Golden Scale |
| |tab1= {{OoT|-}}
| | }} |
| |content1= <gallery widths="64px" heights="64px">
| |
| File:OoT Boss Key Icon.png|{{Term|OoT|Boss Key|link}}
| |
| File:OoT Compass Icon.png|{{Term|OoT|Compass|link}}
| |
| File:OoT Dungeon Map Icon.png|{{Term|OoT|Dungeon Map|link}}
| |
| File:OoT Small Key Icon.png|{{Term|OoT|Small Key|link}}
| |
| </gallery>
| |
| |tab2= {{OoT3D|-}}
| |
| |content2=
| |
| {{#section:Items in Ocarina of Time 3D|Map Subscreen}}
| |
|
| |
|
| | ==={{Term|OoT3D|Quest Status Subscreen}}=== |
| | {{Gallery List|Items |
| | |OoT= Gerudo Token <p>{{Small|'''AKA:''' {{Term|OoT|Gerudo's Card|link|display=Gerudo's Card}}, {{Term|OoT|Gerudo's Membership Card|link|display=Gerudo's Membership Card}}}}</p>, Piece of Heart, Stone of Agony, Token |
| | |OoT3D= Gerudo Token, Golden Skull Token, Piece of Heart, Shard of Agony |
| }} | | }} |
|
| |
|
| ==Other {{Plural|OoT|Item}}==
| | ;{{Plural|OoT3D|Spiritual Stone}} |
| {{Tabs | | {{Gallery List|Items |
| |default= 1 | | |OoT= Spiritual Stone of the Forest <p>{{Small|'''AKA:''' {{Term|OoT|Kokiri's Emerald|link|display=Kokiri's Emerald}}}}</p>, Spiritual Stone of Fire <p>{{Small|'''AKA:''' {{Term|OoT|Goron's Ruby|link|display=Goron's Ruby}}, {{Term|OoT|Red Stone|link|display=Red Stone}}}}</p>, Spiritual Stone of Water <p>{{Small|'''AKA:''' {{Term|OoT|Zora's Engagement Ring|link|display=Zora's Engagement Ring}}, {{Term|OoT|Zora's Sapphire|link|display=Zora's Sapphire}}}}</p> |
| |tab1= {{OoT|-}} | | |OoT3D= Spiritual Stone of the Forest <p>{{Small|'''AKA:''' {{Term|OoT3D|Kokiri's Emerald|link|display=Kokiri's Emerald}}}}</p>, Spiritual Stone of Fire <p>{{Small|'''AKA:''' {{Term|OoT3D|Goron's Ruby|link|display=Goron's Ruby}}, {{Term|OoT3D|Red Stone|link|display=Red Stone}}}}</p>, Spiritual Stone of Water <p>{{Small|'''AKA:''' {{Term|OoT3D|Zora's Engagement Ring|link|display=Zora's Engagement Ring}}, {{Term|OoT3D|Zora's Sapphire|link|display=Zora's Sapphire}}}}</p> |
| |content1= <gallery widths="64px" heights="64px">
| | }} |
| File:OoT Blue Rupee Model.png|{{Term|OoT|Blue Rupee|link}}
| |
| File:OoT Bundle of Arrows Model.png|{{Term|OoT|Bundle of Arrows|link}}
| |
| File:OoT Bundle of Arrows Model 2.png|{{Term|OoT|Bundle of Arrows|link}}
| |
| File:OoT Deku Seeds Icon.png|{{Term|OoT|Deku Seed|link}}
| |
| File:OoT Green Rupee Model.png|{{Term|OoT|Green Rupee|link}}
| |
| File:OoT Gold Rupee Model.png|{{Term|OoT|Gold Rupee|link}}<br/>{{Small|{{Term|OoT|Huge Rupee|link|display=Huge Rupee}}}}
| |
| File:OoT Heart Icon.png|{{Term|OoT|Heart|link}}<br/>{{Small|{{Term|OoT|Recovery Heart|link|display=Recovery Heart}}}}
| |
| File:OoT Heart Container Icon.png|{{Term|OoT|Heart Container|link}}
| |
| File:OoT Lure Model.png|{{Term|OoT|Lure|link}}
| |
| File:OoT Magic Jar Model.png|{{Term|OoT|Magic Jar|link}}
| |
| File:OoT Magic Jar Model 2.png|{{Term|OoT|Magic Jar|link}}
| |
| File:OoT Purple Rupee Model.png|{{Term|OoT|Purple Rupee|link}}
| |
| File:OoT Red Rupee Model.png|{{Term|OoT|Red Rupee|link}}
| |
| File:OoT Silver Rupee Model.png|{{Term|OoT|Silver Rupee|link}}<br/>{{Small|{{Term|OoT|Jewel of White|link|display=Jewel of White}}}}
| |
| File:OoT Sinking Lure Model.png|{{Term|OoT|Sinking Lure|link}}
| |
| </gallery> | |
| |tab2= {{OoT3D|-}}
| |
| |content2=
| |
| {{#section:Items in Ocarina of Time 3D|Other Items}}
| |
|
| |
|
| | ;{{Plural|OoT3D|Medallion}} |
| | {{Gallery List|Items |
| | |OoT= Light Medallion, Forest Medallion, Fire Medallion, Water Medallion, Shadow Medallion, Spirit Medallion |
| }} | | }} |
|
| |
|
| =={{Plural|OoT|Object}}== | | ==={{Term|OoT3D|Map Subscreen}}=== |
| {{Tabs
| | {{Gallery List|Items |
| |default= 1
| | |OoT= Boss Key, Compass, Dungeon Map, Small Key |
| |tab1= {{OoT|-}}
| | }} |
| |content1= <gallery>
| |
| File:OoT Bed Model.png|{{Term|OoT|Bed|link}}
| |
| File:OoT Beehive Model.png|{{Term|OoT|Beehive|link}}
| |
| File:OoT Block Model.png|{{Term|OoT|Block|link}}
| |
| File:OoT Bomb Flower Model.png|{{Term|OoT|Bomb Flower|link}}
| |
| File:OoT Broom Model.png|{{Term|OoT|Broom|link}}
| |
| File:OoT Carrot Model.png|{{Term|OoT|Carrot|link}}
| |
| File:OoT Coffin Model.png|<!-- Uses Series term -->{{Term|OoT|Coffin|link}}
| |
| File:OoT Cooking Pot Model.png|{{Term|OoT|Cooking Pot|link}}
| |
| File:OoT Cracked Tile Model.png|{{Term|OoT|Cracked Tile|link}}
| |
| File:OoT Deku Flower Model.png|{{Term|OoT|Deku Flower|link}}
| |
| File:OoT Door of Time Model.png|{{Term|OoT|Door of Time|link}}
| |
| File:OoT Eyeball Switch Model.png|{{Term|OoT|Eyeball Switch|link}}
| |
| File:OoT False Wall Model.png|<!-- Uses Series term -->{{Term|OoT|False Wall|link}}
| |
| File:OoT False Wall Model 2.png|<!-- Uses Series term -->{{Term|OoT|False Wall|link}}
| |
| File:OoT Fire Model.png|{{Term|OoT|Fire|link}}
| |
| File:OoT Fire Barrier.png|{{Term|OoT|Fire Barrier|link}}
| |
| File:OoT Fishing Rod Model.png|{{Term|OoT|Fishing Rod|link}}
| |
| File:OoT Floor Switch Model.png|{{Term|OoT|Floor Switch|link}}
| |
| File:OoT Forest Barrier.png|{{Term|OoT|Forest Barrier|link}}
| |
| File:OoT Gossip Stone Model.png|{{Term|OoT|Gossip Stone|link}}
| |
| File:OoT Gravekeeper's Diary Model.png|{{Term|OoT|Gravekeeper's Diary|link}}
| |
| File:OoT Iron Bars Model.png|{{Term|OoT|Iron Bars|link}}
| |
| File:OoT Jar Model.png|{{Term|OoT|Jar|link}}
| |
| File:OoT Jukebox Model.png|{{Term|OoT|Jukebox|link}}
| |
| File:OoT Ladder Model.png|{{Term|OoT|Ladder|link}}
| |
| File:OoT Lava Pit Model.png|{{Term|OoT|Lava Pit|link}}
| |
| File:OoT Light Barrier.png|{{Term|OoT|Light Barrier|link}}
| |
| File:OoT Lily Pad Model.png|{{Term|OoT|Lily Pad|link}}
| |
| File:OoT Locked Door Model.png|{{Term|OoT|Locked Door|link}}
| |
| File:OoT Palm Tree Model.png|{{Term|OoT|Palm Tree|link}}
| |
| File:OoT Pedestal of the Master Sword Model.png|{{Term|OoT|Pedestal of the Master Sword|link}}<br/>{{Small|{{Term|OoT|Pedestal of Time|link|display=Pedestal of Time}}}}
| |
| File:OoT Red Ice Model.png|{{Term|OoT|Red Ice|link}}
| |
| File:OoT Rock Model.png|{{Term|OoT|Rock|link}}
| |
| File:OoT Rope Model.png|{{Term|OoT|Rope (Object)|link}}
| |
| File:OoT Scarecrow Model.png|{{Term|OoT|Scarecrow|link}}
| |
| File:OoT Shadow Barrier.png|{{Term|OoT|Shadow Barrier|link}}
| |
| File:OoT Sheikah Stone Model.png|{{Term|OoT|Sheikah Stone|link}}
| |
| File:OoT Sign Model.png|{{Term|OoT|Sign|link}}
| |
| File:OoT Six Evil Barriers.png|{{Term|OoT|Six Evil Barriers|link}}
| |
| File:OoT Skull of Truth Model.png|{{Term|OoT|Skull of Truth|link}}
| |
| File:OoT Small Drain Hole.png|{{Term|OoT|Small Drain Hole|link}}
| |
| File:OoT Spirit Barrier.png|{{Term|OoT|Spirit Barrier|link}}
| |
| File:OoT Stained Glass.png|{{Term|OoT|Stained Glass|link}}
| |
| File:OoT Statue Model.png|{{Term|OoT|Statue|link}}
| |
| File:OoT Stepping Stones in the Pond Model.png|{{Term|OoT|Stepping Stones in the Pond|link}}
| |
| File:OoT Sun Block Model.png|{{Term|OoT|Sun Block|link}}
| |
| File:OoT Sun Switch Model.png|{{Term|OoT|Sun Switch|link}}
| |
| File:OoT Target Model.png|{{Term|OoT|Target|link}}
| |
| File:OoT Time Block Model.png|{{Term|OoT|Time Block|link}}
| |
| File:OoT Torch Model.png|{{Term|OoT|Torchlight|link}}
| |
| File:OoT Treasure Chest Model.png|{{Term|OoT|Treasure Chest|link}}
| |
| File:OoT Tree Model.png|{{Term|OoT|Tree|link}}
| |
| File:OoT Wallet Model.png|{{Term|OoT|Wallet|link}}
| |
| File:OoT Warp Point Model.png|{{Term|OoT|Warp Point|link}}
| |
| File:OoT Water Barrier.png|{{Term|OoT|Water Barrier|link}}
| |
| File:OoT Web Model.png|{{Term|OoT|Web|link}}
| |
| File:OoT Wooden Box Model.png|{{Term|OoT|Wooden Box|link}}
| |
| </gallery>
| |
| |tab2= {{OoT3D|-}}
| |
| |content2=
| |
| {{#section:Items in Ocarina of Time 3D|Objects}}
| |
|
| |
|
| | ===Other {{Plural|OoT3D|Item}}=== |
| | {{Gallery List|Items |
| | |OoT= Blue Rupee [File:OoT Blue Rupee Model.png], Bundle of Arrows [File:OoT Bundle of Arrows Model.png], Bundle of Arrows [File:OoT Bundle of Arrows Model 2.png], Deku Seed, Green Rupee [File:OoT Green Rupee Model.png], Gold Rupee [File:OoT Gold Rupee Model.png], Heart <p>{{Small|'''AKA:''' {{Term|OoT|Recovery Heart|link}}}}</p>, Heart Container, Lure [File:OoT Lure Model.png], Magic Jar [File:OoT Magic Jar Model.png], Magic Jar [File:OoT Magic Jar Model 2.png], Purple Rupee [File:OoT Purple Rupee Model.png], Red Rupee [File:OoT Red Rupee Model.png], Silver Rupee [File:OoT Silver Rupee Model.png]<p>{{Small|'''AKA:''' {{Term|OoT|Jewel of White|link|display=Jewel of White}}}}</p>, Sinking Lure [File:OoT Sinking Lure Model.png] |
| | |OoT3D= Blue Rupee [File:OoT3D Blue Rupee Model.png], Bundle of Arrows [File:OoT3D Bundle of Arrows Model.png], Bundle of Arrows [File:OoT3D Bundle of Arrows Model 2.png], Deku Seed, Green Rupee [File:OoT3D Green Rupee Model.png], Gold Rupee [File:OoT3D Gold Rupee Model.png], Heart <p>{{Small|'''AKA:''' {{Term|OoT3D|Recovery Heart|link}}}}</p>, Heart Container, Lure [File:OoT3D Lure Model.png], Magic Jar [File:OoT3D Magic Jar Model.png], Magic Jar [File:OoT3D Magic Jar Model 2.png], Purple Rupee [File:OoT3D Purple Rupee Model.png], Red Rupee [File:OoT3D Red Rupee Model.png], Silver Rupee [File:OoT3D Silver Rupee Model.png]<p>{{Small|'''AKA:''' {{Term|OoT3D|Jewel of White|link|display=Jewel of White}}}}</p>, Sinking Lure [File:OoT3D Sinking Lure Model.png] |
| }} | | }} |
|
| |
|
| {{ItemNav}} | | {{ItemNav}} |


 Heart
Heart


