Locations in Ocarina of Time: Difference between revisions
Jump to navigation
Jump to search
TriforceTony (talk | contribs) |
TriforceTony (talk | contribs) No edit summary |
||
| (7 intermediate revisions by 2 users not shown) | |||
| Line 5: | Line 5: | ||
=={{Term|OoT|Sacred Realm}}== | =={{Term|OoT|Sacred Realm}}== | ||
{{Gallery List|Locations | |||
|OoT= Sacred Realm, Chamber of Sages | |||
|OoT3D= Sacred Realm, Chamber of Sages | |||
}} | |||
=={{Term|OoT|Hyrule}}== | =={{Term|OoT|Hyrule}}== | ||
{{Gallery List|Locations | |||
|OoT= Death Mountain, Gerudo Valley, Hyrule Castle, Hyrule Castle Town, Hyrule Field, Kakariko Village, Kokiri Forest, Lake Hylia, Lost Woods, Zora's Domain | |||
|OoT3D= Death Mountain, Gerudo Valley, Hyrule Castle, Hyrule Castle Town, Hyrule Field, Kakariko Village, Kokiri Forest, Lake Hylia, Lost Woods, Zora's Domain | |||
}} | |||
==={{Term|OoT| | ==={{Term|OoT|Death Mountain}}=== | ||
{{Gallery List|Locations | |||
|OoT= Death Mountain Crater, Death Mountain Summit, Death Mountain Trail, Dodongo's Cavern, Fire Temple, Goron City, Great Fairy's Fountain | |||
|OoT3D= Death Mountain Crater, Death Mountain Summit, Death Mountain Trail, Dodongo's Cavern, Fire Temple, Goron City, Great Fairy's Fountain | |||
}} | |||
===={{Term|OoT|Goron City}}==== | |||
{{Gallery List|Locations | |||
|OoT= Darunia's Room, Goron Shop, Medigoron's Blade Storrrrrrrre | |||
|OoT3D= Darunia's Room, Goron Shop, Medigoron's Blade Storrrrrrrre | |||
}} | |||
==={{Term|OoT|Gerudo Valley}}=== | |||
{{Gallery List|Locations | |||
|OoT= Carpenters' Tent, Desert Colossus, Gerudo's Fortress, Gerudo Training Ground, Great Fairy's Fountain, Haunted Wasteland, Horseback Archery Range, Spirit Temple | |||
|OoT3D= Carpenters' Tent, Desert Colossus, Gerudo's Fortress, Gerudo Training Ground, Great Fairy's Fountain, Haunted Wasteland, Horseback Archery Range, Spirit Temple | |||
}} | |||
==={{Term|OoT|Hyrule Castle}}=== | ==={{Term|OoT|Hyrule Castle}}=== | ||
;{{Term|OoT|Child Era}} | ;{{Term|OoT|Child Era}} | ||
{{Gallery List|Locations | |||
|OoT= Castle Courtyard, Castle Gardens, Great Fairy's Fountain | |||
|OoT3D= Castle Courtyard, Castle Gardens, Great Fairy's Fountain | |||
}} | |||
;{{Term|OoT|Adult Era}} | ;{{Term|OoT|Adult Era}} | ||
{{Gallery List|Locations | |||
|OoT= Ganon's Castle, Great Fairy's Fountain, Rainbow Bridge | |||
|OoT3D= Ganon's Castle, Great Fairy's Fountain, Rainbow Bridge | |||
}} | |||
==={{Term|OoT|Hyrule Castle Town}}=== | ==={{Term|OoT|Hyrule Castle Town}}=== | ||
;{{Term|OoT|Child Era}} | ;{{Term|OoT|Child Era}} | ||
{{Gallery List|Locations | |||
|OoT= Back Alley, Bazaar, Bombchu Bowling Alley, Bombchu Shop, Castle Gate, Happy Mask Shop, Market, Medicine Shop, Guardhouse, Mamamu Yan's House, Shooting Gallery, Temple of Time, Treasure Chest Game | |||
|OoT3D= Back Alley, Bazaar, Bombchu Bowling Alley, Bombchu Shop, Castle Gate, Happy Mask Shop, Market, Medicine Shop, Guardhouse, Mamamu Yan's House, Shooting Gallery, Temple of Time, Treasure Chest Game | |||
}} | |||
;{{Term|OoT|Adult Era}} | ;{{Term|OoT|Adult Era}} | ||
{{Gallery List|Locations | |||
|OoT= Castle Gate [2], Ghost Shop, Market [2], Temple of Time [2] | |||
|OoT3D= Castle Gate [2], Ghost Shop, Market [2], Temple of Time [2] | |||
}} | |||
==={{Term|OoT|Hyrule Field}}=== | |||
;{{Term|OoT|Child Era}} | |||
{{Gallery List|Locations | |||
|OoT= Lon Lon Ranch, Secret Grotto | |||
|OoT3D= Lon Lon Ranch, Secret Grotto | |||
}} | |||
;{{Term|OoT|Adult Era}} | |||
{{Gallery List|Locations | |||
|OoT= Lon Lon Ranch<br>{{Small|{{Term|OoT3D|Ingo Ranch|link|display=Ingo Ranch}}}}</br>, Secret Grotto | |||
|OoT3D= Lon Lon Ranch<br>{{Small|{{Term|OoT3D|Ingo Ranch|link|display=Ingo Ranch}}}}</br>, Secret Grotto | |||
}} | |||
</ | |||
==={{Term|OoT| | ===={{Term|OoT|Lon Lon Ranch}}==== | ||
{{Gallery List|Locations | |||
|OoT= Corral, Stable, Storage Shed, Talon and Malon's House | |||
|OoT3D= Corral, Stable, Storage Shed, Talon and Malon's House | |||
}} | |||
==={{Term|OoT|Kakariko Village}}=== | ==={{Term|OoT|Kakariko Village}}=== | ||
;{{Term|OoT|Child Era}} | ;{{Term|OoT|Child Era}} | ||
{{Gallery List|Locations | |||
|OoT= Kakariko Windmill, Bottom of the Well, Granny's Potion Shop, Gravekeeper's Hut, Graveyard Boy's House, House of Skulltula, Impa's House, Kakariko Village Graveyard, Royal Family's Tomb, Shadow Temple, Unfinished House, Well of Three Features | |||
|OoT3D= Kakariko Windmill, Bottom of the Well, Granny's Potion Shop, Gravekeeper's Hut, Graveyard Boy's House, House of Skulltula, Impa's House, Kakariko Village Graveyard, Royal Family's Tomb, Shadow Temple, Unfinished House, Well of Three Features | |||
}} | |||
;{{Term|OoT|Adult Era}} | ;{{Term|OoT|Adult Era}} | ||
{{Gallery List|Locations | |||
|OoT= Kakariko Windmill, Bottom of the Well, Bazaar [2], Gravekeeper's Hut, Granny's Potion Shop, House of Skulltula, Impa's House, Kakariko Village Graveyard, Medicine Shop [2], Royal Family's Tomb, Shadow Temple, Shooting Gallery, Well of Three Features, ? | |||
|OoT3D= Kakariko Windmill, Bottom of the Well, Bazaar [2], Gravekeeper's Hut, Granny's Potion Shop, House of Skulltula, Impa's House, Kakariko Village Graveyard, Medicine Shop [2], Royal Family's Tomb, Shadow Temple, Shooting Gallery, Well of Three Features, ? | |||
}} | |||
==={{Term|OoT|Kokiri Forest}}=== | |||
{{Gallery List|Locations | |||
|OoT= Forest Training Center, Great Deku Tree's Meadow, House of the Great Mido, House of the Know-It-All Bros., House of the Twins, Inside the Deku Tree, Kokiri Shop, Link's House, Saria's House | |||
|OoT3D= Forest Training Center, Great Deku Tree's Meadow, House of the Great Mido, House of the Know-It-All Bros., House of the Twins, Inside the Deku Tree, Kokiri Shop, Link's House, Saria's House | |||
}} | |||
==={{Term|OoT| | ==={{Term|OoT|Lake Hylia}}=== | ||
{{Gallery List|Locations | |||
|OoT= Fishing Pond, Lakeside Laboratory, Water Temple | |||
|OoT3D= Fishing Pond, Lakeside Laboratory, Water Temple | |||
}} | |||
==={{Term|OoT|Lost Woods}}=== | |||
{{Gallery List|Locations | |||
|OoT= Fairy Fountain, Forest Stage, Forest Temple, Sacred Forest Meadow | |||
|OoT3D= Fairy Fountain, Forest Stage, Forest Temple, Sacred Forest Meadow | |||
}} | |||
==={{Term|OoT|Zora's Domain}}=== | ==={{Term|OoT|Zora's Domain}}=== | ||
{{Gallery List|Locations | |||
|OoT= Great Fairy's Fountain, High-Dive Practice Spot, Ice Cavern, Inside Jabu-Jabu's Belly, King Zora's Throne Room, Sleepless Waterfall, Zora Shop, Zora's Fountain, Zora's River | |||
|OoT3D= Great Fairy's Fountain, High-Dive Practice Spot, Ice Cavern, Inside Jabu-Jabu's Belly, King Zora's Throne Room, Sleepless Waterfall, Zora Shop, Zora's Fountain, Zora's River | |||
}} | |||
{{Categories | {{Categories | ||
|Location Listings | |Location Listings | ||
}} | }} | ||
Latest revision as of 00:14, 24 July 2023
| Regions in Ocarina of Time | |
|---|---|
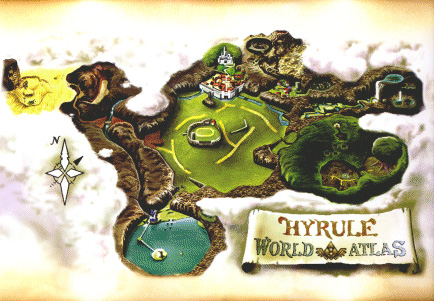 Click on a location | |
Sacred Realm
Ocarina of TimeOcarina of Time 3D


Hyrule
Ocarina of TimeOcarina of Time 3D


Death Mountain
Ocarina of TimeOcarina of Time 3D


Goron City


Gerudo Valley
Ocarina of TimeOcarina of Time 3D


Hyrule Castle
- Child Era


- Adult Era
Ocarina of TimeOcarina of Time 3D


Hyrule Castle Town
- Child Era
Ocarina of TimeOcarina of Time 3D


- Adult Era


Hyrule Field
- Child Era
Ocarina of TimeOcarina of Time 3D

- Adult Era
Ocarina of TimeOcarina of Time 3D
Lon Lon Ranch
Ocarina of TimeOcarina of Time 3D
Kakariko Village
- Child Era
Ocarina of TimeOcarina of Time 3D


- Adult Era
Ocarina of TimeOcarina of Time 3D


Kokiri Forest
Ocarina of TimeOcarina of Time 3D


Lake Hylia
Ocarina of TimeOcarina of Time 3D


Lost Woods


Zora's Domain
Ocarina of TimeOcarina of Time 3D


