Main Room: Difference between revisions
TriforceTony (talk | contribs) (Created page with "{{Infobox Location |image= {{Media |Screenshot OoT= File:OoT Great Hall.png |Screenshot OoT3D= File:OoT3D Main Room.png }} |caption= |pronunciation= |game= OoT |other= |inhab= |items= |services= |season= |temperature= |counter= |theme= |related= {{Term|OoT3D|Forest Temple|link}} |strategy= |zu= }} The {{Term/Store|{{subst:#titleparts:{{subst:PAGENAME}}}}||Series, OoT3D}},{{Exp Game|OoT3D}} also known as the {{Term/Store|Great Hall||OoT}},{{Exp Game|OoT}}<r...") |
TriforceTony (talk | contribs) |
||
| (6 intermediate revisions by 3 users not shown) | |||
| Line 20: | Line 20: | ||
|zu= | |zu= | ||
}} | }} | ||
The {{Term/Store|Main Room||Series, OoT3D}},{{Exp Game|OoT3D}} also known as the {{Term/Store|Great Hall||OoT}},{{Exp Game|OoT}}<ref>{{Cite Guide|quote= |game= OoT |guide= Versus |page= 73}}</ref> is a location in {{OoT}}. | The {{Term/Store|Main Room||Series, OoT3D}},{{Exp Game|OoT3D}}<ref>{{Cite eGuide|quote= |game= OoT3D |guide= Prima |page= 74 |section= The Forest Medallion}}</ref> also known as the {{Term/Store|Great Hall||OoT}},{{Exp Game|OoT}}<ref>{{Cite Guide|quote= |game= OoT |guide= Versus |page= 73}}</ref> is a location in {{OoT}}. | ||
==Features and Overview== | ==Features and Overview== | ||
The {{Term|OoT3D|Main Room}} is the central room of the {{Term|OoT3D|Forest Temple|link}}. It connects to the {{Term|OoT3D|East Courtyard|link}}, the {{Term|OoT3D| | The {{Term|OoT3D|Main Room}} is the central room of the {{Term|OoT3D|Forest Temple|link}}. It serves as a hub connecting various parts of the first floor of the {{Term|OoT3D|Forest Temple|display=Temple}}. The northwest {{Term|OoT3D|Door|link}} connects to the {{Term|OoT3D|West Courtyard|link}}, but is blocked by a {{Term|OoT3D|Time Block|link}}. Similarly, the northeast {{Term|OoT3D|Door}} connects to the {{Term|OoT3D|East Courtyard|link}} but is blocked by a portcullis controlled by a {{Term|OoT3D|Eye Switch|link}}. The other side of this {{Term|OoT3D|Door}} is not blocked, but it will lock once {{Term|OoT3D|Link|link}} passes through it into the {{Term|OoT3D|Main Room}}. In order to pass from the {{Term|OoT3D|Main Room}} into the {{Term|OoT3D|East Courtyard}}, {{Term|OoT3D|Link}} must hit the {{Term|OoT3D|Eye Switch}} with an {{Term|OoT3D|Arrow|link}}. The {{Term|OoT3D|Locked Door|link}} to the west gives way to the {{Term|OoT3D|Stone Tower|link}} and the north {{Term|OoT3D|Door}} leads to a chamber where two {{Plural|OoT3D|Stalfos|link}} wait as a {{Term|OoT3D|Sub-Boss|link}} fight. {{Plural|OoT3D|Jar|link}} containing recovery {{Plural|OoT3D|Item|link}} can be found along the southwest and southeast walls of the {{Term|OoT3D|Main Room}}. | ||
At the center of the room is a large pedestal, around which are four golden {{Plural|OoT3D|Torch|link}} with orange, purple, blue, and yellow flames. The first time {{Term|OoT3D|Link|link}} enters the {{Term|OoT3D|Main Room}}, the {{Term|OoT3D|Poe Sisters|link}} will appear from the {{Plural|TotK|Torch}}, causing their flames to disappear and the central pedestal to sink into the ground. As he defeats the {{Term|OoT3D|Poe Sisters}}, their respective flames will be reignited. The eastern {{Term|OoT3D|Door}} sits atop a mezzanine leading from the room where {{Term|OoT3D|Amy|link}} can be found. | |||
After {{Term|OoT3D|Joelle|link}}, {{Term|OoT3D|Beth|link}}, and {{Term|OoT3D|Amy}} have been defeated, {{Term|OoT3D|Meg|link}} will appear in the center of the {{Term|OoT3D|Main Room}}. Once she has been defeated, the central pedestal will reemerge from the ground, allowing {{Term|OoT3D|Link}} to access the {{Term|OoT3D|Basement|link}}. | |||
The {{Term|OoT3D|Main Room}} remains relatively unchanged in the {{MQ}} mode, though it is now mirrored in {{OoT3D}}'s {{MQ|-}}. The {{Term|OoT3D|Time Block}} covering the entrance to the {{Term|OoT3D|West Courtyard}} is no longer present, as the {{Term|OoT3D|Door}} is also blocked by a portcullis controlled by a golden {{Term|OoT3D|Eye Switch}} over its entrance. | |||
===={{Plural|OoT3D|Enemy}}==== | ===={{Plural|OoT3D|Enemy}}==== | ||
{{Hatnote|There are no {{Plural|OoT3D|Enemy|link}} here in the {{MQ}} mode.}} | |||
{{Gallery List|Enemies | {{Gallery List|Enemies | ||
|OoT= Gold Skulltula [Qty:1] | |OoT= Gold Skulltula [Qty:1] | ||
| Line 33: | Line 40: | ||
{{Gallery List|Enemies | {{Gallery List|Enemies | ||
|OoT= Meg [Qty:1] | |OoT= Meg [Qty:1] | ||
}} | |||
==={{Plural|OoT3D|Golden Skull Token}}=== | |||
{{Gold Skulltulas|game= OoT3D | |||
|- | |||
| Forest Temple [2] | |||
| On the wall east of the northern {{Term|OoT3D|Door|link}} | |||
}} | }} | ||
| Line 52: | Line 66: | ||
{{Ref}} | {{Ref}} | ||
{{Forest Temple}} | |||
{{Categories | {{Categories | ||
|Forest Temple, Rooms | |||
|locations= OoT3D | |locations= OoT3D | ||
}} | }} | ||
Latest revision as of 22:55, 19 October 2023
The Main Room,(OoT3D)[1] also known as the Great Hall,(OoT)[2] is a location in Ocarina of Time.
Features and Overview
The Main Room is the central room of the Forest Temple. It serves as a hub connecting various parts of the first floor of the Temple. The northwest Door connects to the West Courtyard, but is blocked by a Time Block. Similarly, the northeast Door connects to the East Courtyard but is blocked by a portcullis controlled by a Eye Switch. The other side of this Door is not blocked, but it will lock once Link passes through it into the Main Room. In order to pass from the Main Room into the East Courtyard, Link must hit the Eye Switch with an Arrow. The Locked Door to the west gives way to the Stone Tower and the north Door leads to a chamber where two Stalfos wait as a Sub-Boss fight. Jars containing recovery Items can be found along the southwest and southeast walls of the Main Room.
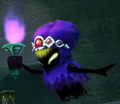
At the center of the room is a large pedestal, around which are four golden Torches with orange, purple, blue, and yellow flames. The first time Link enters the Main Room, the Poe Sisters will appear from the Torches, causing their flames to disappear and the central pedestal to sink into the ground. As he defeats the Poe Sisters, their respective flames will be reignited. The eastern Door sits atop a mezzanine leading from the room where Amy can be found.
After Joelle, Beth, and Amy have been defeated, Meg will appear in the center of the Main Room. Once she has been defeated, the central pedestal will reemerge from the ground, allowing Link to access the Basement.
The Main Room remains relatively unchanged in the Master Quest mode, though it is now mirrored in Ocarina of Time 3D's Master Quest. The Time Block covering the entrance to the West Courtyard is no longer present, as the Door is also blocked by a portcullis controlled by a golden Eye Switch over its entrance.
Enemies
Sub-Bosses
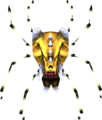
Golden Skull Tokens
| Gold Skulltula | |
|---|---|
| Location | On the wall east of the northern Door |
| Gold Skulltula | Location |
|---|---|
On the wall east of the northern Door |
Nomenclature
| Language | Names | |
|---|---|---|
| This table was generated using translation pages. To request an addition, please contact a staff member with a reference. | ||
Other Names
| Name | Main Hall[3] |
|---|---|
| Applies to | |
| Source | |
| Superseded by |
| Name | Applies to | Source | Superseded by |
|---|---|---|---|
Main Hall[3] |
See Also
References
- ↑ (The Legend of Zelda: Ocarina of Time 3D—Prima Official Game Guide by Prima Games, pg. 74 § The Forest Medallion)
- ↑ The Legend of Zelda: Ocarina of Time—Perfect Guide, Versus Books, pg. 73
- ↑ The Legend of Zelda: Ocarina of Time—Prima's Official Strategy Guide, Prima Games, pg. 131


