Akkala Highlands: Difference between revisions
Veronie002 (talk | contribs) m (added HWAoC) |
TriforceTony (talk | contribs) |
||
| (21 intermediate revisions by 4 users not shown) | |||
| Line 1: | Line 1: | ||
{{Infobox Location | {{Infobox Location | ||
|image= File:BotW Akkala Highlands.png | |image= | ||
{{Media | |||
|Screenshot BotW= File:BotW Akkala Highlands.png | |||
|Screenshot TotK= File:TotK Akkala Highlands.png | |||
|Map BotW= File:BotW Akkala Highlands Map Area.png | |||
}} | |||
|caption= | |caption= | ||
|game= BotW | |pronunciation= | ||
|other= HWAoC | |game= BotW, TotK | ||
|inhab= | |other= HWAoC | ||
|inhab= | |||
|items= | |items= | ||
| | |services= | ||
|season= | |season= | ||
|temperature= | |||
|counter= | |||
{{List| | |||
{{Term|Series|Akkala Highlands Depths|link}} {{Small|({{Term|TotK|Depths|link}})}}, | |||
{{Term|Series|Akkala Highlands Sky|link}} {{Small|({{Term|TotK|Sky|link}})}} | |||
}} | |||
|theme= | |theme= | ||
|related= {{List|{{Term|Series|Akkala Sea|link}}, {{Term|Series|Deep Akkala|link}}}} | |||
|strategy= | |||
|zu= | |||
}} | }} | ||
{{Term/Store|Akkala Highlands||Series, BotW, HWAoC}} | The {{Term/Store|Akkala Highlands||Series, BotW, TotK, HWAoC}} are a recurring location in {{TLoZ|series}}.<ref>{{Cite|'''{{Big|Akkala Highlands}}'''|Map|BotW}}</ref><ref>{{Cite|{{Big|'''Akkala Highlands'''}}|Map|TotK}}</ref><ref>{{Cite|{{Big|{{Color|HWAoC Map|'''Akkala Highlands'''}}}}|Map|HWAoC}}</ref> | ||
{{ | |||
==Features and Overview== | ==Features and Overview== | ||
==={{BotW|-}}=== | ==={{BotW|-}}=== | ||
The {{Term|BotW|Akkala Highlands}} are a densely-wooded area in the northeast of {{Term|BotW|Hyrule|link}}. It borders the {{Term|BotW|Akkala Sea|link}} to the east, {{Term|BotW|Deep Akkala|link}} to the north, {{Term|BotW|Eldin Canyon|link}} to the west, and the {{Term|BotW|Lanayru Great Spring|link}} to the south. As with the {{Term|BotW|Akkala|link}} {{Term|BotW|Region|link}} itself, the {{Plural|BotW|Tree|link}} in the {{Term|BotW|Akkala Highlands}} possess a permanent {{Term|BotW|Autumn|link|display=Autumnal}} coloration. | |||
{{ | |||
The {{Term|BotW|Akkala Highlands}} have historically been a defensive region for {{Term|BotW|Hyrule Kingdom|link}}, defending it from attacks from the {{Term|BotW|Akkala Sea}} with the {{Term|BotW|Akkala Citadel|link}}. Ironically, the {{Term|BotW|Akkala Highlands}} are where the {{Term|BotW|Hyrule Kingdom}} fell during the second {{Term|BotW|Great Calamity|link}} from a {{Term|BotW|Guardian|link}} attack originating at {{Term|BotW|Hyrule Kingdom}}'s center, {{Term|BotW|Hyrule Field|link}}.<ref>{{Cite Book|quote= |book= CaC |publisher= |page= 285}}</ref> | |||
{{ | |||
A century after the second {{Term|BotW|Great Calamity}}, the {{Term|BotW|Bolson Construction|link}} company attempts to reconstruct civilization in the {{Term|BotW|Akkala Highlands}} by dispatching {{Term|BotW|Hudson|link}} to build a new settlement. {{Term|BotW|Hudson}} settles on a rock island in the northern part of {{Term|BotW|Lake Akkala|link}}, naming the new village {{Term|BotW|Tarrey Town|link}}. At some point prior to this, {{Term|BotW|Epona Co.|link}} established the {{Term|BotW|South Akkala Stable|link}} near the base of the {{Term|BotW|Akkala Citadel Ruins|link}} to assist travelers in the region. | |||
{{ | |||
===Akkala | ====Climates==== | ||
{{ | {{Collapsible | ||
|header= Akkala Plain Climate | |||
|frame= false | |||
|collapse= true | |||
|content= | |||
{{(!}} class="wikitable" | |||
{{!}}+ | |||
!colspan=2{{!}} Climate Data | |||
{{!-}} | |||
{{!}} | |||
[[File:BotW Akkala Highlands Akkala Plain Climate Area.png|thumb|center|Map boundaries of the "Akkala plain" climate within the {{Term|BotW|Akkala Highlands}}]] | |||
=== | {{!}}style="padding: 0px 50px 0px 50px;"{{!}} | ||
{{ | {{(!}} class="wikitable" style="margin: auto auto" | ||
{{!}}+ Weather | |||
{{!-}} | |||
! Weather Type !! Chance | |||
{{!-}} | |||
{{!}} Clear {{!!}} 35% | |||
{{!-}} | |||
{{!}} Cloudy {{!!}} 40% | |||
{{!-}} | |||
{{!}} Rain/Snow {{!!}} 10% | |||
{{!-}} | |||
{{!}} Heavy Rain/Snow {{!!}} 5% | |||
{{!-}} | |||
{{!}} Storm {{!!}} 10% | |||
{{!)}} | |||
=== | {{!-}} | ||
{{ | {{!}}style="padding: 25px 50px 25px 50px;" colspan=2{{!}} | ||
{{(!}} class="wikitable" style="margin: auto auto" | |||
{{!}}+ Temperature vs. Altitude | |||
{{!-}} | |||
! Altitude !! Temperature (Day) !! Temperature (Night) | |||
{{!-}} | |||
{{!}} 0m+ {{!!}} 77.0 °F{{Exp|25.0 °C}} {{!!}} 73.4 °F{{Exp|23.0 °C}} | |||
{{!-}} | |||
{{!}} 100m+ {{!!}} 73.4 °F{{Exp|23.0 °C}} {{!!}} 68.0 °F{{Exp|20.0 °C}} | |||
{{!-}} | |||
{{!}} 200m+ {{!!}} 68.0 °F{{Exp|20.0 °C}} {{!!}} 62.6 °F{{Exp|17.0 °C}} | |||
{{!-}} | |||
{{!}} 300m+ {{!!}} 62.6 °F{{Exp|17.0 °C}} {{!!}} 53.6 °F{{Exp|12.0 °C}} | |||
{{!-}} | |||
{{!}} 400m+ {{!!}} 53.6 °F{{Exp|12.0 °C}} {{!!}} 46.4 °F{{Exp|8.0 °C}} | |||
{{!-}} | |||
{{!}} 500m+ {{!!}} 42.8 °F{{Exp|6.0 °C}} {{!!}} 39.2 °F{{Exp|4.0 °C}} | |||
{{!-}} | |||
{{!}} 600m+ {{!!}} 33.8 °F{{Exp|1.0 °C}} {{!!}} 26.6 °F{{Exp|-3.0 °C}} | |||
{{!-}} | |||
{{!}} 700m+ {{!!}} 5.0 °F{{Exp|-15.0 °C}} {{!!}} 1.4 °F{{Exp|-17.0 °C}} | |||
{{!-}} | |||
{{!}} 800m+ {{!!}} -13.0 °F{{Exp|-25.0 °C}} {{!!}} -16.6 °F{{Exp|-27.0 °C}} | |||
{{!-}} | |||
{{!}} 900m+ {{!!}} -18.4 °F{{Exp|-28.0 °C}} {{!!}} -18.4 °F{{Exp|-28.0 °C}} | |||
{{!-}} | |||
{{!}} 1000m+ {{!!}} -18.4 °F{{Exp|-28.0 °C}} {{!!}} -18.4 °F{{Exp|-28.0 °C}} | |||
{{!)}} | |||
{{!)}} | |||
{{ | }} | ||
=== | {{Collapsible | ||
{{ | |header= Zora Temperate Climate | ||
|frame= false | |||
|collapse= true | |||
|content= | |||
{{(!}} class="wikitable" | |||
{{!}}+ | |||
!colspan=2{{!}} Climate Data | |||
{{!-}} | |||
{{!}} | |||
[[File:BotW Akkala Highlands Zora Temperate Climate Area.png|thumb|center|Map boundaries of the "Zora temperate" climate within the {{Term|BotW|Akkala Highlands}}]] | |||
=== | {{!}}style="padding: 0px 50px 0px 50px;"{{!}} | ||
{{ | {{(!}} class="wikitable" style="margin: auto auto" | ||
{{!}}+ Weather | |||
{{!-}} | |||
! Weather Type !! Chance | |||
{{!-}} | |||
{{!}} Clear {{!!}} 50% | |||
{{!-}} | |||
{{!}} Cloudy {{!!}} 20% | |||
{{!-}} | |||
{{!}} Rain/Snow {{!!}} 20% | |||
{{!-}} | |||
{{!}} Heavy Rain/Snow {{!!}} 10% | |||
{{!-}} | |||
{{!}} Storm {{!!}} 0% | |||
{{!)}} | |||
=== | {{!-}} | ||
{{ | {{!}}style="padding: 25px 50px 25px 50px;" colspan=2{{!}} | ||
{{(!}} class="wikitable" style="margin: auto auto" | |||
{{!}}+ Temperature vs. Altitude | |||
{{!-}} | |||
! Altitude !! Temperature (Day) !! Temperature (Night) | |||
{{!-}} | |||
{{!}} 0m+ {{!!}} 77.0 °F{{Exp|25.0 °C}} {{!!}} 73.4 °F{{Exp|23.0 °C}} | |||
{{!-}} | |||
{{!}} 100m+ {{!!}} 73.4 °F{{Exp|23.0 °C}} {{!!}} 68.0 °F{{Exp|20.0 °C}} | |||
{{!-}} | |||
{{!}} 200m+ {{!!}} 68.0 °F{{Exp|20.0 °C}} {{!!}} 62.6 °F{{Exp|17.0 °C}} | |||
{{!-}} | |||
{{!}} 300m+ {{!!}} 59.0 °F{{Exp|15.0 °C}} {{!!}} 53.6 °F{{Exp|12.0 °C}} | |||
{{!-}} | |||
{{!}} 400m+ {{!!}} 50.0 °F{{Exp|10.0 °C}} {{!!}} 46.4 °F{{Exp|8.0 °C}} | |||
{{!-}} | |||
{{!}} 500m+ {{!!}} 46.4 °F{{Exp|8.0 °C}} {{!!}} 44.6 °F{{Exp|7.0 °C}} | |||
{{!-}} | |||
{{!}} 600m+ {{!!}} 39.2 °F{{Exp|4.0 °C}} {{!!}} 38.3 °F{{Exp|3.5 °C}} | |||
{{!-}} | |||
{{!}} 700m+ {{!!}} 39.2 °F{{Exp|4.0 °C}} {{!!}} 38.3 °F{{Exp|3.5 °C}} | |||
{{!-}} | |||
{{!}} 800m+ {{!!}} 30.2 °F{{Exp|-1.0 °C}} {{!!}} 26.6 °F{{Exp|-3.0 °C}} | |||
{{!-}} | |||
{{!}} 900m+ {{!!}} 30.2 °F{{Exp|-1.0 °C}} {{!!}} 26.6 °F{{Exp|-3.0 °C}} | |||
{{!-}} | |||
{{!}} 1000m+ {{!!}} 14.0 °F{{Exp|-10.0 °C}} {{!!}} 14.0 °F{{Exp|-10.0 °C}} | |||
{{!)}} | |||
{{!)}} | |||
{{ | }} | ||
=== | ====Areas==== | ||
{{ | {{Gallery List|Locations | ||
|BotW= Akkala Bridge Ruins, Akkala Citadel Ruins, Akkala Falls, Akkala Parade Ground Ruins, Akkala Span, Akkala Tower, Ankel Island, Dah Hesho Shrine, Davdi Island, East Akkala Plains, East Sokkala Bridge, Fang and Bone [Lake Akkala], Kaepora Pass, Kah Mael Shrine, Kanalet Ridge, Ke'nai Shakah Shrine, Knuckel Island, Lake Akkala, Mija's Great Fairy Fountain, Ordorac Quarry, Rist Peninsula, Ritaag Zumo Shrine, Shadow Pass, Sokkala Bridge, South Akkala Plains, South Akkala Plains West, South Akkala Stable, South Lake Akkala, Tarrey Town, Tingel Island, Torin Wetland, Tutsuwa Nima Shrine, Ukuku Plains, Ulri Mountain, Ulria Grotto, West Sokkala Bridge, Ze Kasho Shrine | |||
}} | |||
=== | ==={{TotK|-}}=== | ||
{{ | {{TotK Quest/Container|width= 46rem| | ||
{{TotK Quest | |||
|name= Bring Peace to Akkala! | |||
|type= Side Adventure | |||
|giver= [[Toren]] | |||
|location= [[Eldin Canyon]] | |||
}} | |||
{{TotK Quest | |||
|name= Misko's Treasure: The Fierce Deity | |||
|type= Side Quest | |||
|giver= [[Misko's Letter]] | |||
|location= [[Cephla Lake Cave]] | |||
}} | |||
{{TotK Quest | |||
|name= Potential Princess Sightings! | |||
|type= Side Adventure | |||
|giver= [[Traysi]] | |||
|location= [[Lucky Clover Gazette]] | |||
}} | |||
{{TotK Quest | |||
|name= Rock for Sale | |||
|type= Shrine Quest | |||
|giver= [[Hagie]] | |||
|location= [[Tarrey Town]] | |||
}} | |||
{{TotK Quest | |||
|name= Teach Me a Lesson II | |||
|type= Side Quest | |||
|giver= [[Symin]] | |||
|location= [[Hateno Village]] | |||
}} | |||
{{TotK Quest | |||
|name= The All-Clucking Cucco | |||
|type= Side Adventure | |||
|giver= [[Penn]] | |||
|location= [[South Akkala Stable]] | |||
}} | |||
{{TotK Quest | |||
|name= The Search for Koltin | |||
|type= Side Adventure | |||
|giver= [[Koltin]] | |||
|location= [[Eldin Canyon]] | |||
}} | |||
}} | |||
{{Stub|TotK}} | |||
=== | ====Areas==== | ||
{{ | {{Gallery List|Locations | ||
|TotK= Akkala Bridge Ruins, Akkala Citadel Ruins, Akkala Citadel Ruins Cave, Akkala Citadel Ruins Summit Cave, Akkala Falls, Akkala Parade Ground Ruins, Akkala Span, Ankel Island, Davdi Island, Domizuin Shrine, East Akkala Plains, East Akkala Plains Chasm, East Sokkala Bridge, Gatanisis Shrine, Jochi-ihiga Shrine, Kaepora Pass, Kanalet Ridge, Knuckel Island, Lake Akkala, Malin Bay East, Octorok Lake, Ordorac Quarry, Rasitakiwak Shrine, Rist Peninsula, Shadow Pass, Sinatanika Shrine, Sokkala Bridge, South Akkala Plains, South Akkala Plains Chasm, South Akkala Plains West, South Akkala Stable, South Akkala Stable Well, South Lake Akkala, Tarrey Town, Tingel Island, Tingel Island Chasm, Torin Wetland, Ukuku Plains, Ulri Mountain, Ulri Mountain Skyview Tower, Ulria Grotto, Ulria Grotto East Cave, Ulria Grotto South Cave, West Sokkala Bridge | |||
}} | |||
==Other Appearances== | ==Other Appearances== | ||
| Line 119: | Line 222: | ||
{{Stub|HWAoC}} | {{Stub|HWAoC}} | ||
{{Noncanon|End}} | {{Noncanon|End}} | ||
==Gallery== | |||
<gallery> | |||
File:BotW Akkala Highlands Promotional Screenshot.png|A promotional screenshot of {{Term|BotW|Link}} in the {{Term|BotW|Akkala Highlands}} from {{BotW|-}} | |||
</gallery> | |||
==Nomenclature== | ==Nomenclature== | ||
{{Nomenclature}} | {{Nomenclature}} | ||
==See Also== | |||
* {{Term|Series|Akkala|link}} | |||
* {{Term|Series|Akkala Highlands Depths|link}} | |||
* {{Term|Series|Akkala Highlands Sky|link}} | |||
* {{Term|Series|Akkala Sea|link}} | |||
* {{Term|Series|Deep Akkala|link}} | |||
{{Ref}} | {{Ref}} | ||
| Line 127: | Line 242: | ||
{{Categories | {{Categories | ||
|Akkala, Akkala Highlands, Highlands | |Akkala, Akkala Highlands, Highlands | ||
|locations= BotW | |locations= BotW, TotK, HWAoC | ||
}} | }} | ||
Latest revision as of 22:14, 19 March 2024
The Akkala Highlands are a recurring location in The Legend of Zelda series.[1][2][3]
Features and Overview
Breath of the Wild
The Akkala Highlands are a densely-wooded area in the northeast of Hyrule. It borders the Akkala Sea to the east, Deep Akkala to the north, Eldin Canyon to the west, and the Lanayru Great Spring to the south. As with the Akkala Region itself, the Trees in the Akkala Highlands possess a permanent Autumnal coloration.
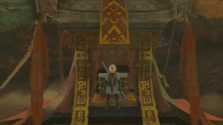
The Akkala Highlands have historically been a defensive region for Hyrule Kingdom, defending it from attacks from the Akkala Sea with the Akkala Citadel. Ironically, the Akkala Highlands are where the Hyrule Kingdom fell during the second Great Calamity from a Guardian attack originating at Hyrule Kingdom's center, Hyrule Field.[4]
A century after the second Great Calamity, the Bolson Construction company attempts to reconstruct civilization in the Akkala Highlands by dispatching Hudson to build a new settlement. Hudson settles on a rock island in the northern part of Lake Akkala, naming the new village Tarrey Town. At some point prior to this, Epona Co. established the South Akkala Stable near the base of the Akkala Citadel Ruins to assist travelers in the region.
Climates
| Climate Data | |||||||||||||||||||||||||||||||||||||
|---|---|---|---|---|---|---|---|---|---|---|---|---|---|---|---|---|---|---|---|---|---|---|---|---|---|---|---|---|---|---|---|---|---|---|---|---|---|
 |
| ||||||||||||||||||||||||||||||||||||
| |||||||||||||||||||||||||||||||||||||
| Climate Data | |||||||||||||||||||||||||||||||||||||
|---|---|---|---|---|---|---|---|---|---|---|---|---|---|---|---|---|---|---|---|---|---|---|---|---|---|---|---|---|---|---|---|---|---|---|---|---|---|
 |
| ||||||||||||||||||||||||||||||||||||
| |||||||||||||||||||||||||||||||||||||
Areas


Tears of the Kingdom
- Related Quests

|
Bring Peace to Akkala! | |||
| Side Adventure | ||||
Bring Peace to Akkala! | |
|
Potential Princess Sightings! | |||
| Side Adventure | ||||
Potential Princess Sightings! | |

|
Rock for Sale | |||
| Shrine Quest | ||||
Rock for Sale | |

|
Teach Me a Lesson II | |||
| Side Quest | ||||
Teach Me a Lesson II | |
|
|
The All-Clucking Cucco | |||
| Side Adventure | ||||
The All-Clucking Cucco | |
|
|
The Search for Koltin | |||
| Side Adventure | ||||
The Search for Koltin | |
|
|
Bring Peace to Akkala! | |||
| Side Adventure | ||||
Bring Peace to Akkala! | |
|
|
Potential Princess Sightings! | |||
| Side Adventure | ||||
Potential Princess Sightings! | |
|
|
Rock for Sale | |||
| Shrine Quest | ||||
Rock for Sale | |
|
|
Teach Me a Lesson II | |||
| Side Quest | ||||
Teach Me a Lesson II | |
|
|
The All-Clucking Cucco | |||
| Side Adventure | ||||
The All-Clucking Cucco | |
|
|
The Search for Koltin | |||
| Side Adventure | ||||
The Search for Koltin | |
Areas


Other Appearances
Hyrule Warriors: Age of Calamity
Gallery
-
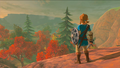
A promotional screenshot of Link in the Akkala Highlands from Breath of the Wild

Nomenclature
| Language | Names | Meanings |
|---|---|---|
Japanese | アッカレこうげん高原 (TotK) | |
ChineseTR | 阿卡萊高原 (Ākǎlái gāoyuán) (TotK) | |
ChineseSI | 阿卡莱高原 (Ākǎlái gāoyuán) (TotK) | |
Dutch | Akkala-hoogvlakte (HWAoC)[6] | Same as English. |
FrenchCA | Hauteurs d'Akkala (TotK) | |
FrenchEU | Hauteurs d'Akkala (TotK) | |
German | Akkala-Hochebene (TotK | HWAoC)[5] | |
Italian | Altopiano di Akkala (TotK) | |
Korean | 추낙 고원 (TotK) | |
SpanishEU | Sierra de Akkala (TotK) | |
| This table was generated using translation pages. To request an addition, please contact a staff member with a reference. | ||
See Also
References
- ↑ "Akkala Highlands" — Map (Breath of the Wild)
- ↑ "Akkala Highlands" — Map (Tears of the Kingdom)
- ↑ "Akkala Highlands" — Map (Hyrule Warriors: Age of Calamity)
- ↑ Creating a Champion, Dark Horse Books, pg. 285
- ↑ "Akkala-Hochebene" — Map (Hyrule Warriors: Age of Calamity)
- ↑ "Akkala-hoogvlakte" — Map (Hyrule Warriors: Age of Calamity)