Central Tower: Difference between revisions
MannedTooth (talk | contribs) No edit summary |
No edit summary |
||
| (13 intermediate revisions by 7 users not shown) | |||
| Line 1: | Line 1: | ||
{{Hatnote|This article is about the recurring location in {{TLoZ|Series}}. For the Central Tower in {{ST}}, see {{Term|ST|Tower of Spirits|link}}. For the {{Term|HWAoC|Movie|link}} in {{HWAoC}}, see {{Term|HWAoC|The Central Tower|link}}.}} | |||
{{Infobox | {{Infobox Location | ||
|image= File:BotW Central Tower.png | |image= File:BotW Central Tower.png | ||
|caption= | |caption= | ||
|pronunciation= | |pronunciation= | ||
|game= | |game= BotW | ||
|other= | |other= HWAoC | ||
|inhab= | |inhab= | ||
|items= | |items= | ||
| | |services= | ||
|season= | |season= | ||
|temperature= | |||
|counter= | |||
|theme= | |theme= | ||
|related= | |||
{{List| | |||
{{Term|Series|Central Tower Region|link}}, | |||
{{Term|Series|Hyrule Garrison Ruins|link}} | |||
}} | }} | ||
The {{Term/Store|Central Tower||Series, BotW}} is a location in {{ | |strategy= | ||
|zu= | |||
}} | |||
The {{Term/Store|Central Tower||Series, BotW, HWAoC}} is a recurring location in {{TLoZ|Series}}.<ref>{{Cite|{{Color|BotW Monk Blue|'''Central Tower'''}}|Map|BotW}}</ref><ref>{{Cite|The Central Tower|Story|HWAoC}}</ref> | |||
==Features and Overview== | ==Features and Overview== | ||
The Central Tower is a | ==={{BotW|-}}=== | ||
The {{Term|BotW|Central Tower}} is a {{Term|BotW|Sheikah Tower|link}} that is located in {{Term|BotW|Hyrule Field|link}}. The {{Term|BotW|Central Tower}} is surrounded by a portion of the {{Term|BotW|Hyrule Garrison Ruins|link}} littered with several {{Plural|BotW|Decayed Guardian|link}}. When activated, {{Term|BotW|Central Tower}} adds the {{Term|BotW|Central Tower Region|link}} to the {{Term|BotW|Sheikah Slate|link}}. | |||
In | In {{Term|BotW|Master Mode|link}}, a metallic {{Term|BotW|Treasure Chest}} containing a {{Term|BotW|Knight's Claymore|link}} can be found atop a platform suspended by {{Term|BotW|Sky Octorok|link}} north of the {{Term|BotW|Central Tower}}. | ||
===Creatures=== | ====Creatures==== | ||
<gallery> | <gallery> | ||
File:BotW Bright-Chested Duck Model.png| | File:BotW Bright-Chested Duck Model.png|{{Term|BotW|Bright-Chested Duck|link}} | ||
File:BotW Bushy-Tailed Squirrel Model.png|{{Term|BotW|Bushy-Tailed Squirrel|link}} | File:BotW Bushy-Tailed Squirrel Model.png|{{Term|BotW|Bushy-Tailed Squirrel|link}} | ||
File:BotW Common Sparrow Model.png| | File:BotW Common Sparrow Model.png|{{Term|BotW|Common Sparrow|link}} | ||
File:BotW Fairy Model.png| | File:BotW Fairy Model.png|{{Term|BotW|Fairy|link}} | ||
File:BotW Grassland Fox Model.png| | File:BotW Grassland Fox Model.png|{{Term|BotW|Grassland Fox|link}} | ||
File:BotW Hightail Lizard Model.png| | File:BotW Hightail Lizard Model.png|{{Term|BotW|Hightail Lizard|link}} | ||
File:BotW Mountain Buck Model.png|{{Term|BotW|Mountain Buck|link}} | File:BotW Mountain Buck Model.png|{{Term|BotW|Mountain Buck|link}} | ||
File:BotW Mountain Doe Model.png|{{Term|BotW|Mountain Doe|link}} | File:BotW Mountain Doe Model.png|{{Term|BotW|Mountain Doe|link}} | ||
File:BotW Pink Heron Model.png| | File:BotW Pink Heron Model.png|{{Term|BotW|Pink Heron|link}} | ||
File:BotW Restless Cricket Model.png| | File:BotW Restless Cricket Model.png|{{Term|BotW|Restless Cricket|link}} | ||
File:BotW Rugged Rhino Beetle Model.png| | File:BotW Rugged Rhino Beetle Model.png|{{Term|BotW|Rugged Rhino Beetle|link}} | ||
File:BotW Sunset Firefly Model.png| | File:BotW Sunset Firefly Model.png|{{Term|BotW|Sunset Firefly|link}} | ||
File:BotW Warm Darner Model.png| | File:BotW Warm Darner Model.png|{{Term|BotW|Warm Darner|link}} | ||
File:BotW Woodland Boar Model.png|{{Term|BotW|Woodland Boar|link}} | File:BotW Woodland Boar Model.png|{{Term|BotW|Woodland Boar|link}} | ||
</gallery> | </gallery> | ||
===Minor Enemies=== | ====Minor Enemies==== | ||
{{ | {{Tabs | ||
|align= | |align= | ||
|default= 1 | |default= 1 | ||
|tab1= Normal Mode | |tab1= Normal Mode | ||
|content1= <gallery> | |content1= <gallery> | ||
File:BotW Chuchu Model 3.png| | File:BotW Chuchu Model 3.png|{{Term|BotW|Chuchu|link}} | ||
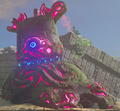
File:BotW Decayed Guardian Model.png| | File:BotW Decayed Guardian Model.png|{{Term|BotW|Decayed Guardian|link}} | ||
File:BotW Keese Model.png| | File:BotW Keese Model.png|{{Term|BotW|Keese|link}} | ||
File:BotW Stalmoblin Model.png| | File:BotW Stalmoblin Model.png|{{Term|BotW|Stalmoblin|link}} | ||
File:BotW Stalmoblin Model.png| | File:BotW Stalmoblin Model.png|{{Term|BotW|Stalmoblin|link}}{{Enemy Weapon|Weapon|Spiked Moblin Spear}} | ||
File:BotW Stalmoblin Model.png| | File:BotW Stalmoblin Model.png|{{Term|BotW|Stalmoblin|link}}{{Enemy Weapon|Bow|Soldier's Bow}}{{Enemy Weapon|Bow|Arrows}} | ||
File:BotW Stone Pebblit Model.png| | File:BotW Stone Pebblit Model.png|{{Term|BotW|Stone Pebblit|link}} | ||
File:BotW Yiga Footsoldier Model.png| | File:BotW Yiga Footsoldier Model.png|{{Term|BotW|Yiga Footsoldier|link}}{{Enemy Weapon|Weapon|Duplex Bow}}{{Enemy Weapon|Bow|Arrows}} | ||
</gallery> | </gallery> | ||
|tab2= Master Mode | |tab2= Master Mode | ||
|content2= <gallery> | |content2= <gallery> | ||
File:BotW Blue Bokoblin Model.png| | File:BotW Blue Bokoblin Model.png|{{Term|BotW|Blue Bokoblin|link}}{{Enemy Weapon|Bow|Spiked Boko Bow}}{{Enemy Weapon|Bow|Arrows}} | ||
File:BotW Chuchu Model 3.png| | File:BotW Chuchu Model 3.png|{{Term|BotW|Chuchu|link}} | ||
File:BotW Decayed Guardian Model.png| | File:BotW Decayed Guardian Model.png|{{Term|BotW|Decayed Guardian|link}} | ||
File:BotW Keese Model.png| | File:BotW Keese Model.png|{{Term|BotW|Keese|link}} | ||
File:BotW Sky Octorok Model.png| | File:BotW Sky Octorok Model.png|{{Term|BotW|Sky Octorok|link}} | ||
File:BotW Stalmoblin Model.png| | File:BotW Stalmoblin Model.png|{{Term|BotW|Stalmoblin|link}} | ||
File:BotW Stalmoblin Model.png| | File:BotW Stalmoblin Model.png|{{Term|BotW|Stalmoblin|link}}{{Enemy Weapon|Weapon|Spiked Moblin Spear}} | ||
File:BotW Stalmoblin Model.png| | File:BotW Stalmoblin Model.png|{{Term|BotW|Stalmoblin|link}}{{Enemy Weapon|Bow|Soldier's Bow}}{{Enemy Weapon|Bow|Arrows}} | ||
File:BotW Stone Pebblit Model.png| | File:BotW Stone Pebblit Model.png|{{Term|BotW|Stone Pebblit|link}} | ||
File:BotW Yiga Footsoldier Model.png| | File:BotW Yiga Footsoldier Model.png|{{Term|BotW|Yiga Footsoldier|link}}{{Enemy Weapon|Weapon|Duplex Bow}}{{Enemy Weapon|Bow|Arrows}} | ||
</gallery> | </gallery> | ||
}} | }} | ||
===Materials=== | ====Materials==== | ||
<gallery> | <gallery> | ||
File:BotW Acorn Model.png| | File:BotW Acorn Model.png|{{Term|BotW|Acorn|link}} | ||
File:BotW Apple Model.png| | File:BotW Apple Model.png|{{Term|BotW|Apple|link}} | ||
File:BotW Big Hearty Radish Model.png| | File:BotW Big Hearty Radish Model.png|{{Term|BotW|Big Hearty Radish|link}} | ||
File:BotW Bird Egg Model.png| | File:BotW Bird Egg Model.png|{{Term|BotW|Bird Egg|link}} | ||
File:BotW Blue Nightshade Model.png| | File:BotW Blue Nightshade Model.png|{{Term|BotW|Blue Nightshade|link}} | ||
File:BotW Chickaloo Tree Nut Model.png| | File:BotW Chickaloo Tree Nut Model.png|{{Term|BotW|Chickaloo Tree Nut|link}} | ||
File:BotW Hearty Radish Model.png| | File:BotW Hearty Radish Model.png|{{Term|BotW|Hearty Radish|link}} | ||
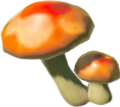
File:BotW Hylian Shroom Model.png| | File:BotW Hylian Shroom Model.png|{{Term|BotW|Hylian Shroom|link}} | ||
File:BotW Stamella Shroom Model.png| | File:BotW Stamella Shroom Model.png|{{Term|BotW|Stamella Shroom|link}} | ||
</gallery> | </gallery> | ||
===Equipment=== | ====Equipment==== | ||
<gallery> | <gallery> | ||
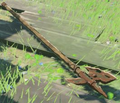
File:BotW Rusty Halberd Model.png| | File:BotW Rusty Halberd Model.png|{{Term|BotW|Rusty Halberd|link}} | ||
</gallery> | </gallery> | ||
==Other Appearances== | |||
==={{HWAoC|-}}=== | |||
{{Noncanon|Start}} | |||
The {{Term|HWAoC|Central Tower}} serves as a hub for the {{Plural|HWAoC|Warrior|link}} throughout {{HWAoC}}. After "{{Term|HWAoC|The Central Tower|link}}" {{Term|HWAoC|Movie|link}} plays during the {{Term|HWAoC|Scenario|link}} "{{Term|HWAoC|The Battle of Hyrule Field|link}}", it appears as part of the {{Term|HWAoC|Hyrule Field|link}} {{Term|HWAoC|Stage|link}}. | |||
During "{{Term|HWAoC|The Central Tower}}" {{Term|HWAoC|Movie}}, {{Term|HWAoC|Link|link}} catches the {{Term|HWAoC|Sheikah Slate|link}} after {{Term|HWAoC|Impa|link}} throws it to him. This causes the ground to start to rumble, and the {{Term|HWAoC|Central Tower}} rises from underground, knocking away the {{Plural|HWAoC|Bokoblin|link}} that were chasing {{Term|HWAoC|Impa}}. Afterwards, {{Term|HWAoC|Impa}} and {{Term|HWAoC|Link}} return to inspect the {{Term|HWAoC|Central Tower}} in "{{Term|HWAoC|The Diminutive Guardian|link}}" {{Term|HWAoC|Movie}}, but they leave chasing {{Term|HWAoC|Terrako|link}} after it begins running toward {{Term|HWAoC|Hyrule Castle|link}}.<ref>{{Cite|Impa racks her brain over the mysterious, diminutive Guardian and the tower that suddenly appeared. Meanwhile, the Guardian spots Hyrule Castle and, ignoring Impa's shouts, rushes toward it as fast as it can.|Story|HWAoC}}</ref> | |||
{{Noncanon|End}} | |||
==Nomenclature== | ==Nomenclature== | ||
{{ | {{Nomenclature}} | ||
==See Also== | ==See Also== | ||
* | * {{Term|Series|Central Hyrule|link}} | ||
* {{Term|Series|Central Tower Region|link}} | |||
* {{Term|Series|Sheikah Tower|link}} | |||
{{Ref}} | {{Ref}} | ||
{{Categories | {{Categories | ||
|Ancient Technology, Hyrule Field, Sheikah Towers | |Ancient Technology, Hyrule Field, Sheikah Towers | ||
| | |locations= BotW, HWAoC | ||
}} | }} | ||
Latest revision as of 20:54, 6 February 2024
The Central Tower is a recurring location in The Legend of Zelda series.[1][2]
Features and Overview
Breath of the Wild
The Central Tower is a Sheikah Tower that is located in Hyrule Field. The Central Tower is surrounded by a portion of the Hyrule Garrison Ruins littered with several Decayed Guardians. When activated, Central Tower adds the Central Tower Region to the Sheikah Slate.
In Master Mode, a metallic Treasure Chest containing a Knight's Claymore can be found atop a platform suspended by Sky Octorok north of the Central Tower.
Creatures
Minor Enemies
Materials
Equipment
Other Appearances
Hyrule Warriors: Age of Calamity
The Central Tower serves as a hub for the Warriors throughout Hyrule Warriors: Age of Calamity. After "The Central Tower" Movie plays during the Scenario "The Battle of Hyrule Field", it appears as part of the Hyrule Field Stage.
During "The Central Tower" Movie, Link catches the Sheikah Slate after Impa throws it to him. This causes the ground to start to rumble, and the Central Tower rises from underground, knocking away the Bokoblins that were chasing Impa. Afterwards, Impa and Link return to inspect the Central Tower in "The Diminutive Guardian" Movie, but they leave chasing Terrako after it begins running toward Hyrule Castle.[3]
Nomenclature
| Language | Names | |
|---|---|---|
| This table was generated using translation pages. To request an addition, please contact a staff member with a reference. | ||
See Also
References
- ↑ "Central Tower" — Map (Breath of the Wild)
- ↑ "The Central Tower" — Story (Hyrule Warriors: Age of Calamity)
- ↑ "Impa racks her brain over the mysterious, diminutive Guardian and the tower that suddenly appeared. Meanwhile, the Guardian spots Hyrule Castle and, ignoring Impa's shouts, rushes toward it as fast as it can." — Story (Hyrule Warriors: Age of Calamity)


