
Suthorn Ruins
The Suthorn Ruins are a Dungeon in Echoes of Wisdom.[1]
Entrance to the Ruins
Related Quests

|

|
The Mysterious Rifts | ||
| Main Quest | ||||
| Hyrule Castle | ||||
| Main Quest
| |
The Mysterious Rifts | |
| Hyrule Castle | |
|
|
|
The Mysterious Rifts | ||
| Main Quest | ||||
| Hyrule Castle | ||||
| Main Quest
| |
The Mysterious Rifts | |
| Hyrule Castle | |

The Suthorn Ruins are located in Suthorn Forest to the south of Hyrule. Link visits the Suthorn Ruins to confront Ganon and save Princess Zelda. However, after destroying Ganon, Link is swallowed into a Rift created by Ganon's Trident. This Rift quickly expands throughout the Suthorn Ruins, forcing Zelda to flee. After Zelda is accused of causing the Rifts that have begun to appear across all of Hyrule, she returns to the Suthorn Forest and enters the Rift to the Stilled Suthorn Forest inside the Still World where the Suthorn Ruins now sit.


The Suthorn Ruins are heavily focused on navigational puzzles. Elements of the Ruins are also obstructed by large Objects that are too heavy for Zelda to move. In order to account for this, Tri teaches Zelda the Bind and Reverse Bond techniques shortly after she enters the Ruins. By using Bind, Zelda is capable of moving other things in tandem with her actions. Similarly, Reverse Bond allows Zelda to move in relation to other things, such as hovering platforms that pass over gaps.
-
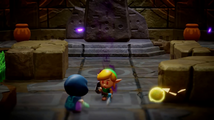
Zelda being attacked by Link's impostor
-
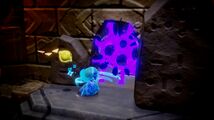
Zelda using her new Swordfighter Form to advance


Within the Suthorn Ruins, Zelda confronts a malicious impostor of Link who attacks her on sight. After the impostor is defeated, he leaves the Mysterious Sword lodged in the ground. By pulling the Mysterious Sword, Zelda earns the Swordfighter Form. This ability allows Zelda to temporarily adopt Link's aspects, including his swordfighting capabilities. The Mysterious Sword is required to advance through the Ruins as dark webbing obstructs portions of the Ruins and can only be destroyed with this Sword.

The latter half of the Suthorn Ruins requires Zelda to demonstrate her mastery over her Bind ability. Enemies such as Deku Babas appear, which can be defeated by pulling their heads from their stems with Bind. One room features a blocked door which can only be opened by pulling a Shield from the wall. Additionally, multiple rooms require Zelda to move Statues of Darknuts onto Floor Switches from the other side of a room separated by iron bars. A side-scrolling room also tests Zelda's ability to use Reverse Bond with a series of floating platforms.
-
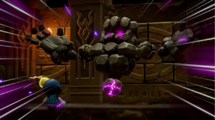
Seismic Talus challenging Zelda to battle
-
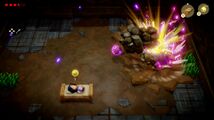
Zelda Resting in the fight


At the end of the Ruins the Seismic Talus awaits Zelda. Once the Seismic Talus is defeated, Tri's friends are released and Tri receives an additional counter to summon Echoes, increasing the total Cost limit to four. The Seismic Talus also leaves behind a mysterious fragment and a Heart Container.
Enemies


Sub-Bosses

Bosses

Treasure Chests
| Treasure Chest | |
|---|---|
| Contents | |
| Coordinates |  |
| Notes | In the room west of the first Ladder |
| Treasure Chest | |
| Contents | |
| Coordinates |  |
| Notes | In the side-scrolling room inhabited by Strandtulas |
| Treasure Chest | |
| Contents | —Not Applicable |
| Coordinates |  |
| Notes | Atop the high ledge in the southwest portion of the room before the Link battle |
| Treasure Chest | |
| Contents | |
| Coordinates |  |
| Notes | In the side-scrolling room immediately after the Link battle |
| Treasure Chest | |
| Contents | |
| Coordinates |  |
| Notes | In the northwestern 1F room housing the lone Deku Baba behind a grate |
| Treasure Chest | |
| Contents | |
| Coordinates |  |
| Notes | At the top of the side-scrolling room immediately before the room housing the Big Key |
| Treasure Chest | |
| Contents | |
| Coordinates |  |
| Notes | Inside the room northeast of the chamber housing the Big Door |


| Treasure Chest | Contents | Coordinates | Notes |
|---|---|---|---|
| In the room west of the first Ladder | ||
| In the side-scrolling room inhabited by Strandtulas | ||
—Not Applicable | | Atop the high ledge in the southwest portion of the room before the Link battle | |
| In the side-scrolling room immediately after the Link battle | ||
| In the northwestern 1F room housing the lone Deku Baba behind a grate | ||
| At the top of the side-scrolling room immediately before the room housing the Big Key | ||
| Inside the room northeast of the chamber housing the Big Door |
Echo Objects


Nomenclature
 Names in Other Regions Names in Other Regions  | ||
|---|---|---|
| Language | Names | |
| This table was generated using translation pages. To request an addition, please contact a staff member with a reference. | ||
Gallery
-
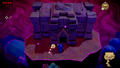
The exterior of the Suthorn Ruins in the Stilled Suthorn Forest

See Also
References
- ↑
Suthorn Ruins
— Game Screen (Echoes of Wisdom)