Power Gem: Difference between revisions
(replaced brs w/List & added Term) |
Htwretched (talk | contribs) (Remade list with Data Table, proper terms, requirements, and numbers from Prima guide) |
||
| Line 26: | Line 26: | ||
By collecting 10 {{Plural|PH|Power Gem}}, the {{Term|PH|Leaf|link|display=Spirit of Power}} ignites {{Term|PH|Link|link}}'s {{Term|PH|Sword|link}} and doubles its attack power. Getting all 20 quadruples the amount of such power. Hitting a {{Term|PH|Phantom|link}} or {{Term|PH|Reapling|link}} from behind with {{Term|PH|Oshus's Sword|link}} with the {{Term|PH|Leaf|display=Spirit of Power}} equipped will stun it. {{Plural|PH|Enemy|link}} such as {{Plural|PH|Bubble|link}}, {{Plural|PH|Phantom Eye|link}} and {{Plural|PH|Fire Keese|link}} can be killed directly with the {{Plural|PH|Sword}} and no longer need to be stunned first. | By collecting 10 {{Plural|PH|Power Gem}}, the {{Term|PH|Leaf|link|display=Spirit of Power}} ignites {{Term|PH|Link|link}}'s {{Term|PH|Sword|link}} and doubles its attack power. Getting all 20 quadruples the amount of such power. Hitting a {{Term|PH|Phantom|link}} or {{Term|PH|Reapling|link}} from behind with {{Term|PH|Oshus's Sword|link}} with the {{Term|PH|Leaf|display=Spirit of Power}} equipped will stun it. {{Plural|PH|Enemy|link}} such as {{Plural|PH|Bubble|link}}, {{Plural|PH|Phantom Eye|link}} and {{Plural|PH|Fire Keese|link}} can be killed directly with the {{Plural|PH|Sword}} and no longer need to be stunned first. | ||
{| | {{Data Table | ||
|game= PH | |||
|columns= Number, Location [Term], Requirement(s) [List], How to Obtain [Description] | |||
|- | |- | ||
| 1 | | '''1''' | ||
| | | Mercay Island Shop | ||
| | | 500 {{Plural|PH|Rupee|link}} | ||
| Purchase from the {{Term|PH|Shop}} at any time. | |||
|- | |- | ||
| 2 | | '''2''' | ||
| | | Isle of Ember | ||
| Given by {{Term|PH| | | N/A | ||
| Given by {{Term|PH|Astrid|link}} after completing the {{Term|PH|Temple of Fire|link}}. | |||
|- | |- | ||
| 3 | | '''3''' | ||
| {{Term|PH| | | Cannon Island | ||
| N/A | |||
| Inside a {{Term|PH|Treasure Chest|link|display=Chest}} in the {{Term|PH|Bomb Garden Cavern|link}}. | |||
|- | |- | ||
| 4 | | '''4''' | ||
| {{Term|PH| | | Isle of Gust | ||
| N/A | |||
| Inside a {{Term|PH|Treasure Chest|display=Chest}} on an elevated platform along the west edge. | |||
|- | |- | ||
| 5 | | '''5''' | ||
| {{Term|PH| | | Temple of Wind | ||
| N/A | |||
| Inside a {{Term|PH|Treasure Chest|display=Chest}} in the west side of the {{Term|PH|Sandworm|link}} room, Floor B2. | |||
|- | |- | ||
| 6 | | '''6''' | ||
| {{Term|PH|Temple of | | Mercay Island | ||
| | | N/A | ||
| Speak to {{Term|PH|Oshus|link}} in [[Oshus's House|his house]] after completing the {{Term|PH|Temple of Wind|link}}.<br/>'''Note:''' {{Term|PH|Oshus}} will send this {{Term|PH|Power Gem}} in a {{Term|PH|Letter|link}} if {{Term|PH|Link|link}} does not speak to him. | |||
|- | |- | ||
| 7 | | '''7''' | ||
| {{ | | Mercay Island | ||
| | | {{Plural|PH|Bomb|link}} | ||
| Inside a {{Term|PH|Treasure Chest|display=Chest}} in a {{Term|PH|Cave|link}} near the {{Term|PH|Temple of the Ocean King|link}}. | |||
|- | |- | ||
| 8 | | '''8''' | ||
| {{Term|PH| | | Temple of the Ocean King | ||
| N/A | |||
| Inside a {{Term|PH|Treasure Chest|display=Chest}} that appears after defeating the three {{Plural|PH|Phantom Eye|link}} on Floor B4. | |||
|- | |- | ||
| 9 | | '''9''' | ||
| {{ | | Temple of Courage | ||
| Inside | | {{Plural|PH|Bomb}} | ||
| Inside a {{Term|PH|Treasure Chest|display=Chest}} in the northwest corner of Floor 1F. | |||
|- | |- | ||
| 10 | | '''10''' | ||
| {{Term|PH| | | Temple of Courage | ||
| | | {{Term|PH|Bow|link}} | ||
| Inside a {{Term|PH|Treasure Chest|display=Chest}} that appears after shooting two {{Plural|PH|Eyeball Switch|link}} in the south room of Floor 2F. | |||
|- | |- | ||
| 11 | | '''11''' | ||
| {{Term|PH| | | Temple of the Ocean King | ||
| Inside a | | {{Term|PH|Bow}} | ||
| Inside a {{Term|PH|Treasure Chest|display=Chest}} that appears after shooting the {{Term|PH|Eyeball Switch}} in the northeast of Floor B3. | |||
|- | |- | ||
| 12 | | '''12''' | ||
| {{Term|PH| | | Goron Island | ||
| {{Plural|PH|Bomb}} | |||
| Inside a {{Term|PH|Treasure Chest|display=Chest}} in the {{Term|PH|North Maze|link}}. | |||
|- | |- | ||
| 13 | | '''13''' | ||
| {{Term|PH| | | Isle of Frost | ||
| | | {{Term|PH|Grappling Hook|link}} | ||
| Inside a {{Term|PH|Treasure Chest|display=Chest}} on a high ledge in the {{Term|PH|Great Ice Field|link}}. | |||
|- | |- | ||
| 14 | | '''14''' | ||
| {{Term|PH| | | Molida Island | ||
| | | {{Term|PH|Grappling Hook}} | ||
| Inside a {{Term|PH|Treasure Chest|display=Chest}} on a high ledge in the {{Term|PH|Molida Island Cavern|link}}. | |||
|- | |- | ||
| 15 | | '''15''' | ||
| {{Term|PH| | | Spirit Island | ||
| Inside a | | {{Term|PH|Grappling Hook}} | ||
| Inside a {{Term|PH|Treasure Chest|display=Chest}} in the island's east side. | |||
|- | |- | ||
| 16 | | '''16''' | ||
| {{Term|PH| | | Bannan Island | ||
| Inside a | | {{Term|PH|Grappling Hook}} | ||
| Inside a {{Term|PH|Treasure Chest|display=Chest}} on a tiny island east of the {{Term|PH|Dock|link.}} | |||
|- | |- | ||
| 17 | | '''17''' | ||
| {{Term|PH| | | Temple of the Ocean King | ||
| Inside a | | {{Term|PH|Grappling Hook}} | ||
| Inside a large {{Term|PH|Treasure Chest|display=Chest}} that appears after hitting a {{Term|PH|Shock Switch|link}} in the northeast of Floor B7. | |||
|- | |- | ||
| 18 | | '''18''' | ||
| {{Term|PH| | | Isle of the Dead | ||
| | | {{Term|PH|Shovel|link}}, {{Plural|PH|Bomb}} | ||
| Inside a {{Term|PH|Treasure Chest|display=Chest}} behind a {{Term|PH|Cracked Wall|link}} in the hidden {{Term|PH|Cave}}. | |||
|- | |- | ||
| 19 | | '''19''' | ||
| {{Term|PH| | | Isle of Ruins | ||
| | | N/A | ||
| After lowering the {{Term|PH|Water (Terrain)|link}} level, inside a {{Term|PH|Treasure Chest|display=Chest}} to the northeast of the maze. | |||
|- | |- | ||
| 20 | | '''20''' | ||
| | | N/A | ||
| | | N/A | ||
| At any {{Term|PH|Postbox|link}} after completing {{Term|PH|Mutoh's Temple|link}}, receive a {{Term|PH|Letter}} from {{Term|PH|King Mutoh|link}}. | |||
}} | |||
==Nomenclature== | ==Nomenclature== | ||
Revision as of 01:59, 28 March 2024
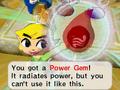
Power Gems are Items in Phantom Hourglass.[1]
Location and Uses
By collecting 10 Power Gems, the Spirit of Power ignites Link's Sword and doubles its attack power. Getting all 20 quadruples the amount of such power. Hitting a Phantom or Reapling from behind with Oshus's Sword with the Spirit of Power equipped will stun it. Enemies such as Bubbles, Phantom Eyes and Fire Keese can be killed directly with the Swords and no longer need to be stunned first.
| Number | 1 |
|---|---|
| Location | |
| Requirement(s) |
|
| How to Obtain | Purchase from the Shop at any time. |
| Number | 2 |
| Location | |
| Requirement(s) | — |
| How to Obtain | Given by Astrid after completing the Temple of Fire. |
| Number | 3 |
| Location | |
| Requirement(s) | — |
| How to Obtain | Inside a Chest in the Bomb Garden Cavern. |
| Number | 4 |
| Location | |
| Requirement(s) | — |
| How to Obtain | Inside a Chest on an elevated platform along the west edge. |
| Number | 5 |
| Location | |
| Requirement(s) | — |
| How to Obtain | Inside a Chest in the west side of the Sandworm room, Floor B2. |
| Number | 6 |
| Location | |
| Requirement(s) | — |
| How to Obtain | Speak to Oshus in his house after completing the Temple of Wind. |
| Number | 7 |
| Location | |
| Requirement(s) | |
| How to Obtain | Inside a Chest in a Cave near the Temple of the Ocean King. |
| Number | 8 |
| Location | |
| Requirement(s) | — |
| How to Obtain | Inside a Chest that appears after defeating the three Phantom Eyes on Floor B4. |
| Number | 9 |
| Location | |
| Requirement(s) |
|
| How to Obtain | Inside a Chest in the northwest corner of Floor 1F. |
| Number | 10 |
| Location | |
| Requirement(s) | |
| How to Obtain | Inside a Chest that appears after shooting two Eyeball Switches in the south room of Floor 2F. |
| Number | 11 |
| Location | |
| Requirement(s) |
|
| How to Obtain | Inside a Chest that appears after shooting the Eyeball Switch in the northeast of Floor B3. |
| Number | 12 |
| Location | |
| Requirement(s) |
|
| How to Obtain | Inside a Chest in the North Maze. |
| Number | 13 |
| Location | |
| Requirement(s) | |
| How to Obtain | Inside a Chest on a high ledge in the Great Ice Field. |
| Number | 14 |
| Location | |
| Requirement(s) |
|
| How to Obtain | Inside a Chest on a high ledge in the Molida Island Cavern. |
| Number | 15 |
| Location | |
| Requirement(s) |
|
| How to Obtain | Inside a Chest in the island's east side. |
| Number | 16 |
| Location | |
| Requirement(s) |
|
| How to Obtain | Inside a Chest on a tiny island east of the Dock |
| Number | 17 |
| Location | |
| Requirement(s) |
|
| How to Obtain | Inside a large Chest that appears after hitting a Shock Switch in the northeast of Floor B7. |
| Number | 18 |
| Location | |
| Requirement(s) |
|
| How to Obtain | Inside a Chest behind a Bomb Wall in the hidden Cave. |
| Number | 19 |
| Location | |
| Requirement(s) | — |
| How to Obtain | After lowering the Water level, inside a Chest to the northeast of the maze. |
| Number | 20 |
| Location | — |
| Requirement(s) | — |
| How to Obtain | At any Mailbox after completing Mutoh's Temple, receive a Letter from King Mutoh. |
| Number | Location | Requirement(s) | How to Obtain |
|---|---|---|---|
1 |
| Purchase from the Shop at any time. | |
2 | — | Given by Astrid after completing the Temple of Fire. | |
3 | — | Inside a Chest in the Bomb Garden Cavern. | |
4 | — | Inside a Chest on an elevated platform along the west edge. | |
5 | — | Inside a Chest in the west side of the Sandworm room, Floor B2. | |
6 | — | Speak to Oshus in his house after completing the Temple of Wind. | |
7 | Inside a Chest in a Cave near the Temple of the Ocean King. | ||
8 | — | Inside a Chest that appears after defeating the three Phantom Eyes on Floor B4. | |
9 |
| Inside a Chest in the northwest corner of Floor 1F. | |
10 | Inside a Chest that appears after shooting two Eyeball Switches in the south room of Floor 2F. | ||
11 |
| Inside a Chest that appears after shooting the Eyeball Switch in the northeast of Floor B3. | |
12 |
| Inside a Chest in the North Maze. | |
13 | Inside a Chest on a high ledge in the Great Ice Field. | ||
14 |
| Inside a Chest on a high ledge in the Molida Island Cavern. | |
15 |
| Inside a Chest in the island's east side. | |
16 |
| Inside a Chest on a tiny island east of the Dock | |
17 |
| Inside a large Chest that appears after hitting a Shock Switch in the northeast of Floor B7. | |
18 |
| Inside a Chest behind a Bomb Wall in the hidden Cave. | |
19 | — | After lowering the Water level, inside a Chest to the northeast of the maze. | |
20 | — | — | At any Mailbox after completing Mutoh's Temple, receive a Letter from King Mutoh. |
Nomenclature
| Language | Names | |
|---|---|---|
Japanese | ||
FrenchCA | Joyau de la Force[8] | |
FrenchEU | Goutte de force[6] | |
German | Krafttropfen[5] | |
Italian | Gemma del potere[2] | |
SpanishLA | Gema del Poder[7] | |
SpanishEU | Cristal de poder[9] | |
| This table was generated using translation pages. To request an addition, please contact a staff member with a reference. | ||
Gallery
-
Link obtaining a Power Gem

See Also
References
- ↑ 1.0 1.1 1.2 Encyclopedia, Dark Horse Books, pg. 134 (PH)
- ↑ "Gemma del potere" — Inventory (Phantom Hourglass)
- ↑ "ちからのみなもと" — Inventory (Phantom Hourglass)
- ↑ "力のみなもとを手に入れた!
ただならめ力を感じるが
このままでは使えない" — N/A (Phantom Hourglass) - ↑ "Krafttropfen" — Inventory (Phantom Hourglass)
- ↑ "Goutte de force" — Inventory (Phantom Hourglass)
- ↑ "Gema del Poder" — Inventory (Phantom Hourglass)
- ↑ "Joyau de la Force" — Inventory (Phantom Hourglass)
- ↑ "Cristal de poder" — Inventory (Phantom Hourglass)