Darkness: Difference between revisions
JumbledLimes (talk | contribs) (+name ref) |
mNo edit summary |
||
| (32 intermediate revisions by 6 users not shown) | |||
| Line 1: | Line 1: | ||
{{ | {{Split|Shadow}} | ||
{{Lacking Sources}} | {{Lacking Sources}} | ||
{{Infobox Object | {{Infobox Object | ||
|image= File:TP Dark Fog.png | |image= File:TP Dark Fog.png | ||
|caption = [[ | |caption = [[Dark Fog]] in {{TP|-}} | ||
|game = | |game = | ||
|other = | |other = | ||
|uses = | |uses = | ||
|comp = [[Light]] | |comp = [[Light]] | ||
}} | }} | ||
{{Term/Store|Darkness||Series, TP, TPHD}},<ref>{{Cite| | {{Term/Store|Darkness||Series, TP, TPHD, TotK}},<ref>{{Cite Guide|quote= |game= TotK |publisher= Piggyback |page= 17}}</ref>{{Name Ref|TPHD}} often also referred to as '''Shadow''',<ref>{{Cite|Discovery Log: Day... I've lost count.<br/><br/>I can feel that I'm a hair's breadth away from unlocking the secrets hidden within the {{Color|BotW Red|pedestal}}.<br/><br/>I'm certain that "{{Color|BotW Red|casting}}" and "{{Color|BotW Red|cold}}" refer to using a specific type of {{Color|BotW Red|shadow}}.<br/><br/>But I've run out of food entirely, and I doubt now that I ever had the tools to do the job...whatever they might be.|Mountain Peak Log|BotW}}</ref> is a pivotal element that has played a vital role in {{TLoZ|Series}}. It has served various purposes, both storyline-wise and gameplay-wise, and usually as a manifestation of evil (but not always). | ||
==Role in the Series== | ==Role in the Series== | ||
| Line 49: | Line 49: | ||
File:ALttP Babusu Sprite.png|[[Babasu]] | File:ALttP Babusu Sprite.png|[[Babasu]] | ||
File:LADX Bone Putter Sprite.png|[[Bone Putter]] | File:LADX Bone Putter Sprite.png|[[Bone Putter]] | ||
File:ALttP | File:ALttP Agahnim Artwork.png|[[Agahnim]] | ||
File:LADX Boo Buddy Sprite.png|[[Boo Buddy]] | File:LADX Boo Buddy Sprite.png|[[Boo Buddy]] | ||
File:LADX Giant Ghini Sprite.png|[[Giant Ghini]] | File:LADX Giant Ghini Sprite.png|[[Giant Ghini]] | ||
| Line 57: | Line 57: | ||
File:TP Stalchildren Render.png|[[Stalchild]]ren | File:TP Stalchildren Render.png|[[Stalchild]]ren | ||
File:OoT Poe Model.png|[[Poe]] | File:OoT Poe Model.png|[[Poe]] | ||
File:Poe Sisters.png|[[Poe Sisters]] | File:MM Poe Sisters Model.png|[[Poe Sisters]] | ||
File:MM Big Poe Model.png|[[Big Poe]] | File:MM Big Poe Model.png|[[Big Poe]] | ||
File:OoT Wallmaster Model.png|[[Wallmaster]] | File:OoT Wallmaster Model.png|[[Wallmaster]] | ||
| Line 67: | Line 67: | ||
File:OoT Anubis Model.png|[[Anubis]] | File:OoT Anubis Model.png|[[Anubis]] | ||
File:MM Black Boe Model.png|[[Boe|Black Boe]] | File:MM Black Boe Model.png|[[Boe|Black Boe]] | ||
File:MM | File:MM Ghost Model.png|[[Ghost (Majora's Mask)|Ghost]] | ||
File:Skullfish.png|[[Skullfish]] | File:MM Skullfish Model 2.png|[[Skullfish]] | ||
File:MM Desbreko Model.png|[[Desbreko]] | File:MM Desbreko Model.png|[[Desbreko]] | ||
File:MM Captain Keeta Model.png|[[Captain Keeta]] | File:MM Captain Keeta Model.png|[[Captain Keeta]] | ||
File:OoT Flat Model.png|[[Flat]] | File:OoT Flat the Younger Model.png|[[Flat the Younger]] | ||
File:OoT Sharp Model.png|[[Sharp]] | File:OoT Sharp the Elder Model.png|[[Sharp the Elder]] | ||
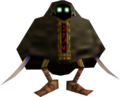
File:MM Garo Model.png|[[Garo]] | File:MM Garo Model.png|[[Garo]] | ||
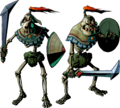
File:MM Garo Master Model.png|[[Garo Master]] | File:MM Garo Master Model.png|[[Garo Master]] | ||
File:MM King's Lackeys Artwork.png|[[King's Lackeys]] | File:MM King's Lackeys Artwork.png|[[King's Lackeys]] | ||
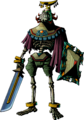
File:MM Igos du Ikana Artwork.png|[[Igos du Ikana]] | File:MM Igos du Ikana Artwork.png|[[Igos du Ikana]] | ||
File: | File:MM Gomess Model.png|[[Gomess]] | ||
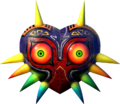
File:MM3D Majora's Mask Render.png|{{MM|Object}} | File:MM3D Majora's Mask Render.png|{{MM|Object}} | ||
File:OoA Pumpkin Head Sprite.png|[[Pumpkin Head]] | File:OoA Pumpkin Head Sprite.png|[[Pumpkin Head]] | ||
File:Shadow Hag.png|[[Shadow Hag]] | File:OoA Shadow Hag Sprite.png|[[Shadow Hag]] | ||
File:OoS Vire Artwork.png|[[Vire]] | File:OoS Vire Artwork.png|[[Vire]] | ||
File:Blue Stalfos.png|[[Blue Stalfos]] | File:OoA Blue Stalfos Sprite 2.png|[[Blue Stalfos (Sub-Boss)]] | ||
File:OoA Veran Artwork.png|[[Veran]] | File:OoA Veran Artwork.png|[[Veran]] | ||
File:Medusa Head.png|[[Medusa Head]] | File:OoS Medusa Head Sprite.png|[[Medusa Head]] | ||
File:OoS Onox Artwork.png|[[General Onox]] | File:OoS Onox Artwork.png|[[General Onox]] | ||
File:FS Rupee Wraith Artwork.png|[[Rupee Wraith]] | File:FS Rupee Wraith Artwork.png|[[Rupee Wraith]] | ||
| Line 125: | Line 125: | ||
File:ALBW Yuga Artwork.png|[[Yuga]] | File:ALBW Yuga Artwork.png|[[Yuga]] | ||
File:ALBW Yuga Ganon Model.png|[[Yuga Ganon]] | File:ALBW Yuga Ganon Model.png|[[Yuga Ganon]] | ||
File:TFH Blue Poe.png|[[Poe]] (blue) | File:TFH Blue Poe Model.png|[[Poe]] (blue) | ||
File:TFH Green Poe.png|[[Poe]] (green) | File:TFH Green Poe Model.png|[[Poe]] (green) | ||
File:TFH Red Poe.png|[[Poe]] (red) | File:TFH Red Poe Model.png|[[Poe]] (red) | ||
File:TFH White Poe.png|[[Poe]] (white) | File:TFH White Poe Model.png|[[Poe]] (white) | ||
File:TFH Prankster Poe Model.png|[[Prankster Poe]] | File:TFH Prankster Poe Model.png|[[Prankster Poe]] | ||
File:TFH Key Bandit Poe Model.png|{{Term|TFH|Key Bandit Poe|link}} | File:TFH Key Bandit Poe Model.png|{{Term|TFH|Key Bandit Poe|link}} | ||
| Line 146: | Line 146: | ||
==[[Dark World]] Settings== | ==[[Dark World]] Settings== | ||
<gallery> | <gallery> | ||
File: | File:ALttP Dark World Map.png|[[Dark World]] | ||
File:GreatBridgeOfHyliaTP.png|[[Hyrule]] covered by [[Twilight]] | File:GreatBridgeOfHyliaTP.png|[[Hyrule]] covered by [[Twilight]] | ||
File:ST Dark Realm Map.png|[[Dark Realm]] | File:ST Dark Realm Map.png|[[Dark Realm]] | ||
| Line 155: | Line 155: | ||
<div style="overflow: auto; height: 350px;"> | <div style="overflow: auto; height: 350px;"> | ||
<gallery> | <gallery> | ||
File: | File:OoT Kakariko Village Graveyard.png|[[Graveyard]] | ||
File:OoT Ganon's Castle.png|[[Ganon's Castle]] | File:OoT Ganon's Castle.png|[[Ganon's Castle]] | ||
File: | File:OoT Royal Family's Tomb.png|[[Royal Family's Tomb]] | ||
File: | File:OoT Market 2.png|[[Hyrule Castle Town]] ({{Term|OoT|Adult Era}}) | ||
File:OoT Bottom of the Well.png|[[Bottom of the Well]] | File:OoT Bottom of the Well.png|[[Bottom of the Well]] | ||
File:Shadow. | File:OoT Shadow Temple.png|[[Shadow Temple]] | ||
File:MM Oceanside Spider House.png|[[Oceanside Spider House]] | File:MM Oceanside Spider House.png|[[Oceanside Spider House]] | ||
File:MM Ikana Graveyard.png|[[Ikana Graveyard]] | File:MM Ikana Graveyard.png|[[Ikana Graveyard]] | ||
| Line 168: | Line 168: | ||
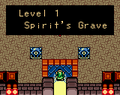
File:Spirit's Grave.png|[[Spirit's Grave]] | File:Spirit's Grave.png|[[Spirit's Grave]] | ||
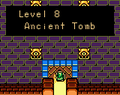
File:Ancient Tomb.png|[[Ancient Tomb]] | File:Ancient Tomb.png|[[Ancient Tomb]] | ||
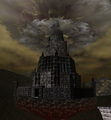
File:Black Tower | File:OoA Black Tower.png|[[Black Tower]] | ||
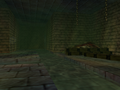
File:Explorer's Crypt | File:OoS Explorer's Crypt.png|[[Explorer's Crypt]] | ||
File:Northern Peak.png|[[Northern Peak]] | File:Northern Peak.png|[[Northern Peak]] | ||
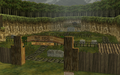
File:TWW Forsaken Fortress.png|[[Forsaken Fortress]] | File:TWW Forsaken Fortress.png|[[Forsaken Fortress]] | ||
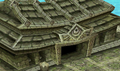
File: | File:TWW Medli Flying.png|{{Term|TWW|Earth Temple|link}} | ||
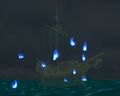
File:TWW Ghost Ship.jpg|{{Term|TWWHD|Ghost Ship|link}} | File:TWW Ghost Ship.jpg|{{Term|TWWHD|Ghost Ship|link}} | ||
File:Temple of Darkness | File:FSA Temple of Darkness.png|[[Temple of Darkness]] | ||
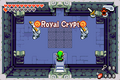
File:TMC Royal Crypt.png|[[Royal Crypt]] | File:TMC Royal Crypt.png|[[Royal Crypt]] | ||
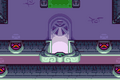
File:TMC Dark Hyrule Castle | File:TMC Dark Hyrule Castle.png|[[Dark Hyrule Castle]] | ||
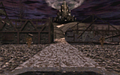
File:ArbitersGroundsDistanceTP.png|[[Arbiter's Grounds (Dungeon)|]] | File:ArbitersGroundsDistanceTP.png|[[Arbiter's Grounds (Dungeon)|Arbiter's Grounds]] | ||
File: | File:TP Palace of Twilight.png|[[Palace of Twilight]] | ||
File:PH Temple of the Ocean King.png|[[Temple of the Ocean King]] | File:PH Temple of the Ocean King.png|[[Temple of the Ocean King]] | ||
File:Corruption SS.jpg|[[Ancient Cistern]] (lower floors) | File:Corruption SS.jpg|[[Ancient Cistern]] (lower floors) | ||
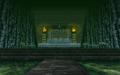
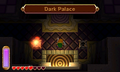
File:Dark | File:ALBW Dark Palace.png|[[Dark Palace]] | ||
File:Skull | File:ALBW Skull Woods.png|[[Skull Woods]] | ||
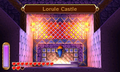
File:Lorule | File:ALBW Lorule Castle.png|[[Lorule Castle]] | ||
File:TFH Illusory Mansion Stage 2.png|[[Illusory Mansion]] | File:TFH Illusory Mansion Stage 2.png|[[Illusory Mansion]] | ||
File:TFH Palace Noir Stage 1.png|[[Palace Noir]] | File:TFH Palace Noir Stage 1.png|[[Palace Noir]] | ||
| Line 189: | Line 189: | ||
File:TFH Grim Temple Stage 3.png|[[Grim Temple]] | File:TFH Grim Temple Stage 3.png|[[Grim Temple]] | ||
File:BotW Divine Beast Vah Rudania 2.png|{{Term|BotW|Divine Beast Vah Rudania|link}} (first half) | File:BotW Divine Beast Vah Rudania 2.png|{{Term|BotW|Divine Beast Vah Rudania|link}} (first half) | ||
File:BotW | File:BotW Thyphlo Ruins.png|[[Thyphlo Ruins]] | ||
</gallery> | </gallery> | ||
</div> | </div> | ||
{{Ref}} | |||
{{Categories | {{Categories | ||
|Elements, Undead | |Elements, Undead | ||
}} | }} | ||
Revision as of 22:37, 26 April 2024

Darkness,[1][name references needed] often also referred to as Shadow,[2] is a pivotal element that has played a vital role in The Legend of Zelda series. It has served various purposes, both storyline-wise and gameplay-wise, and usually as a manifestation of evil (but not always).
Role in the Series
Darkness as a symbolic element
Of all the elemental staples in the series, such as fire, ice or light, darkness has carried over the worst reputation. The reason for this is because this is the signature source of evil in the World of The Legend of Zelda and, most importantly, it is even the origin of the evil beings and creatures that overrun the Light World. Though the line between what is good and what is evil is not always clear, it is known that there has always been a contrast between light and dark, with Link striving in favor of the former. As detailed below, darkness is frequently portrayed through a setting that is more difficult to conquer than the Light World. In some games, Link himself is occasionally forced to fight his dark counterpart as well.
That said, darkness does not always symbolize evil. In Ocarina of Time, aside from the portrayal originated from Ganon and his servants, darkness is canonically represented in the same way the other elements are. That representation, the Shadow Temple, offers several puzzles, obstacles and enemies revolving around it, and is guarded by the Sage of Shadow (by the moment the events of the game take place, Impa fulfills that role, and also guards the Shadow Medallion until she gives it to Link). The Nocturne of Shadow pays homage to the element as well, and instantly transports anyone playing it to the backside of Kakariko Village Graveyard, where the temple is located.
Darkness has been represented by several benign races over the course of the series. One of them is the Sheikah, a near-extinct race who used to protect the land of Hyrule secretly; the Ikana Kingdom, no longer belonging to the world of mortals, overruns a major region of Termina when the Skull Kid invades the Stone Tower Temple in Majora's Mask; the Twili, formerly the Interlopers in Hyrule, was a peaceful race inhabiting the Twilight Realm until Zant's rise to power; etc.
Darkness as a setting
In addition to the shadow dungeons located through Hyrule and several other lands, there are also entire overworld locations that revolve around housing the creatures of darkness. The Dark World, in A Link to the Past, is a notable example, as every location from the Light World has a geographically direct counterpart in the other setting, which also shows a more evil vibe (for example, Village of Outcasts when compared to Kakariko Village). This applies, to a lesser extent, to the landmarks of Hyrule in Twilight Princess when covered by the influence of Twilight by Zant and the de-powering of the Light Spirits who guard the different provinces.
In most cases, when Link stands on a place cursed by a dark force, he is affected in one or another way; in the aforementioned examples, the side effect is shapeshifting. Dark Fog, also located on dark places, affect the young hero the same way. In the Temple of the Ocean King, Link loses Sand of Hours continuously when he is not within a safe zone. There may be a higher population of enemies (and some of them being undead) in these places as well.
Darkness as a puzzle device
In some Stealth missions, such as the infiltration in Deku Palace (Majora's Mask) or in Forsaken Fortress (The Wind Waker), it is convenient to remain in the darkness, and some hunt-based sidequests are best taken place at night. Likewise, in Spirit Tracks, some dark rooms house bombable walls that remain unnoticeable if there are lit candles, and Dark Ore must be transported under as little sunlight as possible.

To date, there has been only one dark weapon usable by Link as an item. This item is the Fierce Deity's Mask, so far exclusive of Majora's Mask, which allows the wearer to turn into Fierce Deity Link and become capable of performing unmatched devastating attacks, enough to defeat bosses very quickly. It is hinted that the powers of this mask are as evil as those of Majora's Mask itself, but it can only be used during boss battles without glitches.

In the particular case of Twilight Princess, Midna allows Link to make use of dark powers, although only as long as Link is within his wolf form. One of these abilities is creating a field of energy that surrounds enemies, and allows the young hero to attack them all almost instantly. In wolf form, Link can also activate senses that allow him to see otherwise invisible objects, spirits, and scents (but his sight is darkened significantly). Also, Midna can teleport both Link and any big and heavy object from one landmark to another. Finally, when Midna is in possession of the entirety of the Fused Shadow, she is able to transform into a spider-looking entity with deadly powers. Because she is the only one capable of using such dark powers without being corrupted by them, they aim to retrieve both the fragments of the Fused Shadow and the fragments of the Mirror of Twilight, as regular enemies and characters otherwise mutate heavily into evil, dangerous monsters due to them.
Dark-lurking and undead enemies and bosses
-

-

-

-

-

-

-
-

-

-

-

-

-

-

-

-

-

-

-
-

-

-

-
-
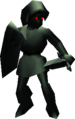
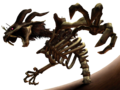
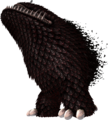
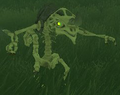
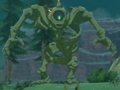
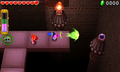
Floormaster (and its smaller variations)
-

-
-

-
-
-

-

-

-
-

-

-

-
-

-
-
-

-
-

-

-

-

-

-

-
-

-

-

-

-
-
-
-
-

-
-
-
-
-

-
-
-

-
-

-

-

-
-

-

-
-
-

-

-
-
-

-
-

-
-
-
-
-

-

-

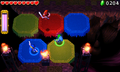
Poe (blue)
-

Poe (green)
-

Poe (red)
-

Poe (white)
-

-

-

-

-
-

-
-
-

-
-

-


Dark World Settings


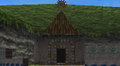
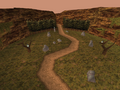
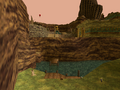
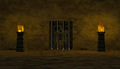
Dark-themed and somber locations
-
-
-
-
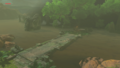
Hyrule Castle Town (Adult Era)
-
-

-
-
-
-
-
-
-
-

-
-
-

-
-
-
-
-
-

-
-
-

Ancient Cistern (lower floors)
-
-

-
-
-
-
-
-

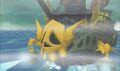
Divine Beast Vah Rudania (first half)
-


References
- ↑ The Legend of Zelda: Tears of the Kingdom—The Complete Official Guide, Piggyback Interactive Limited, pg. 17
- ↑ "Discovery Log: Day... I've lost count.
I can feel that I'm a hair's breadth away from unlocking the secrets hidden within the pedestal.
I'm certain that "casting" and "cold" refer to using a specific type of shadow.
But I've run out of food entirely, and I doubt now that I ever had the tools to do the job...whatever they might be." — Mountain Peak Log (Breath of the Wild)