Kinstone Fusion: Difference between revisions
No edit summary |
m (→Nomenclature) |
||
| (131 intermediate revisions by 37 users not shown) | |||
| Line 1: | Line 1: | ||
{{Infobox Mechanic | |||
|image= File:TMC Kinstone Fusion Artwork.png | |||
|caption= | |||
|game= TMC | |||
|other= | |||
|purpose= | |||
|related= | |||
}} | |||
{{Term/Store|Kinstone Fusion|Kinstone Fusions|Series, TMC}} is a mechanic in {{TMC}}.<ref>{{Cite|KINSTONE FUSION|N/A|TMC}}</ref> | |||
[[ | ==Overview== | ||
{{Term|TMC|Kinstone Fusion}} is the act of matching two complementary {{Plural|TMC|Kinstone Piece|link}} with another character or object, resulting in a completed gold, red, blue, or green medallion. {{Plural|TMC|Kinstone Piece}} only match with a precise complementary match, despite their many variations and colors. A successful {{Term|TMC|Kinstone Fusion|display=Fusion}} creates a form of "good luck" for {{Term|TMC|Link|link}}, often rewarding him with items and new passageways. | |||
After a successful {{Term|TMC|Kinstone Fusion}}, the {{Term|TMC|Map Screen|link}} will denote the general location and type of reward with various icons: | |||
*Doors and arrows signify newly accessible areas. | |||
*People signify a character having something new. | |||
*Scrolls signify newly appeared {{Plural|TMC|Treasure Chest|link}}. | |||
*Eggs signify newly appeared creatures, namely {{Plural|TMC|Golden Monster|link}} and {{Plural|TMC|Joy Butterfly|link}}. | |||
*Sprouts signify a {{Term|TMC|Bean|link}} that has grown into a {{Term|TMC|Beanstalk|link}} and can now be climbed to reach a secret area. | |||
There is also a unique icon that appears on the map of {{Term|TMC|South Hyrule Field|link}} representing the {{Term|TMC|Portal|link}} to the {{Term|TMC|Home of the Wind Tribe|link}}; it appears after {{Term|TMC|Link}} has {{Term|TMC|Kinstone Fusion|display=Fused}} {{Plural|TMC|Kinstone Piece}} with {{Term|TMC|Strato|link}}. | |||
<gallery class="center"> | |||
File:TMC Map of Hyrule Icon.png|The icon that appears when a new path becomes accessible | |||
File:TMC Map of Hyrule Icon 2.png|The icon that appears when a new opening appears | |||
File:TMC Map of Hyrule Icon 3.png|The icon that appears when either a {{Term|TMC|Golden Monster|link}} or a {{Term|TMC|Joy Butterfly|link}} appears | |||
File:TMC Map of Hyrule Icon 4.png|The icon that appears when someone has been inspired to offer something new | |||
File:TMC Map of Hyrule Icon 5.png|The icon that appears when a {{Term|TMC|Treasure Chest|link}} appears | |||
File:TMC Map of Hyrule Icon 6.png|The icon that appears when a {{Term|TMC|Beanstalk|link}} grows | |||
File:TMC Map of Hyrule Icon 7.png|The icon that appears when the {{Term|TMC|Portal|link}} appears | |||
</gallery> | |||
===Fusers=== | |||
There are many different characters and objects that can perform {{Plural|TMC|Kinstone Fusion}} in {{TMC}}. While many characters will always possess a {{Term|TMC|Kinstone Piece|link}} to {{Term|TMC|Kinstone Fusion|display=Fuse}}, there are a number of {{Plural|TMC|Kinstone Fusion|display=Fusions}} that are not tied to any particular individual. Instead, these {{Plural|TMC|Kinstone Fusion|display=Fusions}} can be triggered with almost any character in the game, even if they already have an established {{Term|TMC|Kinstone Fusion|display=Fusion}}. Some characters can {{Term|TMC|Kinstone Fusion|display=Fuse}} {{Plural|TMC|Kinstone Piece}} multiple times, as well, and some {{Plural|TMC|Kinstone Fusion|display=Fusions}} may not be triggered the first time a character is encountered. Some characters have a random chance of their {{Term|TMC|Kinstone Fusion|display=Fusion}} becoming available, and {{Term|TMC|Link|link}} may need to leave and re-enter the particular area a number of times before the {{Term|TMC|Kinstone Fusion|display=Fusion}} becomes available. | |||
====Random Fusers==== | |||
The 18 random {{Plural|TMC|Kinstone Fusion|display=Fusions}} can be performed with any of the following characters, and some may also trigger multiple random {{Plural|TMC|Kinstone Fusion|display=Fusions}}. Some characters, such as {{Term|TMC|King Daltus|link}}, become unavailable after certain points in the story are reached, while others, such as {{Term|TMC|Sturgeon|link}}, do not become available until after certain points in the story are reached. If one of the following characters has an available {{Term|TMC|Kinstone Fusion|display=Fusion}} and becomes inaccessible during the story, that {{Term|TMC|Kinstone Fusion|display=Fusion}} will simply transfer to another available character from the list at random. | |||
<div style="column-count:2;-moz-column-count:2;-webkit-column-count:2"> | |||
*{{Term|TMC|Anju|link}} | |||
*{{Term|TMC|Anton|link}} | |||
*{{Term|TMC|Baris|link}} | |||
*{{Term|TMC|Berry|link}} | |||
*{{Term|TMC|Bindle|link}} | |||
*{{Term|TMC|Brent|link}} | |||
*{{Term|TMC|Breve|link}} | |||
*{{Term|TMC|Brocco|link}} | |||
*{{Term|TMC|Chai|link}} | |||
*{{Term|TMC|Crenel Hermit|link}} | |||
*{{Term|TMC|Cucco|link}} (on top of {{Term|TMC|Anju's Henhouse|link}}) | |||
*{{Term|TMC|Cucco Chick|link}} (on top of the {{Term|TMC|Swiftblade School|link}}) | |||
*{{Term|TMC|Dottie|link}} | |||
*{{Term|TMC|Doyle|link}} | |||
*{{Term|TMC|Elsie|link}} | |||
*{{Term|TMC|Epona|link}} | |||
*{{Term|TMC|Erik|link}} | |||
*{{Term|TMC|Festari|link}} | |||
*{{Term|TMC|Gregal|link}} | |||
*{{Term|TMC|Growler|link}} | |||
*{{Term|TMC|Harrison|link}} | |||
*{{Term|TMC|Herb|link}} | |||
*{{Term|TMC|Jasmine|link}} | |||
*{{Term|TMC|Jim|link}} | |||
*{{Term|TMC|Joel|link}} | |||
*{{Term|TMC|Jotari|link}} | |||
*{{Term|TMC|Julietta|link}} | |||
*{{Term|TMC|June|link}} | |||
*{{Term|TMC|Keeley|link}} | |||
*{{Term|TMC|King Daltus|link}} | |||
*{{Term|TMC|Klaus|link}} | |||
*{{Term|TMC|Leila|link}} | |||
*{{Term|TMC|Lolly|link}} | |||
*{{Term|TMC|Mack|link}} | |||
*{{Term|TMC|Malon|link}} | |||
*{{Term|TMC|Marshall|link}} | |||
*{{Term|TMC|Minister Potho|link}} | |||
*{{Term|TMC|Mutoh|link}} | |||
*{{Term|TMC|Pina|link}} | |||
*{{Term|TMC|Purry|link}} | |||
*{{Term|TMC|Rolf|link}} | |||
*{{Term|TMC|Romio|link}} | |||
*{{Term|TMC|Satchel|link}} | |||
*{{Term|TMC|Scratcher|link}} | |||
*{{Term|TMC|Sheila|link}} | |||
*{{Term|TMC|Sturgeon|link}} | |||
*{{Term|TMC|Talon|link}} | |||
*{{Term|TMC|Verona|link}} | |||
</div> | |||
In addition, random {{Plural|TMC|Kinstone Fusion|display=Fusions}} may be performed with any of the {{Plural|TMC|Minish|link}} found throughout {{Term|TMC|Hyrule|link}}; {{Plural|TMC|Forest Picori|link}}, {{Plural|TMC|Library Minish|link}}, {{Plural|TMC|Mountain Minish|link}}, and {{Plural|TMC|Town Minish|link}} may all have {{Plural|TMC|Kinstone Fusion|display=Fusions}} available. | |||
===List of Fusions=== | |||
A total of 100 {{Plural|TMC|Kinstone Fusion}} can be performed throughout the game; 18 of them are random {{Plural|TMC|Kinstone Fusion|display=Fusions}} not tied to a particular character, and 9 of them are necessary to advance the story (these required {{Plural|TMC|Kinstone Fusion|display=Fusions}} are performed with gold {{Plural|TMC|Kinstone Piece}}). | |||
In addition, many {{Plural|TMC|Kinstone Fusion|display=Fusions}} do not become available until certain events have transpired; there are six "stages" of the game that transition into one another as {{Term|TMC|Link|link}} continues on his journey.{{Note|In {{Guide|TMC|Nintendo}}, there are seven stages listed; however, in-game, there are only six. The guide includes an additional stage before the final one, separating the final stage into two. The guide's version of Stage 6 ends the moment {{Term|TMC|Link}} obtains the {{Term|TMC|Four Sword}}, and it uses Stage 7 to represent the final part of the game.<ref>{{Cite Guide|quote= |game= TMC |publisher= Nintendo |page= 98}}</ref> The only NPC that the guide claims to be unavailable to {{Term|TMC|Kinstone Fusion|display=Fuse}} with until its version of Stage 6 is the {{Term|TMC|Mysterious Wall}} in the northern portion of {{Term|TMC|Lake Hylia}};<ref>{{Cite Guide|quote= |game= TMC |publisher= Nintendo |page= 99}}</ref> however, it is possible to {{Term|TMC|Kinstone Fusion|display=Fuse}} with it as soon as the {{Term|TMC|Roc's Cape}} is obtained, prior to obtaining the {{Term|TMC|Wind Element}} and thus placing it in Stage 5.}} | |||
*'''Stage 1:''' From the moment {{Term|TMC|Link}} first encounters the {{Term|TMC|Hurdy-Gurdy Man|link}} in {{Term|TMC|Hyrule Town|link}} and obtains the {{Term|TMC|Kinstone Bag|link}} to the moment that he enters {{Term|TMC|Western Wood|link}} for the first time and {{Term|TMC|Vaati|link}} impersonates {{Term|TMC|King Daltus|link}} | |||
*'''Stage 2:''' From the end of stage 1 to the moment {{Term|TMC|Link}} obtains the {{Term|TMC|Ocarina of Wind|link}} after defeating {{Term|TMC|Mazaal|link}} | |||
*'''Stage 3:''' From the end of stage 2 to the moment {{Term|TMC|Link}} obtains the {{Term|TMC|Water Element|link}} and encounters {{Term|TMC|Gustaf|link}}'s spirit at {{Term|TMC|Lake Hylia|link}} | |||
*'''Stage 4:''' From the end of stage 3 to the moment {{Term|TMC|Link}} obtains a gold {{Term|TMC|Kinstone Piece}} from {{Term|TMC|Gustaf}} in the {{Term|TMC|Royal Crypt|link}} | |||
*'''Stage 5:''' From the end of stage 4 to the moment {{Term|TMC|Link}} obtains the {{Term|TMC|Wind Element|link}} after defeating the {{Term|TMC|Gyorg Pair|link}} | |||
*'''Stage 6:''' From the end of stage 5 to the moment {{Term|TMC|Link}} defeats {{Term|TMC|Vaati's Wrath|link}} and finishes the game | |||
The {{Term|TMC|Tingle Siblings?|link}} keep track of successful {{Plural|TMC|Kinstone Fusion}}, including {{Term|TMC|Gold Kinstone|display=Gold}} ones. After all 100 are {{Term|TMC|Kinstone Fusion|display=Fused}}, {{Term|TMC|Tingle|link}} will replace the {{Term|TMC|Kinstone Bag|link}} with the {{Term|TMC|Tingle Trophy|link}}. | |||
In the table below, the "{{Term|TMC|Kinstone Piece}}" column indicates the color and physical shape of the {{Term|TMC|Kinstone Piece}} involved in the particular {{Term|TMC|Kinstone Fusion|display=Fusion}}. The possible colors and shapes are as follows: | |||
<gallery widths=40px heights=40px> | |||
File:TMC Kinstone Piece Green Sprite.png | |||
File:TMC Kinstone Piece Green Sprite 2.png | |||
File:TMC Kinstone Piece Green Sprite 3.png | |||
</gallery> | |||
<gallery widths=40px heights=40px> | |||
File:TMC Kinstone Piece Blue Sprite.png | |||
File:TMC Kinstone Piece Blue Sprite 2.png | |||
</gallery> | |||
<gallery widths=40px heights=40px> | |||
File:TMC Kinstone Piece Red Sprite.png | |||
File:TMC Kinstone Piece Red Sprite 2.png | |||
File:TMC Kinstone Piece Red Sprite 3.png | |||
</gallery> | |||
<gallery widths=40px heights=40px> | |||
File:TMC Kinstone Piece Gold Sprite.png | |||
File:TMC Kinstone Piece Gold Sprite 2.png | |||
File:TMC Kinstone Piece Gold Sprite 3.png | |||
File:TMC Kinstone Piece Gold Sprite 4.png | |||
File:TMC Kinstone Piece Gold Sprite 5.png | |||
File:TMC Kinstone Piece Gold Sprite 6.png | |||
File:TMC Kinstone Piece Gold Sprite 7.png | |||
</gallery> | |||
{|class="wikitable sortable" style="text-align:left" | |||
|- | |||
!style="width:15%"| Fuser | |||
!style="width:20%"| Location | |||
!style="width:5%"| {{Term|TMC|Kinstone Piece}} | |||
!style="width:5%"| Stage | |||
!class="unsortable" style="width:50%"| Result | |||
|- | |||
|style="text-align:center"| [[File:TMC Ankle Sprite.png|center]]<br/>{{Term|TMC|Ankle|link}} | |||
| {{Term|TMC|Lon Lon Ranch|link}} | |||
| [[File:TMC Kinstone Piece Green Sprite.png|center]] | |||
|style="text-align:center"| 2 | |||
| A {{Term|TMC|Tree|link}} opens in {{Term|TMC|North Hyrule Field|link}}, leading to a {{Term|TMC|Treasure Chest|link}} containing a red {{Term|TMC|Kinstone Piece|link}} and a {{Term|TMC|Switch|link}}; when all four {{Plural|TMC|Switch}} are pressed, a {{Term|TMC|Ladder|link}} descends, giving {{Term|TMC|Link|link}} access to a {{Term|TMC|Treasure Chest}} containing the {{Term|TMC|Magical Boomerang|link}} | |||
|- | |||
|style="text-align:center"| [[File:TMC Belari Sprite.png|center]]<br/>{{Term|TMC|Belari|link}} | |||
| {{Term|TMC|Minish Woods|link}} | |||
| [[File:TMC Kinstone Piece Red Sprite.png|center]] | |||
|style="text-align:center"| 4 | |||
| A {{Term|TMC|Treasure Chest|link}} appears in the {{Term|TMC|Wind Ruins|link}} containing a {{Term|TMC|Big Bomb Bag|link}} | |||
|- | |||
|style="text-align:center"| [[File:TMC Bremor Sprite.png|center]]<br/>{{Term|TMC|Bremor|link}} | |||
| {{Term|TMC|Hyrule Town|link}} | |||
| [[File:TMC Kinstone Piece Red Sprite.png|center]] | |||
|style="text-align:center"| 3 | |||
| {{Term|TMC|Mutoh|link}} becomes inspired to build a second {{Term|TMC|Vacant House|link}} in {{Term|TMC|Hyrule Town|link}} for {{Term|TMC|Gorman|link}} to rent | |||
|- | |||
|style="text-align:center"| [[File:TMC Business Scrub Sprite.png|center]]<br/>{{Term|TMC|Business Scrub|link}} | |||
| {{Term|TMC|Castor Wilds|link}} | |||
| [[File:TMC Kinstone Piece Blue Sprite.png|center]] | |||
|style="text-align:center"| 2 | |||
| A {{Term|TMC|Tree|link}} opens in {{Term|TMC|Minish Woods|link}}, containing a {{Term|TMC|Business Scrub}} that will sell {{Plural|TMC|Kinstone Piece}} | |||
|- | |||
|style="text-align:center"| [[File:TMC Business Scrub Sprite.png|center]]<br/>{{Term|TMC|Business Scrub|link}} | |||
| {{Term|TMC|Minish Woods|link}} | |||
| [[File:TMC Kinstone Piece Green Sprite 3.png|center]] | |||
|style="text-align:center"| 3 | |||
| A crack appears in {{Term|TMC|Castor Wilds|link}} with a {{Term|TMC|Treasure Chest|link}} containing a red {{Term|TMC|Kinstone Piece|link}} inside | |||
|- | |||
|style="text-align:center"| [[File:TMC Business Scrub Sprite.png|center]]<br/>{{Term|TMC|Business Scrub|link}} | |||
| {{Term|TMC|Minish Woods|link}} | |||
| [[File:TMC Kinstone Piece Green Sprite.png|center]] | |||
|style="text-align:center"| 3 | |||
| A {{Term|TMC|Golden Octorok|link}} appears in {{Term|TMC|Western Wood|link}} | |||
|- | |||
|style="text-align:center"| [[File:TMC Candy Sprite.png|center]]<br/>{{Term|TMC|Candy (The Minish Cap)|link}} | |||
| {{Term|TMC|Hyrule Town|link}} | |||
| [[File:TMC Kinstone Piece Blue Sprite.png|center]] | |||
|style="text-align:center"| 2 | |||
| A shoal rises in {{Term|TMC|Trilby Highlands|link}}, allowing {{Term|TMC|Link|link}} to access a {{Term|TMC|Dig Cavern|link}} once he has obtained the {{Term|TMC|Flippers|link}} | |||
|- | |||
|style="text-align:center"| [[File:TMC Caprice Sprite.png|center]]<br/>{{Term|TMC|Caprice|link}} | |||
| {{Term|TMC|Home of the Wind Tribe|link}} | |||
| [[File:TMC Kinstone Piece Green Sprite 3.png|center]] | |||
|style="text-align:center"| 5 | |||
| A {{Term|TMC|Treasure Chest|link}} appears in {{Term|TMC|Veil Falls|link}} containing a blue {{Term|TMC|Kinstone Piece|link}} | |||
|- | |||
|style="text-align:center"| [[File:TMC Dampé Sprite.png|center]]<br/>{{Term|TMC|Dampé|link}} | |||
| {{Term|TMC|Royal Valley|link}} | |||
| [[File:TMC Kinstone Piece Green Sprite.png|center]] | |||
|style="text-align:center"| 5 | |||
| A crack appears in the {{Term|TMC|Wind Ruins|link}} with a {{Term|TMC|Treasure Chest|link}} containing a red {{Term|TMC|Kinstone Piece|link}} inside | |||
|- | |||
|style="text-align:center"| [[File:TMC Dampé Sprite.png|center]]<br/>{{Term|TMC|Dampé|link}} | |||
| {{Term|TMC|Royal Valley|link}} | |||
| [[File:TMC Kinstone Piece Blue Sprite 2.png|center]] | |||
|style="text-align:center"| 5 | |||
| A {{Term|TMC|Tombstone|link}} opens in the graveyard with {{Term|TMC|Gina|link}} inside, along with a {{Term|TMC|Treasure Chest|link}} with 100 {{Plural|TMC|Mysterious Shell|link}} | |||
|- | |||
|style="text-align:center"| [[File:TMC David Jr. Sprite.png|center]]<br/>{{Term|TMC|David Jr.|link}} | |||
| {{Term|TMC|Lake Hylia|link}} | |||
| [[File:TMC Kinstone Piece Green Sprite 3.png|center]] | |||
|style="text-align:center"| 2 | |||
| A {{Term|TMC|Tree|link}} opens in {{Term|TMC|North Hyrule Field|link}}, leading to a {{Term|TMC|Treasure Chest|link}} containing 200 {{Plural|TMC|Mysterious Shell|link}} and a {{Term|TMC|Switch|link}}; when all four {{Plural|TMC|Switch}} are pressed, a {{Term|TMC|Ladder|link}} descends, giving {{Term|TMC|Link|link}} access to a {{Term|TMC|Treasure Chest}} containing the {{Term|TMC|Magical Boomerang|link}} | |||
|- | |||
|style="text-align:center"| [[File:TMC David Jr. Sprite.png|center]]<br/>{{Term|TMC|David Jr.|link}} | |||
| {{Term|TMC|Lake Hylia|link}} | |||
| [[File:TMC Kinstone Piece Green Sprite 2.png|center]] | |||
|style="text-align:center"| 3 | |||
| A {{Term|TMC|Treasure Chest|link}} appears in the {{Term|TMC|Minish|link}}-sized path to {{Term|TMC|Melari's Mine|link}} containing 200 {{Plural|TMC|Mysterious Shell|link}} | |||
|- | |||
|style="text-align:center"| [[File:TMC Din Sprite.png|center]]<br/>{{Term|TMC|Din (Oracle)|link}} | |||
| {{Term|TMC|Hyrule Town|link}} | |||
| [[File:TMC Kinstone Piece Red Sprite 3.png|center]] | |||
|style="text-align:center"| 5 | |||
| A {{Term|TMC|Joy Butterfly|link}} appears in the {{Term|TMC|Wind Ruins|link}} that, when collected, allows {{Term|TMC|Link|link}} to shoot {{Plural|TMC|Arrow|link}} more quickly | |||
|- | |||
|style="text-align:center"| [[File:TMC Eenie Sprite.png|center]]<br/>{{Term|TMC|Eenie|link}} | |||
| {{Term|TMC|Eastern Hills|link}} | |||
| [[File:TMC Kinstone Piece Blue Sprite.png|center]] | |||
|style="text-align:center"| 2 | |||
| The {{Term|TMC|Goron|link}} at {{Term|TMC|Lon Lon Ranch|link}} opens the {{Term|TMC|Goron Cave|link}} (if a {{Term|TMC|Mysterious Wall|link}} has already been {{Term|TMC|Kinstone Fusion|display=Fused}} with, then another {{Term|TMC|Goron}} will arrive in the {{Term|TMC|Goron Cave}}) | |||
|- | |||
|style="text-align:center"| [[File:TMC Farore Sprite.png|center]]<br/>{{Term|TMC|Farore (Oracle)|link}} | |||
| {{Term|TMC|Hyrule Town|link}} | |||
| [[File:TMC Kinstone Piece Red Sprite 3.png|center]] | |||
|style="text-align:center"| 3 | |||
| {{Term|TMC|Gorman|link}} arrives in {{Term|TMC|Hyrule Town|link}}, searching for a young woman to rent out his {{Term|TMC|Vacant House|link}} | |||
|- | |||
|style="text-align:center"| [[File:TMC Farore Sprite.png|center]]<br/>{{Term|TMC|Farore (Oracle)|link}} | |||
| {{Term|TMC|Hyrule Town|link}} | |||
| [[File:TMC Kinstone Piece Red Sprite.png|center]] | |||
|style="text-align:center"| 5 | |||
| A {{Term|TMC|Joy Butterfly|link}} appears in {{Term|TMC|Castor Wilds|link}} that, when collected, allows {{Term|TMC|Link|link}} to dig more quickly with the {{Term|TMC|Mole Mitts|link}} | |||
|- | |||
|style="text-align:center"| [[File:TMC Fifi Sprite.png|center]]<br/>{{Term|TMC|Fifi|link}} | |||
| {{Term|TMC|Stockwell's House|link}} | |||
| [[File:TMC Kinstone Piece Green Sprite 3.png|center]] | |||
|style="text-align:center"| 2 | |||
| A {{Term|TMC|Treasure Chest|link}} appears in the {{Term|TMC|Minish|link}}-sized path to {{Term|TMC|Mayor Hagen's Lakeside Cabin|link}} containing a blue {{Term|TMC|Kinstone Piece|link}} | |||
|- | |||
|style="text-align:center"| [[File:TMC Flurris Sprite.png|center]]<br/>{{Term|TMC|Flurris|link}} | |||
| {{Term|TMC|Home of the Wind Tribe|link}} | |||
| [[File:TMC Kinstone Piece Green Sprite 2.png|center]] | |||
|style="text-align:center"| 5 | |||
| A {{Term|TMC|Golden Rope|link}} appears in {{Term|TMC|Castor Wilds|link}} | |||
|- | |||
|style="text-align:center"| [[File:TMC Flurris Sprite.png|center]]<br/>{{Term|TMC|Flurris|link}} | |||
| {{Term|TMC|Home of the Wind Tribe|link}} | |||
| [[File:TMC Kinstone Piece Green Sprite 2.png|center]] | |||
|style="text-align:center"| 5 | |||
| A fallen {{Term|TMC|Tree|link}} rises in {{Term|TMC|Western Wood|link}}, giving access to a patch of dirt where {{Term|TMC|Link|link}} can dig up 300 {{Plural|TMC|Rupee|link}} with the {{Term|TMC|Mole Mitts|link}} | |||
|- | |||
|style="text-align:center"| [[File:TMC Forest Picori Sprite.png|center]]<br/>{{Term|TMC|Forest Picori|link}} | |||
| {{Term|TMC|Eastern Hills|link}} | |||
| [[File:TMC Kinstone Piece Blue Sprite 2.png|center]] | |||
|style="text-align:center"| 3 | |||
| A {{Term|TMC|Bean|link}} grows into a {{Term|TMC|Beanstalk|link}} with a {{Term|TMC|Piece of Heart|link}} and two {{Plural|TMC|Treasure Chest|link}} containing 200 {{Plural|TMC|Rupee|link}} and 200 {{Plural|TMC|Mysterious Shell|link}} | |||
|- | |||
|style="text-align:center"| [[File:TMC Forest Picori Sprite.png|center]]<br/>{{Term|TMC|Forest Picori|link}} | |||
| {{Term|TMC|Hyrule Castle Garden|link}} | |||
| [[File:TMC Kinstone Piece Green Sprite 2.png|center]] | |||
|style="text-align:center"| 3 | |||
| A fallen {{Term|TMC|Tree|link}} rises in {{Term|TMC|Western Wood|link}}, giving access to a patch of dirt where {{Term|TMC|Link|link}} can dig up 400 {{Plural|TMC|Rupee|link}} with the {{Term|TMC|Mole Mitts|link}} | |||
|- | |||
|style="text-align:center"| [[File:TMC Forest Picori Sprite.png|center]]<br/>{{Term|TMC|Forest Picori|link}} | |||
| {{Term|TMC|Lake Hylia|link}} | |||
| [[File:TMC Kinstone Piece Blue Sprite.png|center]] | |||
|style="text-align:center"| 3 | |||
| A {{Term|TMC|Bean|link}} grows into a {{Term|TMC|Beanstalk|link}} with a {{Term|TMC|Piece of Heart|link}} and two {{Plural|TMC|Treasure Chest|link}} containing 200 {{Plural|TMC|Rupee|link}} and 200 {{Plural|TMC|Mysterious Shell|link}} | |||
|- | |||
|style="text-align:center"| [[File:TMC Forest Picori Sprite.png|center]]<br/>{{Term|TMC|Forest Picori|link}} | |||
| {{Term|TMC|Lake Hylia|link}} | |||
| [[File:TMC Kinstone Piece Red Sprite.png|center]] | |||
|style="text-align:center"| 3 | |||
| A {{Term|TMC|Tree|link}} opens in {{Term|TMC|Western Wood|link}}, containing a {{Term|TMC|Piece of Heart|link}} | |||
|- | |||
|style="text-align:center"| [[File:TMC Forest Picori Sprite.png|center]][[File:TMC Zill Sprite.png]]<br/>{{Term|TMC|Forest Picori|link}} (or {{Term|TMC|Zill|link}}) | |||
| {{Term|TMC|Minish Village|link}} (or {{Term|TMC|Hyrule Town|link}}) | |||
| [[File:TMC Kinstone Piece Green Sprite 2.png|center]] | |||
|style="text-align:center"| 3 | |||
| A {{Term|TMC|Lily Pad|link}} appears in {{Term|TMC|Castor Wilds|link}} | |||
|- | |||
|style="text-align:center"| [[File:TMC Forest Picori Sprite.png|center]][[File:TMC Zill Sprite.png]]<br/>{{Term|TMC|Forest Picori|link}} (or {{Term|TMC|Zill|link}}) | |||
| {{Term|TMC|Minish Village|link}} (or {{Term|TMC|Hyrule Town|link}}) | |||
| [[File:TMC Kinstone Piece Green Sprite 3.png|center]] | |||
|style="text-align:center"| 3 | |||
| A {{Term|TMC|Lily Pad|link}} appears in {{Term|TMC|Castor Wilds|link}} | |||
|- | |||
|style="text-align:center"| [[File:TMC Forest Picori Sprite.png|center]][[File:TMC Zill Sprite.png]]<br/>{{Term|TMC|Forest Picori|link}} (or {{Term|TMC|Zill|link}}) | |||
| {{Term|TMC|Minish Village|link}} (or {{Term|TMC|Hyrule Town|link}}) | |||
| [[File:TMC Kinstone Piece Green Sprite.png|center]] | |||
|style="text-align:center"| 3 | |||
| A {{Term|TMC|Lily Pad|link}} appears in {{Term|TMC|Castor Wilds|link}} | |||
|- | |||
|style="text-align:center"| [[File:TMC Forest Picori Sprite.png|center]]<br/>{{Term|TMC|Forest Picori|link}} | |||
| {{Term|TMC|Minish Village|link}} | |||
| [[File:TMC Kinstone Piece Red Sprite 3.png|center]] | |||
|style="text-align:center"| 7 | |||
| A shoal rises in {{Term|TMC|Veil Falls|link}}, allowing {{Term|TMC|Link|link}} to access a {{Term|TMC|Dig Cavern|link}} with a {{Term|TMC|Piece of Heart|link}} inside | |||
|- | |||
|style="text-align:center"| [[File:TMC Forest Picori Sprite.png|center]]<br/>{{Term|TMC|Forest Picori|link}} | |||
| {{Term|TMC|Minish Village|link}} | |||
| [[File:TMC Kinstone Piece Red Sprite.png|center]] | |||
|style="text-align:center"| 7 | |||
| A crack appears near the {{Term|TMC|Wind Crest|link}} at {{Term|TMC|Lake Hylia|link}} that leads to {{Term|TMC|Librari|link}}'s home, where he will give {{Term|TMC|Link|link}} a full {{Term|TMC|Heart Container|link}} | |||
|- | |||
|style="text-align:center"| [[File:TMC Forest Picori Sprite.png|center]]<br/>{{Term|TMC|Forest Picori|link}} | |||
| {{Term|TMC|Mount Crenel's Base|link}} | |||
| [[File:TMC Kinstone Piece Green Sprite 2.png|center]] | |||
|style="text-align:center"| 2 | |||
| A {{Term|TMC|Treasure Chest|link}} appears at {{Term|TMC|Mount Crenel's Base}} containing 200 {{Plural|TMC|Rupee|link}} | |||
|- | |||
|style="text-align:center"| [[File:TMC Forest Picori Sprite.png|center]]<br/>{{Term|TMC|Forest Picori|link}} | |||
| {{Term|TMC|North Hyrule Field|link}} | |||
| [[File:TMC Kinstone Piece Green Sprite 3.png|center]] | |||
|style="text-align:center"| 3 | |||
| A {{Term|TMC|Treasure Chest|link}} appears in the {{Term|TMC|Wind Ruins|link}} containing 200 {{Plural|TMC|Mysterious Shell|link}} | |||
|- | |||
|style="text-align:center"| [[File:TMC Forest Picori Sprite.png|center]]<br/>{{Term|TMC|Forest Picori|link}} | |||
| {{Term|TMC|South Hyrule Field|link}} | |||
| [[File:TMC Kinstone Piece Red Sprite 2.png|center]] | |||
|style="text-align:center"| 3 | |||
| {{Term|TMC|Syrup|link}} is inspired to make the {{Term|TMC|Red Potion|link}} | |||
|- | |||
|style="text-align:center"| [[File:TMC Forest Picori Sprite.png|center]]<br/>{{Term|TMC|Forest Picori|link}} | |||
| {{Term|TMC|Trilby Highlands|link}} | |||
| [[File:TMC Kinstone Piece Green Sprite.png|center]] | |||
|style="text-align:center"| 3 | |||
| A pool in {{Term|TMC|Trilby Highlands}} is drained, revealing a cave with 75 {{Plural|TMC|Rupee|link}} | |||
|- | |||
|style="text-align:center"| [[File:TMC Forest Picori Sprite.png|center]]<br/>{{Term|TMC|Forest Picori|link}} | |||
| {{Term|TMC|Western Wood|link}} | |||
| [[File:TMC Kinstone Piece Blue Sprite.png|center]] | |||
|style="text-align:center"| 3 | |||
| A {{Term|TMC|Bean|link}} grows into a {{Term|TMC|Beanstalk|link}} with 320 {{Plural|TMC|Rupee|link}} and a {{Term|TMC|Treasure Chest|link}} containing a red {{Term|TMC|Kinstone Piece|link}} | |||
|- | |||
|style="text-align:center"| [[File:TMC Forest Picori Sprite.png|center]]<br/>{{Term|TMC|Forest Picori|link}} | |||
| {{Term|TMC|Wind Ruins|link}} | |||
| [[File:TMC Kinstone Piece Red Sprite 3.png|center]] | |||
|style="text-align:center"| 3 | |||
| A {{Term|TMC|Bean|link}} grows into a {{Term|TMC|Beanstalk|link}} with a {{Term|TMC|Treasure Chest|link}} at the top containing a {{Term|TMC|Large Quiver|link}} | |||
|- | |||
|style="text-align:center"| [[File:TMC Gale Sprite.png|center]]<br/>{{Term|TMC|Gale|link}} | |||
| {{Term|TMC|Cloud Tops|link}} | |||
| [[File:TMC Kinstone Piece Red Sprite 2.png|center]] | |||
|style="text-align:center"| 5 | |||
| A waterfall opens at {{Term|TMC|Veil Falls|link}} with a {{Term|TMC|Piece of Heart|link}} inside | |||
|- | |||
|style="text-align:center"| [[File:TMC Gentari Sprite.png|center]]<br/>{{Term|TMC|Gentari|link}} | |||
| {{Term|TMC|Minish Village|link}} | |||
| [[File:TMC Kinstone Piece Red Sprite 3.png|center]] | |||
|style="text-align:center"| 4 | |||
| {{Term|TMC|Belari|link}} is inspired to create the {{Plural|TMC|Remote Bomb|link}} | |||
|- | |||
|style="text-align:center"| [[File:TMC Gina Sprite.png|center]]<br/>{{Term|TMC|Gina|link}} | |||
| {{Term|TMC|Royal Valley|link}} | |||
| [[File:TMC Kinstone Piece Green Sprite.png|center]] | |||
|style="text-align:center"| 5 | |||
| A fallen {{Term|TMC|Tree|link}} rises in {{Term|TMC|Western Wood|link}}, giving access to a {{Term|TMC|Treasure Chest|link}} containing 100 {{Plural|TMC|Mysterious Shell|link}} | |||
|- | |||
|style="text-align:center"| [[File:TMC Gina Sprite.png|center]]<br/>{{Term|TMC|Gina|link}} | |||
| {{Term|TMC|Royal Valley|link}} | |||
| [[File:TMC Kinstone Piece Green Sprite.png|center]] | |||
|style="text-align:center"| 5 | |||
| A waterfall opens in {{Term|TMC|Hyrule Town|link}}, leading to a {{Term|TMC|Treasure Chest|link}} containing 200 {{Plural|TMC|Mysterious Shell|link}} | |||
|- | |||
|style="text-align:center"| [[File:TMC Goron Digger Sprite.png|center]]<br/>{{Term|TMC|Goron Digger|link}} | |||
| {{Term|TMC|Lon Lon Ranch|link}} | |||
| [[File:TMC Kinstone Piece Blue Sprite 2.png|center]] | |||
|style="text-align:center"| 2 | |||
| The {{Term|TMC|Goron Merchant|link}} appears in {{Term|TMC|Hyrule Town|link}} | |||
|- | |||
|style="text-align:center"| [[File:TMC Goron Digger Sprite.png|center]]<br/>{{Term|TMC|Goron Digger|link}} | |||
| {{Term|TMC|Goron Cave|link}} | |||
| [[File:TMC Kinstone Piece Red Sprite.png|center]] | |||
|style="text-align:center"| 7 | |||
| {{Term|TMC|Biggoron|link}} awakens at {{Term|TMC|Veil Springs|link}} | |||
|- | |||
|style="text-align:center"| [[File:TMC Grayblade Sprite.png|center]]<br/>{{Term|TMC|Grayblade|link}} | |||
| {{Term|TMC|Mount Crenel|link}} | |||
| [[File:TMC Kinstone Piece Red Sprite.png|center]] | |||
|style="text-align:center"| 3 | |||
| A waterfall opens in {{Term|TMC|Castor Wilds|link}}, leading to {{Term|TMC|Scarblade|link}}'s dojo | |||
|- | |||
|style="text-align:center"| [[File:TMC Grimblade Sprite.png|center]]<br/>{{Term|TMC|Grimblade|link}} | |||
| {{Term|TMC|Hyrule Castle Garden|link}} | |||
| [[File:TMC Kinstone Piece Red Sprite 3.png|center]] | |||
|style="text-align:center"| 5 | |||
| A waterfall opens at {{Term|TMC|Veil Falls|link}}, leading to {{Term|TMC|Splitblade|link}}'s dojo | |||
|- | |||
|style="text-align:center"| [[File:TMC Hurdy-Gurdy Man Sprite.png|center]]<br/>{{Term|TMC|Hurdy-Gurdy Man|link}} | |||
| {{Term|TMC|Hyrule Town|link}} | |||
| [[File:TMC Kinstone Piece Blue Sprite 2.png|center]] | |||
|style="text-align:center"| 1 | |||
| A {{Term|TMC|Tree|link}} opens in {{Term|TMC|South Hyrule Field|link}}, containing a {{Term|TMC|Piece of Heart|link}} | |||
|- | |||
|style="text-align:center"| [[File:TMC Hailey Sprite.png|center]]<br/>{{Term|TMC|Hailey|link}} | |||
| {{Term|TMC|Cloud Tops|link}} | |||
| [[File:TMC Kinstone Piece Green Sprite 2.png|center]] | |||
|style="text-align:center"| 5 | |||
| A {{Term|TMC|Golden Tektite|link}} appears at {{Term|TMC|Veil Falls|link}} | |||
|- | |||
|style="text-align:center"| [[File:TMC Knuckle Sprite.png|center]]<br/>{{Term|TMC|Knuckle|link}} | |||
| {{Term|TMC|Trilby Highlands|link}} | |||
| [[File:TMC Kinstone Piece Green Sprite 2.png|center]] | |||
|style="text-align:center"| 2 | |||
| A {{Term|TMC|Tree|link}} opens in {{Term|TMC|North Hyrule Field|link}}, leading to a {{Term|TMC|Treasure Chest|link}} containing a red {{Term|TMC|Kinstone Piece|link}} and a {{Term|TMC|Switch|link}}; when all four {{Plural|TMC|Switch}} are pressed, a {{Term|TMC|Ladder|link}} descends, giving {{Term|TMC|Link|link}} access to a {{Term|TMC|Treasure Chest}} containing the {{Term|TMC|Magical Boomerang|link}} | |||
|- | |||
|style="text-align:center"| [[File:TMC Librari Sprite.png|center]]<br/>{{Term|TMC|Librari|link}} | |||
| {{Term|TMC|Hyrule Town|link}} | |||
| [[File:TMC Kinstone Piece Green Sprite 3.png|center]] | |||
|style="text-align:center"| 3 | |||
| A {{Term|TMC|Golden Octorok|link}} appears at the {{Term|TMC|Wind Ruins|link}} | |||
|- | |||
|style="text-align:center"| [[File:TMC Mama Sprite.png|center]]<br/>{{Term|TMC|Mama|link}} | |||
| {{Term|TMC|Hyrule Town|link}} | |||
| [[File:TMC Kinstone Piece Green Sprite.png|center]] | |||
|style="text-align:center"| 3 | |||
| A shoal rises in {{Term|TMC|Lake Hylia|link}}, allowing {{Term|TMC|Link|link}} access to a {{Term|TMC|Dig Cavern|link}} | |||
|- | |||
|style="text-align:center"| [[File:TMC Mayor Hagen Sprite.png|center]]<br/>{{Term|TMC|Mayor Hagen|link}} | |||
| {{Term|TMC|Hyrule Town|link}} | |||
| [[File:TMC Kinstone Piece Red Sprite 3.png|center]] | |||
|style="text-align:center"| 1 | |||
| A pool drains at {{Term|TMC|Lon Lon Ranch|link}}, leading to a {{Term|TMC|Treasure Chest|link}} containing a {{Term|TMC|Big Wallet|link}} | |||
|- | |||
|style="text-align:center"| [[File:TMC Meenie Sprite.png|center]]<br/>{{Term|TMC|Meenie|link}} | |||
| {{Term|TMC|Eastern Hills|link}} | |||
| [[File:TMC Kinstone Piece Green Sprite 2.png|center]] | |||
|style="text-align:center"| 2 | |||
| A {{Term|TMC|Treasure Chest|link}} appears on the {{Term|TMC|Crenel Wall|link}} containing a blue {{Term|TMC|Kinstone Piece|link}} | |||
|- | |||
|style="text-align:center"| [[File:TMC Melari Sprite.png|center]]<br/>{{Term|TMC|Melari|link}} | |||
| {{Term|TMC|Melari's Mine|link}} | |||
| [[File:TMC Kinstone Piece Red Sprite 2.png|center]] | |||
|style="text-align:center"| 2 | |||
| A {{Term|TMC|Bean|link}} grows into a {{Term|TMC|Beanstalk|link}} with a {{Term|TMC|Piece of Heart|link}} and 160 {{Plural|TMC|Rupee|link}} | |||
|- | |||
|style="text-align:center"| [[File:TMC Mountain Minish Sprite.png|center]]<br/>{{Term|TMC|Mountain Minish|link}} | |||
| {{Term|TMC|Melari's Mine|link}} | |||
| [[File:TMC Kinstone Piece Green Sprite 2.png|center]] | |||
|style="text-align:center"| 2 | |||
| A {{Term|TMC|Treasure Chest|link}} appears in the rainy {{Term|TMC|Minish|link}}-sized path on {{Term|TMC|Mount Crenel|link}} containing a blue {{Term|TMC|Kinstone Piece|link}} | |||
|- | |||
|style="text-align:center"| [[File:TMC Mountain Minish Sprite.png|center]]<br/>{{Term|TMC|Mountain Minish|link}} | |||
| {{Term|TMC|Melari's Mine|link}} | |||
| [[File:TMC Kinstone Piece Green Sprite.png|center]] | |||
|style="text-align:center"| 2 | |||
| A {{Term|TMC|Treasure Chest|link}} appears in {{Term|TMC|Minish Woods|link}} containing a blue {{Term|TMC|Kinstone Piece|link}} | |||
|- | |||
|style="text-align:center"| [[File:TMC Mountain Minish Sprite.png|center]]<br/>{{Term|TMC|Mountain Minish|link}} | |||
| {{Term|TMC|Melari's Mine|link}} | |||
| [[File:TMC Kinstone Piece Green Sprite 3.png|center]] | |||
|style="text-align:center"| 2 | |||
| A {{Term|TMC|Treasure Chest|link}} appears in the {{Term|TMC|Minish|link}}-sized path on {{Term|TMC|Mount Crenel|link}} near the hot spring containing a blue {{Term|TMC|Kinstone Piece|link}} | |||
|- | |||
|style="text-align:center"| [[File:TMC Mountain Minish Sprite.png|center]]<br/>{{Term|TMC|Mountain Minish|link}} | |||
| {{Term|TMC|Melari's Mine|link}} | |||
| [[File:TMC Kinstone Piece Green Sprite.png|center]] | |||
|style="text-align:center"| 1 | |||
| A {{Term|TMC|Golden Tektite|link}} appears on {{Term|TMC|Mount Crenel|link}} | |||
|- | |||
|style="text-align:center"| [[File:TMC Mysterious Cloud Sprite.png|center]]<br/>{{Term|TMC|Mysterious Cloud|link}} (northwest) | |||
| {{Term|TMC|Cloud Tops|link}} | |||
| [[File:TMC Kinstone Piece Gold Sprite 5.png|center]] | |||
|style="text-align:center"| 5 | |||
| A pinwheel begins turning; when all five are turning, a {{Term|TMC|Tornado|link}} appears to transport {{Term|TMC|Link|link}} upwards to the {{Term|TMC|Home of the Wind Tribe|link}} | |||
|- | |||
|style="text-align:center"| [[File:TMC Mysterious Cloud Sprite.png|center]]<br/>{{Term|TMC|Mysterious Cloud|link}} (center) | |||
| {{Term|TMC|Cloud Tops|link}} | |||
| [[File:TMC Kinstone Piece Gold Sprite 5.png|center]] | |||
|style="text-align:center"| 5 | |||
| A pinwheel begins turning; when all five are turning, a {{Term|TMC|Tornado|link}} appears to transport {{Term|TMC|Link|link}} upwards to the {{Term|TMC|Home of the Wind Tribe|link}} | |||
|- | |||
|style="text-align:center"| [[File:TMC Mysterious Cloud Sprite.png|center]]<br/>{{Term|TMC|Mysterious Cloud|link}} (southwest) | |||
| {{Term|TMC|Cloud Tops|link}} | |||
| [[File:TMC Kinstone Piece Gold Sprite 6.png|center]] | |||
|style="text-align:center"| 5 | |||
| A pinwheel begins turning; when all five are turning, a {{Term|TMC|Tornado|link}} appears to transport {{Term|TMC|Link|link}} upwards to the {{Term|TMC|Home of the Wind Tribe|link}} | |||
|- | |||
|style="text-align:center"| [[File:TMC Mysterious Cloud Sprite.png|center]]<br/>{{Term|TMC|Mysterious Cloud|link}} (southeast) | |||
| {{Term|TMC|Cloud Tops|link}} | |||
| [[File:TMC Kinstone Piece Gold Sprite 6.png|center]] | |||
|style="text-align:center"| 5 | |||
| A pinwheel begins turning; when all five are turning, a {{Term|TMC|Tornado|link}} appears to transport {{Term|TMC|Link|link}} upwards to the {{Term|TMC|Home of the Wind Tribe|link}} | |||
|- | |||
|style="text-align:center"| [[File:TMC Mysterious Cloud Sprite.png|center]]<br/>{{Term|TMC|Mysterious Cloud|link}} (northeast) | |||
| {{Term|TMC|Cloud Tops|link}} | |||
| [[File:TMC Kinstone Piece Gold Sprite 7.png|center]] | |||
|style="text-align:center"| 5 | |||
| A pinwheel begins turning; when all five are turning, a {{Term|TMC|Tornado|link}} appears to transport {{Term|TMC|Link|link}} upwards to the {{Term|TMC|Home of the Wind Tribe|link}} | |||
|- | |||
|style="text-align:center"| [[File:TMC Mysterious Statue Sprite.png|center]]<br/>{{Term|TMC|Mysterious Statue|link}} (left) | |||
| {{Term|TMC|Castor Wilds|link}} | |||
| [[File:TMC Kinstone Piece Gold Sprite.png|center]] | |||
|style="text-align:center"| 2 | |||
| A nearby boulder is damaged; when {{Term|TMC|Link|link}} has {{Term|TMC|Kinstone Fusion|link|display=Fused}} with all three {{Plural|TMC|Mysterious Statue}}, the boulder shatters, granting him access to the {{Term|TMC|Wind Ruins|link}} | |||
|- | |||
|style="text-align:center"| [[File:TMC Mysterious Statue Sprite.png|center]]<br/>{{Term|TMC|Mysterious Statue|link}} (center) | |||
| {{Term|TMC|Castor Wilds|link}} | |||
| [[File:TMC Kinstone Piece Gold Sprite 2.png|center]] | |||
|style="text-align:center"| 2 | |||
| A nearby boulder is damaged; when {{Term|TMC|Link|link}} has {{Term|TMC|Kinstone Fusion|link|display=Fused}} with all three {{Plural|TMC|Mysterious Statue}}, the boulder shatters, granting him access to the {{Term|TMC|Wind Ruins|link}} | |||
|- | |||
|style="text-align:center"| [[File:TMC Mysterious Statue Sprite.png|center]]<br/>{{Term|TMC|Mysterious Statue|link}} (right) | |||
| {{Term|TMC|Castor Wilds|link}} | |||
| [[File:TMC Kinstone Piece Gold Sprite 3.png|center]] | |||
|style="text-align:center"| 2 | |||
| A nearby boulder is damaged; when {{Term|TMC|Link|link}} has {{Term|TMC|Kinstone Fusion|link|display=Fused}} with all three {{Plural|TMC|Mysterious Statue}}, the boulder shatters, granting him access to the {{Term|TMC|Wind Ruins|link}} | |||
|- | |||
|style="text-align:center"| [[File:TMC Mysterious Wall Sprite.png|center]]<br/>{{Term|TMC|Mysterious Wall|link}} | |||
| {{Term|TMC|Eastern Hills|link}} | |||
| [[File:TMC Kinstone Piece Blue Sprite.png|center]] | |||
|style="text-align:center"| 2 | |||
| The {{Term|TMC|Goron|link}} at {{Term|TMC|Lon Lon Ranch|link}} opens the {{Term|TMC|Goron Cave|link}} (if {{Term|TMC|Eenie|link}} or another {{Term|TMC|Mysterious Wall}} have already been {{Term|TMC|Kinstone Fusion|display=Fused}} with, then another {{Term|TMC|Goron}} will arrive in the {{Term|TMC|Goron Cave}}) | |||
|- | |||
|style="text-align:center"| [[File:TMC Mysterious Wall Sprite.png|center]]<br/>{{Term|TMC|Mysterious Wall|link}} | |||
| {{Term|TMC|Minish Woods|link}} | |||
| [[File:TMC Kinstone Piece Blue Sprite 2.png|center]] | |||
|style="text-align:center"| 2 | |||
| The {{Term|TMC|Goron|link}} at {{Term|TMC|Lon Lon Ranch|link}} opens the {{Term|TMC|Goron Cave|link}} (if {{Term|TMC|Eenie|link}} or another {{Term|TMC|Mysterious Wall}} have already been {{Term|TMC|Kinstone Fusion|display=Fused}} with, then another {{Term|TMC|Goron}} will arrive in the {{Term|TMC|Goron Cave}}) | |||
|- | |||
|style="text-align:center"| [[File:TMC Mysterious Wall Sprite.png|center]]<br/>{{Term|TMC|Mysterious Wall|link}} | |||
| {{Term|TMC|Lake Hylia|link}} | |||
| [[File:TMC Kinstone Piece Blue Sprite 2.png|center]] | |||
|style="text-align:center"| 5 | |||
| The {{Term|TMC|Goron|link}} at {{Term|TMC|Lon Lon Ranch|link}} opens the {{Term|TMC|Goron Cave|link}} (if {{Term|TMC|Eenie|link}} or another {{Term|TMC|Mysterious Wall}} have already been {{Term|TMC|Kinstone Fusion|display=Fused}} with, then another {{Term|TMC|Goron}} will arrive in the {{Term|TMC|Goron Cave}}) | |||
|- | |||
|style="text-align:center"| [[File:TMC Mysterious Wall Sprite.png|center]]<br/>{{Term|TMC|Mysterious Wall|link}} | |||
| {{Term|TMC|Mount Crenel|link}} | |||
| [[File:TMC Kinstone Piece Blue Sprite 2.png|center]] | |||
|style="text-align:center"| 2 | |||
| The {{Term|TMC|Goron|link}} at {{Term|TMC|Lon Lon Ranch|link}} opens the {{Term|TMC|Goron Cave|link}} (if {{Term|TMC|Eenie|link}} or another {{Term|TMC|Mysterious Wall}} have already been {{Term|TMC|Kinstone Fusion|display=Fused}} with, then another {{Term|TMC|Goron}} will arrive in the {{Term|TMC|Goron Cave}}) | |||
|- | |||
|style="text-align:center"| [[File:TMC Mysterious Wall Sprite.png|center]]<br/>{{Term|TMC|Mysterious Wall|link}} | |||
| {{Term|TMC|Trilby Highlands|link}} | |||
| [[File:TMC Kinstone Piece Blue Sprite.png|center]] | |||
|style="text-align:center"| 2 | |||
| The {{Term|TMC|Goron|link}} at {{Term|TMC|Lon Lon Ranch|link}} opens the {{Term|TMC|Goron Cave|link}} (if {{Term|TMC|Eenie|link}} or another {{Term|TMC|Mysterious Wall}} have already been {{Term|TMC|Kinstone Fusion|display=Fused}} with, then another {{Term|TMC|Goron}} will arrive in the {{Term|TMC|Goron Cave}}) | |||
|- | |||
|style="text-align:center"| [[File:TMC Nayru Sprite.png|center]]<br/>{{Term|TMC|Nayru (Oracle)|link}} | |||
| {{Term|TMC|Hyrule Town|link}} | |||
| [[File:TMC Kinstone Piece Red Sprite 2.png|center]] | |||
|style="text-align:center"| 5 | |||
| A {{Term|TMC|Joy Butterfly|link}} appears in the {{Term|TMC|Royal Valley|link}} that, when collected, allows {{Term|TMC|Link|link}} to swim more quickly with the {{Term|TMC|Flippers|link}} | |||
|- | |||
|style="text-align:center"| [[File:TMC Percy Sprite.png|center]]<br/>{{Term|TMC|Percy|link}} | |||
| {{Term|TMC|Trilby Highlands|link}} | |||
| [[File:TMC Kinstone Piece Red Sprite 3.png|center]] | |||
|style="text-align:center"| 2 | |||
| A fallen tree rises in {{Term|TMC|Western Wood|link}}, giving {{Term|TMC|Link|link}} access to {{Term|TMC|Percy's House|link}} | |||
|- | |||
|style="text-align:center"| [[File:TMC Postman Sprite.png|center]]<br/>{{Term|TMC|Postman|link}} | |||
| {{Term|TMC|Hyrule Town|link}} | |||
| [[File:TMC Kinstone Piece Blue Sprite.png|center]] | |||
|style="text-align:center"| 2 | |||
| {{Term|TMC|Marcy|link}} appears in the {{Term|TMC|Post Office|link}} and begins selling the {{Term|TMC|Swordsman Newsletter|link}} | |||
|- | |||
|style="text-align:center"| [[File:TMC Siroc Sprite.png|center]]<br/>{{Term|TMC|Siroc|link}} | |||
| {{Term|TMC|Home of the Wind Tribe|link}} | |||
| [[File:TMC Kinstone Piece Green Sprite.png|center]] | |||
|style="text-align:center"| 5 | |||
| A {{Term|TMC|Treasure Chest|link}} appears in the {{Term|TMC|Royal Valley|link}} containing a red {{Term|TMC|Kinstone Piece|link}} | |||
|- | |||
|style="text-align:center"| [[File:TMC Siroc Sprite.png|center]]<br/>{{Term|TMC|Siroc|link}} | |||
| {{Term|TMC|Home of the Wind Tribe|link}} | |||
| [[File:TMC Kinstone Piece Green Sprite 2.png|center]] | |||
|style="text-align:center"| 5 | |||
| A {{Term|TMC|Treasure Chest|link}} appears in the {{Term|TMC|Royal Valley|link}} containing a red {{Term|TMC|Kinstone Piece|link}} | |||
|- | |||
|style="text-align:center"| [[File:TMC Smith Sprite.png|center]]<br/>{{Term|TMC|Smith|link}} | |||
| {{Term|TMC|South Hyrule Field|link}} | |||
| [[File:TMC Kinstone Piece Red Sprite 2.png|center]] | |||
|style="text-align:center"| 2 | |||
| A {{Term|TMC|Treasure Chest|link}} appears in the {{Term|TMC|Eastern Hills|link}} containing an {{Term|TMC|Empty Bottle|link}} | |||
|- | |||
|style="text-align:center"| [[File:TMC Smith Sprite.png|center]]<br/>{{Term|TMC|Smith|link}} | |||
| {{Term|TMC|South Hyrule Field|link}} | |||
| [[File:TMC Kinstone Piece Green Sprite 3.png|center]] | |||
|style="text-align:center"| 2 | |||
| A {{Term|TMC|Treasure Chest|link}} appears in {{Term|TMC|Trilby Highlands|link}} containing a red {{Term|TMC|Kinstone Piece|link}} | |||
|- | |||
|style="text-align:center"| [[File:TMC Source of the Flow Sprite.png|center]]<br/>{{Term|TMC|Source of the Flow|link}} | |||
| {{Term|TMC|Veil Falls|link}} | |||
| [[File:TMC Kinstone Piece Gold Sprite 4.png|center]] | |||
|style="text-align:center"| 5 | |||
| The stone slab at the end of the bridge opens, granting {{Term|TMC|Link|link}} access to the caves of {{Term|TMC|Veil Falls|link}} that lead to {{Term|TMC|Veil Springs|link}} | |||
|- | |||
|style="text-align:center"| [[File:TMC Spekter Sprite.png|center]]<br/>{{Term|TMC|Spekter|link}} | |||
| {{Term|TMC|Royal Valley|link}} | |||
| [[File:TMC Kinstone Piece Blue Sprite 2.png|center]] | |||
|style="text-align:center"| 4 | |||
| {{Term|TMC|Borlov|link}} creates a harder difficulty in the {{Term|TMC|Chest Mini-Game Shop|link}} | |||
|- | |||
|style="text-align:center"| [[File:TMC Spekter Sprite.png|center]]<br/>{{Term|TMC|Spekter|link}} | |||
| {{Term|TMC|Royal Valley|link}} | |||
| [[File:TMC Kinstone Piece Blue Sprite.png|center]] | |||
|style="text-align:center"| 4 | |||
| {{Term|TMC|Spookter|link}} leaves {{Term|TMC|Hyrule Town|link}}, giving {{Term|TMC|Link|link}} access to the inside of {{Term|TMC|Anju's Henhouse|link}} | |||
|- | |||
|style="text-align:center"| [[File:TMC Strato Sprite.png|center]]<br/>{{Term|TMC|Strato|link}} | |||
| {{Term|TMC|Hyrule Town|link}} | |||
| [[File:TMC Kinstone Piece Red Sprite.png|center]] | |||
|style="text-align:center"| 1 | |||
| A {{Term|TMC|Portal|link}} appears in {{Term|TMC|South Hyrule Field|link}} that leads to the {{Term|TMC|Home of the Wind Tribe|link}} | |||
|- | |||
|style="text-align:center"| [[File:TMC Tina Sprite.png|center]]<br/>{{Term|TMC|Tina|link}} | |||
| {{Term|TMC|Hyrule Town|link}} | |||
| [[File:TMC Kinstone Piece Green Sprite 3.png|center]] | |||
|style="text-align:center"| 5 | |||
| A {{Term|TMC|Treasure Chest|link}} appears in {{Term|TMC|Trilby Highlands|link}} containing a red {{Term|TMC|Kinstone Piece|link}} | |||
|- | |||
|style="text-align:center"| [[File:TMC Tingle Sprite.png|center]]<br/>{{Term|TMC|Tingle|link}} | |||
| {{Term|TMC|South Hyrule Field|link}} | |||
| [[File:TMC Kinstone Piece Green Sprite 3.png|center]] | |||
|style="text-align:center"| 2 | |||
| A {{Term|TMC|Tree|link}} opens in {{Term|TMC|North Hyrule Field|link}}, leading to a {{Term|TMC|Treasure Chest|link}} containing a red {{Term|TMC|Kinstone Piece|link}} and a {{Term|TMC|Switch|link}}; when all four {{Plural|TMC|Switch}} are pressed, a {{Term|TMC|Ladder|link}} descends, giving {{Term|TMC|Link|link}} access to a {{Term|TMC|Treasure Chest}} containing the {{Term|TMC|Magical Boomerang|link}} | |||
|- | |||
|style="text-align:center"| [[File:TMC Tingle Sprite.png|center]]<br/>{{Term|TMC|Tingle|link}} | |||
| {{Term|TMC|South Hyrule Field|link}} | |||
| [[File:TMC Kinstone Piece Red Sprite.png|center]] | |||
|style="text-align:center"| 3 | |||
| A {{Term|TMC|Golden Tektite|link}} appears on {{Term|TMC|Mount Crenel|link}} | |||
|- | |||
|style="text-align:center"| [[File:TMC Waveblade Sprite.png|center]]<br/>{{Term|TMC|Waveblade|link}} | |||
| {{Term|TMC|Lake Hylia|link}} | |||
| [[File:TMC Kinstone Piece Red Sprite 2.png|center]] | |||
|style="text-align:center"| 5 | |||
| A waterfall opens in {{Term|TMC|North Hyrule Field|link}}, leading to {{Term|TMC|Greatblade|link}}'s dojo | |||
|- | |||
|style="text-align:center"| Random | |||
| N/A | |||
| [[File:TMC Kinstone Piece Blue Sprite 2.png|center]] | |||
|style="text-align:center"| 1 | |||
| A {{Term|TMC|Tree|link}} opens in {{Term|TMC|North Hyrule Field|link}}, containing a {{Term|TMC|Fairy Fountain|link}} | |||
|- | |||
|style="text-align:center"| Random | |||
| N/A | |||
| [[File:TMC Kinstone Piece Green Sprite.png|center]] | |||
|style="text-align:center"| 1 | |||
| A pool in {{Term|TMC|Hyrule Castle Garden|link}} is drained, leading to a {{Term|TMC|Fairy Fountain|link}} | |||
|- | |||
|style="text-align:center"| Random | |||
| N/A | |||
| [[File:TMC Kinstone Piece Green Sprite 3.png|center]] | |||
|style="text-align:center"| 1 | |||
| A pool in {{Term|TMC|South Hyrule Field|link}} is drained, leading to a cave with 75 {{Plural|TMC|Rupee|link}} | |||
|- | |||
|style="text-align:center"| Random | |||
| N/A | |||
| [[File:TMC Kinstone Piece Green Sprite 3.png|center]] | |||
|style="text-align:center"| 1 | |||
| A {{Term|TMC|Golden Octorok|link}} appears in {{Term|TMC|Minish Woods|link}} | |||
|- | |||
|style="text-align:center"| Random | |||
| N/A | |||
| [[File:TMC Kinstone Piece Green Sprite 3.png|center]] | |||
|style="text-align:center"| 1 | |||
| A {{Term|TMC|Golden Rope|link}} appears in the {{Term|TMC|Eastern Hills|link}} | |||
|- | |||
|style="text-align:center"| Random | |||
| N/A | |||
| [[File:TMC Kinstone Piece Green Sprite.png|center]] | |||
|style="text-align:center"| 1 | |||
| A {{Term|TMC|Golden Rope|link}} appears in {{Term|TMC|Hyrule Castle Garden|link}} | |||
|- | |||
|style="text-align:center"| Random | |||
| N/A | |||
| [[File:TMC Kinstone Piece Green Sprite 2.png|center]] | |||
|style="text-align:center"| 1 | |||
| A crack appears in {{Term|TMC|Minish Woods|link}} near the entrance to the {{Term|TMC|Minish Village|link}}, leading to a {{Term|TMC|Treasure Chest|link}} containing a blue {{Term|TMC|Kinstone Piece|link}} | |||
|- | |||
|style="text-align:center"| Random | |||
| N/A | |||
| [[File:TMC Kinstone Piece Green Sprite.png|center]] | |||
|style="text-align:center"| 1 | |||
| A {{Term|TMC|Treasure Chest|link}} appears in the {{Term|TMC|Minish|link}}-sized path at {{Term|TMC|Funday School|link}} containing a red {{Term|TMC|Kinstone Piece|link}} | |||
|- | |||
|style="text-align:center"| Random | |||
| N/A | |||
| [[File:TMC Kinstone Piece Green Sprite 3.png|center]] | |||
|style="text-align:center"| 1 | |||
| A {{Term|TMC|Treasure Chest|link}} appears in the {{Term|TMC|Minish|link}}-sized path at {{Term|TMC|Lon Lon Ranch|link}} containing a red {{Term|TMC|Kinstone Piece|link}} | |||
|- | |||
|style="text-align:center"| Random | |||
| N/A | |||
| [[File:TMC Kinstone Piece Green Sprite.png|center]] | |||
|style="text-align:center"| 1 | |||
| A {{Term|TMC|Treasure Chest|link}} appears in the {{Term|TMC|Minish|link}}-sized path leading to the {{Term|TMC|Minish Village|link}} containing 200 {{Plural|TMC|Rupee|link}} | |||
|- | |||
|style="text-align:center"| Random | |||
| N/A | |||
| [[File:TMC Kinstone Piece Green Sprite.png|center]] | |||
|style="text-align:center"| 1 | |||
| A {{Term|TMC|Treasure Chest|link}} appears in {{Term|TMC|Minish Woods|link}} containing a red {{Term|TMC|Kinstone Piece|link}} | |||
|- | |||
|style="text-align:center"| Random | |||
| N/A | |||
| [[File:TMC Kinstone Piece Green Sprite 2.png|center]] | |||
|style="text-align:center"| 1 | |||
| A {{Term|TMC|Treasure Chest|link}} appears in {{Term|TMC|Minish Woods|link}} containing a red {{Term|TMC|Kinstone Piece|link}} | |||
|- | |||
|style="text-align:center"| Random | |||
| N/A | |||
| [[File:TMC Kinstone Piece Green Sprite 2.png|center]] | |||
|style="text-align:center"| 1 | |||
| A {{Term|TMC|Treasure Chest|link}} appears in {{Term|TMC|Minish Woods|link}} containing 200 {{Plural|TMC|Rupee|link}} | |||
|- | |||
|style="text-align:center"| Random | |||
| N/A | |||
| [[File:TMC Kinstone Piece Green Sprite 2.png|center]] | |||
|style="text-align:center"| 1 | |||
| A {{Term|TMC|Treasure Chest|link}} appears in {{Term|TMC|Minish Woods|link}} containing a blue {{Term|TMC|Kinstone Piece|link}} | |||
|- | |||
|style="text-align:center"| Random | |||
| N/A | |||
| [[File:TMC Kinstone Piece Green Sprite 2.png|center]] | |||
|style="text-align:center"| 1 | |||
| A {{Term|TMC|Treasure Chest|link}} appears at {{Term|TMC|Lon Lon Ranch|link}} containing 200 {{Plural|TMC|Rupee|link}} | |||
|- | |||
|style="text-align:center"| Random | |||
| N/A | |||
| [[File:TMC Kinstone Piece Green Sprite.png|center]] | |||
|style="text-align:center"| 1 | |||
| A {{Term|TMC|Treasure Chest|link}} appears in {{Term|TMC|North Hyrule Field|link}} containing 200 {{Plural|TMC|Mysterious Shell|link}} | |||
|- | |||
|style="text-align:center"| Random | |||
| N/A | |||
| [[File:TMC Kinstone Piece Green Sprite 3.png|center]] | |||
|style="text-align:center"| 1 | |||
| A {{Term|TMC|Treasure Chest|link}} appears in {{Term|TMC|South Hyrule Field|link}} containing 200 {{Plural|TMC|Mysterious Shell|link}} | |||
|- | |||
|style="text-align:center"| Random | |||
| N/A | |||
| [[File:TMC Kinstone Piece Red Sprite 2.png|center]] | |||
|style="text-align:center"| 1 | |||
| A fountain in {{Term|TMC|Hyrule Castle Garden|link}} drains, leading to a {{Term|TMC|Piece of Heart|link}} | |||
|} | |||
==Nomenclature== | |||
{{Nomenclature}} | |||
==Gallery== | |||
<gallery> | |||
File:TMC Kinstone Screen 2.png|Pre-release {{Term|TMC|Kinstone Fusion}} with {{Term|TMC|Sheila}} | |||
File:Kinstone Piece Needed.png|A representation of all the {{Plural|TMC|Kinstone Piece}} needed to perform all 100 {{Plural|TMC|Kinstone Fusion}} | |||
</gallery> | |||
==See Also== | |||
* {{Term|Series|Kinstone|link}} | |||
{{Notes}} | |||
{{Ref}} | |||
{{Kinstones}} | |||
{{Categories | |||
|mechanics= TMC | |||
}} | |||
Latest revision as of 23:19, 14 April 2024
Kinstone Fusion is a mechanic in The Minish Cap.[1]
Overview
Kinstone Fusion is the act of matching two complementary Kinstone Pieces with another character or object, resulting in a completed gold, red, blue, or green medallion. Kinstone Pieces only match with a precise complementary match, despite their many variations and colors. A successful Fusion creates a form of "good luck" for Link, often rewarding him with items and new passageways.
After a successful Kinstone Fusion, the Map Screen will denote the general location and type of reward with various icons:
- Doors and arrows signify newly accessible areas.
- People signify a character having something new.
- Scrolls signify newly appeared Chests.
- Eggs signify newly appeared creatures, namely Golden Monsters and Joy Butterflies.
- Sprouts signify a Bean that has grown into a Beanstalk and can now be climbed to reach a secret area.
There is also a unique icon that appears on the map of South Hyrule Field representing the Portal to the Home of the Wind Tribe; it appears after Link has Fused Kinstone Pieces with Strato.
-

The icon that appears when a new path becomes accessible
-

The icon that appears when a new opening appears
-

The icon that appears when either a Golden Monster or a Joy Butterfly appears
-

The icon that appears when someone has been inspired to offer something new
-

The icon that appears when a Chest appears
-

The icon that appears when a Beanstalk grows
-

The icon that appears when the Portal appears
Fusers
There are many different characters and objects that can perform Kinstone Fusions in The Minish Cap. While many characters will always possess a Kinstone Piece to Fuse, there are a number of Fusions that are not tied to any particular individual. Instead, these Fusions can be triggered with almost any character in the game, even if they already have an established Fusion. Some characters can Fuse Kinstone Pieces multiple times, as well, and some Fusions may not be triggered the first time a character is encountered. Some characters have a random chance of their Fusion becoming available, and Link may need to leave and re-enter the particular area a number of times before the Fusion becomes available.
Random Fusers
The 18 random Fusions can be performed with any of the following characters, and some may also trigger multiple random Fusions. Some characters, such as King Daltus, become unavailable after certain points in the story are reached, while others, such as Sturgeon, do not become available until after certain points in the story are reached. If one of the following characters has an available Fusion and becomes inaccessible during the story, that Fusion will simply transfer to another available character from the list at random.
- Anju
- Anton
- Baris
- Berry
- Bindle
- Brent
- Breve
- Brocco
- Chai
- Crenel Hermit
- Cucco (on top of Anju's Henhouse)
- Cucco Chick (on top of the Swiftblade School)
- Dottie
- Doyle
- Elsie
- Epona
- Erik
- Festari
- Gregal
- Growler
- Harrison
- Herb
- Jasmine
- Jim
- Joel
- Jotari
- Julietta
- June
- Keeley
- King Daltus
- Klaus
- Leila
- Lolly
- Mack
- Malon
- Marshall
- Minister Potho
- Mutoh
- Pina
- Purry
- Rolf
- Romio
- Satchel
- Scratcher
- Sheila
- Sturgeon
- Talon
- Verona
In addition, random Fusions may be performed with any of the Minish found throughout Hyrule; Forest Picori, Library Minish, Mountain Minish, and Town Minish may all have Fusions available.
List of Fusions
A total of 100 Kinstone Fusions can be performed throughout the game; 18 of them are random Fusions not tied to a particular character, and 9 of them are necessary to advance the story (these required Fusions are performed with gold Kinstone Pieces).
In addition, many Fusions do not become available until certain events have transpired; there are six "stages" of the game that transition into one another as Link continues on his journey.[note 1]
- Stage 1: From the moment Link first encounters the Hurdy-Gurdy Man in Hyrule Town and obtains the Kinstone Bag to the moment that he enters Western Wood for the first time and Vaati impersonates King Daltus
- Stage 2: From the end of stage 1 to the moment Link obtains the Ocarina of Wind after defeating Mazaal
- Stage 3: From the end of stage 2 to the moment Link obtains the Water Element and encounters Gustaf's spirit at Lake Hylia
- Stage 4: From the end of stage 3 to the moment Link obtains a gold Kinstone Piece from Gustaf in the Royal Crypt
- Stage 5: From the end of stage 4 to the moment Link obtains the Wind Element after defeating the Gyorg Pair
- Stage 6: From the end of stage 5 to the moment Link defeats Vaati's Wrath and finishes the game
The Tingle Siblings? keep track of successful Kinstone Fusions, including Gold ones. After all 100 are Fused, Tingle will replace the Kinstone Bag with the Tingle Trophy.
In the table below, the "Kinstone Piece" column indicates the color and physical shape of the Kinstone Piece involved in the particular Fusion. The possible colors and shapes are as follows:
| Fuser | Location | Kinstone Piece | Stage | Result |
|---|---|---|---|---|
Ankle |
Lon Lon Ranch | 2 | A Tree opens in North Hyrule Field, leading to a Chest containing a red Kinstone Piece and a Switch; when all four Switches are pressed, a Ladder descends, giving Link access to a Chest containing the Magical Boomerang | |
Belari |
Minish Woods | 4 | A Chest appears in the Wind Ruins containing a Big Bomb Bag | |
Bremor |
Hyrule Town | 3 | Mutoh becomes inspired to build a second Vacant House in Hyrule Town for Gorman to rent | |
Business Scrub |
Castor Wilds | 2 | A Tree opens in Minish Woods, containing a Business Scrub that will sell Kinstone Pieces | |
Business Scrub |
Minish Woods | 3 | A crack appears in Castor Wilds with a Chest containing a red Kinstone Piece inside | |
Business Scrub |
Minish Woods | 3 | A Golden Octorok appears in Western Wood | |
Candy |
Hyrule Town | 2 | A shoal rises in Trilby Highlands, allowing Link to access a Secret Cave once he has obtained the Flippers | |
Caprice |
Home of the Wind Tribe | 5 | A Chest appears in Veil Falls containing a blue Kinstone Piece | |
Dampé |
Royal Valley | 5 | A crack appears in the Wind Ruins with a Chest containing a red Kinstone Piece inside | |
Dampé |
Royal Valley | 5 | A Tombstone opens in the graveyard with Gina inside, along with a Chest with 100 Mysterious Shells | |
David Jr. |
Lake Hylia | 2 | A Tree opens in North Hyrule Field, leading to a Chest containing 200 Mysterious Shells and a Switch; when all four Switches are pressed, a Ladder descends, giving Link access to a Chest containing the Magical Boomerang | |
David Jr. |
Lake Hylia | 3 | A Chest appears in the Minish-sized path to Melari's Mine containing 200 Mysterious Shells | |
Din |
Hyrule Town | 5 | A Joy Butterfly appears in the Wind Ruins that, when collected, allows Link to shoot Arrows more quickly | |
Eenie |
Eastern Hills | 2 | The Goron at Lon Lon Ranch opens the Goron Cave (if a Mysterious Wall has already been Fused with, then another Goron will arrive in the Goron Cave) | |
Farore |
Hyrule Town | 3 | Gorman arrives in Hyrule Town, searching for a young woman to rent out his Vacant House | |
Farore |
Hyrule Town | 5 | A Joy Butterfly appears in Castor Wilds that, when collected, allows Link to dig more quickly with the Mole Mitts | |
Fifi |
Stockwell's House | 2 | A Chest appears in the Minish-sized path to Mayor Hagen's Lakeside Cabin containing a blue Kinstone Piece | |
Flurris |
Home of the Wind Tribe | 5 | A Golden Rope appears in Castor Wilds | |
Flurris |
Home of the Wind Tribe | 5 | A fallen Tree rises in Western Wood, giving access to a patch of dirt where Link can dig up 300 Rupees with the Mole Mitts | |
Forest Picori |
Eastern Hills | 3 | A Bean grows into a Beanstalk with a Piece of Heart and two Chests containing 200 Rupees and 200 Mysterious Shells | |
Forest Picori |
Hyrule Castle Garden | 3 | A fallen Tree rises in Western Wood, giving access to a patch of dirt where Link can dig up 400 Rupees with the Mole Mitts | |
Forest Picori |
Lake Hylia | 3 | A Bean grows into a Beanstalk with a Piece of Heart and two Chests containing 200 Rupees and 200 Mysterious Shells | |
Forest Picori |
Lake Hylia | 3 | A Tree opens in Western Wood, containing a Piece of Heart | |
Forest Picori (or Zill) |
Minish Village (or Hyrule Town) | 3 | A Lily appears in Castor Wilds | |
Forest Picori (or Zill) |
Minish Village (or Hyrule Town) | 3 | A Lily appears in Castor Wilds | |
Forest Picori (or Zill) |
Minish Village (or Hyrule Town) | 3 | A Lily appears in Castor Wilds | |
Forest Picori |
Minish Village | 7 | A shoal rises in Veil Falls, allowing Link to access a Secret Cave with a Piece of Heart inside | |
Forest Picori |
Minish Village | 7 | A crack appears near the Wind Crest at Lake Hylia that leads to Librari's home, where he will give Link a full Heart Container | |
Forest Picori |
Mount Crenel's Base | 2 | A Chest appears at Mount Crenel's Base containing 200 Rupees | |
Forest Picori |
North Hyrule Field | 3 | A Chest appears in the Wind Ruins containing 200 Mysterious Shells | |
Forest Picori |
South Hyrule Field | 3 | Syrup is inspired to make the Red Potion | |
Forest Picori |
Trilby Highlands | 3 | A pool in Trilby Highlands is drained, revealing a cave with 75 Rupees | |
Forest Picori |
Western Wood | 3 | A Bean grows into a Beanstalk with 320 Rupees and a Chest containing a red Kinstone Piece | |
Forest Picori |
Wind Ruins | 3 | A Bean grows into a Beanstalk with a Chest at the top containing a Large Quiver | |
Gale |
Cloud Tops | 5 | A waterfall opens at Veil Falls with a Piece of Heart inside | |
Gentari |
Minish Village | 4 | Belari is inspired to create the Remote Bombs | |
Gina |
Royal Valley | 5 | A fallen Tree rises in Western Wood, giving access to a Chest containing 100 Mysterious Shells | |
Gina |
Royal Valley | 5 | A waterfall opens in Hyrule Town, leading to a Chest containing 200 Mysterious Shells | |
Goron Digger |
Lon Lon Ranch | 2 | The Goron Merchant appears in Hyrule Town | |
Goron Digger |
Goron Cave | 7 | Biggoron awakens at Veil Springs | |
Grayblade |
Mount Crenel | 3 | A waterfall opens in Castor Wilds, leading to Scarblade's dojo | |
Grimblade |
Hyrule Castle Garden | 5 | A waterfall opens at Veil Falls, leading to Splitblade's dojo | |
Hurdy-Gurdy Man |
Hyrule Town | 1 | A Tree opens in South Hyrule Field, containing a Piece of Heart | |
Hailey |
Cloud Tops | 5 | A Golden Tektite appears at Veil Falls | |
Knuckle |
Trilby Highlands | 2 | A Tree opens in North Hyrule Field, leading to a Chest containing a red Kinstone Piece and a Switch; when all four Switches are pressed, a Ladder descends, giving Link access to a Chest containing the Magical Boomerang | |
Librari |
Hyrule Town | 3 | A Golden Octorok appears at the Wind Ruins | |
Mama |
Hyrule Town | 3 | A shoal rises in Lake Hylia, allowing Link access to a Secret Cave | |
Mayor Hagen |
Hyrule Town | 1 | A pool drains at Lon Lon Ranch, leading to a Chest containing a Big Wallet | |
Meenie |
Eastern Hills | 2 | A Chest appears on the Crenel Wall containing a blue Kinstone Piece | |
Melari |
Melari's Mine | 2 | A Bean grows into a Beanstalk with a Piece of Heart and 160 Rupees | |
Mountain Minish |
Melari's Mine | 2 | A Chest appears in the rainy Minish-sized path on Mount Crenel containing a blue Kinstone Piece | |
Mountain Minish |
Melari's Mine | 2 | A Chest appears in Minish Woods containing a blue Kinstone Piece | |
Mountain Minish |
Melari's Mine | 2 | A Chest appears in the Minish-sized path on Mount Crenel near the hot spring containing a blue Kinstone Piece | |
Mountain Minish |
Melari's Mine | 1 | A Golden Tektite appears on Mount Crenel | |
Mysterious Cloud (northwest) |
Cloud Tops | 5 | A pinwheel begins turning; when all five are turning, a Tornado appears to transport Link upwards to the Home of the Wind Tribe | |
Mysterious Cloud (center) |
Cloud Tops | 5 | A pinwheel begins turning; when all five are turning, a Tornado appears to transport Link upwards to the Home of the Wind Tribe | |
Mysterious Cloud (southwest) |
Cloud Tops | 5 | A pinwheel begins turning; when all five are turning, a Tornado appears to transport Link upwards to the Home of the Wind Tribe | |
Mysterious Cloud (southeast) |
Cloud Tops | 5 | A pinwheel begins turning; when all five are turning, a Tornado appears to transport Link upwards to the Home of the Wind Tribe | |
Mysterious Cloud (northeast) |
Cloud Tops | 5 | A pinwheel begins turning; when all five are turning, a Tornado appears to transport Link upwards to the Home of the Wind Tribe | |
Mysterious Statue (left) |
Castor Wilds | 2 | A nearby boulder is damaged; when Link has Fused with all three Mysterious Statues, the boulder shatters, granting him access to the Wind Ruins | |
Mysterious Statue (center) |
Castor Wilds | 2 | A nearby boulder is damaged; when Link has Fused with all three Mysterious Statues, the boulder shatters, granting him access to the Wind Ruins | |
Mysterious Statue (right) |
Castor Wilds | 2 | A nearby boulder is damaged; when Link has Fused with all three Mysterious Statues, the boulder shatters, granting him access to the Wind Ruins | |
Mysterious Wall |
Eastern Hills | 2 | The Goron at Lon Lon Ranch opens the Goron Cave (if Eenie or another Mysterious Wall have already been Fused with, then another Goron will arrive in the Goron Cave) | |
Mysterious Wall |
Minish Woods | 2 | The Goron at Lon Lon Ranch opens the Goron Cave (if Eenie or another Mysterious Wall have already been Fused with, then another Goron will arrive in the Goron Cave) | |
Mysterious Wall |
Lake Hylia | 5 | The Goron at Lon Lon Ranch opens the Goron Cave (if Eenie or another Mysterious Wall have already been Fused with, then another Goron will arrive in the Goron Cave) | |
Mysterious Wall |
Mount Crenel | 2 | The Goron at Lon Lon Ranch opens the Goron Cave (if Eenie or another Mysterious Wall have already been Fused with, then another Goron will arrive in the Goron Cave) | |
Mysterious Wall |
Trilby Highlands | 2 | The Goron at Lon Lon Ranch opens the Goron Cave (if Eenie or another Mysterious Wall have already been Fused with, then another Goron will arrive in the Goron Cave) | |
Nayru |
Hyrule Town | 5 | A Joy Butterfly appears in the Royal Valley that, when collected, allows Link to swim more quickly with the Flippers | |
Percy |
Trilby Highlands | 2 | A fallen tree rises in Western Wood, giving Link access to Percy's House | |
Postman |
Hyrule Town | 2 | Marcy appears in the Post Office and begins selling the Swordsman Newsletter | |
Siroc |
Home of the Wind Tribe | 5 | A Chest appears in the Royal Valley containing a red Kinstone Piece | |
Siroc |
Home of the Wind Tribe | 5 | A Chest appears in the Royal Valley containing a red Kinstone Piece | |
Smith |
South Hyrule Field | 2 | A Chest appears in the Eastern Hills containing an Empty Bottle | |
Smith |
South Hyrule Field | 2 | A Chest appears in Trilby Highlands containing a red Kinstone Piece | |
Source of the Flow |
Veil Falls | 5 | The stone slab at the end of the bridge opens, granting Link access to the caves of Veil Falls that lead to Veil Springs | |
Spekter |
Royal Valley | 4 | Borlov creates a harder difficulty in the Chest Mini-Game Shop | |
Spekter |
Royal Valley | 4 | Spookter leaves Hyrule Town, giving Link access to the inside of Anju's Henhouse | |
Strato |
Hyrule Town | 1 | A Portal appears in South Hyrule Field that leads to the Home of the Wind Tribe | |
Tina |
Hyrule Town | 5 | A Chest appears in Trilby Highlands containing a red Kinstone Piece | |
Tingle |
South Hyrule Field | 2 | A Tree opens in North Hyrule Field, leading to a Chest containing a red Kinstone Piece and a Switch; when all four Switches are pressed, a Ladder descends, giving Link access to a Chest containing the Magical Boomerang | |
Tingle |
South Hyrule Field | 3 | A Golden Tektite appears on Mount Crenel | |
Waveblade |
Lake Hylia | 5 | A waterfall opens in North Hyrule Field, leading to Greatblade's dojo | |
| Random | N/A | 1 | A Tree opens in North Hyrule Field, containing a Fairy Fountain | |
| Random | N/A | 1 | A pool in Hyrule Castle Garden is drained, leading to a Fairy Fountain | |
| Random | N/A | 1 | A pool in South Hyrule Field is drained, leading to a cave with 75 Rupees | |
| Random | N/A | 1 | A Golden Octorok appears in Minish Woods | |
| Random | N/A | 1 | A Golden Rope appears in the Eastern Hills | |
| Random | N/A | 1 | A Golden Rope appears in Hyrule Castle Garden | |
| Random | N/A | 1 | A crack appears in Minish Woods near the entrance to the Minish Village, leading to a Chest containing a blue Kinstone Piece | |
| Random | N/A | 1 | A Chest appears in the Minish-sized path at Funday School containing a red Kinstone Piece | |
| Random | N/A | 1 | A Chest appears in the Minish-sized path at Lon Lon Ranch containing a red Kinstone Piece | |
| Random | N/A | 1 | A Chest appears in the Minish-sized path leading to the Minish Village containing 200 Rupees | |
| Random | N/A | 1 | A Chest appears in Minish Woods containing a red Kinstone Piece | |
| Random | N/A | 1 | A Chest appears in Minish Woods containing a red Kinstone Piece | |
| Random | N/A | 1 | A Chest appears in Minish Woods containing 200 Rupees | |
| Random | N/A | 1 | A Chest appears in Minish Woods containing a blue Kinstone Piece | |
| Random | N/A | 1 | A Chest appears at Lon Lon Ranch containing 200 Rupees | |
| Random | N/A | 1 | A Chest appears in North Hyrule Field containing 200 Mysterious Shells | |
| Random | N/A | 1 | A Chest appears in South Hyrule Field containing 200 Mysterious Shells | |
| Random | N/A | 1 | A fountain in Hyrule Castle Garden drains, leading to a Piece of Heart |
Nomenclature
| Language | Names | |
|---|---|---|
| This table was generated using translation pages. To request an addition, please contact a staff member with a reference. | ||
Gallery
-
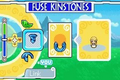
Pre-release Kinstone Fusion with Sheila
-
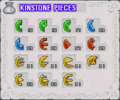
A representation of all the Kinstone Pieces needed to perform all 100 Kinstone Fusions


See Also
Notes
- ↑ In The Legend of Zelda: The Minish Cap—The Official Nintendo Player's Guide by Nintendo Power, there are seven stages listed; however, in-game, there are only six. The guide includes an additional stage before the final one, separating the final stage into two. The guide's version of Stage 6 ends the moment Link obtains the Four Sword, and it uses Stage 7 to represent the final part of the game.[2] The only NPC that the guide claims to be unavailable to Fuse with until its version of Stage 6 is the Mysterious Wall in the northern portion of Lake Hylia;[3] however, it is possible to Fuse with it as soon as the Roc's Cape is obtained, prior to obtaining the Wind Element and thus placing it in Stage 5.
References
- ↑ "KINSTONE FUSION" — N/A (The Minish Cap)
- ↑ The Legend of Zelda: The Minish Cap—The Official Nintendo Player's Guide, Nintendo of America, pg. 98
- ↑ The Legend of Zelda: The Minish Cap—The Official Nintendo Player's Guide, Nintendo of America, pg. 99