Bosses in Tears of the Kingdom: Difference between revisions
m (Find the Fifth Sage can be started after that Boss has already been defeated, but it must be defeated during Guidance of Ages Past) |
TriforceTony (talk | contribs) mNo edit summary |
||
| (3 intermediate revisions by 3 users not shown) | |||
| Line 28: | Line 28: | ||
===Taluses=== | ===Taluses=== | ||
{{Gallery List|Enemies | {{Gallery List|Enemies | ||
|TotK= Stone Talus, Stone Talus (Luminous), Stone Talus (Rare), Battle Talus, Frost Talus, Igneo Talus | |TotK= Stone Talus, Stone Talus (Luminous), Stone Talus (Rare), Battle Talus, Battle Talus [2], Frost Talus, Igneo Talus | ||
}} | }} | ||
| Line 131: | Line 131: | ||
===={{Term|TotK|Kara Kara Bazaar}}==== | ===={{Term|TotK|Kara Kara Bazaar}}==== | ||
{{Gallery List|Enemies | {{Gallery List|Enemies | ||
|TotK= Gibdo {{Qty|∞}}{{ | |TotK= Gibdo {{Qty|∞}}{{List Note|An indefinite number of these {{Plural|TotK|Enemy}} will be summoned until the {{Term|TotK|Gibdo}} hives are destroyed.}} | ||
}} | }} | ||
{{ | {{List Notes}} | ||
===={{Term|TotK|Gerudo Town}}==== | ===={{Term|TotK|Gerudo Town}}==== | ||
{{Gallery List|Enemies | {{Gallery List|Enemies | ||
|TotK= Gibdo {{Qty|∞}}{{ | |TotK= Gibdo {{Qty|∞}}{{List Note|name=Hive|An indefinite number of these {{Plural|TotK|Enemy}} will be summoned until the {{Term|TotK|Gibdo}} hives are destroyed.}}, Moth Gibdo {{Qty|∞}}{{List Note|name=Hive}} | ||
}} | }} | ||
{{ | {{List Notes}} | ||
===={{Term|TotK|Lightning Temple}}==== | ===={{Term|TotK|Lightning Temple}}==== | ||
{{Gallery List|Enemies | {{Gallery List|Enemies | ||
|TotK= Queen Gibdo {{Qty|1}}<br/>''{{Small|Scourge of the Lightning Temple}}'', Gibdo {{Qty|∞}}{{ | |TotK= Queen Gibdo {{Qty|1}}<br/>''{{Small|Scourge of the Lightning Temple}}'', Gibdo {{Qty|∞}}{{List Note|name=Hive|An indefinite number of these {{Plural|TotK|Enemy}} will be summoned until the {{Term|TotK|Gibdo}} hives are destroyed.}}, Moth Gibdo {{Qty|∞}}{{List Note|name=Hive}} | ||
}} | }} | ||
{{ | {{List Notes}} | ||
==={{Term|TotK|Crisis at Hyrule Castle}}=== | ==={{Term|TotK|Crisis at Hyrule Castle}}=== | ||
| Line 189: | Line 189: | ||
}} | }} | ||
==={{Term|TotK|Guidance | ==={{Term|TotK|Guidance from Ages Past}}=== | ||
===={{Term|TotK|Spirit Temple}}==== | ===={{Term|TotK|Spirit Temple}}==== | ||
{{Gallery List|Enemies | {{Gallery List|Enemies | ||
| Line 200: | Line 200: | ||
:{{Small|War in the Depths of Hyrule}}<br/>The Demon King's Army | :{{Small|War in the Depths of Hyrule}}<br/>The Demon King's Army | ||
{{Gallery List|Enemies | {{Gallery List|Enemies | ||
|TotK= Black Bokoblin [4], Black Boss Bokoblin [4], Blue Bokoblin [ | |TotK= Black Bokoblin [4], Black Boss Bokoblin [4], Blue Bokoblin [3], Bokoblin [4] | ||
}} | }} | ||
| Line 223: | Line 223: | ||
;Wave 5 | ;Wave 5 | ||
{{Gallery List|Enemies | {{Gallery List|Enemies | ||
|TotK= Colgera {{Qty|1}}{{ | |TotK= Colgera {{Qty|1}}{{List Note|Only faced if the "{{Term|TotK|Tulin of Rito Village|link}}" {{Term|TotK|Main Quest|link}} has not been completed.}}<br/>''{{Small|War in the Depths of Hyrule}}'', Marbled Gohma {{Qty|1}}{{List Note|Faced after {{Term|TotK|Colgera|link}}, but only if the "{{Term|TotK|Yunobo of Goron City|link}}" {{Term|TotK|Main Quest}} has not been completed.}}<br/>''{{Small|War in the Depths of Hyrule}}'', Mucktorok {{Qty|1}}{{List Note|Faced after {{Term|TotK|Marbled Gohma|link}}, but only if the "{{Term|TotK|Sidon of the Zora|link}}" {{Term|TotK|Main Quest}} has not been completed.}}<br/>''{{Small|War in the Depths of Hyrule}}'', Queen Gibdo {{Qty|1}}{{List Note|Faced after {{Term|TotK|Mucktorok|link}}, but only if the "{{Term|TotK|Riju of Gerudo Town|link}}" {{Term|TotK|Main Quest}} has not been completed.}}<br/>''{{Small|War in the Depths of Hyrule}}'', Seized Construct {{Qty|1}}{{List Note|Faced after {{Term|TotK|Queen Gibdo|link}}, but only if the "{{Term|TotK|Find the Fifth Sage|link}}" {{Term|TotK|Main Quest}} has not been completed.}}<br/>''{{Small|War in the Depths of Hyrule}}'' | ||
}} | }} | ||
{{ | {{List Notes}} | ||
;Wave 6 | ;Wave 6 | ||
{{Gallery List|Enemies | {{Gallery List|Enemies | ||
|TotK= Phantom Ganon {{Qty|5}}{{ | |TotK= Phantom Ganon {{Qty|5}}{{List Note|Faced after {{Term|TotK|Seized Construct|link}}, but only if the "{{Term|TotK|Crisis at Hyrule Castle|link}}" {{Term|TotK|Main Quest}} has not been completed.}}<br/>''{{Small|The Demon King's Phantom Saboteur}}'' | ||
}} | }} | ||
{{ | {{List Notes}} | ||
===={{Term|TotK|Gloom's Origin}}==== | ===={{Term|TotK|Gloom's Origin}}==== | ||
| Line 241: | Line 241: | ||
;Phase 2 | ;Phase 2 | ||
{{Gallery List|Enemies | {{Gallery List|Enemies | ||
|TotK= Demon King Ganondorf [2] {{Qty|1}}<br/>''{{Small|Master of the Secret Stone}}'', Phantom Ganon [2] {{Qty|4}}{{ | |TotK= Demon King Ganondorf [2] {{Qty|1}}<br/>''{{Small|Master of the Secret Stone}}'', Phantom Ganon [2] {{Qty|4}}{{List Note|These {{Plural|TotK|Enemy}} will disappear once {{Term|TotK|Demon King Ganondorf}}'s health is reduced by half.}} | ||
}} | }} | ||
{{ | {{List Notes}} | ||
===={{Term|TotK|Central Hyrule Sky}}==== | ===={{Term|TotK|Central Hyrule Sky}}==== | ||
Latest revision as of 06:30, 3 April 2024
Overworld Bosses


Flux Constructs


Froxes


Gleeoks


Hinoxes


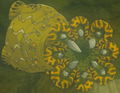
Taluses

_Model.png)
_Model.png)


Side Adventure Bosses
Bring Peace to Hyrule Field!
- Marauders of Hyrule Field
Monster Forces


Bring Peace to Necluda!
- Marauders of Necluda
Monster Forces
Bring Peace to Eldin!
- Marauders of Eldin
Monster Forces
Bring Peace to Akkala!
- Marauders of Akkala
Monster Forces
Bring Peace to Faron!
- Marauders of Faron
Monster Forces
Bring Peace to Hebra!
- Marauders of Hebra
Monster Forces
Master Kohga of the Yiga Clan
Great Abandoned Central Mine
-
Master Kohga ×1
Leader of the Yiga Clan
Abandoned Gerudo Mine
-
Master Kohga ×1
Leader of the Yiga Clan
Abandoned Lanayru Mine
-
Master Kohga ×1
Leader of the Yiga Clan -


Abandoned Hebra Mine
-
Master Kohga ×1
Wielder of Ultimate Yiga Power
Main Quest Bosses
Tulin of Rito Village
Wind Temple
-
Colgera×1
Scourge of the Wind Temple

Yunobo of Goron City
YunoboCo HQ
-

Yunobo ×1
Clearly Not Himself

Death Mountain Crater
-

Moragia ×1
Rising from the Death Mountain Crater

Fire Temple
-
Marbled Gohma ×1
Scourge of the Fire Temple

Sidon of the Zora
Mipha Court
-
Sludge Like ×1
Ambusher of Mipha Court

Water Temple
-

Mucktorok ×1
Scourge of the Water Temple

Riju of Gerudo Town
Kara Kara Bazaar
![Gibdo ×∞[a]](/wiki/File:TotK_Gibdo_Model.png)
- ↑ An indefinite number of these Enemies will be summoned until the Gibdo hives are destroyed.
Gerudo Town
![Moth Gibdo ×∞[a]](/wiki/File:TotK_Moth_Gibdo_Model.png)
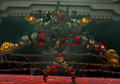
Lightning Temple
-
Queen Gibdo ×1
Scourge of the Lightning Temple -
![Gibdo ×∞[a]](//cdn.wikimg.net/en/zeldawiki/images/thumb/0/01/TotK_Gibdo_Model.png/75px-TotK_Gibdo_Model.png)
-
![Moth Gibdo ×∞[a]](//cdn.wikimg.net/en/zeldawiki/images/thumb/e/ee/TotK_Moth_Gibdo_Model.png/120px-TotK_Moth_Gibdo_Model.png)

Crisis at Hyrule Castle
Second Gatehouse
- Scourge of Hyrule Castle
Monster Forces


Library
- Scourge of Hyrule Castle
Monster Forces
-

-
Fire Chuchu ×1
-

Ice Chuchu ×1

Hyrule Castle B3
- Scourge of Hyrule Castle
Monster Forces
-
Gibdo ×3
-
Moth Gibdo ×1
Water Pump Room
- Scourge of Hyrule Castle
Monster Forces


Princess Zelda's Room
- Scourge of Hyrule Castle
Monster Forces

Hyrule Castle B3
- Scourge of Hyrule Castle
Monster Forces
-
Shock Like ×3

Sanctum
-
Phantom Ganon ×5
The Demon King's Phantom Saboteur
Guidance from Ages Past
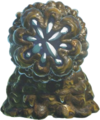
Spirit Temple
-
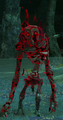
Seized Construct ×1
Scourge of the Spirit Temple

Destroy Ganondorf
Gloom's Lair
- Wave 1
- War in the Depths of Hyrule
The Demon King's Army
- Wave 2
- War in the Depths of Hyrule
The Demon King's Army


- Wave 3
- War in the Depths of Hyrule
The Demon King's Army
-
Gibdo ×4
-
Moth Gibdo ×4


- Wave 4
- War in the Depths of Hyrule
The Demon King's Army
-
Black Moblin ×1
-
Blue Moblin ×2
-
Moblin ×6
- Wave 5
-
-
Marbled Gohma ×1[b]
War in the Depths of Hyrule -
-
Queen Gibdo ×1[d]
War in the Depths of Hyrule -
Seized Construct ×1[e]
War in the Depths of Hyrule
- ↑ Only faced if the "Tulin of Rito Village" Main Quest has not been completed.
- ↑ Faced after Colgera, but only if the "Yunobo of Goron City" Main Quest has not been completed.
- ↑ Faced after Marbled Gohma, but only if the "Sidon of the Zora" Main Quest has not been completed.
- ↑ Faced after Mucktorok, but only if the "Riju of Gerudo Town" Main Quest has not been completed.
- ↑ Faced after Queen Gibdo, but only if the "Find the Fifth Sage" Main Quest has not been completed.
- Wave 6
-
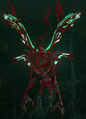
Phantom Ganon ×5[a]
The Demon King's Phantom Saboteur
- ↑ Faced after Seized Construct, but only if the "Crisis at Hyrule Castle" Main Quest has not been completed.
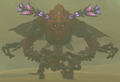
Gloom's Origin
- Phase 1
-
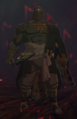
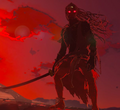
Demon King Ganondorf ×1
The Menace Unleashed

- Phase 2
-
Demon King Ganondorf ×1
Master of the Secret Stone -
![Phantom Ganon ×4[a]](//cdn.wikimg.net/en/zeldawiki/images/thumb/9/97/TotK_Phantom_Ganon_Model_2.png/120px-TotK_Phantom_Ganon_Model_2.png)

![Phantom Ganon ×4[a]](/wiki/File:TotK_Phantom_Ganon_Model_2.png)
- ↑ These Enemies will disappear once Demon King Ganondorf's health is reduced by half.
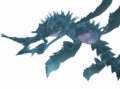
Central Hyrule Sky
-
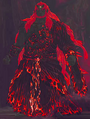
Demon Dragon ×1
Draconified Demon King


