Spirit: Difference between revisions
MannedTooth (talk | contribs) m (Text replacement - "|theme music=" to "|theme=") |
mNo edit summary |
||
| (37 intermediate revisions by 16 users not shown) | |||
| Line 1: | Line 1: | ||
{{Improve}} | {{Improve}} | ||
:''Spirit redirects here. For other uses, see [[Spirit (Disambiguation)]].'' | :''Spirit redirects here. For other uses, see [[Spirit (Disambiguation)]].'' | ||
{{Species | {{Infobox Species | ||
| | |image= | ||
| | {{Media | ||
| | |Model MM= File:MM Spirit Model.png | ||
|game= | |Model MM3D= File:MM3D Spirit Model.png | ||
|other= | |Model FSA= File:FSA Spirit Model.png | ||
|Model TP= File:TP Spirit Model.png | |||
|Model TPHD= File:TPHD Spirit Model.png | |||
|Model PH= File:PH Spirit Model.png | |||
|Model BotW= File:BotW Spirit Model.png | |||
}} | |||
|caption= | |||
|game= MM, FSA, TP, PH, BotW, TotK | |||
|other= SSBU | |||
|era= | |era= | ||
|habitat= | |habitat= | ||
| Line 15: | Line 23: | ||
|theme= | |theme= | ||
}} | }} | ||
{{Term/Store|Spirit|Spirits|Series, PH, SSBU}} are metaphysical entities without a corporeal body, often times the form taken by the deceased in the afterlife, and are a recurring | {{Term/Store|Spirit|Spirits|Series, TP, TPHD, PH, SSBU|plural}} are metaphysical entities without a corporeal body, often times the form taken by the deceased in the afterlife, and are a recurring element throughout {{TLoZ|Series}}.<ref>{{Cite|That was a soldier's {{Color|TPHD Red|spirit}}. Maybe it's someone from the other world? Eee hee!|Midna|TPHD}}</ref><ref>{{Cite Guide|quote= |game= PH|guide= Prima|page= 8}}</ref>{{Fact}} | ||
==Role in the Series== | |||
===Spirit as a symbolic element=== | |||
[[File:OoT_Spirit_Temple.png|200px|thumb|right|The [[Spirit Temple]]]] | |||
In {{OoT}}, the [[Hero of Time]] journeys to the [[Spirit Temple]] within the [[Desert Colossus]] to awaken the [[Sage of Spirit]]. After doing so, she gives [[Link]] the [[Spirit Medallion]], a symbol of her power. | |||
Spirit is given homage by the [[Requiem of Spirit]], a magical melody that allows instant transportation to the Desert Colossus. | |||
The element of Spirit is embodied by the Gerudo race, who maintain the use of the Spirit Temple. [[Nabooru]], a member of the Gerudo, awakens as the Sage of Spirit in {{OoT|-}}; one of the [[Seven Heroines]] in Gerudo folklore also represents the element of Spirit in {{BotW}}. However, there exists a Zonai Sage of Spirit named [[Mineru]] during the [[Imprisoning War]] in {{TotK}}. | |||
[[File:Ganondorf_Horse_Charging_TP.jpg|200px|thumb|left|Ganondorf charging into battle with his [[Phantom Rider|Phantom Riders]]]] | |||
Spirit plays an important role in Gerudo culture during the era of {{OoT|-}}. To reach the Spirit Temple, a Gerudo must pass the two trials within the [[Haunted Wasteland]], a desert rife with raging sandstorms and mirages that make navigation extremely perilous. The second trial involves employing the aid of an invisible spectre to reach the Spirit Temple.<ref>{{Cite|One with the {{Color|OoT Red|eye of truth}} shall be guided to the Spirit Temple by an inviting ghost.|N/A|OoT3D}}</ref>. The ability to see past illusions and detect invisible objects requires intense training of the mind; the [[Sheikah]] constructed the [[Lens of Truth]] to accomplish the same feat with far less effort.<ref> {{Cite|A long time ago... There was a man in this very village who had an eye they said could see the truth! Now usually, you have to train your mind's eye most strenuously to actually see the truth... But this fella, no, they say he had a different way of doing things... His house stood where the well is now...|Professor Shikashi|OoT}}</ref> | |||
The [[Twinrova]] sisters had the ability to merge their very being into one person, who possessed the combined magical abilities of both witches. They also used the Spirit Temple to conduct brainwashing experiments in order to turn individuals loyal to the [[Demon King]], with even Nabooru falling victim. | |||
[[Ganondorf]], the most infamous Gerudo of all, practiced a kind of magic that allowed him to create a ghostly copy of himself, known as [[Phantom Ganon]]. He could create many of these at a time, even on horseback, such as the [[Phantom Rider|Phantom Riders]]. | |||
===Spirit as an incorporeal state or possessing force=== | |||
Spirits are entities with a non-physical, astral form. They are normally invisible to the naked eye, and must either live within or take on the form of concrete matter to communicate with mortals. These forms can include dragons, trees, or other animals and natural phenomena. The [[Dragon#Skyward_Sword|ancient dragons]], [[Light Spirit|Light Spirits]], [[Jabu-Jabu]], and [[Great Deku Tree]] are such examples of spirits taken form.<ref>{{Cite Book|quote= |book= E |publisher= |page= 22 {{Exp Game|OoT}}}}</ref> Spirits can also represent the elements; Valoo from {{TWW}} is known as the [[Wind|Sky]] Spirit, while the Great Deku Tree is called the [[Earth]] Spirit.<ref>{{Cite|We do so by the graces of the sky spirit, {{Color|TWW Light Red|Valoo}}. When a Rito reaches adulthood, he or she journeys to the top of {{Color|TWW Light Red|Dragon Roost}} to receive a {{Color|TWW Light Red|scale}} from the great dragon. It is this scale that enables the Rito to grow his or her wings.|Rito Chieftain|TWW}}</ref><ref>{{Cite|You received Farore's Pearl! The earth spirit, the Deku Tree, has seen fit to give you this jewel, a treasure of the goddess, Farore.|N/A|TWW}}</ref> The Kokiri also commune with the Forest Spirits in the [[Lost Woods]], while the Gorons and Zoras worship the Fire Spirits and Water Spirits in the Fire Temple and Water Temple respectively. | |||
A deceased mortal may also take on the form of a spirit or ghost. [[Bubble|Bubbles]], [[Poe|Poes]], [[Hyu]], [[Moa]], [[Boo|Boos]], and [[Ghini]] are examples of spirits created from the dead, and can often be found haunting graveyards or catacombs. This phenomenon is not limited to humans and can also extend to animals and even plants, such as the [[Pols Voice]] and the [[Peahat]], which is thought to be the ghost of a flower; though it is unclear what the Pols Voice is a ghost of. | |||
When [[Princess Zelda]] is slain in {{ST}}, she becomes a spirit and gains the ability to possess and manipulate objects like the [[Phantom]] suits of armor to aid Link. The Sage of Spirit Mineru could also place her spirit into the [[Purah Pad]] and later take control of a large [[Mineru's Construct|Construct]]. | |||
===Spirit as the heart, reflection, and inner balance=== | |||
When the Hero of Time explores the Water Temple, his [[Dark_Link#Ocarina_of_Time|own reflection]] comes to life and mimics Link's movements. Reflection becomes an important element in the Spirit Temple and [[Stone Tower Temple]] later in the hero's journey, as both temples require the [[Mirror Shield]] used to reflect sunlight or magical ice and fire attacks. | |||
The Spirit Temple was constructed with the intention that the "pure heart of a child" would allow full exploration of the dungeon's chambers later as an adult. The child section and adult section of the temple eventually lead to the left and right hands of the [[Goddess of the Sand]], representing a balance between past and future. | |||
When [[Kotake]] and [[Koume]] combine to form Twinrova, they embody the duality and balance of their opposing [[Ice]] and [[Fire]] magic, respectively. When Twinrova is separated back into Kotake and Koume, they briefly take on the form of circling ice and fire orbs in a manner greatly resembling the symbol of the Spirit Medallion. | |||
The Elegy of Emptiness is a magical melody that allows the user to create a statue which [[King Igos du Ikana]] describes as a "soldier who has no heart" who will "not falter in the darkness." These statues are useful in scaling the [[Stone Tower]], a stucture that not even hundreds of the King's soldiers could conquer.<ref>{{Cite|To return true light to this land, you must seal the doors of Stone Tower where the winds of darkness blow through. But Stone Tower is an impenetrable stronghold. Hundreds of soldiers from my kingdom would not even be able to topple it. It is far too reckless for one to take on such a challenge. ...And so... I grant to you a soldier who has no heart. One who will not falter in the darkness.|Igos du Ikana|MM}}</ref> | |||
===Spirit as a puzzle device=== | |||
Compared to other elemental themes like Fire and Ice, the element of Spirit is abstract, esoteric, and vaguely defined, leading to it becoming the least understood in the Zelda series. Nevertheless, it represents a consistent motif found throughout many dungeons in the series. | |||
The concepts of duality, balance, and reflection are built into almost every aspect of the Spirit Temple. The temple is separated into two halves and are traversed by Link in both his child and adult forms, and both treasures of the dungeon are found in the left and right hands of the Goddess of the Sand. In some rooms, Link faces the [[Anubis]], who will mirror his movements across the room and attack when he swings his sword in a manner similar to Dark Link. These enemies can only be destroyed by fire, and can be tricked by Link's circling movements into venturing onto open flames; when doing this, Link and the Anubis resemble the circling orbs of the Spirit Medallion. The final puzzle of the dungeon involves using the Mirror Shield to reflect sunlight onto the face of the Goddess of the Sun, crumbling it away to reveal the headquarters of Twinrova. Similar themes exist in the Stone Tower Temple, which also involves heavy use of the Mirror Shield and the daulity between rightside-up and upside-down. | |||
The very objects and terrain in a haunted dungeon can come to life when possessed by spirits; these may include [[Flying Pot]]s, [[Flying Tile]]s, [[Trap Door|falling doors]], suits of armor like the [[Iron Knuckle]], statues such as the [[Armos#Ocarina of Time|Armos]], and even weapons like the [[Death Sword]] found in the [[Arbiter's Grounds]]. | |||
The main mechanic of the [[Forest_Temple#Ocarina_of_Time|Forest Temple]] involves tracking down the stolen torch flames of four Poes to advance deeper inside the temple; the same mechanic returns in the Arbiter's Grounds. | |||
Puzzles may also make use of Link taking control of inaminate objects himself, such as in the [[Tower of the Gods]], where the Hero of Winds learns the [[Command Melody]] to telepathically control the [[Servants of the Tower|Servant Statues]]. The Command Melody also becomes useful in later dungeons, such as when Link takes control of [[Medli]] in the haunted catacombs of the [[Earth Temple]] to solve mirror puzzles very similar to the Spirit Temple. The [[Link#Twilight_Princess|Hero of Twilight]] also makes use of the [[Dominion Rod]] from the [[Temple of Time]] to take control of large statues who can mimic Link's attacks on his behalf. | |||
Similar puzzles involve the use of autonomous enemies and obstacles, such as luring an Armos onto a pressure switch in the Spirit Temple, or using the ray of a Beamos to activate orb switches in the [[Desert Palace]]. Some puzzles also involve Link using semi-autonomous weapons such as the [[Bombchu]] to hit faraway switches that could otherwise not be hit with his bow or sword, as seen in the Spirit Temple, the [[Spirit Room]], and the [[Link Dungeon|Hylian section of the Moon dungeon]]. | |||
==Characteristics== | ==Characteristics== | ||
==={{MM|-}}=== | ==={{MM|-}}=== | ||
Several major characters appear as spirits in {{MM}}. Inhabitants of {{Term|MM3D|Termina|link}} who have passed away may live on as a {{Term|MM3D|Spirit}} if their will is strong enough, although they can only be seen by the living with the {{Term|MM3D|Lens of Truth|link}}.{{Fact}} Many {{Plural|MM3D|Spirit}} with troubles and lingering regrets wander at {{Term|MM3D|Ikana Hill|link}}.<ref>{{Cite|Beyond here is the place where spirits with troubles and lingering regrets wander.|N/A|MM}}</ref> {{Term|MM3D|Spider|link}} Tokens contain the {{Plural|MM3D|Spirit}} of the spiders that must be slain to obtain them.<ref>{{Cite|And when you defeat them...don't forget...the {{Color|MM Red|spider token}}...it contains the spider's spirit...|N/A|MM}}</ref> Some {{Plural|MM3D|Mask|link}} that {{Term|MM3D|Link|link}} can collect contain the {{Plural|MM3D|Spirit}} of deceased characters. The {{Term|MM3D|Goron Mask|link}} contains the {{Term|MM3D|Spirit}} of {{Term|MM3D|Darmani III|link}} and the {{Term|MM3D|Zora Mask|link}} contains the spirit of {{Term|MM3D|Mikau|link}}.<ref>{{Cite|This mask contains the spirit of a proud Goron hero!|N/A|MM}}</ref><ref>{{Cite|This mask contains the spirit of a legendary guitarist!|N/A|MM}}</ref> All four {{Term|MM3D|Boss|link}} Remains imprison an innocent {{Term|MM3D|Spirit}} within that {{Term|MM3D|Link}} frees after defeating each {{Term|MM3D|Boss}}.<ref>{{Cite|You have just freed the innocent spirit that this dark mask had kept imprisoned within the body of evil Odolwa.|N/A|MM}}</ref><ref>{{Cite|You have just freed the innocent spirit that this dark mask had kept imprisoned within the body of evil Goht.|N/A|MM}}</ref><ref>{{Cite|You have just freed the innocent spirit that this dark mask had kept imprisoned within the body of evil Gyorg.|N/A|MM}}</ref><ref>{{Cite|You have just freed the innocent spirit that this dark mask had kept imprisoned within the body of evil Twinmold.|N/A|MM}}</ref> | |||
==={{FSA|-}}=== | ==={{FSA|-}}=== | ||
{{ | {{Stub|FSA}} | ||
The | The {{Plural|FSA|Old Man|link}} found in {{Plural|FSA|Cave|link}} and {{Plural|FSA|Dungeon|link}} appear in the form of spirits who assist the four {{Plural|FSA|Links|link}} by giving them cryptic hints. | ||
==={{TP|-}}=== | ==={{TP|-}}=== | ||
[[File:SoldierSpiritsTP.png|thumb|180px|Spirits in Telma's bar]] | [[File:SoldierSpiritsTP.png|thumb|180px|Spirits in Telma's bar]] | ||
During the events of {{TP}} living inhabitants of | During the events of {{TP}} living inhabitants of {{Term|TPHD|Hyrule|link}} are transformed into '''spirits''' under the influence of the {{Term|TPHD|Twilight|link}}.<ref>{{Cite|Twilight covered Hyrule like a shroud, and without light, the people became as spirits. Within the twilight, they live on, unaware that they have passed into spirit forms... All the people know now is fear... Fear of a nameless evil...|Princess Zelda|TP}}</ref> Soldier spirits can be a glowing flame floating in the air, which are currently alive soldiers. In contrast, there are spirits (possibly not even spirits, just ghosts) in {{Term|TPHD|Hyrule Castle|link}}, which do not appear in {{Term|TPHD|Twilight|link}} and look undead. They have red, long hair, glowing eyes, and the same armor as their live counterparts. These are actually very helpful, because if {{Term|TPHD|Wolf Link|link}} uses his senses, he will see them pointing to someplace. The pointing helps in making the right decision, right footing, and puzzle solving. Not all are transformed into spirits within the {{Term|TPHD|Twilight}}; it is believed that its effects are partially negated by the protection of the {{Term|TPHD|Triforce|link}}. {{Term|TPHD|Ganondorf|link}} becomes a horned, yellow, glowing head, similar to a skull, as shown in a cutscene where {{Term|TPHD|Zant|link}} talks in the {{Term|TPHD|Palace of Twilight}}. {{Term|TPHD|Link}} becomes wolf (strangely not transforming in the {{Term|TPHD|Palace of Twilight}}), whereas {{Term|TPHD|Princess Zelda|link}} remains in her true form. The {{Plural|TPHD|Twili|link}} also remain in their true form due to them naturally inhabiting the {{Term|TPHD|Twilight Realm|link}}. | ||
There are also | There are also {{Plural|TPHD|Spirit of Light|link}}. Three of the four have a reference to the {{Plural|TPHD|Golden Goddess|link}}, {{Term|TPHD|Nayru (Goddess)|link}}, {{Term|TPHD|Din (Goddess)|link}}, and {{Term|TPHD|Farore (Goddess)|link}}. | ||
For example, the | For example, the {{Term|TPHD|Lanayru Province|link}} is named after the Goddess of Wisdom, {{Term|TPHD|Nayru (Goddess)}}. | ||
==={{PH|-}}=== | ==={{PH|-}}=== | ||
{{ | {{Stub|PH}} | ||
{{Main|Ciela | {{Main|Ciela, Leaf, Neri}} | ||
In {{PH}}, three | In {{PH}}, three {{Plural|PH|Fairy|link}} hold {{Term|PH|Spirit}} titles. {{Term|PH|Ciela|link}} is the {{Term|PH|Spirit}} of {{Term|PH|Time|link}} and Courage, {{Term|PH|Leaf|link}} is the {{Term|PH|Spirit}} of Power, and {{Term|PH|Neri|link}} is the {{Term|PH|Spirit}} of Wisdom. | ||
==={{BotW|-}}=== | ==={{BotW|-}}=== | ||
In {{BotW}}, the four [[Champion]]s and [[King Rhoam]] were killed in the [[Great Calamity]] and appear 100 years later as Spirits. Other Spirits include the [[Lord of the Mountain]] and the three [[Dragon]]s known as [[Farosh]], [[Dinraal]], and [[Naydra]]. | In {{BotW}}, the four [[Champion]]s and [[King Rhoam]] were killed in the [[Great Calamity]] and appear 100 years later as Spirits. In their spirit forms, their bodies are slightly faded in color and are constantly surrounded by turquoise-colored aura and flames. Other Spirits include the [[Lord of the Mountain]] and the three [[Dragon]]s known as [[Farosh]], [[Dinraal]], and [[Naydra]]. | ||
==={{TotK|-}}=== | |||
{{Main|Satori}} | |||
{{Stub|TotK}} | |||
==Other Appearances== | ==Other Appearances== | ||
==={{SSBU|-}}=== | |||
{{Noncanon|Start}} | {{Noncanon|Start}} | ||
{{Smashwiki|Spirits (characters)|Spirit}} | {{Smashwiki|Spirits (characters)|Spirit}} | ||
{{Main|Primary Spirit|| | {{Main|Primary Spirit, Support Spirit}} | ||
{{Plural|SSBU|Spirit}} are the manifestations of characters who have lost their physical forms in the imaginative world of {{SSBU}}. Despite this, many {{Plural|SSBU|Spirit}} have retained their innate qualities, such as {{Term|Series|Medli|link}} retaining an immunity to Strong Wind. {{Plural|SSBU|Spirit}} replace {{Plural|SSBU|Trophy|link}} from previous {{SSB|-}} titles. | |||
Two kinds of | Two kinds of {{Plural|SSBU|Spirit}} exist: {{Plural|SSBU|Primary Spirit|link}} and {{Plural|SSBU|Support Spirit|link}}. In matches, {{Plural|SSBU|Primary Spirit}} can lend their power to {{Plural|SSBU|Fighter|link}} who are equipped with them, augmenting the {{Term|SSBU|Fighter}}'s stats. However, only one {{Term|SSBU|Primary Spirit}} may be equipped to a given {{Term|SSBU|Fighter}} at any time. {{Plural|SSBU|Primary Spirit}} may also have Slots in which {{Plural|SSBU|Support Spirit}} can be assigned, granting the {{Plural|SSBU|Primary Spirit}} their collective skills. To balance the available Slots that {{Plural|SSBU|Primary Spirit}} possess, {{Plural|SSBU|Support Spirit}} are accompanied by Costs, which consume Slots when assigned. | ||
{{Plural|SSBU|Spirit}} are categorized into four classes based on strength. Average strength {{Plural|SSBU|Spirit}} are known as Novices, strong {{Plural|SSBU|Spirit}} are known as Advanced, particularly strong {{Plural|SSBU|Spirit}} are Aces, and {{Plural|SSBU|Spirit}} that outrank all previous classes are known as Legends. Primary {{Plural|SSBU|Spirit}} also fit into four possible types: Attack {{Plural|SSBU|Spirit}}, Grab {{Plural|SSBU|Spirit}}, Shield {{Plural|SSBU|Spirit}}, and a fourth, unknown type. Attack {{Plural|SSBU|Spirit}} have advantage over Grab {{Plural|SSBU|Spirit}}, Grab {{Plural|SSBU|Spirit}} have advantage over Shield {{Plural|SSBU|Spirit}} whereas the latter have advantage over Attack {{Plural|SSBU|Spirit}}. Some {{Plural|SSBU|Spirit}} are capable of hastening the rate at which the Final Smash Meter fills and some {{Plural|SSBU|Spirit}} have the ability to cause {{Term|SSBU|Stage|link}} hazards. | |||
{{Plural|SSBU|Spirit}} can be acquired by winning {{Plural|SSBU|Spirit Battle|link}}, which are listed on the {{Term|SSBU|Spirit Board|link}}. In {{Plural|SSBU|Spirit Battle}}, {{Plural|SSBU|Spirit}} are paired with complementary {{Plural|SSBU|Fighter}} based on shared personality, appearance, or other qualities. {{Plural|SSBU|Spirit}} can also be obtained by exchanging gold at the {{Term|SSBU|Shop|link}}. | |||
Defeating Master | Defeating {{Plural|SSBU|Master Spirit|link}} unlocks various facilities, such as the Gym and the Dojo. At the Gym, which is operated by {{Ssb|Doc Louis}}, Primary {{Plural|SSBU|Spirit}} can be left to gain experience as time passes. Similarly, the Dojo is operated by various characters and is where {{Plural|SSBU|Spirit}} can learn new Styles. {{Plural|SSBU|Spirit}} can also be sent on Expeditions to areas such as the Ruins, the Caves, and the Jungle in search of treasure which they will collect over a set period of time under Toadette's direction. | ||
{{Plural|SSBU|Spirit}} can be sent back to the "real world", causing them to disappear from the collection. In exchange, they leave behind {{Plural|SSBU|Core|link}}, which can be assembled to Summon other {{Plural|SSBU|Spirit}} at the cost of those respective Cores and SP. Similarly, amiibo Figure Players can Inherit stats and skills from both Primary and Support {{Plural|SSBU|Spirit}}, though this consumes the {{Term|SSBU|Spirit}}. | |||
<section begin=Var/><div style="display:none"> | <section begin=Var/><div style="display:none"> | ||
{{#vardefine:Novice|★<br>'''NOVICE'''}} | {{#vardefine:Novice|★<br/>'''NOVICE'''}} | ||
{{#vardefine:Advanced|★★<br>'''ADVANCED'''}} | {{#vardefine:Advanced|★★<br/>'''ADVANCED'''}} | ||
{{#vardefine:Ace|★★★<br>'''ACE'''}} | {{#vardefine:Ace|★★★<br/>'''ACE'''}} | ||
{{#vardefine:Legend|★★★★<br>'''LEGEND'''}} | {{#vardefine:Legend|★★★★<br/>'''LEGEND'''}} | ||
{{#vardefine:Attack|[[File:SSBU Attack Type Icon.png|x20px|link=]] Attack}} | {{#vardefine:Attack|[[File:SSBU Attack Type Icon.png|x20px|link=]] Attack}} | ||
{{#vardefine:Shield|[[File:SSBU Shield Type Icon.png|x20px|link=]] Shield}} | {{#vardefine:Shield|[[File:SSBU Shield Type Icon.png|x20px|link=]] Shield}} | ||
{{#vardefine:Grab|[[File:SSBU Grab Type Icon.png|x20px|link=]] Grab}} | {{#vardefine:Grab|[[File:SSBU Grab Type Icon.png|x20px|link=]] Grab}} | ||
{{#vardefine:Neutral|[[File:SSBU Neutral Type Icon.png|x20px|link=]] Neutral}} | {{#vardefine:Neutral|[[File:SSBU Neutral Type Icon.png|x20px|link=]] Neutral}} | ||
{{#vardefine:Fighter| | {{#vardefine:Fighter|{{Term|SSBU|Fighter Spirit|link}}}} | ||
{{#vardefine:Master| | {{#vardefine:Master|{{Term|SSBU|Master Spirit|link}}}} | ||
{{#vardefine:Primary|{{Small|([[File:SSBU Primary Spirit Icon.png|10px]] | {{#vardefine:Primary|{{Small|([[File:SSBU Primary Spirit Icon.png|10px]] {{Term|SSBU|Primary Spirit|link}})}}}} | ||
{{#vardefine:Support|[[File:SSBU Support Spirit Icon.png|x20px]] | {{#vardefine:Support|[[File:SSBU Support Spirit Icon.png|x20px]] {{Term|SSBU|Support Spirit|link}}}} | ||
{{#vardefine:Slot|⎔}} | {{#vardefine:Slot|⎔}} | ||
{{#vardefine:Cost|⬣}}</div> | {{#vardefine:Cost|⬣}}</div> | ||
<section end=Var/><!-- | <section end=Var/><!-- | ||
--> | --> | ||
{| class=" | {| class="wikitable sortable" style="width:100%; max-width:57.5em; text-align:center;" | ||
|- | |- | ||
!style="width:10%"| Number | !style="width:10%"| Number | ||
| Line 82: | Line 146: | ||
|- | |- | ||
| 36 | | 36 | ||
| <includeonly>[[File:SSBU Goomba Spirit Icon.png|x100px|link=]]<br></includeonly>[[Primary Spirit#Goomba|Goomba]] | | <includeonly>[[File:SSBU Goomba Spirit Icon.png|x100px|link=]]<br/></includeonly>[[Primary Spirit#Goomba|Goomba]] | ||
| ''{{Smw|Super Mario Bros.}}'' | | ''{{Smw|Super Mario Bros.}}'' | ||
| {{#var:Novice}} | | {{#var:Novice}} | ||
| Line 88: | Line 152: | ||
|- | |- | ||
| 47 | | 47 | ||
| <includeonly>[[File:SSBU Wart Spirit Icon.png|x100px|link=]]<br></includeonly>[[Primary Spirit#Wart|Wart]] | | <includeonly>[[File:SSBU Wart Spirit Icon.png|x100px|link=]]<br/></includeonly>[[Primary Spirit#Wart|Wart]] | ||
| ''Yume Kōjō: Doki Doki Panic'' | | ''Yume Kōjō: Doki Doki Panic'' | ||
| {{#var:Advanced}} | | {{#var:Advanced}} | ||
| Line 94: | Line 158: | ||
|- | |- | ||
| 51 | | 51 | ||
| <includeonly>[[File:SSBU Chain Chomp Spirit Icon.png|x100px|link=]]<br></includeonly>[[Primary Spirit#Chain Chomp|Chain Chomp]] | | <includeonly>[[File:SSBU Chain Chomp Spirit Icon.png|x100px|link=]]<br/></includeonly>[[Primary Spirit#Chain Chomp|Chain Chomp]] | ||
| ''{{Smw|Super Mario Bros. 3}}'' | | ''{{Smw|Super Mario Bros. 3}}'' | ||
| {{#var:Advanced}} | | {{#var:Advanced}} | ||
| Line 100: | Line 164: | ||
|- | |- | ||
| 93 | | 93 | ||
| <includeonly>[[File:SSBU Master Cycle Spirit Icon.png|x100px|link=Primary Spirit#Master Cycle]]<br></includeonly>[[Primary Spirit#Master Cycle|Master Cycle]] | | <includeonly>[[File:SSBU Master Cycle Spirit Icon.png|x100px|link=Primary Spirit#Master Cycle]]<br/></includeonly>[[Primary Spirit#Master Cycle|Master Cycle]] | ||
| {{MK8}} | | {{MK8}} | ||
| {{#var:Legend}} | | {{#var:Legend}} | ||
| {{#var:Grab}}<br>{{#var:Primary}}<section end="Master Cycle"/><section begin="Link"/> | | {{#var:Grab}}<br/>{{#var:Primary}}<section end="Master Cycle"/><section begin="Link"/> | ||
|- | |- | ||
| 172 | | 172 | ||
| <includeonly>[[File:SSBU Link Spirit Icon.png|x100px|link=Fighter Spirit#Link]]<br></includeonly>[[Fighter Spirit#Link|Link]] | | <includeonly>[[File:SSBU Link Spirit Icon.png|x100px|link=Fighter Spirit#Link]]<br/></includeonly>[[Fighter Spirit#Link|Link]] | ||
| {{BotW}} | | {{BotW}} | ||
| — | | — | ||
| Line 112: | Line 176: | ||
|- | |- | ||
| 173 | | 173 | ||
| <includeonly>[[File:SSBU Zelda Spirit Icon.png|x100px|link=Fighter Spirit#Zelda]]<br></includeonly>[[Fighter Spirit#Zelda|Zelda]] | | <includeonly>[[File:SSBU Zelda Spirit Icon.png|x100px|link=Fighter Spirit#Zelda]]<br/></includeonly>[[Fighter Spirit#Zelda|Zelda]] | ||
| {{ALBW}} | | {{ALBW}} | ||
| — | | — | ||
| Line 118: | Line 182: | ||
|- | |- | ||
| 174 | | 174 | ||
| <includeonly>[[File:SSBU Sheik Spirit Icon.png|x100px|link=Fighter Spirit#Sheik]]<br></includeonly>[[Fighter Spirit#Sheik|Sheik]] | | <includeonly>[[File:SSBU Sheik Spirit Icon.png|x100px|link=Fighter Spirit#Sheik]]<br/></includeonly>[[Fighter Spirit#Sheik|Sheik]] | ||
| {{OoT}} | | {{OoT}} | ||
| — | | — | ||
| Line 124: | Line 188: | ||
|- | |- | ||
| 175 | | 175 | ||
| <includeonly>[[File:SSBU Ganondorf Spirit Icon.png|x100px|link=Fighter Spirit#Ganondorf]]<br></includeonly>[[Fighter Spirit#Ganondorf|Ganondorf]] | | <includeonly>[[File:SSBU Ganondorf Spirit Icon.png|x100px|link=Fighter Spirit#Ganondorf]]<br/></includeonly>[[Fighter Spirit#Ganondorf|Ganondorf]] | ||
| {{OoT}} | | {{OoT}} | ||
| — | | — | ||
| Line 130: | Line 194: | ||
|- | |- | ||
| 176 | | 176 | ||
| <includeonly>[[File:SSBU Young Link Spirit Icon.png|x100px|link=Fighter Spirit#Young Link]]<br></includeonly>[[Fighter Spirit#Young Link|Young Link]] | | <includeonly>[[File:SSBU Young Link Spirit Icon.png|x100px|link=Fighter Spirit#Young Link]]<br/></includeonly>[[Fighter Spirit#Young Link|Young Link]] | ||
| {{OoT}} | | {{OoT}} | ||
| — | | — | ||
| Line 136: | Line 200: | ||
|- | |- | ||
| 177 | | 177 | ||
| <includeonly>[[File:SSBU Toon Link Spirit Icon.png|x100px|link=Fighter Spirit#Toon Link]]<br></includeonly>[[Fighter Spirit#Toon Link|Toon Link]] | | <includeonly>[[File:SSBU Toon Link Spirit Icon.png|x100px|link=Fighter Spirit#Toon Link]]<br/></includeonly>[[Fighter Spirit#Toon Link|Toon Link]] | ||
| {{TWW}} | | {{TWW}} | ||
| — | | — | ||
| Line 142: | Line 206: | ||
|- | |- | ||
| 178 | | 178 | ||
| <includeonly>[[File:SSBU Link (The Legend of Zelda) Spirit Icon.png|x100px|link=Primary Spirit#Link (The Legend of Zelda)]]<br></includeonly>[[Primary Spirit#Link (The Legend of Zelda)|Link {{Small|(The Legend of Zelda)}}]] | | <includeonly>[[File:SSBU Link (The Legend of Zelda) Spirit Icon.png|x100px|link=Primary Spirit#Link (The Legend of Zelda)]]<br/></includeonly>[[Primary Spirit#Link (The Legend of Zelda)|Link {{Small|(The Legend of Zelda)}}]] | ||
| {{TLoZ}} | | {{TLoZ}} | ||
| {{#var:Legend}} | | {{#var:Legend}} | ||
| {{#var:Neutral}}<br>{{#var:Primary}}<section end="Link (The Legend of Zelda)"/><section begin="Octorok"/> | | {{#var:Neutral}}<br/>{{#var:Primary}}<section end="Link (The Legend of Zelda)"/><section begin="Octorok"/> | ||
|- | |- | ||
| 179 | | 179 | ||
| <includeonly>[[File:SSBU Octorok Spirit Icon.png|x100px|link=Primary Spirit#Octorok]]<br></includeonly>[[Primary Spirit#Octorok|Octorok]] | | <includeonly>[[File:SSBU Octorok Spirit Icon.png|x100px|link=Primary Spirit#Octorok]]<br/></includeonly>[[Primary Spirit#Octorok|Octorok]] | ||
| {{SS}} | | {{SS}} | ||
| {{#var:Novice}} | | {{#var:Novice}} | ||
| {{#var:Grab}}<br>{{#var:Primary}}<section end="Octorok"/><section begin="Moblin"/> | | {{#var:Grab}}<br/>{{#var:Primary}}<section end="Octorok"/><section begin="Moblin"/> | ||
|- | |- | ||
| 180 | | 180 | ||
| <includeonly>[[File:SSBU Moblin Spirit Icon.png|x100px|link=Primary Spirit#Moblin]]<br></includeonly>[[Primary Spirit#Moblin|Moblin]] | | <includeonly>[[File:SSBU Moblin Spirit Icon.png|x100px|link=Primary Spirit#Moblin]]<br/></includeonly>[[Primary Spirit#Moblin|Moblin]] | ||
| {{OoT}} | | {{OoT}} | ||
| {{#var:Novice}} | | {{#var:Novice}} | ||
| {{#var:Neutral}}<br>{{#var:Primary}}<section end="Moblin"/><section begin="Tektite"/> | | {{#var:Neutral}}<br/>{{#var:Primary}}<section end="Moblin"/><section begin="Tektite"/> | ||
|- | |- | ||
| 181 | | 181 | ||
| <includeonly>[[File:SSBU Tektite Spirit Icon.png|x100px|link=Primary Spirit#Tektite]]<br></includeonly>[[Primary Spirit#Tektite|Tektite]] | | <includeonly>[[File:SSBU Tektite Spirit Icon.png|x100px|link=Primary Spirit#Tektite]]<br/></includeonly>[[Primary Spirit#Tektite|Tektite]] | ||
| {{TP}} | | {{TP}} | ||
| {{#var:Novice}} | | {{#var:Novice}} | ||
| {{#var:Shield}}<br>{{#var:Primary}}<section end="Tektite"/><section begin="Like Like"/> | | {{#var:Shield}}<br/>{{#var:Primary}}<section end="Tektite"/><section begin="Like Like"/> | ||
|- | |- | ||
| 182 | | 182 | ||
| <includeonly>[[File:SSBU Like Like Spirit Icon.png|x100px|link=Support Spirit#Like Like]]<br></includeonly>[[Support Spirit#Like Like|Like Like]] | | <includeonly>[[File:SSBU Like Like Spirit Icon.png|x100px|link=Support Spirit#Like Like]]<br/></includeonly>[[Support Spirit#Like Like|Like Like]] | ||
| {{TLoZ}} | | {{TLoZ}} | ||
| {{#var:Advanced}} | | {{#var:Advanced}} | ||
| Line 172: | Line 236: | ||
|- | |- | ||
| 183 | | 183 | ||
| <includeonly>[[File:SSBU Darknut Spirit Icon.png|x100px|link=Primary Spirit#Darknut]]<br></includeonly>[[Primary Spirit#Darknut|Darknut]] | | <includeonly>[[File:SSBU Darknut Spirit Icon.png|x100px|link=Primary Spirit#Darknut]]<br/></includeonly>[[Primary Spirit#Darknut|Darknut]] | ||
| {{TP}} | | {{TP}} | ||
| {{#var:Advanced}} | | {{#var:Advanced}} | ||
| {{#var:Shield}}<br>{{#var:Primary}}<section end="Darknut"/><section begin="Fairy Bottle"/> | | {{#var:Shield}}<br/>{{#var:Primary}}<section end="Darknut"/><section begin="Fairy Bottle"/> | ||
|- | |- | ||
| 184 | | 184 | ||
| <includeonly>[[File:SSBU Fairy Bottle Spirit Icon.png|x100px|link=Support Spirit#Fairy Bottle]]<br></includeonly>[[Support Spirit#Fairy Bottle|Fairy Bottle]] | | <includeonly>[[File:SSBU Fairy Bottle Spirit Icon.png|x100px|link=Support Spirit#Fairy Bottle]]<br/></includeonly>[[Support Spirit#Fairy Bottle|Fairy Bottle]] | ||
| {{MM3D}} | | {{MM3D}} | ||
| {{#var:Advanced}} | | {{#var:Advanced}} | ||
| Line 184: | Line 248: | ||
|- | |- | ||
| 185 | | 185 | ||
| <includeonly>[[File:SSBU Agahnim Spirit Icon.png|x100px|link=Primary Spirit#Agahnim]]<br></includeonly>[[Primary Spirit#Agahnim|Agahnim]] | | <includeonly>[[File:SSBU Agahnim Spirit Icon.png|x100px|link=Primary Spirit#Agahnim]]<br/></includeonly>[[Primary Spirit#Agahnim|Agahnim]] | ||
| {{ALttP}} | | {{ALttP}} | ||
| {{#var:Advanced}} | | {{#var:Advanced}} | ||
| {{#var:Shield}}<br>{{#var:Primary}}<section end="Agahnim"/><section begin="Cucco"/> | | {{#var:Shield}}<br/>{{#var:Primary}}<section end="Agahnim"/><section begin="Cucco"/> | ||
|- | |- | ||
| 186 | | 186 | ||
| <includeonly>[[File:SSBU Cucco Spirit Icon.png|x100px|link=Support Spirit#Cucco]]<br></includeonly>[[Support Spirit#Cucco|Cucco]] | | <includeonly>[[File:SSBU Cucco Spirit Icon.png|x100px|link=Support Spirit#Cucco]]<br/></includeonly>[[Support Spirit#Cucco|Cucco]] | ||
| {{TLoZ|Series}} | | {{TLoZ|Series}} | ||
| {{#var:Novice}} | | {{#var:Novice}} | ||
| Line 196: | Line 260: | ||
|- | |- | ||
| 187 | | 187 | ||
| <includeonly>[[File:SSBU Marin Spirit Icon.png|x100px|link=Support Spirit#Marin]]<br></includeonly>[[Support Spirit#Marin|Marin]] | | <includeonly>[[File:SSBU Marin Spirit Icon.png|x100px|link=Support Spirit#Marin]]<br/></includeonly>[[Support Spirit#Marin|Marin]] | ||
| {{LA|DX}} | | {{LA|DX}} | ||
| {{#var:Advanced}} | | {{#var:Advanced}} | ||
| Line 202: | Line 266: | ||
|- | |- | ||
| 188 | | 188 | ||
| <includeonly>[[File:SSBU Wind Fish Spirit Icon.png|x100px|link=Support Spirit#Wind Fish]]<br></includeonly>[[Support Spirit#Wind Fish|Wind Fish]] | | <includeonly>[[File:SSBU Wind Fish Spirit Icon.png|x100px|link=Support Spirit#Wind Fish]]<br/></includeonly>[[Support Spirit#Wind Fish|Wind Fish]] | ||
| {{LA}} | | {{LA}} | ||
| {{#var:Legend}} | | {{#var:Legend}} | ||
| Line 208: | Line 272: | ||
|- | |- | ||
| 189 | | 189 | ||
| <includeonly>[[File:SSBU Young Zelda Spirit Icon.png|x100px|link=Primary Spirit#Young Zelda]]<br></includeonly>[[Primary Spirit#Young Zelda|Young Zelda]] | | <includeonly>[[File:SSBU Young Zelda Spirit Icon.png|x100px|link=Primary Spirit#Young Zelda]]<br/></includeonly>[[Primary Spirit#Young Zelda|Young Zelda]] | ||
| {{OoT}} | | {{OoT}} | ||
| {{#var:Advanced}} | | {{#var:Advanced}} | ||
| {{#var:Shield}}<br>{{#var:Primary}}<section end="Young Zelda"/><section begin="Zelda (Ocarina of Time)"/> | | {{#var:Shield}}<br/>{{#var:Primary}}<section end="Young Zelda"/><section begin="Zelda (Ocarina of Time)"/> | ||
|- | |- | ||
| 190 | | 190 | ||
| <includeonly>[[File:SSBU Zelda (Ocarina of Time) Spirit Icon.png|x100px|link=Primary Spirit#Zelda (Ocarina of Time)]]<br></includeonly>[[Primary Spirit#Zelda (Ocarina of Time)|Zelda {{Small|(Ocarina of Time)}}]] | | <includeonly>[[File:SSBU Zelda (Ocarina of Time) Spirit Icon.png|x100px|link=Primary Spirit#Zelda (Ocarina of Time)]]<br/></includeonly>[[Primary Spirit#Zelda (Ocarina of Time)|Zelda {{Small|(Ocarina of Time)}}]] | ||
| {{OoT}} | | {{OoT}} | ||
| {{#var:Legend}} | | {{#var:Legend}} | ||
| {{#var:Shield}}<br>{{#var:Primary}}<section end="Zelda (Ocarina of Time)"/><section begin="Ganon"/> | | {{#var:Shield}}<br/>{{#var:Primary}}<section end="Zelda (Ocarina of Time)"/><section begin="Ganon"/> | ||
|- | |- | ||
| 191 | | 191 | ||
| <includeonly>[[File:SSBU Ganon Spirit Icon.png|x100px|link=Primary Spirit#Ganon]]<br></includeonly>[[Primary Spirit#Ganon|Ganon]] | | <includeonly>[[File:SSBU Ganon Spirit Icon.png|x100px|link=Primary Spirit#Ganon]]<br/></includeonly>[[Primary Spirit#Ganon|Ganon]] | ||
| {{OoT}} | | {{OoT}} | ||
| {{#var:Ace}} | | {{#var:Ace}} | ||
| {{#var:Neutral}}<br>{{#var:Primary}}<section end="Ganon"/><section begin="Saria"/> | | {{#var:Neutral}}<br/>{{#var:Primary}}<section end="Ganon"/><section begin="Saria"/> | ||
|- | |- | ||
| 192 | | 192 | ||
| <includeonly>[[File:SSBU Saria Spirit Icon.png|x100px|link=Support Spirit#Saria]]<br></includeonly>[[Support Spirit#Saria|Saria]] | | <includeonly>[[File:SSBU Saria Spirit Icon.png|x100px|link=Support Spirit#Saria]]<br/></includeonly>[[Support Spirit#Saria|Saria]] | ||
| {{OoT}} | | {{OoT}} | ||
| {{#var:Ace}} | | {{#var:Ace}} | ||
| Line 232: | Line 296: | ||
|- | |- | ||
| 193 | | 193 | ||
| <includeonly>[[File:SSBU Impa Spirit Icon.png|x100px|link=Primary Spirit#Impa]]<br></includeonly>[[Primary Spirit#Impa|Impa]] | | <includeonly>[[File:SSBU Impa Spirit Icon.png|x100px|link=Primary Spirit#Impa]]<br/></includeonly>[[Primary Spirit#Impa|Impa]] | ||
| {{OoT}} | | {{OoT}} | ||
| {{#var:Ace}} | | {{#var:Ace}} | ||
| {{#var:Shield}}<br>{{#var:Primary}}<section end=Impa""/><section begin="Kaepora Gaebora"/> | | {{#var:Shield}}<br/>{{#var:Primary}}<section end=Impa""/><section begin="Kaepora Gaebora"/> | ||
|- | |- | ||
| 194 | | 194 | ||
| <includeonly>[[File:SSBU Kaepora Gaebora Spirit Icon.png|x100px|link=Support Spirit#Kaepora Gaebora]]<br></includeonly>[[Support Spirit#Kaepora Gaebora|Kaepora Gaebora]] | | <includeonly>[[File:SSBU Kaepora Gaebora Spirit Icon.png|x100px|link=Support Spirit#Kaepora Gaebora]]<br/></includeonly>[[Support Spirit#Kaepora Gaebora|Kaepora Gaebora]] | ||
| {{OoT}} | | {{OoT}} | ||
| {{#var:Advanced}} | | {{#var:Advanced}} | ||
| Line 244: | Line 308: | ||
|- | |- | ||
| 195 | | 195 | ||
| <includeonly>[[File:SSBU Malon Spirit Icon.png|x100px|link=Support Spirit#Malon]]<br></includeonly>[[Support Spirit#Malon|Malon]] | | <includeonly>[[File:SSBU Malon Spirit Icon.png|x100px|link=Support Spirit#Malon]]<br/></includeonly>[[Support Spirit#Malon|Malon]] | ||
| {{OoT}} | | {{OoT}} | ||
| {{#var:Advanced}} | | {{#var:Advanced}} | ||
| Line 250: | Line 314: | ||
|- | |- | ||
| 196 | | 196 | ||
| <includeonly>[[File:SSBU Epona Spirit Icon.png|x100px|link=Support Spirit#Epona]]<br></includeonly>[[Support Spirit#Epona|Epona]] | | <includeonly>[[File:SSBU Epona Spirit Icon.png|x100px|link=Support Spirit#Epona]]<br/></includeonly>[[Support Spirit#Epona|Epona]] | ||
| {{OoT}} | | {{OoT}} | ||
| {{#var:Ace}} | | {{#var:Ace}} | ||
| Line 256: | Line 320: | ||
|- | |- | ||
| 197 | | 197 | ||
| <includeonly>[[File:SSBU Goron Spirit Icon.png|x100px|link=Support Spirit#Goron]]<br></includeonly>[[Support Spirit#Goron|Goron]] | | <includeonly>[[File:SSBU Goron Spirit Icon.png|x100px|link=Support Spirit#Goron]]<br/></includeonly>[[Support Spirit#Goron|Goron]] | ||
| {{OoT}} | | {{OoT}} | ||
| {{#var:Novice}} | | {{#var:Novice}} | ||
| Line 262: | Line 326: | ||
|- | |- | ||
| 198 | | 198 | ||
| <includeonly>[[File:SSBU Darunia Spirit Icon.png|x100px|link=Master Spirit#Darunia]]<br></includeonly>[[Master Spirit#Darunia|Darunia]] | | <includeonly>[[File:SSBU Darunia Spirit Icon.png|x100px|link=Master Spirit#Darunia]]<br/></includeonly>[[Master Spirit#Darunia|Darunia]] | ||
| {{OoT}} | | {{OoT}} | ||
| — | | — | ||
| Line 268: | Line 332: | ||
|- | |- | ||
| 199 | | 199 | ||
| <includeonly>[[File:SSBU Zora Spirit Icon.png|x100px|link=Support Spirit#Zora]]<br></includeonly>[[Support Spirit#Zora|Zora]] | | <includeonly>[[File:SSBU Zora Spirit Icon.png|x100px|link=Support Spirit#Zora]]<br/></includeonly>[[Support Spirit#Zora|Zora]] | ||
| {{OoT}} | | {{OoT}} | ||
| {{#var:Novice}} | | {{#var:Novice}} | ||
| Line 274: | Line 338: | ||
|- | |- | ||
| 200 | | 200 | ||
| <includeonly>[[File:SSBU Ruto Spirit Icon.png|x100px|link=Primary Spirit#Ruto]]<br></includeonly>[[Primary Spirit#Ruto|Ruto]] | | <includeonly>[[File:SSBU Ruto Spirit Icon.png|x100px|link=Primary Spirit#Ruto]]<br/></includeonly>[[Primary Spirit#Ruto|Ruto]] | ||
| {{OoT}} | | {{OoT}} | ||
| {{#var:Ace}} | | {{#var:Ace}} | ||
| {{#var:Shield}}<br>{{#var:Primary}}<section end="Ruto"/><section begin="Great Fairy"/> | | {{#var:Shield}}<br/>{{#var:Primary}}<section end="Ruto"/><section begin="Great Fairy"/> | ||
|- | |- | ||
| 201 | | 201 | ||
| <includeonly>[[File:SSBU Great Fairy Spirit Icon.png|x100px|link=Support Spirit#Great Fairy]]<br></includeonly>[[Support Spirit#Great Fairy|Great Fairy]] | | <includeonly>[[File:SSBU Great Fairy Spirit Icon.png|x100px|link=Support Spirit#Great Fairy]]<br/></includeonly>[[Support Spirit#Great Fairy|Great Fairy]] | ||
| {{MM3D}} | | {{MM3D}} | ||
| {{#var:Ace}} | | {{#var:Ace}} | ||
| Line 286: | Line 350: | ||
|- | |- | ||
| 202 | | 202 | ||
| <includeonly>[[File:SSBU Koume & Kotake Spirit Icon.png|x100px|link=Primary Spirit#Koumre & Kotake]]<br></includeonly>[[Primary Spirit#Koume & Kotake|Koume & Kotake]] | | <includeonly>[[File:SSBU Koume & Kotake Spirit Icon.png|x100px|link=Primary Spirit#Koumre & Kotake]]<br/></includeonly>[[Primary Spirit#Koume & Kotake|Koume & Kotake]] | ||
| {{OoT}} | | {{OoT}} | ||
| {{#var:Advanced}} | | {{#var:Advanced}} | ||
| {{#var:Neutral}}<br>{{#var:Primary}}<section end="Koume & Kotake"/><section begin="Twinrova"/> | | {{#var:Neutral}}<br/>{{#var:Primary}}<section end="Koume & Kotake"/><section begin="Twinrova"/> | ||
|- | |- | ||
| 203 | | 203 | ||
| <includeonly>[[File:SSBU Twinrova Spirit Icon.png|x100px|link=Primary Spirit#Twinrova]]<br></includeonly>[[Primary Spirit#Twinrova|Twinrova]] | | <includeonly>[[File:SSBU Twinrova Spirit Icon.png|x100px|link=Primary Spirit#Twinrova]]<br/></includeonly>[[Primary Spirit#Twinrova|Twinrova]] | ||
| {{OoT}} | | {{OoT}} | ||
| {{#var:Ace}} | | {{#var:Ace}} | ||
| {{#var:Neutral}}<br>{{#var:Primary}}<section end="Twinrova"/><section begin="ReDead"/> | | {{#var:Neutral}}<br/>{{#var:Primary}}<section end="Twinrova"/><section begin="ReDead"/> | ||
|- | |- | ||
| 204 | | 204 | ||
| <includeonly>[[File:SSBU ReDead Spirit Icon.png|x100px|link=Primary Spirit#ReDead]]<br></includeonly>[[Primary Spirit#ReDead|ReDead]] | | <includeonly>[[File:SSBU ReDead Spirit Icon.png|x100px|link=Primary Spirit#ReDead]]<br/></includeonly>[[Primary Spirit#ReDead|ReDead]] | ||
| {{OoT}} | | {{OoT}} | ||
| {{#var:Novice}} | | {{#var:Novice}} | ||
| {{#var:Grab}}<br>{{#var:Primary}}<section end="ReDead"/><section begin="Skull Kid"/> | | {{#var:Grab}}<br/>{{#var:Primary}}<section end="ReDead"/><section begin="Skull Kid"/> | ||
|- | |- | ||
| 205 | | 205 | ||
| <includeonly>[[File:SSBU Skull Kid Spirit Icon.png|x100px|link=Primary Spirit#Skull Kid]]<br></includeonly>[[Primary Spirit#Skull Kid|Skull Kid]] | | <includeonly>[[File:SSBU Skull Kid Spirit Icon.png|x100px|link=Primary Spirit#Skull Kid]]<br/></includeonly>[[Primary Spirit#Skull Kid|Skull Kid]] | ||
| {{OoT}} | | {{OoT}} | ||
| {{#var:Advanced}} | | {{#var:Advanced}} | ||
| {{#var:Grab}}<br>{{#var:Primary}}<section end="Skull Kid"/><section begin="Skull Kid & Majora's Mask"/> | | {{#var:Grab}}<br/>{{#var:Primary}}<section end="Skull Kid"/><section begin="Skull Kid & Majora's Mask"/> | ||
|- | |- | ||
| 206 | | 206 | ||
| <includeonly>[[File:SSBU Skull Kid & Majora's Mask Spirit Icon.png|x100px|link=Primary Spirit#Skull Kid & Majora's Mask]]<br></includeonly>[[Primary Spirit#Skull Kid & Majora's Mask|Skull Kid & Majora's Mask]] | | <includeonly>[[File:SSBU Skull Kid & Majora's Mask Spirit Icon.png|x100px|link=Primary Spirit#Skull Kid & Majora's Mask]]<br/></includeonly>[[Primary Spirit#Skull Kid & Majora's Mask|Skull Kid & Majora's Mask]] | ||
| {{MM}} | | {{MM}} | ||
| {{#var:Legend}} | | {{#var:Legend}} | ||
| {{#var:Grab}}<br>{{#var:Primary}}<section end="Skull Kid & Majora's Mask"/><section begin="Deku Link"/> | | {{#var:Grab}}<br/>{{#var:Primary}}<section end="Skull Kid & Majora's Mask"/><section begin="Deku Link"/> | ||
|- | |- | ||
| 207 | | 207 | ||
| <includeonly>[[File:SSBU Deku Link Spirit Icon.png|x100px|link=Primary Spirit#Deku Link]]<br></includeonly>[[Primary Spirit#Deku Link|Deku Link]] | | <includeonly>[[File:SSBU Deku Link Spirit Icon.png|x100px|link=Primary Spirit#Deku Link]]<br/></includeonly>[[Primary Spirit#Deku Link|Deku Link]] | ||
| {{MM}} | | {{MM}} | ||
| {{#var:Advanced}} | | {{#var:Advanced}} | ||
| {{#var:Grab}}<br>{{#var:Primary}}<section end="Deku Link"/><section begin="Fierce Deity Link"/> | | {{#var:Grab}}<br/>{{#var:Primary}}<section end="Deku Link"/><section begin="Fierce Deity Link"/> | ||
|- | |- | ||
| 208 | | 208 | ||
| <includeonly>[[File:SSBU Fierce Deity Link Spirit Icon.png|x100px|link=Primary Spirit#Fierce Deity Link]]<br></includeonly>[[Primary Spirit#Fierce Deity Link|Fierce Deity Link]] | | <includeonly>[[File:SSBU Fierce Deity Link Spirit Icon.png|x100px|link=Primary Spirit#Fierce Deity Link]]<br/></includeonly>[[Primary Spirit#Fierce Deity Link|Fierce Deity Link]] | ||
| {{MM}} | | {{MM}} | ||
| {{#var:Legend}} | | {{#var:Legend}} | ||
| {{#var:Attack}}<br>{{#var:Primary}}<section end="Fierce Deity Link"/><section begin="Majora's Mask"/> | | {{#var:Attack}}<br/>{{#var:Primary}}<section end="Fierce Deity Link"/><section begin="Majora's Mask"/> | ||
|- | |- | ||
| 209 | | 209 | ||
| <includeonly>[[File:SSBU Majora's Mask Spirit Icon.png|x100px|link=Support Spirit#Majora's Mask]]<br></includeonly>[[Support Spirit#Majora's Mask|Majora's Mask]] | | <includeonly>[[File:SSBU Majora's Mask Spirit Icon.png|x100px|link=Support Spirit#Majora's Mask]]<br/></includeonly>[[Support Spirit#Majora's Mask|Majora's Mask]] | ||
| {{MM3D}} | | {{MM3D}} | ||
| {{#var:Ace}} | | {{#var:Ace}} | ||
| Line 334: | Line 398: | ||
|- | |- | ||
| 210 | | 210 | ||
| <includeonly>[[File:SSBU Moon Spirit Icon.png|x100px|link=Support Spirit#Moon]]<br></includeonly>[[Support Spirit#Moon|Moon]] | | <includeonly>[[File:SSBU Moon Spirit Icon.png|x100px|link=Support Spirit#Moon]]<br/></includeonly>[[Support Spirit#Moon|Moon]] | ||
| {{TLoZ|Series}} | | {{TLoZ|Series}} | ||
| {{#var:Ace}} | | {{#var:Ace}} | ||
| Line 340: | Line 404: | ||
|- | |- | ||
| 211 | | 211 | ||
| <includeonly>[[File:SSBU Tingle Spirit Icon.png|x100px|link=Support Spirit#Tingle]]<br></includeonly>[[Support Spirit#Tingle|Tingle]] | | <includeonly>[[File:SSBU Tingle Spirit Icon.png|x100px|link=Support Spirit#Tingle]]<br/></includeonly>[[Support Spirit#Tingle|Tingle]] | ||
| {{MM}} | | {{MM}} | ||
| {{#var:Ace}} | | {{#var:Ace}} | ||
| Line 346: | Line 410: | ||
|- | |- | ||
| 212 | | 212 | ||
| <includeonly>[[File:SSBU Happy Mask Salesman Spirit Icon.png|x100px|link=Support Spirit#Happy Mask Salesman]]<br></includeonly>[[Support Spirit#Happy Mask Salesman|Happy Mask Salesman]] | | <includeonly>[[File:SSBU Happy Mask Salesman Spirit Icon.png|x100px|link=Support Spirit#Happy Mask Salesman]]<br/></includeonly>[[Support Spirit#Happy Mask Salesman|Happy Mask Salesman]] | ||
| {{MM}} | | {{MM}} | ||
| {{#var:Advanced}} | | {{#var:Advanced}} | ||
| Line 352: | Line 416: | ||
|- | |- | ||
| 213 | | 213 | ||
| <includeonly>[[File:SSBU Kafei Spirit Icon.png|x100px|link=Support Spirit#Kafei]]<br></includeonly>[[Support Spirit#Kafei|Kafei]] | | <includeonly>[[File:SSBU Kafei Spirit Icon.png|x100px|link=Support Spirit#Kafei]]<br/></includeonly>[[Support Spirit#Kafei|Kafei]] | ||
| {{MM}} | | {{MM}} | ||
| {{#var:Advanced}} | | {{#var:Advanced}} | ||
| Line 358: | Line 422: | ||
|- | |- | ||
| 214 | | 214 | ||
| <includeonly>[[File:SSBU Postman Spirit Icon.png|x100px|link=Support Spirit#Postman]]<br></includeonly>[[Support Spirit#Postman|Postman]] | | <includeonly>[[File:SSBU Postman Spirit Icon.png|x100px|link=Support Spirit#Postman]]<br/></includeonly>[[Support Spirit#Postman|Postman]] | ||
| {{MM}} | | {{MM}} | ||
| {{#var:Novice}} | | {{#var:Novice}} | ||
| Line 364: | Line 428: | ||
|- | |- | ||
| 215 | | 215 | ||
| <includeonly>[[File:SSBU Din Spirit Icon.png|x100px|link=Support Spirit#Din]]<br></includeonly>[[Support Spirit#Din|Din]] | | <includeonly>[[File:SSBU Din Spirit Icon.png|x100px|link=Support Spirit#Din]]<br/></includeonly>[[Support Spirit#Din|Din]] | ||
| {{OoS}} | | {{OoS}} | ||
| {{#var:Advanced}} | | {{#var:Advanced}} | ||
| Line 370: | Line 434: | ||
|- | |- | ||
| 216 | | 216 | ||
| <includeonly>[[File:SSBU Nayru Spirit Icon.png|x100px|link=Support Spirit#Nayru]]<br></includeonly>[[Support Spirit#Nayru|Nayru]] | | <includeonly>[[File:SSBU Nayru Spirit Icon.png|x100px|link=Support Spirit#Nayru]]<br/></includeonly>[[Support Spirit#Nayru|Nayru]] | ||
| {{OoA}} | | {{OoA}} | ||
| {{#var:Advanced}} | | {{#var:Advanced}} | ||
| Line 376: | Line 440: | ||
|- | |- | ||
| 217 | | 217 | ||
| <includeonly>[[File:SSBU Ricky Spirit Icon.png|x100px|link=Support Spirit#Ricky]]<br></includeonly>[[Support Spirit#Ricky|Ricky]] | | <includeonly>[[File:SSBU Ricky Spirit Icon.png|x100px|link=Support Spirit#Ricky]]<br/></includeonly>[[Support Spirit#Ricky|Ricky]] | ||
| {{OoS}} | | {{OoS}} | ||
| {{#var:Novice}} | | {{#var:Novice}} | ||
| {{#var:Support}}<section end="Ricky"/><section begin="Dimitri"/> | | {{#var:Support}}<section end="Ricky"/><section begin="Dimitri (The Legend of Zelda)"/> | ||
|- | |- | ||
| 218 | | 218 | ||
| <includeonly>[[File:SSBU Dimitri Spirit | | <includeonly>[[File:SSBU Dimitri (The Legend of Zelda) Spirit Icon.png|x100px|link=Support Spirit#Dimitri (The Legend of Zelda)]]<br/></includeonly>[[Support Spirit#Dimitri (The Legend of Zelda)|Dimitri {{Small|(The Legend of Zelda)}}]] | ||
| {{OoS}} | | {{OoS}} | ||
| {{#var:Novice}} | | {{#var:Novice}} | ||
| {{#var:Support}}<section end="Dimitri"/><section begin="Moosh"/> | | {{#var:Support}}<section end="Dimitri (The Legend of Zelda)"/><section begin="Moosh"/> | ||
|- | |- | ||
| 219 | | 219 | ||
| <includeonly>[[File:SSBU Moosh Spirit Event Icon.png|x100px|link=Support Spirit#Moosh]]<br></includeonly>[[Support Spirit#Moosh|Moosh]] | | <includeonly>[[File:SSBU Moosh Spirit Event Icon.png|x100px|link=Support Spirit#Moosh]]<br/></includeonly>[[Support Spirit#Moosh|Moosh]] | ||
| {{OoS}} | | {{OoS}} | ||
| {{#var:Novice}} | | {{#var:Novice}} | ||
| Line 394: | Line 458: | ||
|- | |- | ||
| 220 | | 220 | ||
| <includeonly>[[File:SSBU Ganondorf (Twilight Princess) Spirit Icon.png|x100px|link=Primary Spirit#Ganondorf (Twilight Princess)]]<br></includeonly>[[Primary Spirit#Ganondorf (Twilight Princess)|Ganondorf {{Small|(Twilight Princess)}}]] | | <includeonly>[[File:SSBU Ganondorf (Twilight Princess) Spirit Icon.png|x100px|link=Primary Spirit#Ganondorf (Twilight Princess)]]<br/></includeonly>[[Primary Spirit#Ganondorf (Twilight Princess)|Ganondorf {{Small|(Twilight Princess)}}]] | ||
| {{TP}} | | {{TP}} | ||
| {{#var:Ace}} | | {{#var:Ace}} | ||
| {{#var:Attack}}<br>{{#var:Primary}}<section end="Ganondorf (Twilight Princess)"/><section begin="Beast Ganon"/> | | {{#var:Attack}}<br/>{{#var:Primary}}<section end="Ganondorf (Twilight Princess)"/><section begin="Beast Ganon"/> | ||
|- | |- | ||
| 221 | | 221 | ||
| <includeonly>[[File:SSBU Beast Ganon Spirit Icon.png|x100px|link=Primary Spirit#Beast Ganon]]<br></includeonly>[[Primary Spirit#Beast Ganon|Beast Ganon]] | | <includeonly>[[File:SSBU Beast Ganon Spirit Icon.png|x100px|link=Primary Spirit#Beast Ganon]]<br/></includeonly>[[Primary Spirit#Beast Ganon|Beast Ganon]] | ||
| {{TP}} | | {{TP}} | ||
| {{#var:Legend}} | | {{#var:Legend}} | ||
| {{#var:Attack}}<br>{{#var:Primary}}<section end="Beast Ganon"/><section begin="Midna"/> | | {{#var:Attack}}<br/>{{#var:Primary}}<section end="Beast Ganon"/><section begin="Midna"/> | ||
|- | |- | ||
| 222 | | 222 | ||
| <includeonly>[[File:SSBU Midna Spirit Icon.png|x100px|link=Primary Spirit#Midna]]<br></includeonly>[[Primary Spirit#Midna|Midna]] | | <includeonly>[[File:SSBU Midna Spirit Icon.png|x100px|link=Primary Spirit#Midna]]<br/></includeonly>[[Primary Spirit#Midna|Midna]] | ||
| {{TP}} | | {{TP}} | ||
| {{#var:Ace}} | | {{#var:Ace}} | ||
| {{#var:Grab}}<br>{{#var:Primary}}<section end="Midna"/><section begin="Wolf Link & Midna"/> | | {{#var:Grab}}<br/>{{#var:Primary}}<section end="Midna"/><section begin="Wolf Link & Midna"/> | ||
|- | |- | ||
| 223 | | 223 | ||
| <includeonly>[[File:SSBU Wolf Link & Midna Spirit Icon.png|x100px|link=Primary Spirit#Wolf Link & Midna]]<br></includeonly>[[Primary Spirit#Wolf Link & Midna|Wolf Link & Midna]] | | <includeonly>[[File:SSBU Wolf Link & Midna Spirit Icon.png|x100px|link=Primary Spirit#Wolf Link & Midna]]<br/></includeonly>[[Primary Spirit#Wolf Link & Midna|Wolf Link & Midna]] | ||
| {{TP}} | | {{TP}} | ||
| {{#var:Legend}} | | {{#var:Legend}} | ||
| {{#var:Grab}}<br>{{#var:Primary}}<section end="Wolf Link & Midna"/><section begin="Zant"/> | | {{#var:Grab}}<br/>{{#var:Primary}}<section end="Wolf Link & Midna"/><section begin="Zant"/> | ||
|- | |- | ||
| 224 | | 224 | ||
| <includeonly>[[File:SSBU Zant Spirit Icon.png|x100px|link=Primary Spirit#Zant]]<br></includeonly>[[Primary Spirit#Zant|Zant]] | | <includeonly>[[File:SSBU Zant Spirit Icon.png|x100px|link=Primary Spirit#Zant]]<br/></includeonly>[[Primary Spirit#Zant|Zant]] | ||
| {{TP}} | | {{TP}} | ||
| {{#var:Advanced}} | | {{#var:Advanced}} | ||
| {{#var:Attack}}<br>{{#var:Primary}}<section end="Zant"/><section begin="Agitha"/> | | {{#var:Attack}}<br/>{{#var:Primary}}<section end="Zant"/><section begin="Agitha"/> | ||
|- | |- | ||
| 225 | | 225 | ||
| <includeonly>[[File:SSBU Agitha Spirit Icon.png|x100px|link=Support Spirit#Agitha]]<br></includeonly>[[Support Spirit#Agitha|Agitha]] | | <includeonly>[[File:SSBU Agitha Spirit Icon.png|x100px|link=Support Spirit#Agitha]]<br/></includeonly>[[Support Spirit#Agitha|Agitha]] | ||
| {{TP}} | | {{TP}} | ||
| {{#var:Novice}} | | {{#var:Novice}} | ||
| Line 430: | Line 494: | ||
|- | |- | ||
| 226 | | 226 | ||
| <includeonly>[[File:SSBU King Bulblin & Lord Bullbo Spirit Event Icon.png|x100px|link=Primary Spirit#King Bulblin & Lord Bullbo]]<br></includeonly>[[Primary Spirit#King Bulblin & Lord Bullbo|King Bulblin & Lord Bullbo]] | | <includeonly>[[File:SSBU King Bulblin & Lord Bullbo Spirit Event Icon.png|x100px|link=Primary Spirit#King Bulblin & Lord Bullbo]]<br/></includeonly>[[Primary Spirit#King Bulblin & Lord Bullbo|King Bulblin & Lord Bullbo]] | ||
| {{TP}} | | {{TP}} | ||
| {{#var:Novice}} | | {{#var:Novice}} | ||
| {{#var:Attack}}<br>{{#var:Primary}}<section end="King Bulblin & Lord Bullbo"/><section begin="Fi"/> | | {{#var:Attack}}<br/>{{#var:Primary}}<section end="King Bulblin & Lord Bullbo"/><section begin="Fi"/> | ||
|- | |- | ||
| 227 | | 227 | ||
| <includeonly>[[File:SSBU Fi Spirit Icon.png|x100px|link=Support Spirit#Fi]]<br></includeonly>[[Support Spirit#Fi|Fi]] | | <includeonly>[[File:SSBU Fi Spirit Icon.png|x100px|link=Support Spirit#Fi]]<br/></includeonly>[[Support Spirit#Fi|Fi]] | ||
| {{SS}} | | {{SS}} | ||
| {{#var:Ace}} | | {{#var:Ace}} | ||
| Line 442: | Line 506: | ||
|- | |- | ||
| 228 | | 228 | ||
| <includeonly>[[File:SSBU Ghirahim Spirit Icon.png|x100px|link=Primary Spirit#Ghirahim]]<br></includeonly>[[Primary Spirit#Ghirahim|Ghirahim]] | | <includeonly>[[File:SSBU Ghirahim Spirit Icon.png|x100px|link=Primary Spirit#Ghirahim]]<br/></includeonly>[[Primary Spirit#Ghirahim|Ghirahim]] | ||
| {{SS}} | | {{SS}} | ||
| {{#var:Ace}} | | {{#var:Ace}} | ||
| {{#var:Grab}}<br>{{#var:Primary}}<section end="Ghirahim"/><section begin="The Imprisoned"/> | | {{#var:Grab}}<br/>{{#var:Primary}}<section end="Ghirahim"/><section begin="The Imprisoned"/> | ||
|- | |- | ||
| 229 | | 229 | ||
| <includeonly>[[File:SSBU The Imprisoned Spirit Icon.png|x100px|link=Primary Spirit#The Imprisoned]]<br></includeonly>[[Primary Spirit#The Imprisoned|The Imprisoned]] | | <includeonly>[[File:SSBU The Imprisoned Spirit Icon.png|x100px|link=Primary Spirit#The Imprisoned]]<br/></includeonly>[[Primary Spirit#The Imprisoned|The Imprisoned]] | ||
| {{SS}} | | {{SS}} | ||
| {{#var:Advanced}} | | {{#var:Advanced}} | ||
| {{#var:Shield}}<br>{{#var:Primary}}<section end="The Imprisoned"/><section begin="Demise"/> | | {{#var:Shield}}<br/>{{#var:Primary}}<section end="The Imprisoned"/><section begin="Demise"/> | ||
|- | |- | ||
| 230 | | 230 | ||
| <includeonly>[[File:SSBU Demise Spirit Icon.png|x100px|link=Primary Spirit#Demise]]<br></includeonly>[[Primary Spirit#Demise|Demise]] | | <includeonly>[[File:SSBU Demise Spirit Icon.png|x100px|link=Primary Spirit#Demise]]<br/></includeonly>[[Primary Spirit#Demise|Demise]] | ||
| {{SS}} | | {{SS}} | ||
| {{#var:Ace}} | | {{#var:Ace}} | ||
| {{#var:Shield}}<br>{{#var:Primary}}<section end="Demise"/><section begin="Loftwing"/> | | {{#var:Shield}}<br/>{{#var:Primary}}<section end="Demise"/><section begin="Loftwing"/> | ||
|- | |- | ||
| 231 | | 231 | ||
| <includeonly>[[File:SSBU Loftwing Spirit Icon.png|x100px|link=Support Spirit#Loftwing]]<br></includeonly>[[Support Spirit#Loftwing|Loftwing]] | | <includeonly>[[File:SSBU Loftwing Spirit Icon.png|x100px|link=Support Spirit#Loftwing]]<br/></includeonly>[[Support Spirit#Loftwing|Loftwing]] | ||
| {{SS}} | | {{SS}} | ||
| {{#var:Novice}} | | {{#var:Novice}} | ||
| Line 466: | Line 530: | ||
|- | |- | ||
| 232 | | 232 | ||
| <includeonly>[[File:SSBU Groose Spirit Icon.png|x100px|link=Primary Spirit#Groose]]<br></includeonly>[[Primary Spirit#Groose|Groose]] | | <includeonly>[[File:SSBU Groose Spirit Icon.png|x100px|link=Primary Spirit#Groose]]<br/></includeonly>[[Primary Spirit#Groose|Groose]] | ||
| {{SS}} | | {{SS}} | ||
| {{#var:Advanced}} | | {{#var:Advanced}} | ||
| {{#var:Shield}}<br>{{#var:Primary}}<section end="Groose"/><section begin="Wall-Merged Link"/> | | {{#var:Shield}}<br/>{{#var:Primary}}<section end="Groose"/><section begin="Wall-Merged Link"/> | ||
|- | |- | ||
| 233 | | 233 | ||
| <includeonly>[[File:SSBU Wall-Merged Link Spirit Icon.png|x100px|link=Primary Spirit#Wall-Merged Link]]<br></includeonly>[[Primary Spirit#Wall-Merged Link|Wall-Merged Link]] | | <includeonly>[[File:SSBU Wall-Merged Link Spirit Icon.png|x100px|link=Primary Spirit#Wall-Merged Link]]<br/></includeonly>[[Primary Spirit#Wall-Merged Link|Wall-Merged Link]] | ||
| {{ALBW}} | | {{ALBW}} | ||
| {{#var:Advanced}} | | {{#var:Advanced}} | ||
| {{#var:Neutral}}<br>{{#var:Primary}}<section end="Wall-Merged Link"/><section begin="Link (A Link Between Worlds)"/> | | {{#var:Neutral}}<br/>{{#var:Primary}}<section end="Wall-Merged Link"/><section begin="Link (A Link Between Worlds)"/> | ||
|- | |- | ||
| 234 | | 234 | ||
| <includeonly>[[File:SSBU Link (A Link Between Worlds) Spirit Icon.png|x100px|link=Primary Spirit#Link (A Link Between Worlds)]]<br></includeonly>[[Primary Spirit#Link (A Link Between Worlds)|Link {{Small|(A Link Between Worlds)}}]] | | <includeonly>[[File:SSBU Link (A Link Between Worlds) Spirit Icon.png|x100px|link=Primary Spirit#Link (A Link Between Worlds)]]<br/></includeonly>[[Primary Spirit#Link (A Link Between Worlds)|Link {{Small|(A Link Between Worlds)}}]] | ||
| {{ALBW}} | | {{ALBW}} | ||
| {{#var:Ace}} | | {{#var:Ace}} | ||
| {{#var:Neutral}}<br>{{#var:Primary}}<section end="Link (A Link Between Worlds)"/><section begin="Ravio"/> | | {{#var:Neutral}}<br/>{{#var:Primary}}<section end="Link (A Link Between Worlds)"/><section begin="Ravio"/> | ||
|- | |- | ||
| 235 | | 235 | ||
| <includeonly>[[File:SSBU Ravio Spirit Icon.png|x100px|link=Support Spirit#Ravio]]<br></includeonly>[[Support Spirit#Ravio|Ravio]] | | <includeonly>[[File:SSBU Ravio Spirit Icon.png|x100px|link=Support Spirit#Ravio]]<br/></includeonly>[[Support Spirit#Ravio|Ravio]] | ||
| {{ALBW}} | | {{ALBW}} | ||
| {{#var:Advanced}} | | {{#var:Advanced}} | ||
| {{#var:Support}}<section end="Ravio"/><section begin="Hilda"/> | | {{#var:Support}}<section end="Ravio"/><section begin="Hilda (The Legend of Zelda)"/> | ||
|- | |- | ||
| 236 | | 236 | ||
| <includeonly>[[File:SSBU Hilda Spirit Icon.png|x100px|link=Primary Spirit#Hilda]]<br></includeonly>[[Primary Spirit#Hilda|Hilda]] | | <includeonly>[[File:SSBU Hilda (The Legend of Zelda) Spirit Icon.png|x100px|link=Primary Spirit#Hilda (The Legend of Zelda)]]<br/></includeonly>[[Primary Spirit#Hilda (The Legend of Zelda)|Hilda {{Small|(The Legend of Zelda)}}]] | ||
| {{ALBW}} | | {{ALBW}} | ||
| {{#var:Ace}} | | {{#var:Ace}} | ||
| {{#var:Shield}}<br>{{#var:Primary}}<section end="Hilda"/><section begin="Yuga"/> | | {{#var:Shield}}<br/>{{#var:Primary}}<section end="Hilda (The Legend of Zelda)"/><section begin="Yuga"/> | ||
|- | |- | ||
| 237 | | 237 | ||
| <includeonly>[[File:SSBU Yuga Spirit Icon.png|x100px|link=Primary Spirit#Yuga]]<br></includeonly>[[Primary Spirit#Yuga|Yuga]] | | <includeonly>[[File:SSBU Yuga Spirit Icon.png|x100px|link=Primary Spirit#Yuga]]<br/></includeonly>[[Primary Spirit#Yuga|Yuga]] | ||
| {{ALBW}} | | {{ALBW}} | ||
| {{#var:Ace}} | | {{#var:Ace}} | ||
| {{#var:Shield}}<br>{{#var:Primary}}<section end="Yuga"/><section begin="Zelda (Breath of the Wild)"/> | | {{#var:Shield}}<br/>{{#var:Primary}}<section end="Yuga"/><section begin="Zelda (Breath of the Wild)"/> | ||
|- | |- | ||
| 238 | | 238 | ||
| <includeonly>[[File:SSBU Zelda (Breath of the Wild) Spirit Icon.png|x100px|link=Support Spirit#Zelda (Breath of the Wild)]]<br></includeonly>[[Support Spirit#Zelda (Breath of the Wild)|Zelda {{Small|(Breath of the Wild)}}]] | | <includeonly>[[File:SSBU Zelda (Breath of the Wild) Spirit Icon.png|x100px|link=Support Spirit#Zelda (Breath of the Wild)]]<br/></includeonly>[[Support Spirit#Zelda (Breath of the Wild)|Zelda {{Small|(Breath of the Wild)}}]] | ||
| {{BotW}} | | {{BotW}} | ||
| {{#var:Ace}} | | {{#var:Ace}} | ||
| Line 508: | Line 572: | ||
|- | |- | ||
| 239 | | 239 | ||
| <includeonly>[[File:SSBU Mipha Spirit Icon.png|x100px|link=Support Spirit#Mipha]]<br></includeonly>[[Support Spirit#Mipha|Mipha]] | | <includeonly>[[File:SSBU Mipha Spirit Icon.png|x100px|link=Support Spirit#Mipha]]<br/></includeonly>[[Support Spirit#Mipha|Mipha]] | ||
| {{BotW}} | | {{BotW}} | ||
| {{#var:Advanced}} | | {{#var:Advanced}} | ||
| Line 514: | Line 578: | ||
|- | |- | ||
| 240 | | 240 | ||
| <includeonly>[[File:SSBU Daruk Spirit Icon.png|x100px|link=Primary Spirit#Daruk]]<br></includeonly>[[Primary Spirit#Daruk|Daruk]] | | <includeonly>[[File:SSBU Daruk Spirit Icon.png|x100px|link=Primary Spirit#Daruk]]<br/></includeonly>[[Primary Spirit#Daruk|Daruk]] | ||
| {{BotW}} | | {{BotW}} | ||
| {{#var:Advanced}} | | {{#var:Advanced}} | ||
| {{#var:Shield}}<br>{{#var:Primary}}<section end="Daruk"/><section begin="Revali"/> | | {{#var:Shield}}<br/>{{#var:Primary}}<section end="Daruk"/><section begin="Revali"/> | ||
|- | |- | ||
| 241 | | 241 | ||
| <includeonly>[[File:SSBU Revali Spirit Icon.png|x100px|link=Support Spirit#Revali]]<br></includeonly>[[Support Spirit#Revali|Revali]] | | <includeonly>[[File:SSBU Revali Spirit Icon.png|x100px|link=Support Spirit#Revali]]<br/></includeonly>[[Support Spirit#Revali|Revali]] | ||
| {{BotW}} | | {{BotW}} | ||
| {{#var:Advanced}} | | {{#var:Advanced}} | ||
| Line 526: | Line 590: | ||
|- | |- | ||
| 242 | | 242 | ||
| <includeonly>[[File:SSBU Urbosa Spirit Icon.png|x100px|link=Primary Spirit#Urbosa]]<br></includeonly>[[Primary Spirit#Urbosa|Urbosa]] | | <includeonly>[[File:SSBU Urbosa Spirit Icon.png|x100px|link=Primary Spirit#Urbosa]]<br/></includeonly>[[Primary Spirit#Urbosa|Urbosa]] | ||
| {{BotW}} | | {{BotW}} | ||
| {{#var:Advanced}} | | {{#var:Advanced}} | ||
| {{#var:Attack}}<br>{{#var:Primary}}<section end="Urbosa"/><section begin="Calamity Ganon"/> | | {{#var:Attack}}<br/>{{#var:Primary}}<section end="Urbosa"/><section begin="Calamity Ganon"/> | ||
|- | |- | ||
| 243 | | 243 | ||
| <includeonly>[[File:SSBU Calamity Ganon Spirit Icon.png|x100px|link=Primary Spirit#Calamity Ganon]]<br></includeonly>[[Primary Spirit#Calamity Ganon|Calamity Ganon]] | | <includeonly>[[File:SSBU Calamity Ganon Spirit Icon.png|x100px|link=Primary Spirit#Calamity Ganon]]<br/></includeonly>[[Primary Spirit#Calamity Ganon|Calamity Ganon]] | ||
| {{BotW}} | | {{BotW}} | ||
| {{#var:Legend}} | | {{#var:Legend}} | ||
| {{#var:Attack}}<br>{{#var:Primary}}<section end="Calamity Ganon"/><section begin="Bokoblin"/> | | {{#var:Attack}}<br/>{{#var:Primary}}<section end="Calamity Ganon"/><section begin="Bokoblin"/> | ||
|- | |- | ||
| 244 | | 244 | ||
| <includeonly>[[File:SSBU Bokoblin Spirit Icon.png|x100px|link=Primary Spirit#Bokoblin]]<br></includeonly>[[Primary Spirit#Bokoblin|Bokoblin]] | | <includeonly>[[File:SSBU Bokoblin Spirit Icon.png|x100px|link=Primary Spirit#Bokoblin]]<br/></includeonly>[[Primary Spirit#Bokoblin|Bokoblin]] | ||
| {{BotW}} | | {{BotW}} | ||
| {{#var:Novice}} | | {{#var:Novice}} | ||
| {{#var:Neutral}}<br>{{#var:Primary}}<section end="Bokoblin"/><section begin="Guardian"/> | | {{#var:Neutral}}<br/>{{#var:Primary}}<section end="Bokoblin"/><section begin="Guardian"/> | ||
|- | |- | ||
| 245 | | 245 | ||
| <includeonly>[[File:SSBU Guardian Spirit Icon.png|x100px|link=Support Spirit#Guardian]]<br></includeonly>[[Support Spirit#Guardian|Guardian]] | | <includeonly>[[File:SSBU Guardian Spirit Icon.png|x100px|link=Support Spirit#Guardian]]<br/></includeonly>[[Support Spirit#Guardian|Guardian]] | ||
| {{BotW}} | | {{BotW}} | ||
| {{#var:Advanced}} | | {{#var:Advanced}} | ||
| Line 550: | Line 614: | ||
|- | |- | ||
| 246 | | 246 | ||
| <includeonly>[[File:SSBU Tetra Spirit Icon.png|x100px|link=Primary Spirit#Tetra]]<br></includeonly>[[Primary Spirit#Tetra|Tetra]] | | <includeonly>[[File:SSBU Tetra Spirit Icon.png|x100px|link=Primary Spirit#Tetra]]<br/></includeonly>[[Primary Spirit#Tetra|Tetra]] | ||
| {{TWW}} | | {{TWW}} | ||
| {{#var:Ace}} | | {{#var:Ace}} | ||
| {{#var:Shield}}<br>{{#var:Primary}}<section end="Tetra"/><section begin="Zelda (The Wind Waker)"/> | | {{#var:Shield}}<br/>{{#var:Primary}}<section end="Tetra"/><section begin="Zelda (The Wind Waker)"/> | ||
|- | |- | ||
| 247 | | 247 | ||
| <includeonly>[[File:SSBU Zelda (The Wind Waker) Spirit Icon.png|x100px|link=Primary Spirit#Zelda (The Wind Waker)]]<br></includeonly>[[Primary Spirit#Zelda (The Wind Waker)|Zelda {{Small|(The Wind Waker)}}]] | | <includeonly>[[File:SSBU Zelda (The Wind Waker) Spirit Icon.png|x100px|link=Primary Spirit#Zelda (The Wind Waker)]]<br/></includeonly>[[Primary Spirit#Zelda (The Wind Waker)|Zelda {{Small|(The Wind Waker)}}]] | ||
| {{TWW}} | | {{TWW}} | ||
| {{#var:Ace}} | | {{#var:Ace}} | ||
| {{#var:Shield}}<br>{{#var:Primary}}<section end="Zelda (The Wind Waker)"/><section begin="King of Red Lions"/> | | {{#var:Shield}}<br/>{{#var:Primary}}<section end="Zelda (The Wind Waker)"/><section begin="King of Red Lions"/> | ||
|- | |- | ||
| 248 | | 248 | ||
| <includeonly>[[File:SSBU King of Red Lions Spirit Icon.png|x100px|link=Primary Spirit#King of Red Lions]]<br></includeonly>[[Primary Spirit#King of Red Lions|King of Red Lions]] | | <includeonly>[[File:SSBU King of Red Lions Spirit Icon.png|x100px|link=Primary Spirit#King of Red Lions]]<br/></includeonly>[[Primary Spirit#King of Red Lions|King of Red Lions]] | ||
| {{TWW}} | | {{TWW}} | ||
| {{#var:Advanced}} | | {{#var:Advanced}} | ||
| {{#var:Attack}}<br>{{#var:Primary}}<section end="King of Red Lions"/><section begin="King of Hyrule"/> | | {{#var:Attack}}<br/>{{#var:Primary}}<section end="King of Red Lions"/><section begin="King of Hyrule"/> | ||
|- | |- | ||
| 249 | | 249 | ||
| <includeonly>[[File:SSBU King of Hyrule Spirit Icon.png|x100px|link=Primary Spirit#King of Hyrule]]<br></includeonly>[[Primary Spirit#King of Hyrule|King of Hyrule]] | | <includeonly>[[File:SSBU King of Hyrule Spirit Icon.png|x100px|link=Primary Spirit#King of Hyrule]]<br/></includeonly>[[Primary Spirit#King of Hyrule|King of Hyrule]] | ||
| {{TWW}} | | {{TWW}} | ||
| {{#var:Ace}} | | {{#var:Ace}} | ||
| {{#var:Attack}}<br>{{#var:Primary}}<section end="King of Hyrule"/><section begin="Aryll"/> | | {{#var:Attack}}<br/>{{#var:Primary}}<section end="King of Hyrule"/><section begin="Aryll"/> | ||
|- | |- | ||
| 250 | | 250 | ||
| <includeonly>[[File:SSBU Aryll Spirit Icon.png|x100px|link=Support Spirit#Aryll]]<br></includeonly>[[Support Spirit#Aryll|Aryll]] | | <includeonly>[[File:SSBU Aryll Spirit Icon.png|x100px|link=Support Spirit#Aryll]]<br/></includeonly>[[Support Spirit#Aryll|Aryll]] | ||
| {{TWW}} | | {{TWW}} | ||
| {{#var:Ace}} | | {{#var:Ace}} | ||
| Line 580: | Line 644: | ||
|- | |- | ||
| 251 | | 251 | ||
| <includeonly>[[File:SSBU Medli Spirit Icon.png|x100px|link=Support Spirit#Medli]]<br></includeonly>[[Support Spirit#Medli|Medli]] | | <includeonly>[[File:SSBU Medli Spirit Icon.png|x100px|link=Support Spirit#Medli]]<br/></includeonly>[[Support Spirit#Medli|Medli]] | ||
| {{TWW}} | | {{TWW}} | ||
| {{#var:Ace}} | | {{#var:Ace}} | ||
| Line 586: | Line 650: | ||
|- | |- | ||
| 252 | | 252 | ||
| <includeonly>[[File:SSBU Valoo Spirit Icon.png|x100px|link=Support Spirit#Valoo]]<br></includeonly>[[Support Spirit#Valoo|Valoo]] | | <includeonly>[[File:SSBU Valoo Spirit Icon.png|x100px|link=Support Spirit#Valoo]]<br/></includeonly>[[Support Spirit#Valoo|Valoo]] | ||
| {{TWW}} | | {{TWW}} | ||
| {{#var:Advanced}} | | {{#var:Advanced}} | ||
| Line 592: | Line 656: | ||
|- | |- | ||
| 253 | | 253 | ||
| <includeonly>[[File:SSBU Beedle Spirit Icon.png|x100px|link=Master Spirit#Beedle]]<br></includeonly>[[Master Spirit#Beedle|Beedle]] | | <includeonly>[[File:SSBU Beedle Spirit Icon.png|x100px|link=Master Spirit#Beedle]]<br/></includeonly>[[Master Spirit#Beedle|Beedle]] | ||
| {{TWW}} | | {{TWW}} | ||
| — | | — | ||
| Line 598: | Line 662: | ||
|- | |- | ||
| 254 | | 254 | ||
| <includeonly>[[File:SSBU Fishman Spirit Icon.png|x100px|link=Support Spirit#Fishman]]<br></includeonly>[[Support Spirit#Fishman|Fishman]] | | <includeonly>[[File:SSBU Fishman Spirit Icon.png|x100px|link=Support Spirit#Fishman]]<br/></includeonly>[[Support Spirit#Fishman|Fishman]] | ||
| {{TWW}} | | {{TWW}} | ||
| {{#var:Novice}} | | {{#var:Novice}} | ||
| Line 604: | Line 668: | ||
|- | |- | ||
| 255 | | 255 | ||
| <includeonly>[[File:SSBU Vaati Spirit Icon.png|x100px|link=Primary Spirit#Vaati]]<br></includeonly>[[Primary Spirit#Vaati|Vaati]] | | <includeonly>[[File:SSBU Vaati Spirit Icon.png|x100px|link=Primary Spirit#Vaati]]<br/></includeonly>[[Primary Spirit#Vaati|Vaati]] | ||
| {{FS}} | | {{FS}} | ||
| {{#var:Ace}} | | {{#var:Ace}} | ||
| {{#var:Grab}}<br>{{#var:Primary}}<section end="Vaati"/><section begin="Ezlo"/> | | {{#var:Grab}}<br/>{{#var:Primary}}<section end="Vaati"/><section begin="Ezlo"/> | ||
|- | |- | ||
| 256 | | 256 | ||
| <includeonly>[[File:SSBU Ezlo Spirit Icon.png|x100px|link=Support Spirit#Ezlo]]<br></includeonly>[[Support Spirit#Ezlo|Ezlo]] | | <includeonly>[[File:SSBU Ezlo Spirit Icon.png|x100px|link=Support Spirit#Ezlo]]<br/></includeonly>[[Support Spirit#Ezlo|Ezlo]] | ||
| {{TMC}} | | {{TMC}} | ||
| {{#var:Advanced}} | | {{#var:Advanced}} | ||
| Line 616: | Line 680: | ||
|- | |- | ||
| 257 | | 257 | ||
| <includeonly>[[File:SSBU Linebeck Spirit Icon.png|x100px|link=Master Spirit#Linebeck]]<br></includeonly>[[Master Spirit#Linebeck|Linebeck]] | | <includeonly>[[File:SSBU Linebeck Spirit Icon.png|x100px|link=Master Spirit#Linebeck]]<br/></includeonly>[[Master Spirit#Linebeck|Linebeck]] | ||
| {{PH}} | | {{PH}} | ||
| — | | — | ||
| Line 622: | Line 686: | ||
|- | |- | ||
| 258 | | 258 | ||
| <includeonly>[[File:SSBU Phantom Spirit Icon.png|x100px|link=Primary Spirit#Phantom]]<br></includeonly>[[Primary Spirit#Phantom|Phantom]] | | <includeonly>[[File:SSBU Phantom Spirit Icon.png|x100px|link=Primary Spirit#Phantom]]<br/></includeonly>[[Primary Spirit#Phantom|Phantom]] | ||
| {{PH}} | | {{PH}} | ||
| {{#var:Advanced}} | | {{#var:Advanced}} | ||
| {{#var:Shield}}<br>{{#var:Primary}}<section end="Phantom"/><section begin="Zelda (Spirit Tracks)"/> | | {{#var:Shield}}<br/>{{#var:Primary}}<section end="Phantom"/><section begin="Zelda (Spirit Tracks)"/> | ||
|- | |- | ||
| 259 | | 259 | ||
| <includeonly>[[File:SSBU Zelda (Spirit Tracks) Spirit Icon.png|x100px|link=Primary Spirit#Zelda (Spirit Tracks)]]<br></includeonly>[[Primary Spirit#Zelda (Spirit Tracks)|Zelda {{Small|(Spirit Tracks)}}]] | | <includeonly>[[File:SSBU Zelda (Spirit Tracks) Spirit Icon.png|x100px|link=Primary Spirit#Zelda (Spirit Tracks)]]<br/></includeonly>[[Primary Spirit#Zelda (Spirit Tracks)|Zelda {{Small|(Spirit Tracks)}}]] | ||
| {{ST}} | | {{ST}} | ||
| {{#var:Ace}} | | {{#var:Ace}} | ||
| {{#var:Shield}}<br>{{#var:Primary}}<section end="Zelda (Spirit Tracks)"/><section begin="Alfonzo & Engineer Link"/> | | {{#var:Shield}}<br/>{{#var:Primary}}<section end="Zelda (Spirit Tracks)"/><section begin="Alfonzo & Engineer Link"/> | ||
|- | |- | ||
| 260 | | 260 | ||
| <includeonly>[[File:SSBU Alfonzo & Engineer Link Spirit Icon.png|x100px|link=Support Spirit#Alfonzo & Engineer Link]]<br></includeonly>[[Support Spirit#Alfonzo & Engineer Link|Alfonzo & Engineer Link]] | | <includeonly>[[File:SSBU Alfonzo & Engineer Link Spirit Icon.png|x100px|link=Support Spirit#Alfonzo & Engineer Link]]<br/></includeonly>[[Support Spirit#Alfonzo & Engineer Link|Alfonzo & Engineer Link]] | ||
| {{ST}} | | {{ST}} | ||
| {{#var:Advanced}} | | {{#var:Advanced}} | ||
| Line 640: | Line 704: | ||
|- | |- | ||
| 261 | | 261 | ||
| <includeonly>[[File:SSBU Byrne Spirit Icon.png|x100px|link=Primary Spirit#Byrne]]<br></includeonly>[[Primary Spirit#Byrne|Byrne]] | | <includeonly>[[File:SSBU Byrne Spirit Icon.png|x100px|link=Primary Spirit#Byrne]]<br/></includeonly>[[Primary Spirit#Byrne|Byrne]] | ||
| {{ST}} | | {{ST}} | ||
| {{#var:Novice}} | | {{#var:Novice}} | ||
| {{#var:Attack}}<br>{{#var:Primary}}<section end="Byrne"/><section begin="Totem Link"/> | | {{#var:Attack}}<br/>{{#var:Primary}}<section end="Byrne"/><section begin="Totem Link"/> | ||
|- | |- | ||
| 262 | | 262 | ||
| <includeonly>[[File:SSBU Totem Link Spirit Icon.png|x100px|link=Primary Spirit#Totem Link]]<br></includeonly>[[Primary Spirit#Totem Link|Totem Link]] | | <includeonly>[[File:SSBU Totem Link Spirit Icon.png|x100px|link=Primary Spirit#Totem Link]]<br/></includeonly>[[Primary Spirit#Totem Link|Totem Link]] | ||
| {{TFH}} | | {{TFH}} | ||
| {{#var:Advanced}} | | {{#var:Advanced}} | ||
| {{#var:Grab}}<br>{{#var:Primary}}<section end="Totem Link"/><section begin="Madame Couture"/> | | {{#var:Grab}}<br/>{{#var:Primary}}<section end="Totem Link"/><section begin="Madame Couture"/> | ||
|- | |- | ||
| 263 | | 263 | ||
| <includeonly>[[File:SSBU Madame Couture Spirit Icon.png|x100px|link=Support Spirit#Madame Couture]]<br></includeonly>[[Support Spirit#Madame Couture|Madame Couture]] | | <includeonly>[[File:SSBU Madame Couture Spirit Icon.png|x100px|link=Support Spirit#Madame Couture]]<br/></includeonly>[[Support Spirit#Madame Couture|Madame Couture]] | ||
| {{TFH}} | | {{TFH}} | ||
| {{#var:Advanced}} | | {{#var:Advanced}} | ||
| Line 658: | Line 722: | ||
|- | |- | ||
| 1145 | | 1145 | ||
| <includeonly>[[File:SSBU Prince Richard Spirit Icon.png|x100px|link=]]<br></includeonly>[[Primary Spirit#Prince Richard|Prince Richard]] | | <includeonly>[[File:SSBU Prince Richard Spirit Icon.png|x100px|link=]]<br/></includeonly>[[Primary Spirit#Prince Richard|Prince Richard]] | ||
| ''Kaeru no Tame ni Kane wa Naru'' | | ''Kaeru no Tame ni Kane wa Naru'' | ||
| {{#var:Ace}} | | {{#var:Ace}} | ||
| Line 664: | Line 728: | ||
|- | |- | ||
| 1322 | | 1322 | ||
| <includeonly>[[File:SSBU Link (Link's Awakening) Spirit Icon.png|x100px|link=]]<br></includeonly>[[Primary Spirit#Link (Link's Awakening)|Link {{Small|(Link's Awakening)}}]] | | <includeonly>[[File:SSBU Link (Link's Awakening) Spirit Icon.png|x100px|link=]]<br/></includeonly>[[Primary Spirit#Link (Link's Awakening)|Link {{Small|(Link's Awakening)}}]] | ||
| {{LA|NS}} | | {{LA|NS}} | ||
| {{#var:Ace}} | | {{#var:Ace}} | ||
| Line 670: | Line 734: | ||
|- | |- | ||
| 1323 | | 1323 | ||
| <includeonly>[[File:SSBU Owl Spirit Icon.png|x100px|link=]]<br></includeonly>[[Support Spirit#Owl|Owl]] | | <includeonly>[[File:SSBU Owl Spirit Icon.png|x100px|link=]]<br/></includeonly>[[Support Spirit#Owl|Owl]] | ||
| {{LA|NS}} | | {{LA|NS}} | ||
| {{#var:Advanced}} | | {{#var:Advanced}} | ||
| {{#var:Support}}<section end="Owl"/> | | {{#var:Support}}<section end="Owl"/><section begin="Diminutive Guardian"/> | ||
|- | |||
| 1453 | |||
| <includeonly>[[File:SSBU Diminutive Guardian Spirit Icon.png|x100px|link=]]<br/></includeonly>[[Support Spirit#Diminutive Guardian|Diminutive Guardian]] | |||
| {{HWAoC}} | |||
| {{#var:Novice}} | |||
| {{#var:Support}}<section end="Diminutive Guardian"/><section begin="Impa (Age of Calamity)"/> | |||
|- | |||
| 1454 | |||
| <includeonly>[[File:SSBU Impa (Age of Calamity) Spirit Icon.png|x100px|link=]]<br/></includeonly>[[Primary Spirit#Impa (Age of Calamity)|Impa {{Small|(Age of Calamity)}}]] | |||
| {{HWAoC}} | |||
| {{#var:Ace}} | |||
| {{#var:Grab}}<br/>{{#var:Primary}}<section end="Impa (Age of Calamity)"/><section begin="Master Kohga"/> | |||
|- | |||
| 1455 | |||
| <includeonly>[[File:SSBU Master Kohga Spirit Icon.png|x100px|link=]]<br/></includeonly>[[Primary Spirit#Master Kohga|Master Kohga]] | |||
| {{HWAoC}} | |||
| {{#var:Advanced}} | |||
| {{#var:Attack}}<br/>{{#var:Primary}}<section end="Master Kohga"/><section begin="Rauru"/> | |||
|- | |||
| 1514 | |||
| <includeonly>[[File:SSBU Rauru Spirit Icon.png|x100px|link=]]<br/></includeonly>[[Support Spirit#Rauru|Rauru]] | |||
| {{TotK}} | |||
| {{#var:Legend}} | |||
| {{#var:Support}}<section end="Rauru"/> | |||
|} | |} | ||
{{Noncanon|End}} | {{Noncanon|End}} | ||
==Nomenclature== | ==Nomenclature== | ||
The term "Spirit" can refer to several different things in the Japanese language, such as the gods, the soul, or ghosts. However, these often all translate to "Spirit" in English. | |||
{{Nomenclature}} | |||
==Gallery== | ==Gallery== | ||
<gallery> | <gallery> | ||
File:Old | File:FSA Lonely Old Man Sprite.png|The {{Term|FSA|Spirit}} of a {{Term|FSA|Lonely Old Man|link}} from {{FSA|-}} | ||
File:TP Deceased Soldiers in Sewers Beta.png|Deceased | File:TP Deceased Soldiers in Sewers Beta.png|Deceased {{Plural|TP|Soldier|link}} in the {{Term|TP|Castle Sewers|link}}, as seen in an early version of {{TP|-}} | ||
File:TP Ghost Soldiers.jpg|{{Term|TP|Soldier}} ghosts in the {{Term|TP|Hyrule Castle Graveyard|link}} from {{TP|-}} | |||
File:BotW Champions and the King.png|The souls of King Rhoam and the Champions, as seen in [[The Legend of Zelda: Breath of the Wild]] | |||
</gallery> | </gallery> | ||
==Trivia== | |||
* The Spirit Medallion was originally a magic spell that would have allowed Link to become or take control of Navi and fly in a manner reminiscent of the [[Fairy Spell]] from {{TAoL}}.<ref>{{Cite Web|quote= 魂のメダルをもらった!Cで使えばナビィになれる!ナビィになって飛び回れ! You got the Spirit Medallion! Use it with C to turn into Navi! Fly around as Navi! |author= |published= |retrieved= April 30, 2024|url= https://tcrf.net/Proto:The_Legend_of_Zelda:_Ocarina_of_Time/Late_1997_Overdump/Text|title= The Legend of Zelda: Ocarina of Time/Late 1997 Overdump/Text|site= The Cutting Room Floor|type= }}</ref> | |||
* Unused dialogue from Navi implies the "mirages" mentioned regarding the Haunted Wasteland would have involved illusory flags hidden among real ones that would likely require the Lens of Truth to identify, much like the Phantom Guide.<ref>{{Cite|WHAAAT!? Look at all those flags! Can you figure out which ones are real?|Navi|OoT}}</ref> | |||
*In {{MM|-}}, the icon for the Elegy of Emptiness in the start menu is colored orange just like the Requiem of Spirit from {{OoT|-}}, implying the Ikana section of the game is the spiritual successor to the Gerudo chapter in {{OoT|-}}. | |||
==See Also== | ==See Also== | ||
* | * {{Term|Series|Fighter Spirit|link}} | ||
* | * {{Term|Series|Master Spirit|link}} | ||
* | * {{Term|Series|Primary Spirit|link}} | ||
* | * {{Term|Series|Support Spirit|link}} | ||
{{Ref}} | {{Ref}} | ||
{{Categories | |||
|Undead | |||
}} | |||
Revision as of 01:12, 1 May 2024

- Spirit redirects here. For other uses, see Spirit (Disambiguation).
Spirits are metaphysical entities without a corporeal body, often times the form taken by the deceased in the afterlife, and are a recurring element throughout The Legend of Zelda series.[1][2][citation needed]
Role in the Series
Spirit as a symbolic element

In Ocarina of Time, the Hero of Time journeys to the Spirit Temple within the Desert Colossus to awaken the Sage of Spirit. After doing so, she gives Link the Spirit Medallion, a symbol of her power.
Spirit is given homage by the Requiem of Spirit, a magical melody that allows instant transportation to the Desert Colossus.
The element of Spirit is embodied by the Gerudo race, who maintain the use of the Spirit Temple. Nabooru, a member of the Gerudo, awakens as the Sage of Spirit in Ocarina of Time; one of the Seven Heroines in Gerudo folklore also represents the element of Spirit in Breath of the Wild. However, there exists a Zonai Sage of Spirit named Mineru during the Imprisoning War in Tears of the Kingdom.

Spirit plays an important role in Gerudo culture during the era of Ocarina of Time. To reach the Spirit Temple, a Gerudo must pass the two trials within the Haunted Wasteland, a desert rife with raging sandstorms and mirages that make navigation extremely perilous. The second trial involves employing the aid of an invisible spectre to reach the Spirit Temple.[3]. The ability to see past illusions and detect invisible objects requires intense training of the mind; the Sheikah constructed the Lens of Truth to accomplish the same feat with far less effort.[4]
The Twinrova sisters had the ability to merge their very being into one person, who possessed the combined magical abilities of both witches. They also used the Spirit Temple to conduct brainwashing experiments in order to turn individuals loyal to the Demon King, with even Nabooru falling victim.
Ganondorf, the most infamous Gerudo of all, practiced a kind of magic that allowed him to create a ghostly copy of himself, known as Phantom Ganon. He could create many of these at a time, even on horseback, such as the Phantom Riders.
Spirit as an incorporeal state or possessing force
Spirits are entities with a non-physical, astral form. They are normally invisible to the naked eye, and must either live within or take on the form of concrete matter to communicate with mortals. These forms can include dragons, trees, or other animals and natural phenomena. The ancient dragons, Light Spirits, Jabu-Jabu, and Great Deku Tree are such examples of spirits taken form.[5] Spirits can also represent the elements; Valoo from The Wind Waker is known as the Sky Spirit, while the Great Deku Tree is called the Earth Spirit.[6][7] The Kokiri also commune with the Forest Spirits in the Lost Woods, while the Gorons and Zoras worship the Fire Spirits and Water Spirits in the Fire Temple and Water Temple respectively.
A deceased mortal may also take on the form of a spirit or ghost. Bubbles, Poes, Hyu, Moa, Boos, and Ghini are examples of spirits created from the dead, and can often be found haunting graveyards or catacombs. This phenomenon is not limited to humans and can also extend to animals and even plants, such as the Pols Voice and the Peahat, which is thought to be the ghost of a flower; though it is unclear what the Pols Voice is a ghost of.
When Princess Zelda is slain in Spirit Tracks, she becomes a spirit and gains the ability to possess and manipulate objects like the Phantom suits of armor to aid Link. The Sage of Spirit Mineru could also place her spirit into the Purah Pad and later take control of a large Construct.
Spirit as the heart, reflection, and inner balance
When the Hero of Time explores the Water Temple, his own reflection comes to life and mimics Link's movements. Reflection becomes an important element in the Spirit Temple and Stone Tower Temple later in the hero's journey, as both temples require the Mirror Shield used to reflect sunlight or magical ice and fire attacks.
The Spirit Temple was constructed with the intention that the "pure heart of a child" would allow full exploration of the dungeon's chambers later as an adult. The child section and adult section of the temple eventually lead to the left and right hands of the Goddess of the Sand, representing a balance between past and future.
When Kotake and Koume combine to form Twinrova, they embody the duality and balance of their opposing Ice and Fire magic, respectively. When Twinrova is separated back into Kotake and Koume, they briefly take on the form of circling ice and fire orbs in a manner greatly resembling the symbol of the Spirit Medallion.
The Elegy of Emptiness is a magical melody that allows the user to create a statue which King Igos du Ikana describes as a "soldier who has no heart" who will "not falter in the darkness." These statues are useful in scaling the Stone Tower, a stucture that not even hundreds of the King's soldiers could conquer.[8]
Spirit as a puzzle device
Compared to other elemental themes like Fire and Ice, the element of Spirit is abstract, esoteric, and vaguely defined, leading to it becoming the least understood in the Zelda series. Nevertheless, it represents a consistent motif found throughout many dungeons in the series.
The concepts of duality, balance, and reflection are built into almost every aspect of the Spirit Temple. The temple is separated into two halves and are traversed by Link in both his child and adult forms, and both treasures of the dungeon are found in the left and right hands of the Goddess of the Sand. In some rooms, Link faces the Anubis, who will mirror his movements across the room and attack when he swings his sword in a manner similar to Dark Link. These enemies can only be destroyed by fire, and can be tricked by Link's circling movements into venturing onto open flames; when doing this, Link and the Anubis resemble the circling orbs of the Spirit Medallion. The final puzzle of the dungeon involves using the Mirror Shield to reflect sunlight onto the face of the Goddess of the Sun, crumbling it away to reveal the headquarters of Twinrova. Similar themes exist in the Stone Tower Temple, which also involves heavy use of the Mirror Shield and the daulity between rightside-up and upside-down.
The very objects and terrain in a haunted dungeon can come to life when possessed by spirits; these may include Flying Pots, Flying Tiles, falling doors, suits of armor like the Iron Knuckle, statues such as the Armos, and even weapons like the Death Sword found in the Arbiter's Grounds.
The main mechanic of the Forest Temple involves tracking down the stolen torch flames of four Poes to advance deeper inside the temple; the same mechanic returns in the Arbiter's Grounds.
Puzzles may also make use of Link taking control of inaminate objects himself, such as in the Tower of the Gods, where the Hero of Winds learns the Command Melody to telepathically control the Servant Statues. The Command Melody also becomes useful in later dungeons, such as when Link takes control of Medli in the haunted catacombs of the Earth Temple to solve mirror puzzles very similar to the Spirit Temple. The Hero of Twilight also makes use of the Dominion Rod from the Temple of Time to take control of large statues who can mimic Link's attacks on his behalf.
Similar puzzles involve the use of autonomous enemies and obstacles, such as luring an Armos onto a pressure switch in the Spirit Temple, or using the ray of a Beamos to activate orb switches in the Desert Palace. Some puzzles also involve Link using semi-autonomous weapons such as the Bombchu to hit faraway switches that could otherwise not be hit with his bow or sword, as seen in the Spirit Temple, the Spirit Room, and the Hylian section of the Moon dungeon.
Characteristics
Majora's Mask
Several major characters appear as spirits in Majora's Mask. Inhabitants of Termina who have passed away may live on as a Spirit if their will is strong enough, although they can only be seen by the living with the Lens of Truth.[citation needed] Many Spirits with troubles and lingering regrets wander at Ikana Hill.[9] Spider Tokens contain the Spirits of the spiders that must be slain to obtain them.[10] Some Masks that Link can collect contain the Spirits of deceased characters. The Goron Mask contains the Spirit of Darmani III and the Zora Mask contains the spirit of Mikau.[11][12] All four Boss Remains imprison an innocent Spirit within that Link frees after defeating each Boss.[13][14][15][16]
Four Swords Adventures
The Old Men found in Caves and Dungeons appear in the form of spirits who assist the four Links by giving them cryptic hints.
Twilight Princess

During the events of Twilight Princess living inhabitants of Hyrule are transformed into spirits under the influence of the Twilight.[17] Soldier spirits can be a glowing flame floating in the air, which are currently alive soldiers. In contrast, there are spirits (possibly not even spirits, just ghosts) in Hyrule Castle, which do not appear in Twilight and look undead. They have red, long hair, glowing eyes, and the same armor as their live counterparts. These are actually very helpful, because if Wolf Link uses his senses, he will see them pointing to someplace. The pointing helps in making the right decision, right footing, and puzzle solving. Not all are transformed into spirits within the Twilight; it is believed that its effects are partially negated by the protection of the Triforce. Ganondorf becomes a horned, yellow, glowing head, similar to a skull, as shown in a cutscene where Zant talks in the Palace of Twilight. Link becomes wolf (strangely not transforming in the Palace of Twilight), whereas Princess Zelda remains in her true form. The Twili also remain in their true form due to them naturally inhabiting the Twilight Realm.
There are also Spirits of Light. Three of the four have a reference to the Golden Goddesses, Nayru, Din, and Farore. For example, the Lanayru Province is named after the Goddess of Wisdom, Nayru.
Phantom Hourglass
In Phantom Hourglass, three Fairies hold Spirit titles. Ciela is the Spirit of Time and Courage, Leaf is the Spirit of Power, and Neri is the Spirit of Wisdom.
Breath of the Wild
In Breath of the Wild, the four Champions and King Rhoam were killed in the Great Calamity and appear 100 years later as Spirits. In their spirit forms, their bodies are slightly faded in color and are constantly surrounded by turquoise-colored aura and flames. Other Spirits include the Lord of the Mountain and the three Dragons known as Farosh, Dinraal, and Naydra.
Tears of the Kingdom
Other Appearances
Super Smash Bros. Ultimate
- See SmashWiki's article on Spirit for more information.
Spirits are the manifestations of characters who have lost their physical forms in the imaginative world of Super Smash Bros. Ultimate. Despite this, many Spirits have retained their innate qualities, such as Medli retaining an immunity to Strong Wind. Spirits replace Trophies from previous Super Smash Bros. titles.
Two kinds of Spirits exist: Primary Spirits and Support Spirits. In matches, Primary Spirits can lend their power to Fighters who are equipped with them, augmenting the Fighter's stats. However, only one Primary Spirit may be equipped to a given Fighter at any time. Primary Spirits may also have Slots in which Support Spirits can be assigned, granting the Primary Spirits their collective skills. To balance the available Slots that Primary Spirits possess, Support Spirits are accompanied by Costs, which consume Slots when assigned.
Spirits are categorized into four classes based on strength. Average strength Spirits are known as Novices, strong Spirits are known as Advanced, particularly strong Spirits are Aces, and Spirits that outrank all previous classes are known as Legends. Primary Spirits also fit into four possible types: Attack Spirits, Grab Spirits, Shield Spirits, and a fourth, unknown type. Attack Spirits have advantage over Grab Spirits, Grab Spirits have advantage over Shield Spirits whereas the latter have advantage over Attack Spirits. Some Spirits are capable of hastening the rate at which the Final Smash Meter fills and some Spirits have the ability to cause Stage hazards.
Spirits can be acquired by winning Spirit Battles, which are listed on the Spirit Board. In Spirit Battles, Spirits are paired with complementary Fighters based on shared personality, appearance, or other qualities. Spirits can also be obtained by exchanging gold at the Shop.
Defeating Master Spirits unlocks various facilities, such as the Gym and the Dojo. At the Gym, which is operated by Doc Louis, Primary Spirits can be left to gain experience as time passes. Similarly, the Dojo is operated by various characters and is where Spirits can learn new Styles. Spirits can also be sent on Expeditions to areas such as the Ruins, the Caves, and the Jungle in search of treasure which they will collect over a set period of time under Toadette's direction.
Spirits can be sent back to the "real world", causing them to disappear from the collection. In exchange, they leave behind Core, which can be assembled to Summon other Spirits at the cost of those respective Cores and SP. Similarly, amiibo Figure Players can Inherit stats and skills from both Primary and Support Spirits, though this consumes the Spirit.
Nomenclature
The term "Spirit" can refer to several different things in the Japanese language, such as the gods, the soul, or ghosts. However, these often all translate to "Spirit" in English.
| Language | Names | |
|---|---|---|
| This table was generated using translation pages. To request an addition, please contact a staff member with a reference. | ||
Gallery
-

The Spirit of a Lonely Old Man from Four Swords Adventures
-
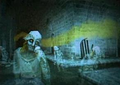
Deceased Soldiers in the Castle Sewers, as seen in an early version of Twilight Princess
-
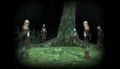
Soldier ghosts in the Hyrule Castle Graveyard from Twilight Princess
-
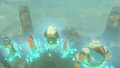
The souls of King Rhoam and the Champions, as seen in The Legend of Zelda: Breath of the Wild


Trivia
- The Spirit Medallion was originally a magic spell that would have allowed Link to become or take control of Navi and fly in a manner reminiscent of the Fairy Spell from The Adventure of Link.[18]
- Unused dialogue from Navi implies the "mirages" mentioned regarding the Haunted Wasteland would have involved illusory flags hidden among real ones that would likely require the Lens of Truth to identify, much like the Phantom Guide.[19]
- In Majora's Mask, the icon for the Elegy of Emptiness in the start menu is colored orange just like the Requiem of Spirit from Ocarina of Time, implying the Ikana section of the game is the spiritual successor to the Gerudo chapter in Ocarina of Time.
See Also
References
- ↑ "That was a soldier's spirit. Maybe it's someone from the other world? Eee hee!" — Midna (Twilight Princess HD)
- ↑ The Legend of Zelda: Phantom Hourglass—Prima Official Game Guide, Prima Games, pg. 8
- ↑ "One with the eye of truth shall be guided to the Spirit Temple by an inviting ghost." — N/A (Ocarina of Time 3D)
- ↑ "A long time ago... There was a man in this very village who had an eye they said could see the truth! Now usually, you have to train your mind's eye most strenuously to actually see the truth... But this fella, no, they say he had a different way of doing things... His house stood where the well is now..." — Professor Shikashi (Ocarina of Time)
- ↑ Encyclopedia, Dark Horse Books, pg. 22 (OoT)
- ↑ "We do so by the graces of the sky spirit, Valoo. When a Rito reaches adulthood, he or she journeys to the top of Dragon Roost to receive a scale from the great dragon. It is this scale that enables the Rito to grow his or her wings." — Rito Chieftain (The Wind Waker)
- ↑ "You received Farore's Pearl! The earth spirit, the Deku Tree, has seen fit to give you this jewel, a treasure of the goddess, Farore." — N/A (The Wind Waker)
- ↑ "To return true light to this land, you must seal the doors of Stone Tower where the winds of darkness blow through. But Stone Tower is an impenetrable stronghold. Hundreds of soldiers from my kingdom would not even be able to topple it. It is far too reckless for one to take on such a challenge. ...And so... I grant to you a soldier who has no heart. One who will not falter in the darkness." — Igos du Ikana (Majora's Mask)
- ↑ "Beyond here is the place where spirits with troubles and lingering regrets wander." — N/A (Majora's Mask)
- ↑ "And when you defeat them...don't forget...the spider token...it contains the spider's spirit..." — N/A (Majora's Mask)
- ↑ "This mask contains the spirit of a proud Goron hero!" — N/A (Majora's Mask)
- ↑ "This mask contains the spirit of a legendary guitarist!" — N/A (Majora's Mask)
- ↑ "You have just freed the innocent spirit that this dark mask had kept imprisoned within the body of evil Odolwa." — N/A (Majora's Mask)
- ↑ "You have just freed the innocent spirit that this dark mask had kept imprisoned within the body of evil Goht." — N/A (Majora's Mask)
- ↑ "You have just freed the innocent spirit that this dark mask had kept imprisoned within the body of evil Gyorg." — N/A (Majora's Mask)
- ↑ "You have just freed the innocent spirit that this dark mask had kept imprisoned within the body of evil Twinmold." — N/A (Majora's Mask)
- ↑ "Twilight covered Hyrule like a shroud, and without light, the people became as spirits. Within the twilight, they live on, unaware that they have passed into spirit forms... All the people know now is fear... Fear of a nameless evil..." — Princess Zelda (Twilight Princess)
- ↑ "魂のメダルをもらった!Cで使えばナビィになれる!ナビィになって飛び回れ! You got the Spirit Medallion! Use it with C to turn into Navi! Fly around as Navi!" — The Legend of Zelda: Ocarina of Time/Late 1997 Overdump/Text , The Cutting Room Floor, retrieved April 30, 2024.
- ↑ "WHAAAT!? Look at all those flags! Can you figure out which ones are real?" — Navi (Ocarina of Time)