Bell: Difference between revisions
m (Text replacement - "{{Ref}} {{Categories" to "{{Ref}} {{Categories") |
|||
| (35 intermediate revisions by 11 users not shown) | |||
| Line 1: | Line 1: | ||
{{Hatnote|Not to be confused with {{Term|Series|Sea Lily's Bell|link}}.}} | |||
{{Item | {{Infobox Item | ||
|image= File:ALBW Bell Model.png | |image= | ||
{{Media | |||
<!-- Uses Series term -->|Model MM= File:MM Bell Model.png | |||
<!-- Uses Series term -->|Model MM3D= File:MM3D Bell Model.png | |||
<!-- Uses Series term -->|Model TWW= File:TWW Bell Model.png | |||
<!-- Uses Series term -->|Model TWWHD= File:TWWHD Bell Model.png | |||
|Model TP= File:TP Bell Model.png | |||
|Model TPHD= File:TPHD Bell Model.png | |||
|Model PH= File:PH Bell Model.png | |||
<!-- Uses Series term -->|Model ST= File:ST Bell Model.png | |||
<!-- Uses Series term -->|Model SS= File:SS Bell Model.png | |||
<!-- Uses Series term -->|Model SSHD= File:SSHD Bell Model.png | |||
|Model ALBW= File:ALBW Bell Model.png | |||
|Model BotW= File:BotW Bell Model.png | |||
|Model TotK= File:TotK Bell Model.png | |||
|Sprite LA= File:LA Bell Sprite.png | |||
|Sprite LADX= File:LADX Bell Sprite.png | |||
|Sprite OoS= File:OoS Bell Sprite.png | |||
<!-- Uses Series term -->|Sprite TMC= File:TMC Bell Sprite.png | |||
|Sprite ALBW= File:ALBW Bell Icon.png | |||
}} | |||
|caption= | |caption= | ||
|game= | |game= LA, MM, OoS, TWW, TMC, TP, PH, ST, SS, ALBW, BotW, TotK | ||
|other= | |other= TFoE, HW | ||
|cost= | |cost= | ||
|uses= Transport to any activated | |uses= | ||
|comp= {{Term|Series|Fairy Ocarina|link}} | {{Infobox Game Blocks | ||
|ALBW= Transport to any activated {{Term|ALBW|Weather Vane|link}} | |||
}} | |||
|comp= {{List|{{Term|Series|Fairy Ocarina|link}}, {{Term|Series|Flute|link}}, {{Term|Series|Ocarina|link}}, {{Term|OoT3D|Ocarina of Time (Item)|link}}, {{Term|Series|Ocarina of Wind|link}}}} | |||
}} | }} | ||
{{Term/Store|Bell|Bells|Series, TP, TPHD, ALBW, TotK, TFoE|plural}} are recurring {{Plural|Series|Item|link}} and {{Plural|Series|Object|link}} in {{TLoZ|Series}}.<ref>{{Cite Guide|quote= |game= TP |guide= Prima |page= 350}}</ref><ref>{{Cite eGuide|quote= |game= TPHD |guide= Prima |section= {{Small|Dungeon 6: Temple of Time}}<br/>Task 2: Unlock the Door in the Central Mechanical Platform Chamber |edition= |year= }}</ref><ref>{{Cite Book|quote= |book= E |publisher= |page= 116 {{Exp Game|ALBW}}}}</ref><ref>{{Cite|'''Bell'''|Inventory|TFoE}}</ref><ref>{{Cite|There's a {{Color|TotK Red|bell}} at the top of the tower, and ya gotta ring it real loud. Throw something at it with as much force as you can. Do that, and the bell will answer.|Strade|TotK}}</ref>{{Name Ref|LANS, MM3D, OoS, TWWHD, PH, ST, SSHD, BotW, HWDE}} | |||
==Location and Uses== | ==Location and Uses== | ||
==={{ | ==={{LA|-}}=== | ||
{{Stub|LANS}} | |||
{{Main|Sea Lily's Bell}} | |||
The {{Term|LANS|Sea Lily's Bell}} is a {{Term|LANS|Bell}} that is found inside the {{Term|LANS|Key Cavern|link}}. | |||
==={{MM|-}}=== | |||
A small {{Term|MM3D|Bell}} is mounted on a wooden post at the {{Term|MM3D|Laundry Pool|link}}. Above the Bell is a sign which reads,{{Note|In {{MM3D}}, the {{Term|MM3D|Hylian (Language)|link}} inscription on the sign is an abbreviation of the sign's full message. In the original {{MM}}, the inscription is gibberish.}} | |||
{{Transcript| | |||
Those with business, please ring bell. No solicitors. | |||
<div style{{=}}"text-align: right">Curiosity Shop</div> | |||
}} | |||
The {{Term| | The {{Term|MM3D|Bell}} can be rung to draw {{Term|MM3D|Kafei|link}} out from the {{Term|MM3D|Curiosity Shop Back Room|link}}. If {{Term|MM3D|Link}} mails the {{Term|MM3D|Letter to Kafei|link}}, the {{Term|MM3D|Postman}} will ring the bell at 3:05 PM on the {{Term|MM3D|Second Day|link}} in order to hand-deliver the letter to Kafei. {{Term|MM3D|Link}} can also ring the {{Term|MM3D|Bell}} with by attacking it. If {{Term|MM3D|Kafei}} is in the {{Term|MM3D|Curiosity Shop Back Room}}, he will briefly step out and look around, then promptly go back inside and lock the door behind him. Kafei stops responding to the Bell at 1:00 PM on the Second Day if he received the {{Term|MM3D|Letter to Kafei}}, or at the {{Term|MM3D|Dawn of the Final Day|link}} if he did not receive it. | ||
{{Term| | A second, larger {{Term|MM3D|Bell}} appears on the {{Term|MM3D|Stock Pot Inn|link}}'s terrace. Striking it with an attack causes it to sway slightly, but otherwise has no effect. | ||
{| | {{Heading|Hylian Inscriptions}} | ||
{{Game Tabs | |||
|MM= | |||
{{Data Table | |||
|game= MM | |||
|columns= Object, Inscriptions, Transliteration, Meaning | |||
|- | |- | ||
| [[File: | | [[File:MM Bell Model.png|80px]]<br/>{{Term|MM3D|Curiosity Shop|link}} {{Term|MM3D|Bell}} at {{Term|MM3D|Laundry Pool|link}} | ||
| {{Term| | | {{H|OoT|イヘアトサ}}<br/>{{Small|(Flipped vertically)}} | ||
| {{Romanize|イヘアトサ|i he a to sa||3}} | |||
| ''Gibberish'' | |||
|- | |- | ||
| [[File: | | [[File:MM Stock Pot Inn Bell Model.png|160px]]<br/>{{Term|MM3D|Stock Pot Inn|link}} {{Term|MM3D|Bell}} in {{Term|MM3D|East Clock Town|link}} | ||
| {{Term| | | {{H|OoT|エルエ}}<br/>{{Small|(First {{H|OoT|エ}} flipped vertically)}}<br/>{{Small|(Repeated)}} | ||
| {{Romanize|エルエ|e ru e||3}} | |||
| ''Gibberish'' | |||
}} | |||
|MM3D= | |||
{{Data Table | |||
|game= MM | |||
|columns= Object, Inscriptions, Transliteration, Meaning | |||
|- | |- | ||
| [[File: | | [[File:MM3D Bell Model.png|80px]]<br/>{{Term|MM3D|Curiosity Shop|link}} {{Term|MM3D|Bell}} at {{Term|MM3D|Laundry Pool|link}} | ||
| {{Term| | | {{H|OoT2|ヘルナラ シテ<br/>マニヤ}} | ||
| {{Romanize|ベル鳴らして|Beru narashite||3}}<br/>{{Romanize|マニ屋|Mani-ya||3}} | |||
| Ring bell<br/>Curiosity Shop | |||
|- | |- | ||
| [[File: | | [[File:MM3D Stock Pot Inn Bell Model.png|160px]]<br/>{{Term|MM3D|Stock Pot Inn|link}} {{Term|MM3D|Bell}} in {{Term|MM3D|East Clock Town|link}} | ||
| {{H|OoT2|ヘルヘ}}<br/>{{Small|(Second {{H|OoT|ヘ}} flipped vertically)}}<br/>{{Small|(Repeated)}} | |||
| | | {{Romanize|ベルベ|Berube||3}} | ||
| Bell{{List Note|The flipped {{H|OoT2|ヘ}} ({{Romanize|ベ|Be||3}}) character makes it so that parts of the inscription read "bell" when read from left to right or right to left.}} | |||
| {{Term| | }} | ||
| | {{List Notes}} | ||
| | }} | ||
| {{ | |||
| | ==={{OoS|-}}=== | ||
| | {{Stub|OoS}} | ||
| {{ | <!-- Rusty Bell, Pirate's Bell --> | ||
| | |||
| | ==={{TWW|-}}=== | ||
| {{ | {{Stub|TWWHD}} | ||
|- | <!-- The Bell atop the Tower of the Gods --> | ||
| | |||
| {{ | ==={{TMC|-}}=== | ||
{{Stub|TMC}} | |||
<!-- Bell in Hyrule Town --> | |||
|- | |||
==={{TP|-}}=== | |||
| {{Term|ALBW| | {{Stub|TPHD}} | ||
| | <!-- Bell atop the Sanctuary in Kakariko Village (can be rung for a Silver Rupee), the bells that transport the Mechanical Statue in the Temple of Time (can be rung with the Ball & Chain for Red Rupees) --> | ||
| {{Term|ALBW| | ==={{PH|-}}=== | ||
| | {{Stub|PH}} | ||
<!-- Bell Prow, Bell Anchor --> | |||
| {{Term|ALBW| | |||
==={{ST|-}}=== | |||
| | {{Stub|ST}} | ||
| {{Term|ALBW| | <!-- Bells on top of Blocks in the Snow Temple --> | ||
| [ | ==={{SS|-}}=== | ||
| {{Term|ALBW| | {{Stub|SSHD}} | ||
<!-- Bell atop the Knight Academy --> | |||
| | |||
| {{Term|ALBW| | ==={{ALBW|-}}=== | ||
The {{Term|ALBW|Bell}} is a gift from {{Term|ALBW|Irene|link}}. Shortly after {{Term|ALBW|Yuga|link}} begins his attack on {{Term|ALBW|Hyrule Castle|link}}, {{Term|ALBW|Irene}} spots {{Term|ALBW|Link}} walking about {{Term|ALBW|Hyrule|link}} as she flies overhead on her broom. She explains that the {{Term|ALBW|Fortune-Teller|link}} told her to "take care of green" in order to avoid meeting disaster, and that she believes {{Term|ALBW|Link}} to be said "green".<ref>{{Cite|All right. Get this. I had my fortune told this morning, right? And I was told I'd soon be visited by disaster. DISASTER! But if I want to change my future, I should take care of...green. I was like, GREEN?<br/>[...]<br/>And then you came along—and then it all made sense. I've got to take care of you, greenie.|Irene|ALBW}}</ref> Once {{Term|ALBW|Link}} is given the {{Term|ALBW|Bell}}, a new button for ringing it at any time appears permanently on the bottom screen. | |||
| | |||
| {{Term|ALBW| | The {{Term|ALBW|Bell}} is used to summon {{Term|ALBW|Irene}} in order to {{Term|ALBW|Warping|link|display=transport}} {{Term|ALBW|Link}} to any {{Term|ALBW|Weather Vane|link}} that has been activated within the world he currently inhabits. After {{Term|ALBW|Irene}} is kidnapped by {{Term|ALBW|Yuga}} and later awakens as a {{Term|ALBW|Sage|link}}, ringing the {{Term|ALBW|Bell}} will only summon her broom. The {{Term|ALBW|Bell}} has no effect when used indoors. | ||
{{Term|ALBW|Link}} can warp to any of the following locations using the {{Term|ALBW|Bell}}: | |||
{{Data Table Copy | |||
|fromPage= Weather Vane | |||
| | |storedAs= Hyrule Weather Vanes | ||
| {{Term|ALBW| | }} | ||
| | {{Data Table Copy | ||
| | |fromPage= Weather Vane | ||
|storedAs= Lorule Weather Vanes | |||
}} | |||
| | |||
| {{Term|ALBW| | ==={{BotW|-}}=== | ||
{{Stub|BotW}} | |||
| | <!-- Bell in the Bell Tower --> | ||
|- | ==={{TotK|-}}=== | ||
{{Stub|TotK}} | |||
|} | |||
==Other Appearances== | ==Other Appearances== | ||
==={{TFoE|-}}=== | |||
{{Noncanon|Start}} | {{Noncanon|Start}} | ||
[[File:TFoE Bell Sprite.png|left|25px]] | |||
[[File: | In {{TFoE}}, the {{Term|TFoE|Bell}} is an item that can be rung to stop flying enemies for a short period of time, for about eight seconds. It costs 5 {{Plural|TFoE|Rupee|link}} per use. It is obtained in the {{Term|TFoE|Goronu (Stage)|link}} area after defeating {{Term|TFoE|Goronu (Boss)|link}}. | ||
In {{TFoE}}, the {{Term|TFoE|Bell}} is an item that can be rung to stop flying enemies for a short period of time, for about eight seconds. It costs 5 {{Plural|TFoE|Rupee|link | {{Noncanon|End}} | ||
==={{HW|-}}=== | ==={{HW|-}}=== | ||
{{ | {{Noncanon|Start}} | ||
{{ | {{Stub|HWDE}} | ||
| | {{Frameless|[[File:HW Marin Sea Lily's Bell Render.png|thumb|200px|right|{{Term|HW|Marin}} wielding the {{Term|HW|Bell}}]]}} | ||
| | |||
| | |||
| | |||
}} | |||
In {{HW}}, the {{Term|HW|Bell}} is a class of [[Weapons in Hyrule Warriors|Weapon]] used by {{Term|HW|Marin|link}}, which is available through the {{LA|-}} Pack DLC in {{HW|-}} and {{HW|L}}. The {{Term|HW|Bell}} and {{Term|HW|Marin}} are instead unlocked by clearing [[Koholint Island Map/Faron Woods (Hyrule Warriors: Definitive Edition)#Battle F4|Battle F4]] on the [[Koholint Island Map]] in [[Adventure Mode]] in {{HW|DE}}. It is associated with {{Term|HWDE|Element|link|display=Water}}. | In {{HW}}, the {{Term|HW|Bell}} is a class of [[Weapons in Hyrule Warriors|Weapon]] used by {{Term|HW|Marin|link}}, which is available through the {{LA|-}} Pack DLC in {{HW|-}} and {{HW|L}}. The {{Term|HW|Bell}} and {{Term|HW|Marin}} are instead unlocked by clearing [[Koholint Island Map/Faron Woods (Hyrule Warriors: Definitive Edition)#Battle F4|Battle F4]] on the [[Koholint Island Map]] in [[Adventure Mode]] in {{HW|DE}}. It is associated with {{Term|HWDE|Element|link|display=Water}}. | ||
| Line 111: | Line 154: | ||
The default {{Term|HW|Bell}} is the '''Sea Lily Bell''', which is named after and resembles artwork of the [[Instrument of the Sirens#Hyrule Warriors|Sea Lily's Bell]] from {{LA}}. The second form of the {{Term|HW|Bell}} is the '''Wavelet Bell''', followed by the '''Awakening Bell'''. | The default {{Term|HW|Bell}} is the '''Sea Lily Bell''', which is named after and resembles artwork of the [[Instrument of the Sirens#Hyrule Warriors|Sea Lily's Bell]] from {{LA}}. The second form of the {{Term|HW|Bell}} is the '''Wavelet Bell''', followed by the '''Awakening Bell'''. | ||
{| class=" | {| class="wikitable" style="text-align:center; width:100%; max-width:40em" | ||
|+Weapon Power | |+Weapon Power | ||
!colspan="3"|Weapon | !colspan="3"|Weapon | ||
| Line 127: | Line 170: | ||
|- | |- | ||
! Lv.1 | ! Lv.1 | ||
| [[File: | | [[File:HW Sea Lily Bell Icon.png|link=]]<br/>'''Sea Lily Bell''' | ||
| | | {{HW Element|Water}} | ||
| 80 | | 80 | ||
| 88 | | 88 | ||
| Line 137: | Line 180: | ||
|- | |- | ||
! Lv.2 | ! Lv.2 | ||
| [[File: | | [[File:HW Wavelet Bell Icon.png|link=]]<br/>'''Wavelet Bell''' | ||
| | | {{HW Element|Water}} | ||
| 150 | | 150 | ||
| 165 | | 165 | ||
| Line 147: | Line 190: | ||
|- | |- | ||
! Lv.3 | ! Lv.3 | ||
| [[File: | | [[File:HW Awakening Bell Icon.png|link=]]<br/>'''Awakening Bell''' | ||
| | | {{HW Element|Water}} | ||
| 280 | | 280 | ||
| 308 | | 308 | ||
| Line 156: | Line 199: | ||
| 420 | | 420 | ||
|- | |- | ||
! Lv.4 {{Exp Game|HWL | ! Lv.4 {{Exp Game|HWL, HWDE}} | ||
| [[File: | | [[File:HW Awakening Bell Icon.png|link=]]<br/>'''Awakening Bell +''' | ||
| | | {{HW Element|Water}} | ||
| 500 | | 500 | ||
| 550 | | 550 | ||
| Line 167: | Line 210: | ||
|- | |- | ||
! Lv.4+ {{Exp Game|HWDE}} | ! Lv.4+ {{Exp Game|HWDE}} | ||
| [[File: | | [[File:HW Awakening Bell Icon.png|link=]]<br/>'''Awakening Sunbell''' | ||
| | | {{HW Element|Water}}<br/>{{HW Element|Light}} | ||
| 500 | | 500 | ||
| 550 | | 550 | ||
| Line 178: | Line 221: | ||
====Attack Combinations==== | ====Attack Combinations==== | ||
{| class=" | {| class="wikitable" style="text-align:center; width:100%;" | ||
|- | |- | ||
!Attack Pattern | !Attack Pattern | ||
| Line 197: | Line 240: | ||
=====Weak Point Smash===== | =====Weak Point Smash===== | ||
{{Main|Critical Point#Hyrule Warriors | {{Main|Critical Point#Hyrule Warriors}} | ||
Against commander enemies, {{Term|HW|Marin}} swings the {{Term|HW|Bell}} to splash big gushes of water to her sides; one to her right, one to her left, and then one straight up at her enemies. Against {{Plural|HW|Giant Boss|link}}, {{Term|HW|Marin}} swings her {{Term|HW|Bell}} onto the boss before jumping over and riding the {{Term|HW|Wind Fish|link}} as it flies in and rams itself at the {{Term|HW|Giant Boss}}. | Against commander enemies, {{Term|HW|Marin}} swings the {{Term|HW|Bell}} to splash big gushes of water to her sides; one to her right, one to her left, and then one straight up at her enemies. Against {{Plural|HW|Giant Boss|link}}, {{Term|HW|Marin}} swings her {{Term|HW|Bell}} onto the boss before jumping over and riding the {{Term|HW|Wind Fish|link}} as it flies in and rams itself at the {{Term|HW|Giant Boss}}. | ||
| Line 213: | Line 256: | ||
==Nomenclature== | ==Nomenclature== | ||
{{ | {{Nomenclature}} | ||
==Gallery== | ==Gallery== | ||
<gallery> | <gallery> | ||
File:ALBW Link Ringing Bell Model.png|{{Term|ALBW|Link}} ringing the {{Term|ALBW|Bell}} in {{ | File:ALBW Link Ringing Bell Model.png|{{Term|ALBW|Link}} ringing the {{Term|ALBW|Bell}} from {{ALBW|-}} | ||
File:HWS Bell Adventure Mode Icon.png|Adventure Mode Bell icon from {{HW|-}} | File:TotK Bell Model 2.png|The {{Term|TotK|Bell}} in the {{Term|TotK|Bell Tower}} from {{TotK|-}} | ||
File:HWDE Marin Awakening Sunbell.png|Marin wielding the Awakening Sunbell | File:HWS Bell Adventure Mode Icon.png|{{Term|HW|Adventure Mode}} {{Term|HW|Bell}} icon from {{HW|-}} | ||
File:HWDE Marin Awakening Sunbell.png|{{Term|HWDE|Marin}} wielding the {{Term|HWDE|Awakening Sunbell}} from {{HWDE|-}} | |||
</gallery> | </gallery> | ||
==See Also== | ==See Also== | ||
* {{Term|Series|Awakening Bell|link}} | |||
* {{Term|Series|Awakening Bell +|link}} | |||
* {{Term|Series|Awakening Sunbell|link}} | |||
* {{Term|Series|Bell Tower|link}} | |||
* {{Term|Series|Sea Lily's Bell|link}} | * {{Term|Series|Sea Lily's Bell|link}} | ||
* {{Term|Series|Wavelet Bell|link}} | |||
{{Notes}} | |||
{{Ref}} | {{Ref}} | ||
{{Categories | {{Categories | ||
|Instruments, Percussion Instruments, Transportation | |Bells, Instruments, Percussion Instruments, Transportation, Weapons | ||
|items= ALBW, TFoE, HW, HWL, HWDE | |items= LA, LADX, LANS, OoS, PH, ALBW, TFoE, HW, HWL, HWDE | ||
|objects= MM<!-- Uses Series term -->, MM3D<!-- Uses Series term -->, TMC<!-- Uses Series term -->, TP, TPHD, ST<!-- Uses Series term -->, SS<!-- Uses Series term -->, SSHD<!-- Uses Series term -->, ALBW, BotW, TotK | |||
}} | }} | ||
Latest revision as of 09:14, 17 April 2024
Bells are recurring Items and Objects in The Legend of Zelda series.[1][2][3][4][5][name references needed]
Location and Uses
Link's Awakening
The Sea Lily's Bell is a Bell that is found inside the Key Cavern.
Majora's Mask
A small Bell is mounted on a wooden post at the Laundry Pool. Above the Bell is a sign which reads,[note 1]
Those with business, please ring bell. No solicitors.
Curiosity Shop
The Bell can be rung to draw Kafei out from the Curiosity Shop Back Room. If Link mails the Letter to Kafei, the Postman will ring the bell at 3:05 PM on the Second Day in order to hand-deliver the letter to Kafei. Link can also ring the Bell with by attacking it. If Kafei is in the Curiosity Shop Back Room, he will briefly step out and look around, then promptly go back inside and lock the door behind him. Kafei stops responding to the Bell at 1:00 PM on the Second Day if he received the Letter to Kafei, or at the Dawn of the Final Day if he did not receive it.
A second, larger Bell appears on the Stock Pot Inn's terrace. Striking it with an attack causes it to sway slightly, but otherwise has no effect.
Hylian Inscriptions
| Object | |
|---|---|
| Inscriptions | (Flipped vertically) |
| Transliteration | イヘアトサ |
| Meaning | Gibberish |
| Object | |
| Inscriptions | (First (Repeated) |
| Transliteration | エルエ |
| Meaning | Gibberish |


| Object | Inscriptions | Transliteration | Meaning |
|---|---|---|---|
(Flipped vertically) | イヘアトサ | Gibberish | |
(First (Repeated) | エルエ | Gibberish |
| Object | |
|---|---|
| Inscriptions | |
| Transliteration | ベル鳴らして マニ屋 |
| Meaning | Ring bell Curiosity Shop |
| Object | |
| Inscriptions | (Second (Repeated) |
| Transliteration | ベルベ |
| Meaning | Bell[a] |


| Object | Inscriptions | Transliteration | Meaning |
|---|---|---|---|
ベル鳴らして マニ屋 | Ring bell Curiosity Shop | ||
(Second (Repeated) | ベルベ | Bell[a] |
- ↑ The flipped
 (ベ) character makes it so that parts of the inscription read "bell" when read from left to right or right to left.
Oracle of Seasons
The Wind Waker
The Minish Cap
Twilight Princess
Phantom Hourglass
Spirit Tracks
Skyward Sword
A Link Between Worlds
The Bell is a gift from Irene. Shortly after Yuga begins his attack on Hyrule Castle, Irene spots Link walking about Hyrule as she flies overhead on her broom. She explains that the Fortune Teller told her to "take care of green" in order to avoid meeting disaster, and that she believes Link to be said "green".[6] Once Link is given the Bell, a new button for ringing it at any time appears permanently on the bottom screen.
The Bell is used to summon Irene in order to transport Link to any Weather Vane that has been activated within the world he currently inhabits. After Irene is kidnapped by Yuga and later awakens as a Sage, ringing the Bell will only summon her broom. The Bell has no effect when used indoors.
Link can warp to any of the following locations using the Bell:
| Image | Location |
|---|---|
 | |
 | |
 | |
 | |
 | |
 | |
 | |
 | |
 |
| Image | Location |
|---|---|
 | |
 | |
 | |
 | |
 | |
 | |
 | |
 | |
 | |
 | |
 | |
 | |
 |
Breath of the Wild
Tears of the Kingdom
Other Appearances
The Faces of Evil
In The Faces of Evil, the Bell is an item that can be rung to stop flying enemies for a short period of time, for about eight seconds. It costs 5 Rubies per use. It is obtained in the Goronu area after defeating Goronu.
Hyrule Warriors

In Hyrule Warriors, the Bell is a class of Weapon used by Marin, which is available through the Link's Awakening Pack DLC in Hyrule Warriors and Hyrule Warriors Legends. The Bell and Marin are instead unlocked by clearing Battle F4 on the Koholint Island Map in Adventure Mode in Hyrule Warriors: Definitive Edition. It is associated with Water.
Variations
The default Bell is the Sea Lily Bell, which is named after and resembles artwork of the Sea Lily's Bell from Link's Awakening. The second form of the Bell is the Wavelet Bell, followed by the Awakening Bell.
| Weapon | Number of Stars | |||||||
|---|---|---|---|---|---|---|---|---|
| Tier | Icon | Element(s) | 0 | 1 | 2 | 3 | 4 | 5 |
| Lv.1 | Sea Lily Bell |
80 | 88 | 96 | 104 | 112 | 120 | |
| Lv.2 | Wavelet Bell |
150 | 165 | 180 | 195 | 210 | 225 | |
| Lv.3 | Awakening Bell |
280 | 308 | 336 | 364 | 392 | 420 | |
| Lv.4 (HWL | HWDE) | Awakening Bell + |
500 | 550 | 600 | 650 | 700 | 750 | |
| Lv.4+ (HWDE) | Awakening Sunbell |
500 | 550 | 600 | 650 | 700 | 750 | |
Attack Combinations
| Attack Pattern | Effect |
|---|---|
| Y Y Y Y Y Y | |
| Y Y Y Y X | |
| Y Y Y Y Y Y Y | |
| Y Y Y Y Y X |
Weak Point Smash
Against commander enemies, Marin swings the Bell to splash big gushes of water to her sides; one to her right, one to her left, and then one straight up at her enemies. Against Giant Bosses, Marin swings her Bell onto the boss before jumping over and riding the Wind Fish as it flies in and rams itself at the Giant Boss.
Special Attack
Marin gives a small curtsy to her enemies before ringing the Bell to call forth the Wind Fish. She then checks above her to see if it is coming, followed by the Wind Fish heavily dropping down onto the enemies in front of her. Marin gives a small whine in surprise upon the Wind Fish's impact.
Focus Spirit
Upon activation, Marin swings her Bell once and then closes her eyes as she holds a fish to her chest, building the energy within her before jumping with a fist-pump in the air. When deactivating, Marin happily twirls around and starts to hover from the ground while singing the "Ballad of the Wind Fish". A Magic Circle then appears beneath her enemies in front of her as a music note in a bubble starts drawing in nearby enemies. She then ends her song, causing the bubble to burst. Upon depletion, Marin swings the Bell in the air before making one big swing that sends a huge water bubble into the air, which then comes crashing down as a burst of water against her enemies. The impact knocks Marin down in surprise.
Trivia
- Using the Bell during Hyrule Hotfoot will disqualify Link from the race, giving him no awards upon reaching the goal. However, this will not occur if Link uses the Bell while in Lorule.
Nomenclature
| Language | Names | Meanings |
|---|---|---|
Japanese | ベル (Beru)[8] | Bell |
Dutch | Bel[10] | |
FrenchCA | Cloche[14] | |
FrenchEU | Clochette[9] | |
German | Glocke[12] | |
Italian | Campanella[7] | |
Korean | 벨을 (Bel-eul)[13] | |
PortugueseEU | Campainha[10] | |
Russian | Колокольчик (Kolokol'chik)[10] | |
SpanishLA | Campana[11] | |
SpanishEU | Campana[15] | |
| This table was generated using translation pages. To request an addition, please contact a staff member with a reference. | ||
Gallery
-
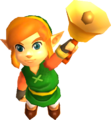
Link ringing the Bell from A Link Between Worlds
-
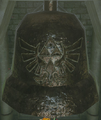
The Bell in the Bell Tower from Tears of the Kingdom
-

Adventure Mode Bell icon from Hyrule Warriors
-

Marin wielding the Awakening Sunbell from Hyrule Warriors: Definitive Edition


See Also
Notes
- ↑ In Majora's Mask 3D, the Hylian inscription on the sign is an abbreviation of the sign's full message. In the original Majora's Mask, the inscription is gibberish.
References
- ↑ The Legend of Zelda: Twilight Princess—PRIMA Official Game Guide, Prima Games, pg. 350
- ↑ (The Legend of Zelda: Twilight Princess HD—Official Digital Strategy Guide by Prima Games, § Dungeon 6: Temple of Time
Task 2: Unlock the Door in the Central Mechanical Platform Chamber) - ↑ Encyclopedia, Dark Horse Books, pg. 116 (ALBW)
- ↑ "Bell" — Inventory (The Faces of Evil)
- ↑ "There's a bell at the top of the tower, and ya gotta ring it real loud. Throw something at it with as much force as you can. Do that, and the bell will answer." — Strade (Tears of the Kingdom)
- ↑ "All right. Get this. I had my fortune told this morning, right? And I was told I'd soon be visited by disaster. DISASTER! But if I want to change my future, I should take care of...green. I was like, GREEN?
[...]
And then you came along—and then it all made sense. I've got to take care of you, greenie." — Irene (A Link Between Worlds) - ↑ "Hai ottenuto la campanella! Suonala per chiamare Irene ogni volta che vuoi!" — N/A (A Link Between Worlds, Italian localization)
- ↑ "ベルをもらった!
鳴らせばいつでもアイリンに会える!" — N/A (A Link Between Worlds) - ↑ "Vous avez obtenu la clochette ! Utilisez-la à tout moment pour appeler Aëline !" — N/A (A Link Between Worlds)
- ↑ 10.0 10.1 10.2 A Link Between Worlds manual, pg. 7
- ↑ "¡Has obtenido la campana!
Hazla sonar para llamar a Airín en cualquier momento." — N/A (A Link Between Worlds) - ↑ "Du hast die Glocke erhalten! Damit kannst du jederzeit Irene rufen!" — N/A (A Link Between Worlds)
- ↑ "벨을 받았다!
울리면 언제든지 아이린을 만날 수 있다!" — N/A (A Link Between Worlds) - ↑ "Vous avez obtenu la cloche! Utilisez-la à tout moment pour appeler Arinne!" — N/A (A Link Between Worlds)
- ↑ "¡Has conseguido la campana!
Hazla sonar para llamar a Airín en cualquier momento." — N/A (A Link Between Worlds)
- Items
- Bells
- Instruments
- Percussion Instruments
- Transportation
- Weapons
- Objects
- Items in Link's Awakening
- Items in Link's Awakening DX
- Items in Link's Awakening (Nintendo Switch)
- Objects in Majora's Mask
- Objects in Majora's Mask 3D
- Items in Oracle of Seasons
- Objects in The Minish Cap
- Objects in Twilight Princess
- Objects in Twilight Princess HD
- Items in Phantom Hourglass
- Objects in Spirit Tracks
- Objects in Skyward Sword
- Objects in Skyward Sword HD
- Items in A Link Between Worlds
- Objects in A Link Between Worlds
- Objects in Breath of the Wild
- Objects in Tears of the Kingdom
- Items in The Faces of Evil
- Items in Hyrule Warriors
- Items in Hyrule Warriors Legends
- Items in Hyrule Warriors: Definitive Edition