Scenario: Difference between revisions

From Zelda Wiki, the Zelda encyclopedia
Jump to navigation Jump to search
Line 251: Line 251:
|-
|-
|[[File:HWAoC Revali, the Rito Warrior.png|313x313px|link= Revali, the Rito Warrior]]<br/>"'''{{Term|HWAoC|Revali, the Rito Warrior|link}}'''"
|[[File:HWAoC Revali, the Rito Warrior.png|313x313px|link= Revali, the Rito Warrior]]<br/>"'''{{Term|HWAoC|Revali, the Rito Warrior|link}}'''"
|[[File:HWAoC Revali the Rito Warrior Map.png|313x313px|link=]]<br/> {{Term|HWAoC|Tabantha Frontier|link}}
|[[File:HWAoC Revali, the Rito Warrior Map.png|313x313px|link=]]<br/> {{Term|HWAoC|Tabantha Frontier|link}}
| "{{Term|HWAoC|The Champion Revali|link}}"<br/>"{{Term|HWAoC|Revali, Ace Archer & Aviator|link}}"
| "{{Term|HWAoC|The Champion Revali|link}}"<br/>"{{Term|HWAoC|Revali, Ace Archer & Aviator|link}}"
|6
|6
|-
|-
|[[File:HWAoC Urbosa, the Gerudo Chief.png|313x313px|link= Urbosa, the Gerudo Chief]]<br/>"'''{{Term|HWAoC|Urbosa, the Gerudo Chief|link}}'''"
|[[File:HWAoC Urbosa, the Gerudo Chief.png|313x313px|link= Urbosa, the Gerudo Chief]]<br/>"'''{{Term|HWAoC|Urbosa, the Gerudo Chief|link}}'''"
|[[File:HWAoC Urbosa, the Gerudo Cheif Map.png|313x313px|link=]]<br/> {{Term|HWAoC|Gerudo Town|link}}
|[[File:HWAoC Urbosa, the Gerudo Chief Map.png|313x313px|link=]]<br/> {{Term|HWAoC|Gerudo Town|link}}
| "{{Term|HWAoC|The Champion Urbosa|link}}"<br/>"{{Term|HWAoC|Intense Battle against the Molduga|link}}"<br/>"{{Term|HWAoC|Master Kohga, Top Banana of the Yiga Clan|link}}"
| "{{Term|HWAoC|The Champion Urbosa|link}}"<br/>"{{Term|HWAoC|Intense Battle against the Molduga|link}}"<br/>"{{Term|HWAoC|Master Kohga, Top Banana of the Yiga Clan|link}}"
|5
|5

Revision as of 11:38, 18 April 2024

Scenarios are recurring story arc battles in The Legend of Zelda series.[1][name references needed]

Overview

Hyrule Warriors

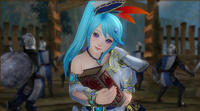
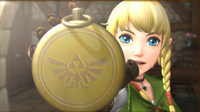
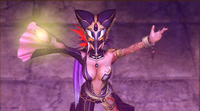
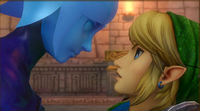
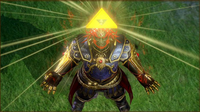
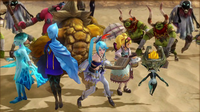
In Hyrule Warriors, Scenarios follow the plot of the War Across the Ages. There are a total of 23 Scenarios across eight arcs in Hyrule Warriors and 32 Scenarios across 10 arcs in Hyrule Warriors Legends and Hyrule Warriors: Definitive Edition. Completing one Scenario will unlock the following Scenario in the story.[2] The Scenarios can be accessed from the Select Scenario menu in Legend Mode or Free Mode. Each Scenario can only be played by certain Warriors assigned to the Scenario.[2] However, in Free Mode, any Warriors can be used to play a Scenario.[3] A Scenario can only be played in Free Mode if it has been previously beaten in Legend Mode. Scenarios can be played in any four Difficulty levels: Easy, Normal, Hard, and Hero.[4] Hero Mode is only unlocked after completing every Scenario in Legend Mode. Every Sub-Weapon can be unlocked in different Scenarios.

Every Scenario will have a Heart Container and a Piece of Heart for a specific Warrior hidden around the Stage.[5] Every Scenario will also have two Gold Skulltulas that can be found after completing certain objectives.[6] The first Gold Skulltula will always be revealed after killing 1,000 Enemies with any Warrior, while the second Gold Skulltula will vary in objectives depending on the Scenario. The second Gold Skulltula will only be able to be defeated in a Scenario after Hero Mode has been unlocked.[citation needed] The objectives needed to make a Gold Skulltula appear in a Scenario will be displayed on the Select Scenario menu or the Check Skulltulas screen in the Warrior Info menu before starting a Scenario.[7]

List of Scenarios

Scenario Arc Stage Theme Game
File:HWDE The Dragon of the Caves.png
"The Dragon of the Caves"
Cia's Tale Eldin Caves "Solidus Cave" All
File:HWDE The Invasion Begins.png
"The Invasion Begins"
Cia's Tale Hyrule Field All

"The Armies of Ruin"
Prologue Hyrule Field All

"The Sheikah Tribesman"
Prologue Eldin Caves "Solidus Cave" All

"The Sorceress of the Woods"
Prologue Faron Woods "In the Greenwood" All

"The Girl in the Green Tunic"
Linkle's Tale Faron Woods "In the Greenwood" Hyrule Warriors Legends / Hyrule Warriors: Definitive Edition

"The Sorceress of the Valley"
Prologue Valley of Seers "Eclipse of the Sun" All
File:HWDE The Demon Lord's Plan.png
"The Demon Lord's Plan"
Linkle's Tale Sealed Grounds "Heart of the End" Hyrule Warriors Legends / Hyrule Warriors: Definitive Edition
File:HWDE The Demon Lord.png
"The Demon Lord"
Cia's Tale Skyloft "Skyloft:SS" All

"Land in the Sky"
Skyward Sword Skyloft "Skyloft:SS" All

"Sealed Ambition"
Skyward Sword Sealed Grounds "Heart of the End" All

"Land of Myth"
Ocarina of Time Death Mountain (Hyrule Warriors) "Hammer of Stones" All

"The Water Temple"
Ocarina of Time Lake Hylia "Sequence of Drops" All
File:HWDE Powers Collide.png
"Powers Collide"
Linkle's Tale Lake Hylia "Sequence of Drops" Hyrule Warriors Legends / Hyrule Warriors: Definitive Edition
File:HWDE The Usurper King.png
"The Usurper King"
Cia's Tale Palace of Twilight "Remnant of the Twilight" All

"Land of Twilight"
Twilight Princess Twilight Field "Hyrule Field:TP" All

"The Shadow King"
Twilight Princess Palace of Twilight "Remnant of the Twilight" All

"The Sacred Sword"
Epilogue Temple of the Sacred Sword "Silent Guardians" All
File:HWDE Her True Self.png
"Her True Self"
Linkle's Tale Palace of Twilight "Remnant of the Twilight" Hyrule Warriors Legends / Hyrule Warriors: Definitive Edition

"A War of Spirit"
Epilogue Temple of Souls "Psychostorm" All
File:HWDE Darkness Falls.png
"Darkness Falls"
Cia's Tale Valley of Seers "Eclipse of the Sun" All

"Shining Beacon"
Epilogue Valley of Seers "Eclipse of the Moon" All

"Ganondorf's Return"
Ganondorf Gerudo Desert "Sandstream" All
File:HWDE March of the Demon King.png
"March of the Demon King"
Ganondorf Valley of Seers "Eclipse of the Sun" All

"Battle of the Triforce"
Ganondorf Hyrule Field All

"Enduring Resolve"
Grand Finale Gerudo Desert "Sandstream" All

"Liberation of the Triforce"
Grand Finale Ganon's Tower "Eclipse of the World" All
File:HWDE The Other Hero.png
"The Other Hero"
Linkle's Tale Ganon's Tower Hyrule Warriors Legends / Hyrule Warriors: Definitive Edition
File:HWDE A New Disturbance.png
"A New Disturbance"
Wind Waker Forsaken Fortress Hyrule Warriors Legends / Hyrule Warriors: Definitive Edition
File:HWDE The Search for Cia.png
"The Search for Cia"
Wind Waker Gerudo Desert "Sandstream" Hyrule Warriors Legends / Hyrule Warriors: Definitive Edition
File:HWDE Reclaiming the Darkness.png
"Reclaiming the Darkness"
Wind Waker Temple of Souls Hyrule Warriors Legends / Hyrule Warriors: Definitive Edition
File:HWDE Watchers of the Triforce.png
"Watchers of the Triforce"
Wind Waker Wind and Earth Temples Hyrule Warriors Legends / Hyrule Warriors: Definitive Edition

Hyrule Warriors: Age of Calamity


List of Scenarios

Scenario Stage Theme Recommended Level

"The Battle of Hyrule Field"

Hyrule Field
"The Battle of Hyrule Field (Theme)"
"Powerful Foe"
1

"Road to the Ancient Lab"

Breach of Demise
"Hold the Line"
"Guardian Menace"
3
link = Mipha, the Zora Princess
"Mipha, the Zora Princess"

Zora's Domain
"The Champion Mipha"
"Powerful Foe"
"Divine Beast Vah Ruta Looms"
6

"Daruk, the Goron Hero"

Death Mountain
"The Champion Daruk"
"Intense Battle against the Talus"
"Divine Beast Vah Rudania Looms"
5

"Revali, the Rito Warrior"

Tabantha Frontier
"The Champion Revali"
"Revali, Ace Archer & Aviator"
6

"Urbosa, the Gerudo Chief"

Gerudo Town
"The Champion Urbosa"
"Intense Battle against the Molduga"
"Master Kohga, Top Banana of the Yiga Clan"
5

"The Yiga Clan Attacks!"

Hyrule Outpost
"Blades of the Yiga (Theme)"
"Intense Battle against the Hinox"
"Sooga, Right Hand of the Inverted Eye"
16

"Freeing Korok Forest"

Great Hyrule Forest
"Divine Beast Vah Medoh Looms"
"Searching the Lost Woods"
"Intense Battle against the Hinox"
"The Knight Who Seals the Darkness"
"Astor, Prophet of Doom"
22

"The Road Home, Besieged"

Crenel Peak
"Push Forward"
"Intense Battle against the Talus"
23

"Akkala Tower"

Akkala Citadel
"Battle of Liberation"
"Sooga, Right Hand of the Inverted Eye"
25

"Destroy the Yiga Clan!"

Yiga Clan Hideout
"Divine Beast Vah Naboris Looms"
"Blades of the Yiga (Theme)"
"Master Kohga, Top Banana of the Yiga Clan"
33

"When Courage Fails"
File:HWAoC When Courage Fails Map.png
Damel Forest
"Hold the Line"
"Intense Battle against the Hinox"
35

"Calamity Strikes"

Hyrule Castle
"The Calamity's Revival"
"The Calamity's Revival - Fierce"
38

"Water and Fire"

Lanayru Wetlands
"Worlds Converge – Sidon & Yunobo"
"In Dire Need"
"Intense Battle against the Talus"
"Divine Beast Vah Rudania Looms"
41

"Air and Lightning"

Hyrule Ridge
"Worlds Converge – Riju & Teba"
"Intense Battle against the Hinox"
"In Dire Need"
"Divine Beast Vah Medoh Looms"
40

"Relentless as a Waterfall"
File:HWAoC Relentless as a Waterfall Map.png
Akkala Citadel
"Divine Beast Vah Ruta Looms"
"Rescue Operation"
"Intense Battle against the Hinox"
"Crescendo"
43

"Each Step Like Thunder"

Fort Hateno
"Divine Beast Vah Naboris Looms"
"Battle of Liberation"
"With Power Awakened"
"Powerful Foe"
47

"The Great Plateau"

Great Plateau
"Rescue Operation"
"Intense Battle against the Hinox"
"In Dire Need"
49

"All Hyrule, United"

Hyrule Field
"Push Forward"
"Intense Battle against the Hinox"
"Intense Battle against the Talus"
"Mortal Struggle beneath a Blood Moon"
"The Calamity's Return - Fierce"
54

"The Future of Hyrule"

Hyrule Castle
"Final Battle"
"Intense Battle against the Hinox"
"Astor, Prophet of Doom"
"Harbinger Ganon, Hatred and Malice Incarnate"
"Decisive Fight against Calamity Ganon"
57

"EX To Zelda's Side"
File:HWAoC EX To Zelda's Side Map.png
Mount Daphnes
"The Time-Traveling Guardian's Plight"
"Intense Battle against the Hinox"
"Harbinger Ganon, Hatred and Malice Incarnate"
40

"EX Battle of Goponga Village"
File:HWAoC EX Battle of Goponga Village Map.png
Goponga Village
"Assault"
"Intense Battle against the Hinox"
"In Dire Need"
44

"EX Battle for Kakariko Village"
File:HWAoC EX Battle for Kakariko Village Map.png
Kakariko Village
"The Battle of Kakariko Village"
"Sooga, Right Hand of the Inverted Eye"
44

"EX Searching Hyrule Forest"
File:HWAoC EX Searching Hyrule Forest Map.png
Great Hyrule Forest
"Searching the Lost Woods" 44

"EX Liberate the Ancient Lab"
File:HWAoC EX Liberate the Ancient Lab Map.png
Breach of Demise
"The Champion Urbosa" 44

"EX The Princess and the King"
File:HWAoC EX The Princess and the King Map.png
Lanayru Road
"Assault" 53

"EX The Yiga Clan's Retreat"
File:HWAoC EX The Yiga Clan's Retreat Map.png
Crenel Peak
"The Calamity's Revival"
"Sooga, Right Hand of the Inverted Eye"
53

"EX Guardian of Remembrance"
File:HWAoC EX Guardian of Remembrance Map.png
Mount Daphnes
"Push Forward"
"Harbinger Ganon, Hatred and Malice Incarnate"
"Intense Battle against the Hinox"
"Astor, Prophet of Doom"
"Crescendo"
58

Nomenclature

Names in Other Regions
LanguageNames
This table was generated using translation pages.
To request an addition, please contact a staff member with a reference.

See Also

References

  1. Hyrule Warriors Legends—Collector's Edition Guide, Prima Games, pg. 4
  2. 2.0 2.1 Hyrule Warriors Legends—Collector's Edition Guide, Prima Games, pg. 4
  3. "Replay any scenario with any unlocked warrior." — Select Mode (Hyrule Warriors: Definitive Edition)
  4. "X Button Change Difficulty" — Select Scenario (Hyrule Warriors: Definitive Edition)
  5. "You can check information on heart containers and pieces of heart hidden on a given battlefield from the Select Scenario screen. However, each will only appear when using a specific warrior." — Tutorial (Hyrule Warriors: Definitive Edition)
  6. "Gold Skulltulas will only appear within the spider's web on the map once you fulfill certain battle conditions. They flee after a set period of time has passed, so move quickly!" — Tutorial (Hyrule Warriors: Definitive Edition)
  7. "You can check information on Gold Skulltulas hidden on a given battlefield from the Select Scenario screen. However, some only appear when using specific warriors or weapons." — Tutorial (Hyrule Warriors: Definitive Edition)