Sub-Boss: Difference between revisions
TriforceTony (talk | contribs) No edit summary |
mNo edit summary |
||
| (42 intermediate revisions by 9 users not shown) | |||
| Line 1: | Line 1: | ||
{{Improve}} | {{Improve}} | ||
{{Term/Store|Sub-Boss|Sub-Bosses|Series, SS, BotW|plural}},{{Exp Game|SS | {{Term/Store|Sub-Boss|Sub-Bosses|Series, SS, BotW, TotK|plural}},{{Exp Game|SS, BotW, TotK}}<ref>{{Cite Guide|quote= |game= SS |publisher= Prima |page= 79}}</ref><ref>{{Cite Guide|quote= |game= BotW |publisher= Piggyback |page= 328}}</ref><ref>{{Cite Guide|quote= |game= TotK |guide= Piggyback |page= 480}}</ref> also known as {{Term/Store|Guardian|Guardians|LA|plural}},{{Exp Game|LA}}<ref>{{Cite Guide|quote= |game= LA |publisher= Nintendo |page= 102}}</ref>{{Name Ref|LANS}} {{Term/Store|Middle Boss|Middle Bosses|OoT, MM, TPHD|plural}},{{Exp Game|OoT, MM, TP}}<ref>{{Cite Track|author= Koji Kondo |track= Middle Boss Battle |discography= {{Term|OoT3D|The Legend of Zelda: Ocarina of Time 3D Official Soundtrack|link}} |publisher= Nintendo of America |year= 2011 |format= CD}}</ref><ref>{{Cite Track|author= Toru Minegishi |track= Middle Boss Battle |discography= {{Term|MM|The Legend of Zelda: Majora's Mask Official Soundtrack|link}} |publisher= Club Nintendo |year= 2013 |format= CD}}</ref><ref>{{Cite Track|author= n.a. |track= Middle Boss Battle #1 |discography= {{Term|TPHD|The Legend of Zelda: Twilight Princess HD Original Soundtrack|link}} |publisher= Symphony No.5 |year= 2016 |format= CD}}</ref> {{Term/Store|Miniboss|Minibosses|OoS, TWW, TWWHD, CoH|plural}},{{Exp Game|OoS, OoA, TWW, CoH}}<ref>{{Cite Guide|quote= |game= OoS|guide= Nintendo|page= 44}}</ref><ref>{{Cite Guide|quote= |game= OoA|guide= Nintendo|page= 79}}</ref><ref>{{Cite Book|quote= |book= E |publisher= |page= 212 {{Exp Game|TWW, TWWHD}}}}</ref><ref>{{Cite|DEFEAT THE MINIBOSS|N/A|CoH}}</ref> and {{Term/Store|Mini-Boss|Mini-Bosses|MM3D, TFH|plural}},{{Exp Game|TFH}}<ref>{{Cite eGuide|quote= {{Small|Monsters and Enemies}}<br/>Mini-Bosses |game= MM3D |publisher= Prima |section= Mini-Bosses}}</ref><ref>{{Cite Guide|quote= |game= TFH |publisher= Prima |page= 20}}</ref> are more difficult variants of enemies usually encountered in {{Plural|Series|Dungeon|link}}. | ||
==Characteristics== | ==Characteristics== | ||
| Line 37: | Line 37: | ||
==={{ALttP|-}}=== | ==={{ALttP|-}}=== | ||
{{ImageCaption | {{ImageCaption | ||
|image= File: | |image= File:ALttP Ball and Chain Trooper Artwork.png | ||
|size= 150px | |size= 150px | ||
|align= right | |align= right | ||
| Line 45: | Line 45: | ||
*{{Term|ALttP|Ball and Chain Soldier|link}} | *{{Term|ALttP|Ball and Chain Soldier|link}} | ||
{{Plural|ALttP|Boss}} returning as {{Plural|ALttP|Sub-Boss}}: | {{Plural|ALttP|Boss}} returning as {{Plural|ALttP|Sub-Boss}}: | ||
*{{Plural|ALttP|Armos Knight|link}} {{Small|''({{Term|ALttP|Ganon's Tower | *{{Plural|ALttP|Armos Knight|link}} {{Small|''({{Term|ALttP|Ganon's Tower|link}})''}} | ||
*{{Plural|ALttP|Lanmola|link}} {{Small|''({{Term|ALttP|Ganon's Tower | *{{Plural|ALttP|Lanmola|link}} {{Small|''({{Term|ALttP|Ganon's Tower}})''}} | ||
*{{Term|ALttP|Moldorm (Boss)|link}} {{Small|''({{Term|ALttP|Ganon's Tower | *{{Term|ALttP|Moldorm (Boss)|link}} {{Small|''({{Term|ALttP|Ganon's Tower}})''}} | ||
*{{ALttP&FS|-}}: | *{{ALttP&FS|-}}: | ||
**{{Term|ALttP|Helmasaur King|link}} {{Small|''({{Term|ALttP|Palace of the Four Sword|link}})''}} | **{{Term|ALttP|Helmasaur King|link}} {{Small|''({{Term|ALttP|Palace of the Four Sword|link}})''}} | ||
| Line 58: | Line 58: | ||
==={{LA|-}}=== | ==={{LA|-}}=== | ||
{{ImageCaption | {{ImageCaption | ||
|image= File:LADX Grim Creeper Sprite. | |image= File:LADX Grim Creeper Sprite.png | ||
|size= 140px | |size= 140px | ||
|align= right | |align= right | ||
|caption= {{Term|LA|Grim Creeper | |caption= {{Term|LA|Grim Creeper}} | ||
|captionalign= center | |captionalign= center | ||
}} | }} | ||
| Line 95: | Line 95: | ||
*{{Plural|OoT3D|Stalfos|link}} {{Small|''({{Term|OoT3D|Forest Temple|link}})''}} | *{{Plural|OoT3D|Stalfos|link}} {{Small|''({{Term|OoT3D|Forest Temple|link}})''}} | ||
*{{Term|OoT3D|Meg|link}} {{Small|''({{Term|OoT3D|Forest Temple}})''}} | *{{Term|OoT3D|Meg|link}} {{Small|''({{Term|OoT3D|Forest Temple}})''}} | ||
*{{Term|OoT3D|Flare Dancer|link}} {{Small|''({{Term|OoT3D|Fire Temple | *{{Term|OoT3D|Flare Dancer|link}} {{Small|''({{Term|OoT3D|Fire Temple|link}})''}} | ||
*{{Term|OoT3D|White Wolfos|link}} {{Small|''({{Term|OoT3D|Ice Cavern | *{{Term|OoT3D|White Wolfos|link}} {{Small|''({{Term|OoT3D|Ice Cavern|link}})''}} | ||
*{{Term|OoT3D|Dark Link|link}} {{Small|''({{Term|OoT3D|Water Temple | *{{Term|OoT3D|Dark Link|link}} {{Small|''({{Term|OoT3D|Water Temple|link}})''}} | ||
*{{Term|OoT3D|Dead Hand|link}} {{Small|''({{Term|OoT3D|Bottom of the Well|link}}, {{Term|OoT3D|Shadow Temple|link}})''}} | *{{Term|OoT3D|Dead Hand|link}} {{Small|''({{Term|OoT3D|Bottom of the Well|link}}, {{Term|OoT3D|Shadow Temple|link}})''}} | ||
*{{Plural|OoT3D|Gerudo Thief|link}} {{Small|''({{Term|OoT3D|Gerudo's Fortress|link}})''}} | *{{Plural|OoT3D|Gerudo Thief|link}} {{Small|''({{Term|OoT3D|Gerudo's Fortress|link}})''}} | ||
*{{Term|OoT3D|Iron Knuckle (Boss)|link}} {{Small|''({{Term|OoT3D|Spirit Temple|link}}, {{Term|OoT3D|Gerudo Training Ground|link}}, {{Term|OoT3D|Ganon's Castle|link}})''}} | *{{Term|OoT3D|Iron Knuckle (Boss)|link}} {{Small|''({{Term|OoT3D|Spirit Temple|link}}, {{Term|OoT3D|Gerudo's Training Ground|link}}, {{Term|OoT3D|Ganon's Castle|link}})''}} | ||
{{clear}} | {{clear}} | ||
---- | ---- | ||
| Line 106: | Line 106: | ||
==={{MM|-}}=== | ==={{MM|-}}=== | ||
{{ImageCaption | {{ImageCaption | ||
|image= File:MM Igos du Ikana.png | |image= File:MM Igos du Ikana Artwork.png | ||
|size= 150px | |size= 150px | ||
|align= right | |align= right | ||
| Line 113: | Line 113: | ||
}} | }} | ||
*{{Plural|MM3D|Dynalfos|link}} {{Small|''({{Term|MM3D|Woodfall Temple|link}}, {{Term|MM3D|Secret Shrine|link}})''}} | *{{Plural|MM3D|Dynalfos|link}} {{Small|''({{Term|MM3D|Woodfall Temple|link}}, {{Term|MM3D|Secret Shrine|link}})''}} | ||
*{{Term|MM3D|Gekko|link}} & {{Term|MM3D|Snapper ( | *{{Term|MM3D|Gekko|link}} & {{Term|MM3D|Snapper (Turtle)|link}} {{Small|''({{Term|MM3D|Woodfall Temple}})''}} | ||
*{{Term|MM3D|Wizzrobe|link}} {{Small|''({{Term|MM3D|Snowhead Temple|link}}, {{Term|MM3D|Ancient Castle of Ikana|link}}, {{Term|MM3D|Stone Tower Temple|link}}, {{Term|MM3D|Secret Shrine}})''}} | *{{Term|MM3D|Wizzrobe|link}} {{Small|''({{Term|MM3D|Snowhead Temple|link}}, {{Term|MM3D|Ancient Castle of Ikana|link}}, {{Term|MM3D|Stone Tower Temple|link}}, {{Term|MM3D|Secret Shrine}})''}} | ||
*{{Term|MM3D|Gerudo Pirate (Miniboss)|link}} {{Small|''({{Term|MM3D|Pirates' Fortress|link}})''}} | *{{Term|MM3D|Gerudo Pirate (Miniboss)|link}} {{Small|''({{Term|MM3D|Pirates' Fortress|link}})''}} | ||
| Line 150: | Line 150: | ||
==={{OoS|-}}=== | ==={{OoS|-}}=== | ||
{{ImageCaption | {{ImageCaption | ||
|image= File:Agunima.png | |image= File:OoS Agunima Sprite.png | ||
|size= 144px | |size= 144px | ||
|align= right | |align= right | ||
| Line 180: | Line 180: | ||
*{{Term|TWWHD|Mothula|link}} {{Small|''({{Term|TWWHD|Forbidden Woods|link}})''}} | *{{Term|TWWHD|Mothula|link}} {{Small|''({{Term|TWWHD|Forbidden Woods|link}})''}} | ||
*{{Term|TWWHD|Silver Darknut|link}} {{Small|''({{Term|TWWHD|Tower of the Gods|link}})''}} | *{{Term|TWWHD|Silver Darknut|link}} {{Small|''({{Term|TWWHD|Tower of the Gods|link}})''}} | ||
*{{Term|TWWHD|Phantom Ganon|link}} {{Small|''({{Term|TWWHD|Forsaken Fortress}}, {{Term|TWWHD|Ganon's | *{{Term|TWWHD|Phantom Ganon|link}} {{Small|''({{Term|TWWHD|Forsaken Fortress}}, {{Term|TWWHD|Ganon's Castle|link}})''}} | ||
*{{Plural|TWWHD|Stalfos|link}} {{Small|''({{Term|TWWHD|Earth Temple | *{{Plural|TWWHD|Stalfos|link}} {{Small|''({{Term|TWWHD|Earth Temple|link}})''}} | ||
*{{Term|TWWHD|Wizzrobe|link}} {{Small|''({{Term|TWWHD|Wind Temple|link}})''}} | *{{Term|TWWHD|Wizzrobe|link}} {{Small|''({{Term|TWWHD|Wind Temple|link}})''}} | ||
*{{Term|TWWHD|Mighty Darknut|link}} {{Small|''({{Term|TWWHD|Hyrule Castle|link}})''}} | *{{Term|TWWHD|Mighty Darknut|link}} {{Small|''({{Term|TWWHD|Hyrule Castle|link}})''}} | ||
| Line 187: | Line 187: | ||
*{{Term|TWWHD|Big Octo|link}} {{Small|''({{Term|TWWHD|Great Sea}})''}} | *{{Term|TWWHD|Big Octo|link}} {{Small|''({{Term|TWWHD|Great Sea}})''}} | ||
{{Plural|TWWHD|Boss}} returning as {{Plural|TWWHD|Sub-Boss}}: | {{Plural|TWWHD|Boss}} returning as {{Plural|TWWHD|Sub-Boss}}: | ||
*{{Term|TWWHD|Gohma|link}} {{Small|''({{Term|TWWHD|Ganon's | *{{Term|TWWHD|Gohma|link}} {{Small|''({{Term|TWWHD|Ganon's Castle}})''}} | ||
*{{Term|TWWHD|Kalle Demos|link}} {{Small|''({{Term|TWWHD|Ganon's | *{{Term|TWWHD|Kalle Demos|link}} {{Small|''({{Term|TWWHD|Ganon's Castle}})''}} | ||
*{{Term|TWWHD|Jalhalla|link}} {{Small|''({{Term|TWWHD|Ganon's | *{{Term|TWWHD|Jalhalla|link}} {{Small|''({{Term|TWWHD|Ganon's Castle}})''}} | ||
*{{Term|TWWHD|Molgera|link}} {{Small|''({{Term|TWWHD|Ganon's | *{{Term|TWWHD|Molgera|link}} {{Small|''({{Term|TWWHD|Ganon's Castle}})''}} | ||
{{clear}} | {{clear}} | ||
---- | ---- | ||
| Line 196: | Line 196: | ||
==={{FSA|-}}=== | ==={{FSA|-}}=== | ||
{{ImageCaption | {{ImageCaption | ||
|image= File: | |image= File:FSA Big Dark Stalfos Sprite.png | ||
|size= 88px | |size= 88px | ||
|align= right | |align= right | ||
| Line 215: | Line 215: | ||
==={{TMC|-}}=== | ==={{TMC|-}}=== | ||
{{ImageCaption | {{ImageCaption | ||
|image= File:TMC Spiny Chuchu | |image= File:TMC Spiny Chuchu Sprite 2.png | ||
|size= 96px | |size= 96px | ||
|align= right | |align= right | ||
| Line 225: | Line 225: | ||
*{{Term|TMC|Darknut|link}} {{Small|''({{Term|TMC|Fortress of Winds|link}})''}} | *{{Term|TMC|Darknut|link}} {{Small|''({{Term|TMC|Fortress of Winds|link}})''}} | ||
*{{Term|TMC|Big Blue Chuchu|link}} {{Small|''({{Term|TMC|Temple of Droplets}})''}} | *{{Term|TMC|Big Blue Chuchu|link}} {{Small|''({{Term|TMC|Temple of Droplets}})''}} | ||
*{{Term|TMC|Red Darknut|link}} {{Small|''({{Term|TMC|Palace of Winds | *{{Term|TMC|Red Darknut|link}} {{Small|''({{Term|TMC|Palace of Winds|link}}, {{Term|TMC|Dark Hyrule Castle|link}})''}} | ||
*{{Term|TMC|Black Knight|link}} {{Small|''({{Term|TMC|Dark Hyrule Castle}})''}} | *{{Term|TMC|Black Knight|link}} {{Small|''({{Term|TMC|Dark Hyrule Castle}})''}} | ||
{{clear}} | {{clear}} | ||
| Line 239: | Line 239: | ||
}} | }} | ||
*{{Term|TPHD|Ook|link}} {{Small|''({{Term|TPHD|Forest Temple|link}})''}} | *{{Term|TPHD|Ook|link}} {{Small|''({{Term|TPHD|Forest Temple|link}})''}} | ||
*{{Term|TPHD|King Bulblin|link}} & {{Term|TPHD|Lord Bullbo|link}} {{Small|''({{Term|TPHD|Bridge of Eldin|link}}, {{Term|TPHD|Great Bridge | *{{Term|TPHD|King Bulblin|link}} & {{Term|TPHD|Lord Bullbo|link}} {{Small|''({{Term|TPHD|Bridge of Eldin|link}}, {{Term|TPHD|Great Hylian Bridge|link}})''}} | ||
*{{Term|TPHD|Dangoro|link}} {{Small|''({{Term|TPHD|Goron Mines|link}})''}} | *{{Term|TPHD|Dangoro|link}} {{Small|''({{Term|TPHD|Goron Mines|link}})''}} | ||
*{{Term|TPHD|Twilit Carrier Kargarok|link}} {{Small|''({{Term|TPHD|Lake Hylia|link}})''}} | *{{Term|TPHD|Twilit Carrier Kargarok|link}} {{Small|''({{Term|TPHD|Lake Hylia|link}})''}} | ||
| Line 246: | Line 246: | ||
*{{Term|TPHD|Skull Kid|link}} & {{Plural|TPHD|Puppet|link}} {{Small|''({{Term|TPHD|Sacred Grove|link}})''}} | *{{Term|TPHD|Skull Kid|link}} & {{Plural|TPHD|Puppet|link}} {{Small|''({{Term|TPHD|Sacred Grove|link}})''}} | ||
*{{Term|TPHD|King Bulblin}} {{Small|''({{Term|TPHD|Gerudo Desert|link}}, {{Term|TPHD|Hyrule Castle|link}})''}} | *{{Term|TPHD|King Bulblin}} {{Small|''({{Term|TPHD|Gerudo Desert|link}}, {{Term|TPHD|Hyrule Castle|link}})''}} | ||
*{{Term|TPHD|Death Sword|link}} {{Small|''({{Term|TPHD|Arbiter's Grounds ( | *{{Term|TPHD|Death Sword|link}} {{Small|''({{Term|TPHD|Arbiter's Grounds (Dungeon)|link}})''}} | ||
*{{Term|TPHD|Darkhammer|link}} {{Small|''({{Term|TPHD|Snowpeak Ruins|link}})''}} | *{{Term|TPHD|Darkhammer|link}} {{Small|''({{Term|TPHD|Snowpeak Ruins|link}})''}} | ||
*{{Term|TPHD|Darknut|link}} {{Small|''({{Term|TPHD|Temple of Time ( | *{{Term|TPHD|Darknut|link}} {{Small|''({{Term|TPHD|Temple of Time (Dungeon)|link}})''}} | ||
*{{Term|TPHD|Aeralfos|link}} {{Small|''({{Term|TPHD|City in the Sky|link}})''}} | *{{Term|TPHD|Aeralfos|link}} {{Small|''({{Term|TPHD|City in the Sky|link}})''}} | ||
*{{Term|TPHD|Phantom Zant|link}} {{Small|''({{Term|TPHD|Palace of Twilight|link}})''}} | *{{Term|TPHD|Phantom Zant|link}} {{Small|''({{Term|TPHD|Palace of Twilight|link}})''}} | ||
| Line 256: | Line 256: | ||
==={{PH|-}}=== | ==={{PH|-}}=== | ||
{{ImageCaption | {{ImageCaption | ||
|image= File:Massive Eye.png | |image= File:PH Massive Eye Model.png | ||
|size= 200px | |size= 200px | ||
|align= right | |align= right | ||
| Line 282: | Line 282: | ||
*{{Term|ST|Geozard Chief|link}} {{Small|''({{Term|ST|Tower of Spirits|link}})''}} | *{{Term|ST|Geozard Chief|link}} {{Small|''({{Term|ST|Tower of Spirits|link}})''}} | ||
*{{Term|ST|Big Blin|link}} {{Small|''({{Term|ST|Ocean Realm|link}})''}} | *{{Term|ST|Big Blin|link}} {{Small|''({{Term|ST|Ocean Realm|link}})''}} | ||
*{{Term|ST|Snapper | *{{Term|ST|Snapper|link}} {{Small|''({{Term|ST|Ocean Temple|link}})''}} | ||
*{{Term|ST|Heatoise|link}} {{Small|''({{Term|ST|Fire Temple | *{{Term|ST|Heatoise|link}} {{Small|''({{Term|ST|Fire Temple|link}})''}} | ||
*{{Plural|ST|Stalfos Warrior|link}} {{Small|''({{Term|ST|Sand Temple|link}})''}} | *{{Plural|ST|Stalfos Warrior|link}} {{Small|''({{Term|ST|Sand Temple|link}})''}} | ||
*{{Term|ST|Dark Link|link}} {{Small|''({{Term|ST|Take 'Em All On!|link}})''}} | *{{Term|ST|Dark Link|link}} {{Small|''({{Term|ST|Take 'Em All On!|link}})''}} | ||
| Line 291: | Line 291: | ||
==={{SS|-}}=== | ==={{SS|-}}=== | ||
{{ImageCaption | {{ImageCaption | ||
|image= File:Scervo.png | |image= File:SS LD-002G Scervo Render.png | ||
|size= 200px | |size= 200px | ||
|align= right | |align= right | ||
| Line 298: | Line 298: | ||
}} | }} | ||
*{{Term|SS|Stalfos|link}} {{Small|''({{Term|SS|Skyview Temple|link}})''}} | *{{Term|SS|Stalfos|link}} {{Small|''({{Term|SS|Skyview Temple|link}})''}} | ||
*{{Term|SS|Lizalfos|link}} {{Small|''({{Term|SS|Earth Temple | *{{Term|SS|Lizalfos|link}} {{Small|''({{Term|SS|Earth Temple|link}})''}} | ||
*{{Term|SS|Stalmaster|link}} {{Small|''({{Term|SS|Ancient Cistern|link}}, {{Term|SS|Sky Keep|link}})''}} | *{{Term|SS|Stalmaster|link}} {{Small|''({{Term|SS|Ancient Cistern|link}}, {{Term|SS|Sky Keep|link}})''}} | ||
*{{Term|SS|LD-002G Scervo|link}} {{Small|''({{Term|SS|Sandship|link}})''}} | *{{Term|SS|LD-002G Scervo|link}} {{Small|''({{Term|SS|Sandship|link}})''}} | ||
*{{Term|SS|Dark Lizalfos|link}} {{Small|''({{Term|SS|Fire Sanctuary ( | *{{Term|SS|Dark Lizalfos|link}} {{Small|''({{Term|SS|Fire Sanctuary (Dungeon)|link}})''}} | ||
*{{Term|SS|Magmanos|link}} {{Small|''({{Term|SS|Fire Sanctuary ( | *{{Term|SS|Magmanos|link}} {{Small|''({{Term|SS|Fire Sanctuary (Dungeon)}})''}} | ||
*{{Term|SS|Moldorm|link}} {{Small|''({{Term|SS|Fire Sanctuary ( | *{{Term|SS|Moldorm|link}} {{Small|''({{Term|SS|Fire Sanctuary (Dungeon)}}, {{Term|SS|Sky Keep}})''}} | ||
*{{Term|SS|LD-003D Dreadfuse|link}} {{Small|''({{Term|SS|Sky Keep}})''}} | *{{Term|SS|LD-003D Dreadfuse|link}} {{Small|''({{Term|SS|Sky Keep}})''}} | ||
*{{Term|SS|Metal Shield Moblin|link}} {{Small|''({{Term|SS|Sky Keep}})''}} | *{{Term|SS|Metal Shield Moblin|link}} {{Small|''({{Term|SS|Sky Keep}})''}} | ||
| Line 322: | Line 322: | ||
*{{Plural|ALBW|Red Stalfos|link}} {{Small|''({{Term|ALBW|Tower of Hera|link}})''}} | *{{Plural|ALBW|Red Stalfos|link}} {{Small|''({{Term|ALBW|Tower of Hera|link}})''}} | ||
*{{Plural|ALBW|Heedle|link}} {{Small|''({{Term|ALBW|House of Gales|link}})''}} | *{{Plural|ALBW|Heedle|link}} {{Small|''({{Term|ALBW|House of Gales|link}})''}} | ||
*{{Plural|ALBW|Green Goriya|link}} & {{Term|ALBW|Red Goriya|link}} {{Small|''({{Term|ALBW|Dark Palace | *{{Plural|ALBW|Green Goriya|link}} & {{Term|ALBW|Red Goriya|link}} {{Small|''({{Term|ALBW|Dark Palace|link}})''}} | ||
*{{Term|ALBW|Gigabari|link}} {{Small|''({{Term|ALBW|Swamp Palace|link}}, {{Term|ALBW|Lorule Castle|link}})''}} | *{{Term|ALBW|Gigabari|link}} {{Small|''({{Term|ALBW|Swamp Palace|link}}, {{Term|ALBW|Lorule Castle|link}})''}} | ||
*{{Plural|ALBW|Gibdo|link}} & {{Plural|ALBW|Purple Mini-Moldorm|link}} {{Small|''({{Term|ALBW|Skull Woods | *{{Plural|ALBW|Gibdo|link}} & {{Plural|ALBW|Purple Mini-Moldorm|link}} {{Small|''({{Term|ALBW|Skull Woods|link}})''}} | ||
*{{Plural|ALBW|Eyegore|link}} {{Small|''({{Term|ALBW|Thieves' Hideout ( | *{{Plural|ALBW|Eyegore|link}} {{Small|''({{Term|ALBW|Thieves' Hideout (Dungeon)|link}})''}} | ||
*{{Plural|ALBW|Flying Tile|link}} & {{Plural|ALBW|Devalant|link}} {{Small|''({{Term|ALBW|Desert Palace|link}})''}} | *{{Plural|ALBW|Flying Tile|link}} & {{Plural|ALBW|Devalant|link}} {{Small|''({{Term|ALBW|Desert Palace|link}})''}} | ||
*{{Term|ALBW|Big Pengator|link}} & {{Plural|ALBW|Pengator|link}} {{Small|''({{Term|ALBW|Ice Ruins|link}})''}} | *{{Term|ALBW|Big Pengator|link}} & {{Plural|ALBW|Pengator|link}} {{Small|''({{Term|ALBW|Ice Ruins|link}})''}} | ||
| Line 338: | Line 338: | ||
==={{TFH|-}}=== | ==={{TFH|-}}=== | ||
{{ImageCaption | {{ImageCaption | ||
|image= File:TFH | |image= File:TFH Lil' Hinox Model.png | ||
|size= 175px | |size= 175px | ||
|align= right | |align= right | ||
| Line 352: | Line 352: | ||
*{{Term|TFH|Gigaleon|link}} {{Small|''({{Term|TFH|Deception Castle|link}})''}} | *{{Term|TFH|Gigaleon|link}} {{Small|''({{Term|TFH|Deception Castle|link}})''}} | ||
{{clear}} | {{clear}} | ||
==Nomenclature== | |||
{{Nomenclature}} | |||
{{Ref}} | {{Ref}} | ||
{{ | {{Categories | ||
|Listings, Roles | |||
|mechanics= LA, LADX, LANS, OoT, OoT3D, MM, MM3D, TWW, TWWHD, TP, TPHD, SS, SSHD, TFH, BotW, CoH | |||
}} | |||
Latest revision as of 08:54, 24 April 2024
Sub-Bosses,(SS | BotW | TotK)[1][2][3] also known as Guardians,(LA)[4][name references needed] Middle Bosses,(OoT | MM | TP)[5][6][7] Minibosses,(OoS | OoA | TWW | CoH)[8][9][10][11] and Mini-Bosses,(TFH)[12][13] are more difficult variants of enemies usually encountered in Dungeons.
Characteristics
Sub-Bosses usually protect an item within a Dungeon or other locations. Most of the time, they must be defeated to proceed within a Dungeon or area. A common characteristic that distinguishes a Sub-Boss from a regular enemy is a particular battle theme played during the encounter, which is different from the usual enemy theme. They may return later as common enemies, likely because Link will have new tools and weapons to defeat them more easily. They may come in groups, as in the case of common enemies. If they are fought in a room, the doors usually lock until they are defeated.
List of Sub-Bosses
The Legend of Zelda
Almost every Boss is eventually fought again as a Sub-Boss, as they no longer guard Heart Containers or Triforce fragments in their later appearances.
The Adventure of Link
Bosses returning as Sub-Bosses:
A Link to the Past
Bosses returning as Sub-Bosses:
- Armos Knights (Ganon's Tower)
- Lanmolas (Ganon's Tower)
- Moldorm (Ganon's Tower)
- A Link to the Past & Four Swords:
- Helmasaur King (Palace of the Four Sword)
- Arrghus (Palace of the Four Sword)
- Mothula (Palace of the Four Sword)
- Blind the Thief (Palace of the Four Sword)
Link's Awakening
- Rolling Bones (Tail Cave, Turtle Rock)
- King Moblin (Moblin Cave)
- Hinox (Bottle Grotto, Eagle's Tower, Turtle Rock)
- Dodongo Snakes (Key Cavern, Face Shrine, Turtle Rock)
- Lanmola (Yarna Desert)
- Cue Ball (Angler's Tunnel, Turtle Rock)
- Master Stalfos (Catfish's Maw)
- Gohmas (Catfish's Maw)
- Armos Knight (Southern Face Shrine)
- Smasher (Face Shrine, Turtle Rock)
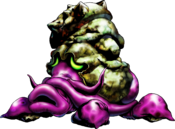
- Grim Creeper (Eagle's Tower)
- Turtle Rock (Tal Tal Mountain Range)
- Blaino (Turtle Rock)
- Link's Awakening DX:
- Avalaunch (Color Dungeon)
- Giant Buzz Blob (Color Dungeon)
Ocarina of Time
- Lizalfos (Dodongo's Cavern)
- Big Octo (Inside Jabu-Jabu's Belly)
- Stalfos (Forest Temple)
- Meg (Forest Temple)
- Flare Dancer (Fire Temple)
- White Wolfos (Ice Cavern)
- Dark Link (Water Temple)
- Dead Hand (Bottom of the Well, Shadow Temple)
- Gerudo Thieves (Gerudo's Fortress)
- Iron Knuckle (Spirit Temple, Gerudo Training Ground, Ganon's Castle)
Majora's Mask
- Dinolfos (Woodfall Temple, Secret Shrine)
- Gekko & Snapper (Woodfall Temple)
- Wizzrobe (Snowhead Temple, Ancient Castle of Ikana, Stone Tower Temple, Secret Shrine)
- Gerudo Pirate (Miniboss) (Pirates' Fortress)
- Wart (Great Bay Temple, Secret Shrine)
- Gekko & Mad Jelly (Great Bay Temple)
- Captain Keeta (Ikana Graveyard)
- Iron Knuckle (Ikana Graveyard)
- Big Poe (Ikana Graveyard, Secret Shrine)
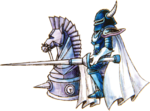
- King's Lackeys (Ancient Castle of Ikana)
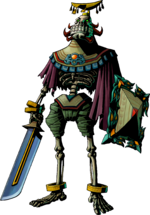
- Igos du Ikana (Ancient Castle of Ikana)
- Garo Master (Stone Tower Temple, Secret Shrine)
- Gomess (Stone Tower Temple)
- Poe Sisters (Ikana Canyon)
Oracle of Ages
- Giant Ghini (Spirit's Grave)
- Swoop (Wing Dungeon)
- Subterror (Moonlit Grotto)
- Armos Warrior (Skull Dungeon)
- Smasher (Crown Dungeon)
- Vire (Mermaid's Cave)
- Angler Fish (Jabu-Jabu's Belly)
- Blue Stalfos (Ancient Tomb)
Oracle of Seasons
- Brother Goriyas (Gnarled Root Dungeon)
- Facade (Snake's Remains)
- Omuai (Poison Moth's Lair)
- Agunima (Dancing Dragon Dungeon)
- Great Moblin (Moblin's Keep)
- Syger (Unicorn's Cave)
- Vire (Ancient Ruins)
- Poe Sisters (Explorer's Crypt)
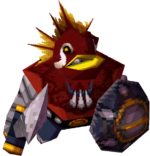
- Frypolar (Sword & Shield Maze)
The Wind Waker
- Bokoblin (Forsaken Fortress)
- Bokoblins & Moblin (Dragon Roost Cavern)
- Mothula (Forbidden Woods)
- Darknut (Tower of the Gods)
- Phantom Ganon (Forsaken Fortress, Ganon's Castle)
- Stalfos (Earth Temple)
- Wizzrobe (Wind Temple)
- Mighty Darknut (Hyrule Castle)
- Cyclos (Great Sea)
- Big Octo (Great Sea)
Bosses returning as Minibosses:
- Gohma (Ganon's Castle)
- Kalle Demos (Ganon's Castle)
- Jalhalla (Ganon's Castle)
- Molgera (Ganon's Castle)
Four Swords Adventures
- Chief Soldier
- Shadow Link
- Manhandla
- Dodongos
- Big Dark Stalfos
- Gohma
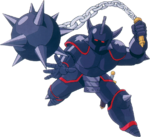
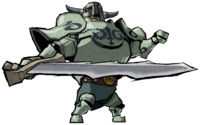
- Ball and Chain Soldiers
- Big Dodongo
The Minish Cap
- Madderpillar (Deepwood Shrine, Temple of Droplets)
- Spiny Chuchus (Cave of Flames)
- Darknut (Fortress of Winds)
- Big Blue Chuchu (Temple of Droplets)
- Red Darknut (Palace of Winds, Dark Hyrule Castle)
- Black Knight (Dark Hyrule Castle)
Twilight Princess
- Ook (Forest Temple)
- King Bulblin & Lord Bullbo (Bridge of Eldin, Great Hylian Bridge)
- Dangoro (Goron Mines)
- Twilit Carrier Kargarok (Lake Hylia)
- Twilit Bloat (Lake Hylia)
- Deku Toad (Lakebed Temple)
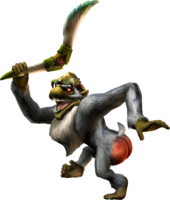
- Skull Kid & Puppets (Sacred Grove)
- King Bulblin (Gerudo Desert, Hyrule Castle)
- Death Sword (Arbiter's Grounds)
- Darkhammer (Snowpeak Ruins)
- Darknut (Temple of Time)
- Aeralfos (City in the Sky)
- Phantom Zant (Palace of Twilight)
Phantom Hourglass
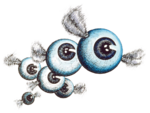
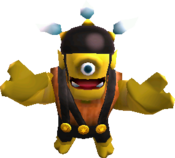
- Giant Eye Plant (Near Molida Island, Near Bannan Island)
- Massive Eye (Near Goron Island)
- Jolene (Ocean)
- Phantoms (Temple of the Ocean King)
Spirit Tracks
- Mothula (Forest Temple)
- Rocktite (Forest Realm, Fire Realm, Sand Realm)
- Ice Keese (Snow Temple)
- Geozard Chief (Tower of Spirits)
- Big Blin (Ocean Realm)
- Snapper (Ocean Temple)
- Heatoise (Fire Temple)
- Stalfos Warriors (Sand Temple)
- Dark Link (Take 'Em All On!)
Skyward Sword
- Stalfos (Skyview Temple)
- Lizalfos (Earth Temple)
- Stalmaster (Ancient Cistern, Sky Keep)
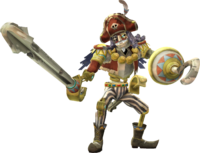
- LD-002G Scervo (Sandship)
- Dark Lizalfos (Fire Sanctuary)
- Magmanos (Fire Sanctuary)
- Moldorm (Fire Sanctuary, Sky Keep)
- LD-003D Dreadfuse (Sky Keep)
- Metal Shield Moblin (Sky Keep)
Bosses returning as Sub-Bosses:
A Link Between Worlds
- Armos (Eastern Palace)
- Red Stalfos (Tower of Hera)
- Heedles (House of Gales)
- Green Goriyas & Red Goriya (Dark Palace)
- Gigabari (Swamp Palace, Lorule Castle)
- Gibdos & Purple Mini-Moldorms (Skull Woods)
- Eyegores (Thieves' Hideout)
- Flying Tiles & Devalants (Desert Palace)
- Big Pengator & Pengators (Ice Ruins)
- Fire Gimos (Turtle Rock)
- Fire Ball and Chain Soldier (Lorule Castle)
Bosses returning as Sub-Bosses:
Tri Force Heroes
- Electric Blob King (Buzz Blob Cave)
- Electric Blob Queen (Abyss of Agony)
- Hinox Brothers (Hinox Mine, Bomb Storage)
- Freezlord (Snowball Ravine)
- Vulture Vizier (Stone Corridors)
- Grim Repoe (Palace Noir)
- Gigaleon (Deception Castle)
Nomenclature
| Language | Names | |
|---|---|---|
| Mini-boss (LANS) | ||
| Mini-eindbaas (LANS) | ||
| Miniboss (LANS) | ||
| Miniboss (LANS) | ||
| Miniboss (LANS) | ||
| Miniboss (LANS) | ||
| Мини-босс (Mini-boss) (LANS) | ||
| Minijefe (LANS) | ||
| This table was generated using translation pages. To request an addition, please contact a staff member with a reference. | ||
References
- ↑ The Legend of Zelda: Skyward Sword—Prima Official Game Guide, Prima Games, pg. 79
- ↑ The Legend of Zelda: Breath of the Wild—The Complete Official Guide, Piggyback Interactive Limited, pg. 328
- ↑ The Legend of Zelda: Tears of the Kingdom—The Complete Official Guide, Piggyback Interactive Limited, pg. 480
- ↑ The Legend of Zelda: Link's Awakening—Nintendo Player's Guide, Nintendo of America, pg. 102
- ↑ Koji Kondo. "Middle Boss Battle" The Legend of Zelda: Ocarina of Time 3D Official Soundtrack, Nintendo of America, 2011. CD
- ↑ Toru Minegishi. "Middle Boss Battle" The Legend of Zelda: Majora's Mask Official Soundtrack, Club Nintendo, 2013. CD
- ↑ n.a.. "Middle Boss Battle #1" The Legend of Zelda: Twilight Princess HD Original Soundtrack, Symphony No.5, 2016. CD
- ↑ The Legend of Zelda: Oracle of Seasons and Oracle of Ages—The Official Nintendo Player's Guide, Nintendo of America, pg. 44
- ↑ The Legend of Zelda: Oracle of Seasons and Oracle of Ages—The Official Nintendo Player's Guide, Nintendo of America, pg. 79
- ↑ Encyclopedia, Dark Horse Books, pg. 212 (TWW | TWWHD)
- ↑ "DEFEAT THE MINIBOSS" — N/A (Cadence of Hyrule)
- ↑ "Monsters and Enemies
Mini-Bosses" (The Legend of Zelda: Majora's Mask 3D—Official Digital Strategy Guide for 3DS by Prima Games, § Mini-Bosses) - ↑ The Legend of Zelda: Tri Force Heroes—Official Guide, Prima Games, pg. 20
- Listings
- Roles
- Mechanics
- Mechanics in Link's Awakening
- Mechanics in Link's Awakening DX
- Mechanics in Link's Awakening (Nintendo Switch)
- Mechanics in Ocarina of Time
- Mechanics in Ocarina of Time 3D
- Mechanics in Majora's Mask
- Mechanics in Majora's Mask 3D
- Mechanics in The Wind Waker
- Mechanics in The Wind Waker HD
- Mechanics in Twilight Princess
- Mechanics in Twilight Princess HD
- Mechanics in Skyward Sword
- Mechanics in Skyward Sword HD
- Mechanics in Tri Force Heroes
- Mechanics in Breath of the Wild
- Mechanics in Cadence of Hyrule

