Mask: Difference between revisions
MannedTooth (talk | contribs) m (Text replacement - "Hero's Charm Artwork.png" to "TWW Hero's Charm Render.png") |
mNo edit summary |
||
| (30 intermediate revisions by 10 users not shown) | |||
| Line 1: | Line 1: | ||
{{Item | {{Infobox Item | ||
|image= File:Hawkeye.png | |||
|image= | |||
|caption= The Hawkeye from {{TP|-}} | |caption= The Hawkeye from {{TP|-}} | ||
|game= | |game= OoT, MM, OoA, TWW, TMC, TP, BotW, TotK | ||
|other= | |other= ALttP (Ishinomori), FPTRR, HW, CoH, HWAoC | ||
|cost= | |cost= | ||
|uses= | |uses= | ||
| Line 12: | Line 10: | ||
|theme= | |theme= | ||
}} | }} | ||
{{Term/Store|Mask|Masks|Series, MM, MM3D, TMC|plural}} are recurring | {{Term/Store|Mask|Masks|Series, MM, MM3D, TMC|plural}} are recurring {{Plural|Series|Item|link}} in {{TLoZ|Series}}.{{Name Ref|MM3D, OoA, TWWHD, TPHD, BotW}} {{Plural|Series|Mask}} go unnamed in {{TMC}}. | ||
==Location and Uses== | ==Location and Uses== | ||
| Line 20: | Line 18: | ||
The Masks are only obtainable and usable while Link is a child. Most of the Masks possess no abilities when worn, however, some like the [[Skull Mask]] and the [[Bunny Hood]] do grant small abilities. | The Masks are only obtainable and usable while Link is a child. Most of the Masks possess no abilities when worn, however, some like the [[Skull Mask]] and the [[Bunny Hood]] do grant small abilities. | ||
{| class=" | {| class="wikitable" style="width:100%; text-align:left;" | ||
!style="width:10%"|Mask | !style="width:10%"|Mask | ||
!style="width:45%"|Method of Obtainment | !style="width:45%"|Method of Obtainment | ||
!style="width:45%"|Uses | !style="width:45%"|Uses | ||
|+ List of {{Plural|OoT3D|Mask}} | |||
|- | |- | ||
|style="text-align:center"| [[File:MM3D Keaton Mask Icon.png]]<br>[[Keaton Mask]] | |style="text-align:center"| [[File:MM3D Keaton Mask Icon.png]]<br/>[[Keaton Mask]] | ||
| Available after showing [[Zelda's Letter]] to the [[Soldier]] guarding the gate to [[Death Mountain]] in [[Kakariko Village]]. | | Available after showing [[Zelda's Letter]] to the [[Soldier]] guarding the gate to [[Death Mountain]] in [[Kakariko Village]]. | ||
| To be sold for 15 Rupees to the Soldier guarding the entrance to Death Mountain. | | To be sold for 15 Rupees to the Soldier guarding the entrance to Death Mountain. | ||
|- | |- | ||
|style="text-align:center"| [[File:OoT3D Skull Mask Icon.png]]<br>[[Skull Mask]] | |style="text-align:center"| [[File:OoT3D Skull Mask Icon.png]]<br/>[[Skull Mask]] | ||
| Available after selling the Keaton Mask. | | Available after selling the Keaton Mask. | ||
| To be sold for 20 Rupees to the [[Skull Kid]] in [[Lost Woods]].<br>Prevents [[Keese]] from attacking.<br>Used to obtain a [[Deku Stick]] upgrade at the [[Forest Stage]]. | | To be sold for 20 Rupees to the [[Skull Kid]] in [[Lost Woods]].<br/>Prevents [[Keese]] from attacking.<br/>Used to obtain a [[Deku Stick]] upgrade at the [[Forest Stage]]. | ||
|- | |- | ||
|style="text-align:center"| [[File:OoT3D Spooky Mask Icon.png]]<br>[[Spooky Mask]] | |style="text-align:center"| [[File:OoT3D Spooky Mask Icon.png]]<br/>[[Spooky Mask]] | ||
| Available after selling the Skull Mask. | | Available after selling the Skull Mask. | ||
| To be sold for 30 Rupees to the [[Graveyard Boy]] in the [[Kakariko Village Graveyard]]. | | To be sold for 30 Rupees to the [[Graveyard Boy]] in the [[Kakariko Village Graveyard]]. | ||
|- | |- | ||
|style="text-align:center"| [[File:MM3D Bunny Hood Icon.png]]<br>[[Bunny Hood]] | |style="text-align:center"| [[File:MM3D Bunny Hood Icon.png]]<br/>[[Bunny Hood]] | ||
| Available after selling the Spooky Mask. | | Available after selling the Spooky Mask. | ||
| To be sold for 50 Rupees to the [[Running Man]] in [[Hyrule Field]].<br>Prevents [[Stalchild]]ren from appearing. | | To be sold for 50 Rupees to the [[Running Man]] in [[Hyrule Field]].<br/>Prevents [[Stalchild]]ren from appearing. | ||
|- | |- | ||
|style="text-align:center"| [[File:MM3D Mask of Truth Icon.png]]<br>[[Mask of Truth]] | |style="text-align:center"| [[File:MM3D Mask of Truth Icon.png]]<br/>[[Mask of Truth]] | ||
| Available after selling the Bunny Hood. | | Available after selling the Bunny Hood. | ||
| Enables Link to listen to [[Gossip Stone]]s.<br>Used to obtain a [[Deku Nut]] upgrade at the Forest Stage. | | Enables Link to listen to [[Gossip Stone]]s.<br/>Used to obtain a [[Deku Nut]] upgrade at the Forest Stage. | ||
|- | |- | ||
|style="text-align:center"| [[File:OoT3D Goron Mask Icon.png]]<br>[[Goron Mask]] | |style="text-align:center"| [[File:OoT3D Goron Mask Icon.png]]<br/>[[Goron Mask]] | ||
| Available after selling the Bunny Hood. | | Available after selling the Bunny Hood. | ||
|style="text-align:center"| — | |style="text-align:center"| — | ||
|- | |- | ||
|style="text-align:center"| [[File:OoT3D Zora Mask Icon.png]]<br>[[Zora Mask]] | |style="text-align:center"| [[File:OoT3D Zora Mask Icon.png]]<br/>[[Zora Mask]] | ||
| Available after selling the Bunny Hood. | | Available after selling the Bunny Hood. | ||
|style="text-align:center"| — | |style="text-align:center"| — | ||
|- | |- | ||
|style="text-align:center"| [[File:OoT3D Gerudo Mask Icon.png]]<br>[[Gerudo Mask]] | |style="text-align:center"| [[File:OoT3D Gerudo Mask Icon.png]]<br/>[[Gerudo Mask]] | ||
| Available after selling the Bunny Hood. | | Available after selling the Bunny Hood. | ||
|style="text-align:center"| — | |style="text-align:center"| — | ||
| Line 61: | Line 60: | ||
In {{MM}}, numerous Masks appear. Some give certain abilities when worn, while others completely transform Link's form. | In {{MM}}, numerous Masks appear. Some give certain abilities when worn, while others completely transform Link's form. | ||
{| class=" | {| class="wikitable" style="width:100%; text-align:left;" | ||
!style="width:10%"|Mask | !style="width:10%"|Mask | ||
!style="width:30%"|Method of Obtainment | !style="width:30%"|Method of Obtainment | ||
!style="width:30%"|Uses | !style="width:30%"|Uses | ||
!style="width:30%"|In-game Description | !style="width:30%"|In-game Description | ||
|+ List of {{Plural|MM3D|Mask}} | |||
|- | |- | ||
|style="text-align:center"|[[File:MM3D Deku Mask Icon.png]]<br>[[Deku Mask]] | |style="text-align:center"|[[File:MM3D Deku Mask Icon.png]]<br/>[[Deku Mask]] | ||
| Obtained after learning the "[[Song of Healing]]." | | Obtained after learning the "[[Song of Healing]]." | ||
| Transforms Link into a [[Deku Link|Deku]]. | | Transforms Link into a [[Deku Link|Deku]]. | ||
| Wear it with (C) to assume Deku form. Use (C) to change back. | | Wear it with (C) to assume Deku form. Use (C) to change back. | ||
|- | |- | ||
|style="text-align:center"|[[File:MM3D Goron Mask Icon.png]]<br>[[Goron Mask]] | |style="text-align:center"|[[File:MM3D Goron Mask Icon.png]]<br/>[[Goron Mask]] | ||
| Obtained after playing the "[[Song of Healing]]" in [[Darmani III]]'s grave in the [[Goron Graveyard]]. | | Obtained after playing the "[[Song of Healing]]" in [[Darmani III]]'s grave in the [[Goron Graveyard]]. | ||
| Transforms Link into a [[Goron Link|Goron]]. | | Transforms Link into a [[Goron Link|Goron]]. | ||
| Wear it with (C) to assume Goron form. Use (C) to change back. | | Wear it with (C) to assume Goron form. Use (C) to change back. | ||
|- | |- | ||
|style="text-align:center"|[[File:MM3D Zora Mask Icon.png]]<br>[[Zora Mask]] | |style="text-align:center"|[[File:MM3D Zora Mask Icon.png]]<br/>[[Zora Mask]] | ||
| Obtained after playing the "Song of Healing" for [[Mikau]] in the [[Great Bay Coast]]. | | Obtained after playing the "Song of Healing" for [[Mikau]] in the [[Great Bay Coast]]. | ||
| Transforms Link into a [[Zora Link|Zora]]. | | Transforms Link into a [[Zora Link|Zora]]. | ||
| Wear it with (C) to assume Zora form. Use (C) to change back. | | Wear it with (C) to assume Zora form. Use (C) to change back. | ||
|- | |- | ||
|style="text-align:center"|[[File:MM3D Fierce Deity's Mask Icon.png]]<br>[[Fierce Deity's Mask]] | |style="text-align:center"|[[File:MM3D Fierce Deity's Mask Icon.png]]<br/>[[Fierce Deity's Mask]] | ||
| Obtained after playing [[Hide-and-Seek]] with the [[Moon Children]] and giving all 20 Masks to them. | | Obtained after playing [[Hide-and-Seek]] with the [[Moon Children]] and giving all 20 Masks to them. | ||
| Transforms Link into the [[Fierce Deity Link]]. | | Transforms Link into the [[Fierce Deity Link]]. | ||
| Wear it with (C). Its dark power can be used only in boss rooms. | | Wear it with (C). Its dark power can be used only in boss rooms. | ||
|- | |- | ||
|style="text-align:center"|[[File:MM3D All-Night Mask Icon.png]]<br>[[All-Night Mask]] | |style="text-align:center"|[[File:MM3D All-Night Mask Icon.png]]<br/>[[All-Night Mask]] | ||
| Bought in the [[Curiosity Shop]] on the [[Final Day]] for 500 Rupees. | | Bought in the [[Curiosity Shop]] on the [[Final Day]] for 500 Rupees. | ||
| Keeps Link from falling asleep. | | Keeps Link from falling asleep. | ||
| When you wear it with (C), you don't get sleepy. | | When you wear it with (C), you don't get sleepy. | ||
|- | |- | ||
|style="text-align:center"|[[File:MM3D Blast Mask Icon.png]]<br>[[Blast Mask]] | |style="text-align:center"|[[File:MM3D Blast Mask Icon.png]]<br/>[[Blast Mask]] | ||
| Obtained after stopping [[Sakon]] from stealing the [[Old Lady from Bomb Shop|Old Lady]]'s [[Bomb Bag]]. | | Obtained after stopping [[Sakon]] from stealing the [[Old Lady from Bomb Shop|Old Lady]]'s [[Bomb Bag]]. | ||
| Detonates like a [[Bomb]], but damages Link. | | Detonates like a [[Bomb]], but damages Link. | ||
| Wear it with (C), then detonate it with (B)... Losing hearts from the explosion is a side effect. | | Wear it with (C), then detonate it with (B)... Losing hearts from the explosion is a side effect. | ||
|- | |- | ||
|style="text-align:center"|[[File:MM3D Bremen Mask Icon.png]]<br>[[Bremen Mask]] | |style="text-align:center"|[[File:MM3D Bremen Mask Icon.png]]<br/>[[Bremen Mask]] | ||
| Obtained after hearing [[Guru-Guru]]'s confessions at night at the [[Laundry Pool]] | | Obtained after hearing [[Guru-Guru]]'s confessions at night at the [[Laundry Pool]] | ||
| Plays music and prompts small animals to march. | | Plays music and prompts small animals to march. | ||
| Wear it with (C) so young animals will mistake you for their leader. | | Wear it with (C) so young animals will mistake you for their leader. | ||
|- | |- | ||
|style="text-align:center"|[[File:MM3D Bunny Hood Icon.png]]<br>[[Bunny Hood]] | |style="text-align:center"|[[File:MM3D Bunny Hood Icon.png]]<br/>[[Bunny Hood]] | ||
| Obtained after making all of [[Grog]]'s [[Cucco]]s from the [[Cucco Shack]] grow. | | Obtained after making all of [[Grog]]'s [[Cucco]]s from the [[Cucco Shack]] grow. | ||
| Increases running speed, jumping distance, and agility. | | Increases running speed, jumping distance, and agility. | ||
| Wear it with (C) to be filled with the speed and hearing of the wild. | | Wear it with (C) to be filled with the speed and hearing of the wild. | ||
|- | |- | ||
|style="text-align:center"|[[File:MM3D Captain's Hat Icon.png]]<br>[[Captain's Hat]] | |style="text-align:center"|[[File:MM3D Captain's Hat Icon.png]]<br/>[[Captain's Hat]] | ||
| Obtained after defeating [[Captain Keeta]] in the [[Ikana Graveyard]]. | | Obtained after defeating [[Captain Keeta]] in the [[Ikana Graveyard]]. | ||
| Enables conversation with Stalchildren<br>Prevents Stalchildren and [[ReDead]] attacks. | | Enables conversation with Stalchildren<br/>Prevents Stalchildren and [[ReDead]] attacks. | ||
| Wear it with (C) to pose as Captain Keeta. | | Wear it with (C) to pose as Captain Keeta. | ||
|- | |- | ||
|style="text-align:center"|[[File:MM3D Couple's Mask Icon.png]]<br>[[Couple's Mask]] | |style="text-align:center"|[[File:MM3D Couple's Mask Icon.png]]<br/>[[Couple's Mask]] | ||
| Earned through the [[Reuniting Kafei and Anju]] sidequest. | | Earned through the [[Reuniting Kafei and Anju]] sidequest. | ||
| Symbolizes ultimate love, stops long disputes among people. | | Symbolizes ultimate love, stops long disputes among people. | ||
| When you wear it with (C), you can soften people's hearts. | | When you wear it with (C), you can soften people's hearts. | ||
|- | |- | ||
|style="text-align:center"|[[File:MM3D Don Gero's Mask Icon.png]]<br>[[Don Gero's Mask]] | |style="text-align:center"|[[File:MM3D Don Gero's Mask Icon.png]]<br/>[[Don Gero's Mask]] | ||
| Obtained after feeding the starving Goron in the [[Mountain Village]] | | Obtained after feeding the starving Goron in the [[Mountain Village]] | ||
| Allows communication with [[Frog]]s. | | Allows communication with [[Frog]]s. | ||
| When you wear it, you can call the Frog Choir members together. | | When you wear it, you can call the Frog Choir members together. | ||
|- | |- | ||
|style="text-align:center"|[[File:MM3D Garo's Mask Icon.png]]<br>[[Garo's Mask]] | |style="text-align:center"|[[File:MM3D Garo's Mask Icon.png]]<br/>[[Garo's Mask]] | ||
| Obtained after winning the [[Gorman Track]] race. | | Obtained after winning the [[Gorman Track]] race. | ||
| Allows entry into the [[Ikana Canyon]].<br>Summons [[Garo]] Ninjas.<br>Prevents ReDeads from attacking. | | Allows entry into the [[Ikana Canyon]].<br/>Summons [[Garo]] Ninjas.<br/>Prevents ReDeads from attacking. | ||
| This mask can summon the hidden Garo ninjas. Wear it with (C). | | This mask can summon the hidden Garo ninjas. Wear it with (C). | ||
|- | |- | ||
|style="text-align:center"|[[File:MM3D Great Fairy Mask Icon.png]]<br>[[Great Fairy Mask]] | |style="text-align:center"|[[File:MM3D Great Fairy Mask Icon.png]]<br/>[[Great Fairy Mask]] | ||
| Obtained after retrieving the lost [[Stray Fairy]] from [[Clock Town]] for the second time. | | Obtained after retrieving the lost [[Stray Fairy]] from [[Clock Town]] for the second time. | ||
| Attracts Stray Fairies. | | Attracts Stray Fairies. | ||
| The mask's hair will shimmer when you're close to a Stray Fairy. | | The mask's hair will shimmer when you're close to a Stray Fairy. | ||
|- | |- | ||
|style="text-align:center"|[[File:MM3D Giant's Mask Icon.png]]<br>[[Giant's Mask]] | |style="text-align:center"|[[File:MM3D Giant's Mask Icon.png]]<br/>[[Giant's Mask]] | ||
| Obtained after defeating one of the [[Eyegore]]s in the [[Stone Tower Temple]]. {{Exp Game|MM}}<br>Obtained after defeating the blue [[Twinmold]]. {{Exp Game|MM3D}} | | Obtained after defeating one of the [[Eyegore]]s in the [[Stone Tower Temple]]. {{Exp Game|MM}}<br/>Obtained after defeating the blue [[Twinmold]]. {{Exp Game|MM3D}} | ||
| Transforms Link into a giant during the battle against Twinmold. | | Transforms Link into a giant during the battle against Twinmold. | ||
| If you wear it in a certain room, you'll grow into a giant. | | If you wear it in a certain room, you'll grow into a giant. | ||
|- | |- | ||
|style="text-align:center"|[[File:MM3D Gibdo Mask Icon.png]]<br>[[Gibdo Mask]] | |style="text-align:center"|[[File:MM3D Gibdo Mask Icon.png]]<br/>[[Gibdo Mask]] | ||
| Obtained after playing the "Song of Healing" for [[Pamela's Father]]. | | Obtained after playing the "Song of Healing" for [[Pamela's Father]]. | ||
| Prevents Gibdos and ReDeads from attacking. | | Prevents Gibdos and ReDeads from attacking. | ||
| Use it with (C). Even a real Gibdo will mistake you for its own kind. | | Use it with (C). Even a real Gibdo will mistake you for its own kind. | ||
|- | |- | ||
|style="text-align:center"|[[File:MM3D Kafei's Mask Icon.png]]<br>[[Kafei's Mask]] | |style="text-align:center"|[[File:MM3D Kafei's Mask Icon.png]]<br/>[[Kafei's Mask]] | ||
| Obtained through the reuniting [[Kafei]] and [[Anju]] sidequest. | | Obtained through the reuniting [[Kafei]] and [[Anju]] sidequest. | ||
| Characters will talk about [[Kafei]]. | | Characters will talk about [[Kafei]]. | ||
| Wear it with (C) to inquire about Kafei's whereabouts. | | Wear it with (C) to inquire about Kafei's whereabouts. | ||
|- | |- | ||
|style="text-align:center"|[[File:MM3D Kamaro's Mask Icon.png]]<br>[[Kamaro's Mask]] | |style="text-align:center"|[[File:MM3D Kamaro's Mask Icon.png]]<br/>[[Kamaro's Mask]] | ||
| Obtained after playing the "Song of Healing" for [[Kamaro]] in [[Termina Field]]. | | Obtained after playing the "Song of Healing" for [[Kamaro]] in [[Termina Field]]. | ||
| Allows Link to dance. | | Allows Link to dance. | ||
| Wear this with (C) to perform a mysterious dance. | | Wear this with (C) to perform a mysterious dance. | ||
|- | |- | ||
|style="text-align:center"|[[File:MM3D Keaton Mask Icon.png]]<br>[[Keaton Mask]] | |style="text-align:center"|[[File:MM3D Keaton Mask Icon.png]]<br/>[[Keaton Mask]] | ||
| Obtained through the reuniting Kafei and Anju sidequest. | | Obtained through the reuniting Kafei and Anju sidequest. | ||
| Summons [[Keaton]]s when rustling grass is attacked. | | Summons [[Keaton]]s when rustling grass is attacked. | ||
| The mask of the ghost fox, Keaton. Wear it with (C). | | The mask of the ghost fox, Keaton. Wear it with (C). | ||
|- | |- | ||
|style="text-align:center"|[[File:MM3D Mask of Scents Icon.png]]<br>[[Mask of Scents]] | |style="text-align:center"|[[File:MM3D Mask of Scents Icon.png]]<br/>[[Mask of Scents]] | ||
| Obtained after completing the [[Deku Butler]]'s race in the [[Deku Shrine]]. | | Obtained after completing the [[Deku Butler]]'s race in the [[Deku Shrine]]. | ||
| Enables Link to find the location of [[Mushroom]]s. | | Enables Link to find the location of [[Mushroom]]s. | ||
| Wear it with (C) to heighten your sense of smell. | | Wear it with (C) to heighten your sense of smell. | ||
|- | |- | ||
|style="text-align:center"|[[File:MM3D Mask of Truth Icon.png]]<br>[[Mask of Truth]] | |style="text-align:center"|[[File:MM3D Mask of Truth Icon.png]]<br/>[[Mask of Truth]] | ||
| Obtained after defeating all the [[Gold Skulltula]]s in the [[Swamp Spider House]]. | | Obtained after defeating all the [[Gold Skulltula]]s in the [[Swamp Spider House]]. | ||
| Allows Link to listen to Gossip Stones and the thoughts of animals. | | Allows Link to listen to Gossip Stones and the thoughts of animals. | ||
| Wear it to read the thoughts of Gossip Stones and animals. | | Wear it to read the thoughts of Gossip Stones and animals. | ||
|- | |- | ||
|style="text-align:center"|[[File:MM3D Moon | |style="text-align:center"|[[File:MM3D Moon Mask Render.png|30px]]<br/>[[Moon Mask]] | ||
|style="text-align:center"| — | |style="text-align:center"| — | ||
| Used to create the Couple's Mask. Unusable by Link. | | Used to create the Couple's Mask. Unusable by Link. | ||
|style="text-align:center"| — | |style="text-align:center"| — | ||
|- | |- | ||
|style="text-align:center"|[[File:MM3D Postman's Hat Icon.png]]<br>[[Postman's Hat]] | |style="text-align:center"|[[File:MM3D Postman's Hat Icon.png]]<br/>[[Postman's Hat]] | ||
| Obtained through the reuniting Kafei and Anju sidequest. | | Obtained through the reuniting Kafei and Anju sidequest. | ||
| Enables Link to check the contents of | | Enables Link to check the contents of {{Plural|TWWHD|Postbox|link}}. | ||
| You can look in mailboxes when you wear this with (C). | | You can look in mailboxes when you wear this with (C). | ||
|- | |- | ||
|style="text-align:center"|[[File:MM3D Romani's Mask Icon.png]]<br>[[Romani's Mask]] | |style="text-align:center"|[[File:MM3D Romani's Mask Icon.png]]<br/>[[Romani's Mask]] | ||
| Obtained through the [[Helping Romani and Cremia]] sidequest. | | Obtained through the [[Helping Romani and Cremia]] sidequest. | ||
| Grants access to the [[Milk Bar]] at night. | | Grants access to the [[Milk Bar]] at night. | ||
| Wear it with (C) to show you're a member of the Milk Bar, Latte. | | Wear it with (C) to show you're a member of the Milk Bar, Latte. | ||
|- | |- | ||
|style="text-align:center"|[[File:MM3D Stone Mask Icon.png]]<br>[[Stone Mask]] | |style="text-align:center"|[[File:MM3D Stone Mask Icon.png]]<br/>[[Stone Mask]] | ||
| Obtained after helping [[Shiro]] recover his energy with a [[Potion]] in the [[Road to Ikana]]. | | Obtained after helping [[Shiro]] recover his energy with a [[Potion]] in the [[Road to Ikana]]. | ||
| Makes Link invisible to most enemies and characters. | | Makes Link invisible to most enemies and characters. | ||
| Become as plain as stone so you can blend into your surroundings. | | Become as plain as stone so you can blend into your surroundings. | ||
|- | |- | ||
|style="text-align:center"|[[File:MM3D Sun | |style="text-align:center"|[[File:MM3D Sun Mask Render.png|35px]]<br/>[[Sun Mask]] | ||
|style="text-align:center"| — | |style="text-align:center"| — | ||
| Used to create the Couple's Mask. Unusable by Link. | | Used to create the Couple's Mask. Unusable by Link. | ||
|style="text-align:center"| — | |style="text-align:center"| — | ||
|- | |- | ||
|style="text-align:center"|[[File:MM3D Troupe Leader's Mask Icon.png]]<br>[[Troupe Leader's Mask]] | |style="text-align:center"|[[File:MM3D Troupe Leader's Mask Icon.png]]<br/>[[Troupe Leader's Mask]] | ||
| Obtained after playing the "[[Ballad of the Wind Fish#Majora's Mask|Ballad of the Wind Fish]]" for [[Gorman]] in the Milk Bar. | | Obtained after playing the "[[Ballad of the Wind Fish#Majora's Mask|Ballad of the Wind Fish]]" for [[Gorman]] in the Milk Bar. | ||
| Calms angry people.<br>Prevents attacks from the Milk Road pursuers. | | Calms angry people.<br/>Prevents attacks from the Milk Road pursuers. | ||
| People related to Gorman will react to this. | | People related to Gorman will react to this. | ||
|- | |- | ||
|style="text-align:center"|[[File:MM3D Odolwa's Remains Icon.png|MM3D Odolwa's Remains Icon.png]][[File:MM3D Goht's Remains Icon.png]]<br>[[File:MM3D Gyorg's Remains Icon.png]][[File:MM3D Twinmold's Remains Icon.png]]<br>Boss Remains | |style="text-align:center"|[[File:MM3D Odolwa's Remains Icon.png|MM3D Odolwa's Remains Icon.png]][[File:MM3D Goht's Remains Icon.png]]<br/>[[File:MM3D Gyorg's Remains Icon.png]][[File:MM3D Twinmold's Remains Icon.png]]<br/>Boss Remains | ||
| Obtained after defeating its corresponding boss. | | Obtained after defeating its corresponding boss. | ||
| Allows a rematch with each boss. Unusable by Link. | | Allows a rematch with each boss. Unusable by Link. | ||
| The remains of the boss in [Temple]. | | The remains of the boss in [Temple]. | ||
|- | |- | ||
|style="text-align:center"|[[File:MM3D Majora's Mask Render.png|40px]]<br>{{MM|Object}} | |style="text-align:center"|[[File:MM3D Majora's Mask Render 2.png|40px]]<br/>{{MM|Object}} | ||
|style="text-align:center"| — | |style="text-align:center"| — | ||
| Grants destructive, corrupting powers to the one who wears it. Unusable by Link. | | Grants destructive, corrupting powers to the one who wears it. Unusable by Link. | ||
| Line 214: | Line 214: | ||
==={{TWW|-}}=== | ==={{TWW|-}}=== | ||
{{Main|Hero's Charm}} | {{Main|Hero's Charm}} | ||
[[File: | [[File:TWWWD Hero's Charm Artwork.png|right|90px]] | ||
In {{TWW}}, the [[Hero's Charm]] is a Mask Link can wear to view enemy and bosses' health bars when [[targeting]]. It is received after Link gives 40 [[Joy Pendant]]s to [[Mrs. Marie]] in [[Windfall Island]]. In {{TWWHD}}, the Hero's Charm is instead located inside a [[Treasure Chest]] at the end of the [[Savage Labyrinth]]. | In {{TWW}}, the [[Hero's Charm]] is a Mask Link can wear to view enemy and bosses' health bars when [[targeting]]. It is received after Link gives 40 [[Joy Pendant]]s to [[Mrs. Marie]] in [[Windfall Island]]. In {{TWWHD}}, the Hero's Charm is instead located inside a [[Treasure Chest]] at the end of the [[Savage Labyrinth]]. | ||
[[Jalhalla]], the boss of the | [[Jalhalla]], the boss of the {{Term|TWW|Earth Temple|link}}, is a mask that boasts control over [[Poe]]s. Link must defeat the fifteen Poes that make up its body in order to defeat it. | ||
==={{TMC|-}}=== | |||
{{Plural|TMC|Mask}} appear on walls in {{TMC}}, specifically the walls in {{Term|TMC|Mayor Hagen's House|link}} and the {{Term|TMC|Royal Hyrule Library|link}}. If {{Term|TMC|Link|link}} uses the {{Term|TMC|Pegasus Boots|link}} to {{Term|TMC|Dash Attack|link|display=Dash}} into the wall near a {{Term|TMC|Mask}}, it will fall off and break on the ground, occasionally dropping {{Plural|TMC|Rupee|link}}. | |||
==={{TP|-}}=== | ==={{TP|-}}=== | ||
| Line 228: | Line 231: | ||
The [[Zant Mask]] is an enemy that resembles a giant version of [[Zant]]'s mask helmet. It only appears in the [[Palace of Twilight]]. | The [[Zant Mask]] is an enemy that resembles a giant version of [[Zant]]'s mask helmet. It only appears in the [[Palace of Twilight]]. | ||
==={{BotW|-}}=== | |||
{{Stub|BotW}} | |||
{| class="wikitable" style="width:100%; max-width:57.5em; text-align:left;" | |||
|+ List of {{Plural|BotW|Mask}} | |||
|- | |||
!style="width:30%"|Mask | |||
!style="width:10%"|Defense | |||
!style="width:60%"|Description | |||
|- | |||
|style="text-align:center;"| [[File:BotW Bokoblin Mask Icon.png|link=Bokoblin Mask]]<br/>'''{{Term|BotW|Bokoblin Mask|link}}''' | |||
|style="text-align:center;"| '''3''' | |||
| ''Kilton's handmade Bokoblin headgear. It's almost charming in a cute, monstrous kind of way... Equip it to blend in with Bokoblins.'' | |||
|- | |||
|style="text-align:center;"| [[File:BotW Fierce Deity Mask Icon.png|link=Fierce Deity Mask]]<br/>'''{{Term|BotW|Fierce Deity Mask|link}}''' | |||
|style="text-align:center;"| '''3''' | |||
| ''Legends say this mask was once worn by a hero from a world in which the moon threatened to fall. It looks scary, but wearing it offers fierce, godlike power.'' | |||
|- | |||
|style="text-align:center;"| [[File:BotW Gerudo Veil Icon.png|link=Gerudo Veil]]<br/>'''{{Term|BotW|Gerudo Veil|link}}''' | |||
|style="text-align:center;"| '''1''' | |||
| ''A mask worn by Gerudo women. It protects the skin from the harsh sun, but don't expect it to protect much in combat...'' | |||
|- | |||
|style="text-align:center;"| [[File:BotW Korok Mask Icon.png|link=Korok Mask]]<br/>'''{{Term|BotW|Korok Mask|link}}''' | |||
|style="text-align:center;"| '''1''' | |||
| ''A mask inspired by those fun-loving Koroks. It shakes when one is hiding nearby. It's a rather rare find.'' | |||
|- | |||
|style="text-align:center;"| [[File:BotW Lizalfos Mask Icon.png|link=Lizalfos Mask]]<br/>'''{{Term|BotW|Lizalfos Mask|link}}''' | |||
|style="text-align:center;"| '''3''' | |||
| ''Kilton's handmade Lizalfos headgear. It's designed to replicate the unique tongue and horn of the Lizalfos. Equip it to blend in with Lizalfos.'' | |||
|- | |||
|style="text-align:center;"| [[File:BotW Lynel Mask Icon.png|link=Lynel Mask]]<br/>'''{{Term|BotW|Lynel Mask|link}}''' | |||
|style="text-align:center;"| '''3''' | |||
| ''Kilton's handmade Lynel headgear. It's so well crafted, it can deceive a real Lynel. Equip it to blend in with Lynels, but don't linger too long. Those beasts are smart.'' | |||
|- | |||
|style="text-align:center;"| [[File:BotW Majora's Mask Icon.png|link=Majora's Mask (Item)]]<br/>'''{{Term|BotW|Majora's Mask (Item)|link}}''' | |||
|style="text-align:center;"| '''1''' | |||
| ''An eerie mask passed down from ancient times. Wearing it makes it harder for certain enemies to spot you. It's a rather rare find.'' | |||
|- | |||
|style="text-align:center;"| [[File:BotW Moblin Mask Icon.png|link=Moblin Mask]]<br/>'''{{Term|BotW|Moblin Mask|link}}''' | |||
|style="text-align:center;"| '''3''' | |||
| ''Kilton's handmade Moblin headgear. It's designed to replicate the Moblin's distinct long nose and large horn. Equip it to blend in with Moblins.'' | |||
|- | |||
|style="text-align:center;"| [[File:BotW Radiant Mask Icon.png|link=Radiant Mask]]<br/>'''{{Term|BotW|Radiant Mask|link}}''' | |||
|style="text-align:center;"| '''3''' | |||
| ''A special mask for members of the Gerudo Secret Club. Painted with dye made from crushed luminous stones, it gives off a lurid, mysterious glow in the dark.'' | |||
|- | |||
|style="text-align:center;"| [[File:BotW Sheik's Mask Icon.png|link=Sheik's Mask]]<br/>'''{{Term|BotW|Sheik's Mask|link}}''' | |||
|style="text-align:center;"| '''2''' | |||
| ''A mask said to have been worn by a Sheikah who saved a time-traveling hero. Made from the finest of Sheikah stealth fabrics, it is the final word in undercover gear.'' | |||
|- | |||
|style="text-align:center;"| [[File:BotW Stealth Mask Icon.png|link=Stealth Mask]]<br/>'''{{Term|BotW|Stealth Mask|link}}''' | |||
|style="text-align:center;"| '''2''' | |||
| ''It may look like a regular cloth mask, but it was made using Sheikah crafting techniques to suppress the noisy rustling of clothes. Perfect for sneaking about.'' | |||
|} | |||
==Other Appearances== | ==Other Appearances== | ||
==={{FPTRR|-}}=== | |||
{{Ambig|Start}} | {{Ambig|Start}} | ||
In {{FPTRR}}, [[Tingle]] receives a Mask for defeating [[Baron]]. The origin of this Mask is debated, with a different story told by each [[Bodyguard]], and is immediately sold to that Bodyguard. It has no purpose beyond this financial reward. | In {{FPTRR}}, [[Tingle]] receives a Mask for defeating [[Baron]]. The origin of this Mask is debated, with a different story told by each [[Bodyguard]], and is immediately sold to that Bodyguard. It has no purpose beyond this financial reward. | ||
{{Ambig|End}} | {{Ambig|End}} | ||
==={{HW|-}}=== | |||
{{Noncanon|Start}} | {{Noncanon|Start}} | ||
{{Stub|HW}} | |||
{{ImageCaption | {{ImageCaption | ||
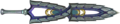
|image = File:HW Young Link Sword.png | |image = File:HW Young Link Sword.png | ||
| Line 249: | Line 307: | ||
Several other Masks from {{MM|-}} appear as unlockable [[Costume]]s in the [[Termina Map]], which are included in the {{MM|-}} DLC Pack. A Keaton Mask is also worn by [[Young Link]] over his head. | Several other Masks from {{MM|-}} appear as unlockable [[Costume]]s in the [[Termina Map]], which are included in the {{MM|-}} DLC Pack. A Keaton Mask is also worn by [[Young Link]] over his head. | ||
The Mask is also a class of Weapon used by Young Link, based on the Fierce Deity's Mask. It is associated with {{Term|HWDE|Element|link|display=Darkness}}. While Young Link primarily uses the [[Kokiri Sword]] as his actual Weapon in battle, he can temporarily transform into the Fierce Deity as part of his [[Weak Point Smash]], Special Attack, and predominately his [[Focus Spirit]]. While in Focus Spirit, the Kokiri Sword transforms into Fierce Deity's sword, and his attack power, speed and range is heightened for the duration of the Focus Spirit. As Young Link is able to play the {{ | The Mask is also a class of Weapon used by Young Link, based on the Fierce Deity's Mask. It is associated with {{Term|HWDE|Element|link|display=Darkness}}. While Young Link primarily uses the [[Kokiri Sword]] as his actual Weapon in battle, he can temporarily transform into the Fierce Deity as part of his [[Weak Point Smash]], Special Attack, and predominately his [[Focus Spirit]]. While in Focus Spirit, the Kokiri Sword transforms into Fierce Deity's sword, and his attack power, speed and range is heightened for the duration of the Focus Spirit. As Young Link is able to play the {{Term|OoT3D|Ocarina of Time (Item)|link}} to empty his Special Attack Meter and fill his [[Magic Meter]], it is possible for Young Link to stay in his Focus Spirit for lengthy periods of time. | ||
====Variations==== | ====Variations==== | ||
| Line 256: | Line 314: | ||
In {{HW|L}} only, the fourth form of the Mask is the '''Inflamed Deity's Mask''', which is associated with both the Elements of {{Term|HWDE|Element|link|display=Fire}} and Darkness. | In {{HW|L}} only, the fourth form of the Mask is the '''Inflamed Deity's Mask''', which is associated with both the Elements of {{Term|HWDE|Element|link|display=Fire}} and Darkness. | ||
{| class=" | {| class="wikitable" style="text-align:center; width:100%; max-width:40em" | ||
|+Weapon Power | |+Weapon Power | ||
|- | |- | ||
| Line 273: | Line 331: | ||
|- | |- | ||
! Lv.1 | ! Lv.1 | ||
| [[File:HW Fierce Deity Mask.png|link=]]<br>'''Fierce Deity Mask''' | | [[File:HW Fierce Deity Mask Icon.png|link=]]<br/>'''Fierce Deity Mask''' | ||
| [[File:HWDE Darkness Element Icon.png|link=|20px]] '''<span style="color:#3c1463">Darkness</span>''' | | [[File:HWDE Darkness Element Icon.png|link=|20px]] '''<span style="color:#3c1463">Darkness</span>''' | ||
| 80 | | 80 | ||
| Line 283: | Line 341: | ||
|- | |- | ||
! Lv.2 | ! Lv.2 | ||
| [[File:HW Furious Deity Mask.png|link=]]<br>'''Furious Deity Mask''' | | [[File:HW Furious Deity Mask Icon.png|link=]]<br/>'''Furious Deity Mask''' | ||
| [[File:HWDE Darkness Element Icon.png|link=|20px]] '''<span style="color:#3c1463">Darkness</span>''' | | [[File:HWDE Darkness Element Icon.png|link=|20px]] '''<span style="color:#3c1463">Darkness</span>''' | ||
| 150 | | 150 | ||
| Line 293: | Line 351: | ||
|- | |- | ||
! Lv.3 | ! Lv.3 | ||
| [[File:HW Vengeful Deity Mask.png|link=]]<br>'''Vengeful Deity Mask''' | | [[File:HW Vengeful Deity Mask Icon.png|link=]]<br/>'''Vengeful Deity Mask''' | ||
| [[File:HWDE Darkness Element Icon.png|link=|20px]] '''<span style="color:#3c1463">Darkness</span>''' | | [[File:HWDE Darkness Element Icon.png|link=|20px]] '''<span style="color:#3c1463">Darkness</span>''' | ||
| 280 | | 280 | ||
| Line 302: | Line 360: | ||
| 420 | | 420 | ||
|- | |- | ||
! Lv.4 {{Exp Game|HWL | ! Lv.4 {{Exp Game|HWL, HWDE}} | ||
| [[File:HW Vengeful Deity Mask.png|link=]]<br>'''Vengeful Deity Mask +''' | | [[File:HW Vengeful Deity Mask Icon.png|link=]]<br/>'''Vengeful Deity Mask +''' | ||
| [[File:HWDE Darkness Element Icon.png|link=|20px]] '''<span style="color:#3c1463">Darkness</span>''' | | [[File:HWDE Darkness Element Icon.png|link=|20px]] '''<span style="color:#3c1463">Darkness</span>''' | ||
| 500 | | 500 | ||
| Line 312: | Line 370: | ||
| 750 | | 750 | ||
|- | |- | ||
! Lv.4+ {{Exp Game|HWL | ! Lv.4+ {{Exp Game|HWL, HWDE}} | ||
| [[File:HW Vengeful Deity Mask.png|link=]]<br>'''Inflamed Deity's Mask''' | | [[File:HW Vengeful Deity Mask Icon.png|link=]]<br/>'''Inflamed Deity's Mask''' | ||
| [[File:HWDE Darkness Element Icon.png|link=|20px]] '''<span style="color:#3c1463">Darkness</span>'''<br>[[File:HWDE Fire Element Icon.png|link=|20px]] '''<span style="color:#E06666">Fire</span>''' | | [[File:HWDE Darkness Element Icon.png|link=|20px]] '''<span style="color:#3c1463">Darkness</span>'''<br/>[[File:HWDE Fire Element Icon.png|link=|20px]] '''<span style="color:#E06666">Fire</span>''' | ||
| 500 | | 500 | ||
| 550 | | 550 | ||
| Line 324: | Line 382: | ||
====Attack Combinations==== | ====Attack Combinations==== | ||
{| class=" | {| class="wikitable" style="text-align:center; width:100%;" | ||
|- | |- | ||
!Attack Pattern | !Attack Pattern | ||
!Effect | !Effect | ||
|- | |- | ||
| '''Y Y Y Y Y Y''' | |style="text-align:center;"| '''Y Y Y Y Y Y''' | ||
| | | | ||
|- | |- | ||
| '''Y Y Y Y X''' | |style="text-align:center;"| '''Y Y Y Y X''' | ||
| | | | ||
|- | |- | ||
| '''Y Y Y Y Y Y Y''' | |style="text-align:center;"| '''Y Y Y Y Y Y Y''' | ||
| | | | ||
|- | |- | ||
| '''Y Y Y Y Y X ''' | |style="text-align:center;"| '''Y Y Y Y Y X ''' | ||
| | | | ||
|} | |} | ||
=====Weak Point Smash===== | =====Weak Point Smash===== | ||
{{Main|Critical Point#Hyrule Warriors | {{Main|Critical Point#Hyrule Warriors}} | ||
Against Captains and Warriors, Young Link dons the Fierce Deity Mask and becomes the Fierce Deity briefly. He then slashes his enemy rapidly, along with any other enemies caught in the attack. Against Giant Bosses, Young Link transforms into the Fierce Deity as he charges his blade with power, then strikes the boss in an uppercut slash before leaping into the air. He then comes down at the boss, striking his blade into the boss's weak point. | Against Captains and Warriors, Young Link dons the Fierce Deity Mask and becomes the Fierce Deity briefly. He then slashes his enemy rapidly, along with any other enemies caught in the attack. Against Giant Bosses, Young Link transforms into the Fierce Deity as he charges his blade with power, then strikes the boss in an uppercut slash before leaping into the air. He then comes down at the boss, striking his blade into the boss's weak point. | ||
| Line 353: | Line 411: | ||
{{Main|Focus Spirit}} | {{Main|Focus Spirit}} | ||
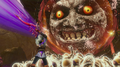
Upon activation, Young Link dons the Fierce Deity's Mask. Its power surges through his body, causing him to scream similarly to the Mask cutscenes in {{MM|-}}. Young Link henceforth becomes the Fierce Deity for the duration of the Focus Spirit. During his Focus Spirit Attack, the Fierce Deity holds up his blade as [[Skull Kid]], along with [[Tatl]] and [[Tael]], appear dropping the Moon. The Fierce Deity then slashes the Moon in half, causing a powerful blow to the surrounding enemies in the shock wave's wake. When the Focus Spirit Gauge is depleted, the Fierce Deity leans back and performs a Spin Attack, bursting in Darkness energy in the process. | Upon activation, Young Link dons the Fierce Deity's Mask. Its power surges through his body, causing him to scream similarly to the Mask cutscenes in {{MM|-}}. Young Link henceforth becomes the Fierce Deity for the duration of the Focus Spirit. During his Focus Spirit Attack, the Fierce Deity holds up his blade as [[Skull Kid]], along with [[Tatl]] and [[Tael]], appear dropping the Moon. The Fierce Deity then slashes the Moon in half, causing a powerful blow to the surrounding enemies in the shock wave's wake. When the Focus Spirit Gauge is depleted, the Fierce Deity leans back and performs a Spin Attack, bursting in Darkness energy in the process. | ||
{{Noncanon|End}} | |||
==={{CoH|-}}=== | |||
{{Ambig|Start}} | |||
{{Stub|CoH}} | |||
{{Ambig|End}} | |||
==={{HWAoC|-}}=== | |||
{{Noncanon|Start}} | |||
{{Stub|HWAoC}} | |||
{{Noncanon|End}} | {{Noncanon|End}} | ||
| Line 360: | Line 429: | ||
==Nomenclature== | ==Nomenclature== | ||
{{ | {{Nomenclature}} | ||
==Gallery== | ==Gallery== | ||
<gallery> | <gallery> | ||
File:Link MM 25Anny.png|25th Anniversary artwork of Link with the Keaton and Zora | File:Link MM 25Anny.png|25th Anniversary artwork of {{Term|Series|Link}} with the {{Term|Series|Keaton Mask}} and {{Term|Series|Zora Mask}} | ||
File:MM Link Goron Mask.png|Artwork of Link with the Goron Mask from {{MM|-}} | File:MM Link Goron Mask Artwork.png|Artwork of {{Term|MM|Link}} with the {{Term|MM|Goron Mask}} from {{MM|-}} | ||
File:MM3D Link Masks Artwork.png|Artwork of Link with the Deku and Zora | File:MM3D Link Masks Artwork.png|Artwork of {{Term|MM3D|Link}} with the {{Term|MM3D|Deku Mask}} and {{Term|MM3D|Zora Mask}} from {{MM3D|-}} | ||
File:HW Young Link.png| | File:MM Link Mask Model.png|An unused {{Term|MM|Link}} {{Term|MM|Mask}} from {{MM|-}} | ||
File:HW Mask Adventure Mode Icon.png| | File:TMC Mask Sprite.png|A {{Term|TMC|Mask}} from {{TMC|-}} | ||
File:Young Link Transforming HW.png|Young Link donning the Mask from {{HW|-}} | File:TMC Mask Sprite 2.png|A {{Term|TMC|Mask}} from {{TMC|-}} | ||
File:HWDE Young Link Inflamed Deity's Mask.png|Young Link using the Inflamed Deity Mask from {{HW|DE|-}} | File:TMC Mask Sprite 3.png|A {{Term|TMC|Mask}} from {{TMC|-}} | ||
File:TMC Mask Sprite 4.png|A {{Term|TMC|Mask}} from {{TMC|-}} | |||
File:TMC Mask Sprite 5.png|A {{Term|TMC|Mask}} from {{TMC|-}} | |||
File:HW Young Link Render.png|Render of {{Term|HW|Link}} with the {{Term|HW|Keaton Mask}} from {{HW|-}} | |||
File:HW Mask Adventure Mode Icon.png|The {{Term|HW|Adventure Mode}} icon for a {{Term|HW|Mask}} from {{HW|-}} | |||
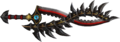
File:HW Furious Deity Mask Sword Model.png|The {{Term|HW|Sword}} used with the {{Term|HW|Furious Deity Mask}} from {{HW|-}} | |||
File:HW Vengeful Deity Mask Sword Model.png|The {{Term|HW|Sword}} used with the {{Term|HW|Vengeful Deity Mask}} from {{HW|-}} | |||
File:Young Link Transforming HW.png|{{Term|HW|Young Link}} donning the {{Term|HW|Mask}} from {{HW|-}} | |||
File:HWDE Young Link Inflamed Deity's Mask.png|{{Term|HWDE|Young Link}} using the {{Term|HWDE|Inflamed Deity Mask}} from {{HW|DE|-}} | |||
</gallery> | </gallery> | ||
{{Categories | |||
|Item Groups, Listings, Side Quests, Weapons | |||
|items= OoT, OoT3D, MM, MM3D, OoA, TWW, TWWHD, TP, TPHD, BotW, HW, HWL, HWDE, CoH, HWAoC | |||
}} | |||
Latest revision as of 08:58, 24 April 2024
Masks are recurring Items in The Legend of Zelda series.[name references needed] Masks go unnamed in The Minish Cap.
Location and Uses
Ocarina of Time
In Ocarina of Time, Masks are part of the Mask Trading Sequence. In it, the Happy Mask Salesman of the Happy Mask Shop lends Link a Mask and has him look for a character to sell it to. Link is then tasked to return to the shop to bring back the Rupees used to purchase the mask, sometimes even having to pay out of his own Wallet when the costumer refuses to pay the appropriate amount. Link is continuously given another Mask to sell until the Happy Mask Salesman has no more left to sell. This allows Link to borrow any of the Masks, plus a few additional ones, to wear around Hyrule.
The Masks are only obtainable and usable while Link is a child. Most of the Masks possess no abilities when worn, however, some like the Skull Mask and the Bunny Hood do grant small abilities.
| Mask | Method of Obtainment | Uses |
|---|---|---|
Keaton Mask |
Available after showing Zelda's Letter to the Soldier guarding the gate to Death Mountain in Kakariko Village. | To be sold for 15 Rupees to the Soldier guarding the entrance to Death Mountain. |
Skull Mask |
Available after selling the Keaton Mask. | To be sold for 20 Rupees to the Skull Kid in Lost Woods. Prevents Keese from attacking. Used to obtain a Deku Stick upgrade at the Forest Stage. |
Spooky Mask |
Available after selling the Skull Mask. | To be sold for 30 Rupees to the Graveyard Boy in the Kakariko Village Graveyard. |
Bunny Hood |
Available after selling the Spooky Mask. | To be sold for 50 Rupees to the Running Man in Hyrule Field. Prevents Stalchildren from appearing. |
Mask of Truth |
Available after selling the Bunny Hood. | Enables Link to listen to Gossip Stones. Used to obtain a Deku Nut upgrade at the Forest Stage. |
Goron Mask |
Available after selling the Bunny Hood. | — |
Zora Mask |
Available after selling the Bunny Hood. | — |
Gerudo Mask |
Available after selling the Bunny Hood. | — |
Majora's Mask
In Majora's Mask, numerous Masks appear. Some give certain abilities when worn, while others completely transform Link's form.
| Mask | Method of Obtainment | Uses | In-game Description |
|---|---|---|---|
Deku Mask |
Obtained after learning the "Song of Healing." | Transforms Link into a Deku. | Wear it with (C) to assume Deku form. Use (C) to change back. |
Goron Mask |
Obtained after playing the "Song of Healing" in Darmani III's grave in the Goron Graveyard. | Transforms Link into a Goron. | Wear it with (C) to assume Goron form. Use (C) to change back. |
Zora Mask |
Obtained after playing the "Song of Healing" for Mikau in the Great Bay Coast. | Transforms Link into a Zora. | Wear it with (C) to assume Zora form. Use (C) to change back. |
Fierce Deity's Mask |
Obtained after playing Hide-and-Seek with the Moon Children and giving all 20 Masks to them. | Transforms Link into the Fierce Deity Link. | Wear it with (C). Its dark power can be used only in boss rooms. |
All-Night Mask |
Bought in the Curiosity Shop on the Final Day for 500 Rupees. | Keeps Link from falling asleep. | When you wear it with (C), you don't get sleepy. |
Blast Mask |
Obtained after stopping Sakon from stealing the Old Lady's Bomb Bag. | Detonates like a Bomb, but damages Link. | Wear it with (C), then detonate it with (B)... Losing hearts from the explosion is a side effect. |
Bremen Mask |
Obtained after hearing Guru-Guru's confessions at night at the Laundry Pool | Plays music and prompts small animals to march. | Wear it with (C) so young animals will mistake you for their leader. |
Bunny Hood |
Obtained after making all of Grog's Cuccos from the Cucco Shack grow. | Increases running speed, jumping distance, and agility. | Wear it with (C) to be filled with the speed and hearing of the wild. |
Captain's Hat |
Obtained after defeating Captain Keeta in the Ikana Graveyard. | Enables conversation with Stalchildren Prevents Stalchildren and ReDead attacks. |
Wear it with (C) to pose as Captain Keeta. |
Couple's Mask |
Earned through the Reuniting Kafei and Anju sidequest. | Symbolizes ultimate love, stops long disputes among people. | When you wear it with (C), you can soften people's hearts. |
Don Gero's Mask |
Obtained after feeding the starving Goron in the Mountain Village | Allows communication with Frogs. | When you wear it, you can call the Frog Choir members together. |
Garo's Mask |
Obtained after winning the Gorman Track race. | Allows entry into the Ikana Canyon. Summons Garo Ninjas. Prevents ReDeads from attacking. |
This mask can summon the hidden Garo ninjas. Wear it with (C). |
Great Fairy Mask |
Obtained after retrieving the lost Stray Fairy from Clock Town for the second time. | Attracts Stray Fairies. | The mask's hair will shimmer when you're close to a Stray Fairy. |
Giant's Mask |
Obtained after defeating one of the Eyegores in the Stone Tower Temple. (MM) Obtained after defeating the blue Twinmold. (MM3D) |
Transforms Link into a giant during the battle against Twinmold. | If you wear it in a certain room, you'll grow into a giant. |
Gibdo Mask |
Obtained after playing the "Song of Healing" for Pamela's Father. | Prevents Gibdos and ReDeads from attacking. | Use it with (C). Even a real Gibdo will mistake you for its own kind. |
Kafei's Mask |
Obtained through the reuniting Kafei and Anju sidequest. | Characters will talk about Kafei. | Wear it with (C) to inquire about Kafei's whereabouts. |
Kamaro's Mask |
Obtained after playing the "Song of Healing" for Kamaro in Termina Field. | Allows Link to dance. | Wear this with (C) to perform a mysterious dance. |
Keaton Mask |
Obtained through the reuniting Kafei and Anju sidequest. | Summons Keatons when rustling grass is attacked. | The mask of the ghost fox, Keaton. Wear it with (C). |
Mask of Scents |
Obtained after completing the Deku Butler's race in the Deku Shrine. | Enables Link to find the location of Mushrooms. | Wear it with (C) to heighten your sense of smell. |
Mask of Truth |
Obtained after defeating all the Gold Skulltulas in the Swamp Spider House. | Allows Link to listen to Gossip Stones and the thoughts of animals. | Wear it to read the thoughts of Gossip Stones and animals. |
Moon Mask |
— | Used to create the Couple's Mask. Unusable by Link. | — |
Postman's Hat |
Obtained through the reuniting Kafei and Anju sidequest. | Enables Link to check the contents of Postboxes. | You can look in mailboxes when you wear this with (C). |
Romani's Mask |
Obtained through the Helping Romani and Cremia sidequest. | Grants access to the Milk Bar at night. | Wear it with (C) to show you're a member of the Milk Bar, Latte. |
Stone Mask |
Obtained after helping Shiro recover his energy with a Potion in the Road to Ikana. | Makes Link invisible to most enemies and characters. | Become as plain as stone so you can blend into your surroundings. |
Sun Mask |
— | Used to create the Couple's Mask. Unusable by Link. | — |
Troupe Leader's Mask |
Obtained after playing the "Ballad of the Wind Fish" for Gorman in the Milk Bar. | Calms angry people. Prevents attacks from the Milk Road pursuers. |
People related to Gorman will react to this. |
Boss Remains |
Obtained after defeating its corresponding boss. | Allows a rematch with each boss. Unusable by Link. | The remains of the boss in [Temple]. |
Majora's Mask |
— | Grants destructive, corrupting powers to the one who wears it. Unusable by Link. | — |
Oracle of Ages
In Oracle of Ages, the Doggie Mask is part of the Trading Sequence. It is given by the Happy Mask Salesman in exchange for the Tasty Meat. The Mask is then given to Mamamu Yan in Lynna City for her dog. She gives Link the Dumbbell in return.
The Wind Waker
In The Wind Waker, the Hero's Charm is a Mask Link can wear to view enemy and bosses' health bars when targeting. It is received after Link gives 40 Joy Pendants to Mrs. Marie in Windfall Island. In The Wind Waker HD, the Hero's Charm is instead located inside a Treasure Chest at the end of the Savage Labyrinth.
Jalhalla, the boss of the Earth Temple, is a mask that boasts control over Poes. Link must defeat the fifteen Poes that make up its body in order to defeat it.
The Minish Cap
Masks appear on walls in The Minish Cap, specifically the walls in Mayor Hagen's House and the Royal Hyrule Library. If Link uses the Pegasus Boots to Dash into the wall near a Mask, it will fall off and break on the ground, occasionally dropping Rupees.
Twilight Princess
- Main articles: Hawkeye, Fused Shadow, and Zant Mask
In Twilight Princess, the Hawkeye is a Mask which, when worn, allows Link to view long distances. It is also compatible with the Hero's Bow, which produces a cross-hair for firing. The Mask can be bought from Malo in Kakariko Village's Malo Mart for 100 Rupees after completing Talo and Malo's Bow minigame.
The Fused Shadow is a type of Mask that possesses immense power. The Mask holds the magical power of the Dark Interlopers, and was used in the Interloper War. By order of the Goddesses, it was sealed away by the Spirits of Light. It was broken and divided into four parts, which Midna tasks Link with finding during the first half of the game. The helmet Midna wears is one part of the Fused Shadow.
The Zant Mask is an enemy that resembles a giant version of Zant's mask helmet. It only appears in the Palace of Twilight.
Breath of the Wild
| Mask | Defense | Description |
|---|---|---|
Bokoblin Mask |
3 | Kilton's handmade Bokoblin headgear. It's almost charming in a cute, monstrous kind of way... Equip it to blend in with Bokoblins. |
Fierce Deity Mask |
3 | Legends say this mask was once worn by a hero from a world in which the moon threatened to fall. It looks scary, but wearing it offers fierce, godlike power. |
Gerudo Veil |
1 | A mask worn by Gerudo women. It protects the skin from the harsh sun, but don't expect it to protect much in combat... |
Korok Mask |
1 | A mask inspired by those fun-loving Koroks. It shakes when one is hiding nearby. It's a rather rare find. |
Lizalfos Mask |
3 | Kilton's handmade Lizalfos headgear. It's designed to replicate the unique tongue and horn of the Lizalfos. Equip it to blend in with Lizalfos. |
Lynel Mask |
3 | Kilton's handmade Lynel headgear. It's so well crafted, it can deceive a real Lynel. Equip it to blend in with Lynels, but don't linger too long. Those beasts are smart. |
Majora's Mask |
1 | An eerie mask passed down from ancient times. Wearing it makes it harder for certain enemies to spot you. It's a rather rare find. |
Moblin Mask |
3 | Kilton's handmade Moblin headgear. It's designed to replicate the Moblin's distinct long nose and large horn. Equip it to blend in with Moblins. |
Radiant Mask |
3 | A special mask for members of the Gerudo Secret Club. Painted with dye made from crushed luminous stones, it gives off a lurid, mysterious glow in the dark. |
Sheik's Mask |
2 | A mask said to have been worn by a Sheikah who saved a time-traveling hero. Made from the finest of Sheikah stealth fabrics, it is the final word in undercover gear. |
Stealth Mask |
2 | It may look like a regular cloth mask, but it was made using Sheikah crafting techniques to suppress the noisy rustling of clothes. Perfect for sneaking about. |
Other Appearances
Freshly-Picked Tingle's Rosy Rupeeland
In Freshly-Picked Tingle's Rosy Rupeeland, Tingle receives a Mask for defeating Baron. The origin of this Mask is debated, with a different story told by each Bodyguard, and is immediately sold to that Bodyguard. It has no purpose beyond this financial reward.
Hyrule Warriors

In Hyrule Warriors, the Fierce Deity's Mask and the Hawkeye appear as an Attack Badge and an Assist Badge, respectively. The Fierce Deity's Mask Badge grants Warriors an additional Special Attack Gauge. A third gauge is granted by crafting its enhanced Badge. The Hawkeye Badge increases the duration of Bow power-ups. The duration can be further increased by crafting its enhanced Badge.
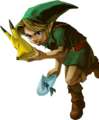
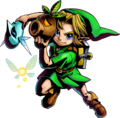
Several other Masks from Majora's Mask appear as unlockable Costumes in the Termina Map, which are included in the Majora's Mask DLC Pack. A Keaton Mask is also worn by Young Link over his head.
The Mask is also a class of Weapon used by Young Link, based on the Fierce Deity's Mask. It is associated with Darkness. While Young Link primarily uses the Kokiri Sword as his actual Weapon in battle, he can temporarily transform into the Fierce Deity as part of his Weak Point Smash, Special Attack, and predominately his Focus Spirit. While in Focus Spirit, the Kokiri Sword transforms into Fierce Deity's sword, and his attack power, speed and range is heightened for the duration of the Focus Spirit. As Young Link is able to play the Ocarina of Time to empty his Special Attack Meter and fill his Magic Meter, it is possible for Young Link to stay in his Focus Spirit for lengthy periods of time.
Variations
The default Mask is the Fierce Deity Mask. The second form of the Mask is the Furious Deity Mask, followed by the Vengeful Deity Mask.
In Hyrule Warriors Legends only, the fourth form of the Mask is the Inflamed Deity's Mask, which is associated with both the Elements of Fire and Darkness.
| Weapon | Number of Stars | |||||||
|---|---|---|---|---|---|---|---|---|
| Tier | Icon | Element(s) | 0 | 1 | 2 | 3 | 4 | 5 |
| Lv.1 | Fierce Deity Mask |
80 | 88 | 96 | 104 | 112 | 120 | |
| Lv.2 | Furious Deity Mask |
150 | 165 | 180 | 195 | 210 | 225 | |
| Lv.3 | Vengeful Deity Mask |
280 | 308 | 336 | 364 | 392 | 420 | |
| Lv.4 (HWL | HWDE) | Vengeful Deity Mask + |
500 | 550 | 600 | 650 | 700 | 750 | |
| Lv.4+ (HWL | HWDE) | Inflamed Deity's Mask |
500 | 550 | 600 | 650 | 700 | 750 | |
Attack Combinations
| Attack Pattern | Effect |
|---|---|
| Y Y Y Y Y Y | |
| Y Y Y Y X | |
| Y Y Y Y Y Y Y | |
| Y Y Y Y Y X |
Weak Point Smash
Against Captains and Warriors, Young Link dons the Fierce Deity Mask and becomes the Fierce Deity briefly. He then slashes his enemy rapidly, along with any other enemies caught in the attack. Against Giant Bosses, Young Link transforms into the Fierce Deity as he charges his blade with power, then strikes the boss in an uppercut slash before leaping into the air. He then comes down at the boss, striking his blade into the boss's weak point.
Special Attack
Young Link dons the Fierce Deity's Mask and, after prepping his sword, swings it in a wide Spin Attack. This attack hits a wide range ahead and around Young Link, and carries the Darkness Element.
Focus Spirit
Upon activation, Young Link dons the Fierce Deity's Mask. Its power surges through his body, causing him to scream similarly to the Mask cutscenes in Majora's Mask. Young Link henceforth becomes the Fierce Deity for the duration of the Focus Spirit. During his Focus Spirit Attack, the Fierce Deity holds up his blade as Skull Kid, along with Tatl and Tael, appear dropping the Moon. The Fierce Deity then slashes the Moon in half, causing a powerful blow to the surrounding enemies in the shock wave's wake. When the Focus Spirit Gauge is depleted, the Fierce Deity leans back and performs a Spin Attack, bursting in Darkness energy in the process.
Cadence of Hyrule
Hyrule Warriors: Age of Calamity
Trivia
- In A Link Between Worlds, numerous characters in Lorule wear Masks. A Masked Elder leads a group of Masked Followers, who have come to wear Masks resembling monsters in the hopes that it will bring them salvation from Lorule's crumbling world. Majora's Mask also appears inside Link's House.
- In Breath of the Wild, certain pieces of Armor that Link can wear are Masks, such as the Bokoblin Mask that allows him to disguise as a Bokoblin.
Nomenclature
| Language | Names | Meanings |
|---|---|---|
ChineseSI | 面具 (Miànjù) (OoT)[4] | |
FrenchCA | Masque (MM3D)[3] | |
Italian | Maschera (MM)[2] | Mask |
SpanishLA | Máscara (MM3D)[1] | |
| This table was generated using translation pages. To request an addition, please contact a staff member with a reference. | ||
Gallery
-
25th Anniversary artwork of Link with the Keaton Mask and Zora Mask
-

Artwork of Link with the Goron Mask from Majora's Mask
-
Artwork of Link with the Deku Mask and Zora Mask from Majora's Mask 3D
-
An unused Link Mask from Majora's Mask
-

A Mask from The Minish Cap
-

A Mask from The Minish Cap
-

A Mask from The Minish Cap
-

A Mask from The Minish Cap
-

A Mask from The Minish Cap
-
Render of Link with the Keaton Mask from Hyrule Warriors
-

The Adventure Mode icon for a Mask from Hyrule Warriors
-
The Sword used with the Furious Deity Mask from Hyrule Warriors
-
The Sword used with the Vengeful Deity Mask from Hyrule Warriors
-
Young Link donning the Mask from Hyrule Warriors
-
Young Link using the Inflamed Deity Mask from Hyrule Warriors: Definitive Edition


- ↑ "Usa este icono para acceder a la pantalla de máscaras y ver las que posees." (Majora's Mask 3D manual, [which page?])
- ↑ "Nell'avventura di Link a Termina le maschere svolgono un ruolo importante." — The Legend of Zelda: Majora's Mask | Nintendo 64 | Giochi | Nintendo, www.nintendo.it, retrieved September 10, 2020.
- ↑ "Faites glisser un masque vers un emplacement pour l'y assigner." (Majora's Mask 3D manual, [which page?])
- ↑ Ocarina of Time manual, iQue version, pg. 26
- Items
- Listings
- Side Quests
- Weapons
- Items in Ocarina of Time
- Items in Ocarina of Time 3D
- Items in Majora's Mask
- Items in Majora's Mask 3D
- Items in Oracle of Ages
- Items in The Wind Waker
- Items in The Wind Waker HD
- Items in Twilight Princess
- Items in Twilight Princess HD
- Items in Breath of the Wild
- Items in Hyrule Warriors
- Items in Hyrule Warriors Legends
- Items in Hyrule Warriors: Definitive Edition
- Items in Cadence of Hyrule
- Items in Hyrule Warriors: Age of Calamity