Moldorm (Boss)
Template:Boss Moldorm,(ALttP)[1] also known as Big Moldorm,(FSA)[1] is a recurring Boss in The Legend of Zelda series.{{Name Ref|BBII They are a much larger version of the common Moldorm.
Characteristics
A Link to the Past
Moldorms made their first appearance as a boss in A Link to the Past. It first appears at the very top of the Tower of Hera and is an infamous boss battle, due to the fact that Link may have to face it many times before he can finally defeat it. The battlefield is unique in the game in that it has no boundaries, meaning that the boss can send Link to lower floors if he is unluckily pushed from the edge by the foe. The Moldorm will actively charge at Link, and has a springy, bouncy body similar to a Hardhat Beetle or a Bumper. Striking it with his sword or getting hit will send Link flying. If Link falls to the lower floor, the entire boss battle will restart; as the boss recover to full health when Link returns.
To harm the monster, he must strike its vulnerable tail; the very tip has a twirling red weak point that causes damage to the monster when struck. The monster requires just six hits with Link's Fighter's Sword to destroy, but its erratic movement makes this extremely difficult. Not only that, but when the monster is close to defeat, it will speed up dramatically, making avoiding and striking the monster more a matter of luck than judgment. While falling from the battle will not harm Link, taking hits from the monster will. The floor below contains a large number of jars that hold Hearts, so Link can continue his attempt to destroy Moldorm over and over until he finally succeeds and obtains the Pendant of Wisdom.
The Moldorm makes a reappearance in Ganon's Tower, only the battlefield is shaped differently, making it harder to defeat; the floor below contains spikes that Link might fall on to as well. However, if Link has the Golden Sword, he can kill this Moldorm in just two hits.
Link's Awakening
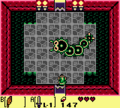
In Link's Awakening, Moldorm appears as the first of the Nightmares that Link must face in his quest to wake the Wind Fish, and resides in the Tail Cave with many Mini-Moldorms and guards the Full Moon Cello. Unlike its previous appearance, it has large mandibles and is able to speak, albeit between loud buzzing.[2] As one of the Nightmares, its desire is to destroy the outsider, Link. Like its previous appearance, it tries to drive Link off the platform the battle takes place upon. The arena is much smaller than before, and Link has no easy way to heal himself if he takes damage; not only that, but with only three Heart Containers, Link will be defeated in only three hits. The Moldorm will take less hits than before, but will charge wildly around after being hit with the sword, before slowing down again (unless it's the final hit, where he will continue to move extremely fast until defeated). The best method to defeat the monster is to use the Whirling Blade Technique. Only two strikes from this move will defeat the monster.
A Link Between Worlds

The boss Moldorm returns as the boss of the Tower of Hera, but guards the Pendant of Power instead of the Pendant of Wisdom. It is fought in the same manner as in A Link to the Past, except that it does not regain health if Link is knocked off the platform. Moldorm's only attack is to glide around the area in an attempt to bump Link off the platform.
A stronger, purple Moldorm appears as one of the bosses in Lorule Castle. Instead of having no walls, its arena has walls that contract and recede, giving Link less room to maneuver. The difficulty of this fight can be mitigated if Link has the Red Mail and Master Sword Lv3. Link can also opt to remain on the platform above the boss floor and throw Bombs down into the arena, letting them explode to damage Moldorm.
Both forms of Moldorm are fought in the Treacherous Tower. The yellow Moldorm is fought as the final enemy in Beginner mode, while the purple Moldorm is the final enemy fought in Advanced mode. They are fought in the same manner as in their storyline battles. This time, however, there is no way for Link to regenerate health in the arena itself. The purple Moldorm can now also push him off the platform.
Tri Force Heroes
In Tri Force Heroes, Moldorm appears as the boss of the Fire Temple Level. It appears as a giant Moldorm with bright, colored eyes, and is fought in a caged enclosure suspended over a pit of lava. Like its other incarnations, it crawls around the area while making sharp turns. Moldorm's eyes will emit green, red, or blue light, and it will pursue the Link whose tunic matches the current color of its eyes. If this Link is hit, Moldorm's tail will be briefly shielded and it will follow a differently colored Link. Three lava pillars beneath the platform will also periodically rise through the red, circular grates that appear on the floor of the platform. They will harm any of the Links who come in contact with them.
The Links must avoid both Moldorm and the pillars of lava while aiming for the creature’s glowing tail and striking it with the Sword. The Link who matches the color of its glowing eyes can lure the Moldorm away, while the other Links aim for its tail. After being struck, its tail will be temporarily encased in a protective shell and it will start to move faster. Eventually Moldorm's tail will glow a bright red and is held higher up, requiring that two of the Links form a Totem in order to reach and strike it. Eventually after taking enough hits, Moldorm will raise its tail even higher and start to quickly and erratically move around its enclosure. The Links must then form a Totem of three to strike its tail. This blow will finish the beast.
Other Appearances
A Link to the Past (Ishinomori)

In the A Link to the Past comic by Shotaro Ishinomori, the Moldorm Link fights in the Tower of Hera appears as a giant spider as opposed to the centipede-like monster fought in the game. When the monster's illusion appears in Ganon's Tower, it is still called a Moldorm.[3]
The Moldorm first appears in Chapter 4, where it ambushes the young hero from above. Link strikes it in one of its eyes with his blade, and upon being told that the Pendant of Wisdom is inside the beast's eye, Link reaches for it and takes it, restoring his cursed arm.[4] Now with all the Pendants of Virtue in his hand, the monster tumbles defeated to the bottom of the tower and breaks Link's fall as it hits the ground.
A Link to the Past (Himekawa)
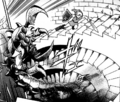
The Moldorm briefly appears in the A Link to the Past manga by Akira Himekawa as well, this time in a much more accurate depiction. Link is shown fighting off the giant centipede as he runs up the Tower of Hera. He manages to slice through one of its pincers and continue his dash up the winding stairway to the Pendant of Wisdom, hanging from the hand of an elegant statue at the very top. Upon collecting the final Pendant, he is mysteriously warped to the Lost Woods.
Ancient Stone Tablets
Nomenclature
| Language | Name | Meaning | |
|---|---|---|---|
| Japanese | デグテール (Degu Tēru) | Big Tail | |
| FrenchEU | Moldorm Gigantehl (TFH) |
Same as English. Gigantail | |
| German | Moldorm | Same as English. | |
| Italian | Gran Moldorm Gran Shippo (TFH) |
Big Moldorm Big Shippo | |
| Korean | 거대 꼬리리 (Geodae Kkoriri) | Big Tail-il | |
| SpanishEU | Degutail (TFH) | ||
Gallery
-
Link fighting Moldorm from Link's Awakening DX
-
A damaged Moldorm from A Link Between Worlds
-
The purple Moldorm from A Link Between Worlds
-
Moldorm from the A Link to the Past manga by Akira Himekawa
-
Artwork of Moldorm from A Link to the Past (Barcode Battler II)
See Also
References
- ↑ 1.0 1.1 Encyclopedia, Dark Horse Books, pg. 193 (ALttP)
- ↑ "BUZZZZZ! BUZZZZ! OUTZZZIDER!" — Moldorm (Link's Awakening DX)
- ↑ "It--It's Agahnim! It can't be! I destroyed him! [...] The Lanmola?! The Moldorm?! They can't be real! I defeated them all!" (A Link to the Past, Nintendo Power, pg. 11)
- ↑ "Link... The pendant is the third eye..." (A Link to the Past, Nintendo Power, pg. 12)


