Gohma: Difference between revisions
(→Gallery: Gohma's Japanese title in Hyrule Warriors.) |
mNo edit summary |
||
| (235 intermediate revisions by 51 users not shown) | |||
| Line 1: | Line 1: | ||
{{ | {{Infobox Boss | ||
{{ | |type= | ||
|image= | |||
{{Media | |||
|Artwork TLoZ= File:TLoZ Gohma Artwork.png | |||
|Artwork OoT= File:OoT Gohma Artwork.png | |||
|Artwork TWW= File:TWW Gohma Artwork.png | |||
|Model OoT= File:OoT Gohma Model.png | |||
|Model OoT3D= File:OoT3D Gohma Model.png | |||
|Model TWW= File:TWW Gohma Model.png | |||
|Model TWWHD= File:TWWHD Gohma Model.png | |||
|Model LANS= File:LANS Gohma Model.png | |||
|Sprite TLoZ= File:TLoZ Gohma Sprite.png | |||
|Sprite LA= File:LA Gohma Sprite.png | |||
|Sprite LADX= File:LADX Gohma Sprite.png | |||
|Sprite OoS= File:OoS Gohma Sprite.png | |||
|Sprite FSA= File:FSA Gohma Sprite.png | |||
}} | |||
|caption= | |||
|pronunciation= {{IPA|ˈgoʊmɑː}} {{Respell|GOH|mah}}<ref>{{Cite Web|quote=For example, here's Gohma. |published=August 4, 2014|url=https://www.youtube.com/watch?v=3_DZtTR3zu0&t=5m36s|title=Hyrule Warriors Direct|site=YouTube}}</ref> | |||
|title= | |||
{{Infobox Game Blocks | |||
|OoT= Parasitic Armored Arachnid<ref>{{Cite|'''Parasitic Armored Arachnid'''<br/>{{Big|'''GOHMA'''}}|Game Screen|OoT}}</ref>, Queen Gohma<ref name="Queen Gohma">{{Cite|How did you know our secret? How irritating! It's so annoying that I'm going to reveal the secret of Queen Gohma to you! In order to administer the coup de grâce to Queen Gohma, strike with your sword {{Color|OoT3D Red|while she's stunned}}. Oh, Queenie... Sorry about that!|Deku Scrub|OoT3D}}</ref> | |||
|HW= Arthropod Cyclops Monster<ref name="Arthropod Cyclops Monster">{{Cite|Arthropod Cyclops Monster<br/>{{Big|Gohma}}|Game Screen|HWDE}}</ref> | |||
}} | |||
|race= | |||
|gender= | |||
{{Infobox Game Blocks | |||
|OoT= Female<ref name="Queen Gohma"/> | |||
|OoS= Male<ref>{{Cite Guide|quote= |game= OoS |guide= Versus |page= 38 {{Exp Game|OoS}}}}</ref> | |||
}} | |||
|game= TLoZ, LA, OoT, OoS, TWW, FSA | |||
|other= TLoZ (TV Series), TLoZ (Valiant Comics), TCT, TFoE, TWoG, OoT (Himekawa), TWWL4kNL, HW | |||
|dungeon= {{List|{{Term|TLoZ|Level 6|link}}, [[Catfish's Maw]], [[Inside the Deku Tree]], [[Dancing Dragon Dungeon]], [[Dragon Roost Cavern]], [[Temple of Time (Dungeon)|Temple of Time]]}} | |||
|habitat= | |||
|health= | |||
{{Infobox Game Blocks | |||
|TLoZ= {{HP|TLoZ|2}} {{Small|(Red)}}, {{HP|TLoZ|6}} {{Small|(Blue)}} | |||
|LA= {{HP|LA|12}} | |||
|OoT= {{HP|OoT|10}} | |||
}} | |||
|weakness= | |||
|reward= | |||
|exp= | |||
|theme= | |||
|strategy= | |||
{{Infobox Game Blocks | |||
|TLoZ= {{StrategyWiki|The Legend of Zelda/Underworld/Quest 1/Dungeon 6#Boss|Gohma}} | |||
}} | |||
|voiceactor= | |||
|attack= | |||
{{Infobox Game Blocks | |||
|TLoZ= | |||
{{Damage | |||
|attack1= Contact | |||
|damage1= 1.00 | |||
|attack2= Eye Beam | |||
|damage2= 1.00 | |||
}} | |||
|LA= | |||
{{Damage | |||
|attack1= Contact | |||
|damage1= 1.00 | |||
|attack2= Eye Beam | |||
|damage2= 0.50 | |||
}} | |||
|OoT= | |||
{{Damage | |||
|attack1= Slam | |||
|damage1= 0.50 | |||
|attack2= Lay Eggs | |||
|damage2= 0.00 | |||
}} | |||
|TWW= | |||
{{Damage | |||
|attack1= Claw Slash | |||
|damage1= 0.25 | |||
|attack2= Claw Slam | |||
|damage2= 0.50 | |||
|attack3= Fire Breath | |||
|damage3= 0.50 | |||
}} | |||
}} | |||
}} | |||
{{Term/Store|Gohma|Gohmas|Series, TLoZ, LA, LADX, LANS, OoT, OoT3D, OoS, TWW, TWWHD, FSA, TFoE, HW, HWL, HWDE|plural}},{{Exp Game|TLoZ, LA, OoT, OoS, TWW, FSA, TFoE, HW, HWL, HWDE}}<ref>{{Cite Book|quote= |book= E |publisher= |page= 182 {{Exp Game|TLoZ, LADX, OoT, OoT3D, OoS, TWW, TWWHD, FSA}}}}</ref><ref>{{Cite Book|quote= |book= DAB |publisher= |page= 82}}</ref><ref>{{Cite|It's a Gohma.|Link|TFoE}}</ref><ref name="Arthropod Cyclops Monster"/>{{Name Ref|BSTLoZ, TWoG}} also known as '''One-Eyed Monsters''',{{Exp Game|FSA}}<ref>{{Cite|Hah... I know what my son says about the weapons in the storage shed... but they're no match for the {{Color|FSA Purple|one-eyed monsters}}. A greater weapon may lie in the cave to the north, where my ancestors rest. But the earth there has crumbled to bits, making it impossible to get there.|Old Man|FSA}}</ref> are recurring {{Plural|Series|Boss|link}} in {{TLoZ|Series}}. {{Plural|Series|Gohma}} go unnamed in {{TWWL4KNL}}. They are usually depicted as large, one-eyed arthropods and often shown as mothers of the {{Plural|Series|Gohma Larva|link}}. They are among the most recurring {{Plural|Series|Boss}} in the series since its conception. | |||
==Characteristics== | |||
==={{TLoZ|-}}=== | |||
{{Manual|TLoZ|Gohma|The super-huge crab that lives in the labyrinths. Its hard shell will repulse any attack. Attack its weak point with a special weapon.}} | |||
A Gohma makes its first appearance in {{TLoZ}}. Its hard shell will repel all attacks, but its single eye is vulnerable to [[Arrow]]s shot with the [[Bow]].<ref>{{Cite Manual|quote= The super-huge crab that lives in the labyrinths. Its hard shell will repulse any attack. Attack its weak point with a special weapon.|game= TLoZ|page= 38}}</ref> Due to this weakness, Gohma frequently keeps its eye closed, and attacks by shooting beams from a distance. There are two varieties of Gohma in this game, those being red and blue; the red Gohma can be killed by a single [[Arrow]] from the [[Bow]], while the blue one takes three Arrows to kill. | |||
In the First Quest, a red Gohma is the boss of {{Term|TLoZ|Level 6|link}}, and also appears as a mini-boss in {{Term|TLoZ|Level 8|link}}. | |||
{{ | |||
{{ | |||
}} | |||
In the [[Second Quest]], a red Gohma appears as an enemy in {{Term|TLoZ|Level 5|link}} and as a mini-boss in {{Term|TLoZ|Level 7|link}}, while a blue Gohma is the boss of Level-6. | |||
{{ | |||
== | ==={{LA|-}}=== | ||
= | In {{LA}}, two {{Plural|LA|Gohma}} appear as the main {{Plural|LA|Sub-Boss}} of the fifth {{Term|LA|Dungeon}}, {{Term|LA|Catfish's Maw|link}}. They move back and forth sideways with their eyes constantly closed, and occasionally try to ram into {{Term|LA|Link|link}}. Only the {{Term|LA|Gohma}} closest to {{Term|LA|Link}} will try to attack. They will also sometimes open their eyes to release a fireball, which also makes them vulnerable to the {{Term|LA|Hookshot|link}}. Playing the "{{Term|LA|Ballad of the Wind Fish|link}}" causes them to instantly open their eyes.{{Verify|LA}} | ||
Additionally, {{Term|LA|Link}} could also use a {{Term|LA|Bow}} and fire {{Plural|LA|Arrow}} into their eyes, which appears to deal more damage than the {{Term|LA|Hookshot}}.{{Verify|LA}} | |||
=== | ==={{OoT|-}}=== | ||
{{Navi | |||
|quote1= {{Color|OoT White|Gohma}}<br/>It's one of the parasitic monsters inside the Deku Tree! Its eye is vulnerable when it's red! | |||
}} | |||
'''Parasitic Armored Arachnid: Gohma''' debuts as the first boss enemy Link will encounter in {{OoT}}. After the [[Great Deku Tree]] refuses to place the [[Spiritual Stones#Kokiri's Emerald|Spiritual Stone of the Forest]] into [[Ganondorf]]'s hands, the King of Thieves curses the ancient tree with a monstrous, Tektite-like creature,<ref>{{Cite|Take this stone with you. The stone that man wanted so much, that he cast the curse on me...|Great Deku Tree|OoT}}</ref> Gohma. With the creature ravaging the inner body of the Deku Tree, spreading her offspring, scattering her web, and leeching on the Tree's life,<ref>{{Cite|That evil man who cast the death curse upon me and sapped my power...|Great Deku Tree|OoT}}</ref> the Great Deku Tree has no choice but to request for Link's help with the aid of [[Navi]] the fairy. Queen Gohma is found on the deepest floor inside the Great Deku Tree, resting atop the ceiling. | |||
[[ | |||
When Link confronts her, he discovers she has one weakness: her eye is vulnerable when it turns red.<ref>{{Cite|Its eye is vulnerable when it's red!|Navi|OoT}}</ref> By shooting at her red eye with a [[Deku Seed]] via the [[Fairy Slingshot]], Gohma will be stunned, leaving her open to attack from Link's sword or [[Deku Stick]]s.<ref name="Queen Gohma"/> After being hit at least once, Gohma will climb onto the room's ceiling and, if she is not stunned with a Deku Seed in time, she will attempt to hatch three Gohma Larva to aid her in battle. However, there is a strategy to defeat Gohma faster that only requires one [[Deku Stick]]. Once Gohma is stunned, Link must jump strike with the Deku Stick and then do multiple shield stabs (done by attacking with the sword while holding R but not [[Z-Targeting]]). Another strategy is to repeatedly land a hit at the very last frame before Gohma gets back up until she is defeated, though this requires perfect timing. It is possible to kill Gohma on the first [[Critical Point]] both ways. The amount of time Queen Gohma remains stunned for varies according to the technique administered: two seconds for using a [[Deku Nut]], five if Link fires a Deku Seed with his slingshot while her eye is red, and around eight if she is shot whilst hanging from the ceiling. | |||
After Link strikes Gohma's eye enough times, she will be defeated, causing the curse on the Deku Tree to break. As a reward, Link receives a [[Heart Container]] and the [[Kokiri]]'s Emerald from the Great Deku Tree before he passes away.<ref>{{Cite|You got the Kokiri's Emerald! This is the Spiritual Stone of the Forest, now entrusted to you by the Great Deku Tree|N/A|OoT}}</ref> | |||
' | |||
==={{OoS|-}}=== | |||
Gohma also makes an appearance inside the [[Dancing Dragon Dungeon]] in {{OoS}}.<ref>{{Cite Guide|quote= |game= OoA|publisher= Nintendo|page=35}}</ref> However, this time around, the beast has an extra appendage, a deadly claw. If Link runs in front of her, she will charge and grab him, then throw him to the ground causing damage. The claw can be removed by slashing with the sword. Additionally, the [[Roc's Feather]] can be used to jump over the claw. Once the claw is destroyed, the [[Slingshot]] can be fired at its open eye, while avoiding the larvae it summons. Defeating Gohma yields the fourth [[Essences of Nature|Essence of Nature]], the [[Soothing Rain]]. | |||
==={{TWW|-}}=== | |||
{{Figurines|TWW}} | |||
[[File:Gohma(WW).jpg|right|thumb|170px|Gohma from {{TWW|-}}]] | |||
In {{TWW}}, Gohma is placed by Ganondorf below the resting spot of the Spirit of the Sky, [[Valoo]], high on [[Dragon Roost Island]]'s peak, without the Sky Spirit knowing about it. Gohma's presence repeatedly torments Valoo and thus angers him enough that he becomes violent and unpredictable. The Sky Spirit causes trouble, confusion and panic among the [[Rito]], the protectors of [[Din's Pearl]]. Link offers to help the Rito, and when he reaches the boss room inside [[Dragon Roost Cavern]], he finds an impressive, lava-resistant, [[Magtail]]-like monster as his foe. Despite its menacing stature, Link manages to crack open Gohma's armor and delivers many lethal strikes to its eye with his sword, eventually killing her.<ref>{{Cite Guide|quote= |game= TWW |guide= Prima |page= 52}}</ref> | |||
To defeat Gohma, Link must wait for an opening to grapple onto Valoo's tail, which dangles from the roof, while avoiding Gohma's pincers. When Link swings to safety, part of the chamber's ceiling falls onto Gohma, cracking her armor. After repeating this process several times, Gohma's armor will be destroyed. At this stage, Link grapples Gohma's eye so he can access it with his sword. Once the eye is in range, Link must attack it with his sword until the boss perishes by hardening and exploding. | |||
For defeating Gohma, Link's prize is a Heart Container, and an apology as well as [[Din's Pearl]] from the [[Rito Chieftain]]'s son, [[Komali]]. Over the course of the game, Gohma must be defeated twice, once in Dragon Roost Cavern and once in {{Term|TWWHD|Ganon's Castle|link}} to complete the game. If Link manages to capture a photograph of Gohma with his [[Picto Box]] and make it into a figurine, he discovers that her armor is actually white with pale, purplish markings. The impression of Gohma's seemingly gold armor and brass markings was created by the lava in the cavern. | |||
[[ | |||
=== | ==={{FSA|-}}=== | ||
In {{FSA}}, Gohma appears in two variations: the first type aimlessly wanders about the fields of [[Hyrule]], and the second type acts as a mini-boss that shoots fireballs at Link. Both types of Gohma can be harmed only by shooting Arrows at its large open eye. | |||
In {{ | {{clear}} | ||
==Other Appearances== | |||
===={{BSTLoZ|-}}==== | |||
{{Noncanon|Start}} | |||
[[File:BSTLoZ Gohma Sprite.png|left]] | |||
[[File:BSTLoZ Gohma Blue Sprite.png|left]] | |||
Gohma also appears in {{BSTLoZ}}. A brown Gohma first appears as the boss of {{Term|BSTLoZ|Level-6|link}}, and can be taken out if it is shot in the eye with a single Arrow. Two blue Gohmas also appear in {{Term|BSTLoZ|Level 8|link}} as a double mini-boss battle. They are much more resilient, and will take three Arrows in each eye, or two Silver Arrows before their defeat. | |||
{{Noncanon|End}} | |||
==={{TLoZ|-}} TV Series=== | |||
{{Noncanon|Start}} | |||
[[File:Gohma (Stinging a Stinger).png|thumb|right|Gohma from ''The Legend of Zelda'' TV series]] | |||
Gohmas appear in three episodes of {{TLoZ|TV Series}}. Their appearance is similar to that of the original ''The Legend of Zelda''. | |||
{{ | In "[[Cold Spells]]", after [[Ganon]] traps Link and [[Princess Zelda]] in a glass container, he calls a Gohma to exterminate the heroes. However, just as Gohma is trying to get Link out of the container, [[Spryte]] arrives in time and shoots a powerful bolt of energy at the Gohma, allowing Link to escape.<ref>{{Cite Episode|quote=Link's in trouble! Maybe my magic will do something!|name=Spryte|show=The Legend of Zelda|episode=2}}</ref> Ganon then shoots fire at Link, which the young hero evades just in time and causes the fire to hit Gohma instead, instantly defeating the giant foe. Another Gohma makes an appearance in the "[[Stinging a Stinger]]" episode after Ganon locks up [[Sleezenose]], Link and Zelda inside the monster's lair.<ref>{{Cite Episode|quote=Throw him to Gohma, then those two!|name=Ganon|show=The Legend of Zelda|episode=9}}</ref> With Gohma slowly approaching the group, Zelda gets out a [[Magic Rope]] from her pouch and Link a [[Boomerang]] while the young hero orders Sleezenose to use his lockpicks to open the gate.<ref>{{Cite Episode|quote= Quick, take these and try to open the gate. Zelda and I will try to hold off Gohma.|name=Link|show=The Legend of Zelda|episode=9}}</ref> Zelda then ties the rope around one of Gohma's horns, which causes the creature to spin her around the room. Link takes this opportunity to use the boomerang and make a giant stalactite fall on top of Gohma, allowing Zelda to continue to spin around until all of the rope is tied around the beast. This immobilizes the Gohma and gives the group a chance to escape its lair. | ||
In "[[The Moblins are Revolting]]" episode, two Gohmas make a brief appearance after a [[Moblin]] frees all of the monsters from the [[Evil Jar]]. These Gohmas can be seen grabbing the Evil Jar from its base and moving it to another covert.<ref>{{Cite Episode|quote= That's it. The Evil Jar. It ours now! Take it to another covert!|name=Moblin|show=The Legend of Zelda|episode=13}}</ref> | |||
[[ | {{Noncanon|End}} | ||
=== | ==={{TLoZ|-}} (Valiant Comics)=== | ||
[[File: | {{Noncanon|Start}} | ||
{{ | [[File:Gohma (VC).png|thumb|right|Gohma from the comics]] | ||
A single Gohma appears in the story of ''[[To the First Power]]'' from {{TLoZ|Valiant Comics}}. When Zelda enters {{Term|TLoZ|Level 1|link}} to train against Ganon's minions, a [[Gohma]] appears behind her.<ref>{{Cite Book|quote=If Link thinks I'm going to give up and call him to rescue me at the first sign of danger, he's in for a surprise! [...] A Gohma!|book= TLoZ (Valiant Comics)|publisher= |page=3}}</ref> Surprised that a Gohma has appeared in such an early level,<ref>{{Cite Book|quote=That's not supposed to happen in level one! I guess Link wanted to surprise me! Well, I'm not quitting!|book= TLoZ (Valiant Comics)|publisher= |page=3}}</ref> the princess tries to fire a [[Sword Beam]] at the foe's eye, but to no avail. Zelda manages to escape the Gohma's grasp and eventually finds the labyrinth's item: the [[Zelda's Bow|Magic Bow]]. This allows the princess to defeat the Gohma with a single shot and make her way into the final chamber of the maze.<ref>{{Cite Book|quote=Nice shot, Zelda! Now...that's the door to the final chamber!|book= TLoZ (Valiant Comics)|publisher= |page= 8 (Issue #2)}}</ref> | |||
{{Noncanon|End}} | |||
==={{TCT|-}}=== | |||
{{ | {{Noncanon|Start}} | ||
In {{TCT}}, [[Princess Zelda]] encounters a Gohma as she's traveling through the [[Desert (The Crystal Trap)|Desert]] and accidentally steps on a hollow surface, which houses the creature. According to the book, Gohmas are known to be clumsy creatures, but once something or someone steps on their territory, they will never give up. The princess, knowing this, begins to circle around the Gohma, which eventually causes for it to fall on its back due to its dizziness. Noticing a faint white spot on its belly, Zelda fires an [[Arrow]] from [[Zelda's Bow|her Bow]] to quickly defeat the monster. | |||
{{Noncanon|End}} | |||
== | ==={{OoT|-}} (Himekawa)=== | ||
{{ | {{Noncanon|Start}} | ||
In the {{OoT|Himekawa}}, Gohma can talk, and her true form was a mere scarab, apparently transformed from dark magic. She is first seen attacking, entering, and eating the [[Great Deku Tree]]. She was originally sent by [[Ganon]] to obtain the [[Kokiri's Emerald]] until she is defeated by [[Link]] and [[Mido]]. | |||
{{Noncanon|End}} | |||
==={{TWWL4KNL|-}}=== | |||
{{Noncanon|Start}} | |||
{{Stub|TWWL4kNL}} | |||
{{Noncanon|End}} | |||
In | ==={{HW|-}}=== | ||
{{Noncanon|Start}} | |||
In {{HW}}, Gohma appears as a giant boss that is encountered in several [[Legend Mode]] and [[Adventure Mode]] stages. In Legend Mode, it appears as a boss in the Scenarios "[[Faron Woods (Hyrule Warriors)|The Sorceress of the Woods]]", "[[Gerudo Desert (Hyrule Warriors)|Ganondorf's Return]]", and two in "[[Valley of Seers|Darkness Falls]]". | |||
Gohma is invulnerable to most attacks, which it blocks with its foreleg shields to protect its eye. It attacks with a large swipe, rapidly spinning, charging, jumping into the air to crash down, or by firing a laser beam from its eye vertically or horizontally. It may also stop to charge a powerful blast from its eye as well. These attacks will also harm nearby enemies. The only time it is vulnerable is after firing a laser beam or stopping to charge an attack, which causes its red iris to turn bright blue. Shooting its eye with the Bow in this window of time will cause it to hysterically flip over and expose the Weak Point Gauge. | |||
Gohma will usually drop the Gohma's Acid [[Material]] when defeated, and rarely the Gohma's Lens Material. | |||
{{Noncanon|End}} | |||
== | ==Trivia== | ||
*Gohma's design from {{OoT|-}} was created by combining a crab with a spider.<!--The original text mentions a bear, however this is very clearly a mistranslation, conflicting "Kumo" (Spider) with "Kuma" (Bear).--><ref>{{Cite Person|quote= Ummm, he's changed a bit. Since he wouldn't look the same if we put him in 3D, the design had to change. He's certainly unpleasant, isn't he? We combined a crab with a spider to make him. It delivers alien-like eggs. It's gross.|name= Shigeru Miyamoto|url= http://www.ign.com/articles/1997/12/03/the-z-files-2|title= THE Z-FILES}}</ref> | |||
**In addition, her roars during her boss battle were recycled for [[Volvagia]] and Ganon, which were edited to be faster and higher-pitched. | |||
=== | ==Nomenclature== | ||
{{Nomenclature}} | |||
{{ | |||
==Gallery== | ==Gallery== | ||
<gallery> | <gallery> | ||
File: | File:LANS Gohma Concept Artwork.png|Concept artwork of {{Term|LANS|Gohma}} from {{LANS|-}} | ||
File:OoT Link Fighting Gohma Artwork.png|Link and Gohma artwork from {{OoT|-}} | |||
File:Gohma | File:Red Eyed Gohma.jpg|Gohma from {{OoT|-}} | ||
File:OOT 3DS 5.jpg|Link battling Gohma in {{OoT3D|-}} | |||
File:Red Eyed Gohma.jpg|Gohma from | File:OoT3D Gohma Model.png|Gohma's Boss Challenge image from {{OoT3D|-}} | ||
File:OOT 3DS 5.jpg|Link battling Gohma in | File:TWWHD Gohma Without Armor.png|Gohma without its armor in {{TWWHD|-}} | ||
File:Gohma | File:Gohma Zelda 4koma OoS Koubunsha.jpg|Gohma from {{OoS4kGB|-}} | ||
File: | File:TFoE Gohma Sprite.png|Gohma from {{TFoE|-}} and {{TWoG|-}} | ||
File:Gohma | File:HW Gohma Render.png|Gohma from {{HW|-}} | ||
File:HW Gohma.png|Gohma from | File:HWDE Gohma Portrait.png|Gohma portrait from {{HW|-}} | ||
File:HWDE Dark Gohma Portrait.png|Dark Gohma portrait from {{HW|-}} | |||
File:HWDE Gohma Mini Map Icon.png|VS Gohma icon from {{HW|-}} | |||
File:HWDE Dark Gohma Mini Map Icon.png|VS Dark Gohma icon from {{HW|-}} | |||
File:HW Gohma Adventure Mode Icon.png|Gohma Adventure Mode Sprite from {{HW|-}} | |||
</gallery> | </gallery> | ||
{{ | ==See Also== | ||
* {{Term|Series|Armogohma|link}} | |||
* {{Term|Series|Marbled Gohma|link}} | |||
* {{Term|Series|Gohma Larva|link}} | |||
* {{Term|Series|Gohmaracas|link}} | |||
* {{Term|Series|Rocktite|link}} | |||
{{Ref}} | {{Ref}} | ||
{{ | {{Bosses|TWW}} | ||
| | {{Categories | ||
| | |Crabs, Crustaceans, Eye Enemies, Fire-Related Enemies, Giant Bosses, Gohmas, Guardians, Parasites | ||
|bosses= TLoZ, LA, LADX, LANS, OoT, OoT3D, OoS, TWW, TWWHD, FSA, BSTLoZ, HW, HWL, HWDE | |||
|enemies= TLoZ, FSA, TLoZ (TV Series), TFoE, TWoG | |||
}} | }} | ||
Latest revision as of 14:11, 25 April 2024
Gohmas,(TLoZ | LA | OoT | OoS | TWW | FSA | TFoE | HW | HWL | HWDE)[6][7][8][4][name references needed] also known as One-Eyed Monsters,(FSA)[9] are recurring Bosses in The Legend of Zelda series. Gohmas go unnamed in The Wind Waker: Link's 4-koma Nautical Logbook. They are usually depicted as large, one-eyed arthropods and often shown as mothers of the Young Gohmas. They are among the most recurring Bosses in the series since its conception.
Characteristics
The Legend of Zelda
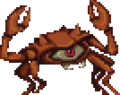
A Gohma makes its first appearance in The Legend of Zelda. Its hard shell will repel all attacks, but its single eye is vulnerable to Arrows shot with the Bow.[10] Due to this weakness, Gohma frequently keeps its eye closed, and attacks by shooting beams from a distance. There are two varieties of Gohma in this game, those being red and blue; the red Gohma can be killed by a single Arrow from the Bow, while the blue one takes three Arrows to kill.
In the First Quest, a red Gohma is the boss of Level 6, and also appears as a mini-boss in Level 8.
In the Second Quest, a red Gohma appears as an enemy in Level 5 and as a mini-boss in Level 7, while a blue Gohma is the boss of Level-6.
Link's Awakening
In Link's Awakening, two Gohmas appear as the main Guardians of the fifth Dungeon, Catfish's Maw. They move back and forth sideways with their eyes constantly closed, and occasionally try to ram into Link. Only the Gohma closest to Link will try to attack. They will also sometimes open their eyes to release a fireball, which also makes them vulnerable to the Hookshot. Playing the "Ballad of the Wind Fish" causes them to instantly open their eyes.[verification needed]
Additionally, Link could also use a Bow and fire Arrows into their eyes, which appears to deal more damage than the Hookshot.[verification needed]
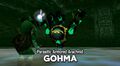
Ocarina of Time

Gohma
It's one of the parasitic monsters inside the Deku Tree! Its eye is vulnerable when it's red!
Parasitic Armored Arachnid: Gohma debuts as the first boss enemy Link will encounter in Ocarina of Time. After the Great Deku Tree refuses to place the Spiritual Stone of the Forest into Ganondorf's hands, the King of Thieves curses the ancient tree with a monstrous, Tektite-like creature,[11] Gohma. With the creature ravaging the inner body of the Deku Tree, spreading her offspring, scattering her web, and leeching on the Tree's life,[12] the Great Deku Tree has no choice but to request for Link's help with the aid of Navi the fairy. Queen Gohma is found on the deepest floor inside the Great Deku Tree, resting atop the ceiling.
When Link confronts her, he discovers she has one weakness: her eye is vulnerable when it turns red.[13] By shooting at her red eye with a Deku Seed via the Fairy Slingshot, Gohma will be stunned, leaving her open to attack from Link's sword or Deku Sticks.[3] After being hit at least once, Gohma will climb onto the room's ceiling and, if she is not stunned with a Deku Seed in time, she will attempt to hatch three Gohma Larva to aid her in battle. However, there is a strategy to defeat Gohma faster that only requires one Deku Stick. Once Gohma is stunned, Link must jump strike with the Deku Stick and then do multiple shield stabs (done by attacking with the sword while holding R but not Z-Targeting). Another strategy is to repeatedly land a hit at the very last frame before Gohma gets back up until she is defeated, though this requires perfect timing. It is possible to kill Gohma on the first Critical Point both ways. The amount of time Queen Gohma remains stunned for varies according to the technique administered: two seconds for using a Deku Nut, five if Link fires a Deku Seed with his slingshot while her eye is red, and around eight if she is shot whilst hanging from the ceiling.
After Link strikes Gohma's eye enough times, she will be defeated, causing the curse on the Deku Tree to break. As a reward, Link receives a Heart Container and the Kokiri's Emerald from the Great Deku Tree before he passes away.[14]
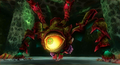
Oracle of Seasons
Gohma also makes an appearance inside the Dancing Dragon Dungeon in Oracle of Seasons.[15] However, this time around, the beast has an extra appendage, a deadly claw. If Link runs in front of her, she will charge and grab him, then throw him to the ground causing damage. The claw can be removed by slashing with the sword. Additionally, the Roc's Feather can be used to jump over the claw. Once the claw is destroyed, the Slingshot can be fired at its open eye, while avoiding the larvae it summons. Defeating Gohma yields the fourth Essence of Nature, the Soothing Rain.
The Wind Waker
| Figurine | |
|---|---|
| Description | Habitat: Dragon Roost Island |

| Figurine | Description |
|---|---|
Habitat: Dragon Roost Island |
.jpg)
In The Wind Waker, Gohma is placed by Ganondorf below the resting spot of the Spirit of the Sky, Valoo, high on Dragon Roost Island's peak, without the Sky Spirit knowing about it. Gohma's presence repeatedly torments Valoo and thus angers him enough that he becomes violent and unpredictable. The Sky Spirit causes trouble, confusion and panic among the Rito, the protectors of Din's Pearl. Link offers to help the Rito, and when he reaches the boss room inside Dragon Roost Cavern, he finds an impressive, lava-resistant, Magtail-like monster as his foe. Despite its menacing stature, Link manages to crack open Gohma's armor and delivers many lethal strikes to its eye with his sword, eventually killing her.[16]
To defeat Gohma, Link must wait for an opening to grapple onto Valoo's tail, which dangles from the roof, while avoiding Gohma's pincers. When Link swings to safety, part of the chamber's ceiling falls onto Gohma, cracking her armor. After repeating this process several times, Gohma's armor will be destroyed. At this stage, Link grapples Gohma's eye so he can access it with his sword. Once the eye is in range, Link must attack it with his sword until the boss perishes by hardening and exploding.
For defeating Gohma, Link's prize is a Heart Container, and an apology as well as Din's Pearl from the Rito Chieftain's son, Komali. Over the course of the game, Gohma must be defeated twice, once in Dragon Roost Cavern and once in Ganon's Castle to complete the game. If Link manages to capture a photograph of Gohma with his Picto Box and make it into a figurine, he discovers that her armor is actually white with pale, purplish markings. The impression of Gohma's seemingly gold armor and brass markings was created by the lava in the cavern.
Four Swords Adventures
In Four Swords Adventures, Gohma appears in two variations: the first type aimlessly wanders about the fields of Hyrule, and the second type acts as a mini-boss that shoots fireballs at Link. Both types of Gohma can be harmed only by shooting Arrows at its large open eye.
Other Appearances
BS The Legend of Zelda
Gohma also appears in BS The Legend of Zelda. A brown Gohma first appears as the boss of Level-6, and can be taken out if it is shot in the eye with a single Arrow. Two blue Gohmas also appear in Level-8 as a double mini-boss battle. They are much more resilient, and will take three Arrows in each eye, or two Silver Arrows before their defeat.
The Legend of Zelda TV Series
.png)
Gohmas appear in three episodes of The Legend of Zelda TV series. Their appearance is similar to that of the original The Legend of Zelda.
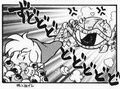
In "Cold Spells", after Ganon traps Link and Princess Zelda in a glass container, he calls a Gohma to exterminate the heroes. However, just as Gohma is trying to get Link out of the container, Spryte arrives in time and shoots a powerful bolt of energy at the Gohma, allowing Link to escape.[17] Ganon then shoots fire at Link, which the young hero evades just in time and causes the fire to hit Gohma instead, instantly defeating the giant foe. Another Gohma makes an appearance in the "Stinging a Stinger" episode after Ganon locks up Sleezenose, Link and Zelda inside the monster's lair.[18] With Gohma slowly approaching the group, Zelda gets out a Magic Rope from her pouch and Link a Boomerang while the young hero orders Sleezenose to use his lockpicks to open the gate.[19] Zelda then ties the rope around one of Gohma's horns, which causes the creature to spin her around the room. Link takes this opportunity to use the boomerang and make a giant stalactite fall on top of Gohma, allowing Zelda to continue to spin around until all of the rope is tied around the beast. This immobilizes the Gohma and gives the group a chance to escape its lair.
In "The Moblins are Revolting" episode, two Gohmas make a brief appearance after a Moblin frees all of the monsters from the Evil Jar. These Gohmas can be seen grabbing the Evil Jar from its base and moving it to another covert.[20]
The Legend of Zelda (Valiant Comics)
.png)
A single Gohma appears in the story of To the First Power from The Legend of Zelda comics by Valiant Comics. When Zelda enters Level 1 to train against Ganon's minions, a Gohma appears behind her.[21] Surprised that a Gohma has appeared in such an early level,[22] the princess tries to fire a Sword Beam at the foe's eye, but to no avail. Zelda manages to escape the Gohma's grasp and eventually finds the labyrinth's item: the Magic Bow. This allows the princess to defeat the Gohma with a single shot and make her way into the final chamber of the maze.[23]
The Crystal Trap
In The Crystal Trap, Princess Zelda encounters a Gohma as she's traveling through the Desert and accidentally steps on a hollow surface, which houses the creature. According to the book, Gohmas are known to be clumsy creatures, but once something or someone steps on their territory, they will never give up. The princess, knowing this, begins to circle around the Gohma, which eventually causes for it to fall on its back due to its dizziness. Noticing a faint white spot on its belly, Zelda fires an Arrow from her Bow to quickly defeat the monster.
Ocarina of Time (Himekawa)
In the Ocarina of Time manga by Akira Himekawa, Gohma can talk, and her true form was a mere scarab, apparently transformed from dark magic. She is first seen attacking, entering, and eating the Great Deku Tree. She was originally sent by Ganon to obtain the Kokiri's Emerald until she is defeated by Link and Mido.
The Legend of Zelda: The Wind Waker: Link's 4-koma Nautical Logbook
Hyrule Warriors
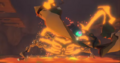
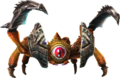
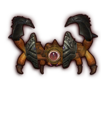
In Hyrule Warriors, Gohma appears as a giant boss that is encountered in several Legend Mode and Adventure Mode stages. In Legend Mode, it appears as a boss in the Scenarios "The Sorceress of the Woods", "Ganondorf's Return", and two in "Darkness Falls".
Gohma is invulnerable to most attacks, which it blocks with its foreleg shields to protect its eye. It attacks with a large swipe, rapidly spinning, charging, jumping into the air to crash down, or by firing a laser beam from its eye vertically or horizontally. It may also stop to charge a powerful blast from its eye as well. These attacks will also harm nearby enemies. The only time it is vulnerable is after firing a laser beam or stopping to charge an attack, which causes its red iris to turn bright blue. Shooting its eye with the Bow in this window of time will cause it to hysterically flip over and expose the Weak Point Gauge.
Gohma will usually drop the Gohma's Acid Material when defeated, and rarely the Gohma's Lens Material.
Trivia
- Gohma's design from Ocarina of Time was created by combining a crab with a spider.[24]
- In addition, her roars during her boss battle were recycled for Volvagia and Ganon, which were edited to be faster and higher-pitched.
Nomenclature
| Language | Names | Meanings |
|---|---|---|
Japanese |
| |
ChineseSI | ||
Dutch | Gohma (TLoZ) | |
FrenchEU | Gohma (TLoZ | TWW | HWDE)[34][35][36] | |
German | Gohma (TWW | HWDE)[33] | |
Italian |
| |
SpanishEU | Gohma (TWW)[39] | |
| This table was generated using translation pages. To request an addition, please contact a staff member with a reference. | ||
Gallery
-

Concept artwork of Gohma from Link's Awakening for Nintendo Switch
-
Link and Gohma artwork from Ocarina of Time
-
Gohma from Ocarina of Time
-

Link battling Gohma in Ocarina of Time 3D
-
Gohma's Boss Challenge image from Ocarina of Time 3D
-
Gohma without its armor in The Wind Waker HD
-
Gohma from Oracle of Seasons 4-koma Gag Battle
-
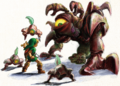
Gohma from The Faces of Evil and The Wand of Gamelon
-
Gohma from Hyrule Warriors
-
Gohma portrait from Hyrule Warriors
-
Dark Gohma portrait from Hyrule Warriors
-

VS Gohma icon from Hyrule Warriors
-

VS Dark Gohma icon from Hyrule Warriors
-

Gohma Adventure Mode Sprite from Hyrule Warriors


See Also
References
- ↑ "For example, here's Gohma." — Hyrule Warriors Direct , YouTube, published August 4, 2014.
- ↑ "Parasitic Armored Arachnid
GOHMA" — Game Screen (Ocarina of Time) - ↑ 3.0 3.1 3.2 "How did you know our secret? How irritating! It's so annoying that I'm going to reveal the secret of Queen Gohma to you! In order to administer the coup de grâce to Queen Gohma, strike with your sword while she's stunned. Oh, Queenie... Sorry about that!" — Deku Scrub (Ocarina of Time 3D)
- ↑ 4.0 4.1 "Arthropod Cyclops Monster
Gohma" — Game Screen (Hyrule Warriors: Definitive Edition) - ↑ Official The Legend of Zelda: Oracle of Seasons & Ages Perfect Guide, Versus Books, pg. 38 (OoS)
- ↑ Encyclopedia, Dark Horse Books, pg. 182 (TLoZ | LADX | OoT | OoT3D | OoS | TWW | TWWHD | FSA)
- ↑ Dreamer Art Book, Nintendo Co., Ltd., pg. 82
- ↑ "It's a Gohma." — Link (The Faces of Evil)
- ↑ "Hah... I know what my son says about the weapons in the storage shed... but they're no match for the one-eyed monsters. A greater weapon may lie in the cave to the north, where my ancestors rest. But the earth there has crumbled to bits, making it impossible to get there." — Old Man (Four Swords Adventures)
- ↑ "The super-huge crab that lives in the labyrinths. Its hard shell will repulse any attack. Attack its weak point with a special weapon." (The Legend of Zelda manual, pg. 38)
- ↑ "Take this stone with you. The stone that man wanted so much, that he cast the curse on me..." — Great Deku Tree (Ocarina of Time)
- ↑ "That evil man who cast the death curse upon me and sapped my power..." — Great Deku Tree (Ocarina of Time)
- ↑ "Its eye is vulnerable when it's red!" — Navi (Ocarina of Time)
- ↑ "You got the Kokiri's Emerald! This is the Spiritual Stone of the Forest, now entrusted to you by the Great Deku Tree" — N/A (Ocarina of Time)
- ↑ The Legend of Zelda: Oracle of Seasons and Oracle of Ages—The Official Nintendo Player's Guide, Nintendo of America, pg. 35
- ↑ The Legend of Zelda: The Wind Waker—Prima's Official Strategy Guide, Prima Games, pg. 52
- ↑ "Link's in trouble! Maybe my magic will do something!" — Spryte (The Legend of Zelda TV Series, Episode 2)
- ↑ "Throw him to Gohma, then those two!" — Ganon (The Legend of Zelda TV Series, Episode 9)
- ↑ "Quick, take these and try to open the gate. Zelda and I will try to hold off Gohma." — Link (The Legend of Zelda TV Series, Episode 9)
- ↑ "That's it. The Evil Jar. It ours now! Take it to another covert!" — Moblin (The Legend of Zelda TV Series, Episode 13)
- ↑ "If Link thinks I'm going to give up and call him to rescue me at the first sign of danger, he's in for a surprise! [...] A Gohma!" (The Legend of Zelda comic, Valiant Comics, pg. 3)
- ↑ "That's not supposed to happen in level one! I guess Link wanted to surprise me! Well, I'm not quitting!" (The Legend of Zelda comic, Valiant Comics, pg. 3)
- ↑ "Nice shot, Zelda! Now...that's the door to the final chamber!" (The Legend of Zelda comic, Valiant Comics, pg. 8 (Issue #2))
- ↑ "Ummm, he's changed a bit. Since he wouldn't look the same if we put him in 3D, the design had to change. He's certainly unpleasant, isn't he? We combined a crab with a spider to make him. It delivers alien-like eggs. It's gross." —Shigeru Miyamoto (THE Z-FILES.)
- ↑ "Sconfiggi Gohma con la tua ultima freccia!" (Defeat Gohma with your last arrow!) — Level 17-1 (Bonus) (NES Remix, Italian localization)
- ↑ 26.0 26.1 Enciclopedia di Hyrule, Magazzini Salani, pg. 182
- ↑ "Gohma
Habitat: Caverna del Monte del Drago.
Vulnerabile: all'Arpione." — Nintendo Gallery (The Wind Waker) - ↑ Hyrule Encyclopedia, Tokuma Shoten Publishing Co., Ltd., pg. 174
- ↑ The Legend of Zelda: Link's Awakening Certain Victory Strategy Guide (1993), Futabasha, pg. 26
- ↑ Nintendo Official Guidebook—The Legend of Zelda: Ocarina of Time, Shogakukan, pg. 81
- ↑ Nintendo Official Guidebook—The Legend of Zelda: Ocarina of Time, Shogakukan, pg. 143
- ↑ "ゴーマ
生息場所 竜の山のほこら
有効武器 カギつめロープ" — Nintendo Gallery (The Wind Waker) - ↑ "Gohma
Heimat: Das Drako-Sanktuarium
Wirksame Waffe: Greifhaken" — Nintendo Gallery (The Wind Waker) - ↑ The Legend of Zelda manual, pg. 38
- ↑ "Gohma
Lieu de résidence: Caverne du Dragon.
Arme efficace: Grappin-Griffe." — Nintendo Gallery (The Wind Waker) - ↑ "Gohma" — Battlefield Info (Hyrule Warriors: Definitive Edition, European French localization)
- ↑ 37.0 37.1 "甲壳寄居兽
哥马" — N/A (Ocarina of Time, iQue version) - ↑ 38.0 38.1 塞尔达传说:百科全书, New Star Press, pg. 177
- ↑ "Gohma
Hábitat: Cueva del Dragón
Arma efectiva: Garra" — Nintendo Gallery (The Wind Waker)
Mazura • Jermafenser • Rebonack • Carock • Gooma • Barba • Thunderbird • Link's Shadow
Ball and Chain Trooper • Armos Knights • Lanmolas • Moldorm • Agahnim
Helmasaur King • Arrghus • Mothula • Blind the Thief • Kholdstare • Vitreous • Trinexx • Ganon
Moldorm • Genie • Slime Eye • Angler Fish • Slime Eel • Facade • Evil Eagle • Hot Head • Shadow Nightmares
Spike Roller • Moblin Chief • Hinox • Dodongo Snakes • Lanmola • Hydrosoar
Master Stalfos • Gohma • Armos Knight • Rover • Grim Creeper • Turtle Rock • Blaino
Gohma • King Dodongo • Barinade • Phantom Ganon • Volvagia • Morpha • Bongo Bongo • Twinrova • Ganon
Lizalfos • Big Octo • Stalfos • Meg • Flare Dancer • White Wolfos • Dark Link • Dead Hand • Gerudo Thief • Iron Knuckle
Odolwa • Goht • Gyorg • Twinmold • Majora's Mask
Dinolfos • Gekko • Wizzrobe • Gerudo Pirate • Wart • Gekko and Mad Jelly
Captain Keeta • Iron Knuckle • Sharp • Igos du Ikana • Garo Master • Gomess • Eyegore
Aquamentus • Dodongo • Mothula • Gohma • Digdogger • Manhandla • Gleeok • Medusa Head • General Onox
Twinrova • Ganon
Brother Goriyas • Facade • Omuai • Agunima • Great Moblin • Syger • Vire • Poe Sisters • Frypolar
Pumpkin Head • Head Thwomp • Shadow Hag • Eyesoar • Smog • Octogon • Possessed Nayru • Plasmarine • Ramrock • Veran
Twinrova • Ganon
Giant Ghini • Swoop • Subterror • Armos Warrior • Great Moblin • Smasher • Vire • Angler Fish • Blue Stalfos
Gohma • Kalle Demos • Gohdan • Helmaroc King • Jalhalla • Molgera • Puppet Ganon • Ganondorf
Mothula • Darknut • Phantom Ganon • Stalfos • Wizzrobe • Mighty Darknut • Big Octo![]()
Phantom Ganon • Stone Arrghus • Helmaroc King • Big Poe • Big Moldorm • Frostare • Vaati • Ganon
Chief Soldier • Shadow Link • Manhandla • Dodongos • Big Dark Stalfos • Gohma • Big Dodongo
Big Green Chuchu • Gleerok • Mazaal • Big Octorok • Gyorg Pair • Vaati
Madderpillar • Dark Nut • Big Blue Chuchu • Red Dark Nut • Black Knight
Diababa • Fyrus • Morpheel • Stallord • Blizzeta • Armogohma • Argorok • Zant • Puppet Zelda • Ganon
Ook • King Bulblin • Dangoro • Twilit Carrier Kargarok • Twilit Bloat
Deku Toad • Death Sword • Darkhammer • Darknut • Aeralfos • Phantom Zant
Stagnox • Fraaz • Phytops • Cragma • Byrne • Skeldritch • Demon Train • Chancellor Cole • Malladus
Mothula • Snapper • Heatoise • Big Blin • Rocktite • Geozard Chief • Dark Link![]()
Ghirahim • Scaldera • Moldarach • The Imprisoned • Koloktos • Tentalus • Levias • Bilocyte • Demise
Stalfos • Lizalfos • Stalmaster • Moldarach • LD-002G Scervo • Dark Lizalfos • Magmanos • Moldorm • LD-003D Dreadfuse
Yuga • Moldorm • Margomill • Gemesaur King • Arrghus • Knucklemaster • Stalblind • Zaganaga • Dharkstare • Grinexx • Yuga Ganon
Armos • Red Stalfos • Heedles • Green & Red Goriyas • Gigabari • Gibdos & Purple Mini-Moldorms • Red Eyegores • Flying Tiles & Devalants • Big Pengator & Pengators • Fire Gimos • Moldorm • Lorule Ball and Chain Soldier • Arrghus
Margoma • Arrghus • Moldorm • Blizzagia • The Lady's Pets • Stalchampion • Prismantus • The Lady • Shadow Links
Electric Blob King • Electric Blob Queen • Hinox Brothers • Freezlord • Vulture Vizier • Grim Repoe • Gigaleon
Windblight Ganon • Fireblight Ganon • Thunderblight Ganon • Waterblight Ganon • Monk Maz Koshia(TCB) • Calamity Ganon • Dark Beast Ganon
Stone Talus • Stone Talus (Luminous) • Stone Talus (Rare) • Igneo Talus • Frost Talus • Igneo Talus Titan(TCB) • Molduga • Molduking(TCB) • Hinox • Blue Hinox • Black Hinox • Master Kohga
Bosses in Tears of the Kingdom
Colgera • Yunobo • Moragia • Marbled Gohma • Sludge Like • Mucktorok • Queen Gibdo • Seized Construct • Phantom Ganon • Demon King's Army • Demon King Ganondorf • Demon Dragon
- Incomplete Link's 4-Koma Nautical Logbook sections
- Crabs
- Crustaceans
- Eye Enemies
- Fire-Related Enemies
- Giant Bosses
- Gohmas
- Guardians
- Parasites
- Bosses
- Enemies
- Bosses in The Legend of Zelda
- Enemies in The Legend of Zelda
- Bosses in Link's Awakening
- Bosses in Link's Awakening DX
- Bosses in Link's Awakening (Nintendo Switch)
- Bosses in Ocarina of Time
- Bosses in Ocarina of Time 3D
- Bosses in Oracle of Seasons
- Bosses in The Wind Waker
- Bosses in The Wind Waker HD
- Bosses in Four Swords Adventures
- Enemies in Four Swords Adventures
- Enemies in The Legend of Zelda (TV Series)
- Enemies in The Faces of Evil
- Enemies in The Wand of Gamelon
- Bosses in BS The Legend of Zelda
- Bosses in Hyrule Warriors
- Bosses in Hyrule Warriors Legends
- Bosses in Hyrule Warriors: Definitive Edition