Kaam Ya'tak Shrine: Difference between revisions
(Clean Up) |
No edit summary |
||
| (17 intermediate revisions by 6 users not shown) | |||
| Line 4: | Line 4: | ||
|pronunciation= | |pronunciation= | ||
|location= {{Term|BotW|Hyrule Field|link}} | |location= {{Term|BotW|Hyrule Field|link}} | ||
|game= | |game= BotW | ||
|other= | |other= | ||
|item= {{Term|BotW| | |item= {{List|{{Term|BotW|Ancient Core|link}}, {{Term|BotW|Diamond|link}}, {{Term|BotW|Edge of Duality|link}}, {{Term|BotW|Knight's Broadsword|link}}, {{Term|BotW|Silver Rupee|link}}}} | ||
|quest= {{Term|BotW|Spirit Orb|link}} | |quest= {{Term|BotW|Spirit Orb|link}} | ||
|mini-boss= | |mini-boss= | ||
| Line 15: | Line 15: | ||
|zu= {{ZU Guide|https://zeldauniverse.net/guides/breath-of-the-wild/sidequests/shrines-of-trials/kaam-yatak-shrine-trial-of-power/|Kaam Ya'tak Shrine}} | |zu= {{ZU Guide|https://zeldauniverse.net/guides/breath-of-the-wild/sidequests/shrines-of-trials/kaam-yatak-shrine-trial-of-power/|Kaam Ya'tak Shrine}} | ||
}} | }} | ||
{{Term/Store|Kaam Ya'tak Shrine||Series, BotW}},<ref name="Trial">{{Cite|{{Big|Kaam Ya'tak Shrine}}<br>Trial of Power|Map|BotW}}</ref> designated by the Trial name '''Trial of Power''',<ref name="Trial"/> is an {{Term|BotW|Ancient Shrine|link}} in {{BotW}}. | {{Term/Store|Kaam Ya'tak Shrine||Series, BotW}},<ref name="Trial">{{Cite|{{Color|BotW Monk Blue|{{Big|Kaam Ya'tak Shrine}}<br/>Trial of Power}}|Map|BotW}}</ref> designated by the Trial name '''Trial of Power''',<ref name="Trial"/> is an {{Term|BotW|Ancient Shrine|link}} in {{BotW}}. | ||
==Entrance to the Shrine== | ==Entrance to the Shrine== | ||
The {{Term|BotW|Kaam Ya'tak Shrine}} is located at the southern base of {{Term|BotW|Mount Daphnes|link}} in {{Term|BotW|Hyrule Field|link}}. When {{Term|BotW|Link}} enters the {{Term|BotW|Ancient Shrine|link}}, he is greeted by {{Term|BotW|Kaam Ya'tak|link}}, the {{Term|BotW|Monk|link}} who designed the eponymous {{Term|BotW|Ancient Shrine|link}}.<ref>{{Cite|To you who sets foot in this shrine... I am Kaam Ya'tak. In the name of the Goddess Hylia, I offer this trial.|Kaam Ya'tak|BotW}}</ref> | The {{Term|BotW|Kaam Ya'tak Shrine}} is located at the southern base of {{Term|BotW|Mount Daphnes|link}} in {{Term|BotW|Hyrule Field|link}}. When {{Term|BotW|Link|link}} enters the {{Term|BotW|Ancient Shrine|link}}, he is greeted by {{Term|BotW|Kaam Ya'tak|link}}, the {{Term|BotW|Monk|link}} who designed the eponymous {{Term|BotW|Ancient Shrine|link}}.<ref>{{Cite|{{Color|BotW Monk Blue|To you who sets foot in this shrine... I am Kaam Ya'tak. In the name of the Goddess Hylia, I offer this trial.}}|Kaam Ya'tak|BotW}}</ref> | ||
==Themes and Navigation== | ==Themes and Navigation== | ||
Inside the {{Term|BotW|Kaam Ya'tak Shrine}}, platforms slope down in stairs to a ground floor. A {{Term|BotW|Boulder|link}} is hanging by a chain in front of a stone door that blocks the next area. The door will only open after the {{Term|BotW|Boulder}} hits it with a lot of force. The hanging {{Term|BotW|Boulder}} is attached to an {{Term|BotW|Iron Ball|link}} on an enclosed grate box above the door. | Inside the {{Term|BotW|Kaam Ya'tak Shrine}}, platforms slope down in stairs to a ground floor. A {{Term|BotW|Boulder|link}} is hanging by a chain in front of a stone door that blocks the next area. The door will only open after the {{Term|BotW|Boulder}} hits it with a lot of force. The hanging {{Term|BotW|Boulder}} is attached to an {{Term|BotW|Iron Ball|link}} on an enclosed grate box above the door. | ||
Using {{Term|BotW|Magnesis|link}} on the {{Term|BotW|Iron Ball}}, {{Term|BotW|Link}} can swing the {{Term|BotW|Boulder}} below into the stone door, breaking it open. {{Term|BotW|Link}} can also use {{Term|BotW|Stasis|link}} on the {{Term|BotW|Boulder}} from below and smash it into the door with a lot of force. | |||
===Minor | The next room is a long hallway that has many rows of {{Plural|BotW|Spiked Iron Ball|link}} rolling across that {{Term|BotW|Link}} must run past. {{Term|BotW|Link}} can easily run past the first {{Term|BotW|Spiked Iron Ball}} as only one rolls across the hallway. The second row, however, has many {{Plural|BotW|Spiked Iron Ball}} rushing down the hallway, so {{Term|BotW|Link}} must use {{Term|BotW|Stasis}} or {{Term|BotW|Magnesis}} to stop them. | ||
{{ | |||
The hallway then turns left to reveal two {{Plural|BotW|Guardian Scout II|link}} that attack {{Term|BotW|Link}}.{{Note|In {{Term|BotW|Master Mode|link}}, these will be two {{Plural|BotW|Guardian Scout III|link}}.|Master Mode}} Past the {{Plural|BotW|Guardian Scout III}}, a pile of leaves trail up and around to a wooden platform that a {{Term|BotW|Boulder}} sits on. Above the leaves is a {{Term|BotW|Lantern|link}} that can be cut down from its rope. Either cutting down the {{Term|BotW|Lantern}} or burning the leaves will set them ablaze, simultaneously setting the wooden platform on fire. The wooden platform will break and the {{Term|BotW|Boulder}} rolls down to the other side of the hallway, smashing into another stone door and opening it. | |||
Through the door, stairs lead to a winding hallway that contains a few {{Plural|BotW|Barrel|link}} that can be broken for {{Plural|BotW|Material|link}}. The hallway eventually leads to another two {{Term|BotW|Guardian Scout II}} guarding another stone door.{{Note||Master Mode}} A gate blocks another area of the {{Term|BotW|Ancient Shrine}}, so {{Term|BotW|Link}} must continue down the hallway. | |||
Down a flight of stairs and to the right, a tilting platform acts as the ground for part of the hallway. The platform, if walked on, will suddenly turn and drop {{Term|BotW|Link}} into the pit below. {{Term|BotW|Link}} must use {{Term|BotW|Stasis}} to halt the platform and walk across, or, if done correctly, {{Term|BotW|Link}} can run and jump across quickly to not make the platform turn enough to drop him. | |||
Across the platform, a {{Term|BotW|Motion Control Puzzle|link}} is found on a raised platform that controls a large hammer. {{Term|BotW|Link}} must move the hammer to knock an {{Term|BotW|Iron Ball}} into a larger {{Term|BotW|Boulder}} to destroy all of the {{Plural|BotW|Wooden Box|link}} and break through the stone door at the end of the hallway. | |||
The next room contains another {{Term|BotW|Boulder}} on a wooden platform that can be burned to drop the {{Term|BotW|Boulder}}. Once the {{Term|BotW|Boulder}} is rolling, it continously falls into a pit below. A {{Term|BotW|Floor Switch|link}} nearby raises part of the ground that the {{Term|BotW|Boulder}} travels on, and if pressed at the right time, it launches the {{Term|BotW|Boulder}} across the gap. However, a large tilting platform will drop the {{Term|BotW|Boulder}} when it lands on it, so {{Term|BotW|Link}} must use {{Term|BotW|Stasis}} to stop the platform from tilting so the {{Term|BotW|Boulder}} can roll across and open the stone door. | |||
Next is the room that was seen earlier through the gate. If {{Term|BotW|Link}} presses the nearby {{Term|BotW|Floor Switch}}, the gate will open and stay open even if he gets off the {{Term|BotW|Floor Switch}}. A large stone hammer sits on a track, and if massive force is applied using {{Term|BotW|Stasis}}, the hammer will fly down the track and open the stone door across the hallway. | |||
Through the stone door and up a flight of stairs, a {{Term|BotW|Shock Switch|link}} can be hit to activate the {{Term|BotW|Tilted Platform|link}} embedded in the ground, simultaneously launching anything that stands on it. If {{Term|BotW|Link}} stands on the {{Term|BotW|Tilted Platform}} and hits the {{Term|BotW|Shock Switch}}, it will launch him up to the {{Term|BotW|Monk's Pedestal|link}}. | |||
Upon approaching {{Term|BotW|Kaam Ya'tak}}, the {{Term|BotW|Monk}} will present {{Term|BotW|Link}} with a {{Term|BotW|Spirit Orb|link}} for completing the {{Term|BotW|Ancient Shrine}}.<ref>{{Cite|{{Color|BotW Monk Blue|Your resourcefulness in overcoming this trial speaks to the promise of a hero... In the name of Goddess Hylia, I bestow upon you this Spirit Orb.}}|Kaam Ya'tak|BotW}}</ref> They will then wish {{Term|BotW|Link}} well before fading away.<ref>{{Cite|{{Color|BotW Monk Blue|May the Goddess smile upon you.}}|Kaam Ya'tak|BotW}}</ref> | |||
In the hallway with the {{Plural|BotW|Guardian Scout II}}, a {{Term|BotW|Treasure Chest|link}} containing an {{Term|BotW|Edge of Duality|link}} can be found in the corner. Through the second stone door, a second {{Term|BotW|Treasure Chest}} containing a {{Term|BotW|Knight's Broadsword|link}} sits to the left of the stairs. A third {{Term|BotW|Treasure Chest}} containing an {{Term|BotW|Ancient Core|link}} can be found to the right of the {{Term|BotW|Motion Control Puzzle}} in the corner of the room, above the stone door. A fourth {{Term|BotW|Treasure Chest}} behind a destructable block in the room with the {{Term|BotW|Floor Switch}} that opens the gate back to the earlier hallway contains a {{Term|BotW|Silver Rupee|link}}. A fifth {{Term|BotW|Treasure Chest}}, located directly beneath {{Term|BotW|Kaam Ya'tak}}, contains a {{Term|BotW|Diamond|link}}. {{Term|BotW|Link}} can obtain this {{Term|BotW|Treasure Chest}} by launching himself using the {{Term|BotW|Shock Switch}}, and then gliding around to the back of the {{Term|BotW|Shock Switch}} on top of the wall and walk around to where the {{Term|BotW|Treasure Chest}} sits. | |||
===Minor {{Plural|BotW|Enemy}}=== | |||
{{Tabs | |||
|align= | |align= | ||
|default= 1 | |default= 1 | ||
|tab1= Normal Mode | |tab1= Normal Mode | ||
|content1= | |content1= {{Gallery List|Enemies | ||
|BotW= Boulder [3], Guardian Scout II {{Equipment|BotW|Guardian Sword}}, Guardian Scout II {{Equipment|BotW|Guardian Spear}}, Spiked Iron Ball [2] | |||
}} | |||
|tab2= Master Mode | |tab2= Master Mode | ||
|content2= | |content2= {{Gallery List|Enemies | ||
|BotW= Boulder [3], Guardian Scout III {{Equipment|BotW|Guardian Sword}}, Guardian Scout III {{Equipment|BotW|Guardian Spear}}, Spiked Iron Ball [2] | |||
}} | |||
}} | }} | ||
==Trivia== | |||
* Because the entire {{Term|BotW|Ancient Shrine}} is all in one long hallway with no enclosed areas, [[Glitches in Breath of the Wild|Glitches]] like the Wind Bomb and other launching glitches can be used to skip the entirety of the {{Term|BotW|Ancient Shrine}} and head straight to {{Term|BotW|Kaam Ya'tak}}. | |||
==Nomenclature== | ==Nomenclature== | ||
| Line 52: | Line 67: | ||
==Gallery== | ==Gallery== | ||
<gallery> | <gallery> | ||
File:BotW Kaam Ya'tak Shrine | File:BotW Kaam Ya'tak Shrine.png|The exterior of {{Term|BotW|Kaam Ya'tak Shrine}} | ||
</gallery> | </gallery> | ||
== | ==See Also== | ||
* | * {{Term|Series|Ancient Shrine|link}} | ||
* {{Term|Series|Hyrule Field|link}} | |||
{{Notes}} | {{Notes}} | ||
{{Ref}} | {{Ref}} | ||
{{DungeonNav2|BotW}} | |||
{{Categories | {{Categories | ||
|Ancient Shrines, Hyrule Field | |Ancient Shrines, Hyrule Field, Shrines | ||
| | |locations= BotW | ||
}} | }} | ||
Latest revision as of 16:54, 17 October 2023
Kaam Ya'tak Shrine,[1] designated by the Trial name Trial of Power,[1] is an Ancient Shrine in Breath of the Wild.
Entrance to the Shrine
The Kaam Ya'tak Shrine is located at the southern base of Mount Daphnes in Hyrule Field. When Link enters the Ancient Shrine, he is greeted by Kaam Ya'tak, the Monk who designed the eponymous Ancient Shrine.[2]
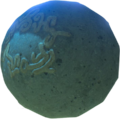
Inside the Kaam Ya'tak Shrine, platforms slope down in stairs to a ground floor. A Boulder is hanging by a chain in front of a stone door that blocks the next area. The door will only open after the Boulder hits it with a lot of force. The hanging Boulder is attached to an Iron Ball on an enclosed grate box above the door.
Using Magnesis on the Iron Ball, Link can swing the Boulder below into the stone door, breaking it open. Link can also use Stasis on the Boulder from below and smash it into the door with a lot of force.
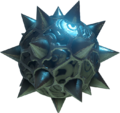
The next room is a long hallway that has many rows of Spiked Iron Balls rolling across that Link must run past. Link can easily run past the first Spiked Iron Ball as only one rolls across the hallway. The second row, however, has many Spiked Iron Balls rushing down the hallway, so Link must use Stasis or Magnesis to stop them.
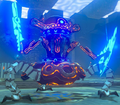
The hallway then turns left to reveal two Guardian Scouts II that attack Link.[note 1] Past the Guardian Scouts III, a pile of leaves trail up and around to a wooden platform that a Boulder sits on. Above the leaves is a Lantern that can be cut down from its rope. Either cutting down the Lantern or burning the leaves will set them ablaze, simultaneously setting the wooden platform on fire. The wooden platform will break and the Boulder rolls down to the other side of the hallway, smashing into another stone door and opening it.
Through the door, stairs lead to a winding hallway that contains a few Barrels that can be broken for Materials. The hallway eventually leads to another two Guardian Scout II guarding another stone door.[note 1] A gate blocks another area of the Ancient Shrine, so Link must continue down the hallway.
Down a flight of stairs and to the right, a tilting platform acts as the ground for part of the hallway. The platform, if walked on, will suddenly turn and drop Link into the pit below. Link must use Stasis to halt the platform and walk across, or, if done correctly, Link can run and jump across quickly to not make the platform turn enough to drop him.
Across the platform, a Motion Control Puzzle is found on a raised platform that controls a large hammer. Link must move the hammer to knock an Iron Ball into a larger Boulder to destroy all of the Wooden Boxes and break through the stone door at the end of the hallway.
The next room contains another Boulder on a wooden platform that can be burned to drop the Boulder. Once the Boulder is rolling, it continously falls into a pit below. A Floor Switch nearby raises part of the ground that the Boulder travels on, and if pressed at the right time, it launches the Boulder across the gap. However, a large tilting platform will drop the Boulder when it lands on it, so Link must use Stasis to stop the platform from tilting so the Boulder can roll across and open the stone door.
Next is the room that was seen earlier through the gate. If Link presses the nearby Floor Switch, the gate will open and stay open even if he gets off the Floor Switch. A large stone hammer sits on a track, and if massive force is applied using Stasis, the hammer will fly down the track and open the stone door across the hallway.
Through the stone door and up a flight of stairs, a Crystal can be hit to activate the Tilted Platform embedded in the ground, simultaneously launching anything that stands on it. If Link stands on the Tilted Platform and hits the Crystal, it will launch him up to the Monk's Pedestal.
Upon approaching Kaam Ya'tak, the Monk will present Link with a Spirit Orb for completing the Ancient Shrine.[3] They will then wish Link well before fading away.[4]
In the hallway with the Guardian Scouts II, a Treasure Chest containing an Edge of Duality can be found in the corner. Through the second stone door, a second Treasure Chest containing a Knight's Broadsword sits to the left of the stairs. A third Treasure Chest containing an Ancient Core can be found to the right of the Motion Control Puzzle in the corner of the room, above the stone door. A fourth Treasure Chest behind a destructable block in the room with the Floor Switch that opens the gate back to the earlier hallway contains a Silver Rupee. A fifth Treasure Chest, located directly beneath Kaam Ya'tak, contains a Diamond. Link can obtain this Treasure Chest by launching himself using the Crystal, and then gliding around to the back of the Crystal on top of the wall and walk around to where the Treasure Chest sits.
Minor Enemies
Trivia
- Because the entire Ancient Shrine is all in one long hallway with no enclosed areas, Glitches like the Wind Bomb and other launching glitches can be used to skip the entirety of the Ancient Shrine and head straight to Kaam Ya'tak.
Nomenclature
| Language | Names | Meanings |
|---|---|---|
| 亚卡·玛塔神庙 (Yàkǎ·mǎtǎ shénmiào)[8] | ||
| ||
| Santuario de Jakam[5] | Jakam Shrine | |
| This table was generated using translation pages. To request an addition, please contact a staff member with a reference. | ||
Gallery
-
The exterior of Kaam Ya'tak Shrine
See Also
Notes
- ↑ 1.0 1.1 In Master Mode, these will be two Guardian Scouts III.
References
- ↑ 1.0 1.1 "Kaam Ya'tak Shrine
Trial of Power" — Map (Breath of the Wild) - ↑ "To you who sets foot in this shrine... I am Kaam Ya'tak. In the name of the Goddess Hylia, I offer this trial." — Kaam Ya'tak (Breath of the Wild)
- ↑ "Your resourcefulness in overcoming this trial speaks to the promise of a hero... In the name of Goddess Hylia, I bestow upon you this Spirit Orb." — Kaam Ya'tak (Breath of the Wild)
- ↑ "May the Goddess smile upon you." — Kaam Ya'tak (Breath of the Wild)
- ↑ "Santuario de Jakam" — Map (Breath of the Wild)
- ↑ "Tempel van Kaam Ya'tak" — Map (Breath of the Wild)
- ↑ "Een grote kracht" — Map (Breath of the Wild)
- ↑ "亚卡·玛塔神庙" — Map (Breath of the Wild)


