Locations in Tears of the Kingdom/All: Difference between revisions
TriforceTony (talk | contribs) |
No edit summary |
||
| (57 intermediate revisions by 4 users not shown) | |||
| Line 1: | Line 1: | ||
{{DISPLAYTITLE: Locations in {{TotK|-}}}} | {{DISPLAYTITLE: Locations in {{TotK|-}}/All}} | ||
The following is a list of locations in {{TotK}}. | The following is a list of locations in {{TotK}}. | ||
| Line 11: | Line 11: | ||
==Location Types== | ==Location Types== | ||
{{ | {{#section:Locations in Tears of the Kingdom|Location Types}} | ||
}} | |||
==The {{Term|TotK|Surface}}== | ==The {{Term|TotK|Surface}}== | ||
{{Gallery List|Locations | {{Gallery List|Locations | ||
|TotK= Hyrule, | |TotK= Hyrule, Koltin's Stall, Lon Lon Ranch [File:No Image.png] | ||
}} | }} | ||
==={{Term|TotK|Akkala}}=== | ==={{Term|TotK|Akkala}}=== | ||
<section begin="Akkala"/> | |||
{{Gallery List|Locations | |||
|TotK= Akkala Highlands, Akkala Sea, Deep Akkala | |||
}}<section end="Akkala"/> | |||
===={{Term|TotK|Akkala Highlands}}==== | |||
<section begin="Akkala Highlands"/> | |||
{{Gallery List|Locations | {{Gallery List|Locations | ||
|TotK= | |TotK= | ||
Akkala Bridge Ruins, | |||
North Akkala | Akkala Citadel Ruins, | ||
Akkala Citadel Ruins Cave, | |||
Akkala Citadel Ruins Summit Cave, | |||
}} | Akkala Falls, | ||
Akkala Parade Ground Ruins, | |||
Akkala Span, | |||
Ankel Island, | |||
Davdi Island, | |||
Domizuin Shrine, | |||
East Akkala Plains, | |||
East Akkala Plains Chasm<noinclude><br/>{{Small|Also in: <code>[[#Akkala Highlands Depths|Akkala Highlands Depths]]</code>}}</noinclude>, | |||
East Sokkala Bridge, | |||
Gatanisis Shrine, | |||
Jochi-ihiga Shrine, | |||
Kaepora Pass<noinclude><br/>{{Small|Also in: <code>[[#Deep Akkala|Deep Akkala]]</code>}}</noinclude>, | |||
Kanalet Ridge, | |||
Knuckel Island, | |||
Lake Akkala, | |||
Link's House, | |||
Malin Bay East, | |||
North Akkala Foothill<noinclude><br/>{{Small|Also in: <code>[[#Deep Akkala|Deep Akkala]]</code>}}</noinclude>, | |||
North Akkala Valley<noinclude><br/>{{Small|Also in: <code>[[#Deep Akkala|Deep Akkala]]</code>}}</noinclude>, | |||
Octorok Lake, | |||
Ordorac Quarry, | |||
Rasitakiwak Shrine, | |||
Rist Peninsula<noinclude><br/>{{Small|Also in: <code>[[#Akkala Sea|Akkala Sea]]</code>}}</noinclude>, | |||
Shadow Pass<noinclude><br/>{{Small|Also in: <code>[[#Deep Akkala|Deep Akkala]]</code>}}</noinclude>, | |||
Sinatanika Shrine, | |||
Sokkala Bridge, | |||
South Akkala Plains, | |||
South Akkala Plains Chasm<noinclude><br/>{{Small|Also in: <code>[[#Akkala Highlands Depths|Akkala Highlands Depths]]</code>}}</noinclude>, | |||
South Akkala Plains West, | |||
South Akkala Stable, | |||
South Akkala Stable Well, | |||
South Lake Akkala, | |||
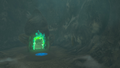
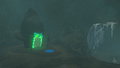
Spring of Power<noinclude><br/>{{Small|Also in: <code>[[#Deep Akkala|Deep Akkala]]</code>}}</noinclude>, | |||
Tarrey Town, | |||
Tingel Island, | |||
Tingel Island Chasm<noinclude><br/>{{Small|Also in: <code>[[#Akkala Highlands Depths|Akkala Highlands Depths]]</code>}}</noinclude>, | |||
Torin Wetland, | |||
Ukuku Plains, Ulri Mountain, | |||
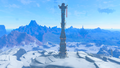
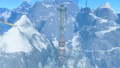
Ulri Mountain Skyview Tower, | |||
Ulria Grotto, | |||
Ulria Grotto East Cave, | |||
Ulria Grotto South Cave, | |||
West Sokkala Bridge | |||
}}<section end="Akkala Highlands"/> | |||
===={{Term|TotK| | ====={{Term|TotK|Tarrey Town}}===== | ||
<section begin="Tarrey Town"/> | |||
{{Gallery List|Locations | {{Gallery List|Locations | ||
|TotK= | |TotK= Break-a-Part Shop, Construction Site Cave, Construction Site Well, Hudson Construction Site, Monster Gallery, Room on the Second Floor, Slippery Falcon (Tarrey Town Branch) <!-- Uses Series term -->, Tarrey Town Race, Tarrey Town Tunnel | ||
}} | }}<section end="Tarrey Town"/> | ||
===={{Term|TotK|Akkala Sea}}==== | ===={{Term|TotK|Akkala Sea}}==== | ||
<section begin="Akkala Sea"/> | |||
{{Gallery List|Locations | {{Gallery List|Locations | ||
|TotK= East Akkala Beach, Gemimik Shrine, Igashuk Shrine, Lomei Labyrinth Chasm, Lomei Labyrinth Island, Malin Bay, North Akkala Beach Cave, Rasiwak Shrine | |TotK= | ||
}} | East Akkala Beach, | ||
Gemimik Shrine, | |||
Igashuk Shrine, | |||
Lomei Labyrinth Chasm<noinclude><br/>{{Small|Also in: <code>[[#Akkala Sea Depths|Akkala Sea Depths]]</code>}}</noinclude>, | |||
Lomei Labyrinth Island, | |||
Malin Bay, | |||
North Akkala Beach<noinclude><br/>{{Small|Also in: <code>[[#Deep Akkala|Deep Akkala]]</code>}}</noinclude>, | |||
North Akkala Beach Cave, | |||
Rasiwak Shrine, | |||
Rist Peninsula<noinclude><br/>{{Small|Also in: <code>[[#Akkala Highlands|Akkala Highlands]]</code>}}</noinclude> | |||
}}<section end="Akkala Sea"/> | |||
===={{Term|TotK|Deep Akkala}}==== | ===={{Term|TotK|Deep Akkala}}==== | ||
<section begin="Deep Akkala"/> | |||
{{Gallery List|Locations | {{Gallery List|Locations | ||
|TotK= Akkala Ancient Tech Lab, Akkala Wilds, Bloodleaf Lake, East Akkala Stable, East Akkala Stable Well, Jochi-iu Shrine, Kamatukis Shrine, Malanya Spring, North Akkala | |TotK= | ||
}} | Akkala Ancient Tech Lab, | ||
Akkala Wilds, | |||
Bloodleaf Lake, | |||
East Akkala Stable, | |||
East Akkala Stable Well, | |||
Jochi-iu Shrine, | |||
Kaepora Pass<noinclude><br/>{{Small|Also in: <code>[[#Akkala Highlands|Akkala Highlands]]</code>}}</noinclude>, | |||
Kamatukis Shrine, | |||
Left Eye of Skull Lake <!-- Uses Series term -->, | |||
Malanya Spring, | |||
North Akkala Beach<noinclude><br/>{{Small|Also in: <code>[[#Akkala Sea|Akkala Sea]]</code>}}</noinclude>, | |||
North Akkala Beach Cave, | |||
North Akkala Foothill<noinclude><br/>{{Small|Also in: <code>[[#Akkala Highlands|Akkala Highlands]]</code>}}</noinclude>, | |||
North Akkala Valley<noinclude><br/>{{Small|Also in: <code>[[#Akkala Highlands|Akkala Highlands]]</code>}}</noinclude>, | |||
Rok Woods, Shadow Pass<noinclude><br/>{{Small|Also in: <code>[[#Akkala Highlands|Akkala Highlands]]</code>}}</noinclude>, | |||
Skull Lake, | |||
Skull Lake Cave, | |||
Skull Lake Chasm<noinclude><br/>{{Small|Also in: <code>[[#Deep Akkala Depths|Deep Akkala Depths]]</code>}}</noinclude>, | |||
Spring of Power<noinclude><br/>{{Small|Also in: <code>[[#Akkala Highlands|Akkala Highlands]]</code>}}</noinclude>, | |||
Tempest Gulch, | |||
Tumlea Heights | |||
}}<section end="Deep Akkala"/> | |||
==={{Term|TotK|Central Hyrule}}=== | ==={{Term|TotK|Central Hyrule}}=== | ||
<section begin="Central Hyrule"/> | |||
{{Gallery List|Locations | {{Gallery List|Locations | ||
|TotK= | |TotK= Great Hyrule Forest, Great Plateau, Hyrule Field, Hyrule Ridge, Lake Hylia | ||
}}<section end="Central Hyrule"/> | |||
===={{Term|TotK|Great Hyrule Forest}}==== | ===={{Term|TotK|Great Hyrule Forest}}==== | ||
<section begin="Great Hyrule Forest"/> | |||
{{Gallery List|Locations | {{Gallery List|Locations | ||
|TotK= Aldor Foothills, Drenan Highlands Chasm, Ekochiu Shrine, Kikakin Shrine, Kiuyoyou Shrine, Lake Mekar, Lake Saria, Lost Woods, Mekar Island, Mido Swamp, Military Training Camp, Ninjis Shrine, Pupunke Shrine, Rauru Hillside, Rauru Hillside Cave, Rauru Settlement Ruins, Rauru Settlement Ruins Well, Rowan Plain, Rowan Plain Well, Sakunbomar Shrine, Sikukuu Shrine, Thyphlo Ruins, Thyphlo Ruins Skyview Tower, Yiga Clan Maritta Branch | |TotK= | ||
}} | Aldor Foothills, | ||
Drenan Highlands Chasm<noinclude><br/>{{Small|Also in: <code>[[#Great Hyrule Forest Depths|Great Hyrule Forest Depths]]</code>}}</noinclude>, | |||
Ekochiu Shrine, | |||
Elma Knolls<noinclude><br/>{{Small|Also in: <code>[[#Hyrule Field|Hyrule Field]]</code>}}</noinclude>, | |||
Helmhead Bridge<noinclude><br/>{{Small|Also in: <code>[[#Hyrule Field|Hyrule Field]]</code>}}</noinclude>, | |||
Hidden Room, | |||
Kikakin Shrine, | |||
Kiuyoyou Shrine, | |||
Korok Forest, | |||
Lake Mekar, | |||
Lake Saria, | |||
Lost Woods, | |||
Mekar Island, | |||
Mido Swamp, | |||
Military Training Camp, | |||
Minshi Woods, | |||
Minshi Woods Chasm<noinclude><br/>{{Small|Also in: <code>[[#Great Hyrule Forest Depths|Great Hyrule Forest Depths]]</code>}}</noinclude>, | |||
Ninjis Shrine, | |||
Pupunke Shrine, | |||
Rauru Hillside, | |||
Rauru Hillside Cave, | |||
Rauru Settlement Ruins, | |||
Rauru Settlement Ruins Well, | |||
Rowan Plain, Rowan Plain Well, | |||
Sakunbomar Shrine, | |||
Salari Plain<noinclude><br/>{{Small|Also in: <code>[[#Hyrule Field|Hyrule Field]]</code>}}</noinclude>, | |||
Sikukuu Shrine, | |||
Tera's Great Fairy Fountain <!-- Uses Series term -->, | |||
Thyphlo Ruins, | |||
Thyphlo Ruins Skyview Tower, | |||
Yiga Clan Maritta Branch | |||
}}<section end="Great Hyrule Forest"/> | |||
====={{Term|TotK|Korok Forest}}===== | ====={{Term|TotK|Korok Forest}}===== | ||
<section begin="Korok Forest"/> | |||
{{Gallery List|Locations | {{Gallery List|Locations | ||
|TotK= Deku Tree Chasm | |TotK= Deku Tree Chasm<noinclude><br/>{{Small|Also in: <code>[[#Great Hyrule Forest Depths|Great Hyrule Forest Depths]]</code>}}</noinclude>, General Shoppe, Great Deku Tree's Navel, Musanokir Shrine, Spore Store | ||
}} | }}<section end="Korok Forest"/> | ||
===={{Term|TotK|Great Plateau}}==== | ===={{Term|TotK|Great Plateau}}==== | ||
<section begin="Great Plateau"/> | |||
{{Gallery List|Locations | {{Gallery List|Locations | ||
|TotK= Eastern Abbey, Forest of Spirits, Great Plateau East Chasm, Great Plateau North Chasm, Great Plateau South Chasm, Great Plateau West Chasm, Hopper Pond, Mount Hylia, Riogok Shrine, River of the Dead, River of the Dead Waterfall Cave, Shrine of Resurrection, Tadarok Shrine, Temple of Time Ruins | |TotK= | ||
}} | Eastern Abbey, | ||
Forest of Spirits, | |||
Great Plateau East Chasm<noinclude><br/>{{Small|Also in: <code>[[#Central Hyrule Depths|Central Hyrule Depths]]</code>}}</noinclude>, | |||
Great Plateau North Chasm<noinclude><br/>{{Small|Also in: <code>[[#Central Hyrule Depths|Central Hyrule Depths]]</code>}}</noinclude>, | |||
Great Plateau South Chasm<noinclude><br/>{{Small|Also in: <code>[[#Central Hyrule Depths|Central Hyrule Depths]]</code>}}</noinclude>, | |||
Great Plateau West Chasm<noinclude><br/>{{Small|Also in: <code>[[#Central Hyrule Depths|Central Hyrule Depths]]</code>}}</noinclude>, | |||
Hopper Pond, | |||
Mount Hylia, | |||
Restoration Room <!-- Uses Series term -->, | |||
Riogok Shrine, | |||
River of the Dead, | |||
River of the Dead Waterfall Cave, | |||
Second Room <!-- Uses Series term -->, | |||
Shrine of Resurrection, | |||
Tadarok Shrine, | |||
Temple of Time Ruins | |||
}}<section end="Great Plateau"/> | |||
===={{Term|TotK|Hyrule Field}}==== | ===={{Term|TotK|Hyrule Field}}==== | ||
<section begin="Hyrule Field"/> | |||
{{Gallery List|Locations | {{Gallery List|Locations | ||
|TotK= | |TotK= | ||
| Line 86: | Line 211: | ||
Bottomless Pond Well, | Bottomless Pond Well, | ||
Breach of Demise, | Breach of Demise, | ||
Bridge of Hylia<noinclude><br/>{{Small|Also in: <code>[[#West Necluda|West Necluda]]</code>}}</noinclude>, | |||
Carok Bridge, | Carok Bridge, | ||
Carok Bridge Well, | Carok Bridge Well, | ||
Castle Town Prison, | Castle Town Prison, | ||
Coliseum Ruins, | Coliseum Ruins, | ||
| Line 96: | Line 221: | ||
Crenel Peak, | Crenel Peak, | ||
Crenel Peak Cave, | Crenel Peak Cave, | ||
Crenel Road, | |||
Digdogg Suspension Bridge, | Digdogg Suspension Bridge, | ||
East Castle Town, | East Castle Town, | ||
East Hyrule Castle, | East Hyrule Castle <!-- Uses Series term -->, | ||
East Post Ruins, | East Post Ruins, | ||
East Ranch Ruins, | East Ranch Ruins <!-- Uses Series term -->, | ||
Elma Knolls<noinclude><br/>{{Small|Also in: <code>[[#Great Hyrule Forest|Great Hyrule Forest]]</code>}}</noinclude>, | |||
Elma Knolls Well, | Elma Knolls Well, | ||
Exchange Ruins, | Exchange Ruins, | ||
Forest of Time, | Forest of Time, | ||
Forest of Time Chasm, | Forest of Time Chasm<noinclude><br/>{{Small|Also in: <code>[[#Central Hyrule Depths|Central Hyrule Depths]]</code>}}</noinclude>, | ||
Gatepost Town Ruins, | Gatepost Town Ruins, | ||
Giant's Forest, | Giant's Forest, | ||
Gleeok Bridge, | Gleeok Bridge, | ||
Gleeok Bridge West, | |||
Great Plateau Foothill Cave, | Great Plateau Foothill Cave, | ||
Helmhead Bridge<noinclude><br/>{{Small|Also in: <code>[[#Great Hyrule Forest|Great Hyrule Forest]]</code>}}</noinclude>, | |||
Horwell Bridge<noinclude><br/>{{Small|Also in: <code>[[#West Necluda|West Necluda]]</code>}}</noinclude>, | |||
Hyrule Castle, | Hyrule Castle, | ||
Hyrule Castle Moat, | Hyrule Castle Moat, | ||
Hyrule Castle Moat East Chasm, | Hyrule Castle Moat East Chasm<noinclude><br/>{{Small|Also in: <code>[[#Central Hyrule Depths|Central Hyrule Depths]]</code>}}</noinclude>, | ||
Hyrule Castle Moat West Chasm, | Hyrule Castle Moat West Chasm<noinclude><br/>{{Small|Also in: <code>[[#Central Hyrule Depths|Central Hyrule Depths]]</code>}}</noinclude>, | ||
Hyrule Castle Town Ruins, | Hyrule Castle Town Ruins, | ||
Hyrule Castle West, | Hyrule Castle West, | ||
Hyrule Field Chasm, | Hyrule Field Chasm<noinclude><br/>{{Small|Also in: <code>[[#Central Hyrule Depths|Central Hyrule Depths]]</code>}}</noinclude>, | ||
Hyrule Field Skyview Tower, | Hyrule Field Skyview Tower, | ||
Hyrule Forest Park, | Hyrule Forest Park, | ||
Hyrule Garrison Ruins, | Hyrule Garrison Ruins, | ||
Irch Plain, | Irch Plain, | ||
Irch Plain South, | |||
Irch Plain Well, | Irch Plain Well, | ||
Ishodag Shrine, | Ishodag Shrine, | ||
Jeddo Bridge<noinclude><br/>{{Small|Also in: <code>[[#Hyrule Ridge|Hyrule Ridge]]</code>}}</noinclude>, | |||
Jiosin Shrine, | Jiosin Shrine, | ||
Jojon Shrine, | Jojon Shrine, | ||
Kamizun Shrine, | Kamizun Shrine, | ||
Kaysa's Great Fairy Fountain <!-- Uses Series term -->, | |||
Kolomo Garrison Ruins, | Kolomo Garrison Ruins, | ||
Kyokugon Shrine, | Kyokugon Shrine, | ||
Lake Hylia North, | Lake Hylia North <!-- Uses Series term -->, | ||
Lake Kolomo, | Lake Kolomo, | ||
Lookout Landing, | Lookout Landing, | ||
| Line 133: | Line 266: | ||
Mabe Village Ruins, | Mabe Village Ruins, | ||
Mabe Village Ruins Well, | Mabe Village Ruins Well, | ||
Manhala Bridge<noinclude><br/>{{Small|Also in: <code>[[#Hyrule Ridge|Hyrule Ridge]]</code>}}</noinclude>, | |||
Maritta Exchange Ruins, | Maritta Exchange Ruins, | ||
Maritta Exchange Ruins Well, | Maritta Exchange Ruins Well, | ||
Mayachin Shrine, | Mayachin Shrine, | ||
Mini Stable [2], | |||
Moat Bridge, | Moat Bridge, | ||
Mount Daphnes, | Mount Daphnes, | ||
| Line 151: | Line 286: | ||
Outskirt Stable, | Outskirt Stable, | ||
Outskirt Stable Well, | Outskirt Stable Well, | ||
Owlan Bridge<noinclude><br/>{{Small|Also in: <code>[[#West Necluda|West Necluda]]</code>}}</noinclude>, | |||
Passeri Greenbelt, | Passeri Greenbelt, | ||
Passeri Greenbelt Cave, | Passeri Greenbelt Cave, | ||
Proxim Bridge<noinclude><br/>{{Small|Also in: <code>[[#West Necluda|West Necluda]]</code>}}</noinclude>, | |||
Quarry Ruins, | Quarry Ruins, | ||
Ranch Ruins, | Ranch Ruins, | ||
| Line 167: | Line 304: | ||
Sage Temple Cave, | Sage Temple Cave, | ||
Sage Temple Ruins, | Sage Temple Ruins, | ||
Salari Plain<noinclude><br/>{{Small|Also in: <code>[[#Great Hyrule Forest|Great Hyrule Forest]]</code>}}</noinclude>, | |||
Scout's Hill, | Scout's Hill, | ||
Sepapa Shrine, | Sepapa Shrine, | ||
| Line 174: | Line 312: | ||
Teniten Shrine, | Teniten Shrine, | ||
Tenmaten Shrine, | Tenmaten Shrine, | ||
Three-Way Intersection, | |||
Tsutsu-um Shrine, | Tsutsu-um Shrine, | ||
Water Reservoir, | Water Reservoir, | ||
West Hyrule Plains<noinclude><br/>{{Small|Also in: <code>[[#Tabantha Frontier|Tabantha Frontier]]</code>}}</noinclude>, | |||
Whistling Hill, | Whistling Hill, | ||
Whistling Hill Cave, | Whistling Hill Cave, | ||
Windvane Meadow, | |||
Yamiyo Shrine | Yamiyo Shrine | ||
}}<section end="Hyrule Field"/> | |||
====={{Term|TotK|Hyrule Castle}}===== | |||
<section begin="Hyrule Castle"/> | |||
{{Heading|Ground-level}} | |||
{{Gallery List|Locations | |||
|TotK= | |||
Dining Hall, | |||
Docks, East Passage, First Gatehouse, Guards' Chamber, | |||
Hyrule Castle Courtyard <!-- Uses Series term -->, | |||
Hyrule Castle Corridors <!-- Uses Series term -->, Hyrule Castle Gate <!-- Uses Series term -->, Hyrule Castle Underground <!-- Uses Series term -->, Lockup, Lockup Back Room <!-- Uses Series term -->, Observation Room, Reception Room <!-- Uses Series term -->, West Passage | |||
}} | }} | ||
{{Heading|Dungeon-level}} | |||
{{Gallery List|Locations | |||
|TotK= Bell Tower <!-- Uses Series term -->, Champions' Hall <!-- Uses Series term -->, Hyrule Castle 1F, Hyrule Castle B1, Hyrule Castle B2, Hyrule Castle B3, Hyrule Castle Courtyard <!-- Uses Series term -->, Hyrule Castle Corridors <!-- Uses Series term -->, Hyrule Castle Gazebo <!-- Uses Series term -->, King's Study, Library, Round Spiral Staircase <!-- Uses Series term -->, Sanctum, Sanctum Observation Room <!-- Uses Series term -->, Second Gatehouse, Serutabomac Shrine, Throne Room, Water Pump Room <!-- Uses Series term --> | |||
}}<section end="Hyrule Castle"/> | |||
====={{Term|TotK|Hyrule Castle Town Ruins}}===== | ====={{Term|TotK|Hyrule Castle Town Ruins}}===== | ||
<section begin="Hyrule Castle Town Ruins"/> | |||
{{Gallery List|Locations | {{Gallery List|Locations | ||
|TotK= Castle Town Watchtower, Central Square, Hyrule Castle Town Gate, Hyrule Castle Town Ruins Well, Hyrule Cathedral, Kyononis Shrine, West Castle Town | |TotK= Castle Town Watchtower, Central Square, Hyrule Castle Town Gate, Hyrule Castle Town Ruins Well, Hyrule Cathedral, Kyononis Shrine, West Castle Town | ||
}} | }}<section end="Hyrule Castle Town Ruins"/> | ||
====={{Term|TotK|Lookout Landing}}===== | ====={{Term|TotK|Lookout Landing}}===== | ||
<section begin="Lookout Landing"/> | |||
{{Gallery List|Locations | {{Gallery List|Locations | ||
|TotK= Emergency Shelter, Lookout Landing Skyview Tower, Lookout Landing Well, Mini Stable, Research Lab | |TotK= Emergency Shelter, Kitchen (Location), Lookout Landing Armor Shop, Lookout Landing Skyview Tower, Lookout Landing Well, Mini Stable, Research Lab, Sacred Ground Ruins <!-- Uses Series term -->, Second Floor, Southern Gate | ||
}}<section end="Lookout Landing"/> | |||
}} | |||
===={{Term|TotK|Hyrule Ridge}}==== | ===={{Term|TotK|Hyrule Ridge}}==== | ||
<section begin="Hyrule Ridge"/> | |||
{{Gallery List|Locations | {{Gallery List|Locations | ||
|TotK= Hyrule Ridge Chasm, Lindor's Brow, Lindor's Brow Cave, Lindor's Brow Skyview Tower, Ludfo's Bog, Makurukis Shrine, Mount Rhoam, Nima Plain, Runakit Shrine, Safula Hill, Sanidin Park Ruins, Seres Scablands, Tabantha Bridge Stable, Tabantha Bridge Stable Well, Taki-ihaban Shrine, Thundra Plateau, Thundra Plateau Cave, Upland Lindor, Washa's Bluff | |TotK= | ||
}} | Dalite Forest, | ||
Hyrule Ridge Chasm <noinclude><br/>{{Small|Also in: <code>[[#Hyrule Ridge Depths|Hyrule Ridge Depths]]</code>}}</noinclude>, | |||
Jeddo Bridge<noinclude><br/>{{Small|Also in: <code>[[#Hyrule Field|Hyrule Field]]</code>}}</noinclude>, | |||
Lindor's Brow, | |||
Lindor's Brow Cave, | |||
Lindor's Brow Skyview Tower, | |||
Ludfo's Bog, | |||
Makurukis Shrine, | |||
Manhala Bridge<noinclude><br/>{{Small|Also in: <code>[[#Hyrule Field|Hyrule Field]]</code>}}</noinclude>, | |||
Mount Rhoam, | |||
Nima Plain, | |||
Runakit Shrine, | |||
Safula Hill, | |||
Sanidin Park Ruins, | |||
Satori Mountain, | |||
Satori Mountain Cave, | |||
Satori Mountain Foothill Cave, | |||
Satori Mountain South, | |||
Seres Scablands, | |||
Sonapan Shrine, | |||
Tabantha Bridge Stable, | |||
Tabantha Bridge Stable Well, | |||
Taki-ihaban Shrine, | |||
Thundra Plateau, | |||
Thundra Plateau Cave, | |||
Upland Lindor, | |||
Usazum Shrine, | |||
Washa's Bluff, | |||
Washa's Bluff East | |||
}}<section end="Hyrule Ridge"/> | |||
===={{Term|TotK|Lake Hylia}}==== | ===={{Term|TotK|Lake Hylia}}==== | ||
<section begin="Lake Hylia"/> | |||
{{Gallery List|Locations | {{Gallery List|Locations | ||
|TotK= En-oma Shrine, Hylia Island, Lake Hylia Chasm, Lake Hylia Whirlpool Cave | |TotK= En-oma Shrine, Hylia Island, Lake Hylia Chasm<noinclude><br/>{{Small|Also in: <code>[[#Lake Hylia Depths|Lake Hylia Depths]]</code>}}</noinclude>, Lake Hylia Whirlpool Cave | ||
}} | }}<section end="Lake Hylia"/> | ||
==={{Term|TotK|Eldin (Region)}} {{Term|TotK|Region}}=== | ==={{Term|TotK|Eldin (Region)}} {{Term|TotK|Region}}=== | ||
<section begin="Eldin"/> | |||
{{Gallery List|Locations | {{Gallery List|Locations | ||
|TotK= Death Mountain, Eldin Canyon, Eldin Mountains | |TotK= Death Mountain, Eldin Canyon, Eldin Mountains | ||
}} | }}<section end="Eldin"/> | ||
===={{Term|TotK|Death Mountain}}==== | ===={{Term|TotK|Death Mountain}}==== | ||
<section begin="Death Mountain"/> | |||
{{Gallery List|Locations | {{Gallery List|Locations | ||
|TotK= Death Mountain Chasm, Death Mountain East Tunnel, Death Mountain West Tunnel, Sitsum Shrine | |TotK= | ||
}} | Death Caldera, | ||
Death Mountain Chasm<noinclude><br/>{{Small|Also in: <code>[[#Death Mountain Depths|Death Mountain Depths]]</code>}}</noinclude>, | |||
Death Mountain Crater, | |||
Death Mountain East Tunnel, | |||
Death Mountain Summit, | |||
Death Mountain West Site<noinclude><br/>{{Small|Also in: <code>[[#Eldin Canyon|Eldin Canyon]]</code>}}</noinclude>, | |||
Death Mountain West Site Station, | |||
Death Mountain West Tunnel, | |||
Lizard Lakes<noinclude><br/>{{Small|Also in: <code>[[#Eldin Canyon|Eldin Canyon]]</code>}}</noinclude>, | |||
Sitsum Shrine | |||
}}<section end="Death Mountain"/> | |||
===={{Term|TotK|Eldin Canyon}}==== | ===={{Term|TotK|Eldin Canyon}}==== | ||
<section begin="Eldin Canyon"/> | |||
{{Gallery List|Locations | {{Gallery List|Locations | ||
|TotK= Bedrock Bistro, Broca Island, Cephla Lake, Cephla Lake Cave, Darb Pond, Darunia Lake, Death Mountain Foothill Cave, Death Mountain West Site, East Restaurant Cave, Eldin's Flank, Eldin Canyon Skyview Tower, Foothill Monster Den, Foothill Stable, Foothill Stable Well, Gero Pond, Golow River, Goro Cove, | |TotK= | ||
}} | Bedrock Bistro, | ||
Broca Island, | |||
Cephla Lake, | |||
Cephla Lake Cave, | |||
Darb Pond, | |||
Darunia Lake, | |||
Death Mountain Foothill Cave, | |||
Death Mountain West Site<noinclude><br/>{{Small|Also in: <code>[[#Death Mountain|Death Mountain]]</code>}}</noinclude>, | |||
East Gut Check Rock <!-- Uses Series term -->, | |||
East Restaurant Cave, | |||
Eldin's Flank, | |||
Eldin Canyon Skyview Tower, | |||
Eldin Eastern Highlands, | |||
Foothill Monster Den, | |||
Foothill Stable, | |||
Foothill Stable Well, | |||
Gero Pond, | |||
Golow River, | |||
Gorko Lake, | |||
Goro Cove, | |||
Goron City, | |||
Gorko Tunnel, | |||
Goron Hot Springs, | |||
Goronbi Lake, | |||
Goronbi Lake North <!-- Uses Series term -->, | |||
Goronbi River, | |||
Goronbi River Cave, | |||
Goronbi River West, | |||
Gortram Cliff, | |||
Gut Check Rock, | |||
Isisim Shrine, | |||
Isle of Rabac, | |||
Isle of Rabac Gallery, | |||
Jiotak Shrine, | |||
Kimayat Shrine, | |||
Kisinona Shrine, | |||
Lake Darman, | |||
Lake Darman Monster Den, | |||
Lake Ferona, | |||
Lake Ferona Cave, | |||
Lake Intenoch, | |||
Lake Intenoch Cave, | |||
Lizard Lakes<noinclude><br/>{{Small|Also in: <code>[[#Death Mountain|Death Mountain]]</code>}}</noinclude>, | |||
Lizard's Burrow, | |||
Maw of Death Mountain, | |||
Mayachideg Shrine, | |||
Medingo Pool, | |||
Momosik Shrine, | |||
Moshapin Shrine, | |||
Mountain Road <!-- Uses Series term -->, | |||
New Road, | |||
North Mine, | |||
Pico Pond, | |||
Pico Pond Cave, | |||
Shadow Hamlet Ruins, | |||
Shadow Hamlet Ruins Well, | |||
Sibajitak Shrine, | |||
Simmerstone Springs, | |||
Southern Mine, | |||
Timawak Shrine, | |||
Trilby Plain, | |||
Trilby Valley, | |||
West Restaurant Cave, | |||
Woodland Stable, | |||
Woodland Stable Well, | |||
YunoboCo HQ, | |||
YunoboCo HQ East Cave, | |||
YunoboCo HQ South Cave, | |||
YunoboCo Mineral Market, | |||
YunoboCo Store, | |||
YunoboCo Store [2], | |||
Zelo Pond | |||
}}<section end="Eldin Canyon"/> | |||
====={{Term|TotK|Goron City}}===== | ====={{Term|TotK|Goron City}}===== | ||
<section begin="Goron City"/> | |||
{{Gallery List|Locations | {{Gallery List|Locations | ||
|TotK= Marakuguc Shrine, Stolock Bridge | |TotK= Boss's House <!-- Uses Series term -->, Goron Gusto Shop, Goron Stone Memorial <!-- Uses Series term -->, Marakuguc Shrine, Ripped and Shredded, Rollin' Inn, Stolock Bridge, YunoboCo Store [3], YunoboCo Store [4] | ||
}} | }}<section end="Goron City"/> | ||
===={{Term|TotK|Eldin Mountains}}==== | ===={{Term|TotK|Eldin Mountains}}==== | ||
<section begin="Eldin Mountains"/> | |||
{{Gallery List|Locations | {{Gallery List|Locations | ||
|TotK= Deplian Badlands, Deplian Badlands Cave, East Deplian Badlands, Eldin Great Skeleton, Mayak Shrine, Minetak Shrine, Sikukuu Shrine, West Deplian Badlands | |TotK= Deplian Badlands, Deplian Badlands Cave, Deplian Badlands South, East Deplian Badlands, Eldin Great Skeleton, Mayak Shrine, Minetak Shrine, Sikukuu Shrine, West Deplian Badlands | ||
}} | }}<section end="Eldin Mountains"/> | ||
==={{Term|TotK|Faron (Region)}} {{Term|TotK|Region}}=== | ==={{Term|TotK|Faron (Region)}} {{Term|TotK|Region}}=== | ||
<section begin="Faron"/> | |||
{{Gallery List|Locations | {{Gallery List|Locations | ||
|TotK= | |TotK= Faron Grasslands, Faron Sea | ||
}}<section end="Faron"/> | |||
===={{Term|TotK|Faron Grasslands}}==== | ===={{Term|TotK|Faron Grasslands}}==== | ||
<section begin="Faron Grasslands"/> | |||
{{Gallery List|Locations | {{Gallery List|Locations | ||
|TotK= Barula Plain, Cora Lakefront Cave, Damel Forest, Darybon Plains, Dracozu Lake, Dracozu River, Fural Plain, Floria River Upstream Excavation, Grinnden Plains, Guchini Plain, Guchini Plain Barrows, Haran Lake, Haran Lakefront Well, Harfin Valley, Harker Lake, Herin Lake, Highland Stable, Highland Stable Well, Horse God Bridge, Ibara Butte, Ishokin Shrine, Jiukoum Shrine, Komo Shoreline Cave, Lake of the Horse God, Mount Faloraa, Nette Plateau, Pagos Woods, Pagos Woods Excavation Site, Parache Plains, Pappetto Grove, Puffer Beach Overhead Cave, Spring of Courage, Utsushok Shrine, Zokassa Ridge, Zonai Ruins | |TotK= | ||
}} | Barula Plain, | ||
Cora Lakefront Cave<noinclude><br/>{{Small|Also in: <code>[[#Faron Sea|Faron Sea]]</code>}}</noinclude>, | |||
Damel Forest, | |||
Darybon Plains, | |||
Dracozu Lake, | |||
Dracozu River, | |||
Fural Plain, | |||
Floria River Upstream Excavation, | |||
Grinnden Plains, | |||
Guchini Plain, | |||
Guchini Plain Barrows, | |||
Haran Lake, | |||
Haran Lakefront Well, | |||
Harfin Valley, | |||
Harker Lake, | |||
Harker Lake East, | |||
Herin Lake, | |||
Herin Lake South, | |||
Highland Stable, | |||
Highland Stable Well, | |||
Horse God Bridge, | |||
Horse God Bridge West, | |||
Ibara Butte, | |||
Ishokin Shrine, | |||
Jiukoum Shrine, | |||
Komo Shoreline<noinclude><br/>{{Small|Also in: <code>[[#Faron Sea|Faron Sea]]</code>}}</noinclude>, | |||
Komo Shoreline Cave, | |||
Lake of the Horse God, | |||
Laverra Beach<noinclude><br/>{{Small|Also in: <code>[[#Faron Sea|Faron Sea]]</code>}}</noinclude>, | |||
Mount Faloraa, | |||
Nette Plateau, | |||
Pagos Woods, | |||
Pagos Woods Excavation Site, | |||
Parache Plains, | |||
Pappetto Grove, | |||
Puffer Beach<noinclude><br/>{{Small|Also in: <code>[[#Faron Sea|Faron Sea]]</code>}}</noinclude>, | |||
Puffer Beach Overhead Cave, | |||
Spring of Courage, | |||
Utsushok Shrine, | |||
Zokassa Ridge, | |||
Zonai Ruins | |||
}}<section end="Faron Grasslands"/> | |||
===={{Term|TotK|Faron Sea}}==== | ===={{Term|TotK|Faron Sea}}==== | ||
<section begin="Faron Sea"/> | |||
{{Gallery List|Locations | {{Gallery List|Locations | ||
|TotK= Cora Lake, Menoat River | |TotK= | ||
}} | Cora Lake, Cora Lakefront Cave<noinclude><br/>{{Small|Also in: <code>[[#Faron Grasslands|Faron Grasslands]]</code>}}</noinclude>, | ||
Komo Shoreline<noinclude><br/>{{Small|Also in: <code>[[#Faron Grasslands|Faron Grasslands]]</code>}}</noinclude>, | |||
Laverra Beach<noinclude><br/>{{Small|Also in: <code>[[#Faron Grasslands|Faron Grasslands]]</code>}}</noinclude>, | |||
Menoat River, | |||
Puffer Beach<noinclude><br/>{{Small|Also in: <code>[[#Faron Grasslands|Faron Grasslands]]</code>}}</noinclude> | |||
}}<section end="Faron Sea"/> | |||
==={{Term|TotK|Gerudo (Region)}} {{Term|TotK|Region}}=== | ==={{Term|TotK|Gerudo (Region)}} {{Term|TotK|Region}}=== | ||
<section begin="Gerudo"/> | |||
{{Gallery List|Locations | {{Gallery List|Locations | ||
|TotK= Gerudo Desert | |TotK= Gerudo Desert, Gerudo Highlands | ||
}}<section end="Gerudo"/> | |||
===={{Term|TotK|Gerudo Desert}}==== | ===={{Term|TotK|Gerudo Desert}}==== | ||
<section begin="Gerudo Desert"/> | |||
{{Gallery List|Locations | {{Gallery List|Locations | ||
|TotK= Ancient Prison Ruins, Arbiter's Grounds, Ancient Altar Ruins, Central Gerudo Cave, Chichim Shrine, Dragon's Exile, East Barrens, East Gerudo Ruins, East Gerudo Ruins Cave, Gerudo Sanctuary, Gerudo Town, Gerudo Great Skeleton, Great Cliffs, Irasak Shrine, Kara Kara Bazaar, Karusa Valley, Kudanisar Shrine, Miryotanog Shrine, North Gerudo Ruins, Northern Icehouse, Palu Wasteland, Quicksand Lake Cave, Red Pillar, Sand-Seal Rental Shop, Siwakama Shrine, South Gerudo Cave, Southern Oasis, Southern Oasis Training Area, Statue of the Eighth Heroine Room, Toruma Dunes, Valley of Silent Statues, West Barrens, West Gerudo Ruins, West Gerudo Underground Ruins | |TotK= | ||
}} | Ancient Prison Ruins, | ||
Arbiter's Grounds, | |||
Ancient Altar Ruins, | |||
Central Gerudo Cave, | |||
Chichim Shrine, | |||
Dragon's Exile, | |||
East Barrens, | |||
East Gerudo Ruins, | |||
East Gerudo Ruins Cave, | |||
Gerudo Desert Gateway<noinclude><br/>{{Small|Also in: <code>[[#Gerudo Highlands|Gerudo Highlands]]</code>}}</noinclude>, | |||
Gerudo Sanctuary, | |||
Gerudo Town, | |||
Gerudo Great Skeleton, | |||
Great Cliffs, | |||
Irasak Shrine, | |||
Kara Kara Bazaar, | |||
Karusa Valley, | |||
Kudanisar Shrine, | |||
Miryotanog Shrine, | |||
North Dragon's Exile <!-- Uses Series term -->, | |||
North Gerudo Ruins, | |||
Northern Icehouse, | |||
Palu Wasteland, | |||
Palu Wasteland South, | |||
Quicksand Lake Cave, | |||
Red Pillar, | |||
Sand-Seal Rental Shop, | |||
Siwakama Shrine, | |||
South Gerudo Cave, | |||
Southern Oasis, | |||
Southern Oasis Training Area, | |||
Statue of the Eighth Heroine Room, | |||
Toruma Dunes, | |||
Valley of Silent Statues, | |||
West Barrens, | |||
West Gerudo Ruins, | |||
West Gerudo Underground Ruins | |||
}}<section end="Gerudo Desert"/> | |||
====={{Term|TotK|Gerudo Town}}===== | ====={{Term|TotK|Gerudo Town}}===== | ||
<section begin="Gerudo Town"/> | |||
{{Gallery List|Locations | {{Gallery List|Locations | ||
|TotK= Soryotanog Shrine | |TotK= Arrow Specialty Shop <!-- Uses Series term -->, Barracks <!-- Uses Series term -->, Cave Next to the Goddess Statue, East Gate, Eastern Area, Fruit Store, Gerudo Secret Club, Gerudo Shelter, Hotel Oasis, Jail, North Gate, Palace Courtyard, Relationship Classroom, Riju's Bedroom <!-- Uses Series term -->, Royal Palace, Royal Palace's Throne Room, Sand-Seal Rental Shop East Gate Booth, Sand-Seal Rental Shop West Gate Booth, Soryotanog Shrine, Stall, Starlight Memories, The Noble Canteen, West Gate | ||
}} | }}<section end="Gerudo Town"/> | ||
====={{Term|TotK|Kara Kara Bazaar}}===== | ====={{Term|TotK|Kara Kara Bazaar}}===== | ||
<section begin="Kara Kara Bazaar"/> | |||
{{Gallery List|Locations | {{Gallery List|Locations | ||
|TotK= Kara Kara Bazaar Well, Mayatat Shrine | |TotK= Fashion Passion, Kara Kara Bazaar Barracks <!-- Uses Series term -->, Kara Kara Bazaar Inn <!-- Uses Series term -->, Kara Kara Bazaar Well, Lighthouse, Mayatat Shrine, Western Entrance | ||
}} | }}<section end="Kara Kara Bazaar"/> | ||
===={{Term|TotK|Gerudo Highlands}}==== | ===={{Term|TotK|Gerudo Highlands}}==== | ||
<section begin="Gerudo Highlands"/> | |||
{{Gallery List|Locations | {{Gallery List|Locations | ||
|TotK= Birida Lookout, Birida Lookout Chasm, Champion's Gate, Cliffs of Ruvara, Daval Peak, East Gerudo Chasm, East Gerudo Mesa, Gerudo Canyon, Gerudo Canyon Mine, Gerudo Canyon Skyview Tower, Gerudo Canyon Stable, Gerudo Canyon | |TotK= | ||
}} | Birida Lookout, | ||
Birida Lookout Chasm<noinclude><br/>{{Small|Also in: <code>[[#Gerudo Highlands Depths|Gerudo Highlands Depths]]</code>}}</noinclude>, | |||
Birida Lookout West, | |||
Champion's Gate, | |||
Champion's Gate North <!-- Uses Series term -->, | |||
Cliffs of Ruvara, | |||
Daval Peak, | |||
East Gerudo Chasm<noinclude><br/>{{Small|Also in: <code>[[#Gerudo Highlands Depths|Gerudo Highlands Depths]]</code>}}</noinclude>, | |||
East Gerudo Mesa, | |||
East Mount Granajh <!-- Uses Series term -->, | |||
East Rutimala Hill, | |||
Eastern Daval Peak <!-- Uses Series term -->, | |||
Gerudo Canyon, | |||
Gerudo Canyon Mine (Cave), | |||
Gerudo Canyon Skyview Tower, | |||
Gerudo Canyon Stable, | |||
Gerudo Canyon Well, | |||
Gerudo Desert Gateway<noinclude><br/>{{Small|Also in: <code>[[#Gerudo Desert|Gerudo Desert]]</code>}}</noinclude>, | |||
Gerudo Highlands Skyview Tower, | |||
Gerudo Summit, | |||
Gerudo Summit Chasm<noinclude><br/>{{Small|Also in: <code>[[#Gerudo Highlands Depths|Gerudo Highlands Depths]]</code>}}</noinclude>, | |||
Hemaar's Descent, | |||
Kitawak Shrine, | |||
Koukot Plateau, | |||
Koukot Plateau Cave, | |||
Laparoh Mesa, | |||
Lower Spectacle Rock Cave, | |||
Massive Zonai Ruin, | |||
Mayamats Shrine, | |||
Meadela's Mantle, | |||
Meadela's Mantle Cave, | |||
Motsusis Shrine, | |||
Mount Agaat, | |||
Mount Granajh, | |||
Mount Nabooru, | |||
Mount Nabooru Cave, | |||
Mount Nabooru South Cave, | |||
Mount Nabooru Well, | |||
Mystathi's Shelf, | |||
Mystathi's Shelf Cave, | |||
Nautelle Wetlands, | |||
Oseira Plains, | |||
Otutsum Shrine, | |||
Rakakudaj Shrine, | |||
Risoka Snowfield, | |||
Rotsumamu Shrine, | |||
Rutimala Hill, | |||
Sapphia's Table, | |||
South Koukot Plateau <!-- Uses Series term -->, | |||
South Lomei Chasm<noinclude><br/>{{Small|Also in: <code>[[#Gerudo Highlands Depths|Gerudo Highlands Depths]]</code>}}</noinclude>, | |||
South Lomei Labyrinth, | |||
South Taafei Hill <!-- Uses Series term -->, | |||
Spectacle Rock, | |||
Spectacle Rock Cave, | |||
Stalry Plateau, | |||
Stalry Plateau Cave, | |||
Statue of the Eighth Heroine, | |||
Statue of the Eighth Heroine Cave, | |||
Suariwak Shrine, | |||
Taafei Hill, | |||
Taafei Hill Cave, | |||
Taobab Grassland, | |||
Tamio River Downstream Cave, | |||
Turakamik Shrine, | |||
Vatorsa Snowfield, | |||
West Sapphia's Table <!-- Uses Series term -->, | |||
West Vatorsa Snowfield <!-- Uses Series term -->, | |||
Yarna Valley, | |||
Yiga Blademaster Station, | |||
Yiga Clan Hideout, | |||
Yiga Clan Hideout Chasm<noinclude><br/>{{Small|Also in: <code>[[#Gerudo Highlands Depths|Gerudo Highlands Depths]]</code>}}</noinclude>, | |||
Zirco Mesa | |||
}}<section end="Gerudo Highlands"/> | |||
==={{Term|TotK|Hebra}}=== | ==={{Term|TotK|Hebra}}=== | ||
<section begin="Hebra"/> | |||
{{Gallery List|Locations | {{Gallery List|Locations | ||
|TotK= | |TotK= Hebra Mountains, Tabantha Frontier | ||
}}<section end="Hebra"/> | |||
===={{Term|TotK|Hebra Mountains}}==== | ===={{Term|TotK|Hebra Mountains}}==== | ||
<section begin="Hebra Mountains"/> | |||
{{Gallery List|Locations | {{Gallery List|Locations | ||
|TotK= Biron Snowshelf, Coldsnap Hollow, Dronoc's Pass, Dronoc's Pass Well, East Biron Snowshelf Cave, Eutoum Shrine, Flight Range, Goflam's Secret Hot Spring, Hebra East Summit, Hebra Great Skeleton, Hebra North Crest, Hebra North Summit, Hebra Peak, Hebra South Summit, Hebra South Summit Cave, Hebra Trailhead Lodge, Hebra Tundra, Hebra West Summit, Icefall Foothills, Icefall Foothills Cave, Lake Kilsie, Lake Kilsie Cave, Mayaotaki Shrine, Mount Drena Foothill Cave, North Biron Snowshelf Cave, North Lomei Chasm, North Lomei Labyrinth, Otak Shrine, Pikida Stonegrove, Pikida Stonegrove Northwest Cave, Pikida Stonegrove Skyview Tower, Rospro Pass, Rospro Pass Cave, Rospro Pass Skyview Tower, Rutafu-um Shrine, Sahirow Shrine, Selmie's Spot, Sherfin's Secret Hot Spring, Sisuran Shrine, Sturnida Basin, Sturnida Secret Hot Spring, Sturnida Springs Cave, Tabantha Tundra, Talonto Peak, Tauyosipun Shrine, Wao-os Shrine, West Lake Totori Cave | |TotK= | ||
}} | Big Bridge, | ||
Biron Snowshelf, | |||
Coldsnap Hollow, | |||
Dronoc's Pass, | |||
Dronoc's Pass Well, | |||
East Biron Snowshelf Cave, | |||
Eutoum Shrine, | |||
Flight Range, | |||
Goflam's Secret Hot Spring, | |||
Hebra East Summit, | |||
Hebra East Summit North, | |||
Hebra Great Skeleton, | |||
Hebra North Crest, | |||
Hebra North Summit, | |||
Hebra Peak, | |||
Hebra South Summit, | |||
Hebra South Summit Cave, | |||
Hebra Trailhead Lodge, | |||
Hebra Tundra, | |||
Hebra West Summit, | |||
Hebra West Summit North, | |||
Hebra West Summit South, | |||
Icefall Foothills, | |||
Icefall Foothills Cave, | |||
Kopeeki Drifts<noinclude><br/>{{Small|Also in: <code>[[#Tabantha Frontier|Tabantha Frontier]]</code>}}</noinclude>, | |||
Lake Kilsie, | |||
Lake Kilsie Cave, | |||
Mayaotaki Shrine, | |||
Mija's Great Fairy Fountain <!-- Uses Series term -->, | |||
Mount Drena Foothill Cave, | |||
Mushroom Haven, | |||
North Biron Snowshelf Cave, | |||
North Lomei Chasm<noinclude><br/>{{Small|Also in: <code>[[#Hebra Mountains Depths|Hebra Mountains Depths]]</code>}}</noinclude>, | |||
North Lomei Labyrinth, | |||
Otak Shrine, | |||
Pikida Stonegrove, | |||
Pikida Stonegrove Northwest Cave, | |||
Pikida Stonegrove Skyview Tower, | |||
Rospro Pass, | |||
Rospro Pass Cave, | |||
Rospro Pass Skyview Tower, | |||
Rutafu-um Shrine, | |||
Sahirow Shrine, | |||
Selmie's Spot, | |||
Sherfin's Secret Hot Spring, | |||
Sisuran Shrine, | |||
Sturnida Basin, | |||
Sturnida Secret Hot Spring, | |||
Sturnida Springs Cave, | |||
Tabantha Tundra, | |||
Talonto Peak, | |||
Tauyosipun Shrine, | |||
Wao-os Shrine, | |||
West Lake Totori Cave, | |||
West Rospro Pass <!-- Uses Series term --> | |||
}}<section end="Hebra Mountains"/> | |||
====={{Term|TotK|Tabantha Tundra}}===== | ====={{Term|TotK|Tabantha Tundra}}===== | ||
<section begin="Tabantha Tundra"/> | |||
{{Gallery List|Locations | {{Gallery List|Locations | ||
|TotK= North Tabantha Snowfield, Orochium Shrine, Oshozan-u Shrine, Snowfield Stable, Snowfield Stable Well, South Tabantha Snowfield | |TotK= North Tabantha Snowfield, Orochium Shrine, Oshozan-u Shrine, Snowfield Stable, Snowfield Stable Well, South Tabantha Snowfield | ||
}} | }}<section end="Tabantha Tundra"/> | ||
===={{Term|TotK|Tabantha Frontier}}==== | ===={{Term|TotK|Tabantha Frontier}}==== | ||
<section begin="Tabantha Frontier"/> | |||
{{Gallery List|Locations | {{Gallery List|Locations | ||
|TotK= Ancient Columns, Ancient Columns Cave, Brightcap Cave, Cuho Mountain, Dragon Bone Mire, Forgotten Temple, Gasas Shrine, Gisa Crater, Gisa Crater Cave, Hebra Headspring, Hebra Headspring Cave, Hebra Falls, Hebra Plunge, Ikatak Shrine, Illumeni Plateau, Iun-orok Shrine, Kolami Bridge, Kopeeki Drifts Cave, Lake Illumeni, Lake Totori, Lucky Clover Gazette, Mayausiy Shrine, Nero Hill, Nouda Shrine, Oromuwak Shrine, Passer Hill, Rayne Highlands, Rito Village, Strock Lake, Tabantha Hills, Tabantha Hills Cave, Tabantha Village Ruins, Tabantha Village Ruins Well, Tama Pond, Tanagar Canyon, Tanagar Canyon West Cave, Turakawak Shrine, Ultra Ball Haul Check-In | |TotK= | ||
}} | Ancient Columns, | ||
Ancient Columns Cave, | |||
Brightcap Cave, | |||
Cuho Mountain, | |||
Dragon Bone Mire, | |||
Forgotten Temple, | |||
Gasas Shrine, | |||
Gisa Crater, | |||
Gisa Crater Cave, | |||
Hebra Headspring, | |||
Hebra Headspring Cave, | |||
Hebra Falls, | |||
Hebra Plunge, | |||
Ikatak Shrine, | |||
Illumeni Plateau, | |||
Iun-orok Shrine, | |||
Kolami Bridge, | |||
Kolami Bridge South <!-- Uses Series term -->, | |||
Kopeeki Drifts<noinclude><br/>{{Small|Also in: <code>[[#Hebra Mountains|Hebra Mountains]]</code>}}</noinclude>, | |||
Kopeeki Drifts Cave, | |||
Lake Illumeni, | |||
Lake Totori, | |||
Lake Totori South, | |||
Lucky Clover Gazette, | |||
Mayausiy Shrine, | |||
Nero Hill, | |||
Nouda Shrine, | |||
Oromuwak Shrine, | |||
Passer Hill, | |||
Pondo's Lodge <!-- Uses Series term -->, | |||
Rayne Highlands, | |||
Rito Village, | |||
Strock Lake, | |||
Strock Lake South, | |||
Tabantha Hills, | |||
Tabantha Hills Cave, | |||
Tabantha Village Ruins, | |||
Tabantha Village Ruins Well, | |||
Tama Pond, | |||
Tanagar Canyon, | |||
Tanagar Canyon West Cave, | |||
Turakawak Shrine, | |||
Ultra Ball Haul Check-In, | |||
West Hebra, | |||
West Hyrule Plains<noinclude><br/>{{Small|Also in: <code>[[#Hyrule Field|Hyrule Field]]</code>}}</noinclude>, | |||
Westbound Road, | |||
Wide Hole | |||
}}<section end="Tabantha Frontier"/> | |||
====={{Term|TotK|Rito Village}}===== | ====={{Term|TotK|Rito Village}}===== | ||
<section begin="Rito Village"/> | |||
{{Gallery List|Locations | {{Gallery List|Locations | ||
|TotK= Brazen Beak, Gatakis Shrine, Kaneli's House, Kitchen (Location), Revali's Landing, Rito Village Chasm, Swallow's Roost, Teba's Home, The Slippery Falcon, Vah Medoh's Perch | |TotK= Brazen Beak, Fishpond in Front of the Village, Gatakis Shrine, Kaneli's House <!-- Uses Series term -->, Kitchen (Location) [2], Revali's Landing, Rito Village Chasm<noinclude><br/>{{Small|Also in: <code>[[#Tabantha Frontier Depths|Tabantha Frontier Depths]]</code>}}</noinclude>, Swallow's Roost, Teba's Home <!-- Uses Series Term -->, The Slippery Falcon, Vah Medoh's Perch | ||
}} | }}<section end="Rito Village"/> | ||
==={{Term|TotK|Lanayru (Region)}} {{Term|TotK|Region}}=== | ==={{Term|TotK|Lanayru (Region)}} {{Term|TotK|Region}}=== | ||
<section begin="Lanayru"/> | |||
{{Gallery List|Locations | {{Gallery List|Locations | ||
|TotK= | |TotK= Lanayru Great Spring, Lanayru Sea, Lanayru Wetlands, Mount Lanayru | ||
}}<section end="Lanayru"/> | |||
===={{Term|TotK|Lanayru Great Spring}}==== | ===={{Term|TotK|Lanayru Great Spring}}==== | ||
<section begin="Lanayru Great Spring"/> | |||
{{Gallery List|Locations | {{Gallery List|Locations | ||
|TotK= Ancient Zora Waterworks, Apogek Shrine, Bank of Wishes, Brynna Plain, Cave Under Zora's Domain, East Reservoir Lake, Great Zora Bridge, Inogo Bridge, Ihen-a Shrine, Ja'Abu Ridge, Joniu Shrine, Kurakat Shrine, Lanayru Road East Cave, Lanayru Road - East Gate, Lanayru Road - West Gate, Lodrum Headland, Luto's Channel, Luto's Crossing, Mikau Lake, Mipha Court, O-ogim Shrine, Oren Bridge, Oren Bridge Cave, Ploymus Mountain, Ploymus Mountain Cave, Pristine Sanctum, Quatta's Shelf, Rabia Plain, Ralis Channel, Ralis Pond, Reservoir Lakefront Cavern, Rutala Dam, Rutala River, Ruto Lake, Ruto Mountain, Ruto Precipice, Samasa Plain, Shatterback Point, Tabahl Woods, Tabahl Woods Cave, Tabahl Woods Well, Tal Tal Peak, Talus Plateau, Tarm Point Cave, Toto Lake, Trotter's Downfall, Upland Zorana, Upland Zorana Byroad, Upland Zorana Foothill Cave, Upland Zorana Mountainside Cave, Upland Zorana Skyview Tower, Upland Zorana Summit Cave, Veiled Falls, Yomizuk Shrine, Zodobon Highlands, Zora's Domain | |TotK= | ||
}} | Afromsia Coast<noinclude><br/>{{Small|Also in: <code>[[#Lanayru Sea|Lanayru Sea]]</code>}}</noinclude>, | ||
Ancient Zora Waterworks, | |||
Apogek Shrine, | |||
Bank of Wishes, | |||
Brynna Plain, | |||
Cave Under Zora's Domain, | |||
Chasm Under Zora's Domain<noinclude><br/>{{Small|Also in: <code>[[#Lanayru Great Spring Depths|Lanayru Great Spring Depths]]</code>}}</noinclude>, | |||
East Reservoir Lake, | |||
Great Zora Bridge, | |||
Inogo Bridge, | |||
Ihen-a Shrine, | |||
Ja'Abu Ridge, | |||
Ja'Abu Ridge Fort, | |||
Joniu Shrine, | |||
Kurakat Shrine, | |||
Lanayru Road East Cave, | |||
Lanayru Road - East Gate, | |||
Lanayru Road - West Gate, | |||
Lodrum Headland, | |||
Luto's Channel, | |||
Luto's Crossing, | |||
Mikau Lake, | |||
Mipha Court, | |||
O-ogim Shrine, | |||
Oren Bridge, | |||
Oren Bridge Cave, | |||
Ploymus Mountain, | |||
Ploymus Mountain Cave, | |||
Pristine Sanctum, | |||
Quatta's Shelf, | |||
Rabia Plain, | |||
Ralis Channel, | |||
Ralis Pond, | |||
Reservoir Lakefront Cavern, | |||
Rutala Dam, | |||
Rutala River, | |||
Ruto Lake, | |||
Ruto Mountain, | |||
Ruto Precipice, | |||
Samasa Plain, | |||
Shatterback Point, | |||
Southern Tal Tal Peak <!-- Uses Series term -->, | |||
Tabahl Woods, | |||
Tabahl Woods Cave, | |||
Tabahl Woods Well, | |||
Tal Tal Peak, | |||
Talus Plateau, | |||
Tarm Point Cave, | |||
Toto Lake, | |||
Trotter's Downfall, | |||
Upland Zorana, | |||
Upland Zorana Byroad, | |||
Upland Zorana Foothill Cave, | |||
Upland Zorana Mountainside Cave, | |||
Upland Zorana Skyview Tower, | |||
Upland Zorana Summit Cave, | |||
Veiled Falls, | |||
Yomizuk Shrine, | |||
Zodobon Highlands, | |||
Zora River<noinclude><br/>{{Small|Also in: <code>[[#Lanayru Wetlands|Lanayru Wetlands]]</code>}}</noinclude>, | |||
Zora's Domain | |||
}}<section end="Lanayru Great Spring"/> | |||
====={{Term|TotK|Zora's Domain}}===== | ====={{Term|TotK|Zora's Domain}}===== | ||
<section begin="Zora's Domain"/> | |||
{{Gallery List|Locations | {{Gallery List|Locations | ||
|TotK= | |TotK= Coral Reef, Hammerhead, Marot Mart, Mogawak Shrine, Seabed Inn, Sleeping Chamber <!-- Uses Series term -->, Throne Room [2], Zora's Domain Square <!-- Uses Series term --> | ||
}} | }}<section end="Zora's Domain"/> | ||
===={{Term|TotK|Lanayru Sea}}==== | ===={{Term|TotK|Lanayru Sea}}==== | ||
<section begin="Lanayru Sea"/> | |||
{{Gallery List|Locations | {{Gallery List|Locations | ||
|TotK= Horon Lagoon, Horon Lagoon Cave, Lanayru Bay, Tarm Point, Wintre Island | |TotK= Afromsia Coast<noinclude><br/>{{Small|Also in: <code>[[#Lanayru Great Spring|Lanayru Great Spring]]</code>}}</noinclude>, Horon Lagoon, Horon Lagoon Cave, Lanayru Bay, Tarm Point, Wintre Island | ||
}} | }}<section end="Lanayru Sea"/> | ||
===={{Term|TotK|Lanayru Wetlands}}==== | ===={{Term|TotK|Lanayru Wetlands}}==== | ||
<section begin="Lanayru Wetlands"/> | |||
{{Gallery List|Locations | {{Gallery List|Locations | ||
|TotK= Bannan Island, Boné Pond, Boné Pond East Cave, Goponga Island, Goponga Village Ruins, Goponga Village Ruins Well, Jonsau Shrine, Kincean Island, Lanayru Wetlands Chasm, Lanayru Wetlands Well, Linebeck Island, Maoikes Shrine, Mercay Island, Millennio Sandbar, Molida Island, Moor Garrison Ruins, Moor Garrison Ruins Well, Morok Shrine, Rikoka Hills, Rikoka Hills Well, Shrine Island, Tukarok Shrine, Wes Island, Wetland Stable, Wetland Stable South Well, Wetland Stable Well, Zauz Island, Zauz Island Well | |TotK= | ||
}} | Bannan Island, | ||
Boné Pond, | |||
Boné Pond East Cave, | |||
Eagus Bridge<noinclude><br/>{{Small|Also in: <code>[[#West Necluda|West Necluda]]</code>}}</noinclude>, | |||
Goponga Island, | |||
Goponga Village Ruins, | |||
Goponga Village Ruins Well, | |||
Jonsau Shrine, Kincean Island, | |||
Lanayru Wetlands Chasm<noinclude><br/>{{Small|Also in: <code>[[#Lanayru Wetlands Depths|Lanayru Wetlands Depths]]</code>}}</noinclude>, | |||
Lanayru Wetlands Well, | |||
Linebeck Island, | |||
Maoikes Shrine, | |||
Mercay Island, | |||
Millennio Sandbar, | |||
Molida Island, | |||
Moor Garrison Ruins, | |||
Moor Garrison Ruins Well, | |||
Morok Shrine, | |||
Rikoka Hills, | |||
Rikoka Hills Well, | |||
Sahasra Slope<noinclude><br/>{{Small|Also in: <code>[[#West Necluda|West Necluda]]</code>}}</noinclude>, | |||
Shrine Island, | |||
Tukarok Shrine, | |||
Wes Island, | |||
Wetland Stable, | |||
Wetland Stable South Well, | |||
Wetland Stable Well, | |||
Zauz Island, | |||
Zauz Island Well, | |||
Zora River<noinclude><br/>{{Small|Also in: <code>[[#Lanayru Great Spring|Lanayru Great Spring]]</code>}}</noinclude> | |||
}}<section end="Lanayru Wetlands"/> | |||
===={{Term|TotK|Mount Lanayru}}==== | ===={{Term|TotK|Mount Lanayru}}==== | ||
<section begin="Mount Lanayru"/> | |||
{{Gallery List|Locations | {{Gallery List|Locations | ||
|TotK= Jikais Shrine, Lanayru Range, Madorna Mountain, Mount Lanayru Skyview Tower, Naydra Snowfield, Naydra Snowfield Chasm, Spring of Wisdom, Walnot Mountain Cave, Zakusu Shrine | |TotK= Jikais Shrine, Lanayru Range, Lanayru Range North, Madorna Mountain, Mount Lanayru Skyview Tower, Naydra Snowfield, Naydra Snowfield Chasm<noinclude><br/>{{Small|Also in: <code>[[#Mount Lanayru Depths|Mount Lanayru Depths]]</code>}}</noinclude>, Spring of Wisdom, Walnot Mountain Cave, Zakusu Shrine | ||
}} | }}<section end="Mount Lanayru"/> | ||
==={{Term|TotK|Necluda}}=== | ==={{Term|TotK|Necluda}}=== | ||
<section begin="Necluda"/> | |||
{{Gallery List|Locations | {{Gallery List|Locations | ||
|TotK= | |TotK= East Necluda, Necluda Sea, West Necluda | ||
}}<section end="Necluda"/> | |||
===={{Term|TotK|East Necluda}}==== | ===={{Term|TotK|East Necluda}}==== | ||
<section begin="East Necluda"/> | |||
{{Gallery List|Locations | {{Gallery List|Locations | ||
|TotK= Anedamimik Shrine, Angel Peak, Atun Valley, Atun Valley Cave, Bamitok Shrine, Breman Peak, Camphor Pond, Cape Cales, Cape Cales Cliffbase Cave, Cliffs of Quince, Courage Steppe, Dunsel Plateau, Ebon Mountain, Fir River, Firly Plateau, Fort Hateno, Hanu Pond, Hateno Village, Jia Highlands, Jogou Shrine, Keelay Plain, Keya Pond, Koto Pond, Lake Jarrah, Lanayru Bluff, Lanayru Promenade, Lanayru Road East Cave, Lanayru Road South Cave, Mapla Point Cave, Marblod Plain, Meda Mountain, Meda Mountain Chasm, Midla Woods, Mount Dunsel, Mount Dunsel Cave, Mount Floria, Mount Floria Cave, Mount Taran, Nirvata Lake, Ovli Plain, Phalian Highlands, Purifier Lake, Rabella Wetlands, Rabella Wetlands Skyview Tower, Robred Dropoff, Robred Dropoff Cave, Sifumim Shrine, Stinger Cliffs, Taran Pass, Temto Hill, Tobio's Hollow, Tobio's Hollow Cave, Tobio's Hollow Chasm, Tuft Mountain, Uten Marsh, Utojis Shrine, Walnot Mountain Cave, Yambi Lake | |TotK= | ||
}} | Anedamimik Shrine, | ||
Angel Peak, | |||
Aris Beach<noinclude><br/>{{Small|Also in: <code>[[#Necluda Sea|Necluda Sea]]</code>}}</noinclude>, | |||
Atun Valley, | |||
Atun Valley Cave, | |||
Bamitok Shrine, | |||
Breman Peak, | |||
Camphor Pond, | |||
Cape Cales, | |||
Cape Cales Cliffbase Cave, | |||
Cape Cresia<noinclude><br/>{{Small|Also in: <code>[[#Necluda Sea|Necluda Sea]]</code>}}</noinclude>, | |||
Clarnet Coast<noinclude><br/>{{Small|Also in: <code>[[#Necluda Sea|Necluda Sea]]</code>}}</noinclude>, | |||
Cliffs of Quince, | |||
Courage Steppe, | |||
Dunsel Plateau, | |||
Ebon Mountain, | |||
Ebon Mountain West, | |||
Fir River, | |||
Firly Plateau, | |||
Fort Hateno, | |||
Hanu Pond, | |||
Hateno Beach<noinclude><br/>{{Small|Also in: <code>[[#Necluda Sea|Necluda Sea]]</code>}}</noinclude>, | |||
Hateno Village, | |||
Jia Highlands<noinclude><br/>{{Small|Also in: <code>[[#West Necluda|West Necluda]]</code>}}</noinclude>, | |||
Jogou Shrine, | |||
Keelay Plain, | |||
Keya Pond, | |||
Korne Beach<noinclude><br/>{{Small|Also in: <code>[[#Necluda Sea|Necluda Sea]]</code>}}</noinclude>, | |||
Koto Pond, | |||
Lake Jarrah, | |||
Lake Siela<noinclude><br/>{{Small|Also in: <code>[[#West Necluda|West Necluda]]</code>}}</noinclude>, | |||
Lanayru Bluff, | |||
Lanayru Promenade, | |||
Lanayru Road East Cave, | |||
Lanayru Road South Cave, | |||
Loshlo Harbor West, | |||
Lurelin Village<noinclude><br/>{{Small|Also in: <code>[[#Necluda Sea|Necluda Sea]]</code>}}</noinclude>, | |||
Mapla Point<noinclude><br/>{{Small|Also in: <code>[[#Necluda Sea|Necluda Sea]]</code>}}</noinclude>, | |||
Mapla Point Cave, | |||
Marblod Plain, | |||
Meda Mountain, | |||
Meda Mountain Chasm<noinclude><br/>{{Small|Also in: <code>[[#East Necluda Depths|East Necluda Depths]]</code>}}</noinclude>, | |||
Midla Woods, | |||
Mount Dunsel, | |||
Mount Dunsel Cave, | |||
Mount Floria, | |||
Mount Floria Cave, | |||
Mount Taran, | |||
Nirvata Lake, | |||
Nirvata Plateau, | |||
North Aris Beach <!-- Uses Series term -->, | |||
Ovli Plain, | |||
Palmorae Beach<noinclude><br/>{{Small|Also in: <code>[[#Necluda Sea|Necluda Sea]]</code>}}</noinclude>, | |||
Phalian Highlands, | |||
Purifier Lake, | |||
Rabella Wetlands, | |||
Rabella Wetlands Skyview Tower, | |||
Rimba Beach<noinclude><br/>{{Small|Also in: <code>[[#Necluda Sea|Necluda Sea]]</code>}}</noinclude>, | |||
Robred Dropoff, | |||
Robred Dropoff Cave, | |||
Sifumim Shrine, Soka Point<noinclude><br/>{{Small|Also in: <code>[[#Necluda Sea|Necluda Sea]]</code>}}</noinclude>, | |||
Squabble River<noinclude><br/>{{Small|Also in: <code>[[#West Necluda|West Necluda]]</code>}}</noinclude>, | |||
Stinger Cliffs, | |||
Taran Pass, | |||
Temto Hill, | |||
Tobio's Hollow, | |||
Tobio's Hollow Cave, | |||
Tobio's Hollow Chasm<noinclude><br/>{{Small|Also in: <code>[[#East Necluda Depths|East Necluda Depths]]</code>}}</noinclude>, | |||
Tuft Mountain, Uten Marsh, | |||
Utojis Shrine, | |||
Walnot Mountain Cave, | |||
Yambi Lake | |||
}}<section end="East Necluda"/> | |||
====={{Term|TotK|Hateno Village}}===== | ====={{Term|TotK|Hateno Village}}===== | ||
<section begin="Hateno Village"/> | |||
{{Gallery List|Locations | {{Gallery List|Locations | ||
|TotK= East Wind, Hateno Ancient Tech Lab, Ventest Clothing Boutique | |TotK= East Wind, Firly Pond, Hateno Ancient Tech Lab, Hateno Pasture, Hateno School, Hateno Village East Well, Hateno Village North Well, Hateno Village South Well, Hateno Village West Well, High Ground <!-- Uses Series term -->, Kochi Dye Shop, Princess Zelda's House, Shed, Silo <!-- Uses Series term -->, The Great Ton Pu Inn, Ventest Clothing Boutique, Village Chief's House <!-- Uses Series term -->, Zanmik Shrine, Zelda's Secret Well, Zelkoa Pond | ||
}} | }}<section end="Hateno Village"/> | ||
===={{Term|TotK|Lurelin Village}}==== | ===={{Term|TotK|Lurelin Village}}==== | ||
<section begin="Lurelin Village"/> | |||
{{Gallery List|Locations | {{Gallery List|Locations | ||
|TotK= Lurelin Village Well | |TotK= Armes's House, Azure Bay, Fishing Resort, Lucky Treasure Shop, Lurelin Village Store, Lurelin Village Well, Village Head's House | ||
}} | }}<section end="Lurelin Village"/> | ||
===={{Term|TotK|Necluda Sea}}==== | ===={{Term|TotK|Necluda Sea}}==== | ||
<section begin="Necluda Sea"/> | |||
{{Gallery List|Locations | {{Gallery List|Locations | ||
|TotK= Deepback Bay, Eventide Island, Eventide Island Cave, Eventide Island Chasm, Hateno Bay, Kitano Bay, Koholit Rock, Loshlo Harbor, Lurelin Water Rally, Marari-in Shrine, Martha's Landing, Tenoko Island, Toronbo Beach | |TotK= | ||
}} | Aris Beach<noinclude><br/>{{Small|Also in: <code>[[#East Necluda|East Necluda]]</code>}}</noinclude>, | ||
Cape Cresia<noinclude><br/>{{Small|Also in: <code>[[#East Necluda|East Necluda]]</code>}}</noinclude>, | |||
Clarnet Coast<noinclude><br/>{{Small|Also in: <code>[[#East Necluda|East Necluda]]</code>}}</noinclude>, | |||
Deepback Bay, | |||
Eventide Island, | |||
Eventide Island Cave, | |||
Eventide Island Chasm<noinclude><br/>{{Small|Also in: <code>[[#Necluda Sea Depths|Necluda Sea Depths]]</code>}}</noinclude>, | |||
Hateno Bay, | |||
Hateno Beach<noinclude><br/>{{Small|Also in: <code>[[#East Necluda|East Necluda]]</code>}}</noinclude>, | |||
Kitano Bay, | |||
Koholit Rock, | |||
Korne Beach<noinclude><br/>{{Small|Also in: <code>[[#East Necluda|East Necluda]]</code>}}</noinclude>, | |||
Loshlo Harbor, | |||
Lurelin Village<noinclude><br/>{{Small|Also in: <code>[[#East Necluda|East Necluda]]</code>}}</noinclude>, | |||
Lurelin Water Rally, | |||
Mapla Point<noinclude><br/>{{Small|Also in: <code>[[#East Necluda|East Necluda]]</code>}}</noinclude>, | |||
Marari-in Shrine, | |||
Martha's Landing, | |||
Palmorae Beach<noinclude><br/>{{Small|Also in: <code>[[#East Necluda|East Necluda]]</code>}}</noinclude>, | |||
Rimba Beach<noinclude><br/>{{Small|Also in: <code>[[#East Necluda|East Necluda]]</code>}}</noinclude>, | |||
Soka Point<noinclude><br/>{{Small|Also in: <code>[[#East Necluda|East Necluda]]</code>}}</noinclude>, | |||
Tenoko Island, | |||
Toronbo Beach, | |||
Toronbo Beach North, | |||
Toronbo Beach South | |||
}}<section end="Necluda Sea"/> | |||
===={{Term|TotK|West Necluda}}==== | ===={{Term|TotK|West Necluda}}==== | ||
<section begin="West Necluda"/> | |||
{{Gallery List|Locations | {{Gallery List|Locations | ||
|TotK= Ash Swamp, Batrea Lake, Big Twin Bridge, Blatchery Plain, Bonooru's Stand, Bronas Forest, Bubinga Forest, Byroad to Lanayru Wetlands, Calora Lake, Calora Lake Cave, Corta Lake, Corta Lake Cave, Cucco Hideaway, Deya Lake, Deya Village Ruins, Deya Village Ruins East Well, Deya Village Ruins North Well, Deya Village Ruins South Well, Deya Village Ruins Well, Dueling Peaks, Dueling Peaks North Cave, Dueling Peaks South Cave, Dueling Peaks Stable, Dueling Peaks Stable Well, East Hill Chasm, Ebara Forest, Eshos Shrine, Farosh Hills, Finra Woods, Finra Woods Excavation Site, Fort Hateno Cave, Floret Sandbar, Floria Bridge, Floria Falls, Hickaly Woods, Hills of Baumer, Hills of Baumer Chasm, Hills of Baumer Well, Horwell Bridge South, Joju-u-u Shrine, Jochisiu Shrine, Kakariko Bridge, Kakariko Village, Kamah Plateau, Lake Floria, Lakeside Stable, Lakeside Stable Well, Lantern Lake, Little Twin Bridge, Mable Ridge, Mount Floria Cave, Mount Rozudo, Nabi Lake, Oakle's Navel, Oakle's Navel Cave, Pillars of Levia, Popla Foothills Excavation Site, Popla Foothills North Well, Popla Foothills Skyview Tower, Popla Foothills South Well, Rassla Lake, Rassla Lake Cave, Riola Spring, Rodai Lake, Rodai Lakefront Tunnel, Sahasra Slope Cave, Sahasra Slope Skyview Tower, Sarjon Woods, Sarjon Woods Cave, Sarjon Bridge, South Nabi Lake, South Nabi Lake Well, Susub Shrine, Tokiy Shrine, Ubota Point, Ubota Point Cave | |TotK= | ||
}} | Ash Swamp, | ||
Batrea Lake, | |||
Big Twin Bridge, | |||
Blatchery Plain, | |||
Bonooru's Stand, | |||
Bridge of Hylia<noinclude><br/>{{Small|Also in: <code>[[#Hyrule Field|Hyrule Field]]</code>}}</noinclude>, | |||
Bronas Forest, | |||
Bubinga Forest, | |||
Byroad to Lanayru Wetlands, | |||
Calora Lake, | |||
Calora Lake Cave, | |||
Corta Lake, | |||
Corta Lake Cave, | |||
Cotera's Great Fairy Fountain <!-- Uses Series term -->, | |||
Cucco Hideaway, | |||
Eagus Bridge<noinclude><br/>{{Small|Also in: <code>[[#Lanayru Wetlands|Lanayru Wetlands]]</code>}}</noinclude>, | |||
Deya Lake, | |||
Deya Village Ruins, | |||
Deya Village Ruins East Well, | |||
Deya Village Ruins North Well, | |||
Deya Village Ruins South Well, | |||
Deya Village Ruins Well, | |||
Dueling Peaks, | |||
Dueling Peaks North Cave, | |||
Dueling Peaks South, | |||
Dueling Peaks South Cave, | |||
Dueling Peaks Stable, | |||
Dueling Peaks Stable Well, | |||
East Batrea Lake, | |||
East Hill Chasm<noinclude><br/>{{Small|Also in: <code>[[#West Necluda Depths|West Necluda Depths]]</code>}}</noinclude>, | |||
Ebara Forest, | |||
Eshos Shrine, | |||
Farosh Hills, | |||
Finra Woods, | |||
Finra Woods Excavation Site, | |||
Fort Hateno Cave, | |||
Floret Sandbar, | |||
Floria Bridge, | |||
Floria Falls, | |||
Hickaly Woods, | |||
Hills of Baumer, | |||
Hills of Baumer Chasm<noinclude><br/>{{Small|Also in: <code>[[#West Necluda Depths|West Necluda Depths]]</code>}}</noinclude>, | |||
Hills of Baumer Well, | |||
Horwell Bridge<noinclude><br/>{{Small|Also in: <code>[[#Hyrule Field|Hyrule Field]]</code>}}</noinclude>, | |||
Horwell Bridge South, | |||
Jia Highlands<noinclude><br/>{{Small|Also in: <code>[[#East Necluda|East Necluda]]</code>}}</noinclude>, | |||
Joju-u-u Shrine, | |||
Jochisiu Shrine, | |||
Kakariko Bridge, | |||
Kakariko Village, | |||
Kamah Plateau, | |||
Lake Floria, | |||
Lake Siela<noinclude><br/>{{Small|Also in: <code>[[#East Necluda|East Necluda]]</code>}}</noinclude>, | |||
Lakeside Stable, | |||
Lakeside Stable Well, | |||
Lantern Lake, | |||
Little Twin Bridge, | |||
Mable Ridge, | |||
Mount Floria Cave, | |||
Mount Rozudo, | |||
Nabi Lake, | |||
North Dueling Peaks <!-- Uses Series term -->, | |||
North Mable Ridge <!-- Uses Series term -->, | |||
Oakle's Navel, | |||
Oakle's Navel Cave, | |||
Owlan Bridge<noinclude><br/>{{Small|Also in: <code>[[#Hyrule Field|Hyrule Field]]</code>}}</noinclude>, | |||
Pillars of Levia, | |||
Popla Foothills Excavation Site, | |||
Popla Foothills North, | |||
Popla Foothills North Well, | |||
Popla Foothills Skyview Tower, | |||
Popla Foothills South Well, | |||
Proxim Bridge<noinclude><br/>{{Small|Also in: <code>[[#Hyrule Field|Hyrule Field]]</code>}}</noinclude>, | |||
Rassla Lake, | |||
Rassla Lake Cave, | |||
Riola Spring, | |||
Rodai Lake, | |||
Rodai Lakefront Tunnel, | |||
Sahasra Slope<noinclude><br/>{{Small|Also in: <code>[[#Lanayru Wetlands|Lanayru Wetlands]]</code>}}</noinclude>, | |||
Sahasra Slope Cave, | |||
Sahasra Slope Skyview Tower, | |||
Sarjon Woods, | |||
Sarjon Woods Cave, | |||
Sarjon Bridge, | |||
South Nabi Lake, | |||
South Nabi Lake Well, | |||
Squabble River<noinclude><br/>{{Small|Also in: <code>[[#East Necluda|East Necluda]]</code>}}</noinclude>, | |||
Susub Shrine, | |||
Tokiy Shrine, | |||
Ubota Point, | |||
Ubota Point Cave | |||
}}<section end="West Necluda"/> | |||
====={{Term|TotK|Kakariko Village}}===== | ====={{Term|TotK|Kakariko Village}}===== | ||
<section begin="Kakariko Village"/> | |||
{{Gallery List|Locations | {{Gallery List|Locations | ||
|TotK= Chief's Hall, Common Cooking Area, East Hill, Eastern Ring Ruin, Enchanted, Floating Ring Ruin, High Spirits Produce, Kakariko Village Well, Lantern Falls, Large Ring Ruin, Makasura Shrine, Mellie's Plum Garden, Nestled Ring Ruin, Olkin's Pumpkins, Paya's Room, Ring Garland Shop, Ring Ruin, Shuteye Inn, Southern Ring Ruin, The Curious Quiver, Zonai Survey Team Base | |TotK= Chief's Hall<br/>{{Small|'''AKA:''' [[Lady Impa's Hall]]{{,}} [[Lady Paya's Hall]]}}, Common Cooking Area <!-- Uses Series term -->, East Hill, Eastern Ring Ruin, Enchanted, Floating Ring Ruin, High Spirits Produce, Kakariko Village Well, Lantern Falls, Large Ring Ruin, Makasura Shrine, Mellie's Plum Garden, Nestled Ring Ruin, Olkin's Pumpkins, Paya's Room <!-- Uses Series term -->, Ring Garland Shop, Ring Ruin, Shuteye Inn, Southern Ring Ruin, The Curious Quiver, Zonai Survey Team Base | ||
}} | }}<section end="Kakariko Village"/> | ||
==The {{Term|TotK|Sky}}== | ==The {{Term|TotK|Sky}}== | ||
| Line 406: | Line 1,227: | ||
===={{Term|TotK|Great Sky Island}}==== | ===={{Term|TotK|Great Sky Island}}==== | ||
{{Gallery List|Locations | {{Gallery List|Locations | ||
|TotK= Bottomless Cave, Garden of Time, Mining Cave, Pit Cave, Pondside Cave, Room of Awakening, Temple of Time | |TotK= Behind the Waterfall, Bottomless Cave, Garden of Time, Mining Cave, Pit Cave, Pondside Cave, Room of Awakening, Temple of Time | ||
}} | }} | ||
| Line 496: | Line 1,317: | ||
==={{Term|TotK|Necluda Sky}}=== | ==={{Term|TotK|Necluda Sky}}=== | ||
{{Gallery List|Locations | {{Gallery List|Locations | ||
|TotK= East Necluda Sky, Necluda Sea Sky, Necluda Sky Archipelago<br/>{{Small|<code>{{Term|TotK|East Necluda Sky}}</code> <code>{{Term|TotK|West Necluda Sky}}</code>, West Necluda Sky, Zonaite Forge Island<br/>{{Small|<code>{{Term|TotK|East Necluda Sky}}</code> <code>{{Term|TotK|West Necluda Sky}}</code>}} | |TotK= East Necluda Sky, Necluda Sea Sky, Necluda Sky Archipelago<br/>{{Small|<code>{{Term|TotK|East Necluda Sky}}</code> <code>{{Term|TotK|West Necluda Sky}}</code>}}, West Necluda Sky, Zonaite Forge Island<br/>{{Small|<code>{{Term|TotK|East Necluda Sky}}</code> <code>{{Term|TotK|West Necluda Sky}}</code>}} | ||
}} | }} | ||
| Line 521: | Line 1,342: | ||
==={{Term|TotK|Akkala Sea Depths}}=== | ==={{Term|TotK|Akkala Sea Depths}}=== | ||
{{Gallery List|Locations | {{Gallery List|Locations | ||
|TotK= Kawisar Lightroot, | |TotK= Kawisar Lightroot, Kimimeg Lightroot, Kuhsagi Lightroot, Lomei Depths Labyrinth, Rist Mine | ||
}} | }} | ||
| Line 541: | Line 1,362: | ||
==={{Term|TotK|East Necluda Depths}}=== | ==={{Term|TotK|East Necluda Depths}}=== | ||
{{Gallery List|Locations | {{Gallery List|Locations | ||
|TotK= Abandoned Hateno Mine, Abandoned Lurelin Mine, Ancient Observation Deck, Cresia Pit Mine, Dunsel Canyon Mine, Ebon Canyon Mine, Floria Canyon Mine, Ginner Grove, Kimimadena Lightroot, Kimnaz Lightroot, Kisihayam Lightroot, Kotimab Lightroot, Midla Grove, Mimufis Lightroot, Retsam Grove, | |TotK= Abandoned Hateno Mine, Abandoned Lurelin Mine, Ancient Observation Deck, Canyon of Awakening Mine, Cresia Pit Mine, Dunsel Canyon Mine, Ebon Canyon Mine, Floria Canyon Mine, Ginner Grove, Kimimadena Lightroot, Kimnaz Lightroot, Kisihayam Lightroot, Kotimab Lightroot, Midla Grove, Mimufis Lightroot, Retsam Grove, Sijotu Lightroot, Taran Canyon Mine, Tuft Canyon Mine, Uogoj Lightroot | ||
}} | }} | ||
| Line 556: | Line 1,377: | ||
==={{Term|TotK|Faron Grasslands Depths}}=== | ==={{Term|TotK|Faron Grasslands Depths}}=== | ||
{{Gallery List|Locations | {{Gallery List|Locations | ||
|TotK= Construct Factory, Dracozu Altar, Faloraa Canyon Mine, Left-Arm Depot, Left-Leg Depot, Nikohsi Lightroot, Muokuij Lightroot, Pappetto Grove [2] | |TotK= Construct Factory, Dracozu Altar, Faloraa Canyon Mine, Left-Arm Depot, Left-Leg Depot, Nikohsi Lightroot, Muokuij Lightroot, Pappetto Grove (Depths) [2], Wellspring of Courage | ||
}} | }} | ||
| Line 566: | Line 1,387: | ||
==={{Term|TotK|Gerudo Highlands Depths}}=== | ==={{Term|TotK|Gerudo Highlands Depths}}=== | ||
{{Gallery List|Locations | {{Gallery List|Locations | ||
|TotK= Agaat Canyon Mine, Daval Canyon Mine, Gerudo Canyon Mine, Granajh Canyon Mine, Jadukakar Lightroot, Kawiraus Lightroot, Kimakarut Lightroot, Mustuto Lightroot, | |TotK= Agaat Canyon Mine, Daval Canyon Mine, Gerudo Canyon Mine (Depths), Granajh Canyon Mine, Jadukakar Lightroot, Kawiraus Lightroot, Kimakarut Lightroot, Mustuto Lightroot, Sisustom Lightroot, South Lomei Depths Labyrinth, Stamayam Lightroot, Umamustor Lightroot | ||
}} | }} | ||
Revision as of 04:16, 10 May 2024
The following is a list of locations in Tears of the Kingdom.
- Jump to a section
-

-

-

Location Types


The Surface


Akkala


Akkala Highlands
-
-
-
-
-
-

-
-
-
-
-
-

-
-
-
-
Kaepora Pass
Also in:Deep Akkala -
-
-
-
-
-
North Akkala Foothill
Also in:Deep Akkala -
North Akkala Valley
Also in:Deep Akkala -
-
-
-
Rist Peninsula
Also in:Akkala Sea -
Shadow Pass
Also in:Deep Akkala -
-
-
-
-
-
-
-
-
Spring of Power
Also in:Deep Akkala -
-
-
-
-
-
-
-
-
-
-
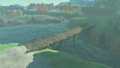


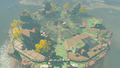
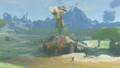
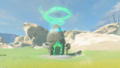
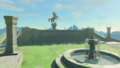
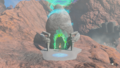
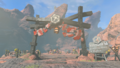
Tarrey Town


.png)


Akkala Sea
-
-
-
-
-
-
-
North Akkala Beach
Also in:Deep Akkala -
-
-
Rist Peninsula
Also in:Akkala Highlands


Deep Akkala
-
-
-
-
-

-
-
Kaepora Pass
Also in:Akkala Highlands -
-
-
-
North Akkala Beach
Also in:Akkala Sea -
-
-
North Akkala Valley
Also in:Akkala Highlands -

-
Shadow Pass
Also in:Akkala Highlands -
-
-
Skull Lake Chasm
Also in:Deep Akkala Depths -
Spring of Power
Also in:Akkala Highlands -
-


Central Hyrule


Great Hyrule Forest
-
-
-
-
Elma Knolls
Also in:Hyrule Field -
Helmhead Bridge
Also in:Hyrule Field -
-
-
-
-
-
-
-
-
-
-
-
-
-
-
-
-
-

-
-
-
-
Salari Plain
Also in:Hyrule Field -
-
-
-
-


Korok Forest


Great Plateau


Hyrule Field
-

-
-
-
-
-
-
-
-

-
-
Bridge of Hylia
Also in:West Necluda -

-
-
-
-

-
-
-
-

-

-
-
-
-
-

-
Elma Knolls
Also in:Great Hyrule Forest -

-

-
-
-
-
-
-
-
-
Helmhead Bridge
Also in:Great Hyrule Forest -
Horwell Bridge
Also in:West Necluda -

-
-
-
-
-
-
-
-
-

-
-
-
-
-
Jeddo Bridge
Also in:Hyrule Ridge -
-
-
-
-
-
-
-
-
-
-
-
-
Manhala Bridge
Also in:Hyrule Ridge -
-
-
-
-
-

-
-
-

-
-
-
-
-
-
-
-
-
-
-
Owlan Bridge
Also in:West Necluda -
-
-
Proxim Bridge
Also in:West Necluda -
-

-
-
-
-
-
-
-
-
-
-
-
-
-
Salari Plain
Also in:Great Hyrule Forest -
-
-
-
-
-
-
-
-

-
-
West Hyrule Plains
Also in:Tabantha Frontier -
-
-
-


Hyrule Castle
Ground-level


Dungeon-level


Hyrule Castle Town Ruins


Lookout Landing


Hyrule Ridge
-
-
Hyrule Ridge Chasm
Also in:Hyrule Ridge Depths -
Jeddo Bridge
Also in:Hyrule Field -
-
-
-
-

-
Manhala Bridge
Also in:Hyrule Field -

-
-
-
-
-
-
-
-
-
-
-
-
-
-
-

-
-
-
-


Lake Hylia


Eldin Region


Death Mountain
-
-
-
-
-
-
Death Mountain West Site
Also in:Eldin Canyon -
-
-
Lizard Lakes
Also in:Eldin Canyon -


Eldin Canyon
-
-
-
-
-
-

-
-
-
-
-
-
-
-
-
-

-
-
-
-
-
-
-
-
-
-
-
-
-
-
-
-
-
-
-
-

-
-
-
-
-
-

-
Lizard Lakes
Also in:Death Mountain -
-
-
-
-
-
-
-
-

-
-
-
-
-
-
-
-
-
-
-
-

-
-
-
-
-
-
-
-


Goron City


Eldin Mountains


Faron Region


Faron Grasslands
-
Cora Lakefront Cave
Also in:Faron Sea -
-
-
-
Komo Shoreline
Also in:Faron Sea -
Laverra Beach
Also in:Faron Sea -
Puffer Beach
Also in:Faron Sea -


Faron Sea
-
Cora Lakefront Cave
Also in:Faron Grasslands -
Komo Shoreline
Also in:Faron Grasslands -
Laverra Beach
Also in:Faron Grasslands -
Puffer Beach
Also in:Faron Grasslands
Gerudo Region


Gerudo Desert


Gerudo Town


Kara Kara Bazaar


Gerudo Highlands
-
-
-
-
Gerudo Desert Gateway
Also in:Gerudo Desert -
-
-
-
-
-
-
-
-
-
-
-
-
-
-
-


Hebra

Hebra Mountains
-
-
Kopeeki Drifts
Also in:Tabantha Frontier -
-
-
-
-
-
-
-
-
-
-
-


Tabantha Tundra


Tabantha Frontier
-
-
-

-
-
-
-
Kopeeki Drifts
Also in:Hebra Mountains -

-
-
-
-
-
-
West Hyrule Plains
Also in:Hyrule Field


Rito Village


Lanayru Region


Lanayru Great Spring
-
Afromsia Coast
Also in:Lanayru Sea -

-
-
-
-
-
-
-
-
-
-
-
-
-
Zora River
Also in:Lanayru Wetlands


Zora's Domain

Lanayru Sea
-
Afromsia Coast
Also in:Lanayru Great Spring
Lanayru Wetlands
-
Eagus Bridge
Also in:West Necluda -
-
-
-
-
-
Sahasra Slope
Also in:West Necluda -
-
-
Zora River
Also in:Lanayru Great Spring


Mount Lanayru


Necluda


East Necluda
-
-
Aris Beach
Also in:Necluda Sea -
-
-
Cape Cresia
Also in:Necluda Sea -
Clarnet Coast
Also in:Necluda Sea -
-
Hateno Beach
Also in:Necluda Sea -

-
Jia Highlands
Also in:West Necluda -
-
Korne Beach
Also in:Necluda Sea -
Lake Siela
Also in:West Necluda -

Lurelin Village
Also in:Necluda Sea -
Mapla Point
Also in:Necluda Sea -
-
-
-
Palmorae Beach
Also in:Necluda Sea -
-
Rimba Beach
Also in:Necluda Sea -

-
-
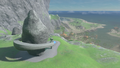
-
Soka Point
Also in:Necluda Sea -
Squabble River
Also in:West Necluda -
-


Hateno Village


Lurelin Village


Necluda Sea
-
Aris Beach
Also in:East Necluda -
Cape Cresia
Also in:East Necluda -
Clarnet Coast
Also in:East Necluda -
-
Hateno Beach
Also in:East Necluda -
Korne Beach
Also in:East Necluda -
Lurelin Village
Also in:East Necluda -
Mapla Point
Also in:East Necluda -
-

-
Palmorae Beach
Also in:East Necluda -
Rimba Beach
Also in:East Necluda -
Soka Point
Also in:East Necluda


West Necluda
-
-
-
-
Bridge of Hylia
Also in:Hyrule Field -
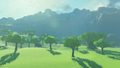
-
Eagus Bridge
Also in:Lanayru Wetlands -
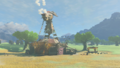
-
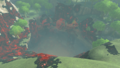
East Hill Chasm
Also in:West Necluda Depths -
-
-
-
-
Horwell Bridge
Also in:Hyrule Field -
-
Jia Highlands
Also in:East Necluda -
-
-

-
Lake Siela
Also in:East Necluda -
-
-
-
Owlan Bridge
Also in:Hyrule Field -
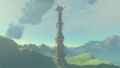
-
-
Proxim Bridge
Also in:Hyrule Field -
-
Sahasra Slope
Also in:Lanayru Wetlands -
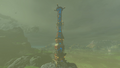
-
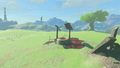
-
Squabble River
Also in:East Necluda -
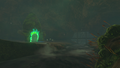
-
-


Kakariko Village


The Sky
-
Central Hyrule Sky Archipelago
Central Hyrule SkyLanayru Wetlands Sky -
Floating Scales Island
Akkala Highlands SkyLanayru Great Spring Sky -
North Gerudo Sky Archipelago
Gerudo Highlands SkyTabantha Frontier Sky -
Starview Island
Gerudo Highlands SkyTabantha Frontier Sky -
Thunderhead Isles
Faron Grasslands SkyWest Necluda Sky


Akkala Sky
-
Sky Mine
Akkala Highlands SkyAkkala Sea Sky
Akkala Highlands Sky

Akkala Sea Sky
Deep Akkala Sky

Central Hyrule Sky


Great Sky Island


Garden of Time


Lake Hylia Sky

Great Hyrule Forest Sky


Hyrule Ridge Sky
Eldin Sky
Eldin Canyon Sky


Faron Sky
Faron Grasslands Sky
Gerudo Sky
Gerudo Highlands Sky


Hebra Sky
Hebra Mountains Sky


Tabantha Frontier Sky


Lanayru Sky
-
South Lanayru Sky Archipelago
Mount Lanayru SkyLanayru Great Spring SkyLanayru Sea Sky -
Valor Island
Lanayru Great Spring SkyLanayru Sea Sky


Lanayru Great Spring Sky


Lanayru Sea Sky

Mount Lanayru Sky

Necluda Sky
-
-
-
Necluda Sky Archipelago
East Necluda SkyWest Necluda Sky -
Zonaite Forge Island
East Necluda SkyWest Necluda Sky


East Necluda Sky


West Necluda Sky


The Depths
-
-
-
-
-
-
-
-
-
-
-
-
-
-
-

-
-

-
-
-
Meda Lavafalls
East Necluda DepthsWest Necluda Depths -
-
-
-


Akkala Highlands Depths


Akkala Sea Depths


Central Hyrule Depths


Death Mountain Depths

Deep Akkala Depths


East Necluda Depths


Eldin Canyon Depths


Eldin Mountains Depths


Faron Grasslands Depths


.png)

Gerudo Desert Depths


Gerudo Highlands Depths


Great Hyrule Forest Depths


Hebra Mountains Depths


Hyrule Ridge Depths


Lake Hylia Depths

Lanayru Great Spring Depths


Lanayru Wetlands Depths


Mount Lanayru Depths


Necluda Sea Depths


Tabantha Frontier Depths


West Necluda Depths


