Gerudo Training Ground: Difference between revisions
MannedTooth (talk | contribs) No edit summary |
TriforceTony (talk | contribs) No edit summary |
||
| (34 intermediate revisions by 7 users not shown) | |||
| Line 1: | Line 1: | ||
{{Dungeon | {{Infobox Dungeon | ||
| | |type= mini | ||
| | |image= | ||
| | {{Media | ||
| | |Screenshot OoT= File:OoT Gerudo Training Ground.png | ||
|Screenshot OoT3D= File:OoT3D Gerudo Training Ground.png | |||
}} | }} | ||
The '''Gerudo Training Ground''' is an optional mini-dungeon in {{OoT}}. It consists of various difficult obstacles that [[Link]] must overcome in order to prove his abilities as a hero. If he manages to complete the training ground, he will be rewarded with the [[Ice Arrow]] as proof of his skill.<ref>{{Cite|You got the Ice Arrow! Set it to | |location= [[Gerudo's Fortress]] | ||
|game= OoT | |||
|item= [[Ice Arrow]] | |||
|mini-boss= | |||
|boss= | |||
|strategy= {{StrategyWiki|The Legend of Zelda: Ocarina of Time/Gerudo Training Grounds|Gerudo Training Ground}} | |||
}} | |||
The {{Term/Store|Gerudo Training Ground||Series, OoT, OoT3D}},<ref>{{Cite|'''{{Big|Gerudo Training Ground}}'''|N/A|OoT3D}}</ref> also known as the '''Gerudo's Training Ground''',{{Exp Game|OoT}}<ref>{{Cite|This is the Gerudo's {{Color|OoT Red|Training Ground}}. Membership card verified. One try for 10 Rupees!|Gerudo|OoT}}</ref> is an optional mini-dungeon in {{OoT}}. It consists of various difficult obstacles that [[Link]] must overcome in order to prove his abilities as a hero. If he manages to complete the training ground, he will be rewarded with the [[Ice Arrow]] as proof of his skill.<ref>{{Cite|You got the {{Color|OoT Dark Blue|Ice Arrow}}! Set it to {{icon|OoT C}} and your arrows will be powered up! If you hit your target, it will freeze. This arrow magic is granted only to those who complete the difficult training of the Gerudos, so use it with pride!|N/A|OoT}}</ref> | |||
==Entrance to the Ground== | ==Entrance to the Ground== | ||
The place can be found within the [[Gerudo's Fortress]]. The [[Gerudo Token]] is required to enter along with a small fee of 10 [[Rupee]]s.<ref>{{Cite|This is the Gerudo's Training Ground. Nobody is allowed to enter without a membership card.|Gerudo|OoT}}</ref><ref>{{Cite|This is the Gerudo | The place can be found within the [[Gerudo's Fortress]]. The [[Gerudo Token]] is required to enter along with a small fee of 10 [[Rupee]]s.<ref>{{Cite|This is the Gerudo's Training Ground. Nobody is allowed to enter without a membership card.|Gerudo|OoT}}</ref><ref>{{Cite|This is the Gerudo {{Color|OoT3D Red|Training Ground}}. Gerudo Token verified. One try for {{Color|OoT3D Red|10 Rupees!}}|Gerudo|OoT3D}}</ref> | ||
==Themes and Navigation== | ==Themes and Navigation== | ||
[[File:Fire Room.jpg|thumb|right|300px|One of the rooms inside the Gerudo Training Ground]] | [[File:Fire Room.jpg|thumb|right|300px|One of the rooms inside the Gerudo Training Ground]] | ||
The Gerudo Training Ground consists of eleven rooms full of traps, enemies, puzzles, and other obstacles that Link must overcome to receive a series of [[Key | The Gerudo Training Ground consists of eleven rooms full of traps, enemies, puzzles, and other obstacles that Link must overcome to receive a series of [[Small Key]]s. These keys are necessary in order to unlock the various doors within the chamber where the Ice Arrow resides. The Ice Arrow chamber, which is located at the center of the Training Ground, is made up of a small maze of locked doors. There are two paths that Link can take to reach the Ice Arrow; however, only one of them will lead to the treasure while the other one leads to a dead-end. A total of 9 Small Keys can be found hidden in the training ground, but only 7 are required to reach the Ice Arrow ''if'' the correct path is chosen from the beginning. Many assume that if Link chooses the wrong path to get to where the Ice Arrow is, there will not be enough Small Keys to correct the mistake, rendering the Ice Arrow impossible to reach. This is a [[Myths of The Legend of Zelda Series|common misunderstanding]] since there are other well-hidden keys inside the Gerudo Training Ground that can help him correct the error. | ||
The entrance hall of the training ground has three doors that lead to different puzzles. The northern door grants access to the Ice Arrow chamber, the eastern door leads to a room where Link must defeat two [[Dinolfos]] and one [[Beamos]] under a limited time, and the western door takes the young hero to a room full of quicksand where two [[Stalfos]] have to be eliminated within the time limit. The east and west doors all lead to the rest of the obstacles, in which the majority consist of collecting Silver [[Rupee]]s under various conditions to receive a Small Key as a reward. Every time Link enters a new room, the conditions to be met will be displayed on-screen as well as mentioning whether the obstacle has to be complete under a limited time or not. | The entrance hall of the training ground has three doors that lead to different puzzles. The northern door grants access to the Ice Arrow chamber, the eastern door leads to a room where Link must defeat two [[Dinolfos]] and one [[Beamos]] under a limited time, and the western door takes the young hero to a room full of quicksand where two [[Stalfos]] have to be eliminated within the time limit. The east and west doors all lead to the rest of the obstacles, in which the majority consist of collecting Silver [[Rupee]]s under various conditions to receive a Small Key as a reward. Every time Link enters a new room, the conditions to be met will be displayed on-screen as well as mentioning whether the obstacle has to be complete under a limited time or not. | ||
The following lists the necessary items to successfully complete the training ground and collect everything: | The following lists the necessary items to successfully complete the training ground and collect everything: | ||
*'''[[ | *'''[[Fairy Bow]]''' – {{Term|OoT3D|Forest Temple|link}} | ||
*'''[[Megaton Hammer]]''' – | *'''[[Megaton Hammer]]''' – {{Term|OoT3D|Fire Temple|link}} | ||
*'''[[Hookshot]]''' – [[Kakariko Village]] | *'''[[Hookshot]]''' – [[Kakariko Village]] | ||
*'''[[Lens of Truth]]''' – [[Bottom of the Well]] | *'''[[Lens of Truth]]''' – [[Bottom of the Well]] | ||
*'''[[Iron Boots]]''' - | *'''[[Iron Boots]]''' - {{Term|OoT3D|Ice Cavern|link}} | ||
*'''[[Silver Gauntlets]]''' – [[Spirit Temple]] | *'''[[Silver Gauntlets]]''' – [[Spirit Temple]] | ||
It is worth noting that the Silver Gauntlets are not required to ultimately reach the treasure since the Small Key obtained through the gauntlets is only used if Link chooses the wrong path at the Ice Arrow chamber. In fact, it is possible to collect seven out of the nine keys with only the Hookshot, Bow, and Hammer, although the player must memorize the locations of the false wall and ceiling that would be visible with the Lens of Truth; the keys unobtainable at that time are the ones which require the Iron Boots and Silver Gauntlets. The [[Hover Boots]] are not required; if Link plays the "[[Song of Time]]" in the Lava Room, he can use the blocks created to reach the upper platform, from which he can reach all the Silver Rupees. The [[Longshot]] is also not required in {{OoT|-}}, but in ''Master Quest'' it is required in the Lava Room and Maze Room. It is not required in either game in the Statue Room, as Link can walk to the other side of the facility to access the upper ledge, although the [[Scarecrow's Song]] in {{OoT|-}} and the Hookshot posts in ''Master Quest'' provide a useful shortcut. | It is worth noting that the Silver Gauntlets are not required to ultimately reach the treasure since the Small Key obtained through the gauntlets is only used if Link chooses the wrong path at the Ice Arrow chamber. In fact, it is possible to collect seven out of the nine keys with only the Hookshot, Bow, and Hammer, although the player must memorize the locations of the false wall and ceiling that would be visible with the Lens of Truth; the keys unobtainable at that time are the ones which require the Iron Boots and Silver Gauntlets. The [[Hover Boots]] are not required; if Link plays the "[[Song of Time]]" in the Lava Room, he can use the blocks created to reach the upper platform, from which he can reach all the Silver Rupees. The [[Longshot]] is also not required in {{OoT|-}}, but in ''Master Quest'' it is required in the Lava Room and Maze Room. It is not required in either game in the Statue Room, as Link can walk to the other side of the facility to access the upper ledge, although the [[Scarecrow's Song]] in {{OoT|-}} and the Hookshot posts in ''Master Quest'' provide a useful shortcut. | ||
In the {{MQ}} version of the game, there are now only three keys in the dungeon. Instead of a chest, there is a crate that hides a rusty switch that, when activated, makes the chest with the [[Ice Arrow]]s appear. The objective in the {{Term|OoT3D|Boulder}} room is the same as in the original version. However, there is only one [[Iron Knuckle (Boss)|Iron Knuckle]] now. The objective for the maze room remains the same as in the original game. Boulders are no longer rolling, but there are stalactites that fall from the ceiling and a [[Wallmaster]]. The [[Hover Boots]] or Longshot are required to get a single Rupee. | |||
In the {{MQ}} version of the game, there are now only three keys in the dungeon. Instead of a chest, there is a crate that hides a rusty switch that, when activated, makes the chest with the [[Ice Arrow]]s appear. | |||
[[Wolfos]] are no longer found in the Wolfos room room. Instead, there are now [[Dinolfos]], [[Lizalfos]] and a [[Beamos]]. A Time Block must be used to go through the invisible wall. In the adjacent room to the north, past the large block that requires the [[Silver Gauntlets]], there is now a [[Stalfos]], but only one chest containing a Purple [[Rupee]]. The Statue room is exactly the same, except for the fact that the statue is now surrounded by fire, which makes the aiming more difficult, and that the [[Scarecrow's Song]] has no effect; Hookshot posts appear once the challenge is complete. The chest with the Ice Arrows is in the room in the upper floor. | |||
Instead of using the [[Megaton Hammer]] to break some blocks in the hammer-themed room, Link is now required to fight Dinolfos and an Ironknuckle. In the lava room, there are lots of [[Red Bubble]]s now and a torch has to be lit so the fire in the platforms disappears and Link can use his [[Hover Boots]] to get all the Rupees. If Link approaches this room from the Statue Room, there is a rusty switch which raises a Hookshot post on the raised, central platform; by using this post in conjunction with the Longshot, the Hover Boots are not required. In the water room next to this one there are less Rupees and enemies such as [[Biri]], [[Bari]], [[Stinger]]s and [[Shell Blade]]s. Link is required to defeat some enemies in a limited time in the Flame Wall room. Among them is an [[Armos]] in the wall, which is no longer surrounded by fire. | |||
=== | ===Minor {{Plural|OoT3D|Enemy}}=== | ||
{{Gallery List|Enemies | |||
|OoT= Armos, Beamos, Boulder, Dinolfos, Door that Falls Down, Like Like, Red Bubble, Shell Blade, Stalfos, Torch Slug, White Wolfos, Wolfos | |||
}} | |||
;{{MQ|-}} | |||
{{Gallery List|Enemies | |||
|OoT= Armos, Bari, Beamos, Biri, Dinolfos, Iron Knuckle, Lizalfos, Red Bubble, Shell Blade, Stalfos, Stinger, Wallmaster | |||
}} | |||
= | |||
==Nomenclature== | ==Nomenclature== | ||
{{ | {{Nomenclature}} | ||
==Gallery== | ==Gallery== | ||
<gallery> | <gallery> | ||
File:TrainingGroundEntrance.png|Entrance to the training ground | File:TrainingGroundEntrance.png|Entrance to the training ground | ||
File: | File:OoT Gerudo Training Ground Map.jpg|Dungeon Map of the Gerudo Training Ground | ||
</gallery> | </gallery> | ||
| Line 108: | Line 64: | ||
{{DungeonNav2|OoT}} | {{DungeonNav2|OoT}} | ||
{{Categories | |||
|dungeons= OoT, OoT3D | |||
|locations= OoT, OoT3D | |||
|side-quests= OoT, OoT3D | |||
}} | |||
Latest revision as of 11:47, 10 July 2023
The Gerudo Training Ground,[1] also known as the Gerudo's Training Ground,(OoT)[2] is an optional mini-dungeon in Ocarina of Time. It consists of various difficult obstacles that Link must overcome in order to prove his abilities as a hero. If he manages to complete the training ground, he will be rewarded with the Ice Arrow as proof of his skill.[3]
Entrance to the Ground
The place can be found within the Gerudo's Fortress. The Gerudo Token is required to enter along with a small fee of 10 Rupees.[4][5]

The Gerudo Training Ground consists of eleven rooms full of traps, enemies, puzzles, and other obstacles that Link must overcome to receive a series of Small Keys. These keys are necessary in order to unlock the various doors within the chamber where the Ice Arrow resides. The Ice Arrow chamber, which is located at the center of the Training Ground, is made up of a small maze of locked doors. There are two paths that Link can take to reach the Ice Arrow; however, only one of them will lead to the treasure while the other one leads to a dead-end. A total of 9 Small Keys can be found hidden in the training ground, but only 7 are required to reach the Ice Arrow if the correct path is chosen from the beginning. Many assume that if Link chooses the wrong path to get to where the Ice Arrow is, there will not be enough Small Keys to correct the mistake, rendering the Ice Arrow impossible to reach. This is a common misunderstanding since there are other well-hidden keys inside the Gerudo Training Ground that can help him correct the error.
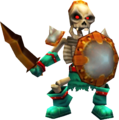
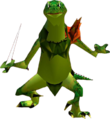
The entrance hall of the training ground has three doors that lead to different puzzles. The northern door grants access to the Ice Arrow chamber, the eastern door leads to a room where Link must defeat two Dinolfos and one Beamos under a limited time, and the western door takes the young hero to a room full of quicksand where two Stalfos have to be eliminated within the time limit. The east and west doors all lead to the rest of the obstacles, in which the majority consist of collecting Silver Rupees under various conditions to receive a Small Key as a reward. Every time Link enters a new room, the conditions to be met will be displayed on-screen as well as mentioning whether the obstacle has to be complete under a limited time or not.
The following lists the necessary items to successfully complete the training ground and collect everything:
- Fairy Bow – Forest Temple
- Megaton Hammer – Fire Temple
- Hookshot – Kakariko Village
- Lens of Truth – Bottom of the Well
- Iron Boots - Ice Cavern
- Silver Gauntlets – Spirit Temple
It is worth noting that the Silver Gauntlets are not required to ultimately reach the treasure since the Small Key obtained through the gauntlets is only used if Link chooses the wrong path at the Ice Arrow chamber. In fact, it is possible to collect seven out of the nine keys with only the Hookshot, Bow, and Hammer, although the player must memorize the locations of the false wall and ceiling that would be visible with the Lens of Truth; the keys unobtainable at that time are the ones which require the Iron Boots and Silver Gauntlets. The Hover Boots are not required; if Link plays the "Song of Time" in the Lava Room, he can use the blocks created to reach the upper platform, from which he can reach all the Silver Rupees. The Longshot is also not required in Ocarina of Time, but in Master Quest it is required in the Lava Room and Maze Room. It is not required in either game in the Statue Room, as Link can walk to the other side of the facility to access the upper ledge, although the Scarecrow's Song in Ocarina of Time and the Hookshot posts in Master Quest provide a useful shortcut.
In the Master Quest version of the game, there are now only three keys in the dungeon. Instead of a chest, there is a crate that hides a rusty switch that, when activated, makes the chest with the Ice Arrows appear. The objective in the Boulder room is the same as in the original version. However, there is only one Iron Knuckle now. The objective for the maze room remains the same as in the original game. Boulders are no longer rolling, but there are stalactites that fall from the ceiling and a Wallmaster. The Hover Boots or Longshot are required to get a single Rupee.
Wolfos are no longer found in the Wolfos room room. Instead, there are now Dinolfos, Lizalfos and a Beamos. A Time Block must be used to go through the invisible wall. In the adjacent room to the north, past the large block that requires the Silver Gauntlets, there is now a Stalfos, but only one chest containing a Purple Rupee. The Statue room is exactly the same, except for the fact that the statue is now surrounded by fire, which makes the aiming more difficult, and that the Scarecrow's Song has no effect; Hookshot posts appear once the challenge is complete. The chest with the Ice Arrows is in the room in the upper floor.
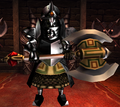
Instead of using the Megaton Hammer to break some blocks in the hammer-themed room, Link is now required to fight Dinolfos and an Ironknuckle. In the lava room, there are lots of Red Bubbles now and a torch has to be lit so the fire in the platforms disappears and Link can use his Hover Boots to get all the Rupees. If Link approaches this room from the Statue Room, there is a rusty switch which raises a Hookshot post on the raised, central platform; by using this post in conjunction with the Longshot, the Hover Boots are not required. In the water room next to this one there are less Rupees and enemies such as Biri, Bari, Stingers and Shell Blades. Link is required to defeat some enemies in a limited time in the Flame Wall room. Among them is an Armos in the wall, which is no longer surrounded by fire.
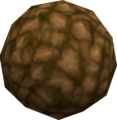
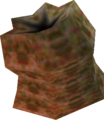
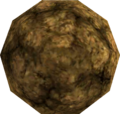
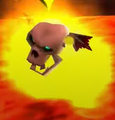
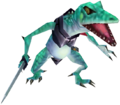
Minor Enemies
- Master Quest
Nomenclature
| Language | Names | Meanings |
|---|---|---|
| ゲルドの修練場 (Gerudo no Shūrenjō) (OoT)[7] | Geldo/Gerudo Training Ground | |
| Zona di addestramento Gerudo (OoT3D)[6] | Gerudo training zone | |
| This table was generated using translation pages. To request an addition, please contact a staff member with a reference. | ||
Gallery
-
Entrance to the training ground
-
Dungeon Map of the Gerudo Training Ground
References
- ↑ "Gerudo Training Ground" — N/A (Ocarina of Time 3D)
- ↑ "This is the Gerudo's Training Ground. Membership card verified. One try for 10 Rupees!" — Gerudo (Ocarina of Time)
- ↑ "You got the Ice Arrow! Set it to
 and your arrows will be powered up! If you hit your target, it will freeze. This arrow magic is granted only to those who complete the difficult training of the Gerudos, so use it with pride!" — N/A (Ocarina of Time)
- ↑ "This is the Gerudo's Training Ground. Nobody is allowed to enter without a membership card." — Gerudo (Ocarina of Time)
- ↑ "This is the Gerudo Training Ground. Gerudo Token verified. One try for 10 Rupees!" — Gerudo (Ocarina of Time 3D)
- ↑ "Zona di addestramento Gerudo - Ingresso riservato ai soci" — Sign (Ocarina of Time 3D, Italian localization)
- ↑ Nintendo Official Guidebook—The Legend of Zelda: Ocarina of Time, Shogakukan, pg. 155


