Dodongo's Cavern: Difference between revisions
MannedTooth (talk | contribs) |
|||
| (12 intermediate revisions by 5 users not shown) | |||
| Line 8: | Line 8: | ||
|caption= | |caption= | ||
|location= [[Death Mountain Trail]] | |location= [[Death Mountain Trail]] | ||
|game= | |game= OoT | ||
|item= [[Bomb Bag]] | |item= {{List|[[Bomb Bag]], [[Gold Skulltula]] ×5}} | ||
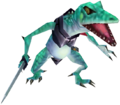
|mini-boss= [[Lizalfos]] | |mini-boss= [[Lizalfos]] | ||
|boss= ''Infernal Dinosaur:'' [[King Dodongo]] | |boss= ''Infernal Dinosaur:'' [[King Dodongo]] | ||
|quest= [[Goron's Ruby]] | |quest= {{List|[[Goron's Ruby]], [[Heart Container]]}} | ||
|theme= | |theme= | ||
|strategy= {{StrategyWiki|The Legend of Zelda: Ocarina of Time/Dodongo's Cavern|Dodongo's Cavern}} | |||
}} | }} | ||
{{Term/Store|Dodongo's Cavern||Series, OoT, OoT3D}} is a {{Term|OoT3D|Dungeon|link}} in {{OoT}}.<ref>{{Cite Book|quote= |book= E |publisher= |page= 149}}</ref> It is the second of three dungeons that child [[Link]] must visit in order to acquire the three [[Spiritual Stones]]. It also has a great amount of rocks in it that the [[Goron]]s that live nearby eat, and it is used for mining food for them.<ref>{{Cite|We are in danger of extinction! It's all because we can't enter our quarry, the Dodongo's Cavern. We Gorons live on a diet of rocks... And the most delicious and nutritious rocks around are found in the Dodongo's Cavern!|Goron|OoT}}</ref> | {{Term/Store|Dodongo's Cavern||Series, OoT, OoT3D}} is a {{Term|OoT3D|Dungeon|link}} in {{OoT}}.<ref>{{Cite Book|quote= |book= E |publisher= |page= 149}}</ref> It is the second of three dungeons that child [[Link]] must visit in order to acquire the three [[Spiritual Stones]]. It also has a great amount of rocks in it that the [[Goron]]s that live nearby eat, and it is used for mining food for them.<ref>{{Cite|We are in danger of extinction! It's all because we can't enter our quarry, the Dodongo's Cavern. We Gorons live on a diet of rocks... And the most delicious and nutritious rocks around are found in the Dodongo's Cavern!|Goron|OoT}}</ref> | ||
| Line 23: | Line 24: | ||
==Themes and Navigation== | ==Themes and Navigation== | ||
Dodongo's Cavern has two floors, some of which include bridges and statues. Some rooms are smaller and darker. Link regularly has to move blocks to depress [[Switch]]es, use Bomb Flowers to destroy walls (which can also be destroyed by defeating a [[Baby Dodongo]]), and occasionally shut off rings of fire by shooting eye switches with the [[Fairy Slingshot]]. It is home to lizard-like creatures, such as the several varieties of Dodongos for which the Cavern is named and [[Lizalfos]], which are the first mini-bosses found in the game. A | Dodongo's Cavern has two floors, some of which include bridges and statues. Some rooms are smaller and darker. Link regularly has to move blocks to depress [[Switch]]es, use Bomb Flowers to destroy walls (which can also be destroyed by defeating a [[Baby Dodongo]]), and occasionally shut off rings of fire by shooting eye switches with the [[Fairy Slingshot]]. It is home to lizard-like creatures, such as the several varieties of Dodongos for which the Cavern is named and [[Lizalfos]], which are the first mini-bosses found in the game. A small, hidden room is located behind the lava-waterfall in the chamber where the first two Lizalfos are fought. This room contains a single [[Heart]]. Many Bomb Flowers grow within the Cavern and are often necessary for solving puzzles before Link obtains the [[Bomb Bag]]. In the main chamber of Dodongo's Cavern lies the remains of a giant dead Dodongo, whose mouth must be opened to progress further into the dungeon.<ref>{{Cite|Giant dead Dodongo... When it sees red, a new way to go will be open.|Stone Tablet|OoT3D}}</ref> | ||
In the {{MQ}} version, the dungeon is largely played in a backwards fashion. Instead of going first to the right, Link must go to the left and to the upper floor. The Lizalfos are first fought in the second floor and then in the first. [[Bomb]]s are obtained much later, where the [[Compass]] was originally found. There are also more [[Business Scrub]]s. The rooms where [[Gold Skulltula]]s were originally found have now many enemies such as [[Skulltula]]s and [[Mad Scrub]]s, giving a reward of only five [[Rupee]]s. [[Poe]]s now appear in the Dodongo room. [[Baby Dodongo]]s are plentiful and Dodongos are found in a different room. There are almost no [[Keese]] and there is a room with several [[Armos]]. Most puzzles feature a sequence of Bomb Flowers on the walls. | In the {{MQ}} version, the dungeon is largely played in a backwards fashion. Instead of going first to the right, Link must go to the left and to the upper floor. The Lizalfos are first fought in the second floor and then in the first. [[Bomb]]s are obtained much later, where the [[Compass]] was originally found. There are also more [[Business Scrub]]s. The rooms where [[Gold Skulltula]]s were originally found have now many enemies such as [[Skulltula]]s and [[Mad Scrub]]s, giving a reward of only five [[Rupee]]s. [[Poe]]s now appear in the Dodongo room. [[Baby Dodongo]]s are plentiful and Dodongos are found in a different room. There are almost no [[Keese]] and there is a room with several [[Armos]]. Most puzzles feature a sequence of Bomb Flowers on the walls. | ||
===Minor | ===Minor {{Plural|OoT3D|Enemy}}=== | ||
{{ | {{Gallery List|Enemies | ||
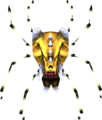
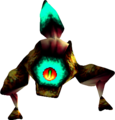
| | |OoT= Armos, Baby Dodongo, Beamos, Blade Trap, Business Scrub, Dodongo, Gold Skulltula, Keese, Fire Keese, Lava Pit, Lizalfos, Skullwalltula | ||
| | |||
}} | }} | ||
;{{MQ|-}} | |||
{{Gallery List|Enemies | |||
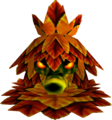
|OoT= Gohma Larva, Mad Scrub, Poe, Skulltula | |||
}} | }} | ||
| Line 95: | Line 48: | ||
==Gallery== | ==Gallery== | ||
<gallery> | <gallery> | ||
File: | File:OoT Dodongo's Cavern Map.jpg|Map of Dodongo's Cavern | ||
</gallery> | </gallery> | ||
{{Ref}} | {{Ref}} | ||
{{DungeonNav2|OoT}} | {{DungeonNav2|OoT}} | ||
{{Categories | {{Categories | ||
|Caverns | |Caverns | ||
|dungeons= OoT, OoT3D | |dungeons= OoT, OoT3D | ||
| | |locations= OoT, OoT3D | ||
}} | }} | ||
[[Category:Dodongos]] | [[Category:Dodongos]] | ||
Latest revision as of 02:38, 22 October 2023
Dodongo's Cavern is a Dungeon in Ocarina of Time.[1] It is the second of three dungeons that child Link must visit in order to acquire the three Spiritual Stones. It also has a great amount of rocks in it that the Gorons that live nearby eat, and it is used for mining food for them.[2]
Entrance to the Cavern
The cave is located about halfway up Death Mountain Trail. Prior to the events of the game, Ganondorf came to Death Mountain to get the Goron's Ruby from Darunia, the chief of the Gorons, who refused. Because of that, Ganondorf infested the cavern with Dodongos and sealed the entrance with a boulder.[3]
Link, who comes to Death Mountain to get the Spiritual Stone as well, is, unlike Ganondorf, able to gain the trust and respect of the Gorons. By using a Bomb Flower (usable only after collection of the Goron's Bracelet)[4] to destroy the boulder blocking the entrance, he is able to enter the cavern and navigate his way through it, defeating the creatures all the way through up to King Dodongo, the boss of the dungeon. In return for this, he is able to receive the Spiritual Stone from the Gorons and proceed with his quest.[5]
Dodongo's Cavern has two floors, some of which include bridges and statues. Some rooms are smaller and darker. Link regularly has to move blocks to depress Switches, use Bomb Flowers to destroy walls (which can also be destroyed by defeating a Baby Dodongo), and occasionally shut off rings of fire by shooting eye switches with the Fairy Slingshot. It is home to lizard-like creatures, such as the several varieties of Dodongos for which the Cavern is named and Lizalfos, which are the first mini-bosses found in the game. A small, hidden room is located behind the lava-waterfall in the chamber where the first two Lizalfos are fought. This room contains a single Heart. Many Bomb Flowers grow within the Cavern and are often necessary for solving puzzles before Link obtains the Bomb Bag. In the main chamber of Dodongo's Cavern lies the remains of a giant dead Dodongo, whose mouth must be opened to progress further into the dungeon.[6]
In the Master Quest version, the dungeon is largely played in a backwards fashion. Instead of going first to the right, Link must go to the left and to the upper floor. The Lizalfos are first fought in the second floor and then in the first. Bombs are obtained much later, where the Compass was originally found. There are also more Business Scrubs. The rooms where Gold Skulltulas were originally found have now many enemies such as Skulltulas and Mad Scrubs, giving a reward of only five Rupees. Poes now appear in the Dodongo room. Baby Dodongos are plentiful and Dodongos are found in a different room. There are almost no Keese and there is a room with several Armos. Most puzzles feature a sequence of Bomb Flowers on the walls.
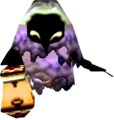
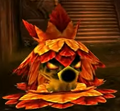
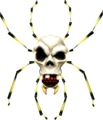
Minor Enemies
- Master Quest
Trivia
- The sign which explains the giant dead Dodongo uses the same texture of a sign seen in a fountain in Super Mario 64. It was changed in Ocarina of Time 3D to a different, more detailed sign that shows visible Hylian at a distance.
- The map items in Ocarina of Time and Majora's Mask, when taken from a Treasure Chest, show a map of Dodongo's Cavern on them.
- Dodongo's Cavern is mentioned in Majora's Mask by the Goron that gives Link Don Gero's Mask, however, he calls it "Dodongo Cavern".[7]
Nomenclature
| Language | Names | Meanings |
|---|---|---|
| ドドンゴの洞窟 (Dodongo no Dogutsu) (OoT)[10] | Same as English. | |
| Caverna dei Dodongo (OoT | OoT3D)[8][9] | Dodongo's cavern | |
| This table was generated using translation pages. To request an addition, please contact a staff member with a reference. | ||
Gallery
-
Map of Dodongo's Cavern
References
- ↑ Encyclopedia, Dark Horse Books, pg. 149
- ↑ "We are in danger of extinction! It's all because we can't enter our quarry, the Dodongo's Cavern. We Gorons live on a diet of rocks... And the most delicious and nutritious rocks around are found in the Dodongo's Cavern!" — Goron (Ocarina of Time)
- ↑ "All this trouble must have been caused by that Gerudo thief, Ganondorf! He said, "Give me the Spiritual Stone! Only then will I open the cave for you!"" — Darunia (Ocarina of Time)
- ↑ "You got the Goron's Bracelet! Now you can pull up Bomb Flowers." — N/A (Ocarina of Time)
- ↑ "You, on the other hand, risked your life for us... Kid, I like you! How's about you and I become Sworn Brothers?! No, there's no big ceremony involved! Just take this as a token of our friendship!" — Darunia (Ocarina of Time)
- ↑ "Giant dead Dodongo... When it sees red, a new way to go will be open." — Stone Tablet (Ocarina of Time 3D)
- ↑ "Th-That's it! It's so good that I dream about it... Dodongo Cavern's finest quality rock sirloin!" — Goron (Majora's Mask)
- ↑ Enciclopedia di Hyrule, Magazzini Salani, pg. 149
- ↑ "Sta bloccando l'ingresso della caverna dei Dodongo." — Goron (Ocarina of Time 3D, Italian localization)
- ↑ Nintendo Official Guidebook—The Legend of Zelda: Ocarina of Time, Shogakukan, pg. 155

