Inside Jabu-Jabu's Belly: Difference between revisions
m (replaced: x4 → ×4) |
No edit summary Tags: Mobile edit Mobile web edit |
||
| (93 intermediate revisions by 32 users not shown) | |||
| Line 1: | Line 1: | ||
:'' | :''This article refers to the {{OoT}} dungeon. For the {{OoA}} dungeon, see [[Jabu-Jabu's Belly]].'' | ||
{{ | {{Infobox Dungeon | ||
| | |image= | ||
| | {{Media | ||
|Screenshot OoT= File:OoT Inside Jabu-Jabu's Belly.png | |||
|Screenshot OoT3D= File:OoT3D Inside Jabu-Jabu's Belly.png | |||
| | |||
}} | }} | ||
'' | |caption= | ||
|pronunciation= | |||
|location= {{Term|OoA|Zora's Fountain|link}} | |||
|game= OoT | |||
|other= | |||
|item= | |||
{{List| | |||
{{Term|OoT3D|Boomerang|link}}, | |||
{{Term|OoT3D|Gold Skulltula|link}} x4, | |||
}} | |||
|quest= | |||
{{List| | |||
{{Term|OoT3D|Zora's Sapphire|link}}, | |||
{{Term|OoT3D|Heart Container|link}}, | |||
}} | |||
|mini-boss= {{Term|OoT3D|Big Octo|link}} | |||
|boss= ''Bio-electric Anemone'' {{Term|OoT3D|Barinade|link}} | |||
|temperature= | |||
|theme= | |||
|strategy= {{StrategyWiki|The Legend of Zelda: Ocarina of Time/Jabu-Jabu's Belly#Inside Jabu-Jabu's Belly|Inside Jabu-Jabu's Belly}} | |||
|zu= | |||
}} | |||
{{Term/Store|Inside Jabu-Jabu's Belly||Series, OoT, OoT3D}},<ref>{{Cite Book|quote= |book= E|publisher= |page= 148}}</ref> also known as '''Lord Jabu-Jabu's Belly''',<ref>{{Cite Book|quote= |book= E |publisher= |page= 208}}</ref> is the third {{Term|OoT3D|Dungeon|link}} in {{OoT}}. | |||
==Entrance to the Belly== | ==Entrance to the Belly== | ||
The | The dungeon is set inside the body of [[Lord Jabu-Jabu]], who spends every day on [[Zora's Fountain]]. To enter, [[Link]] must drop a [[Fish]] from his [[Bottle]] in front of Jabu-Jabu, causing him to open his mouth and suck both the fish and Link inside. His mission here, while he is looking for the third [[Spiritual Stone]], the [[Zora's Sapphire]], is to rescue [[Princess Ruto]].<ref>{{Cite|The evidence seems clear. Of course, you'll go find Ruto. You can pass through here to the altar of Lord Jabu-Jabu.|King Zora|OoT}}</ref> | ||
==Themes and Navigation== | ==Themes and Navigation== | ||
While inside, Link must initially avoid the vast variety of parasitic enemies, including an especially large tentacle-like organism with electrified appendages in the shape of unstable pillars and jellyfish-like creatures called [[Bari]],<ref>{{Cite|Lord Jabu-Jabu is very strange today... There are electrified jellyfish and strange holes around...|Princess Ruto|OoT}}</ref> since they become much harder to kill without the [[Boomerang]], the weapon found inside the dungeon. Shortly thereafter, Link locates [[Princess Ruto]] inside what appears to be the stomach, who initially refuses to accept any help from Link,<ref>{{Cite|You! Who are you?! I am Ruto, Princess of the Zoras. What?! Are you saying my father asked you to come here to save me? I'd never ask anyone to do such a thing! "Letter in a Bottle?" I have no idea what you're talking about! My father is worried about me? I don't care! Anyway, I can't go home right now. And you... Get out of here! understand?!|Princess Ruto|OoT}}</ref> and accidentally falls into a {{Term|OoT3D|Yuck Hole|link}}.<ref>{{Cite|Ooooh Noooooo!|Princess Ruto|OoT}}</ref> Once found again by the young hero, she commands him to help her recover the Sapphire. Link must carry Ruto throughout many rooms to help her find it.<ref>{{Cite|You're that worried about me? Then I will give you the honor of carrying me! However...I won't leave until I find the thing I'm looking for. You'd better believe me!|Princess Ruto|OoT}}</ref> These rooms include areas where Link must fight numerous tentacles with the help of the Boomerang, so that new areas can be explored. He eventually enters a large room that has a central platform with the Zora's Sapphire on it.<ref>{{Cite|That's it! That's what I've been looking for!Throw me up there! Onto the platform!|Princess Ruto|OoT}}</ref> | |||
While inside, Link must initially avoid the vast variety of parasitic enemies, including an especially large tentacle-like organism with electrified appendages in the shape of unstable pillars and jellyfish-like creatures called [[Bari]],<ref>{{ | |||
today... There are electrified jellyfish and strange holes around...| | After taking the Zora's Sapphire, Ruto is captured, and Link is ambushed by a [[Big Octo]] that must be defeated in order to continue.<ref>{{Cite|Oh my goodness! I finally found... My mother's stone... [...] Keeeyaaaah! What is this?! An octopus?!|Princess Ruto|OoT}}</ref> After defeating it, Link continues until he locates the creature causing Jabu-Jabu's discomfort: a parasite called [[Barinade]], the dungeon's boss. Link eventually defeats Barinade, rescues Princess Ruto, and receives the Zora's Sapphire as a reward.<ref>{{Cite|Well, anyway, you saved me, so I guess I'll reward you. What do you wish? Just tell me... [...] My mother gave it to me and said I should give it only to the man who will be my husband. You might call it the Zora's Engagement Ring! All right! I'll give you my most precious possession: Zora's Sapphire!|Princess Ruto|OoT}}</ref> | ||
The dungeon has many strange changes in the {{MQ}} version of the game. Instead of uvula-like switches on the ceilings of Jabu Jabu's intestinal tract, there are now cow head switches attached to walls that operate the opening of doors. As for enemies, [[Lizalfos]] and [[Like Like]]s were added to several rooms, the [[Parasitic Tentacle]]s were dispersed evenly and in larger quantities throughout Jabu-Jabu's insides, and invisible [[Keese]] were supplied to one room that includes an extra [[Gold Skulltula]]. Only three [[Tailpasaran]]s appear in an optional room with a Gold Skulltula, and [[Business Scrub]]s were deleted from the Master Quest version. In terms of items, the [[Dungeon Map]], [[Compass]], and [[Boomerang]] can be obtained much earlier; the room that contained the Boomerang in the original version now contains the Compass, and vice versa. Other changes include the placement of a grown cow in a room, the addition of a water pillar in the room below the {{Plural|OoT3D|Yuck Hole}}, and the presence of [[Bombchu]]s, which are used to complete various new puzzles throughout the dungeon. Princess Ruto is utilized much less as a gameplay mechanic, as she is only required to hit one switch. | |||
== | ===Minor {{Plural|OoT3D|Enemy}}=== | ||
{{Gallery List|Enemies | |||
|OoT= Bari, Biri, Blue Slimy Thing, Blue Tentacle, Business Scrub, Gold Skulltula, Green Slimy Thing, Green Tentacle, Jiggly, Octorok, Red Slimy Thing, Red Tail, Shabom, Stinger, Tailpasaran | |||
}} | |||
;{{MQ|-}} | |||
{{Gallery List|Enemies | |||
|OoT= Gold Skulltula, Keese, Like Like, Lizalfos | |||
}} | |||
==Trivia== | ==Trivia== | ||
* | *A remixed version of the dungeon's theme was used in {{TWW}} as [[Jabun]]'s theme. | ||
{{ | ==Nomenclature== | ||
{{Nomenclature}} | |||
==Gallery== | |||
<gallery> | |||
File:Lordjabujabu.jpg|Entering Lord Jabu-Jabu's mouth | |||
File:OoT Inside Jabu-Jabu's Belly Map.jpg|Dungeon Map of Jabu-Jabu's Belly | |||
File:OoT Inside Jabu-Jabu's Belly Development Plan.jpg|Inside Jabu-Jabu's Belly development plan | |||
| | File:OoT Inside Jabu-Jabu's Belly 2.png|The interior of {{Term|OoT|Inside Jabu-Jabu's Belly}} from {{OoT|-}} | ||
| | </gallery> | ||
| | |||
| | |||
| | |||
}} | |||
{{ | {{Ref}} | ||
{{DungeonNav2|OoT}} | |||
{{Categories | |||
|dungeons= OoT, OoT3D | |||
|locations= OoT, OoT3D | |||
}} | |||
Latest revision as of 19:58, 26 February 2024
- This article refers to the Ocarina of Time dungeon. For the Oracle of Ages dungeon, see Jabu-Jabu's Belly.
Inside Jabu-Jabu's Belly,[1] also known as Lord Jabu-Jabu's Belly,[2] is the third Dungeon in Ocarina of Time.
Entrance to the Belly
The dungeon is set inside the body of Lord Jabu-Jabu, who spends every day on Zora's Fountain. To enter, Link must drop a Fish from his Bottle in front of Jabu-Jabu, causing him to open his mouth and suck both the fish and Link inside. His mission here, while he is looking for the third Spiritual Stone, the Zora's Sapphire, is to rescue Princess Ruto.[3]
While inside, Link must initially avoid the vast variety of parasitic enemies, including an especially large tentacle-like organism with electrified appendages in the shape of unstable pillars and jellyfish-like creatures called Bari,[4] since they become much harder to kill without the Boomerang, the weapon found inside the dungeon. Shortly thereafter, Link locates Princess Ruto inside what appears to be the stomach, who initially refuses to accept any help from Link,[5] and accidentally falls into a Yuck Hole.[6] Once found again by the young hero, she commands him to help her recover the Sapphire. Link must carry Ruto throughout many rooms to help her find it.[7] These rooms include areas where Link must fight numerous tentacles with the help of the Boomerang, so that new areas can be explored. He eventually enters a large room that has a central platform with the Zora's Sapphire on it.[8]
After taking the Zora's Sapphire, Ruto is captured, and Link is ambushed by a Big Octo that must be defeated in order to continue.[9] After defeating it, Link continues until he locates the creature causing Jabu-Jabu's discomfort: a parasite called Barinade, the dungeon's boss. Link eventually defeats Barinade, rescues Princess Ruto, and receives the Zora's Sapphire as a reward.[10]
The dungeon has many strange changes in the Master Quest version of the game. Instead of uvula-like switches on the ceilings of Jabu Jabu's intestinal tract, there are now cow head switches attached to walls that operate the opening of doors. As for enemies, Lizalfos and Like Likes were added to several rooms, the Parasitic Tentacles were dispersed evenly and in larger quantities throughout Jabu-Jabu's insides, and invisible Keese were supplied to one room that includes an extra Gold Skulltula. Only three Tailpasarans appear in an optional room with a Gold Skulltula, and Business Scrubs were deleted from the Master Quest version. In terms of items, the Dungeon Map, Compass, and Boomerang can be obtained much earlier; the room that contained the Boomerang in the original version now contains the Compass, and vice versa. Other changes include the placement of a grown cow in a room, the addition of a water pillar in the room below the Yuck Holes, and the presence of Bombchus, which are used to complete various new puzzles throughout the dungeon. Princess Ruto is utilized much less as a gameplay mechanic, as she is only required to hit one switch.
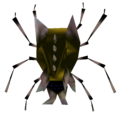
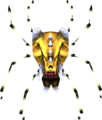
Minor Enemies
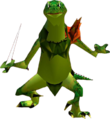
- Master Quest
Trivia
- A remixed version of the dungeon's theme was used in The Wind Waker as Jabun's theme.
Nomenclature
| Language | Names | Meanings |
|---|---|---|
| ジャブジャブ様のお腹 (Jabujabu-sama no Onaka) (OoT)[13] | Inside Lord Jabu-Jabu | |
| Pancia di Jabu Jabu (OoT | OoT3D)[11][12] | Jabu Jabu's Belly | |
| This table was generated using translation pages. To request an addition, please contact a staff member with a reference. | ||
Gallery
-
Entering Lord Jabu-Jabu's mouth
-
Dungeon Map of Jabu-Jabu's Belly
-
Inside Jabu-Jabu's Belly development plan
-
The interior of Inside Jabu-Jabu's Belly from Ocarina of Time
References
- ↑ Encyclopedia, Dark Horse Books, pg. 148
- ↑ Encyclopedia, Dark Horse Books, pg. 208
- ↑ "The evidence seems clear. Of course, you'll go find Ruto. You can pass through here to the altar of Lord Jabu-Jabu." — King Zora (Ocarina of Time)
- ↑ "Lord Jabu-Jabu is very strange today... There are electrified jellyfish and strange holes around..." — Princess Ruto (Ocarina of Time)
- ↑ "You! Who are you?! I am Ruto, Princess of the Zoras. What?! Are you saying my father asked you to come here to save me? I'd never ask anyone to do such a thing! "Letter in a Bottle?" I have no idea what you're talking about! My father is worried about me? I don't care! Anyway, I can't go home right now. And you... Get out of here! understand?!" — Princess Ruto (Ocarina of Time)
- ↑ "Ooooh Noooooo!" — Princess Ruto (Ocarina of Time)
- ↑ "You're that worried about me? Then I will give you the honor of carrying me! However...I won't leave until I find the thing I'm looking for. You'd better believe me!" — Princess Ruto (Ocarina of Time)
- ↑ "That's it! That's what I've been looking for!Throw me up there! Onto the platform!" — Princess Ruto (Ocarina of Time)
- ↑ "Oh my goodness! I finally found... My mother's stone... [...] Keeeyaaaah! What is this?! An octopus?!" — Princess Ruto (Ocarina of Time)
- ↑ "Well, anyway, you saved me, so I guess I'll reward you. What do you wish? Just tell me... [...] My mother gave it to me and said I should give it only to the man who will be my husband. You might call it the Zora's Engagement Ring! All right! I'll give you my most precious possession: Zora's Sapphire!" — Princess Ruto (Ocarina of Time)
- ↑ Enciclopedia di Hyrule, Magazzini Salani, pg. 149
- ↑ "Pancia di Jabu Jabu" — N/A (Ocarina of Time 3D, Italian localization)
- ↑ Nintendo Official Guidebook—The Legend of Zelda: Ocarina of Time, Shogakukan, pg. 155


