Locations in Tears of the Kingdom/All: Difference between revisions
No edit summary |
No edit summary |
||
| (6 intermediate revisions by the same user not shown) | |||
| Line 140: | Line 140: | ||
Ekochiu Shrine, | Ekochiu Shrine, | ||
Elma Knolls<noinclude><br/>{{Small|Also in: <code>[[#Hyrule Field|Hyrule Field]]</code>}}</noinclude>, | Elma Knolls<noinclude><br/>{{Small|Also in: <code>[[#Hyrule Field|Hyrule Field]]</code>}}</noinclude>, | ||
Elma Knolls Chasm<noinclude><br/>{{Small|Also in: <code>[[#Great Hyrule Forest Depths|Great Hyrule Forest Depths]]</code>}}</noinclude>, | |||
Helmhead Bridge<noinclude><br/>{{Small|Also in: <code>[[#Hyrule Field|Hyrule Field]]</code>}}</noinclude>, | Helmhead Bridge<noinclude><br/>{{Small|Also in: <code>[[#Hyrule Field|Hyrule Field]]</code>}}</noinclude>, | ||
Hidden Room, | Hidden Room, | ||
| Line 436: | Line 437: | ||
Golow River, | Golow River, | ||
Gorko Lake, | Gorko Lake, | ||
Gorko Tunnel, | |||
Goro Cove, | Goro Cove, | ||
Goron City, | Goron City, | ||
Goron Hot Springs, | Goron Hot Springs, | ||
Goronbi Lake, | Goronbi Lake, | ||
| Line 486: | Line 487: | ||
YunoboCo HQ South Cave, | YunoboCo HQ South Cave, | ||
YunoboCo Mineral Market, | YunoboCo Mineral Market, | ||
YunoboCo | YunoboCo Storage, | ||
YunoboCo Store [2], | YunoboCo Store [2], | ||
YunoboCo Store [4], | |||
Zelo Pond | Zelo Pond | ||
}}<section end="Eldin Canyon"/> | }}<section end="Eldin Canyon"/> | ||
| Line 494: | Line 496: | ||
<section begin="Goron City"/> | <section begin="Goron City"/> | ||
{{Gallery List|Locations | {{Gallery List|Locations | ||
|TotK= Boss's House <!-- Uses Series term -->, Goron Gusto Shop, Goron Stone Memorial <!-- Uses Series term -->, Marakuguc Shrine, Ripped and Shredded, Rollin' Inn, Stolock Bridge, YunoboCo Store | |TotK= Boss's House <!-- Uses Series term -->, Goron Gusto Shop, Goron Stone Memorial <!-- Uses Series term -->, Marakuguc Shrine, Ripped and Shredded, Rollin' Inn, Stolock Bridge, YunoboCo Store, YunoboCo Store [3] | ||
}}<section end="Goron City"/> | }}<section end="Goron City"/> | ||
| Line 500: | Line 502: | ||
<section begin="Eldin Mountains"/> | <section begin="Eldin Mountains"/> | ||
{{Gallery List|Locations | {{Gallery List|Locations | ||
|TotK= Deplian Badlands, Deplian Badlands Cave, Deplian Badlands South, East Deplian Badlands, Eldin Great Skeleton, Mayak Shrine, Minetak Shrine, Sikukuu Shrine, West Deplian Badlands | |TotK= Deplian Badlands, Deplian Badlands Cave, Deplian Badlands South, Drenan Highlands, Drenan Highlands Chasm<noinclude><br/>{{Small|Also in: <code>[[#Eldin Mountains Depths|Eldin Mountains Depths]]</code>}}</noinclude>,, East Deplian Badlands, Eldin Great Skeleton, Mayak Shrine, Minetak Shrine, Sikukuu Shrine, West Deplian Badlands | ||
}}<section end="Eldin Mountains"/> | }}<section end="Eldin Mountains"/> | ||
| Line 595: | Line 597: | ||
Karusa Valley, | Karusa Valley, | ||
Kudanisar Shrine, | Kudanisar Shrine, | ||
Lightning Temple, | |||
Miryotanog Shrine, | Miryotanog Shrine, | ||
North Dragon's Exile <!-- Uses Series term -->, | North Dragon's Exile <!-- Uses Series term -->, | ||
| Line 627: | Line 630: | ||
|TotK= Fashion Passion, Kara Kara Bazaar Barracks <!-- Uses Series term -->, Kara Kara Bazaar Inn <!-- Uses Series term -->, Kara Kara Bazaar Well, Lighthouse, Mayatat Shrine, Western Entrance | |TotK= Fashion Passion, Kara Kara Bazaar Barracks <!-- Uses Series term -->, Kara Kara Bazaar Inn <!-- Uses Series term -->, Kara Kara Bazaar Well, Lighthouse, Mayatat Shrine, Western Entrance | ||
}}<section end="Kara Kara Bazaar"/> | }}<section end="Kara Kara Bazaar"/> | ||
====={{Term|TotK|Lightning Temple}}===== | |||
{{Gallery List|Locations | |||
|TotK= Lightning Temple 1F, Lightning Temple 2F, Lightning Temple 3F, Lightning Temple 4F, Lightning Temple 5F, Lightning Temple 6F, Lightning Temple 7F, Lightning Temple B1, Room of Ascension, Room of Hopeful Light, Room of Light and Flame, Room of Light and Shade, Room of Offered Light, Room of Natural Light | |||
}} | |||
===={{Term|TotK|Gerudo Highlands}}==== | ===={{Term|TotK|Gerudo Highlands}}==== | ||
| Line 1,287: | Line 1,295: | ||
===={{Term|TotK|Hebra Mountains Sky}}==== | ===={{Term|TotK|Hebra Mountains Sky}}==== | ||
{{Gallery List|Locations | {{Gallery List|Locations | ||
|TotK= East Hebra Sky Archipelago, Ijo-o Shrine, Kahatanaum Shrine, Mayaumekis Shrine, North Lomei Castle Top Floor, Rising Island Chain, Taninoud Shrine, Tenbez Shrine, West Hebra Sky Archipelago | |TotK= East Hebra Sky Archipelago, Ijo-o Shrine, Kahatanaum Shrine, Mayaumekis Shrine, North Lomei Castle Top Floor, Rising Island Chain, Taninoud Shrine, Tenbez Shrine, West Hebra Sky Archipelago, Wind Temple | ||
}} | |||
====={{Term|TotK|Wind Temple}}===== | |||
{{Gallery List|Locations | |||
|TotK= Wind Temple 1F, Wind Temple B1, Wind Temple B2 | |||
}} | }} | ||
| Line 1,302: | Line 1,315: | ||
===={{Term|TotK|Lanayru Great Spring Sky}}==== | ===={{Term|TotK|Lanayru Great Spring Sky}}==== | ||
{{Gallery List|Locations | {{Gallery List|Locations | ||
|TotK= Igoshon Shrine, Jirutagumac Shrine, Sihajog Shrine, Wellspring Island | |TotK= Igoshon Shrine, Jirutagumac Shrine, Sihajog Shrine, Water Temple, Wellspring Island | ||
}} | |||
====={{Term|TotK|Water Temple}}===== | |||
{{Gallery List|Locations | |||
|TotK= Water Temple 1F, Water Temple B1 | |||
}} | }} | ||
| Line 1,332: | Line 1,350: | ||
==The {{Term|TotK|Depths}}== | ==The {{Term|TotK|Depths}}== | ||
{{Gallery List|Locations | {{Gallery List|Locations | ||
|TotK= Akkala Highlands Depths, Akkala Sea Depths, Central Hyrule Depths, Death Mountain Depths, Deep Akkala Depths, East Necluda Depths, Eldin Canyon Depths, Eldin Mountains Depths, Faron Grasslands Depths, Faron Sea Depths, Gerudo Desert Depths, Gerudo Highlands Depths, Great Hyrule Forest Depths, Hebra Mountains Depths, Hyrule Ridge Depths, Lake Hylia Depths, Lanayru Great Spring Depths, Lanayru Sea Depths, Lanayru Wetlands Depths, | |TotK= Akkala Highlands Depths, | ||
Akkala Sea Depths, | |||
Central Hyrule Depths, | |||
Death Mountain Depths, | |||
Deep Akkala Depths, | |||
East Necluda Depths, | |||
Eldin Canyon Depths, | |||
Eldin Mountains Depths, | |||
Faron Grasslands Depths, | |||
Faron Sea Depths, | |||
Gerudo Desert Depths, | |||
Gerudo Highlands Depths, | |||
Great Hyrule Forest Depths, | |||
Hebra Mountains Depths, | |||
Hyrule Ridge Depths, | |||
Lake Hylia Depths, | |||
Lanayru Great Spring Depths, | |||
Lanayru Sea Depths, | |||
Lanayru Wetlands Depths, | |||
Mount Lanayru Depths, | |||
Necluda Sea Depths, | |||
Tabantha Frontier Depths, | |||
West Necluda Depths | |||
}} | }} | ||
==={{Term|TotK|Akkala Highlands Depths}}=== | ==={{Term|TotK|Akkala Highlands Depths}}=== | ||
{{Gallery List|Locations | {{Gallery List|Locations | ||
|TotK= Abandoned Tarrey Mine, Agihi-ihcoj Lightroot, Akinatanis Lightroot, Ancient Underground Fortress, Kawikatisar Lightroot, Niuzimod Lightroot, Sisinatag Lightroot, Ulri Canyon Mine, Wellspring of Power | |TotK= Abandoned Tarrey Mine, | ||
Agihi-ihcoj Lightroot, | |||
Akinatanis Lightroot, | |||
Ancient Underground Fortress, | |||
East Akkala Plains Chasm [2]<noinclude><br/>{{Small|Also in: <code>[[#Akkala Highlands|Akkala Highlands]]</code>}}</noinclude>, | |||
Kawikatisar Lightroot, | |||
Niuzimod Lightroot, | |||
Sisinatag Lightroot, | |||
South Akkala Plains Chasm [2]<noinclude><br/>{{Small|Also in: <code>[[#Akkala Highlands|Akkala Highlands]]</code>}}</noinclude>, | |||
Tingel Island Chasm [2]<noinclude><br/>{{Small|Also in: <code>[[#Akkala Highlands|Akkala Highlands]]</code>}}</noinclude>, | |||
Ulri Canyon Mine, | |||
Wellspring of Power, | |||
Wellspring of Power Bargainer Statue | |||
}} | }} | ||
==={{Term|TotK|Akkala Sea Depths}}=== | ==={{Term|TotK|Akkala Sea Depths}}=== | ||
{{Gallery List|Locations | {{Gallery List|Locations | ||
|TotK= Kawisar Lightroot, Kimimeg Lightroot, Kuhsagi Lightroot, Lomei Depths Labyrinth, Rist Mine | |TotK= Kawisar Lightroot, Kimimeg Lightroot, Kuhsagi Lightroot, Lomei Depths Labyrinth, Lomei Labyrinth Chasm [2]<noinclude><br/>{{Small|Also in: <code>[[#Akkala Sea|Akkala Sea]]</code>}}</noinclude>, Rist Mine | ||
}} | }} | ||
==={{Term|TotK|Central Hyrule Depths}}=== | ==={{Term|TotK|Central Hyrule Depths}}=== | ||
{{Gallery List|Locations | {{Gallery List|Locations | ||
|TotK= Apapes Lightroot, Applean Grove, Camobatures Lightroot, Crenel Canyon Mine, Daphnes Canyon Mine, Great Abandoned Central Mine, Floating Coliseum, Forgotten Foundation, Gadohsi Lightroot, Giant's Grove, Gloom's Approach, Gloom's Lair, Gloom's Origin, Grove of Spirits, Grove of Time, Gustaf Canyon Mine, Hylia Canyon Mine, Iayusus Lightroot, Imprisoning Chamber, Kawakanis Lightroot, Kogoir Lightroot, Koradat Lightroot, Mu-ustust Lightroot, Netinet Lightroot, Nihcayam Lightroot, Nisoij Lightroot, Nogukoyk Lightroot, Nojoj Lightroot, Nuzimak Lightroot, Oyimay Lightroot, Plains Bargainer Statue, Secret Spring of Revival, Sinonoyk Lightroot, Stakijat Lightroot, Zi-ner Lightroot | |TotK= | ||
Apapes Lightroot, | |||
Applean Grove, | |||
Camobatures Lightroot, | |||
Crenel Canyon Mine, | |||
Daphnes Canyon Mine, | |||
Forest of Time Chasm [2]<noinclude><br/>{{Small|Also in: <code>[[#Hyrule Field|Hyrule Field]]</code>}}</noinclude>, | |||
Great Abandoned Central Mine, | |||
Great Abandoned Central Mine Bargainer Statue, | |||
Great Plateau East Chasm [2]<noinclude><br/>{{Small|Also in: <code>[[#Great Plateau|Great Plateau]]</code>}}</noinclude>, | |||
Great Plateau North Chasm [2]<noinclude><br/>{{Small|Also in: <code>[[#Great Plateau|Great Plateau]]</code>}}</noinclude>, | |||
Great Plateau South Chasm [2]<noinclude><br/>{{Small|Also in: <code>[[#Great Plateau|Great Plateau]]</code>}}</noinclude>, | |||
Great Plateau West Chasm [2]<noinclude><br/>{{Small|Also in: <code>[[#Great Plateau|Great Plateau]]</code>}}</noinclude>, | |||
Hyrule Castle Chasm [2]<noinclude><br/>{{Small|Also in: <code>[[#Hyrule Castle|Hyrule Castle]]</code>}}</noinclude>, | |||
Hyrule Castle Moat East Chasm [2]<noinclude><br/>{{Small|Also in: <code>[[#Hyrule Field|Hyrule Field]]</code>}}</noinclude>, | |||
Hyrule Castle Moat West Chasm [2]<noinclude><br/>{{Small|Also in: <code>[[#Hyrule Field|Hyrule Field]]</code>}}</noinclude>, | |||
Hyrule Field Chasm [2]<noinclude><br/>{{Small|Also in: <code>[[#Hyrule Field|Hyrule Field]]</code>}}</noinclude>, | |||
Floating Coliseum, | |||
Forgotten Foundation, | |||
Gadohsi Lightroot, | |||
Giant's Grove, | |||
Gloom's Approach, | |||
Gloom's Lair, | |||
Gloom's Origin, | |||
Grove of Spirits, | |||
Grove of Time, | |||
Gustaf Canyon Mine, | |||
Hylia Canyon Mine, | |||
Iayusus Lightroot, | |||
Imprisoning Chamber, | |||
Kawakanis Lightroot, | |||
Kogoir Lightroot, | |||
Koradat Lightroot, | |||
Mu-ustust Lightroot, | |||
Netinet Lightroot, | |||
Nihcayam Lightroot, | |||
Nisoij Lightroot, | |||
Nogukoyk Lightroot, | |||
Nojoj Lightroot, | |||
Nuzimak Lightroot, | |||
Oyimay Lightroot, | |||
Plains Bargainer Statue, | |||
Secret Spring of Revival, | |||
Sinonoyk Lightroot, | |||
Stakijat Lightroot, | |||
Zi-ner Lightroot | |||
}} | }} | ||
==={{Term|TotK|Death Mountain Depths}}=== | ==={{Term|TotK|Death Mountain Depths}}=== | ||
{{Gallery List|Locations | {{Gallery List|Locations | ||
|TotK= Mustis Lightroot | |TotK= Death Mountain Chasm [2]<noinclude><br/>{{Small|Also in: <code>[[#Death Mountain|Death Mountain]]</code>}}</noinclude>, Mustis Lightroot | ||
}} | }} | ||
==={{Term|TotK|Deep Akkala Depths}}=== | ==={{Term|TotK|Deep Akkala Depths}}=== | ||
{{Gallery List|Locations | {{Gallery List|Locations | ||
|TotK= Akkala House of Bones, Rok Grove, Sikutamak Lightroot, Ui-ihcoj Lightroot | |TotK= Akkala House of Bones, Rok Grove, Sikutamak Lightroot, Skull Lake Chasm [2]<noinclude><br/>{{Small|Also in: <code>[[#Deep Akkala|Deep Akkala]]</code>}}</noinclude>, Ui-ihcoj Lightroot | ||
}} | }} | ||
==={{Term|TotK|East Necluda Depths}}=== | ==={{Term|TotK|East Necluda Depths}}=== | ||
{{Gallery List|Locations | {{Gallery List|Locations | ||
|TotK= Abandoned Hateno Mine, Abandoned Lurelin Mine, Ancient Observation Deck, Canyon of Awakening Mine, Cresia Pit Mine, Dunsel Canyon Mine, Ebon Canyon Mine, Floria Canyon Mine, Ginner Grove, Kimimadena Lightroot, Kimnaz Lightroot, Kisihayam Lightroot, Kotimab Lightroot, Midla Grove, Mimufis Lightroot, Retsam Grove, Sijotu Lightroot, Taran Canyon Mine, Tuft Canyon Mine, Uogoj Lightroot | |TotK= Abandoned Hateno Mine, | ||
Abandoned Lurelin Mine, | |||
Ancient Observation Deck, | |||
Canyon of Awakening Mine, | |||
Cresia Pit Mine, | |||
Dunsel Canyon Mine, | |||
Ebon Canyon Mine, | |||
Floria Canyon Mine, | |||
Ginner Grove, | |||
Kimimadena Lightroot, | |||
Kimnaz Lightroot, | |||
Kisihayam Lightroot, | |||
Kotimab Lightroot, | |||
Meda Lavafalls<noinclude><br/>{{Small|Also in: <code>[[#West Necluda Depths|West Necluda Depths]]</code>}}</noinclude>, | |||
Meda Mountain Chasm [2]<noinclude><br/>{{Small|Also in: <code>[[#East Necluda|East Necluda]]</code>}}</noinclude>, | |||
Midla Grove, | |||
Mimufis Lightroot, | |||
Retsam Grove, | |||
Sijotu Lightroot, | |||
Tobio's Hollow Chasm [2]<noinclude><br/>{{Small|Also in: <code>[[#East Necluda|East Necluda]]</code>}}</noinclude>, | |||
Taran Canyon Mine, | |||
Tuft Canyon Mine, | |||
Uogoj Lightroot | |||
}} | }} | ||
==={{Term|TotK|Eldin Canyon Depths}}=== | ==={{Term|TotK|Eldin Canyon Depths}}=== | ||
{{Gallery List|Locations | {{Gallery List|Locations | ||
|TotK= Abandoned Eldin Mine, Anonisik Lightroot, Cugukaram Lightroot, Fire Temple, Gedihcayam Lightroot, Katijabis Lightroot, Katoij Lightroot, Kawamit Lightroot, Kisomom Lightroot, Misisi Lightroot, Mustis Lightroot, Nipahsom Lightroot, Scorching Coliseum, Tayamik Lightroot | |TotK= Abandoned Eldin Mine, | ||
Anonisik Lightroot, | |||
Cugukaram Lightroot, | |||
Fire Temple, | |||
Gedihcayam Lightroot, | |||
Katijabis Lightroot, | |||
Katoij Lightroot, | |||
Kawamit Lightroot, | |||
Kisomom Lightroot, | |||
Misisi Lightroot, | |||
Mustis Lightroot, | |||
Nipahsom Lightroot, | |||
Scorching Coliseum, | |||
Tayamik Lightroot | |||
}} | |||
===={{Term|TotK|Fire Temple}}==== | |||
{{Gallery List|Locations | |||
|TotK= Fire Temple 1F, Fire Temple 2F, Fire Temple 3F, Fire Temple 4F, Fire Temple 5F | |||
}} | }} | ||
==={{Term|TotK|Eldin Mountains Depths}}=== | ==={{Term|TotK|Eldin Mountains Depths}}=== | ||
{{Gallery List|Locations | {{Gallery List|Locations | ||
|TotK= Eldin Dark Skeleton, Katenim Lightroot, Kayam Lightroot, Uukukis Lightroot | |TotK= Drenan Highlands Chasm [2]<noinclude><br/>{{Small|Also in: <code>[[#Eldin Mountains|Eldin Mountains]]</code>}}</noinclude>, Eldin Dark Skeleton, Katenim Lightroot, Kayam Lightroot, Uukukis Lightroot | ||
}} | }} | ||
==={{Term|TotK|Faron Grasslands Depths}}=== | ==={{Term|TotK|Faron Grasslands Depths}}=== | ||
{{Gallery List|Locations | {{Gallery List|Locations | ||
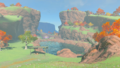
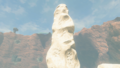
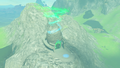
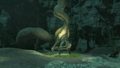
|TotK= Construct Factory, Dracozu Altar, Faloraa Canyon Mine, Left-Arm Depot, Left-Leg Depot, | |TotK= Construct Factory, Dracozu Altar, Faloraa Canyon Mine, Left-Arm Depot, Left-Leg Depot, Muokuij Lightroot, Nikohsi Lightroot, Pappetto Grove (Depths) [2], Wellspring of Courage, Wellspring of Courage Bargainer Statue | ||
}} | }} | ||
==={{Term|TotK|Gerudo Desert Depths}}=== | ==={{Term|TotK|Gerudo Desert Depths}}=== | ||
{{Gallery List|Locations | {{Gallery List|Locations | ||
|TotK= Abandoned Gerudo Mine, Abandoned Kara Kara Mine, Amakawis Lightroot, Desert Coliseum, Gataharak Lightroot, Gerudo Dark Skeleton, Gerudo Underground Cemetery, Gonatoyrim Lightroot, Gonatoyros Lightroot, Kasari Lightroot, Mihcihc Lightroot, Rasinaduk Lightroot, Tatayam Lightroot | |TotK= Abandoned Gerudo Mine, | ||
Abandoned Kara Kara Mine, | |||
Amakawis Lightroot, | |||
Desert Coliseum, | |||
Gataharak Lightroot, | |||
Gerudo Dark Skeleton, | |||
Gerudo Underground Cemetery, | |||
Gonatoyrim Lightroot, | |||
Gonatoyros Lightroot, | |||
Kasari Lightroot, | |||
Mihcihc Lightroot, | |||
Rasinaduk Lightroot, | |||
Tatayam Lightroot | |||
}} | }} | ||
==={{Term|TotK|Gerudo Highlands Depths}}=== | ==={{Term|TotK|Gerudo Highlands Depths}}=== | ||
{{Gallery List|Locations | {{Gallery List|Locations | ||
|TotK= Agaat Canyon Mine, Daval Canyon Mine, Gerudo Canyon Mine (Depths), Granajh Canyon Mine, Jadukakar Lightroot, Kawiraus Lightroot, Kimakarut Lightroot, Mustuto Lightroot, Sisustom Lightroot, South Lomei Depths Labyrinth, Stamayam Lightroot, Umamustor Lightroot | |TotK= Agaat Canyon Mine, | ||
Birida Lookout Chasm [2]<noinclude><br/>{{Small|Also in: <code>[[#Gerudo Highlands|Gerudo Highlands]]</code>}}</noinclude>, | |||
Daval Canyon Mine, | |||
East Gerudo Chasm [2]<noinclude><br/>{{Small|Also in: <code>[[#Gerudo Highlands|Gerudo Highlands]]</code>}}</noinclude>, | |||
Gerudo Canyon Mine (Depths), | |||
Gerudo Summit Chasm [2]<noinclude><br/>{{Small|Also in: <code>[[#Gerudo Highlands|Gerudo Highlands]]</code>}}</noinclude>, | |||
Granajh Canyon Mine, | |||
Jadukakar Lightroot, | |||
Kawiraus Lightroot, | |||
Kimakarut Lightroot, | |||
Mustuto Lightroot, | |||
Sisustom Lightroot, | |||
South Lomei Chasm [2]<noinclude><br/>{{Small|Also in: <code>[[#Gerudo Highlands|Gerudo Highlands]]</code>}}</noinclude>, | |||
South Lomei Depths Labyrinth, | |||
Stamayam Lightroot, | |||
Umamustor Lightroot, | |||
Yiga Clan Hideout Chasm [2]<noinclude><br/>{{Small|Also in: <code>[[#Gerudo Highlands|Gerudo Highlands]]</code>}}</noinclude> | |||
}} | }} | ||
==={{Term|TotK|Great Hyrule Forest Depths}}=== | ==={{Term|TotK|Great Hyrule Forest Depths}}=== | ||
{{Gallery List|Locations | {{Gallery List|Locations | ||
|TotK= Drena Canyon Mine, Eknupup Lightroot, Forest Coliseum, Gleeok Den, Korok Grove, Minshi Grove, Nikakik Lightroot, Ramobnukas Lightroot, Rikonasum Lightroot, Sijnin Lightroot, Uihcoke Lightroot, Uoyoyuik Lightroot | |TotK= Deku Tree Chasm [2]<noinclude><br/>{{Small|Also in: <code>[[#Korok Forest|Korok Forest]]</code>}}</noinclude>, | ||
Drena Canyon Mine, | |||
Eknupup Lightroot, | |||
Elma Knolls Chasm [2]<noinclude><br/>{{Small|Also in: <code>[[#Great Hyrule Forest|Great Hyrule Forest]]</code>}}</noinclude>, | |||
Forest Coliseum, | |||
Gleeok Den, | |||
Korok Grove, | |||
Minshi Grove, | |||
Minshi Woods Chasm [2]<noinclude><br/>{{Small|Also in: <code>[[#Great Hyrule Forest|Great Hyrule Forest]]</code>}}</noinclude>, | |||
Nikakik Lightroot, | |||
Ramobnukas Lightroot, | |||
Rikonasum Lightroot, | |||
Sijnin Lightroot, | |||
Uihcoke Lightroot, | |||
Uoyoyuik Lightroot | |||
}} | }} | ||
==={{Term|TotK|Hebra Mountains Depths}}=== | ==={{Term|TotK|Hebra Mountains Depths}}=== | ||
{{Gallery List|Locations | {{Gallery List|Locations | ||
|TotK= Corvash Canyon Mine, Goflam's Lavafalls, Hebra Canyon Mine, Hebra Dark Skeleton, Ikatoayam Lightroot, Kato Lightroot, Mu-ufatur Lightroot, Muihcoro Lightroot, Muotue Lightroot, Narusis Lightroot, North Lomei Depths Labyrinth, Nupisoyuat Lightroot, Sherfin's Lavafalls, So-oaw Lightroot, Sturnida Lavafalls, U-nazohso Lightroot, Worihas Lightroot | |TotK= Corvash Canyon Mine, | ||
Goflam's Lavafalls, | |||
Hebra Canyon Mine, | |||
Hebra Dark Skeleton, | |||
Ikatoayam Lightroot, | |||
Kato Lightroot, | |||
Mu-ufatur Lightroot, | |||
Muihcoro Lightroot, | |||
Muotue Lightroot, | |||
Narusis Lightroot, | |||
North Lomei Chasm [2]<noinclude><br/>{{Small|Also in: <code>[[#Hebra Mountains|Hebra Mountains]]</code>}}</noinclude>, | |||
North Lomei Depths Labyrinth, | |||
Nupisoyuat Lightroot, | |||
Sherfin's Lavafalls, | |||
So-oaw Lightroot, | |||
Sturnida Lavafalls, | |||
U-nazohso Lightroot, | |||
Worihas Lightroot | |||
}} | }} | ||
==={{Term|TotK|Hyrule Ridge Depths}}=== | ==={{Term|TotK|Hyrule Ridge Depths}}=== | ||
{{Gallery List|Locations | {{Gallery List|Locations | ||
|TotK= Blupee Burrow, Dalite Grove, Lindor Canyon Mine, Muzasu Lightroot, Nabahi-ikat Lightroot, Napanos Lightroot, Rhoam Canyon Mine, Sikurukam Lightroot, Tikanur Lightroot | |TotK= Blupee Burrow, Dalite Grove, Hyrule Ridge Chasm [2]<noinclude><br/>{{Small|Also in: <code>[[#Hyrule Ridge|Hyrule Ridge]]</code>}}</noinclude>, Lindor Canyon Mine, Muzasu Lightroot, Nabahi-ikat Lightroot, Napanos Lightroot, Rhoam Canyon Mine, Sikurukam Lightroot, Tikanur Lightroot | ||
}} | }} | ||
==={{Term|TotK|Lake Hylia Depths}}=== | ==={{Term|TotK|Lake Hylia Depths}}=== | ||
{{Gallery List|Locations | {{Gallery List|Locations | ||
|TotK= Amo-ne Lightroot | |TotK= Amo-ne Lightroot, Lake Hylia Chasm [2]<noinclude><br/>{{Small|Also in: <code>[[#Lake Hylia|Lake Hylia]]</code>}}</noinclude>, | ||
}} | }} | ||
==={{Term|TotK|Lanayru Great Spring Depths}}=== | ==={{Term|TotK|Lanayru Great Spring Depths}}=== | ||
{{Gallery List|Locations | {{Gallery List|Locations | ||
|TotK= A-nehi Lightroot, Abandoned Lanayru Mine, Kawagom Lightroot, Kegopa Lightroot, Kuzimoy Lightroot, Migo-o Lightroot, Ploymus Canyon Mine, Ruto Canyon Mine, Tabahl Grove, Takaruk Lightroot, Uinoj Lightroot | |TotK= A-nehi Lightroot, | ||
Abandoned Lanayru Mine, | |||
Chasm Under Zora's Domain [2]<noinclude><br/>{{Small|Also in: <code>[[#Lanayru Great Spring|Lanayru Great Spring]]</code>}}</noinclude>, | |||
Kawagom Lightroot, | |||
Kegopa Lightroot, | |||
Kuzimoy Lightroot, | |||
Migo-o Lightroot, | |||
Ploymus Canyon Mine, | |||
Ruto Canyon Mine, | |||
Tabahl Grove, | |||
Takaruk Lightroot, | |||
Uinoj Lightroot | |||
}} | }} | ||
==={{Term|TotK|Lanayru Wetlands Depths}}=== | ==={{Term|TotK|Lanayru Wetlands Depths}}=== | ||
{{Gallery List|Locations | {{Gallery List|Locations | ||
|TotK= Korakut Lightroot, Korom Lightroot, Sekioam Lightroot, Uasnoj Lightroot | |TotK= Korakut Lightroot, Korom Lightroot, Lanayru Wetlands Chasm [2]<noinclude><br/>{{Small|Also in: <code>[[#Lanayru Wetlands|Lanayru Wetlands]]</code>}}</noinclude>, Sekioam Lightroot, Uasnoj Lightroot | ||
}} | }} | ||
==={{Term|TotK|Mount Lanayru Depths}}=== | ==={{Term|TotK|Mount Lanayru Depths}}=== | ||
{{Gallery List|Locations | {{Gallery List|Locations | ||
|TotK= Lanayru Canyon Mine, Madorna Canyon Mine, Siakij Lightroot, Usukaz Lightroot, Walnot Canyon Mine, Wellspring of Wisdom | |TotK= Lanayru Canyon Mine, Madorna Canyon Mine, Naydra Snowfield Chasm [2]<noinclude><br/>{{Small|Also in: <code>[[#Mount Lanayru|Mount Lanayru]]</code>}}</noinclude>, Siakij Lightroot, Usukaz Lightroot, Walnot Canyon Mine, Wellspring of Wisdom, Wellspring of Wisdom Bargainer Statue | ||
}} | }} | ||
==={{Term|TotK|Necluda Sea Depths}}=== | ==={{Term|TotK|Necluda Sea Depths}}=== | ||
{{Gallery List|Locations | {{Gallery List|Locations | ||
|TotK= Lone Island Coliseum, Ni-iraram Lightroot | |TotK= Eventide Island Chasm [2]<noinclude><br/>{{Small|Also in: <code>[[#Necluda Sea|Necluda Sea]]</code>}}</noinclude>, Lone Island Coliseum, Ni-iraram Lightroot | ||
}} | }} | ||
==={{Term|TotK|Tabantha Frontier Depths}}=== | ==={{Term|TotK|Tabantha Frontier Depths}}=== | ||
{{Gallery List|Locations | {{Gallery List|Locations | ||
|TotK= Abandoned Hebra Mine, Aduon Lightroot, Cliff Bargainer Statue, Cuho Canyon Mine, Kataki Lightroot, Kawakarut Lightroot, Kawumoro Lightroot, Koro-nui Lightroot, Sasag Lightroot, Sikatag Lightroot, Yisuayam Lightroot | |TotK= Abandoned Hebra Mine, | ||
Aduon Lightroot, | |||
Cliff Bargainer Statue, | |||
Cuho Canyon Mine, | |||
Kataki Lightroot, | |||
Kawakarut Lightroot, | |||
Kawumoro Lightroot, | |||
Koro-nui Lightroot, | |||
Rito Village Chasm [2]<noinclude><br/>{{Small|Also in: <code>[[#Rito Village|Rito Village]]</code>}}</noinclude>, | |||
Sasag Lightroot, | |||
Sikatag Lightroot, | |||
Yisuayam Lightroot | |||
}} | }} | ||
==={{Term|TotK|West Necluda Depths}}=== | ==={{Term|TotK|West Necluda Depths}}=== | ||
{{Gallery List|Locations | {{Gallery List|Locations | ||
|TotK= Abandoned Kakariko Mine, Arusakam Lightroot, Bubinga Grove, Busus Lightroot, Dueling Canyons Mine, Hickaly Grove, Right-Arm Depot, Right-Leg Depot, Rozudo Canyon Mine, Secluded Coliseum, Sohse Lightroot, U-u-ujoj Lightroot, Uisihcoj Lightroot, Yikot Lightroot | |TotK= Abandoned Kakariko Mine, | ||
Arusakam Lightroot, | |||
Bubinga Grove, | |||
Busus Lightroot, | |||
Dueling Canyons Mine, | |||
East Hill Chasm [2]<noinclude><br/>{{Small|Also in: <code>[[#West Necluda|West Necluda]]</code>}}</noinclude>, | |||
Hickaly Grove, | |||
Hills of Baumer Chasm [2]<noinclude><br/>{{Small|Also in: <code>[[#West Necluda|West Necluda]]</code>}}</noinclude>, | |||
Meda Lavafalls<noinclude><br/>{{Small|Also in: <code>[[#East Necluda Depths|East Necluda Depths]]</code>}}</noinclude>, | |||
Right-Arm Depot, | |||
Right-Leg Depot, | |||
Rozudo Canyon Mine, | |||
Secluded Coliseum, | |||
Sohse Lightroot, | |||
Spirit Temple, | |||
U-u-ujoj Lightroot, | |||
Uisihcoj Lightroot, | |||
Yikot Lightroot | |||
}} | }} | ||
Revision as of 01:25, 22 May 2024
The following is a list of locations in Tears of the Kingdom.
- Jump to a section
-

-

-

Location Types


The Surface


Akkala


Akkala Highlands
-
-
-
-
-
-

-
-
-
-
-
-

-
-
-
-
Kaepora Pass
Also in:Deep Akkala -
-
-
-
-
-
North Akkala Foothill
Also in:Deep Akkala -
North Akkala Valley
Also in:Deep Akkala -
-
-
-
Rist Peninsula
Also in:Akkala Sea -
Shadow Pass
Also in:Deep Akkala -
-
-
-
-
-
-
-
-
Spring of Power
Also in:Deep Akkala -
-
-
-
-
-
-
-
-
-
-
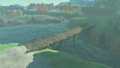


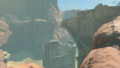
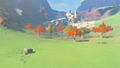
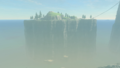
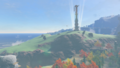
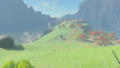
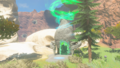
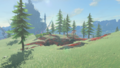
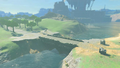
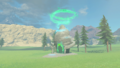
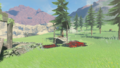
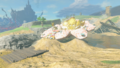
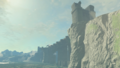
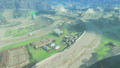
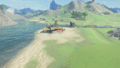
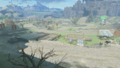
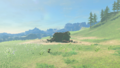
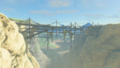
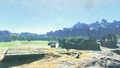
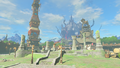
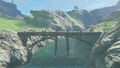
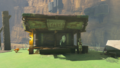
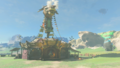
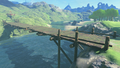
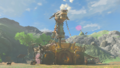
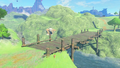
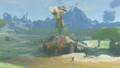
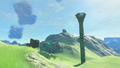
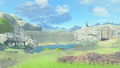
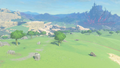
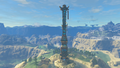
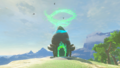
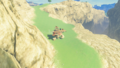
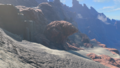
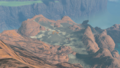
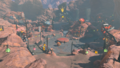
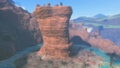
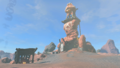
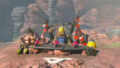
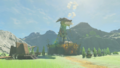
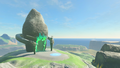
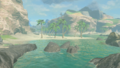
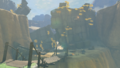
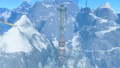
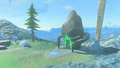
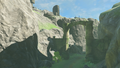
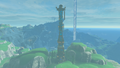
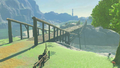
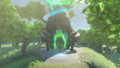
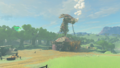
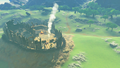
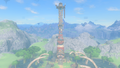
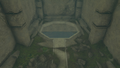
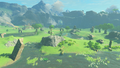
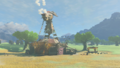
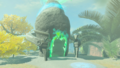
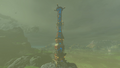
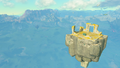
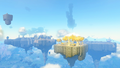
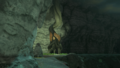
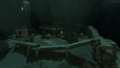
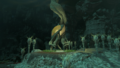
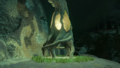
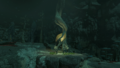
Tarrey Town


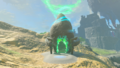
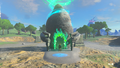
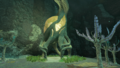
.png)


Akkala Sea
-
-
-
-
-
-
-
North Akkala Beach
Also in:Deep Akkala -
-
-
Rist Peninsula
Also in:Akkala Highlands


Deep Akkala
-
-
-
-
-

-
-
Kaepora Pass
Also in:Akkala Highlands -
-
-
-
North Akkala Beach
Also in:Akkala Sea -
-
-
North Akkala Valley
Also in:Akkala Highlands -

-
Shadow Pass
Also in:Akkala Highlands -
-
-
Skull Lake Chasm
Also in:Deep Akkala Depths -
Spring of Power
Also in:Akkala Highlands -
-


Central Hyrule


Great Hyrule Forest
-
-
-
-
Elma Knolls
Also in:Hyrule Field -
-
Helmhead Bridge
Also in:Hyrule Field -
-
-
-
-
-
-
-
-
-
-
-
-
-
-
-
-
-

-
-
-
-
Salari Plain
Also in:Hyrule Field -
-
-
-
-


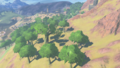
Korok Forest


Great Plateau


Hyrule Field
-

-
-
-
-
-
-
-
-

-
-
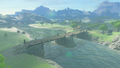
Bridge of Hylia
Also in:West Necluda -

-
-
-
-

-
-
-
-

-

-
-
-
-
-

-
Elma Knolls
Also in:Great Hyrule Forest -

-

-
-
-
-
-
-
-
-
Helmhead Bridge
Also in:Great Hyrule Forest -
Horwell Bridge
Also in:West Necluda -

-
-
-
-
-
-
-
-
-

-
-
-
-
-
Jeddo Bridge
Also in:Hyrule Ridge -
-
-
-
-
-
-
-
-
-
-
-
-
Manhala Bridge
Also in:Hyrule Ridge -
-
-
-
-
-

-
-
-

-
-
-
-
-
-
-
-
-
-
-
Owlan Bridge
Also in:West Necluda -
-
-
Proxim Bridge
Also in:West Necluda -
-

-
-
-
-
-
-
-
-
-
-
-
-
-
Salari Plain
Also in:Great Hyrule Forest -
-
-
-
-
-
-
-
-

-
-
West Hyrule Plains
Also in:Tabantha Frontier -
-
-
-


Hyrule Castle
Ground-level


Dungeon-level


Hyrule Castle Town Ruins


Lookout Landing


Hyrule Ridge
-
-
Hyrule Ridge Chasm
Also in:Hyrule Ridge Depths -
Jeddo Bridge
Also in:Hyrule Field -
-
-
-
-

-
Manhala Bridge
Also in:Hyrule Field -

-
-
-
-
-
-
-
-
-
-
-
-
-
-
-

-
-
-
-


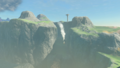
Lake Hylia


Eldin Region


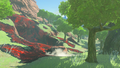
Death Mountain
-
-
-
-
-
-
Death Mountain West Site
Also in:Eldin Canyon -
-
-
Lizard Lakes
Also in:Eldin Canyon -


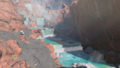
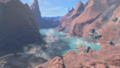
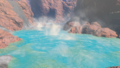
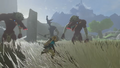
Eldin Canyon
-
-
-
-
-
-

-
-
-
-
-
-
-
-
-
-

-
-
-
-
-
-
-
-
-
-
-
-
-
-
-
-
-
-
-
-

-
-
-
-
-
-

-
Lizard Lakes
Also in:Death Mountain -
-
-
-
-
-
-
-
-

-
-
-
-
-
-
-
-
-
-
-
-

-
-
-
-
-
-
-
-
-


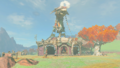
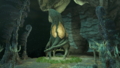
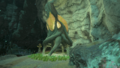
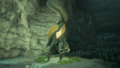
Goron City


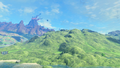
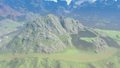
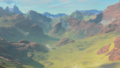
Eldin Mountains


Faron Region


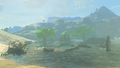
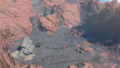
Faron Grasslands
-
-
Cora Lakefront Cave
Also in:Faron Sea -
-
-
-
-
-
-
-
-
-
-

-
-
-
-
-
-
-
-
-

-
-
-
-
Komo Shoreline
Also in:Faron Sea -

-
-
Laverra Beach
Also in:Faron Sea -
-
-
-
-

-
-
Puffer Beach
Also in:Faron Sea -
-
-

-
-


Faron Sea
-
-
Cora Lakefront Cave
Also in:Faron Grasslands -
Komo Shoreline
Also in:Faron Grasslands -
Laverra Beach
Also in:Faron Grasslands -
-
Puffer Beach
Also in:Faron Grasslands


Gerudo Region


Gerudo Desert


Gerudo Town


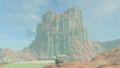
Kara Kara Bazaar


Lightning Temple

Gerudo Highlands
-
-
-
-
Gerudo Desert Gateway
Also in:Gerudo Desert -
-
-
-
-
-
-
-
-
-
-
-
-
-
-
-


Hebra

Hebra Mountains
-
-
Kopeeki Drifts
Also in:Tabantha Frontier -
-
-
-
-
-
-
-
-
-
-
-


Tabantha Tundra


Tabantha Frontier
-
-
-

-
-
-
-
Kopeeki Drifts
Also in:Hebra Mountains -

-
-
-
-
-
-
West Hyrule Plains
Also in:Hyrule Field


Rito Village


Lanayru Region


Lanayru Great Spring
-
Afromsia Coast
Also in:Lanayru Sea -

-
-
-
-
-
-
-
-
-
-
-
-
-
Zora River
Also in:Lanayru Wetlands


Zora's Domain

Lanayru Sea
-
Afromsia Coast
Also in:Lanayru Great Spring
Lanayru Wetlands
-
Eagus Bridge
Also in:West Necluda -
-
-
-
-
-
Sahasra Slope
Also in:West Necluda -
-
-
Zora River
Also in:Lanayru Great Spring


Mount Lanayru


Necluda


East Necluda
-
-
Aris Beach
Also in:Necluda Sea -
-
-
Cape Cresia
Also in:Necluda Sea -
Clarnet Coast
Also in:Necluda Sea -
-
Hateno Beach
Also in:Necluda Sea -

-
Jia Highlands
Also in:West Necluda -
-
Korne Beach
Also in:Necluda Sea -
Lake Siela
Also in:West Necluda -

Lurelin Village
Also in:Necluda Sea -
Mapla Point
Also in:Necluda Sea -
-
-
-
Palmorae Beach
Also in:Necluda Sea -
-
Rimba Beach
Also in:Necluda Sea -

-
-
-
Soka Point
Also in:Necluda Sea -
Squabble River
Also in:West Necluda -
-


Hateno Village


Lurelin Village


Necluda Sea
-
Aris Beach
Also in:East Necluda -
Cape Cresia
Also in:East Necluda -
Clarnet Coast
Also in:East Necluda -
-
Hateno Beach
Also in:East Necluda -
Korne Beach
Also in:East Necluda -
Lurelin Village
Also in:East Necluda -
Mapla Point
Also in:East Necluda -
-

-
Palmorae Beach
Also in:East Necluda -
Rimba Beach
Also in:East Necluda -
Soka Point
Also in:East Necluda


West Necluda
-
-
-
-
Bridge of Hylia
Also in:Hyrule Field -
-
Eagus Bridge
Also in:Lanayru Wetlands -
-
East Hill Chasm
Also in:West Necluda Depths -
-
-
-
-
-
Horwell Bridge
Also in:Hyrule Field -
-
Jia Highlands
Also in:East Necluda -
-
-
-

-
Lake Siela
Also in:East Necluda -
-
-
-
Owlan Bridge
Also in:Hyrule Field -
-
-
Proxim Bridge
Also in:Hyrule Field -
-
Sahasra Slope
Also in:Lanayru Wetlands -
-
-
Squabble River
Also in:East Necluda -
-
-


Kakariko Village


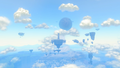
The Sky
-
Central Hyrule Sky Archipelago
Central Hyrule SkyLanayru Wetlands Sky -
Floating Scales Island
Akkala Highlands SkyLanayru Great Spring Sky -
North Gerudo Sky Archipelago
Gerudo Highlands SkyTabantha Frontier Sky -
Starview Island
Gerudo Highlands SkyTabantha Frontier Sky -
Thunderhead Isles
Faron Grasslands SkyWest Necluda Sky


Akkala Sky
-
Sky Mine
Akkala Highlands SkyAkkala Sea Sky
Akkala Highlands Sky

Akkala Sea Sky
Deep Akkala Sky

Central Hyrule Sky


Great Sky Island


Garden of Time


Lake Hylia Sky

Great Hyrule Forest Sky


Hyrule Ridge Sky
Eldin Sky
Eldin Canyon Sky


Faron Sky
Faron Grasslands Sky
Gerudo Sky
Gerudo Highlands Sky


Hebra Sky
Hebra Mountains Sky


Wind Temple


Tabantha Frontier Sky


Lanayru Sky
-
South Lanayru Sky Archipelago
Mount Lanayru SkyLanayru Great Spring SkyLanayru Sea Sky -
Valor Island
Lanayru Great Spring SkyLanayru Sea Sky


Lanayru Great Spring Sky


Water Temple
Lanayru Sea Sky

Mount Lanayru Sky

Necluda Sky
-
-
-
Necluda Sky Archipelago
East Necluda SkyWest Necluda Sky -
Zonaite Forge Island
East Necluda SkyWest Necluda Sky


East Necluda Sky


West Necluda Sky


The Depths


Akkala Highlands Depths
-

-
-

-
-
-

-
-
-
Tingel Island Chasm
Also in:Akkala Highlands -
-


Akkala Sea Depths
-
-
-
-
-
Lomei Labyrinth Chasm
Also in:Akkala Sea -


Central Hyrule Depths
-
-
-
-
Forest of Time Chasm
Also in:Hyrule Field -
-
-
-
-
-
-
Hyrule Castle Chasm
Also in:Hyrule Castle -
-

-

Hyrule Field Chasm
Also in:Hyrule Field -
-
-
-
-

-

-
-
-
-
-
-
-
-
-
-
-

-
-

-
-
-
-
-


Death Mountain Depths


Deep Akkala Depths
-
-
-
-
Skull Lake Chasm
Also in:Deep Akkala -


East Necluda Depths
-

-
-
-
-
-
-
-
-
Meda Lavafalls
Also in:West Necluda Depths -
Meda Mountain Chasm
Also in:East Necluda -
-
-
-
Tobio's Hollow Chasm
Also in:East Necluda -
-


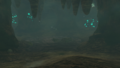
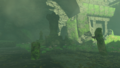
Eldin Canyon Depths


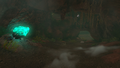
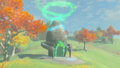
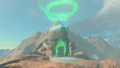
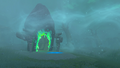
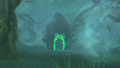
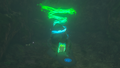
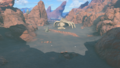
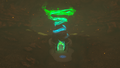
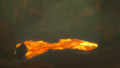
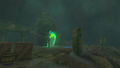
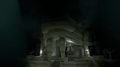
Fire Temple


Eldin Mountains Depths


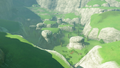
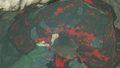
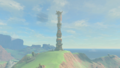
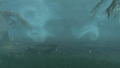
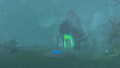
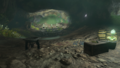
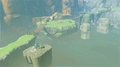
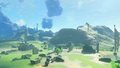
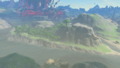
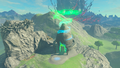
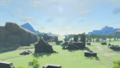
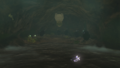
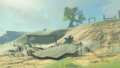
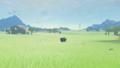
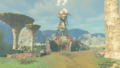
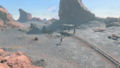
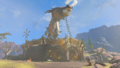
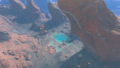
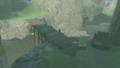
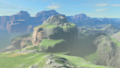
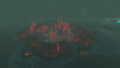
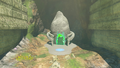
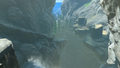
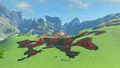
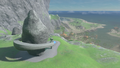
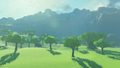
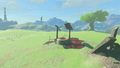
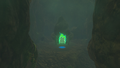
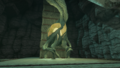
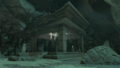
Faron Grasslands Depths


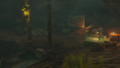
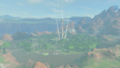
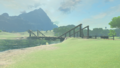
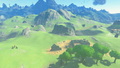
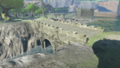
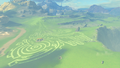
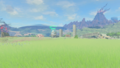
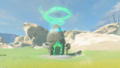
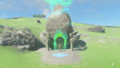
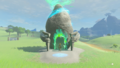
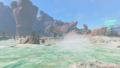
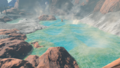
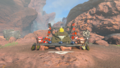
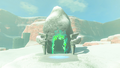
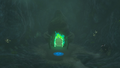
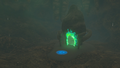
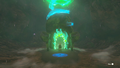
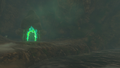
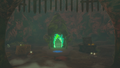
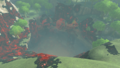
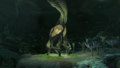
.png)


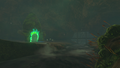
Gerudo Desert Depths


Gerudo Highlands Depths
-
Birida Lookout Chasm
Also in:Gerudo Highlands -
East Gerudo Chasm
Also in:Gerudo Highlands -
Gerudo Summit Chasm
Also in:Gerudo Highlands -
-
-
-

-
-
South Lomei Chasm
Also in:Gerudo Highlands -
-
-


Great Hyrule Forest Depths
-

Deku Tree Chasm
Also in:Korok Forest -
-
Elma Knolls Chasm
Also in:Great Hyrule Forest -
-
-
-
-
-
-
-


Hebra Mountains Depths
-
-
-
-
-
-
-
-
-
North Lomei Chasm
Also in:Hebra Mountains -
-
-
-


Hyrule Ridge Depths
-
-
-
Hyrule Ridge Chasm
Also in:Hyrule Ridge -
-
-
-
-
-
-


Lake Hylia Depths


Lanayru Great Spring Depths


Lanayru Wetlands Depths


Mount Lanayru Depths
-
Naydra Snowfield Chasm
Also in:Mount Lanayru -
-
-
-


Necluda Sea Depths


Tabantha Frontier Depths
-
-
-

-
-
-
-
-
Rito Village Chasm
Also in:Rito Village -
-
-


West Necluda Depths
-
-
-
-
-
East Hill Chasm
Also in:West Necluda -
Hills of Baumer Chasm
Also in:West Necluda -
Meda Lavafalls
Also in:East Necluda Depths -
-
-
-
-


