Gerudo Training Ground: Difference between revisions
TriforceTony (talk | contribs) No edit summary |
TriforceTony (talk | contribs) No edit summary |
||
| (7 intermediate revisions by 2 users not shown) | |||
| Line 31: | Line 31: | ||
;Stone garden room time limit 60 seconds | ;Stone garden room time limit 60 seconds | ||
; | ;Obstacle course room time limit 90 seconds | ||
;Silver Gauntlets room no time limit | ;Silver Gauntlets room no time limit | ||
| Line 66: | Line 66: | ||
Instead of using the [[Megaton Hammer]] to break some blocks in the hammer-themed room, Link is now required to fight Dinolfos and an Ironknuckle. In the lava room, there are lots of [[Red Bubble]]s now and a torch has to be lit so the fire in the platforms disappears and Link can use his [[Hover Boots]] to get all the Rupees. If Link approaches this room from the Statue Room, there is a rusty switch which raises a Hookshot post on the raised, central platform; by using this post in conjunction with the Longshot, the Hover Boots are not required. In the water room next to this one there are less Rupees and enemies such as [[Biri]], [[Bari]], [[Stinger]]s and [[Shell Blade]]s. Link is required to defeat some enemies in a limited time in the Flame Wall room. Among them is an [[Armos]] in the wall, which is no longer surrounded by fire. | Instead of using the [[Megaton Hammer]] to break some blocks in the hammer-themed room, Link is now required to fight Dinolfos and an Ironknuckle. In the lava room, there are lots of [[Red Bubble]]s now and a torch has to be lit so the fire in the platforms disappears and Link can use his [[Hover Boots]] to get all the Rupees. If Link approaches this room from the Statue Room, there is a rusty switch which raises a Hookshot post on the raised, central platform; by using this post in conjunction with the Longshot, the Hover Boots are not required. In the water room next to this one there are less Rupees and enemies such as [[Biri]], [[Bari]], [[Stinger]]s and [[Shell Blade]]s. Link is required to defeat some enemies in a limited time in the Flame Wall room. Among them is an [[Armos]] in the wall, which is no longer surrounded by fire. | ||
{{Heading|Entrance}}<!-- Delete this later, just need to differentiate it from the paragraphs above --> | |||
The entrance to the Training Ground opens into a cavern lit by two [[Torch]]es. Four pillars surround these Torches in a semicircular formation. Beyond these pillars, there are three doorways, decorated with [[Lion]] carvings. To the north is the room housing the Dungeon's treasure, the [[Ice Arrow]] room. To the west is the stone garden room, and to the south is the [[Dinolfos]] room. | |||
An [[Eye Switch]] sits on the wall above the entrance. By striking the Eye Switch with an [[Arrow]], [[Link]] can cause two [[Treasure Chest]]s to appear. One is found between the northwestern pillars, while the other is between the northeastern pillars. Link can play the "[[Song of Storms]]" between the northern pillars to find a [[Big Fairy]]. This Big Fairy can be summoned at any point that Link reenters the entrance room. As Link approaches one of the [[Door]]s that lead further into the Dungeon, he will be given instructions to complete the trials ahead.<ref>{{Cite|If you can overcome the {{Color|OoT3D Red|trials}} in the chambers ahead, then and only then will you be qualified to hold our secret treasure!|N/A|OoT3D}}</ref> | |||
{{Heading|Stone garden room}} | {{Heading|Stone garden room}} | ||
The stone garden room is connected to the entrance chamber to the east and the obstacle course room to the north. It is a spacious chamber with a sandy arena at its center. Four rocks decorate the interior of the arena. As [[Link]] enters the room, a portcullis will close over the [[Door]] to the obstacle course room and a pair of [[Stalfos]] will appear to challenge him. In order to complete the trial, Link must defeat both Stalfos within one minute.<ref name="Limited Time">{{Cite|Defeat all the enemies in a {{Color|OoT3D Red|limited time}}!|N/A|OoT3D}}</ref> However, the sandy arena will draw Link down into it, slowing his movement if he stands still and making the trial more difficult. Once both Stalfos have been defeated, a Treasure Chest will appear and the portcullis blocking the Door to the obstacle course room will raise. | |||
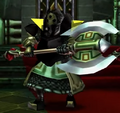
In {{MQ}} mode, Link is instead tasked with defeating a single [[Iron Knuckle]]. As before, Link only has one minute's worth of time to complete the trial and a Treasure Chest will appear once it is completed. The [[Blade Trap]] near the Door to the entrance chamber is no longer present. | |||
{{Listing Container| | {{Listing Container| | ||
{{Listing Item|header= Enemies in ''Normal Quest'' mode|content= | {{Listing Item|header= Enemies in ''Normal Quest'' mode|content= | ||
{{Gallery List|Enemies | {{Gallery List|Enemies | ||
|OoT= Blade Trap [Qty:1], Stalfos [Qty:2] | |OoT= Blade Trap [Qty:1], Stalfos [Qty:2]{{List Note|Two do not [[Zelda Wiki:Glossary#Reappear|reappear]]. However, each will reappear if Link leaves and returns before defeating them both.}} | ||
}} | }} | ||
{{List Notes}} | |||
}} | }} | ||
{{Listing Item|header= Enemies in {{MQ|-}} mode|content= | {{Listing Item|header= Enemies in {{MQ|-}} mode|content= | ||
{{Gallery List|Enemies | {{Gallery List|Enemies | ||
|OoT= Iron Knuckle [Qty:1] | |OoT= Iron Knuckle [Qty:1]{{List Note|One does not [[Zelda Wiki:Glossary#Reappear|reappear]].}} | ||
}} | }} | ||
{{List Notes}} | |||
}} | }} | ||
}} | }} | ||
{{Heading|Boulder room}} | {{Heading|Obstacle course room}} | ||
The obstacle course room is situated between the stone garden room and the [[Silver Gauntlets]] room. It is composed of three corridors that rise in elevation with three hallways on each side of the central corridor connecting them. The flanking corridors have [[Boulder]]s rolling through them periodically as they appear from chutes at the beginnings of each corridor and fall into pits at their respective ends. Instead of containing walkable ramps like its flanking corridors, the final third of the central corridor is separated by a tall ledge. Within the central corridor, there are three [[Hookshot]] [[Target]]s spread along the ceiling. The first sits in the middle of the corridor while another sits above the ledge to allow quick access to its upper level. The [[Door]] to the Silver Gauntlets room is found at the end of the central corridor. However, it is blocked by a portcullis and a [[Flame Wall]] that divides it from the rest of the corridor. The third Hookshot Target is found beyond this Flame Wall, giving Link a method of bypassing it. Additionally, the first hallway to the right and third hallway to the left of the central corridor are blocked by Flame Walls. | |||
When Link enters the room, he is instructed to gather the five [[Silver Rupee]]s hidden throughout it within the time limit of one minute and thirty seconds.<ref>{{Cite|Gather the {{Color|OoT3D Red|jewels of white}} while avoiding traps and danger!|N/A|OoT3D}}</ref> The locations of these Rupees are as follows: | |||
<div style="max-width:46rem; margin:auto;"><gallery class="center" widths="320px"> | |||
File:OoT Gerudo Training Ground Silver Rupee.png|Floating off the ledge in the central corridor | |||
File:OoT Gerudo Training Ground Silver Rupee 2.png|On the right side of the first hallway connecting the central and right-side corridors | |||
File:OoT Gerudo Training Ground Silver Rupee 3.png|Floating beneath the Hookshot Target in the middle of the central corridor | |||
File:OoT Gerudo Training Ground Silver Rupee 4.png|At the end of the left-side corridor | |||
File:OoT Gerudo Training Ground Silver Rupee 5.png|At the start of the left-side corridor | |||
</gallery></div> | |||
After this trial is completed, the portcullis over the Door to the Silver Gauntlets room will raise. However, the Boulders will continue to appear and roll through the flanking corridors. | |||
In {{MQ}} mode, the Boulders are no longer present as a number of [[Ice]]-related obstacles now occupy the room's flanking hallways. As before, the Door to the Silver Gauntlets room will be blocked by a portcullis until the trial is completed by collecting the Silver Rupees. However, there is no longer a time limit and there are only four Rupees to collect. The Hookshot Targets and Flame Walls have also been relocated. | |||
* Beneath the ledge in the central corridor | |||
* Beneath the Hookshot Target on the ceiling near the beginning of the central corridor | |||
* At the start of the left-side corridor | |||
* Inside the pit of the left-side corridor | |||
When the trial is completed, a Hookshot Target tower will appear near the Door to the Silver Gauntlets room, allowing an easy way to bypass the Flame Wall blocking it. | |||
{{Listing Container| | {{Listing Container| | ||
{{Listing Item|header= Enemies in ''Normal Quest'' mode|content= | {{Listing Item|header= Enemies in ''Normal Quest'' mode|content= | ||
{{Gallery List|Enemies | {{Gallery List|Enemies | ||
|OoT= Boulder [Qty:2], Flame Wall [Qty:3], Wallmaster [Qty:1] | |OoT= Boulder [Qty:2], Flame Wall [Qty:3], Wallmaster [Qty:1]{{List Note|One does not [[Zelda Wiki:Glossary#Reappear|reappear]].}} | ||
}} | }} | ||
{{List Notes}} | |||
}} | }} | ||
| Line 98: | Line 133: | ||
{{Heading|Silver Gauntlets room}} | {{Heading|Silver Gauntlets room}} | ||
The [[Silver Gauntlets]] room is located between the obstacle course room and the [[Statue]] room. It is also the only room that connects to the sand pit room. This room is divided into two levels. AT the base level, there is an arena where [[Link]] must fight against [[Wolfos]]. Along the far wall opposite the obstacle course room's [[Door]], there is a large [[Block]] that can only be moved with the strength of the Silver Gauntlets. This Block guards the Door to the sand pit room, which is obstructed by a portcullis. Along the wall to the right of the Block there is a trick wall. Link can use the [[Lens of Truth]] to see through this trick wall to either reveal the second level, or see the first level below. There is a [[Hookshot]] [[Target]] on the ceiling behind this trick wall, which grants Link the ability to ascend to the second level. This second level leads to the Statue room. In front of the Door to this room there is a [[Floor Switch]], which lifts the portcullis over the Door to the sand pit room when pressed. Once all of the Wolfos have been defeated, a [[Treasure Chest]] will appear on the floor near the Block. | |||
In {{MQ}} mode, this arena contains a different set of [[Enemy|Enemies]] which Link must defeat within the span of a minute.<ref name="Limited Time"/> Additionally, there is a [[Blue Fire]] pedestal on the base level of the room. As before, both the trick wall and the heavy Block are present, though the door to the Statue room is now obstructed by both a portcullis and a wall of [[Red Ice]]. Once all of the Enemies have been defeated, a Treasure Chest will appear on the floor opposite the Blue Fire pedestal. As the Hookshot Target on the second level is now absent, Link must instead play the "[[Song of Time]]" near the trick wall to summon a [[Time Block]] to ascend up toward it. | |||
{{Listing Container| | {{Listing Container| | ||
{{Listing Item|header= Enemies in ''Normal Quest'' mode|content= | {{Listing Item|header= Enemies in ''Normal Quest'' mode|content= | ||
{{Gallery List|Enemies | {{Gallery List|Enemies | ||
|OoT= Trap Door [Qty:1], White Wolfos [Qty:2], Wolfos [Qty:2] | |OoT= Trap Door [Qty:1]{{List Note|One [[Zelda Wiki:Glossary#Reappear|reappears]] indefinitely.}}, White Wolfos [Qty:2]{{List Note|name= Wolfos|Two do not [[Zelda Wiki:Glossary#Reappear|reappear]]. However, both will reappear if Link leaves and returns before defeating all of the Wolfos and White Wolfos in the room.}}, Wolfos [Qty:2]{{List Note|name= Wolfos}} | ||
}} | }} | ||
{{List Notes}} | |||
}} | }} | ||
| Line 113: | Line 153: | ||
{{Heading|Sand pit room}} | {{Heading|Sand pit room}} | ||
The sand pit room is a dead-end chamber that features three sand pits and an altar at its end. Like Likes occupy each of these sand pits, which all house [[Treasure Chest]]s. A [[Tricky Chest]] sits atop the altar as a trap, while an [[Invisible Chest]] can be found in the third sand pit. Two Treasure Chests will appear in the first and second pits when all of the Like Likes have been defeated. | |||
In {{MQ}} mode, the Like Likes have been replaced with [[Spike]]s and the Tricky Chest is now absent. A Treasure Chest will appear on the altar once all of the [[Enemy|Enemies]] in this room have been defeated. | |||
{{Listing Container| | {{Listing Container| | ||
{{Listing Item|header= Enemies in ''Normal Quest'' mode|content= | {{Listing Item|header= Enemies in ''Normal Quest'' mode|content= | ||
| Line 149: | Line 193: | ||
{{Heading|Megaton Hammer room}} | {{Heading|Megaton Hammer room}} | ||
The [[Megaton Hammer]] room is connected to the [[Statue]] room and the sea of fire room. A stone pathway leading from the center of the room to the Statue room helps to distinguish the exits. Likewise, a [[Crest of the Gerudo]] sits above the entrance to the sea of fire room. When [[Link]] enters the Megaton Hammer room, portcullises will cover the [[Door]]s leading from it, trapping him inside. Stacked stone | The [[Megaton Hammer]] room is connected to the [[Statue]] room and the sea of fire room. A stone pathway leading from the center of the room to the Statue room helps to distinguish the exits. Likewise, a [[Crest of the Gerudo]] sits above the entrance to the sea of fire room. When [[Link]] enters the Megaton Hammer room, portcullises will cover the [[Door]]s leading from it, trapping him inside. Stacked stone [[Totem (Object)|Totems]] are spread along the walls of this room. These Totems can be destroyed with the Megaton Hammer to reveal things hiding beneath them. A circular [[Flame Wall]] guards a [[Treasure Chest]] at the center of the room and several [[Enemy|Enemies]] inhabit the room. By defeating these Enemies, Link can release the portcullises and cause a Treasure Chest to appear along one of the walls in the room. However, the Flame Wall will remain until its corresponding [[Floor Switch]] is pressed. This Floor Switch is hidden under a single Totem on the wall opposite the Statue room entrance, distinguished by the aforementioned stone pathway. | ||
In {{MQ}} mode, Link is instead required to defeat all of the Enemies in the room, excluding the Flame Wall at the center, within one minute.<ref | In {{MQ}} mode, Link is instead required to defeat all of the Enemies in the room, excluding the Flame Wall at the center, within one minute.<ref name="Limited Time"/> As before, portcullises will block the exits to the room until the Enemies have been defeated and a Treasure Chest will then appear. The Totem blocks are no longer present, leaving the Floor Switch exposed. The Floor Switch will cause the Flame Wall to disappear, though the Treasure Chest that is normally found here is hidden by another puzzle. In order to reveal the Treasure Chest, Link must strike the Crest of the Gerudo along the wall above the Door leading to the sea of fire room. | ||
{{Listing Container| | {{Listing Container| | ||
| Line 177: | Line 221: | ||
{{Listing Item|header= Enemies in {{MQ|-}} mode|content= | {{Listing Item|header= Enemies in {{MQ|-}} mode|content= | ||
{{Gallery List|Enemies | {{Gallery List|Enemies | ||
|OoT= Flame Wall [2][Qty:5], Red Bubble [Qty:3] | |OoT= Flame Wall [2][Qty:5], Lava, Red Bubble [Qty:3] | ||
}} | }} | ||
}} | }} | ||
| Line 183: | Line 227: | ||
{{Heading|Underwater gem room}} | {{Heading|Underwater gem room}} | ||
The underwater gem room features a large stonework pool. The entrance to this pool is obstructed by four [[Time Block]]s which can be removed by playing the "[[Song of Time]]". Each wall of the pool's interior has four apertures and a single [[Hookshot]] [[Target]]. Inside the pool, there are a number of [[Silver Rupee]]s that Link must collect in order to pass its trial.<ref>{{Cite|Collect the {{Color|OoT3D Red|underwater gems}}!|N/A|OoT3D}}</ref> However, the pool moves in a counter-clockwise direction in tandem with a [[Blade Trap]] at its bottom. When all of the Rupees have been collected, a [[Treasure Chest]] will appear above the pool. | |||
In {{MQ}} mode, the Time Blocks obstructing the pool are absent and have been replaced by a [[Web]]. The number of Silver Rupees has been reduced to three and the composition of [[Enemy|Enemies]] within the room has been altered. Because of the mirroring effect that is present in {{OoT3D}}'s {{MQ|-}} mode, the [[Water (Terrain)|Water]] inside the pool now moves in a clockwise direction. | |||
{{Listing Container| | {{Listing Container| | ||
{{Listing Item|header= Enemies in ''Normal Quest'' mode|content= | {{Listing Item|header= Enemies in ''Normal Quest'' mode|content= | ||
| Line 198: | Line 246: | ||
{{Heading|Dinolfos room}} | {{Heading|Dinolfos room}} | ||
The [[Dinolfos]] room is a chamber that is connected to the entrance room and the sea of fire room. The sides of the room are accented with ledges that [[Link]] can climb onto. However, these ledges are guarded from the front by [[Flame Wall]]s. Two [[Recovery Heart]]s sit along the longest ledge. When Link enters the room, the [[Door]] to the sea of fire room will be blocked by a portcullis and he will be instructed to defeat the [[Enemy|Enemies]] inside within a time limit of one minute and thirty seconds.<ref name="Limited Time"/> When this trial is completed, the portcullis over the Door to the sea of fire room will raise and a [[Treasure Chest]] will appear. | |||
In {{MQ}} mode, the composition of Enemies has been changed. In addition to the removal of the [[Beamos]] at the center of the room, there are now two [[Dodongo]]s and a [[Lizalfos]] will descend from the ceiling when Link walks in. The Recovery Hearts are also absent, and the time limit has been reduced by thirty seconds, resulting in the trial lasting for one minute. Finally, the Flame Walls are now absent as a lone [[Armos]] sits atop the longest ledge. As before, the Door to the sea of fire room is blocked by a portcullis until the Enemies have been defeated. A Treasure Chest will also appear at this time. | |||
{{Listing Container| | {{Listing Container| | ||
{{Listing Item|header= Enemies in ''Normal Quest'' mode|content= | {{Listing Item|header= Enemies in ''Normal Quest'' mode|content= | ||
{{Gallery List|Enemies | {{Gallery List|Enemies | ||
|OoT= Beamos [Qty:1], Dinolfos [Qty:2], Flame Wall | |OoT= Beamos [Qty:1]{{List Note|One does not [[Zelda Wiki:Glossary#Reappear|reappear]]. However, it will reappear if Link leaves and returns before also defeating all of the Dinolfos in the room.}}, Dinolfos [Qty:2]{{List Note|Two do not [[Zelda Wiki:Glossary#Reappear|reappear]]. However, each will reappear if Link leaves and returns before defeating them both in addition to the Beamos.}}, Flame Wall [Qty:8] | ||
}} | }} | ||
{{List Notes}} | |||
}} | }} | ||
| Line 220: | Line 273: | ||
{{Heading|''Normal Quest'' mode}} | {{Heading|''Normal Quest'' mode}} | ||
{{Gallery List|Enemies | {{Gallery List|Enemies | ||
|OoT= Beamos [Qty:1 | |OoT= Beamos [Qty:1], Boulder [Qty:2], Dinolfos [Qty:2], Door that Falls Down [Qty:1], Fire Keese [Qty:2], Flame Wall [Qty:3], Flame Wall [2][Qty:2], Lava, Like Like [Qty:3], Blade Trap [Qty:2], Red Bubble [Qty:2], Shell Blade [Qty:4], Stalfos [Qty:2], Torch Slug [Qty:2], Tricky Chest [Qty:1], Wallmaster [Qty:1], White Wolfos [Qty:2], Wolfos [Qty:2] | ||
| | |OoT3D= Beamos [Qty:1], Blade Trap [Qty:2], Boulder [Qty:2], Dinolfos [Qty:2], Fire Keese [Qty:2], Flame Wall [Qty:3], Flame Wall [2][Qty:2], Lava, Like Like [Qty:3], Red Bubble [Qty:2], Shell Blade [Qty:4], Stalfos [Qty:2], Torch Slug [Qty:2], Trap Door [Qty:1], Tricky Chest [Qty:1], Wallmaster [Qty:1], White Wolfos [Qty:2], Wolfos [Qty:2] | ||
}} | }} | ||
| Line 278: | Line 331: | ||
|- | |- | ||
| Treasure Chest | | Treasure Chest | ||
| Bombchu | | Bombchu {{Qty|5}} | ||
| In the segment of the [[Ice Arrow]] room connected to the sea of fire room | | In the segment of the [[Ice Arrow]] room connected to the sea of fire room | ||
|- | |- | ||
Latest revision as of 02:57, 29 June 2024
The Gerudo Training Ground is an optional mini-dungeon in Ocarina of Time.(OoT | OoT3D)[1] It consists of various difficult obstacles that Link must overcome in order to prove his abilities as a hero. If he manages to complete the training ground, he will be rewarded with the Ice Arrow as proof of his skill.[2]
Entrance to the Ground
The place can be found within the Gerudo's Fortress. The Gerudo Token is required to enter along with a small fee of 10 Rupees.[3][4]

The Gerudo Training Ground consists of eleven rooms full of traps, enemies, puzzles, and other obstacles that Link must overcome to receive a series of Small Keys. These keys are necessary in order to unlock the various doors within the chamber where the Ice Arrow resides. The Ice Arrow chamber, which is located at the center of the Training Ground, is made up of a small maze of locked doors. There are two paths that Link can take to reach the Ice Arrow; however, only one of them will lead to the treasure while the other one leads to a dead-end. A total of 9 Small Keys can be found hidden in the training ground, but only 7 are required to reach the Ice Arrow if the correct path is chosen from the beginning. Many assume that if Link chooses the wrong path to get to where the Ice Arrow is, there will not be enough Small Keys to correct the mistake, rendering the Ice Arrow impossible to reach. This is a common misunderstanding since there are other well-hidden keys inside the Gerudo Training Ground that can help him correct the error.
The entrance hall of the training ground has three doors that lead to different puzzles. The northern door grants access to the Ice Arrow chamber, the eastern door leads to a room where Link must defeat two Dinolfos and one Beamos under a limited time, and the western door takes the young hero to a room full of quicksand where two Stalfos have to be eliminated within the time limit. The east and west doors all lead to the rest of the obstacles, in which the majority consist of collecting Silver Rupees under various conditions to receive a Small Key as a reward. Every time Link enters a new room, the conditions to be met will be displayed on-screen as well as mentioning whether the obstacle has to be complete under a limited time or not.
The following lists the necessary items to successfully complete the training ground and collect everything:
- Fairy Bow – Forest Temple
- Megaton Hammer – Fire Temple
- Hookshot – Kakariko Village
- Lens of Truth – Bottom of the Well
- Iron Boots - Ice Cavern
- Silver Gauntlets – Spirit Temple
It is worth noting that the Silver Gauntlets are not required to ultimately reach the treasure since the Small Key obtained through the gauntlets is only used if Link chooses the wrong path at the Ice Arrow chamber. In fact, it is possible to collect seven out of the nine keys with only the Hookshot, Bow, and Hammer, although the player must memorize the locations of the false wall and ceiling that would be visible with the Lens of Truth; the keys unobtainable at that time are the ones which require the Iron Boots and Silver Gauntlets. The Hover Boots are not required; if Link plays the "Song of Time" in the Lava Room, he can use the blocks created to reach the upper platform, from which he can reach all the Silver Rupees. The Longshot is also not required in Ocarina of Time, but in Master Quest it is required in the Lava Room and Maze Room. It is not required in either game in the Statue Room, as Link can walk to the other side of the facility to access the upper ledge, although the Scarecrow's Song in Ocarina of Time and the Hookshot posts in Master Quest provide a useful shortcut.
In the Master Quest version of the game, there are now only three keys in the dungeon. Instead of a chest, there is a crate that hides a rusty switch that, when activated, makes the chest with the Ice Arrows appear. The objective in the Boulder room is the same as in the original version. However, there is only one Iron Knuckle now. The objective for the maze room remains the same as in the original game. Boulders are no longer rolling, but there are stalactites that fall from the ceiling and a Wallmaster. The Hover Boots or Longshot are required to get a single Rupee.
Wolfos are no longer found in the Silver Gauntlets room room. Instead, there are now Dinolfos, Lizalfos and a Beamos. A Time Block must be used to go through the invisible wall. In the adjacent room to the north, past the large block that requires the Silver Gauntlets, there is now a Stalfos, but only one chest containing a Purple Rupee. The Statue room is exactly the same, except for the fact that the statue is now surrounded by fire, which makes the aiming more difficult, and that the Scarecrow's Song has no effect; Hookshot posts appear once the challenge is complete. The chest with the Ice Arrows is in the room in the upper floor.
Instead of using the Megaton Hammer to break some blocks in the hammer-themed room, Link is now required to fight Dinolfos and an Ironknuckle. In the lava room, there are lots of Red Bubbles now and a torch has to be lit so the fire in the platforms disappears and Link can use his Hover Boots to get all the Rupees. If Link approaches this room from the Statue Room, there is a rusty switch which raises a Hookshot post on the raised, central platform; by using this post in conjunction with the Longshot, the Hover Boots are not required. In the water room next to this one there are less Rupees and enemies such as Biri, Bari, Stingers and Shell Blades. Link is required to defeat some enemies in a limited time in the Flame Wall room. Among them is an Armos in the wall, which is no longer surrounded by fire.
Entrance
The entrance to the Training Ground opens into a cavern lit by two Torches. Four pillars surround these Torches in a semicircular formation. Beyond these pillars, there are three doorways, decorated with Lion carvings. To the north is the room housing the Dungeon's treasure, the Ice Arrow room. To the west is the stone garden room, and to the south is the Dinolfos room.
An Eye Switch sits on the wall above the entrance. By striking the Eye Switch with an Arrow, Link can cause two Treasure Chests to appear. One is found between the northwestern pillars, while the other is between the northeastern pillars. Link can play the "Song of Storms" between the northern pillars to find a Big Fairy. This Big Fairy can be summoned at any point that Link reenters the entrance room. As Link approaches one of the Doors that lead further into the Dungeon, he will be given instructions to complete the trials ahead.[5]
Stone garden room
The stone garden room is connected to the entrance chamber to the east and the obstacle course room to the north. It is a spacious chamber with a sandy arena at its center. Four rocks decorate the interior of the arena. As Link enters the room, a portcullis will close over the Door to the obstacle course room and a pair of Stalfos will appear to challenge him. In order to complete the trial, Link must defeat both Stalfos within one minute.[6] However, the sandy arena will draw Link down into it, slowing his movement if he stands still and making the trial more difficult. Once both Stalfos have been defeated, a Treasure Chest will appear and the portcullis blocking the Door to the obstacle course room will raise.
In Master Quest mode, Link is instead tasked with defeating a single Iron Knuckle. As before, Link only has one minute's worth of time to complete the trial and a Treasure Chest will appear once it is completed. The Blade Trap near the Door to the entrance chamber is no longer present.
Enemies in Normal Quest mode
Enemies in Master Quest mode
Obstacle course room
The obstacle course room is situated between the stone garden room and the Silver Gauntlets room. It is composed of three corridors that rise in elevation with three hallways on each side of the central corridor connecting them. The flanking corridors have Boulders rolling through them periodically as they appear from chutes at the beginnings of each corridor and fall into pits at their respective ends. Instead of containing walkable ramps like its flanking corridors, the final third of the central corridor is separated by a tall ledge. Within the central corridor, there are three Hookshot Targets spread along the ceiling. The first sits in the middle of the corridor while another sits above the ledge to allow quick access to its upper level. The Door to the Silver Gauntlets room is found at the end of the central corridor. However, it is blocked by a portcullis and a Flame Wall that divides it from the rest of the corridor. The third Hookshot Target is found beyond this Flame Wall, giving Link a method of bypassing it. Additionally, the first hallway to the right and third hallway to the left of the central corridor are blocked by Flame Walls.
When Link enters the room, he is instructed to gather the five Silver Rupees hidden throughout it within the time limit of one minute and thirty seconds.[7] The locations of these Rupees are as follows:
-
Floating off the ledge in the central corridor
-
On the right side of the first hallway connecting the central and right-side corridors
-
Floating beneath the Hookshot Target in the middle of the central corridor
-
At the end of the left-side corridor
-
At the start of the left-side corridor
After this trial is completed, the portcullis over the Door to the Silver Gauntlets room will raise. However, the Boulders will continue to appear and roll through the flanking corridors.
In Master Quest mode, the Boulders are no longer present as a number of Ice-related obstacles now occupy the room's flanking hallways. As before, the Door to the Silver Gauntlets room will be blocked by a portcullis until the trial is completed by collecting the Silver Rupees. However, there is no longer a time limit and there are only four Rupees to collect. The Hookshot Targets and Flame Walls have also been relocated.
- Beneath the ledge in the central corridor
- Beneath the Hookshot Target on the ceiling near the beginning of the central corridor
- At the start of the left-side corridor
- Inside the pit of the left-side corridor
When the trial is completed, a Hookshot Target tower will appear near the Door to the Silver Gauntlets room, allowing an easy way to bypass the Flame Wall blocking it.
Enemies in Normal Quest mode
-
Boulder ×2
-
Flame Wall ×3
-
Boulder ×2
-
Flame Wall ×3
Enemies in Master Quest mode
-
Flame Wall ×3
-
Freezard ×1
-
Icicle ×8
-
Wallmaster ×1
-
Flame Wall ×3
-
Freezard ×1
-
Icicle ×8
-
Wallmaster ×1
Silver Gauntlets room
The Silver Gauntlets room is located between the obstacle course room and the Statue room. It is also the only room that connects to the sand pit room. This room is divided into two levels. AT the base level, there is an arena where Link must fight against Wolfos. Along the far wall opposite the obstacle course room's Door, there is a large Block that can only be moved with the strength of the Silver Gauntlets. This Block guards the Door to the sand pit room, which is obstructed by a portcullis. Along the wall to the right of the Block there is a trick wall. Link can use the Lens of Truth to see through this trick wall to either reveal the second level, or see the first level below. There is a Hookshot Target on the ceiling behind this trick wall, which grants Link the ability to ascend to the second level. This second level leads to the Statue room. In front of the Door to this room there is a Floor Switch, which lifts the portcullis over the Door to the sand pit room when pressed. Once all of the Wolfos have been defeated, a Treasure Chest will appear on the floor near the Block.
In Master Quest mode, this arena contains a different set of Enemies which Link must defeat within the span of a minute.[6] Additionally, there is a Blue Fire pedestal on the base level of the room. As before, both the trick wall and the heavy Block are present, though the door to the Statue room is now obstructed by both a portcullis and a wall of Red Ice. Once all of the Enemies have been defeated, a Treasure Chest will appear on the floor opposite the Blue Fire pedestal. As the Hookshot Target on the second level is now absent, Link must instead play the "Song of Time" near the trick wall to summon a Time Block to ascend up toward it.
Enemies in Normal Quest mode
Sand pit room
The sand pit room is a dead-end chamber that features three sand pits and an altar at its end. Like Likes occupy each of these sand pits, which all house Treasure Chests. A Tricky Chest sits atop the altar as a trap, while an Invisible Chest can be found in the third sand pit. Two Treasure Chests will appear in the first and second pits when all of the Like Likes have been defeated.
In Master Quest mode, the Like Likes have been replaced with Spikes and the Tricky Chest is now absent. A Treasure Chest will appear on the altar once all of the Enemies in this room have been defeated.
Enemies in Normal Quest mode
-
Like Like ×3
-
Tricky Chest ×1
-
Like Like ×3
-
Tricky Chest ×1
Statue room
The Statue room is divided into two levels, the top level consists of a floor along the wall connected to the Silver Gauntlets room and an isolated section of the Ice Arrow room. The Door to the Ice Arrow room is obstructed by a portcullis, however. The bottom level features a circular floor along the wall with a pit of Lava in its center. When Link sets foot onto the circular floor, it will begin revolving around the room. A Door to the Megaton Hammer room can also be found on this level. Above this Door, there is a Hookshot Target.
Inside the Lava pit, there is a Statue with four faces. Each face has a single Eye which Link is prompted to strike with either the Bow or Hookshot.[8] By doing so, Link can release the portcullis over the Door to the Ice Arrow room and cause a Treasure Chest to appear at the center of the room. However, Link has a limited amount of time to strike all of the Eyes. If he takes longer than 20.24 seconds, the Eyes will reset, forcing him to restart.[note 1] By playing the "Scarecrow's Song", Link can summon Pierre at the top level, providing an easy way to travel between the room's levels via Hookshot.
In Master Quest mode, the Statue at the center of the room is surrounded by Flame Walls and both Pierre's spot and the Hookshot Target are absent. Instead, Hookshot Target towers can be seen at the top level and above the Statue. Striking the Eyes of the Statue now causes a Treasure Chest to appear along the circular floor instead, and it no longer raises the portcullis over the Door to the Ice Arrow room. To release this portcullis, Link can instead strike a Crystal Switch hidden in one of the Flame Walls opposite the top floor.
Enemies in Master Quest mode
-
Flame Wall ×8
-
Flame Wall ×8
Megaton Hammer room
The Megaton Hammer room is connected to the Statue room and the sea of fire room. A stone pathway leading from the center of the room to the Statue room helps to distinguish the exits. Likewise, a Crest of the Gerudo sits above the entrance to the sea of fire room. When Link enters the Megaton Hammer room, portcullises will cover the Doors leading from it, trapping him inside. Stacked stone Totems are spread along the walls of this room. These Totems can be destroyed with the Megaton Hammer to reveal things hiding beneath them. A circular Flame Wall guards a Treasure Chest at the center of the room and several Enemies inhabit the room. By defeating these Enemies, Link can release the portcullises and cause a Treasure Chest to appear along one of the walls in the room. However, the Flame Wall will remain until its corresponding Floor Switch is pressed. This Floor Switch is hidden under a single Totem on the wall opposite the Statue room entrance, distinguished by the aforementioned stone pathway.
In Master Quest mode, Link is instead required to defeat all of the Enemies in the room, excluding the Flame Wall at the center, within one minute.[6] As before, portcullises will block the exits to the room until the Enemies have been defeated and a Treasure Chest will then appear. The Totem blocks are no longer present, leaving the Floor Switch exposed. The Floor Switch will cause the Flame Wall to disappear, though the Treasure Chest that is normally found here is hidden by another puzzle. In order to reveal the Treasure Chest, Link must strike the Crest of the Gerudo along the wall above the Door leading to the sea of fire room.
Enemies in Normal Quest mode
-
Fire Keese ×2
-
Flame Wall ×1
-
Torch Slug ×2
-
Fire Keese ×2
-
Flame Wall ×1
-
Torch Slug ×2
Enemies in Master Quest mode
-
Iron Knuckle ×1
-
Flame Wall ×1
-
Torch Slug ×2
-
Iron Knuckle ×1
-
Flame Wall ×1
-
Torch Slug ×2
Sea of fire room
Enemies in Normal Quest mode
-
Flame Wall ×1
-
Red Bubble ×2
-
Flame Wall ×1
-
Red Bubble ×2
Enemies in Master Quest mode
-
Flame Wall ×5
-
Red Bubble ×3
-
Flame Wall ×5
-
Red Bubble ×3
Underwater gem room
The underwater gem room features a large stonework pool. The entrance to this pool is obstructed by four Time Blocks which can be removed by playing the "Song of Time". Each wall of the pool's interior has four apertures and a single Hookshot Target. Inside the pool, there are a number of Silver Rupees that Link must collect in order to pass its trial.[9] However, the pool moves in a counter-clockwise direction in tandem with a Blade Trap at its bottom. When all of the Rupees have been collected, a Treasure Chest will appear above the pool.
In Master Quest mode, the Time Blocks obstructing the pool are absent and have been replaced by a Web. The number of Silver Rupees has been reduced to three and the composition of Enemies within the room has been altered. Because of the mirroring effect that is present in Ocarina of Time 3D's Master Quest mode, the Water inside the pool now moves in a clockwise direction.
Enemies in Normal Quest mode
-
Razor ×1
-
Shell Blade ×4
-
Blade Trap ×1
-
Shell Blade ×4
Enemies in Master Quest mode
-
Bari ×1
-
Shell Blade ×1
-
Stinger ×2
-
Bari ×1
-
Shell Blade ×1
-
Stinger ×2
Dinolfos room
The Dinolfos room is a chamber that is connected to the entrance room and the sea of fire room. The sides of the room are accented with ledges that Link can climb onto. However, these ledges are guarded from the front by Flame Walls. Two Recovery Hearts sit along the longest ledge. When Link enters the room, the Door to the sea of fire room will be blocked by a portcullis and he will be instructed to defeat the Enemies inside within a time limit of one minute and thirty seconds.[6] When this trial is completed, the portcullis over the Door to the sea of fire room will raise and a Treasure Chest will appear.
In Master Quest mode, the composition of Enemies has been changed. In addition to the removal of the Beamos at the center of the room, there are now two Dodongos and a Lizalfos will descend from the ceiling when Link walks in. The Recovery Hearts are also absent, and the time limit has been reduced by thirty seconds, resulting in the trial lasting for one minute. Finally, the Flame Walls are now absent as a lone Armos sits atop the longest ledge. As before, the Door to the sea of fire room is blocked by a portcullis until the Enemies have been defeated. A Treasure Chest will also appear at this time.
Enemies in Normal Quest mode
-
Flame Wall ×8
-
Flame Wall ×8
Animals
Enemies
Normal Quest mode
-
Beamos ×1
-
Boulder ×2
-
Dinolfos ×2
-
Fire Keese ×2
-
Flame Wall ×3
-
Flame Wall ×2
-
Like Like ×3
-
Razor ×2
-
Red Bubble ×2
-
Shell Blade ×4
-
Stalfos ×2
-
Torch Slug ×2
-
Tricky Chest ×1
-
Wallmaster ×1
-
White Wolfos ×2
-
Wolfos ×2
-
Beamos ×1
-
Blade Trap ×2
-
Boulder ×2
-
Dinolfos ×2
-
Fire Keese ×2
-
Flame Wall ×3
-
Flame Wall ×2
-
Like Like ×3
-
Red Bubble ×2
-
Shell Blade ×4
-
Stalfos ×2
-
Torch Slug ×2
-
Tricky Chest ×1
-
Wallmaster ×1
-
White Wolfos ×2
-
Wolfos ×2
Master Quest mode
-
Armos ×1
-
Bari ×1
-
Dinolfos ×2
-
Dodongo ×2
-
Flame Wall ×3
-
Flame Wall ×14
-
Freezard ×3
-
Icicle ×8
-
Iron Knuckle ×1
-
Iron Knuckle ×1
-
Lizalfos ×1
-
Red Bubble ×3
-
Shell Blade ×1
-
Spike ×3
-
Stalfos ×2
-
Stinger ×2
-
Torch Slug ×2
-
Wallmaster ×1
-
Armos ×1
-
Bari ×1
-
Dinolfos ×2
-
Dodongo ×2
-
Flame Wall ×3
-
Flame Wall ×14
-
Freezard ×3
-
Icicle ×8
-
Iron Knuckle ×1
-
Iron Knuckle ×1
-
Lizalfos ×1
-
Red Bubble ×3
-
Shell Blade ×1
-
Spike ×3
-
Stalfos ×2
-
Stinger ×2
-
Torch Slug ×2
-
Wallmaster ×1
Treasure Chests
Normal Quest mode
| Treasure Chest | |
|---|---|
| Contents | |
| Notes | Between the northeastern pillars in the entrance room |
| Treasure Chest | |
| Contents | |
| Notes | Between the northwestern pillars in the entrance room |
| Treasure Chest | |
| Contents | |
| Notes | In the room west of the entrance |
| Treasure Chest | |
| Contents | |
| Notes | Appears in the Silver Gauntlets room once all of the Wolfos have been defeated |
| Treasure Chest | |
| Contents | |
| Notes | In the second pit in the sand pit room |
| Treasure Chest | |
| Contents | |
| Notes | In the third pit in the sand pit room |
| Treasure Chest | |
| Contents | |
| Notes | Appears in the first pit in the sand pit room once all of the Enemies have been defeated |
| Treasure Chest | |
| Contents | |
| Notes | Appears in the Statue room after all of the eyes have been struck |
| Treasure Chest | |
| Contents | |
| Notes | |
| Treasure Chest | |
| Contents | |
| Notes | Appears in the Megaton Hammer room after all of the Enemies have been defeated |
| Treasure Chest | |
| Contents | |
| Notes | In the center of the Megaton Hammer room |
| Treasure Chest | |
| Contents |
|
| Notes | In the segment of the Ice Arrow room connected to the sea of fire room |
| Treasure Chest | |
| Contents | |
| Notes | In the segment of the Ice Arrow room connected to the sea of fire room |
| Treasure Chest | |
| Contents | |
| Notes | Appears in the underwater gem room once the Silver Rupees have been collected |
| Treasure Chest | |
| Contents | |
| Notes | |
| Treasure Chest | |
| Contents | |
| Notes | |
| Treasure Chest | |
| Contents | |
| Notes | Inside the second room to the left in the Ice Arrow room |
| Treasure Chest | |
| Contents | |
| Notes | Inside the fourth room to the left in the Ice Arrow room |
| Treasure Chest | |
| Contents | |
| Notes | Inside the fifth room to the left in the Ice Arrow room |
| Treasure Chest | |
| Contents | |
| Notes | In the center of the Ice Arrow room |
| Treasure Chest | Contents | Notes |
|---|---|---|
Between the northeastern pillars in the entrance room | ||
Between the northwestern pillars in the entrance room | ||
In the room west of the entrance | ||
Appears in the Silver Gauntlets room once all of the Wolfos have been defeated | ||
In the second pit in the sand pit room | ||
In the third pit in the sand pit room | ||
Appears in the first pit in the sand pit room once all of the Enemies have been defeated | ||
Appears in the Statue room after all of the eyes have been struck | ||
Appears in the Megaton Hammer room after all of the Enemies have been defeated | ||
In the center of the Megaton Hammer room | ||
| In the segment of the Ice Arrow room connected to the sea of fire room | |
In the segment of the Ice Arrow room connected to the sea of fire room | ||
Appears in the underwater gem room once the Silver Rupees have been collected | ||
Inside the second room to the left in the Ice Arrow room | ||
Inside the fourth room to the left in the Ice Arrow room | ||
Inside the fifth room to the left in the Ice Arrow room | ||
In the center of the Ice Arrow room |
Master Quest mode
| Treasure Chest | |
|---|---|
| Contents | |
| Notes | Between the northwestern pillars in the entrance room |
| Treasure Chest | |
| Contents | |
| Notes | Between the northeastern pillars in the entrance room |
| Treasure Chest | |
| Contents | |
| Notes | Appears in the Dinolfos room once all the Enemies have been defeated |
| Treasure Chest | |
| Contents | |
| Notes | Appears in the underwater gem room once all the Enemies have been defeated |
| Treasure Chest | |
| Contents | |
| Notes | Appears in the stone garden room once the Iron Knuckle has been defeated |
| Treasure Chest | |
| Contents | |
| Notes | Appears in the Silver Gauntlets room once all the Enemies have been defeated |
| Treasure Chest | |
| Contents | |
| Notes | Appears in the sand pit room once all the Enemies have been defeated |
| Treasure Chest | |
| Contents | |
| Notes | Appears in the Statue room once the eyes have been struck |
| Treasure Chest | |
| Contents | |
| Notes | Appears in the Megaton Hammer room once the Iron Knuckle and Torch Slugs have been defeated |
| Treasure Chest | |
| Contents | |
| Notes | Appears in the Megaton Hammer room once the Crest of the Gerudo above the Door has been struck |
| Treasure Chest | |
| Contents | |
| Notes | In the segment of the Ice Arrow room connected to the sea of fire room |
| Treasure Chest | |
| Contents | |
| Notes | In the segment of the Ice Arrow room connected to the sea of fire room |
| Treasure Chest | |
| Contents | |
| Notes | |
| Treasure Chest | |
| Contents | |
| Notes | Inside the second room to the right in the Ice Arrow room |
| Treasure Chest | |
| Contents | |
| Notes | Inside the fourth room to the right in the Ice Arrow room |
| Treasure Chest | |
| Contents | |
| Notes | |
| Treasure Chest | |
| Contents | |
| Notes | Appears in the segment of the Ice Arrow room connected to the upper floor of the Statue room once the Rusty Switch at the center of the room has been pressed |
| Treasure Chest | Contents | Notes |
|---|---|---|
Between the northwestern pillars in the entrance room | ||
Between the northeastern pillars in the entrance room | ||
Appears in the Dinolfos room once all the Enemies have been defeated | ||
Appears in the underwater gem room once all the Enemies have been defeated | ||
Appears in the stone garden room once the Iron Knuckle has been defeated | ||
Appears in the Silver Gauntlets room once all the Enemies have been defeated | ||
Appears in the sand pit room once all the Enemies have been defeated | ||
Appears in the Statue room once the eyes have been struck | ||
Appears in the Megaton Hammer room once the Iron Knuckle and Torch Slugs have been defeated | ||
Appears in the Megaton Hammer room once the Crest of the Gerudo above the Door has been struck | ||
In the segment of the Ice Arrow room connected to the sea of fire room | ||
In the segment of the Ice Arrow room connected to the sea of fire room | ||
Inside the second room to the right in the Ice Arrow room | ||
Inside the fourth room to the right in the Ice Arrow room | ||
Appears in the segment of the Ice Arrow room connected to the upper floor of the Statue room once the Rusty Switch at the center of the room has been pressed |
Nomenclature
| Language | Names | Meanings |
|---|---|---|
| ゲルドの修練場 (Gerudo no Shūrenjō) (OoT)[11] | Same as English. | |
| Zona di addestramento Gerudo (OoT3D)[10] | Gerudo training zone | |
| This table was generated using translation pages. To request an addition, please contact a staff member with a reference. | ||
Other Names
| Name | Gerudo's Training Ground[12] |
|---|---|
| Applies to | |
| Source | |
| Superseded by |
| Name | Applies to | Source | Superseded by |
|---|---|---|---|
Gerudo's Training Ground[12] |
Gallery
-
Entrance to the training ground from Ocarina of Time
-
Dungeon Map of the Gerudo Training Ground from Ocarina of Time
Notes
- ↑ In Ocarina of Time 3D, the Eyes are set to reset after 624 frames. At 30 frames per second, this results in a time limit of 20.24 seconds. In prior versions of Ocarina of Time, the Eyes are programmed to reset after 416 frames instead, which equals to 20.16 seconds at 20 frames per second. As a result, Ocarina of Time 3D provides an additional .08 seconds to complete the puzzle.
References
- ↑ "Gerudo Training Ground" — N/A (Ocarina of Time 3D)
- ↑ "You got the Ice Arrow! Set it to
 and your arrows will be powered up! If you hit your target, it will freeze. This arrow magic is granted only to those who complete the difficult training of the Gerudos, so use it with pride!" — N/A (Ocarina of Time)
- ↑ "This is the Gerudo's Training Ground. Nobody is allowed to enter without a membership card." — Gerudo (Ocarina of Time)
- ↑ "This is the Gerudo Training Ground. Gerudo Token verified. One try for 10 Rupees!" — Gerudo (Ocarina of Time 3D)
- ↑ "If you can overcome the trials in the chambers ahead, then and only then will you be qualified to hold our secret treasure!" — N/A (Ocarina of Time 3D)
- ↑ 6.0 6.1 6.2 6.3 "Defeat all the enemies in a limited time!" — N/A (Ocarina of Time 3D)
- ↑ "Gather the jewels of white while avoiding traps and danger!" — N/A (Ocarina of Time 3D)
- ↑ "Blind the eyes of the statue!" — N/A (Ocarina of Time 3D)
- ↑ "Collect the underwater gems!" — N/A (Ocarina of Time 3D)
- ↑ "Zona di addestramento Gerudo - Ingresso riservato ai soci" — Sign (Ocarina of Time 3D, Italian localization)
- ↑ Nintendo Official Guidebook—The Legend of Zelda: Ocarina of Time, Shogakukan, pg. 155
- ↑ "This is the Gerudo's Training Ground. Membership card verified. One try for 10 Rupees!" — Gerudo (Ocarina of Time)

![Stalfos ×2[a]](http://cdn.wikimg.net/en/zeldawiki/images/thumb/a/ab/OoT_Stalfos_Model.png/95px-OoT_Stalfos_Model.png)

![Stalfos ×2[a]](http://cdn.wikimg.net/en/zeldawiki/images/thumb/6/64/OoT3D_Stalfos_Model.png/119px-OoT3D_Stalfos_Model.png)
![Iron Knuckle ×1[a]](http://cdn.wikimg.net/en/zeldawiki/images/thumb/f/fe/OoT_Iron_Knuckle_Model.png/120px-OoT_Iron_Knuckle_Model.png)
![Iron Knuckle ×1[a]](http://cdn.wikimg.net/en/zeldawiki/images/thumb/b/b5/OoT3D_Iron_Knuckle_Model.png/120px-OoT3D_Iron_Knuckle_Model.png)



![Wallmaster ×1[a]](http://cdn.wikimg.net/en/zeldawiki/images/thumb/5/51/OoT_Wallmaster_Model.png/120px-OoT_Wallmaster_Model.png)

![Wallmaster ×1[a]](http://cdn.wikimg.net/en/zeldawiki/images/thumb/a/a1/OoT3D_Wallmaster_Model.png/108px-OoT3D_Wallmaster_Model.png)


![Door that Falls Down ×1[a]](http://cdn.wikimg.net/en/zeldawiki/images/thumb/4/4e/OoT_Door_that_Falls_Down_Model.png/62px-OoT_Door_that_Falls_Down_Model.png)
![White Wolfos ×2[b]](http://cdn.wikimg.net/en/zeldawiki/images/thumb/f/fe/OoT_White_Wolfos_Model.png/120px-OoT_White_Wolfos_Model.png)
![Wolfos ×2[b]](http://cdn.wikimg.net/en/zeldawiki/images/thumb/d/d1/OoT_Wolfos_Model.png/120px-OoT_Wolfos_Model.png)
![White Wolfos ×2[b]](http://cdn.wikimg.net/en/zeldawiki/images/thumb/a/aa/OoT3D_White_Wolfos_Model.png/120px-OoT3D_White_Wolfos_Model.png)
![Wolfos ×2[b]](http://cdn.wikimg.net/en/zeldawiki/images/thumb/8/89/OoT3D_Wolfos_Model.png/90px-OoT3D_Wolfos_Model.png)









![Beamos ×1[a]](http://cdn.wikimg.net/en/zeldawiki/images/thumb/9/9d/OoT_Beamos_Model.png/61px-OoT_Beamos_Model.png)
![Dinolfos ×2[b]](http://cdn.wikimg.net/en/zeldawiki/images/thumb/4/4b/OoT_Dinolfos_Model.png/71px-OoT_Dinolfos_Model.png)
![Beamos ×1[a]](http://cdn.wikimg.net/en/zeldawiki/images/thumb/0/03/OoT3D_Beamos_Model.png/66px-OoT3D_Beamos_Model.png)
![Dinolfos ×2[b]](http://cdn.wikimg.net/en/zeldawiki/images/thumb/0/04/OoT3D_Dinolfos_Model.png/116px-OoT3D_Dinolfos_Model.png)


