Gerudo Training Ground: Difference between revisions
TriforceTony (talk | contribs) |
TriforceTony (talk | contribs) No edit summary |
||
| (19 intermediate revisions by 2 users not shown) | |||
| Line 1: | Line 1: | ||
{{Infobox Dungeon | {{Infobox Dungeon | ||
|image= | |image= | ||
{{Media | {{Media | ||
| Line 6: | Line 5: | ||
|Screenshot OoT3D= File:OoT3D Gerudo Training Ground.png | |Screenshot OoT3D= File:OoT3D Gerudo Training Ground.png | ||
}} | }} | ||
|caption= | |||
|pronunciation= | |||
|location= [[Gerudo's Fortress]] | |location= [[Gerudo's Fortress]] | ||
|game= OoT | |game= OoT | ||
|other= | |||
|item= [[Ice Arrow]] | |item= [[Ice Arrow]] | ||
|quest= | |||
|mini-boss= | |mini-boss= | ||
|boss= | |boss= | ||
|temperature= | |||
|counter= | |||
|theme= | |||
|strategy= {{StrategyWiki|The Legend of Zelda: Ocarina of Time/Gerudo Training Grounds|Gerudo Training Ground}} | |strategy= {{StrategyWiki|The Legend of Zelda: Ocarina of Time/Gerudo Training Grounds|Gerudo Training Ground}} | ||
|zu= | |||
}} | }} | ||
The {{Term/Store|Gerudo Training Ground||Series, OoT, OoT3D}},<ref>{{Cite|'''{{Big|Gerudo Training Ground}}'''|N/A|OoT3D}}</ref> | The {{Term/Store|Gerudo Training Ground||Series, OoT, OoT3D}} is an optional mini-dungeon in {{OoT}}.{{Exp Game|OoT, OoT3D}}<ref>{{Cite|'''{{Big|Gerudo Training Ground}}'''|N/A|OoT3D}}</ref> It consists of various difficult obstacles that [[Link]] must overcome in order to prove his abilities as a hero. If he manages to complete the training ground, he will be rewarded with the [[Ice Arrow]] as proof of his skill.<ref>{{Cite|You got the {{Color|OoT Dark Blue|Ice Arrow}}! Set it to {{icon|OoT C}} and your arrows will be powered up! If you hit your target, it will freeze. This arrow magic is granted only to those who complete the difficult training of the Gerudos, so use it with pride!|N/A|OoT}}</ref> | ||
==Entrance to the Ground== | ==Entrance to the Training Ground== | ||
The | The Gerudo Training Ground can be found within the [[Gerudo's Fortress]]. In order to enter, [[Link]] must speak to a [[Gerudo]] standing guard outside of the [[Dungeon]]. The cost for entry is proof of membership with the [[Gerudo Token]] and a fee of 10 [[Rupee]]s.<ref>{{Cite|This is the Gerudo's Training Ground. Nobody is allowed to enter without a membership card.|Gerudo|OoT}}</ref><ref>{{Cite|This is the Gerudo {{Color|OoT3D Red|Training Ground}}. Gerudo Token verified. One try for {{Color|OoT3D Red|10 Rupees!}}|Gerudo|OoT3D}}</ref> If Link leaves the Dungeon at any point after paying, the gate blocking its entrance will return and he will have to pay another fee to enter. The gate will also close if Link travels too far away from it while at the Gerudo's Fortress. Link will still be charged a fee to enter even if he completes the Dungeon. | ||
==Themes and Navigation== | ==Themes and Navigation== | ||
The Gerudo Training Ground consists of a labyrinth wherein each room serves as a trial. The room containing the [[Dungeon]]'s treasure, the [[Ice Arrow]], is accessible from the entrance, though the treasure can only be obtained by completing the trials and collecting [[Small Key]]s throughout the Dungeon. A total of nine [[Locked Door]]s are present in the Training Ground, though only seven are required to reach the treasure. A handful of these trials feature time limits which will void [[Link]] out if they are not completed in time, dealing a quarter of a [[Heart]] of damage and resetting their challenges. [[Silver Rupee]]s are also used as components for these trials, requiring Link to collect all of the Rupees in a room in order to complete their trials. Each Silver Rupee grants five [[Rupee]]s. If Link leaves a room or a room is reset, any Silver Rupees that were collected and any [[Enemy|Enemies]] that were defeated will return, though Link will be able to retain any money he obtained from collecting them. When a trial is completed, its puzzles will permanently remain completed and any Enemies that must be defeated to advance will no longer appear as well. | |||
To fully navigate the Gerudo Training Ground, Link needs the [[Fairy Bow]] from the [[Forest Temple]], the [[Megaton Hammer]] from the [[Fire Temple]], the [[Hookshot]] from [[Kakariko Village]]'s [[Graveyard]], and the [[Iron Boots]] from the [[Ice Cavern]]. The [[Silver Gauntlets]] from the [[Spirit Temple]], the [[Lens of Truth]] from the [[Bottom of the Well]], and the [[Hover Boots]] from the [[Shadow Temple]] are optional but useful tools to navigate the Dungeon. However, none of these three [[Item]]s are strictly necessary to reach the Dungeon's treasure as though the Lens of Truth helps to see through various illusory walls and floors and to locate a single [[Invisible Chest]], Link can navigate through the illusory segments and open the Invisible Chest without them. The Silver Gauntlets are used to obtain an optional Small Key and though they help with crossing the Lava Room, the [[Hover Boots]] are made unnecessary if Link summons Time Blocks instead. | |||
The entrance to the Training Ground opens into a cavern lit by two [[Torch]]es. Four pillars surround these Torches in a semicircular formation. Beyond these pillars, there are three doorways, decorated with [[Lion]] carvings. To the north is the Treasure Room housing the [[Ice Arrow]]. To the west is the stone garden room, and to the south is the [[Dinolfos]] room. | |||
An [[Eye Switch]] sits on the wall above the entrance. By striking the Eye Switch with an [[Arrow]], Link can cause two [[Treasure Chest]]s to appear. One is found between the northwestern pillars, while the other is between the northeastern pillars. Link can play the "[[Song of Storms]]" between the northern pillars to find a [[Big Fairy]]. This Big Fairy can be summoned at any point that Link reenters the entrance room. As Link approaches one of the [[Door]]s that lead further into the Dungeon, he will be given instructions to complete the trials ahead.<ref>{{Cite|If you can overcome the {{Color|OoT3D Red|trials}} in the chambers ahead, then and only then will you be qualified to hold our secret treasure!|N/A|OoT3D}}</ref> | |||
In {{MQ}} mode, the east and west Doors are blocked by portcullises and the two Torches at the center of the room have been replaced by another variety which are unlit by default. By igniting these Torches, Link can unlock the rooms to each side and advance. There is no longer an Eye Switch in this room and no Big Fairy that can be summoned. | |||
{{Collapsible | |||
|header= Treasure Chests specific to the entrance room | |||
|collapse= true | |||
|content= | |||
{{Heading|Treasure Chests in ''Normal Quest'' mode}} | |||
{{Treasure Chests|game= OoT3D | |||
|- | |||
| Treasure Chest | |||
| Bundle of Arrows | |||
| Between the northeastern pillars in the entrance room<br/>Appears after the [[Eye Switch]] above the entrance is hit | |||
|- | |||
| Treasure Chest | |||
| Blue Rupee | |||
| Between the northwestern pillars in the entrance room<br/>Appears after the [[Eye Switch]] above the entrance is hit | |||
}} | |||
{{Heading|Treasure Chests in {{MQ|-}} mode}} | |||
{{Treasure Chests|game= OoT3D | |||
|- | |||
| Treasure Chest | |||
| Bombchu | |||
| Between the northwestern pillars in the entrance room | |||
|- | |||
| Treasure Chest | |||
| Bundle of Arrows | |||
| Between the northeastern pillars in the entrance room | |||
}} | |||
}} | |||
{{Heading|Dinolfos room}} | |||
The [[Dinolfos]] room is a chamber that is connected to the entrance room and the Lava Room. The sides of the room are accented with ledges that [[Link]] can climb onto. However, these ledges are guarded from the front by [[Flame Wall]]s. Two [[Recovery Heart]]s sit along the longest ledge. When Link enters the room, the [[Door]] to the Lava Room will be blocked by a portcullis and he will be instructed to defeat the [[Enemy|Enemies]] inside within a time limit of one minute and thirty seconds.<ref name="Limited Time"/> When this trial is completed, the portcullis over the Door to the Lava Room will raise and a [[Treasure Chest]] will appear. | |||
In {{MQ}} mode, the composition of Enemies has been changed. In addition to the removal of the [[Beamos]] at the center of the room, there are now two [[Dodongo]]s and a [[Lizalfos]] will descend from the ceiling when Link walks in. The Recovery Hearts are also absent, and the time limit has been reduced by thirty seconds, resulting in the trial lasting for one minute. Finally, the Flame Walls are now absent as a lone [[Armos]] sits atop the longest ledge. As before, the Door to the Lava Room is blocked by a portcullis until the Enemies have been defeated. A Treasure Chest will also appear at this time. | |||
{{Collapsible | |||
|header= Enemies specific to the Dinolfos room | |||
|collapse= true | |||
|content= | |||
{{Listing Container| | |||
{{Listing Item|header= Enemies in ''Normal Quest'' mode|content= | |||
{{Gallery List|Enemies | |||
|OoT= Beamos [Qty:1]{{List Note|One does not [[Zelda Wiki:Glossary#Reappear|reappear]]. However, it will reappear if Link leaves and returns before also defeating all of the Dinolfos in the room.}}, Dinolfos [Qty:2]{{List Note|Two do not [[Zelda Wiki:Glossary#Reappear|reappear]]. However, each will reappear if Link leaves and returns before defeating them both in addition to the Beamos.}}, Flame Wall [Qty:8] | |||
}} | |||
{{List Notes}} | |||
}} | |||
{{Listing Item|header= Enemies in {{MQ|-}} mode|content= | |||
{{Gallery List|Enemies | |||
|OoT= Armos [Qty:1], Dinolfos [Qty:2], Dodongo [Qty:2], Lizalfos [Qty:1] | |||
}} | |||
}} | |||
}} | |||
}} | |||
{{Collapsible | |||
|header= Treasure Chests specific to the Dinolfos room | |||
|collapse= true | |||
|content= | |||
{{Heading|Treasure Chests in ''Normal Quest'' mode}} | |||
{{Treasure Chests|game= OoT3D | |||
|- | |||
| Treasure Chest | |||
| Small Key | |||
| Appears in the [[Dinolfos]] room once all of the [[Enemy|Enemies]] have been defeated | |||
}} | |||
{{Heading|Treasure Chests in {{MQ|-}} mode}} | |||
{{Treasure Chests|game= OoT3D | |||
|- | |||
| Treasure Chest | |||
| Small Key | |||
| Appears in the [[Dinolfos]] room once all of the [[Enemy|Enemies]] have been defeated | |||
}} | |||
}} | |||
[[ | {{Heading|Lava Room}} | ||
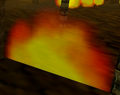
[[File:Fire Room.jpg|thumb|right|320px|alt= A screenshot of the Lava Room from the position of the Door to the underwater gem room. Several stone platforms populate the pit of Lava below.|The Lava Room]] | |||
The Lava Room<!-- Choosing to not make this a page. - Tony 30.6.2024 --> is a [[Lava]]-filled chamber with four exits.<ref>{{Cite eGuide|quote= Gerudo Training Grounds |game= OoT3D |guide= Prima |page= |section= Master Quest § Spirit Temple}}</ref> To the south, it is connected to the [[Dinolfos]] room. To the west it is connected to the dead-end portion of the Treasure Room. Its eastern exit is the only means of entering the underwater gem room, and its northern exit leads to the [[Megaton Hammer]] room. There are five stone platforms spread unevenly throughout the Lava. To safely travel between these platforms, [[Link]] must use the [[Hover Boots]] that are found in the [[Shadow Temple]]. However, there are also [[Torch]]es spread throughout the northern, eastern, and southern exits to the room which Link can instead grapple to with the [[Water Temple]]'s [[Longshot]]. Near the center of the room, Link can play the "[[Song of Time]]" to summon a couple [[Time Block]]s that act as stairs to the western exit, which is on a higher level than the rest of the room. A [[Small Key]] can be found on the ground of the level leading to the Treasure Room. | |||
When Link enters the room, he is instructed to "cross the sea of fire" as five [[Silver Rupee]]s are spread throughout the room. The [[Door]] to the underwater gem room will also be blocked by a portcullis, preventing entry. Three of these Silver Rupees sit in the open on the stone platforms, while one floats in the air near a [[Hookshot]] [[Target]] by the [[Door]] to the Megaton Hammer room. The fifth Rupee is found on a stone platform between the Megaton Hammer room and the Treasure Room. However, it is protected by a [[Flame Wall]], which can only be temporarily disabled by pressing the [[Floor Switch]] on the ledge south of the entrance to the Treasure Room. This disables the Flame Wall for roughly 20 seconds, allowing Link time to reach it and escape. When Link has obtained all five Silver Rupees, the portcullis blocking the underwater gem room will raise, granting him entry. If Link falls into the Lava, he will void out and the room will also reset if the Silver Rupees have not been collected. | |||
In {{MQ}} mode, there are now six Silver Rupees which have been relocated to sit atop each of the stone platforms and below the entrance to the Treasure Room. Flame Walls now guard each of the Silver Rupees and the Time Blocks and Floor Switch are now absent. There is no longer a Small Key sitting in the open within this room and the Torch by the underwater gem room has changed to a type of Torch that only temporarily stays lit. It is unlit by default, and igniting it will temporarily cause the Flame Walls to disappear. As before, the Door to the underwater gem room is blocked by a portcullis that will only raise when the Silver Rupees have been collected. When the Door is opened, Hookshot Target towers will raise from the Lava between the stone platforms, giving Link an alternate method of navigating the room to account for the Flame Walls reappearing. The ledge leading to the Megaton Hammer room features a [[Rusty Switch]] that summons a Hookshot Target tower atop the ledge leading to a segment of the Treasure Room. | |||
{{Collapsible | |||
|header= Enemies specific to the Lava Room | |||
|collapse= true | |||
|content= | |||
{{Listing Container| | |||
{{Listing Item|header= Enemies in ''Normal Quest'' mode|content= | |||
{{Gallery List|Enemies | |||
|OoT= Flame Wall [2][Qty:1], Lava, Red Bubble [Qty:2]{{List Notes|Two [[Zelda Wiki:Glossary#Reappear|reappear]] once certain loading zones have been entered.}} | |||
}} | |||
{{List Notes}} | |||
}} | |||
= | {{Listing Item|header= Enemies in {{MQ|-}} mode|content= | ||
{{Gallery List| | {{Gallery List|Enemies | ||
|OoT= | |OoT= Flame Wall [2][Qty:5], Lava, Red Bubble [Qty:3] | ||
}} | |||
}} | |||
}} | |||
}} | }} | ||
{{Heading|Underwater gem room}} | |||
{{ | The underwater gem room features a large stonework pool. The entrance to this pool is obstructed by four [[Time Block]]s which can be removed by playing the "[[Song of Time]]". Each wall of the pool's interior has four apertures and a single [[Hookshot]] [[Target]]. Inside the pool, there are a number of [[Silver Rupee]]s that Link must collect in order to pass its trial.<ref>{{Cite|Collect the {{Color|OoT3D Red|underwater gems}}!|N/A|OoT3D}}</ref> However, the pool moves in a counter-clockwise direction in tandem with a [[Blade Trap]] at its bottom. When all of the Rupees have been collected, a [[Treasure Chest]] will appear above the pool. | ||
In {{MQ}} mode, the Time Blocks obstructing the pool are absent and have been replaced by a [[Web]]. The number of Silver Rupees has been reduced to three and the composition of [[Enemy|Enemies]] within the room has been altered. Because of the mirroring effect that is present in {{OoT3D}}'s {{MQ|-}} mode, the [[Water (Terrain)|Water]] inside the pool now moves in a clockwise direction. | |||
{{Collapsible | |||
|header= Enemies specific to the underwater gem room | |||
|collapse= true | |||
|content= | |||
{{Listing Container| | |||
{{Listing Item|header= Enemies in ''Normal Quest'' mode|content= | |||
{{Gallery List|Enemies | {{Gallery List|Enemies | ||
|OoT= Blade Trap [Qty:1], | |OoT= Blade Trap [Qty:1], Shell Blade [Qty:4] | ||
}} | |||
}} | }} | ||
{{ | {{Listing Item|header= Enemies in {{MQ|-}} mode|content= | ||
{{Gallery List|Enemies | {{Gallery List|Enemies | ||
|OoT= | |OoT= Bari [Qty:1], Shell Blade [Qty:1], Stinger [Qty:2] | ||
}} | |||
}} | |||
}} | |||
}} | }} | ||
{{Heading|Silver | {{Collapsible | ||
|header= Treasure Chests specific to the underwater gem room | |||
|collapse= true | |||
|content= | |||
{{Heading|Treasure Chests in ''Normal Quest'' mode}} | |||
{{Treasure Chests|game= OoT3D | |||
|- | |||
| Treasure Chest | |||
| Small Key | |||
| Appears in the underwater gem room once the [[Silver Rupee]]s have been collected | |||
}} | |||
{{Heading|Treasure Chests in {{MQ|-}} mode}} | |||
{{Treasure Chests|game= OoT3D | |||
|- | |||
| Treasure Chest | |||
| Small Key | |||
| Appears in the underwater gem room once the [[Silver Rupee]]s have been collected | |||
}} | |||
}} | |||
{{Heading|Megaton Hammer room}} | |||
The [[Megaton Hammer]] room is connected to the [[Statue]] room and the Lava Room. A stone pathway leading from the center of the room to the Statue room helps to distinguish the exits. Likewise, a [[Crest of the Gerudo]] sits above the entrance to the Lava Room. When [[Link]] enters the Megaton Hammer room, portcullises will cover the [[Door]]s leading from it, trapping him inside. Stacked stone [[Totem (Object)|Totems]] are spread along the walls of this room. These Totems can be destroyed with the Megaton Hammer to reveal things hiding beneath them. A circular [[Flame Wall]] guards a [[Treasure Chest]] at the center of the room and several [[Enemy|Enemies]] inhabit the room. By defeating these Enemies, Link can release the portcullises and cause a Treasure Chest to appear along one of the walls in the room. However, the Flame Wall will remain until its corresponding [[Floor Switch]] is pressed. This Floor Switch is hidden under a single Totem on the wall opposite the Statue room entrance, distinguished by the aforementioned stone pathway. | |||
In {{MQ}} mode, Link is instead required to defeat all of the Enemies in the room, excluding the Flame Wall at the center, within one minute.<ref name="Limited Time"/> As before, portcullises will block the exits to the room until the Enemies have been defeated and a Treasure Chest will then appear. The Totem blocks are no longer present, leaving the Floor Switch exposed. The Floor Switch will cause the Flame Wall to disappear, though the Treasure Chest that is normally found here is hidden by another puzzle. In order to reveal the Treasure Chest, Link must strike the Crest of the Gerudo along the wall above the Door leading to the Lava Room. | |||
{{Collapsible | |||
|header= Enemies specific to the Megaton Hammer room | |||
|collapse= true | |||
|content= | |||
{{Listing Container| | |||
{{Listing Item|header= Enemies in ''Normal Quest'' mode|content= | |||
{{Gallery List|Enemies | {{Gallery List|Enemies | ||
|OoT= | |OoT= Fire Keese [Qty:2], Flame Wall [2][Qty:1], Torch Slug [Qty:2] | ||
}} | |||
}} | }} | ||
{{ | {{Listing Item|header= Enemies in {{MQ|-}} mode|content= | ||
{{Gallery List|Enemies | {{Gallery List|Enemies | ||
|OoT= | |OoT= Iron Knuckle [3][Qty:1], Flame Wall [2][Qty:1], Torch Slug [Qty:2] | ||
}} | |||
}} | |||
}} | |||
}} | |||
{{Collapsible | |||
|header= Treasure Chests specific to the Megaton Hammer room | |||
|collapse= true | |||
|content= | |||
{{Heading|Treasure Chests in ''Normal Quest'' mode}} | |||
{{Treasure Chests|game= OoT3D | |||
|- | |||
| Treasure Chest | |||
| Bundle of Arrows | |||
| Appears in the [[Megaton Hammer]] room once the [[Fire Keese]] and [[Torch Slug]]s have been defeated | |||
|- | |||
| Treasure Chest | |||
| Small Key | |||
| In the center of the [[Megaton Hammer]] room<br/>Surrounded by a [[Flame Wall]] that disappears after its corresponding [[Floor Switch]] is pressed | |||
}} | |||
{{Heading|Treasure Chests in {{MQ|-}} mode}} | |||
{{Treasure Chests|game= OoT3D | |||
|- | |||
| Treasure Chest | |||
| Bundle of Arrows | |||
| Appears in the [[Megaton Hammer]] room once the [[Iron Knuckle]] and [[Torch Slug]]s have been defeated | |||
|- | |||
| Treasure Chest | |||
| Small Key | |||
| Appears in the [[Megaton Hammer]] room once the [[Crest of the Gerudo]] above the [[Door]] has been struck | |||
}} | |||
}} | }} | ||
{{Heading|Statue room}} | {{Heading|Statue room}} | ||
The [[Statue]] room is divided into two levels, the top level consists of a floor along the wall connected to the [[Silver Gauntlets]] room and an isolated section of the Treasure Room. The [[Door]] to the Treasure Room is obstructed by a portcullis, however. The bottom level features a circular floor along the wall with a pit of [[Lava]] in its center. When [[Link]] sets foot onto the circular floor, it will begin revolving around the room. A Door to the [[Megaton Hammer]] room can also be found on this level. Above this Door, there is a [[Hookshot]] [[Target]]. | |||
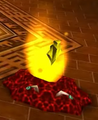
Inside the Lava pit, there is a Statue with four faces. Each face has a single [[Eye]] which Link is prompted to strike with either the [[Bow]] or [[Hookshot]].<ref>{{Cite|Blind the {{Color|OoT3D Red|eyes of the statue}}!|N/A|OoT3D}}</ref> By doing so, Link can release the portcullis over the Door to the Treasure Room and cause a [[Treasure Chest]] to appear at the center of the room. However, Link has a limited amount of time to strike all of the Eyes. If he takes longer than 20.24 seconds, the Eyes will reset, forcing him to restart.{{Note|In {{OoT3D}}, the Eyes are set to reset after 624 frames. At 30 frames per second, this results in a time limit of 20.24 seconds. In prior versions of {{OoT}}, the Eyes are programmed to reset after 416 frames instead, which equals to 20.16 seconds at 20 frames per second. As a result, {{OoT3D}} provides an additional .08 seconds to complete the puzzle.}} By playing the "[[Scarecrow's Song]]", Link can summon [[Pierre]] at the top level, providing an easy way to travel between the room's levels via Hookshot. | |||
In {{MQ}} mode, the Statue at the center of the room is surrounded by [[Flame Wall]]s and both Pierre's spot and the Hookshot Target are absent. Instead, Hookshot Target towers can be seen at the top level and above the Statue. Striking the Eyes of the Statue now causes a Treasure Chest to appear along the circular floor instead, and it no longer raises the portcullis over the Door to the Treasure Room. To release this portcullis, Link can instead strike a [[Crystal Switch]] hidden in one of the Flame Walls opposite the top floor. | |||
{{Collapsible | |||
|header= Enemies specific to the Statue room | |||
|collapse= true | |||
|content= | |||
{{Listing Container| | |||
{{Listing Item|header= Enemies in ''Normal Quest'' mode|content= | |||
{{Gallery List|Enemies | {{Gallery List|Enemies | ||
|OoT= Lava | |OoT= Lava | ||
}} | |||
}} | }} | ||
{{ | {{Listing Item|header= Enemies in {{MQ|-}} mode|content= | ||
{{Gallery List|Enemies | {{Gallery List|Enemies | ||
|OoT= | |OoT= Flame Wall [2][Qty:8], Lava | ||
}} | |||
}} | |||
}} | |||
}} | |||
{{Collapsible | |||
|header= Treasure Chests specific to the Statue room | |||
|collapse= true | |||
|content= | |||
{{Heading|Treasure Chests in ''Normal Quest'' mode}} | |||
{{Treasure Chests|game= OoT3D | |||
|- | |||
| Treasure Chest | |||
| Small Key | |||
| Appears in the [[Statue]] room after all of the eyes have been struck | |||
}} | |||
{{Heading|Treasure Chests in {{MQ|-}} mode}} | |||
{{Treasure Chests|game= OoT3D | |||
|- | |||
| Treasure Chest | |||
| Bombchu | |||
| Appears in the [[Statue]] room after all of the eyes have been struck | |||
}} | |||
}} | }} | ||
{{Heading| | {{Heading|Silver Gauntlets room}} | ||
The [[Silver Gauntlets]] room is located between the obstacle course room and the [[Statue]] room. It is also the only room that connects to the sand pit room. This room is divided into two levels. AT the base level, there is an arena where [[Link]] must fight against [[Wolfos]]. Along the far wall opposite the obstacle course room's [[Door]], there is a large [[Block]] that can only be moved with the strength of the Silver Gauntlets. This Block guards the Door to the sand pit room, which is obstructed by a portcullis. Along the wall to the right of the Block there is a trick wall. Link can use the [[Lens of Truth]] to see through this trick wall to either reveal the second level, or see the first level below. There is a [[Hookshot]] [[Target]] on the ceiling behind this trick wall, which grants Link the ability to ascend to the second level. This second level leads to the Statue room. In front of the Door to this room there is a [[Floor Switch]], which lifts the portcullis over the Door to the sand pit room when pressed. Once all of the Wolfos have been defeated, a [[Treasure Chest]] will appear on the floor near the Block. | |||
In {{MQ}} mode, this arena contains a different set of [[Enemy|Enemies]] which Link must defeat within the span of a minute.<ref name="Limited Time"/> Additionally, there is a [[Blue Fire]] pedestal on the base level of the room. As before, both the trick wall and the heavy Block are present, though the door to the Statue room is now obstructed by both a portcullis and a wall of [[Red Ice]]. Once all of the Enemies have been defeated, a Treasure Chest will appear on the floor opposite the Blue Fire pedestal. As the Hookshot Target on the second level is now absent, Link must instead play the "[[Song of Time]]" near the trick wall to summon a [[Time Block]] to ascend up toward it. | |||
{{Collapsible | |||
|header= Enemies specific to the Silver Gauntlets room | |||
|collapse= true | |||
|content= | |||
{{Listing Container| | |||
{{Listing Item|header= Enemies in ''Normal Quest'' mode|content= | |||
{{Gallery List|Enemies | {{Gallery List|Enemies | ||
|OoT= | |OoT= Trap Door [Qty:1]{{List Note|One [[Zelda Wiki:Glossary#Reappear|reappears]] indefinitely.}}, White Wolfos [Qty:2]{{List Note|name= Wolfos|Two do not [[Zelda Wiki:Glossary#Reappear|reappear]]. However, both will reappear if Link leaves and returns before defeating all of the Wolfos and White Wolfos in the room.}}, Wolfos [Qty:2]{{List Note|name= Wolfos}} | ||
}} | |||
{{List Notes}} | |||
}} | }} | ||
{{ | {{Listing Item|header= Enemies in {{MQ|-}} mode|content= | ||
{{Gallery List|Enemies | {{Gallery List|Enemies | ||
|OoT= | |OoT= Big Skulltula [Qty:3], Stalfos [Qty:2] | ||
}} | |||
}} | |||
}} | |||
}} | |||
{{Collapsible | |||
|header= Treasure Chests specific to the Silver Gauntlets room | |||
|collapse= true | |||
|content= | |||
{{Heading|Treasure Chests in ''Normal Quest'' mode}} | |||
{{Treasure Chests|game= OoT3D | |||
|- | |||
| Treasure Chest | |||
| Bundle of Arrows [2] | |||
| Appears in the [[Silver Gauntlets]] room once all of the Wolfos have been defeated | |||
}} | |||
{{Heading|Treasure Chests in {{MQ|-}} mode}} | |||
{{Treasure Chests|game= OoT3D | |||
|- | |||
| Treasure Chest | |||
| Bundle of Arrows | |||
| Appears in the [[Silver Gauntlets]] room once all of the [[Enemy|Enemies]] have been defeated | |||
}} | |||
}} | }} | ||
{{Heading| | {{Heading|Sand pit room}} | ||
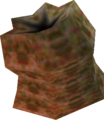
The sand pit room is a dead-end chamber that features three sand pits and an altar at its end. Like Likes occupy each of these sand pits, which all house [[Treasure Chest]]s. A [[Tricky Chest]] sits atop the altar as a trap, while an [[Invisible Chest]] can be found in the third sand pit. Two Treasure Chests will appear in the first and second pits when all of the Like Likes have been defeated. | |||
In {{MQ}} mode, the Like Likes have been replaced with [[Spike]]s and the Tricky Chest is now absent. A Treasure Chest will appear on the altar once all of the [[Enemy|Enemies]] in this room have been defeated. | |||
{{Collapsible | |||
|header= Enemies specific to the sand pit room | |||
|collapse= true | |||
|content= | |||
{{Listing Container| | |||
{{Listing Item|header= Enemies in ''Normal Quest'' mode|content= | |||
{{Gallery List|Enemies | {{Gallery List|Enemies | ||
|OoT= | |OoT= Like Like [Qty:3], Tricky Chest [Qty:1] | ||
}} | |||
}} | }} | ||
= | {{Listing Item|header= Enemies in {{MQ|-}} mode|content= | ||
{{Gallery List|Enemies | {{Gallery List|Enemies | ||
|OoT= | |OoT= Freezard [Qty:2], Spike [Qty:3] | ||
}} | |||
}} | |||
}} | |||
}} | }} | ||
{{Heading| | {{Collapsible | ||
{{ | |header= Treasure Chests specific to the sand pit room | ||
|collapse= true | |||
|content= | |||
{{Heading|Treasure Chests in ''Normal Quest'' mode}} | |||
{{Treasure Chests|game= OoT3D | |||
|- | |||
| Invisible Chest | |||
| Small Key | |||
| In the third pit in the sand pit room | |||
|- | |||
| Treasure Chest | |||
| Gold Rupee | |||
| Appears in the first pit in the sand pit room once all of the [[Enemy|Enemies]] have been defeated | |||
|- | |||
| Treasure Chest | |||
| Blue Rupee | |||
| In the second pit in the sand pit room once all of the [[Enemy|Enemies]] have been defeated | |||
}} | |||
{{Heading|Treasure Chests in {{MQ|-}} mode}} | |||
{{Treasure Chests|game= OoT3D | |||
|- | |||
| Treasure Chest | |||
| Purple Rupee | |||
| Appears in the sand pit room once all of the [[Enemy|Enemies]] have been defeated | |||
}} | |||
}} | }} | ||
{{Heading| | {{Heading|Obstacle course room}} | ||
The obstacle course room is situated between the stone garden room and the [[Silver Gauntlets]] room. It is composed of three corridors that rise in elevation with three hallways on each side of the central corridor connecting them. The flanking corridors have [[Boulder]]s rolling through them periodically as they appear from chutes at the beginnings of each corridor and fall into pits at their respective ends. Instead of containing walkable ramps like its flanking corridors, the final third of the central corridor is separated by a tall ledge. Within the central corridor, there are three [[Hookshot]] [[Target]]s spread along the ceiling. The first sits in the middle of the corridor while another sits above the ledge to allow quick access to its upper level. The [[Door]] to the Silver Gauntlets room is found at the end of the central corridor. However, it is blocked by a portcullis and a [[Flame Wall]] that divides it from the rest of the corridor. The third Hookshot Target is found beyond this Flame Wall, giving Link a method of bypassing it. Additionally, the first hallway to the right and third hallway to the left of the central corridor are blocked by Flame Walls. | |||
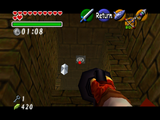
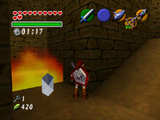
When Link enters the room, he is instructed to gather the five [[Silver Rupee]]s hidden throughout it within the time limit of one minute and thirty seconds.<ref>{{Cite|Gather the {{Color|OoT3D Red|jewels of white}} while avoiding traps and danger!|N/A|OoT3D}}</ref> The locations of these Rupees are as follows: | |||
<div style="max-width:46rem; margin:auto;"><gallery class="center" widths="320px"> | |||
File:OoT Gerudo Training Ground Silver Rupee.png|Floating off the ledge in the central corridor | |||
File:OoT Gerudo Training Ground Silver Rupee 2.png|On the right side of the first hallway connecting the central and right-side corridors | |||
File:OoT Gerudo Training Ground Silver Rupee 3.png|Floating beneath the Hookshot Target in the middle of the central corridor | |||
File:OoT Gerudo Training Ground Silver Rupee 4.png|At the end of the left-side corridor | |||
File:OoT Gerudo Training Ground Silver Rupee 5.png|At the start of the left-side corridor | |||
</gallery></div> | |||
After this trial is completed, the portcullis over the Door to the Silver Gauntlets room will raise. However, the Boulders will continue to appear and roll through the flanking corridors. | |||
In {{MQ}} mode, the Boulders are no longer present as a number of [[Ice]]-related obstacles now occupy the room's flanking hallways. As before, the Door to the Silver Gauntlets room will be blocked by a portcullis until the trial is completed by collecting the Silver Rupees. However, there is no longer a time limit and there are only four Rupees to collect. The Hookshot Targets and Flame Walls have also been relocated. | |||
* Beneath the ledge in the central corridor | |||
* Beneath the Hookshot Target on the ceiling near the beginning of the central corridor | |||
* At the start of the left-side corridor | |||
* Inside the pit of the left-side corridor | |||
When the trial is completed, a Hookshot Target tower will appear near the Door to the Silver Gauntlets room, allowing an easy way to bypass the Flame Wall blocking it. | |||
{{Collapsible | |||
|header= Enemies specific to the obstacle course room | |||
|collapse= true | |||
|content= | |||
{{Listing Container| | |||
{{Listing Item|header= Enemies in ''Normal Quest'' mode|content= | |||
{{Gallery List|Enemies | {{Gallery List|Enemies | ||
|OoT= | |OoT= Boulder [Qty:2], Flame Wall [Qty:3], Wallmaster [Qty:1]{{List Note|One does not [[Zelda Wiki:Glossary#Reappear|reappear]].}} | ||
}} | |||
{{List Notes}} | |||
}} | }} | ||
{{ | {{Listing Item|header= Enemies in {{MQ|-}} mode|content= | ||
{{Gallery List|Enemies | {{Gallery List|Enemies | ||
|OoT= | |OoT= Flame Wall [Qty:3], Freezard [Qty:1], Icicle [Qty:8], Wallmaster [Qty:1] | ||
}} | |||
}} | |||
}} | |||
}} | }} | ||
{{Heading|Stone garden room}} | {{Heading|Stone garden room}} | ||
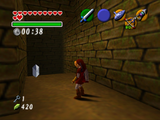
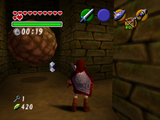
The stone garden room is connected to the entrance chamber to the east and the obstacle course room to the north. It is a spacious chamber with a sandy arena at its center. Four rocks decorate the interior of the arena. As [[Link]] enters the room, a portcullis will close over the [[Door]] to the obstacle course room and a pair of [[Stalfos]] will appear to challenge him. In order to complete the trial, Link must defeat both Stalfos within one minute.<ref name="Limited Time">{{Cite|Defeat all the enemies in a {{Color|OoT3D Red|limited time}}!|N/A|OoT3D}}</ref> However, the sandy arena will draw Link down into it, slowing his movement if he stands still and making the trial more difficult. Once both Stalfos have been defeated, a Treasure Chest will appear and the portcullis blocking the Door to the obstacle course room will raise. | |||
In {{MQ}} mode, Link is instead tasked with defeating a single [[Iron Knuckle]]. As before, Link only has one minute's worth of time to complete the trial and a Treasure Chest will appear once it is completed. The [[Blade Trap]] near the Door to the entrance chamber is no longer present. | |||
{{Collapsible | |||
|header= Enemies specific to the stone garden room | |||
|collapse= true | |||
|content= | |||
{{Listing Container| | |||
{{Listing Item|header= Enemies in ''Normal Quest'' mode|content= | |||
{{Gallery List|Enemies | {{Gallery List|Enemies | ||
|OoT= | |OoT= Blade Trap [Qty:1], Stalfos [Qty:2]{{List Note|Two do not [[Zelda Wiki:Glossary#Reappear|reappear]]. However, each will reappear if Link leaves and returns before defeating them both.}} | ||
}} | |||
{{List Notes}} | |||
}} | }} | ||
{{ | {{Listing Item|header= Enemies in {{MQ|-}} mode|content= | ||
{{Gallery List|Enemies | {{Gallery List|Enemies | ||
|OoT= | |OoT= Iron Knuckle [Qty:1]{{List Note|One does not [[Zelda Wiki:Glossary#Reappear|reappear]].}} | ||
}} | |||
{{List Notes}} | |||
}} | |||
}} | |||
}} | |||
{{Collapsible | |||
|header= Treasure Chests specific to the stone garden room | |||
|collapse= true | |||
|content= | |||
{{Heading|Treasure Chests in ''Normal Quest'' mode}} | |||
{{Treasure Chests|game= OoT3D | |||
|- | |||
| Treasure Chest | |||
| Small Key | |||
| Appears in the stone garden room after the [[Stalfos]] have been defeated | |||
}} | |||
{{Heading|Treasure Chests in {{MQ|-}} mode}} | |||
{{Treasure Chests|game= OoT3D | |||
|- | |||
| Treasure Chest | |||
| Blue Rupee | |||
| Appears in the stone garden room once the [[Iron Knuckle]] has been defeated | |||
}} | |||
}} | |||
{{Heading|Treasure Room}} | |||
The Treasure Room<!-- Choosing to not make this a page. - Tony 30.6.2024 --> is connected to the entrance room, the upper level of the Lava Room, and the upper level of the [[Statue]] room.<ref>{{Cite Guide|quote= |game= OoT |guide= Versus |page= 121}}</ref> It is a spacious chamber separated by fencing which creates cells. These fences can be climbed, although this is only useful to do in one specific cell. Most of these cells are locked off from each other, requiring [[Small Key]]s to traverse between them. From the entrance room's [[Door]], the cells branch in two directions. The path to the left leads to the cell containing the [[Dungeon]]'s treasure, the [[Ice Arrow]]. The path to the right leads to a dead-end and connects to the Lava Room. A disconnected chamber in this room is accessible only by entering from the upper level of the Statue room. From this chamber, [[Link]] can see another seemingly disconnected chamber with a [[Treasure Chest]]. He is also able to view the cell housing the Treasure Chest containing the Ice Arrow from above. | |||
When Link enters the room, he is prompted to retrieve the Small Keys spread throughout the Dungeon.<ref>{{Cite|If you desire to acquire our hidden treasure, you must strive to obtain the {{Color|OoT3D Red|keys}} hidden in each chamber!|N/A|OoT3D}}</ref> In order to reach the Ice Arrow, Link must have a total of seven Small Keys, starting from the entrance room's Door. Two additional Small Keys may be used to fully unlock this room through its dead-end route. The aforementioned disconnected chamber with a Treasure Chest is accessible from the first cell to the left of the entrance Door. This cell has an illusory ceiling which can be passed through to reach it. Several of the cells have their own Treasure Chests, which only provide rewards like [[Rupee]]s. | |||
In {{MQ}} mode, only the three Doors leading to the central cell are locked. The Treasure Chest containing the Ice Arrow is also no longer located in the central cell. Instead, there is now a [[Wooden Box]] concealing a [[Rusty Switch]] that summons the Treasure Chest when activated. This Treasure Chest appears in the isolated segment of the room connected to the Statue room. This side chamber is now decorated with fuchsia flames where two Torches once stood which help to draw attention to it from below and from the adjacent chamber with the illusory floor. | |||
{{Collapsible | |||
|header= Treasure Chests specific to the Treasure Room | |||
|collapse= true | |||
|content= | |||
{{Heading|Treasure Chests in ''Normal Quest'' mode}} | |||
{{Treasure Chests|game= OoT3D | |||
|- | |||
| Treasure Chest | |||
| Small Key | |||
| In the segment of the Treasure Room connected to the upper floor of the [[Statue]] room | |||
|- | |||
| Treasure Chest | |||
| Bombchu {{Qty|5}} | |||
| In the segment of the Treasure Room connected to the Lava Room | |||
|- | |||
| Treasure Chest | |||
| Bundle of Arrows [2] | |||
| In the segment of the Treasure Room connected to the Lava Room | |||
|- | |||
| Treasure Chest | |||
| Small Key | |||
| On a floor above the first room to the left in the Treasure Room<br/>This floor is located above the fencing beside the [[Door]] inside the room; the ceiling is an illusion and can be passed through<br/>Requires at least one Small Key to access | |||
|- | |||
| Treasure Chest | |||
| Purple Rupee | |||
| Inside the second room to the left in the Treasure Room<br/>Requires at least two [[Small Key]]s to access | |||
|- | |||
| Treasure Chest | |||
| Red Rupee | |||
| Inside the fourth room to the left in the Treasure Room<br/>Requires at least four [[Small Key]]s to access | |||
|- | |||
| Treasure Chest | |||
| Bundle of Arrows [2] | |||
| Inside the fifth room to the left in the Treasure Room<br/>Requires at least five [[Small Key]]s to access | |||
|- | |||
| Treasure Chest [2] | |||
| Ice Arrow | |||
| In the center of the Treasure Room<br/>Requires at least seven [[Small Key]]s to access | |||
}} | }} | ||
{{Heading| | {{Heading|Treasure Chests in {{MQ|-}} mode}} | ||
{{ | {{Treasure Chests|game= OoT3D | ||
|- | |||
| Treasure Chest | |||
| Blue Rupee | |||
| In the segment of the Treasure Room connected to the Lava Room | |||
|- | |||
| Treasure Chest | |||
| Green Rupee | |||
| In the segment of the Treasure Room connected to the Lava Room | |||
|- | |||
| Treasure Chest | |||
| Purple Rupee | |||
| On a floor above the first room to the right in the Treasure Room<br/>This floor is located above the fencing beside the [[Door]] inside the room; the ceiling is an illusion and can be passed through | |||
|- | |||
| Treasure Chest | |||
| Green Rupee | |||
| Inside the second room to the right in the Treasure Room | |||
|- | |||
| Treasure Chest | |||
| Red Rupee | |||
| Inside the fourth room to the right in the Treasure Room | |||
|- | |||
| Treasure Chest | |||
| Green Rupee | |||
| Inside the fifth room to the right in the Treasure Room<br/>Requires at least one [[Small Key]] to access | |||
|- | |||
| Treasure Chest [2] | |||
| Ice Arrow | |||
| Appears in the segment of the Treasure Room connected to the upper floor of the [[Statue]] room once the [[Rusty Switch]] at the center of the room has been pressed<br/>Requires at least three [[Small Key]]s | |||
}} | |||
}} | }} | ||
===Animals=== | |||
{{Gallery List| | {{Gallery List|Animals | ||
|OoT= | |OoT= Fish | ||
}} | }} | ||
{{Heading| | ===Enemies=== | ||
{{Heading|''Normal Quest'' mode}} | |||
{{Gallery List|Enemies | {{Gallery List|Enemies | ||
|OoT= Flame Wall [2][Qty: | |OoT= Beamos [Qty:1], Boulder [Qty:2], Dinolfos [Qty:2], Door that Falls Down [Qty:1], Fire Keese [Qty:2], Flame Wall [Qty:3], Flame Wall [2][Qty:2], Lava, Like Like [Qty:3], Blade Trap [Qty:2], Red Bubble [Qty:2], Shell Blade [Qty:4], Stalfos [Qty:2], Torch Slug [Qty:2], Tricky Chest [Qty:1], Wallmaster [Qty:1], White Wolfos [Qty:2], Wolfos [Qty:2] | ||
|OoT3D= Beamos [Qty:1], Blade Trap [Qty:2], Boulder [Qty:2], Dinolfos [Qty:2], Fire Keese [Qty:2], Flame Wall [Qty:3], Flame Wall [2][Qty:2], Lava, Like Like [Qty:3], Red Bubble [Qty:2], Shell Blade [Qty:4], Stalfos [Qty:2], Torch Slug [Qty:2], Trap Door [Qty:1], Tricky Chest [Qty:1], Wallmaster [Qty:1], White Wolfos [Qty:2], Wolfos [Qty:2] | |||
}} | }} | ||
{{Heading| | {{Heading|{{MQ|-}} mode}} | ||
{{Gallery List|Enemies | {{Gallery List|Enemies | ||
|OoT= Iron Knuckle [3][Qty:1], | |OoT= Armos [Qty:1], Bari [Qty:1], Big Skulltula [Qty:3], Dinolfos [Qty:2], Dodongo [Qty:2], Flame Wall [Qty:3], Flame Wall [2][Qty:14], Freezard [Qty:3], Icicle [Qty:8], Iron Knuckle [Qty:1], Iron Knuckle [3][Qty:1], Lava, Lizalfos [Qty:1], Red Bubble [Qty:3], Shell Blade [Qty:1], Spike [Qty:3], Stalfos [Qty:2], Stinger [Qty:2], Torch Slug [Qty:2], Wallmaster [Qty:1] | ||
}} | }} | ||
===Treasure Chests=== | ===Treasure Chests=== | ||
{{Heading|''Normal Quest'' mode}} | |||
{{Treasure Chests|game= OoT3D | {{Treasure Chests|game= OoT3D | ||
|- | |- | ||
| Treasure Chest | | Treasure Chest | ||
| Bundle of Arrows | | Bundle of Arrows | ||
| Between the northeastern pillars in the entrance room | | Between the northeastern pillars in the entrance room<br/>Appears after the [[Eye Switch]] above the entrance is hit | ||
|- | |- | ||
| Treasure Chest | | Treasure Chest | ||
| Line 174: | Line 586: | ||
| Treasure Chest | | Treasure Chest | ||
| Small Key | | Small Key | ||
| | | Appears in the stone garden room after the [[Stalfos]] have been defeated | ||
|- | |- | ||
| Treasure Chest | | Treasure Chest | ||
| Bundle of Arrows [2] | | Bundle of Arrows [2] | ||
| Appears in the [[Silver Gauntlets]] room once all of the Wolfos have been defeated | | Appears in the [[Silver Gauntlets]] room once all of the Wolfos have been defeated | ||
|- | |- | ||
| Invisible Chest | | Invisible Chest | ||
| Line 191: | Line 599: | ||
| Gold Rupee | | Gold Rupee | ||
| Appears in the first pit in the sand pit room once all of the [[Enemy|Enemies]] have been defeated | | Appears in the first pit in the sand pit room once all of the [[Enemy|Enemies]] have been defeated | ||
|- | |||
| Treasure Chest | |||
| Blue Rupee | |||
| In the second pit in the sand pit room once all of the [[Enemy|Enemies]] have been defeated | |||
|- | |- | ||
| Treasure Chest | | Treasure Chest | ||
| Line 198: | Line 610: | ||
| Treasure Chest | | Treasure Chest | ||
| Small Key | | Small Key | ||
| In the segment of the | | In the segment of the Treasure Room connected to the upper floor of the [[Statue]] room | ||
|- | |- | ||
| Treasure Chest | | Treasure Chest | ||
| Bundle of Arrows | | Bundle of Arrows | ||
| Appears in the [[Megaton Hammer]] room | | Appears in the [[Megaton Hammer]] room once the [[Fire Keese]] and [[Torch Slug]]s have been defeated | ||
|- | |- | ||
| Treasure Chest | | Treasure Chest | ||
| Small Key | | Small Key | ||
| In the center of the [[Megaton Hammer]] room<br/>Surrounded by a [[Flame Wall]] that disappears after | | In the center of the [[Megaton Hammer]] room<br/>Surrounded by a [[Flame Wall]] that disappears after its corresponding [[Floor Switch]] is pressed | ||
|- | |- | ||
| Treasure Chest | | Treasure Chest | ||
| Bombchu | | Bombchu {{Qty|5}} | ||
| In the segment of the | | In the segment of the Treasure Room connected to the Lava Room | ||
|- | |- | ||
| Treasure Chest | | Treasure Chest | ||
| Bundle of Arrows [2] | | Bundle of Arrows [2] | ||
| In the segment of the | | In the segment of the Treasure Room connected to the Lava Room | ||
|- | |- | ||
| Treasure Chest | | Treasure Chest | ||
| Line 222: | Line 634: | ||
| Treasure Chest | | Treasure Chest | ||
| Small Key | | Small Key | ||
| Appears in the [[Dinolfos]] once all the [[Enemy|Enemies]] have been defeated | | Appears in the [[Dinolfos]] room once all of the [[Enemy|Enemies]] have been defeated | ||
|- | |- | ||
| Treasure Chest | | Treasure Chest | ||
| Small Key | | Small Key | ||
| On a floor above the first room to the left in the | | On a floor above the first room to the left in the Treasure Room<br/>This floor is located above the fencing beside the [[Door]] inside the room; the ceiling is an illusion and can be passed through<br/>Requires at least one Small Key to access | ||
|- | |- | ||
| Treasure Chest | | Treasure Chest | ||
| Purple Rupee | | Purple Rupee | ||
| Inside the second room to the left in the | | Inside the second room to the left in the Treasure Room<br/>Requires at least two [[Small Key]]s to access | ||
|- | |- | ||
| Treasure Chest | | Treasure Chest | ||
| Red Rupee | | Red Rupee | ||
| Inside the fourth room to the left in the | | Inside the fourth room to the left in the Treasure Room<br/>Requires at least four [[Small Key]]s to access | ||
|- | |- | ||
| Treasure Chest | | Treasure Chest | ||
| Bundle of Arrows [2] | | Bundle of Arrows [2] | ||
| Inside the fifth room to the left in the | | Inside the fifth room to the left in the Treasure Room<br/>Requires at least five [[Small Key]]s to access | ||
|- | |- | ||
| Treasure Chest [2] | | Treasure Chest [2] | ||
| Ice Arrow | | Ice Arrow | ||
| In the center of the | | In the center of the Treasure Room<br/>Requires at least seven [[Small Key]]s to access | ||
}} | }} | ||
{{Heading|{{MQ|-}}}} | {{Heading|{{MQ|-}} mode}} | ||
{{Treasure Chests|game= OoT3D | {{Treasure Chests|game= OoT3D | ||
|- | |- | ||
| Line 258: | Line 670: | ||
| Treasure Chest | | Treasure Chest | ||
| Small Key | | Small Key | ||
| Appears in the Dinolfos room once all the [[Enemy|Enemies]] have been defeated | | Appears in the [[Dinolfos]] room once all of the [[Enemy|Enemies]] have been defeated | ||
|- | |- | ||
| Treasure Chest | | Treasure Chest | ||
| Small Key | | Small Key | ||
| Appears in the underwater gem room once | | Appears in the underwater gem room once the [[Silver Rupee]]s have been collected | ||
|- | |- | ||
| Treasure Chest | | Treasure Chest | ||
| Line 270: | Line 682: | ||
| Treasure Chest | | Treasure Chest | ||
| Bundle of Arrows | | Bundle of Arrows | ||
| Appears in the [[Silver Gauntlets]] room once all the [[Enemy|Enemies]] have been defeated | | Appears in the [[Silver Gauntlets]] room once all of the [[Enemy|Enemies]] have been defeated | ||
|- | |- | ||
| Treasure Chest | | Treasure Chest | ||
| Purple Rupee | | Purple Rupee | ||
| Appears in the sand pit room once all the [[Enemy|Enemies]] have been defeated | | Appears in the sand pit room once all of the [[Enemy|Enemies]] have been defeated | ||
|- | |- | ||
| Treasure Chest | | Treasure Chest | ||
| Bombchu | | Bombchu | ||
| Appears in the [[Statue]] room | | Appears in the [[Statue]] room after all of the eyes have been struck | ||
|- | |- | ||
| Treasure Chest | | Treasure Chest | ||
| Line 290: | Line 702: | ||
| Treasure Chest | | Treasure Chest | ||
| Blue Rupee | | Blue Rupee | ||
| In the segment of the | | In the segment of the Treasure Room connected to the Lava Room | ||
|- | |- | ||
| Treasure Chest | | Treasure Chest | ||
| Green Rupee | | Green Rupee | ||
| In the segment of the | | In the segment of the Treasure Room connected to the Lava Room | ||
|- | |- | ||
| Treasure Chest | | Treasure Chest | ||
| Purple Rupee | | Purple Rupee | ||
| On a floor above the first room to the right in the | | On a floor above the first room to the right in the Treasure Room<br/>This floor is located above the fencing beside the [[Door]] inside the room; the ceiling is an illusion and can be passed through | ||
|- | |- | ||
| Treasure Chest | | Treasure Chest | ||
| Green Rupee | | Green Rupee | ||
| Inside the second room to the right in the | | Inside the second room to the right in the Treasure Room | ||
|- | |- | ||
| Treasure Chest | | Treasure Chest | ||
| Red Rupee | | Red Rupee | ||
| Inside the fourth room to the right in the | | Inside the fourth room to the right in the Treasure Room | ||
|- | |- | ||
| Treasure Chest | | Treasure Chest | ||
| Green Rupee | | Green Rupee | ||
| Inside the fifth room to the right in the | | Inside the fifth room to the right in the Treasure Room<br/>Requires at least one [[Small Key]] to access | ||
|- | |- | ||
| Treasure Chest [2] | | Treasure Chest [2] | ||
| Ice Arrow | | Ice Arrow | ||
| Appears in the segment of the | | Appears in the segment of the Treasure Room connected to the upper floor of the [[Statue]] room once the [[Rusty Switch]] at the center of the room has been pressed<br/>Requires at least three [[Small Key]]s | ||
}} | }} | ||
==Nomenclature== | ==Nomenclature== | ||
{{Nomenclature}} | {{Nomenclature}} | ||
===Other Names=== | |||
{{Other Names | |||
|- | |||
| Gerudo's Training Ground<ref>{{Cite|This is the Gerudo's {{Color|OoT Red|Training Ground}}. Membership card verified. One try for 10 Rupees!|Gerudo|OoT}}</ref> | |||
| {{OoT}} | |||
| {{OoT}} | |||
| {{OoT3D}} | |||
}} | |||
==Gallery== | ==Gallery== | ||
| Line 326: | Line 747: | ||
</gallery> | </gallery> | ||
{{Notes}} | |||
{{Ref}} | {{Ref}} | ||
{{DungeonNav2|OoT}} | {{DungeonNav2|OoT}} | ||
{{Categories | {{Categories | ||
|dungeons= OoT, OoT3D | |dungeons= OoT, OoT3D | ||
Latest revision as of 21:57, 30 June 2024
The Gerudo Training Ground is an optional mini-dungeon in Ocarina of Time.(OoT | OoT3D)[1] It consists of various difficult obstacles that Link must overcome in order to prove his abilities as a hero. If he manages to complete the training ground, he will be rewarded with the Ice Arrow as proof of his skill.[2]
Entrance to the Training Ground
The Gerudo Training Ground can be found within the Gerudo's Fortress. In order to enter, Link must speak to a Gerudo standing guard outside of the Dungeon. The cost for entry is proof of membership with the Gerudo Token and a fee of 10 Rupees.[3][4] If Link leaves the Dungeon at any point after paying, the gate blocking its entrance will return and he will have to pay another fee to enter. The gate will also close if Link travels too far away from it while at the Gerudo's Fortress. Link will still be charged a fee to enter even if he completes the Dungeon.
The Gerudo Training Ground consists of a labyrinth wherein each room serves as a trial. The room containing the Dungeon's treasure, the Ice Arrow, is accessible from the entrance, though the treasure can only be obtained by completing the trials and collecting Small Keys throughout the Dungeon. A total of nine Locked Doors are present in the Training Ground, though only seven are required to reach the treasure. A handful of these trials feature time limits which will void Link out if they are not completed in time, dealing a quarter of a Heart of damage and resetting their challenges. Silver Rupees are also used as components for these trials, requiring Link to collect all of the Rupees in a room in order to complete their trials. Each Silver Rupee grants five Rupees. If Link leaves a room or a room is reset, any Silver Rupees that were collected and any Enemies that were defeated will return, though Link will be able to retain any money he obtained from collecting them. When a trial is completed, its puzzles will permanently remain completed and any Enemies that must be defeated to advance will no longer appear as well.
To fully navigate the Gerudo Training Ground, Link needs the Fairy Bow from the Forest Temple, the Megaton Hammer from the Fire Temple, the Hookshot from Kakariko Village's Graveyard, and the Iron Boots from the Ice Cavern. The Silver Gauntlets from the Spirit Temple, the Lens of Truth from the Bottom of the Well, and the Hover Boots from the Shadow Temple are optional but useful tools to navigate the Dungeon. However, none of these three Items are strictly necessary to reach the Dungeon's treasure as though the Lens of Truth helps to see through various illusory walls and floors and to locate a single Invisible Chest, Link can navigate through the illusory segments and open the Invisible Chest without them. The Silver Gauntlets are used to obtain an optional Small Key and though they help with crossing the Lava Room, the Hover Boots are made unnecessary if Link summons Time Blocks instead.
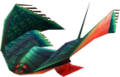
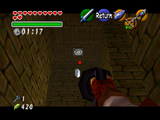
The entrance to the Training Ground opens into a cavern lit by two Torches. Four pillars surround these Torches in a semicircular formation. Beyond these pillars, there are three doorways, decorated with Lion carvings. To the north is the Treasure Room housing the Ice Arrow. To the west is the stone garden room, and to the south is the Dinolfos room.
An Eye Switch sits on the wall above the entrance. By striking the Eye Switch with an Arrow, Link can cause two Treasure Chests to appear. One is found between the northwestern pillars, while the other is between the northeastern pillars. Link can play the "Song of Storms" between the northern pillars to find a Big Fairy. This Big Fairy can be summoned at any point that Link reenters the entrance room. As Link approaches one of the Doors that lead further into the Dungeon, he will be given instructions to complete the trials ahead.[5]
In Master Quest mode, the east and west Doors are blocked by portcullises and the two Torches at the center of the room have been replaced by another variety which are unlit by default. By igniting these Torches, Link can unlock the rooms to each side and advance. There is no longer an Eye Switch in this room and no Big Fairy that can be summoned.
Treasure Chests in Normal Quest mode
| Treasure Chest | |
|---|---|
| Contents | |
| Notes | Between the northeastern pillars in the entrance room |
| Treasure Chest | |
| Contents | |
| Notes | Between the northwestern pillars in the entrance room |


| Treasure Chest | Contents | Notes |
|---|---|---|
Between the northeastern pillars in the entrance room | ||
Between the northwestern pillars in the entrance room |
Treasure Chests in Master Quest mode
| Treasure Chest | |
|---|---|
| Contents | |
| Notes | Between the northwestern pillars in the entrance room |
| Treasure Chest | |
| Contents | |
| Notes | Between the northeastern pillars in the entrance room |
| Treasure Chest | Contents | Notes |
|---|---|---|
Between the northwestern pillars in the entrance room | ||
Between the northeastern pillars in the entrance room |
Dinolfos room
The Dinolfos room is a chamber that is connected to the entrance room and the Lava Room. The sides of the room are accented with ledges that Link can climb onto. However, these ledges are guarded from the front by Flame Walls. Two Recovery Hearts sit along the longest ledge. When Link enters the room, the Door to the Lava Room will be blocked by a portcullis and he will be instructed to defeat the Enemies inside within a time limit of one minute and thirty seconds.[6] When this trial is completed, the portcullis over the Door to the Lava Room will raise and a Treasure Chest will appear.
In Master Quest mode, the composition of Enemies has been changed. In addition to the removal of the Beamos at the center of the room, there are now two Dodongos and a Lizalfos will descend from the ceiling when Link walks in. The Recovery Hearts are also absent, and the time limit has been reduced by thirty seconds, resulting in the trial lasting for one minute. Finally, the Flame Walls are now absent as a lone Armos sits atop the longest ledge. As before, the Door to the Lava Room is blocked by a portcullis until the Enemies have been defeated. A Treasure Chest will also appear at this time.
Enemies in Normal Quest mode
-
![Beamos ×1[a]](//cdn.wikimg.net/en/zeldawiki/images/thumb/9/9d/OoT_Beamos_Model.png/61px-OoT_Beamos_Model.png)
-
![Dinolfos ×2[b]](//cdn.wikimg.net/en/zeldawiki/images/thumb/4/4b/OoT_Dinolfos_Model.png/71px-OoT_Dinolfos_Model.png)
-
Flame Wall ×8
![Beamos ×1[a]](/wiki/File:OoT_Beamos_Model.png)
![Dinolfos ×2[b]](/wiki/File:OoT_Dinolfos_Model.png)

-
![Beamos ×1[a]](//cdn.wikimg.net/en/zeldawiki/images/thumb/0/03/OoT3D_Beamos_Model.png/66px-OoT3D_Beamos_Model.png)
-
![Dinolfos ×2[b]](//cdn.wikimg.net/en/zeldawiki/images/thumb/0/04/OoT3D_Dinolfos_Model.png/116px-OoT3D_Dinolfos_Model.png)
-

Flame Wall ×8
![Beamos ×1[a]](/wiki/File:OoT3D_Beamos_Model.png)
![Dinolfos ×2[b]](/wiki/File:OoT3D_Dinolfos_Model.png)


Treasure Chests in Normal Quest mode
| Treasure Chest | |
|---|---|
| Contents | |
| Notes |

| Treasure Chest | Contents | Notes |
|---|---|---|
Treasure Chests in Master Quest mode
| Treasure Chest | |
|---|---|
| Contents | |
| Notes |
| Treasure Chest | Contents | Notes |
|---|---|---|
Lava Room

The Lava Room is a Lava-filled chamber with four exits.[7] To the south, it is connected to the Dinolfos room. To the west it is connected to the dead-end portion of the Treasure Room. Its eastern exit is the only means of entering the underwater gem room, and its northern exit leads to the Megaton Hammer room. There are five stone platforms spread unevenly throughout the Lava. To safely travel between these platforms, Link must use the Hover Boots that are found in the Shadow Temple. However, there are also Torches spread throughout the northern, eastern, and southern exits to the room which Link can instead grapple to with the Water Temple's Longshot. Near the center of the room, Link can play the "Song of Time" to summon a couple Time Blocks that act as stairs to the western exit, which is on a higher level than the rest of the room. A Small Key can be found on the ground of the level leading to the Treasure Room.
When Link enters the room, he is instructed to "cross the sea of fire" as five Silver Rupees are spread throughout the room. The Door to the underwater gem room will also be blocked by a portcullis, preventing entry. Three of these Silver Rupees sit in the open on the stone platforms, while one floats in the air near a Hookshot Target by the Door to the Megaton Hammer room. The fifth Rupee is found on a stone platform between the Megaton Hammer room and the Treasure Room. However, it is protected by a Flame Wall, which can only be temporarily disabled by pressing the Floor Switch on the ledge south of the entrance to the Treasure Room. This disables the Flame Wall for roughly 20 seconds, allowing Link time to reach it and escape. When Link has obtained all five Silver Rupees, the portcullis blocking the underwater gem room will raise, granting him entry. If Link falls into the Lava, he will void out and the room will also reset if the Silver Rupees have not been collected.
In Master Quest mode, there are now six Silver Rupees which have been relocated to sit atop each of the stone platforms and below the entrance to the Treasure Room. Flame Walls now guard each of the Silver Rupees and the Time Blocks and Floor Switch are now absent. There is no longer a Small Key sitting in the open within this room and the Torch by the underwater gem room has changed to a type of Torch that only temporarily stays lit. It is unlit by default, and igniting it will temporarily cause the Flame Walls to disappear. As before, the Door to the underwater gem room is blocked by a portcullis that will only raise when the Silver Rupees have been collected. When the Door is opened, Hookshot Target towers will raise from the Lava between the stone platforms, giving Link an alternate method of navigating the room to account for the Flame Walls reappearing. The ledge leading to the Megaton Hammer room features a Rusty Switch that summons a Hookshot Target tower atop the ledge leading to a segment of the Treasure Room.
Enemies in Normal Quest mode
-
Flame Wall ×1
-

-
 Red Bubble ×2


-
Flame Wall ×1
-
-
 Red Bubble ×2


Enemies in Master Quest mode
-
Flame Wall ×5
-
-
Red Bubble ×3
-
Flame Wall ×5
-
-
Red Bubble ×3
Underwater gem room
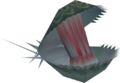
The underwater gem room features a large stonework pool. The entrance to this pool is obstructed by four Time Blocks which can be removed by playing the "Song of Time". Each wall of the pool's interior has four apertures and a single Hookshot Target. Inside the pool, there are a number of Silver Rupees that Link must collect in order to pass its trial.[8] However, the pool moves in a counter-clockwise direction in tandem with a Blade Trap at its bottom. When all of the Rupees have been collected, a Treasure Chest will appear above the pool.
In Master Quest mode, the Time Blocks obstructing the pool are absent and have been replaced by a Web. The number of Silver Rupees has been reduced to three and the composition of Enemies within the room has been altered. Because of the mirroring effect that is present in Ocarina of Time 3D's Master Quest mode, the Water inside the pool now moves in a clockwise direction.
Enemies in Normal Quest mode
-

Razor ×1
-
Shell Blade ×4


-
Blade Trap ×1
-
Shell Blade ×4


Enemies in Master Quest mode
-

Bari ×1
-
Shell Blade ×1
-
Stinger ×2


-
Bari ×1
-
Shell Blade ×1
-

Stinger ×2


Treasure Chests in Normal Quest mode
| Treasure Chest | |
|---|---|
| Contents | |
| Notes | Appears in the underwater gem room once the Silver Rupees have been collected |
| Treasure Chest | Contents | Notes |
|---|---|---|
Appears in the underwater gem room once the Silver Rupees have been collected |
Treasure Chests in Master Quest mode
| Treasure Chest | |
|---|---|
| Contents | |
| Notes | Appears in the underwater gem room once the Silver Rupees have been collected |
| Treasure Chest | Contents | Notes |
|---|---|---|
Appears in the underwater gem room once the Silver Rupees have been collected |
Megaton Hammer room
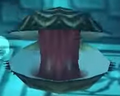
The Megaton Hammer room is connected to the Statue room and the Lava Room. A stone pathway leading from the center of the room to the Statue room helps to distinguish the exits. Likewise, a Crest of the Gerudo sits above the entrance to the Lava Room. When Link enters the Megaton Hammer room, portcullises will cover the Doors leading from it, trapping him inside. Stacked stone Totems are spread along the walls of this room. These Totems can be destroyed with the Megaton Hammer to reveal things hiding beneath them. A circular Flame Wall guards a Treasure Chest at the center of the room and several Enemies inhabit the room. By defeating these Enemies, Link can release the portcullises and cause a Treasure Chest to appear along one of the walls in the room. However, the Flame Wall will remain until its corresponding Floor Switch is pressed. This Floor Switch is hidden under a single Totem on the wall opposite the Statue room entrance, distinguished by the aforementioned stone pathway.
In Master Quest mode, Link is instead required to defeat all of the Enemies in the room, excluding the Flame Wall at the center, within one minute.[6] As before, portcullises will block the exits to the room until the Enemies have been defeated and a Treasure Chest will then appear. The Totem blocks are no longer present, leaving the Floor Switch exposed. The Floor Switch will cause the Flame Wall to disappear, though the Treasure Chest that is normally found here is hidden by another puzzle. In order to reveal the Treasure Chest, Link must strike the Crest of the Gerudo along the wall above the Door leading to the Lava Room.
Enemies in Normal Quest mode
-
Fire Keese ×2
-
Flame Wall ×1
-

Torch Slug ×2


-
Fire Keese ×2
-
Flame Wall ×1
-
Torch Slug ×2


Enemies in Master Quest mode
-
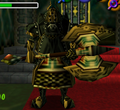
Iron Knuckle ×1
-
Flame Wall ×1
-
Torch Slug ×2

-

Iron Knuckle ×1
-
Flame Wall ×1
-
Torch Slug ×2

Treasure Chests in Normal Quest mode
| Treasure Chest | |
|---|---|
| Contents | |
| Notes | Appears in the Megaton Hammer room once the Fire Keese and Torch Slugs have been defeated |
| Treasure Chest | |
| Contents | |
| Notes | In the center of the Megaton Hammer room |
| Treasure Chest | Contents | Notes |
|---|---|---|
Appears in the Megaton Hammer room once the Fire Keese and Torch Slugs have been defeated | ||
In the center of the Megaton Hammer room |
Treasure Chests in Master Quest mode
| Treasure Chest | |
|---|---|
| Contents | |
| Notes | Appears in the Megaton Hammer room once the Iron Knuckle and Torch Slugs have been defeated |
| Treasure Chest | |
| Contents | |
| Notes | Appears in the Megaton Hammer room once the Crest of the Gerudo above the Door has been struck |
| Treasure Chest | Contents | Notes |
|---|---|---|
Appears in the Megaton Hammer room once the Iron Knuckle and Torch Slugs have been defeated | ||
Appears in the Megaton Hammer room once the Crest of the Gerudo above the Door has been struck |
Statue room
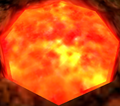
The Statue room is divided into two levels, the top level consists of a floor along the wall connected to the Silver Gauntlets room and an isolated section of the Treasure Room. The Door to the Treasure Room is obstructed by a portcullis, however. The bottom level features a circular floor along the wall with a pit of Lava in its center. When Link sets foot onto the circular floor, it will begin revolving around the room. A Door to the Megaton Hammer room can also be found on this level. Above this Door, there is a Hookshot Target.
Inside the Lava pit, there is a Statue with four faces. Each face has a single Eye which Link is prompted to strike with either the Bow or Hookshot.[9] By doing so, Link can release the portcullis over the Door to the Treasure Room and cause a Treasure Chest to appear at the center of the room. However, Link has a limited amount of time to strike all of the Eyes. If he takes longer than 20.24 seconds, the Eyes will reset, forcing him to restart.[note 1] By playing the "Scarecrow's Song", Link can summon Pierre at the top level, providing an easy way to travel between the room's levels via Hookshot.
In Master Quest mode, the Statue at the center of the room is surrounded by Flame Walls and both Pierre's spot and the Hookshot Target are absent. Instead, Hookshot Target towers can be seen at the top level and above the Statue. Striking the Eyes of the Statue now causes a Treasure Chest to appear along the circular floor instead, and it no longer raises the portcullis over the Door to the Treasure Room. To release this portcullis, Link can instead strike a Crystal Switch hidden in one of the Flame Walls opposite the top floor.
Enemies in Master Quest mode
-
Flame Wall ×8
-
-
Flame Wall ×8
-
Treasure Chests in Normal Quest mode
| Treasure Chest | |
|---|---|
| Contents | |
| Notes | Appears in the Statue room after all of the eyes have been struck |
| Treasure Chest | Contents | Notes |
|---|---|---|
Appears in the Statue room after all of the eyes have been struck |
Treasure Chests in Master Quest mode
| Treasure Chest | |
|---|---|
| Contents | |
| Notes | Appears in the Statue room after all of the eyes have been struck |
| Treasure Chest | Contents | Notes |
|---|---|---|
Appears in the Statue room after all of the eyes have been struck |
Silver Gauntlets room
The Silver Gauntlets room is located between the obstacle course room and the Statue room. It is also the only room that connects to the sand pit room. This room is divided into two levels. AT the base level, there is an arena where Link must fight against Wolfos. Along the far wall opposite the obstacle course room's Door, there is a large Block that can only be moved with the strength of the Silver Gauntlets. This Block guards the Door to the sand pit room, which is obstructed by a portcullis. Along the wall to the right of the Block there is a trick wall. Link can use the Lens of Truth to see through this trick wall to either reveal the second level, or see the first level below. There is a Hookshot Target on the ceiling behind this trick wall, which grants Link the ability to ascend to the second level. This second level leads to the Statue room. In front of the Door to this room there is a Floor Switch, which lifts the portcullis over the Door to the sand pit room when pressed. Once all of the Wolfos have been defeated, a Treasure Chest will appear on the floor near the Block.
In Master Quest mode, this arena contains a different set of Enemies which Link must defeat within the span of a minute.[6] Additionally, there is a Blue Fire pedestal on the base level of the room. As before, both the trick wall and the heavy Block are present, though the door to the Statue room is now obstructed by both a portcullis and a wall of Red Ice. Once all of the Enemies have been defeated, a Treasure Chest will appear on the floor opposite the Blue Fire pedestal. As the Hookshot Target on the second level is now absent, Link must instead play the "Song of Time" near the trick wall to summon a Time Block to ascend up toward it.
![Door that Falls Down ×1[a]](/wiki/File:OoT_Door_that_Falls_Down_Model.png)
![White Wolfos ×2[b]](/wiki/File:OoT_White_Wolfos_Model.png)
![Wolfos ×2[b]](/wiki/File:OoT_Wolfos_Model.png)
![Trap Door ×1[a]](/wiki/File:OoT3D_Trap_Door_Model.png)
![White Wolfos ×2[b]](/wiki/File:OoT3D_White_Wolfos_Model.png)
![Wolfos ×2[b]](/wiki/File:OoT3D_Wolfos_Model.png)


Treasure Chests in Normal Quest mode
| Treasure Chest | |
|---|---|
| Contents | |
| Notes | Appears in the Silver Gauntlets room once all of the Wolfos have been defeated |

| Treasure Chest | Contents | Notes |
|---|---|---|
Appears in the Silver Gauntlets room once all of the Wolfos have been defeated |
Treasure Chests in Master Quest mode
| Treasure Chest | |
|---|---|
| Contents | |
| Notes | Appears in the Silver Gauntlets room once all of the Enemies have been defeated |
| Treasure Chest | Contents | Notes |
|---|---|---|
Appears in the Silver Gauntlets room once all of the Enemies have been defeated |
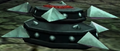
Sand pit room
The sand pit room is a dead-end chamber that features three sand pits and an altar at its end. Like Likes occupy each of these sand pits, which all house Treasure Chests. A Tricky Chest sits atop the altar as a trap, while an Invisible Chest can be found in the third sand pit. Two Treasure Chests will appear in the first and second pits when all of the Like Likes have been defeated.
In Master Quest mode, the Like Likes have been replaced with Spikes and the Tricky Chest is now absent. A Treasure Chest will appear on the altar once all of the Enemies in this room have been defeated.
Enemies in Normal Quest mode
-
Like Like ×3
-
Tricky Chest ×1


-
Like Like ×3
-
Tricky Chest ×1


Treasure Chests in Normal Quest mode
| Treasure Chest | |
|---|---|
| Contents | |
| Notes | In the third pit in the sand pit room |
| Treasure Chest | |
| Contents | |
| Notes | Appears in the first pit in the sand pit room once all of the Enemies have been defeated |
| Treasure Chest | |
| Contents | |
| Notes | In the second pit in the sand pit room once all of the Enemies have been defeated |


| Treasure Chest | Contents | Notes |
|---|---|---|
In the third pit in the sand pit room | ||
Appears in the first pit in the sand pit room once all of the Enemies have been defeated | ||
In the second pit in the sand pit room once all of the Enemies have been defeated |
Treasure Chests in Master Quest mode
| Treasure Chest | |
|---|---|
| Contents | |
| Notes | Appears in the sand pit room once all of the Enemies have been defeated |

| Treasure Chest | Contents | Notes |
|---|---|---|
Appears in the sand pit room once all of the Enemies have been defeated |
Obstacle course room
The obstacle course room is situated between the stone garden room and the Silver Gauntlets room. It is composed of three corridors that rise in elevation with three hallways on each side of the central corridor connecting them. The flanking corridors have Boulders rolling through them periodically as they appear from chutes at the beginnings of each corridor and fall into pits at their respective ends. Instead of containing walkable ramps like its flanking corridors, the final third of the central corridor is separated by a tall ledge. Within the central corridor, there are three Hookshot Targets spread along the ceiling. The first sits in the middle of the corridor while another sits above the ledge to allow quick access to its upper level. The Door to the Silver Gauntlets room is found at the end of the central corridor. However, it is blocked by a portcullis and a Flame Wall that divides it from the rest of the corridor. The third Hookshot Target is found beyond this Flame Wall, giving Link a method of bypassing it. Additionally, the first hallway to the right and third hallway to the left of the central corridor are blocked by Flame Walls.
When Link enters the room, he is instructed to gather the five Silver Rupees hidden throughout it within the time limit of one minute and thirty seconds.[10] The locations of these Rupees are as follows:
-
Floating off the ledge in the central corridor
-
On the right side of the first hallway connecting the central and right-side corridors
-
Floating beneath the Hookshot Target in the middle of the central corridor
-
At the end of the left-side corridor
-
At the start of the left-side corridor


After this trial is completed, the portcullis over the Door to the Silver Gauntlets room will raise. However, the Boulders will continue to appear and roll through the flanking corridors.
In Master Quest mode, the Boulders are no longer present as a number of Ice-related obstacles now occupy the room's flanking hallways. As before, the Door to the Silver Gauntlets room will be blocked by a portcullis until the trial is completed by collecting the Silver Rupees. However, there is no longer a time limit and there are only four Rupees to collect. The Hookshot Targets and Flame Walls have also been relocated.
- Beneath the ledge in the central corridor
- Beneath the Hookshot Target on the ceiling near the beginning of the central corridor
- At the start of the left-side corridor
- Inside the pit of the left-side corridor
When the trial is completed, a Hookshot Target tower will appear near the Door to the Silver Gauntlets room, allowing an easy way to bypass the Flame Wall blocking it.
Enemies in Normal Quest mode
-
Boulder ×2
-
Flame Wall ×3
-
![Wallmaster ×1[a]](//cdn.wikimg.net/en/zeldawiki/images/thumb/5/51/OoT_Wallmaster_Model.png/120px-OoT_Wallmaster_Model.png)

![Wallmaster ×1[a]](/wiki/File:OoT_Wallmaster_Model.png)
-
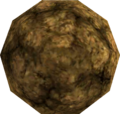
Boulder ×2
-
Flame Wall ×3
-
![Wallmaster ×1[a]](//cdn.wikimg.net/en/zeldawiki/images/thumb/a/a1/OoT3D_Wallmaster_Model.png/108px-OoT3D_Wallmaster_Model.png)

![Wallmaster ×1[a]](/wiki/File:OoT3D_Wallmaster_Model.png)
Enemies in Master Quest mode
-
Flame Wall ×3
-

Freezard ×1
-

Icicle ×8
-
Wallmaster ×1
-
Flame Wall ×3
-

Freezard ×1
-

Icicle ×8
-
Wallmaster ×1
Stone garden room
The stone garden room is connected to the entrance chamber to the east and the obstacle course room to the north. It is a spacious chamber with a sandy arena at its center. Four rocks decorate the interior of the arena. As Link enters the room, a portcullis will close over the Door to the obstacle course room and a pair of Stalfos will appear to challenge him. In order to complete the trial, Link must defeat both Stalfos within one minute.[6] However, the sandy arena will draw Link down into it, slowing his movement if he stands still and making the trial more difficult. Once both Stalfos have been defeated, a Treasure Chest will appear and the portcullis blocking the Door to the obstacle course room will raise.
In Master Quest mode, Link is instead tasked with defeating a single Iron Knuckle. As before, Link only has one minute's worth of time to complete the trial and a Treasure Chest will appear once it is completed. The Blade Trap near the Door to the entrance chamber is no longer present.
Enemies in Normal Quest mode
Enemies in Master Quest mode
![Iron Knuckle ×1[a]](/wiki/File:OoT_Iron_Knuckle_Model.png)
![Iron Knuckle ×1[a]](/wiki/File:OoT3D_Iron_Knuckle_Model.png)
Treasure Chests in Normal Quest mode
| Treasure Chest | |
|---|---|
| Contents | |
| Notes | Appears in the stone garden room after the Stalfos have been defeated |
| Treasure Chest | Contents | Notes |
|---|---|---|
Appears in the stone garden room after the Stalfos have been defeated |
Treasure Chests in Master Quest mode
| Treasure Chest | |
|---|---|
| Contents | |
| Notes | Appears in the stone garden room once the Iron Knuckle has been defeated |
| Treasure Chest | Contents | Notes |
|---|---|---|
Appears in the stone garden room once the Iron Knuckle has been defeated |
Treasure Room
The Treasure Room is connected to the entrance room, the upper level of the Lava Room, and the upper level of the Statue room.[11] It is a spacious chamber separated by fencing which creates cells. These fences can be climbed, although this is only useful to do in one specific cell. Most of these cells are locked off from each other, requiring Small Keys to traverse between them. From the entrance room's Door, the cells branch in two directions. The path to the left leads to the cell containing the Dungeon's treasure, the Ice Arrow. The path to the right leads to a dead-end and connects to the Lava Room. A disconnected chamber in this room is accessible only by entering from the upper level of the Statue room. From this chamber, Link can see another seemingly disconnected chamber with a Treasure Chest. He is also able to view the cell housing the Treasure Chest containing the Ice Arrow from above.
When Link enters the room, he is prompted to retrieve the Small Keys spread throughout the Dungeon.[12] In order to reach the Ice Arrow, Link must have a total of seven Small Keys, starting from the entrance room's Door. Two additional Small Keys may be used to fully unlock this room through its dead-end route. The aforementioned disconnected chamber with a Treasure Chest is accessible from the first cell to the left of the entrance Door. This cell has an illusory ceiling which can be passed through to reach it. Several of the cells have their own Treasure Chests, which only provide rewards like Rupees.
In Master Quest mode, only the three Doors leading to the central cell are locked. The Treasure Chest containing the Ice Arrow is also no longer located in the central cell. Instead, there is now a Wooden Box concealing a Rusty Switch that summons the Treasure Chest when activated. This Treasure Chest appears in the isolated segment of the room connected to the Statue room. This side chamber is now decorated with fuchsia flames where two Torches once stood which help to draw attention to it from below and from the adjacent chamber with the illusory floor.
Treasure Chests in Normal Quest mode
| Treasure Chest | |
|---|---|
| Contents | |
| Notes | In the segment of the Treasure Room connected to the upper floor of the Statue room |
| Treasure Chest | |
| Contents | 
|
| Notes | In the segment of the Treasure Room connected to the Lava Room |
| Treasure Chest | |
| Contents | |
| Notes | In the segment of the Treasure Room connected to the Lava Room |
| Treasure Chest | |
| Contents | |
| Notes | On a floor above the first room to the left in the Treasure Room |
| Treasure Chest | |
| Contents | |
| Notes | Inside the second room to the left in the Treasure Room |
| Treasure Chest | |
| Contents | |
| Notes | Inside the fourth room to the left in the Treasure Room |
| Treasure Chest | |
| Contents | |
| Notes | Inside the fifth room to the left in the Treasure Room |
| Treasure Chest | |
| Contents | |
| Notes | In the center of the Treasure Room |


| Treasure Chest | Contents | Notes |
|---|---|---|
In the segment of the Treasure Room connected to the upper floor of the Statue room | ||
| In the segment of the Treasure Room connected to the Lava Room | |
In the segment of the Treasure Room connected to the Lava Room | ||
On a floor above the first room to the left in the Treasure Room | ||
Inside the second room to the left in the Treasure Room | ||
Inside the fourth room to the left in the Treasure Room | ||
Inside the fifth room to the left in the Treasure Room | ||
In the center of the Treasure Room |
Treasure Chests in Master Quest mode
| Treasure Chest | |
|---|---|
| Contents | |
| Notes | In the segment of the Treasure Room connected to the Lava Room |
| Treasure Chest | |
| Contents | |
| Notes | In the segment of the Treasure Room connected to the Lava Room |
| Treasure Chest | |
| Contents | |
| Notes | On a floor above the first room to the right in the Treasure Room |
| Treasure Chest | |
| Contents | |
| Notes | Inside the second room to the right in the Treasure Room |
| Treasure Chest | |
| Contents | |
| Notes | Inside the fourth room to the right in the Treasure Room |
| Treasure Chest | |
| Contents | |
| Notes | Inside the fifth room to the right in the Treasure Room |
| Treasure Chest | |
| Contents | |
| Notes | Appears in the segment of the Treasure Room connected to the upper floor of the Statue room once the Rusty Switch at the center of the room has been pressed |

| Treasure Chest | Contents | Notes |
|---|---|---|
In the segment of the Treasure Room connected to the Lava Room | ||
In the segment of the Treasure Room connected to the Lava Room | ||
On a floor above the first room to the right in the Treasure Room | ||
Inside the second room to the right in the Treasure Room | ||
Inside the fourth room to the right in the Treasure Room | ||
Inside the fifth room to the right in the Treasure Room | ||
Appears in the segment of the Treasure Room connected to the upper floor of the Statue room once the Rusty Switch at the center of the room has been pressed |
Animals

Enemies
Normal Quest mode
-
Beamos ×1
-
Boulder ×2
-
Dinolfos ×2
-
-
Fire Keese ×2
-
Flame Wall ×3
-
Flame Wall ×2
-
-
Like Like ×3
-
Razor ×2
-
Red Bubble ×2
-
Shell Blade ×4
-

Stalfos ×2
-
Torch Slug ×2
-
Tricky Chest ×1
-
Wallmaster ×1
-
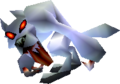
White Wolfos ×2
-

Wolfos ×2
-
Beamos ×1
-
Blade Trap ×2
-
Boulder ×2
-
Dinolfos ×2
-
Fire Keese ×2
-
Flame Wall ×3
-
Flame Wall ×2
-
-
Like Like ×3
-
Red Bubble ×2
-
Shell Blade ×4
-

Stalfos ×2
-
Torch Slug ×2
-
Trap Door ×1
-
Tricky Chest ×1
-
Wallmaster ×1
-
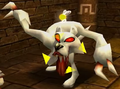
White Wolfos ×2
-

Wolfos ×2
Master Quest mode
-
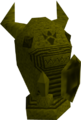
Armos ×1
-
Bari ×1
-

-
Dinolfos ×2
-
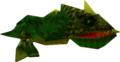
Dodongo ×2
-
Flame Wall ×3
-
Flame Wall ×14
-
Freezard ×3
-
Icicle ×8
-
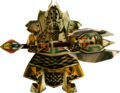
Iron Knuckle ×1
-
Iron Knuckle ×1
-
-

Lizalfos ×1
-
Red Bubble ×3
-
Shell Blade ×1
-

Spike ×3
-
Stalfos ×2
-
Stinger ×2
-
Torch Slug ×2
-
Wallmaster ×1
-
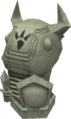
Armos ×1
-
Bari ×1
-
-
Dinolfos ×2
-
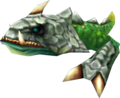
Dodongo ×2
-
Flame Wall ×3
-
Flame Wall ×14
-
Freezard ×3
-
Icicle ×8
-
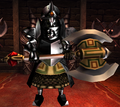
Iron Knuckle ×1
-
Iron Knuckle ×1
-
-
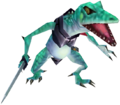
Lizalfos ×1
-
Red Bubble ×3
-
Shell Blade ×1
-
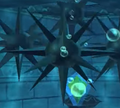
Spike ×3
-
Stalfos ×2
-
Stinger ×2
-
Torch Slug ×2
-
Wallmaster ×1
Treasure Chests
Normal Quest mode
| Treasure Chest | |
|---|---|
| Contents | |
| Notes | Between the northeastern pillars in the entrance room |
| Treasure Chest | |
| Contents | |
| Notes | Between the northwestern pillars in the entrance room |
| Treasure Chest | |
| Contents | |
| Notes | Appears in the stone garden room after the Stalfos have been defeated |
| Treasure Chest | |
| Contents | |
| Notes | Appears in the Silver Gauntlets room once all of the Wolfos have been defeated |
| Treasure Chest | |
| Contents | |
| Notes | In the third pit in the sand pit room |
| Treasure Chest | |
| Contents | |
| Notes | Appears in the first pit in the sand pit room once all of the Enemies have been defeated |
| Treasure Chest | |
| Contents | |
| Notes | In the second pit in the sand pit room once all of the Enemies have been defeated |
| Treasure Chest | |
| Contents | |
| Notes | Appears in the Statue room after all of the eyes have been struck |
| Treasure Chest | |
| Contents | |
| Notes | In the segment of the Treasure Room connected to the upper floor of the Statue room |
| Treasure Chest | |
| Contents | |
| Notes | Appears in the Megaton Hammer room once the Fire Keese and Torch Slugs have been defeated |
| Treasure Chest | |
| Contents | |
| Notes | In the center of the Megaton Hammer room |
| Treasure Chest | |
| Contents |
|
| Notes | In the segment of the Treasure Room connected to the Lava Room |
| Treasure Chest | |
| Contents | |
| Notes | In the segment of the Treasure Room connected to the Lava Room |
| Treasure Chest | |
| Contents | |
| Notes | Appears in the underwater gem room once the Silver Rupees have been collected |
| Treasure Chest | |
| Contents | |
| Notes | |
| Treasure Chest | |
| Contents | |
| Notes | On a floor above the first room to the left in the Treasure Room |
| Treasure Chest | |
| Contents | |
| Notes | Inside the second room to the left in the Treasure Room |
| Treasure Chest | |
| Contents | |
| Notes | Inside the fourth room to the left in the Treasure Room |
| Treasure Chest | |
| Contents | |
| Notes | Inside the fifth room to the left in the Treasure Room |
| Treasure Chest | |
| Contents | |
| Notes | In the center of the Treasure Room |
| Treasure Chest | Contents | Notes |
|---|---|---|
Between the northeastern pillars in the entrance room | ||
Between the northwestern pillars in the entrance room | ||
Appears in the stone garden room after the Stalfos have been defeated | ||
Appears in the Silver Gauntlets room once all of the Wolfos have been defeated | ||
In the third pit in the sand pit room | ||
Appears in the first pit in the sand pit room once all of the Enemies have been defeated | ||
In the second pit in the sand pit room once all of the Enemies have been defeated | ||
Appears in the Statue room after all of the eyes have been struck | ||
In the segment of the Treasure Room connected to the upper floor of the Statue room | ||
Appears in the Megaton Hammer room once the Fire Keese and Torch Slugs have been defeated | ||
In the center of the Megaton Hammer room | ||
| In the segment of the Treasure Room connected to the Lava Room | |
In the segment of the Treasure Room connected to the Lava Room | ||
Appears in the underwater gem room once the Silver Rupees have been collected | ||
On a floor above the first room to the left in the Treasure Room | ||
Inside the second room to the left in the Treasure Room | ||
Inside the fourth room to the left in the Treasure Room | ||
Inside the fifth room to the left in the Treasure Room | ||
In the center of the Treasure Room |
Master Quest mode
| Treasure Chest | |
|---|---|
| Contents | |
| Notes | Between the northwestern pillars in the entrance room |
| Treasure Chest | |
| Contents | |
| Notes | Between the northeastern pillars in the entrance room |
| Treasure Chest | |
| Contents | |
| Notes | |
| Treasure Chest | |
| Contents | |
| Notes | Appears in the underwater gem room once the Silver Rupees have been collected |
| Treasure Chest | |
| Contents | |
| Notes | Appears in the stone garden room once the Iron Knuckle has been defeated |
| Treasure Chest | |
| Contents | |
| Notes | Appears in the Silver Gauntlets room once all of the Enemies have been defeated |
| Treasure Chest | |
| Contents | |
| Notes | Appears in the sand pit room once all of the Enemies have been defeated |
| Treasure Chest | |
| Contents | |
| Notes | Appears in the Statue room after all of the eyes have been struck |
| Treasure Chest | |
| Contents | |
| Notes | Appears in the Megaton Hammer room once the Iron Knuckle and Torch Slugs have been defeated |
| Treasure Chest | |
| Contents | |
| Notes | Appears in the Megaton Hammer room once the Crest of the Gerudo above the Door has been struck |
| Treasure Chest | |
| Contents | |
| Notes | In the segment of the Treasure Room connected to the Lava Room |
| Treasure Chest | |
| Contents | |
| Notes | In the segment of the Treasure Room connected to the Lava Room |
| Treasure Chest | |
| Contents | |
| Notes | On a floor above the first room to the right in the Treasure Room |
| Treasure Chest | |
| Contents | |
| Notes | Inside the second room to the right in the Treasure Room |
| Treasure Chest | |
| Contents | |
| Notes | Inside the fourth room to the right in the Treasure Room |
| Treasure Chest | |
| Contents | |
| Notes | Inside the fifth room to the right in the Treasure Room |
| Treasure Chest | |
| Contents | |
| Notes | Appears in the segment of the Treasure Room connected to the upper floor of the Statue room once the Rusty Switch at the center of the room has been pressed |
| Treasure Chest | Contents | Notes |
|---|---|---|
Between the northwestern pillars in the entrance room | ||
Between the northeastern pillars in the entrance room | ||
Appears in the underwater gem room once the Silver Rupees have been collected | ||
Appears in the stone garden room once the Iron Knuckle has been defeated | ||
Appears in the Silver Gauntlets room once all of the Enemies have been defeated | ||
Appears in the sand pit room once all of the Enemies have been defeated | ||
Appears in the Statue room after all of the eyes have been struck | ||
Appears in the Megaton Hammer room once the Iron Knuckle and Torch Slugs have been defeated | ||
Appears in the Megaton Hammer room once the Crest of the Gerudo above the Door has been struck | ||
In the segment of the Treasure Room connected to the Lava Room | ||
In the segment of the Treasure Room connected to the Lava Room | ||
On a floor above the first room to the right in the Treasure Room | ||
Inside the second room to the right in the Treasure Room | ||
Inside the fourth room to the right in the Treasure Room | ||
Inside the fifth room to the right in the Treasure Room | ||
Appears in the segment of the Treasure Room connected to the upper floor of the Statue room once the Rusty Switch at the center of the room has been pressed |
Nomenclature
| Language | Names | Meanings |
|---|---|---|
Japanese | ゲルドの修練場 (Gerudo no Shūrenjō) (OoT)[14] | Same as English. |
Italian | Zona di addestramento Gerudo (OoT3D)[13] | Gerudo training zone |
| This table was generated using translation pages. To request an addition, please contact a staff member with a reference. | ||
Other Names
| Name | Gerudo's Training Ground[15] |
|---|---|
| Applies to | |
| Source | |
| Superseded by |
| Name | Applies to | Source | Superseded by |
|---|---|---|---|
Gerudo's Training Ground[15] |
Gallery
-
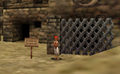
Entrance to the training ground from Ocarina of Time
-
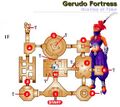
Dungeon Map of the Gerudo Training Ground from Ocarina of Time


Notes
- ↑ In Ocarina of Time 3D, the Eyes are set to reset after 624 frames. At 30 frames per second, this results in a time limit of 20.24 seconds. In prior versions of Ocarina of Time, the Eyes are programmed to reset after 416 frames instead, which equals to 20.16 seconds at 20 frames per second. As a result, Ocarina of Time 3D provides an additional .08 seconds to complete the puzzle.
References
- ↑ "Gerudo Training Ground" — N/A (Ocarina of Time 3D)
- ↑ "You got the Ice Arrow! Set it to
 and your arrows will be powered up! If you hit your target, it will freeze. This arrow magic is granted only to those who complete the difficult training of the Gerudos, so use it with pride!" — N/A (Ocarina of Time)
- ↑ "This is the Gerudo's Training Ground. Nobody is allowed to enter without a membership card." — Gerudo (Ocarina of Time)
- ↑ "This is the Gerudo Training Ground. Gerudo Token verified. One try for 10 Rupees!" — Gerudo (Ocarina of Time 3D)
- ↑ "If you can overcome the trials in the chambers ahead, then and only then will you be qualified to hold our secret treasure!" — N/A (Ocarina of Time 3D)
- ↑ 6.0 6.1 6.2 6.3 "Defeat all the enemies in a limited time!" — N/A (Ocarina of Time 3D)
- ↑ "Gerudo Training Grounds" (The Legend of Zelda: Ocarina of Time 3D—Prima Official Game Guide by Prima Games, § Master Quest § Spirit Temple)
- ↑ "Collect the underwater gems!" — N/A (Ocarina of Time 3D)
- ↑ "Blind the eyes of the statue!" — N/A (Ocarina of Time 3D)
- ↑ "Gather the jewels of white while avoiding traps and danger!" — N/A (Ocarina of Time 3D)
- ↑ The Legend of Zelda: Ocarina of Time—Perfect Guide, Versus Books, pg. 121
- ↑ "If you desire to acquire our hidden treasure, you must strive to obtain the keys hidden in each chamber!" — N/A (Ocarina of Time 3D)
- ↑ "Zona di addestramento Gerudo - Ingresso riservato ai soci" — Sign (Ocarina of Time 3D, Italian localization)
- ↑ Nintendo Official Guidebook—The Legend of Zelda: Ocarina of Time, Shogakukan, pg. 155
- ↑ "This is the Gerudo's Training Ground. Membership card verified. One try for 10 Rupees!" — Gerudo (Ocarina of Time)
Dungeons in The Legend of Zelda
Level 1 • Level 2 • Level 3 • Level 4 • Level 5 • Level 6 • Level 7 • Level 8 • Level 9
Dungeons in The Adventure of Link
Parapa Palace • Midoro Palace • Island Palace • Maze Island Palace • Palace on the Sea • Three-Eye Rock Palace • Great Palace
Dungeons in A Link to the Past
Hyrule Castle • Castle Dungeon • Eastern Palace • Desert Palace • Tower of Hera
Palace of Darkness • Swamp Palace • Skull Woods • Thieves' Town • Ice Palace • Misery Mire • Turtle Rock • Ganon's Tower • Palace of the Four Sword![]()
Tail Cave • Bottle Grotto • Key Cavern • Angler's Tunnel • Catfish's Maw • Face Shrine • Eagle's Tower • Turtle Rock • Wind Fish's Egg
Color Dungeon (LADX | LANS) • Chamber Dungeon (LANS)
Inside the Deku Tree • Dodongo's Cavern • Inside Jabu-Jabu's Belly
Forest Temple • Fire Temple • Water Temple • Shadow Temple • Spirit Temple • Ganon's Castle
Ice Cavern • Bottom of the Well • Gerudo Training Ground
Woodfall Temple • Snowhead Temple • Great Bay Temple • Stone Tower Temple
Swamp Spider House • Pirates' Fortress • Oceanside Spider House • Beneath the Well • Ancient Castle of Ikana • Moon Dungeons
Gnarled Root Dungeon • Snake's Remains • Poison Moth's Lair • Dancing Dragon Dungeon • Unicorn's Cave • Ancient Ruins • Explorer's Crypt • Sword & Shield Maze • Onox's Castle • Room of Rites
Spirit's Grave • Wing Dungeon • Moonlit Grotto • Skull Dungeon • Crown Dungeon • Mermaid's Cave • Jabu-Jabu's Belly • Ancient Tomb • Black Tower • Room of Rites
Maku Road • Great Moblin's Keep • Ambi's Palace • Hero's Cave
Chambers of Insight • Sea of Trees • Talus Cave • Death Mountain • Vaati's Palace
Dragon Roost Cavern • Forbidden Woods • Tower of the Gods • Forsaken Fortress • Earth Temple • Wind Temple • Ganon's Castle
Fire Mountain • Ice Ring Isle • Ghost Ship • Savage Labyrinth
Stages in Four Swords Adventures
Whereabouts of the Wind
Lake Hylia • Cave of No Return • Hyrule Castle
Eastern Hyrule
The Coast • Village of the Blue Maiden • Eastern Temple
Death Mountain
Death Mountain Foothills • The Mountain Path • Tower of Flames
Near the Fields
The Field • The Swamp • Infiltration of Hyrule Castle
The Dark World
Lost Woods (Four Swords Adventures) • Kakariko Village (Four Swords Adventures) • Temple of Darkness
The Desert of Doubt
Desert of Doubt • Desert Temple • Pyramid
Frozen Hyrule
Frozen Hyrule • Temple of Ice • Tower of Winds
Realm of the Heavens • The Dark Cloud • Palace of Winds
Deepwood Shrine • Cave of Flames • Fortress of Winds • Temple of Droplets • Palace of Winds • Dark Hyrule Castle
Forest Temple • Goron Mines • Lakebed Temple • Arbiter's Grounds • Snowpeak Ruins • Temple of Time • City in the Sky • Palace of Twilight • Hyrule Castle
Lantern Caverns • Cave of Ordeals • Cave of Shadows (TPHD)
Temple of the Ocean King • Temple of Fire • Temple of Wind • Temple of Courage • Ghost Ship • Goron Temple • Temple of Ice • Mutoh's Temple
Tower of Spirits • Forest Temple • Snow Temple • Ocean Temple • Fire Temple • Sand Temple
Skyview Temple • Earth Temple • Lanayru Mining Facility • Ancient Cistern • Sandship • Fire Sanctuary • Sky Keep
Dungeons in A Link Between Worlds
Eastern Palace • Tower of Hera • House of Gales • Inside Hyrule Castle • Desert Palace
Ice Ruins • Swamp Palace • Thieves' Hideout • Dark Palace • Skull Woods • Turtle Rock • Lorule Castle
Woodlands
Deku Forest • Buzz Blob Cave • Moblin Base • Forest Temple
Riverside
Secret Fortress • Abyss of Agony • Cove of Transition • Water Temple
Volcano
Blazing Trail • Hinox Mine • Den of Flames • Fire Temple
Ice Cavern
Frozen Plateau • Snowball Ravine • Silver Shrine • Ice Temple
Fortress
Sealed Gateway • Bomb Storage • Training Ground • The Lady's Lair
The Dunes
Infinity Dunes • Stone Corridors • Gibdo Mausoleum • Desert Temple
The Ruins
Illusory Mansion • Palace Noir • Lone Labyrinth • Grim Temple
Sky Realm
Floating Garden • Deception Castle • Dragon Citadel • Sky Temple
Forest Zone • Flooded Zone • Scorching Zone • Frozen Zone • Fortified Zone • Desert Zone • Shadow Zone • Baneful Zone
Dungeons in Breath of the Wild
Divine Beast Vah Ruta • Divine Beast Vah Rudania • Divine Beast Vah Medoh • Divine Beast Vah Naboris • Hyrule Castle
Sword Monk's Shrine (TMT) • Final Trial (TCB)
Akh Va'quot • Bareeda Naag • Bosh Kala • Chaas Qeta • Daag Chokah • Dagah Keek • Dah Kaso • Dah Hesho • Daka Tuss • Dako Tah • Daqa Koh • Daqo Chisay • Dila Maag • Dow Na'eh • Dunba Taag • Gee Ha'rah • Goma Asaagh • Gorae Torr • Ha Dahamar • Hawa Koth • Hia Miu • Hila Rao • Ishto Soh • Ja Baij • Jee Noh • Jitan Sa'mi • Joloo Nah • Ka'o Makagh • Kaam Ya'tak • Kah Mael Shrine • Kah Okeo Shrine • Kah Yah Shrine • Kam Urog Shrine • Katah Chuki • Katosa Aug • Kay Noh • Kaya Wan • Kayra Mah • Ke'nai Shakah • Keeha Yoog • Keh Namut • Kema Kosassa • Kema Zoos • Keo Ruug • Ketoh Wawai • Korgu Chideh • Korsh O'hu • Kuh Takkar • Kuhn Sidajj • Lakna Rokee • Lanno Kooh • Maag Halan • Maag No'rah • Maka Rah • Mezza Lo • Mijah Rokee • Mirro Shaz • Misae Suma • Mo'a Keet • Mogg Latan • Monya Toma • Mozo Shenno • Muwo Jeem • Myahm Agana • Namika Ozz • Ne'ez Yohma • Noya Neha • Oman Au • Owa Daim • Pumaag Nitae • Qua Raym • Qaza Tokki • Qukah Nata • Raqa Zunzo • Ree Dahee • Rin Oyaa • Ritaag Zumo • Rok Uwog • Rona Kachta • Rota Ooh • Rucco Maag • Saas Ko'sah • Sah Dahaj • Sasa Kai • Sha Gehma • Sha Warvo • Shada Naw • Shae Katha • Shae Loya • Shae Mo'sah • Shai Utoh • Shai Yota • Shee Vaneer • Shee Venath • Sheem Dagoze • Sheh Rata • Sho Dantu • Shoda Sah • Shoqa Tatone • Shora Hah • Soh Kofi • Suma Sahma • Ta'loh Naeg • Tah Muhl • Tahno O'ah • Tawa Jinn • Tena Ko'sah • Tho Kayu • To Quomo • Toh Yahsa • Toto Sah • Tu Ka'loh • Tutsuwa Nima • Voo Lota • Wahgo Katta • Ya Naga • Yah Rin • Zalta Wa • Ze Kasho • Zuna Kai
Etsu Korima • Kamia Omuna • Kee Dafunia • Keive Tala • Kiah Toza • Kihiro Moh • Mah Eliya • Noe Rajee • Rinu Honika • Rohta Chigah • Ruvo Korbah • Sato Koda • Sharo Lun • Shira Gomar • Takama Shiri • Yowaka Ita
Dungeons in Tears of the Kingdom
Wind Temple • Fire Temple • Water Temple • Lightning Temple • Hyrule Castle • Spirit Temple • Beneath Hyrule Castle
Anedamimik • Apogek • Bamitok • Chichim • Domizuin • Ekochiu • En-oma • Eshos • Eutoum • Ga-ahisas • Ganos • Gasas • Gatakis • Gatanisis • Gemimik • Gikaku • Gutanbac • Igashuk • Igoshon • Ihen-a • Ijo-o • Ikatak • In-isa • Irasak • Ishodag • Ishokin • Isisim • Iun-orok • Jikais • Jinodok • Jiosin • Jiotak • Jirutagumac • Jiukoum • Jochi-ihiga • Jochi-iu • Jochisiu • Jogou • Jojon • Joju-u-u • Joku-u • Joku-usin • Joniu • Jonsau • Josiu • Kadaunar • Kahatanaum • Kamatukis • Kamizun • Karahatag • Kikakin • Kimayat • Kisinona • Kitawak • Kiuyoyou • Kudanisar • Kumamayn • Kurakat • Kyokugon • Kyononis • Makasura • Makurukis • Maoikes • Marakuguc • Marari-in • Mayachideg • Mayachin • Mayahisik • Mayak • Mayam • Mayamats • Mayanas • Mayaotaki • Mayasiar • Mayatat • Mayaumekis • Mayausiy • Minetak • Miryotanog • Mogawak • Mogisari • Momosik • Morok • Moshapin • Motsusis • Musanokir • Nachoyah • Natak • Ninjis • Nouda • O-ogim • Orochium • Oromuwak • Oshozan-u • Otak • Otutsum • Pupunke • Rakakudaj • Rakashog • Rasitakiwak • Rasiwak • Ren-iz • Riogok • Rotsumamu • Runakit • Rutafu-um • Sahirow • Sakunbomar • Sepapa • Serutabomac • Sibajitak • Sifumim • Sihajog • Sikukuu • Simosiwak • Sinakawak • Sinatanika • Sisuran • Sitsum • Siwakama • Sonapan • Soryotanog • Suariwak • Susub • Susuyai • Tadarok • Tajikats • Taki-ihaban • Taninoud • Taunhiy • Tauyosipun • Tenbez • Teniten • Tenmaten • Timawak • Tokiy • Tsutsu-um • Tukarok • Turakamik • Turakawak • Ukoojisi • Ukouh • Usazum • Utojis • Utsushok • Wao-os • Yamiyo • Yansamin • Yomizuk • Zakusu • Zanmik
Dungeons in Freshly-Picked Tingle's Rosy Rupeeland
Hero's Shrine • Pirate Hideaway • Deku Temple • Insect Cavern • Desma's Labyrinth
Stages in Link's Crossbow Training
Level 1
Ordon Target Practice • Gerudo Stalfos: Defender • Arbiter's Grounds: Ranger
Level 2
Goron Target Practice • Zora River: Defender • Skull Shooting
Level 3
Kakariko Target Practice • Fruit Balloons • The Great Bridge: Defender
Level 4
Zora River Target Practice • Hyrule Castle: Defender • Skulltula Forest: Ranger
Level 5
Oocca Target Practice • Gerudo Moldorm: Defender • The Shootout
Level 6
Ordon Target Practice 2 • Bridge of Eldin: Defender • Snowpeak Ruins: Ranger
Level 7
Underground Target Practice • City in the Sky: Defender • Temple of Time: Ranger
Level 8
Horseback Target Practice • Snowpeak Ruins: Defender • Darknut Battle
Ranch Target Practice • Sacred Grove: Defender • Fossil Stallord Battle
Hyrule Field • Eldin Caves • Faron Woods • Valley of Seers • Death Mountain • Lake Hylia • Twilight Field • Palace of Twilight • Skyloft • Sealed Grounds • Temple of the Sacred Sword • Temple of Souls • Gerudo Desert • Ganon's Tower • Forsaken Fortress • Wind and Earth Temples
Frozen Grotto • Gerudo Ruins • Lost Swamp • Temple of Storms • Hyrule Castle • Future World