Eagle's Tower: Difference between revisions
No edit summary |
m (→Gallery) |
||
| (140 intermediate revisions by 50 users not shown) | |||
| Line 1: | Line 1: | ||
{{ | {{Infobox Dungeon | ||
| | |image= | ||
| | {{Media | ||
|Screenshot LA= File:LA Eagle's Tower Entrance.png | |||
|Screenshot LADX= File:LADX Eagle's Tower.png | |||
|Screenshot LANS= File:LANS Eagle's Tower.jpg | |||
}} | }} | ||
|caption= | |||
|location= {{Term|LADX|Tal Tal Mountain Range|link}} | |||
|game= LA | |||
|item= {{Term|LADX|Mirror Shield|link}} | |||
|mini-boss= {{Term|LADX|Grim Creeper|link}} | |||
|boss= {{Term|LADX|Evil Eagle|link}} | |||
|quest= {{List|{{Term|LADX|Organ of Evening Calm|link}}, {{Term|LADX|Heart Container|link}}}} | |||
|theme= | |||
|strategy= {{StrategyWiki|The Legend of Zelda: Link's Awakening/Eagle's Tower|Eagle's Tower}} | |||
}} | |||
{{Term/Store|Eagle's Tower||Series, LA, LADX}} is the seventh {{Term|LADX|Dungeon|link}} in {{LA}}.<ref>{{Cite Book|quote= |book= E |publisher= |page= 148}}</ref> It is the location of the {{Term|LADX|Organ of Evening Calm|link}}. The entrance to this {{Term|LADX|Dungeon}} is on the far eastern peaks of the {{Term|LADX|Tal Tal Mountain Range|link}}. As the name implies, this {{Term|LADX|Dungeon}} is a tall tower, which is made of grayish-green bricks and has head statues depicting eagles on its sides. The item of the {{Term|LADX|Dungeon}} is the {{Term|LADX|Mirror Shield|link}}. The mini-boss of this {{Term|LADX|Dungeon}} is {{Term|LADX|Grim Creeper|link}}, who also returns as the {{Term|LADX|Boss|link}} of the {{Term|LADX|Dungeon}}, using the {{Term|LADX|Evil Eagle|link}} as his mount. | |||
==Entrance to the Tower== | |||
To get inside, {{Term|LADX|Link|link}} needs to insert the {{Term|LADX|Bird Key|link}} into the {{Term|LADX|Bird Keyhole|link}}. The {{Term|LADX|Bird Key}} is in one of the many caverns of the mountain, across a broad pit that is impassible with only the {{Term|LADX|Roc's Feather|link}}. However, in {{Term|LADX|Mabe Village|link}} there is a {{Term|LADX|Weathercock|link}} which {{Term|LADX|Link}} can move aside with the {{Term|LADX|L-2 Power Bracelet|link}}. This reveals a hidden stairway, leading to the grave of the {{Term|LADX|Flying Rooster|link}}. After being revived by {{Term|LADX|Link}} with the {{Term|LADX|Frog's Song of Soul|link}},<ref>{{Cite|Wow! The Rooster has recovered! He seems very friendly!|N/A|LADX}}</ref> it decides to follow {{Term|LADX|Link}} and aid him by flying whenever {{Term|LADX|Link}} holds it. The {{Term|LADX|Flying Rooster}} helps {{Term|LADX|Link}} fly across the large pit to reach the {{Term|LADX|Bird Key}}. After inserting the it into its {{Term|LADX|Keyhole|link}}, the {{Term|LADX|Eagle's Tower}} rotates once to reveal a hidden ladder that was previously behind it allowing access inside. | |||
==Themes and Navigation== | |||
The interior of this {{Term|LADX|Dungeon|link}} is mostly green flooring and gray walls. This {{Term|LADX|Dungeon}} also has some different blue and orange {{Plural|LADX|Switch Block|link}}. There are also many pits that lead to the floor below them. The very top of the {{Term|LADX|Eagle's Tower}}, where the {{Term|LADX|Boss|link}} battle occurs, is in a side view. | |||
The main puzzle of the {{Term|LADX|Eagle's Tower}} involves collapsing the fourth floor into the third floor, allowing {{Term|LADX|Link|link}} to access more rooms and the {{Term|LADX|Boss}} battle. This involves picking up a heavy, iron ball and throwing it at a total of four support pillars on the second floor.<ref>{{Cite|The riddle is solved when the pillars fall!|Owl Statue|LADX}}</ref> Progress to each pillar is impeded by obstacles, notably the aforementioned {{Plural|LADX|Switch Block}}. Once all of the pillars have been destroyed, there is a brief cutscene showing the top floor of the tower collapsing and becoming part of the third floor. | |||
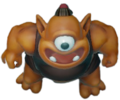
The main treasure of this {{Term|LADX|Dungeon}} is the {{Term|LADX|Mirror Shield|link}}, which is found in a {{Term|LADX|Treasure Chest|link}} blocked by {{Plural|LADX|Switch Block}} on the second floor. However, if {{Term|LADX|Link}} has the {{Term|LADX|Boomerang|link}} he can get the {{Term|LADX|Mirror Shield}} earlier by throwing it diagonally at the {{Term|LADX|Crystal Switch|link}}. The {{Term|LADX|Dungeon}}'s mini-boss is {{Term|LADX|Grim Creeper|link}}, an imp-like being that summons {{Plural|LADX|Keese|link}} to attack {{Term|LADX|Link}}. He is not killed in the first battle, however, and returns, riding {{Term|LADX|Evil Eagle|link}}. This battle takes place on the top of the {{Term|LADX|Eagle's Tower}}, and unlike most {{Plural|LADX|Boss}}, the main issue is not being killed, but being knocked off, because if {{Term|LADX|Link}} falls, the {{Term|LADX|Evil Eagle}} will have regained its health. The {{Term|LADX|Mirror Shield}} is helpful in preventing {{Term|LADX|Link}} from succumbing to the winds produced by the {{Term|LADX|Evil Eagle}}. | |||
When looked on the {{Term|LADX|Dungeon Map|link}}, the {{Term|LADX|Dungeon}} is in the shape of a circle due to it being a round tower. It is the only {{Term|LADX|Dungeon}} in the game whose {{Term|LADX|Dungeon Map}} does not depict anything specific. There are head statues of eagles on the side of the tower, and brown statues of eagles at the beginning of the dungeon as well. | |||
This {{Term|LADX|Dungeon}} is also one of the few {{Plural|LADX|Dungeon}} in {{LA|-}} that contains a {{Term|LADX|Secret Seashell|link}}. It is in the room where {{Term|LADX|Link}} fights the {{Term|LADX|Hinox|link}}, he can drop down one of the leftmost holes and fall onto a platform. By following the platform north, {{Term|LADX|Link}} can find a {{Term|LADX|Treasure Chest}} containing a {{Term|LADX|Secret Seashell}}. | |||
===Minor {{Plural|LANS|Enemy}}=== | |||
{{Gallery List|Enemies | |||
|LA= Beamos, Blade Trap, Bubble, Flying Tile, Gibdo, Goomba, Hinox, Helmasaur, Kirby, Like Like, Mini-Moldorm, Peahat, Rope, Spark, Stalfos, Three-of-a-Kind, Zol | |||
|LADX= Anti-Fairy, Anti-Kirby, Beamos, Blade Trap, Flying Tile, Gibdo, Goomba, Green Zol, Hinox, Iron Mask, Like Like, Mini-Moldorm, Peahat, Rope, Spark, Stalfos, Three-of-a-Kind | |||
|LANS= Anti-Fairy, Anti-Kirby, Beamos, Blade Trap, Flying Tile, Gibdo, Goomba, Green Zol, Hinox, Iron Mask, Like Like, Mini-Moldorm, Peahat, Rope, Spark, Stalfos, Three-of-a-Kind | |||
}} | |||
==Nomenclature== | |||
The {{Term|LADX|Dungeon|link}}'s name is a reference to the {{Term|LADX|Boss|link}}, {{Term|LADX|Evil Eagle|link}}. | |||
{{Nomenclature}} | |||
==Gallery== | |||
<gallery> | |||
File:LA Eagle's Tower.png|{{Term|LA|Eagle's Tower}} with its entrance hidden from {{LA|-}} | |||
File:LA Eagle's Tower Map.png|Layout of {{Term|LA|Eagle's Tower}} | |||
File:LADX Eagle's Tower Map.png|Layout of {{Term|LADX|Eagle's Tower}} | |||
File:LADX Eagle's Tower hidden.png|{{Term|LADX|Eagle's Tower}} with its entrance hidden from {{LA|DX|-}} | |||
File:LADX Grim Creeper.png|The {{Term|LADX|Grim Creeper}} | |||
File:LADX Evil Eagle.png|{{Term|LADX|Evil Eagle}} | |||
File:LADX Organ of Evening Calm.png|The {{Term|LADX|Organ of Evening Calm}} | |||
</gallery> | |||
{{ | {{Ref}} | ||
{{DungeonNav2|LA}} | |||
{{Categories | |||
|Koholint Island, Towers | |||
|dungeons= LA, LADX, LANS | |||
}} | |||
Latest revision as of 01:22, 13 April 2024
Eagle's Tower is the seventh Dungeon in Link's Awakening.[1] It is the location of the Organ of Evening Calm. The entrance to this Dungeon is on the far eastern peaks of the Tal Tal Mountain Range. As the name implies, this Dungeon is a tall tower, which is made of grayish-green bricks and has head statues depicting eagles on its sides. The item of the Dungeon is the Mirror Shield. The mini-boss of this Dungeon is Grim Creeper, who also returns as the Boss of the Dungeon, using the Evil Eagle as his mount.
Entrance to the Tower
To get inside, Link needs to insert the Bird Key into the Bird Keyhole. The Bird Key is in one of the many caverns of the mountain, across a broad pit that is impassible with only the Roc's Feather. However, in Mabe Village there is a Weathercock which Link can move aside with the L-2 Power Bracelet. This reveals a hidden stairway, leading to the grave of the Flying Rooster. After being revived by Link with the Frog's Song of Soul,[2] it decides to follow Link and aid him by flying whenever Link holds it. The Flying Rooster helps Link fly across the large pit to reach the Bird Key. After inserting the it into its Keyhole, the Eagle's Tower rotates once to reveal a hidden ladder that was previously behind it allowing access inside.
The interior of this Dungeon is mostly green flooring and gray walls. This Dungeon also has some different blue and orange Switch Blocks. There are also many pits that lead to the floor below them. The very top of the Eagle's Tower, where the Boss battle occurs, is in a side view.
The main puzzle of the Eagle's Tower involves collapsing the fourth floor into the third floor, allowing Link to access more rooms and the Boss battle. This involves picking up a heavy, iron ball and throwing it at a total of four support pillars on the second floor.[3] Progress to each pillar is impeded by obstacles, notably the aforementioned Switch Blocks. Once all of the pillars have been destroyed, there is a brief cutscene showing the top floor of the tower collapsing and becoming part of the third floor.
The main treasure of this Dungeon is the Mirror Shield, which is found in a Treasure Chest blocked by Switch Blocks on the second floor. However, if Link has the Boomerang he can get the Mirror Shield earlier by throwing it diagonally at the Crystal Switch. The Dungeon's mini-boss is Grim Creeper, an imp-like being that summons Keese to attack Link. He is not killed in the first battle, however, and returns, riding Evil Eagle. This battle takes place on the top of the Eagle's Tower, and unlike most Bosses, the main issue is not being killed, but being knocked off, because if Link falls, the Evil Eagle will have regained its health. The Mirror Shield is helpful in preventing Link from succumbing to the winds produced by the Evil Eagle.
When looked on the Map, the Dungeon is in the shape of a circle due to it being a round tower. It is the only Dungeon in the game whose Map does not depict anything specific. There are head statues of eagles on the side of the tower, and brown statues of eagles at the beginning of the dungeon as well.
This Dungeon is also one of the few Dungeons in Link's Awakening that contains a Secret Seashell. It is in the room where Link fights the Hinox, he can drop down one of the leftmost holes and fall onto a platform. By following the platform north, Link can find a Treasure Chest containing a Secret Seashell.
Minor Enemies
Nomenclature
The Dungeon's name is a reference to the Boss, Evil Eagle.
| Language | Names | Meanings |
|---|---|---|
| Tour du Vautour (LANS) | Vulture's Tower | |
| Tour du Vautour (LA | LADX | LANS)[5] | Vulture's Tower | |
|
| |
| This table was generated using translation pages. To request an addition, please contact a staff member with a reference. | ||
Gallery
-
Eagle's Tower with its entrance hidden from Link's Awakening
-
Layout of Eagle's Tower
-
Layout of Eagle's Tower
-
Eagle's Tower with its entrance hidden from Link's Awakening DX
-
The Grim Creeper
-
Evil Eagle
-
The Organ of Evening Calm
References
- ↑ Encyclopedia, Dark Horse Books, pg. 148
- ↑ "Wow! The Rooster has recovered! He seems very friendly!" — N/A (Link's Awakening DX)
- ↑ "The riddle is solved when the pillars fall!" — Owl Statue (Link's Awakening DX)
- ↑ Enciclopedia di Hyrule, Magazzini Salani, pg. 148
- ↑ Encyclopedia, Les Éditions Soleil, pg. 148


